Gaming Videos & Tutorials
Watch our latest gaming content, tutorials, and gameplay videos. Subscribe to stay updated with new releases.
Videos
Watch our latest gaming videos, guides, and walkthroughs.

HITMAN: Arcade Mode | Patient Zero | Eliminate Targets Only challenge
Check out our website: https://pixelfungaming.com Follow our Facebook page: https://www.facebook.com/pixelfungames Chapters: 0:00:00 - Retrieving the shovel and digging in the graveyard 0:00:35 - Infiltrating the manor through a window 0:01:00 - Using the secret bookshelf elevator to reach the lab 0:02:47 - Dialogue with Lilith Devereux in the secret lab 0:04:30 - Escaping the lab through a series of laser grids 0:05:45 - Re-entering the manor floors to find an antidote 0:07:30 - Crafting the injectable cure in the laboratory room 0:09:12 - Eliminating the first target, Lilith Devereux 0:11:25 - Eliminating the second target in the bedroom area 0:12:07 - Escaping the mission by helicopter Chapters: 0:00 - Retrieving the ring from the grave 0:45 - Solving the library puzzle and entering the elevator 1:20 - Descending into the secret lab 2:30 - Encounter with the target and the AI 4:15 - Escaping the lab and managing infection 7:30 - Crafting the antidote 11:25 - Eliminating the target 12:05 - Exfiltration by helicopter 📖 Interactive written walkthrough with clickable timestamps: https://pixelfungaming.com/videos/hitman-arcade-mode-patient-zero-eliminate-targets-only-challenge

HITMAN: Patient Zero Requiem | Silent Assassin, Suit Only #hitman
Check out our website: https://pixelfungaming.com Follow our Facebook page: https://www.facebook.com/pixelfungames Chapters: 0:00:00 - Agent 47 enters the grand hall for the fundraiser 0:00:07 - Lilith Devereux begins her speech on stage 0:00:55 - Gregory Carlisle presents a traditional ring to Lilith 0:01:31 - Agent 47 approaches Gregory and Lilith for a conversation 0:02:35 - 47 follows the targets as they move to the upper floors 0:03:03 - Infiltrating the targets' private quarters via the window ledge 0:03:31 - Eliminating Gregory Carlisle in the bathroom 0:03:43 - Hiding Gregory's body in the wardrobe 0:04:15 - Confronting Lilith Devereux in the bedroom 0:04:34 - Target eliminated: Lilith Devereux 0:04:47 - Agent 47 exits the mansion and leaves on a motorcycle 0:05:07 - Mission complete summary: Silent Assassin rating achieved Chapters: 0:00 - Entering the fundraiser and assessing the environment 0:45 - Ether pharmaceutical solutions rebranding speech begins 1:30 - Approaching Gregory Carlisle and interacting with guests 2:30 - Stalking the target through the mansion corridors 3:00 - Infiltrating private bathroom via external ledge 3:30 - Silent neutralization of secondary target for security 4:00 - Luring Lilith Devereux into position using environmental distractions 4:20 - Elimination of Lilith Devereux 4:45 - Exfiltrating the estate on a motorbike 5:10 - Mission complete summary: Silent Assassin ranking 📖 Interactive written walkthrough with clickable timestamps: https://pixelfungaming.com/videos/hitman-patient-zero-requiem-silent-assassin-suit-only-hitman

Ghost of Yōtei19

Ghost of Yōt18

Ghost of Yōtei17

Ghost of Yōtei16

Ghost of Yōtei15

Ghost of Yōtei14

Ghost of Yōtei13

Ghost of Yōte12

Ghost of Yōtei11

Ghost of Yōtei10

Ghost of Yōtei9

Ghost of Yōtei8

Ghost of Yōtei7

Ghost of Yōtei7

Ghost of Yōtei7

FiveM® by Cfx re LS85 Los Santos Nov2

FiveM® by Cfx re LS85 Los Santos Nov1

RV Heist Medal

Chemistry project

FiveM® by Cfx re LS85 Los Santos 1985 2025 11 21 22 37 51

pizz

Ghost of Yōtei26

Ghost of Yōtei25

Ghost of Yōtei24

Ghost of Yōtei23

Ghost of Yōtei22

Ghost of Yōtei21

Ghost of Yōtei20

Grand Theft Auto VCoast Guard4

Grand Theft Auto Vpatrol 14

Grand Theft Auto V patrol 13 sandy

Grand Theft Auto Vvcargo2

Grand Theft Auto Vxtra

Grand Theft Auto Vsticky2

Grand Theft Auto Vbountysurvived3

Grand Theft Auto Vbountysurvived2

Grand Theft Auto Vbountysurvived1

Grand Theft Auto Vkamakazefail

Grand Theft Auto Vbusinessbattle2

Grand Theft Auto Vnightclubcargo

Grand Theft Auto Vbounties

Grand Theft Auto Vvcargo 2

Grand Theft Auto Vcoastguard3

Grand Theft Auto Vpatrol 12 , casino taze 2

Grand Theft Auto Vyeti15

Grand Theft Auto Vyeti14

Grand Theft Auto V patrol bridge kill

Grand Theft Auto V sticky v scramjet

Grand Theft Auto patrol off rader fail

Grand Theft Auto V Patrol vinewood kill

Grand Theft Auto V sticky v jet

Grand Theft Auto V sticky v red player

Grand Theft Auto V patrol santa

Grand Theft Auto V jet crash 4

Grand Theft Auto V king of castle 1

Grand Theft Auto V pvp

Grand Theft Auto Vpatrol 15

Grand Theft Auto V patrol vesspucci

Zero Hour: Cocktail Crisis | Hardcore | Solo #zerohourgame Hour
This video showcases a complete, high-intensity tactical mission titled 'Operation: Cocktail Crisis' within a realistic SWAT-style simulation. The footage demonstrates advanced Close Quarters Battle (CQB) techniques as a solo operative systematically clears a multi-story complex. Viewers will observe various tactical environments, including corporate offices, luxury lounges, and a neon-lit nightclub. The gameplay highlights the use of specialized gear such as night vision goggles, suppressed weaponry, and tactical entry tools. Throughout the mission, the operative engages in numerous high-stakes firefights, manages civilian encounters, and ultimately secures critical intelligence before extracting. The video concludes with a detailed mission summary and performance score. Chapters: 0:00:00 - 0:03:00 - Initial Breach and Entry 0:03:00 - 0:06:00 - Clearing the Ground Floor Lounge and Corridors 0:06:00 - 0:09:00 - Night Vision Operations in Service Areas 0:09:00 - 0:12:00 - Restroom and Storage Room Clearance 0:12:00 - 0:15:00 - High-Intensity Firefights in the Nightclub Area 0:15:00 - 0:18:00 - Upper Level Office and Hallway Sweeps 0:18:00 - 0:20:12 - Securing Intelligence and Mission Extraction 📖 Interactive written walkthrough with clickable timestamps: https://pixelfungaming.com/videos/zero-hour-cocktail-crisis-hardcore-solo-zerohourgame-hour

Ready Or Not: Hunger Strike | LETHAL HARD MODE | A #readyornot
This video presents a complete tactical playthrough of a mission in Ready or Not, titled 'Hunger Strike'. It depicts a specialized SWAT unit responding to a high-stakes situation at a Mexican restaurant. Throughout the video, viewers will observe the team utilizing realistic tactical procedures to secure the building. The gameplay highlights methodical room-clearing techniques, coordinated breaches using both lethal and non-lethal equipment, suspect apprehension, and civilian rescue. The mission culminates in the discovery of illicit funds and a comprehensive performance summary showing the team's efficiency in the field. Chapters: 0:00:00 - 0:00:11 - Pre-Mission briefing and team ready-up 0:00:11 - 0:01:03 - Tactical entry into the restaurant and initial sweep 0:01:03 - 0:02:03 - First suspect engagement and movement toward the kitchen 0:02:03 - 0:03:16 - Securing the kitchen area and restraining individuals 0:03:16 - 0:04:13 - Exterior rotation and preparation for a rear breach 0:04:13 - 0:05:01 - Coordinated room breach and neutralization of hostiles 0:05:01 - 0:06:04 - Clearing back-of-house storage and freezer units 0:06:04 - 0:07:15 - Upper-level infiltration and hostage rescue 0:07:15 - 0:08:31 - Final room-clearing operations and securing the perimeter 0:08:31 - 0:09:14 - Mission soft complete and final performance statistics 📖 Interactive written walkthrough with clickable timestamps: https://pixelfungaming.com/videos/ready-or-not-hunger-strike-lethal-hard-mode-a-readyornot

Rise Of The Tomb Raider : Part 1
Lara Croft and her partner Jonah begin a treacherous ascent of a snow-covered mountain peak, searching for a legendary lost city. They battle freezing winds and slippery footing, leading to Lara losing her grip and sliding down an icy slope, barely catching herself. She then climbs precarious ice walls and leaps across chasms while Jonash supports her with a rope. After a near-fatal fall where Jonah saves her from plunging into a deep ravine, they reach a high cave entrance, expressing relief and hope that they are close to their goal. The scene transitions to a flashback two weeks earlier in London, showing Lara researching her father's obsession with the immortal soul and the ancient religious organization known as Trinity, which sought to control eternal life. Lara identifies Syria as the next target. The perspective shifts to Syria's Northwest Border, where Lara and her driver, Feiz, are ambushed by a military helicopter and militants (Trinity forces) in a dusty canyon chase. Their jeep crashes, and Lara narrowly escapes the wreck. Alone and bruised, Lara searches the cliffs for the Prophet's Tomb, finding an overgrown oasis housing ancient ruins. She explores a hidden tomb entrance, translating ancient monoliths and murals that describe the conflict between religious pilgrims and armed soldiers (Trinity). Lara discovers a crypt filled with skeletal soldiers, confirming that the Order of Trinity clashed with the prophet's followers here. Lara Croft explores the dark, crumbling passages of the Prophet's Tomb in Syria. The sequence begins as Lara narrowly escapes a trigger trap, requiring her to shoot structural weak points to clear debris and continue through the collapsing tunnels. She navigates dark, partially flooded corridors, using her climbing axe to break down a crumbling section of masonry, which releases a rush of water and shifts a suspended wooden grate nearby. Swimming through the newly flooded section, Lara proceeds into a large chamber filled with ancient skeletal remains, noting evidence that the Order of Trinity has been searching the tomb. She discovers a historical document, "The Bishop: Word from Rome," detailing the Trinity's concern over the Prophet's supposed continued existence and growing influence. Lara examines a large mural depicting the Prophet's martyrdom, gaining experience and increasing her Greek language proficiency. She explores the chamber, utilizing her pistol to destroy wooden traps suspended from the ceiling and maneuvering across the rubble and broken pillars. After checking her map, Lara returns to the water channel and shoots down the final support holding the large wooden structure. A sudden influx of water triggers a dramatic quick-time event where Lara struggles to escape crushing debris underwater. She emerges into a massive, cavernous area featuring a towering, golden, tiered structure—the Prophet's Tomb—at its center, completing the initial exploration objective. Chapters: 0:00 - Ascending the Mountain Peak in Extreme Weather 0:36 - Lara Falls and Begins Quick-Time Climbing Sequence 1:01 - Climbing Up Steep Ice Walls 1:41 - Perilous Jumps Across Icy Ledges 2:14 - More Vertical Ice Climbing and Rope Use 3:48 - A Near-Fatal Fall Saved by Jonah 4:16 - Entering the Ice Cave and Discussing the Mission 5:27 - The Next Vertical Climb: The Great Icefall 6:14 - Intense Rope Swinging and Dodging Falling Ice 8:35 - Critical Jump and Final Climb to the Summit 9:27 - Reaching the Summit and Seeing the Lost City Ruins 9:39 - Caught in a Massive Avalanche and Dramatic Slide Sequence 13:58 - Flashback: Two Weeks Earlier in London 14:21 - Researching the Myth of the Immortal Soul and Trinity 16:34 - Encountering Anna and Discussing Her Father's Research 18:24 - Arrival in Syria: Desert Journey and Ambush 20:00 - Lara Survives the Jeep Crash and Reaches the Lost Tomb Location 21:56 - Entering the Hidden Oasis and Discovering Ancient Runes 23:40 - Breaking Through a Wall to Find the Prophet's Tomb 24:32 - Exploring the Tomb Entrance and Climbing Ruined Structures 27:08 - Climbing Across a Broken Bridge and Exploring Deeper 28:44 - Discovering the Final Chamber and the Skeletons of Trinity Soldiers 30:00 - Escaping a Collapsing Tunnel Section 30:10 - Shooting a Structural Weak Point to Clear a Trap 30:23 - Entering a Flooded Passage and Hearing Enemy Explosions 30:47 - Breaking Down a Stone Pillar to Control Water Flow 31:20 - Exiting the Water and Discovering a Large Tomb Chamber 32:13 - Finding 'The Bishop: Word From Rome' Document 33:04 - Examining a Mural Depicting the Prophet's Slaying 34:39 - Climbing and Platforming Across Rubble 36:06 - Shooting Traps and Exploring the Upper Levels of the Chamber 37:46 - Map Check and Objective Review (Syria) 39:10 - Solving the Water Flow Puzzle to Open the Gate 39:44 - Underwater Quick Time Event and Escape 40:30 - Discovering The Prophet's Tomb and Updating the Objective 41:22 - Approaching the Golden Tomb Structure

Farcry 6 live #4
The mission begins with the selection of a 1968 Garin Vorona C helicopter at a coastal helipad. After takeoff, flight maneuvers lead the aircraft across the lush landscapes of Costa Del Mar and toward the Balaceras region. Upon arriving at Maria Marquessa Productions, an intense aerial bombardment commences. Rockets and machine-gun fire target military structures, vehicles, and anti-aircraft installments while the helicopter performs evasive maneuvers against incoming surface-to-air missiles. After sustaining heavy damage from the ground defenses, the helicopter crashes into the ocean, forcing a transition to a ground assault. The infiltration continues on foot through the studio's interior, utilizing tactical movement and silenced weaponry. Combat shifts to close quarters as the multi-level facility is cleared room by room. During the search, an unexpected encounter with a caged leopard occurs on the upper floor. The operation concludes with further tactical navigation through the production offices and catwalks. Chapters: 0:00:00 - 0:00:16 - Helipad Selection and Preparation 0:00:17 - 0:02:10 - Aerial Navigation toward Balaceras 0:02:11 - 0:04:40 - Aerial Assault on Maria Marquessa Productions 0:04:41 - 0:05:30 - Helicopter Crash and Shoreline Infiltration 0:05:31 - 0:07:07 - Tactical Ground Combat and Facility Clearing 📖 Interactive written walkthrough with clickable timestamps: https://pixelfungaming.com/videos/farcry-6-live-4

Ghost Recon Wildlands - Capture Santa Blanca Chemist Walkthrough
Tactical stealth gameplay unfolds in this mission from Tom Clancy's Ghost Recon Wildlands, titled 'The Chemist.' Wearing a full ghillie suit for maximum concealment, the operator begins by scouting a heavily guarded Santa Blanca facility from a nearby hillside. After coordinating with the squad, a silent approach begins through the dusty, debris-strewn outskirts of the compound. The operation involves picking off key lookouts, including a sniper in a guard tower, to clear a path toward the target. The tension escalates as the operator moves through narrow alleyways and derelict structures, eventually infiltrating a large, skull-decorated building. When an alarm is triggered, the pace shifts from careful stalking to a desperate search for the objective under enemy fire. The mission concludes with the successful discovery and capture of the Santa Blanca chemist inside a hidden laboratory, fulfilling the primary objective. In this tactical extraction mission, a lone operative in a ghillie suit infiltrates a Santa Blanca laboratory. After coordinating with the squad, the operative quickly neutralizes a hovering enemy helicopter with sustained rifle fire. The target, a chemist, is apprehended within the facility. The subsequent phase involves a careful extraction, moving through the complex while under fire and utilizing cover effectively. The final segment shows the operative carrying the target across rugged, mountainous terrain towards the safe extraction zone, navigating steep slopes and avoiding enemy patrols. Transporting a high-value hostage through rugged desert terrain marks the final phase of the operation. The operative carries the Santa Blanca chemist toward a hilltop extraction point, navigating steep rocks while managing the captive. Once secured in a helicopter, the mission shifts to an aerial extraction toward the Remanzo Bravo rally point. The chemist pleads for his release during the flight, but is instead delivered to a secure location. Upon landing, the operative escorts the target into a safehouse for a high-stakes interrogation. CIA operative Karen Bowman confronts the captive, threatening him until he agrees to cooperate and provide the required formula. The mission concludes with the target's surrender, followed by a review of tactical equipment and character customization in the loadout menu. Chapters: 0:00:00 - Initial scouting of the Santa Blanca facility 0:00:23 - Ordering squad regroup and beginning the stealthy approach 0:01:04 - Silent elimination of the lookout in the guard tower 0:01:25 - Navigating the perimeter fences toward the inner compound 0:01:54 - Maintaining a low profile while taking out nearby cartel members 0:02:22 - Identifying high-value targets near the headquarters 0:03:08 - Moving into position to enter the main objective building 0:03:44 - Infiltrating the church-like structure decorated with skulls 0:04:01 - Alarm triggered and preparation for incoming enemy forces 0:04:30 - Navigating through hallways under high alert 0:04:56 - Locating and capturing the Santa Blanca chemist 0:00:00 - Securing the lab interior and issuing squad orders 0:00:15 - Neutralizing the enemy helicopter with rifle fire 0:00:41 - Capturing the Santa Blanca chemist 0:00:55 - Initiating the extraction and moving through the facility perimeter 0:01:20 - Taking defensive positions inside the lab building during combat 0:03:05 - Re-engaging in movement towards the extraction point 0:04:15 - Traversing the rocky hillside to reach the final extraction zone 00:00:00 - Escorting the chemist to the extraction helicopter 00:01:23 - Aerial extraction and flight to Remanzo Bravo 00:02:18 - Landing at the safehouse and final escort 00:02:40 - Interrogation cutscene with Karen Bowman 00:03:45 - Mission completion and reward screen 00:03:52 - Character loadout and appearance customization 📖 Interactive written walkthrough with clickable timestamps: https://pixelfungaming.com/videos/ghost-recon-wildlands-capture-santa-blanca-chemist-walkthrough

Ghost Recon Wildlands - Capture El Cerebro Walkthrough
Tactical infiltration begins with a stealthy approach through dense jungle terrain, avoiding detection by perimeter patrols. Upon reaching the compound's boundary, a breach is made to enter the facility undetected. Positioning on a high ridge allows for a comprehensive overview of the target village, where enemy movements and key objectives are carefully monitored. The squad is coordinated through tactical commands to ensure they are in position for a synchronized assault. Precision marksmanship is utilized to systematically eliminate guards with silenced weapons, maintaining the element of surprise. Even as enemy forces discover evidence of the intrusion, the tactical advance continues with disciplined fire and calculated movement towards the mission objective of capturing the high-value target. Tactical precision is showcased as an operative scopes out a fortified compound from a rocky overlook before descending into the base. The operative navigates through the industrial structures, engaging in brief but intense combat to neutralize local threats and reach the mission objective. Upon entering a server-filled shack, the high-value target known as El Cerebro is apprehended following a short skirmish. The captive is then led through the camp to a waiting white helicopter under heavy guard. A tense aerial extraction follows, featuring dialogue between the operative and the scientist regarding his escape plans and cartel ties. The mission concludes with a successful landing at a remote safe house, where the target is escorted inside for a high-stakes interrogation cutscene. Tactical operators conduct a high-stakes mission to apprehend 'El Cerebro,' a key figure in the Santa Blanca Cartel. The operation begins with a stealthy approach to a heavily guarded compound, utilizing drones for reconnaissance and synchronized shots to eliminate perimeter sentries. As the team moves deeper into the facility, a fierce firefight erupts, requiring strategic use of cover and heavy weaponry to suppress cartel reinforcements. Upon securing the primary target, a tense interrogation sequence unfolds in a dimly lit safe house. The suspect remains defiant, engaging in a nihilistic philosophical debate with the interrogator while dismissing threats of imprisonment. The mission concludes with a significant plot twist as the team discovers they have captured a decoy—a submersible designer—while the real El Cerebro has successfully evaded capture, leaving the operators to reassess their intelligence and plan their next move. Chapters: 0:00:00 - Stealthy infiltration through dense jungle vegetation 0:00:48 - Breaching the compound perimeter and securing a vantage point 0:01:03 - Tactical observation and target identification from the ridge 0:01:41 - Squad coordination and regrouping for the assault 0:02:10 - Advancing through the compound under foliage cover 0:02:41 - Long-range precision targeting of key hostiles 0:03:10 - Silenced takedown of a guard near the target building 0:04:18 - Engaging multiple targets as stealth is partially compromised 0:04:48 - Final tactical shots before the mission continues deeper into the base 0:00:00 - Initial reconnaissance of the enemy base 0:00:40 - Infiltration of the compound 0:01:25 - Breaching the server room and capturing El Cerebro 0:02:10 - Escorting the target to the extraction vehicle 0:03:05 - Aerial extraction and target dialogue 0:04:15 - Landing at the safe house 0:04:40 - Final delivery and interrogation cutscene 0:00:00 - Mission briefing and tactical insertion 0:02:30 - Stealth infiltration of the cartel compound 0:04:45 - Intense firefight with Santa Blanca reinforcements 0:07:15 - Securing the target and extraction 0:09:45 - Interrogation of the suspected cartel leader 0:10:55 - Revealing the identity of the decoy 0:11:25 - Mission wrap-up and objective assessment

MAFIA 3 | Definitive Edition Live #5
Recruitment for the student Kikyou begins in the gacha interface. Successive ten-pulls yield a variety of students across different rarity tiers. Pink flashes signal the arrival of high-rarity three-star students, resulting in several new acquisitions and duplicates. Following numerous recruitment attempts, Kikyou joins the roster during a featured banner session. The focus shifts to character management where Kikyou receives significant level upgrades and skill enhancements to prepare for combat. The session concludes with a detailed showcase of her unique Live2D memorial lobby animation, featuring interactive dialogue and environmental transitions on the home screen. Chapters: 0:00:00 - 0:00:50 - Navigating the Recruitment Menu and Banner Selection 0:00:50 - 0:03:15 - Initial Gacha Multi-Summons and Low-Rarity Results 0:03:15 - 0:05:40 - Three-Star Student Highlights and Rare Character Animations 0:05:40 - 0:07:25 - Continued Recruitment Progress Toward the Pity Threshold 0:07:25 - 0:08:10 - Successfully Recruiting Kikyou From the Banner 0:08:10 - 0:09:35 - Kikyou Leveling, Skill Upgrades, and Stat Enhancements 0:09:35 - 0:10:14 - Memorial Lobby Unlock and Live2D Interaction Showcase 📖 Interactive written walkthrough with clickable timestamps: https://pixelfungaming.com/videos/mafia-3-definitive-edition-live-5

Ready Or Not: ''Fixed'' Surrender Bug #readyornot
This video showcases tactical gameplay from a first-person shooter, specifically a SWAT team conducting a room clearance operation. The footage begins with a chaotic entry and immediate confrontation with multiple suspects. Viewers see the tactical team using flashlights and verbal commands to subdue individuals. The video demonstrates an engagement where a threat is neutralized, followed by the systematic securing of the premises, which includes restraining suspects and collecting evidence. The walkthrough concludes with a detailed mission performance screen where the team's efficiency is calculated, resulting in a high ranking. Chapters: 0:00:00 - 0:00:04 - Initial Breach and Room Entry 0:00:04 - 0:00:14 - Suspect Confrontation and Verbal Commands 0:00:14 - 0:00:20 - Neutralization of a Hostile Threat 0:00:20 - 0:00:33 - Securing the Area and Evidence Collection 0:00:33 - 0:00:51 - Mission Performance Score and Ranking 0:00:51 - 0:00:56 - Outro and Channel Credits 📖 Interactive written walkthrough with clickable timestamps: https://pixelfungaming.com/videos/ready-or-not-fixed-surrender-bug-readyornot

Ghost Recon Wildlands - Locate Chuwi and Rosa Walkthrough
A tactical infiltration operation begins with a helicopter descent into the outskirts of a dense jungle village. After landing, a ground-based approach utilizes natural foliage for concealment while a drone is deployed to conduct thorough reconnaissance. The drone identifies multiple Santa Blanca cartel members, including snipers on balconies and guards patrolling the streets. Following the recon phase, a slow and deliberate movement through the village leads to a brief character customization menu to adjust gear for better environmental blending. The final phase involves breaching a secured residential building, neutralizing threats with close-quarters combat, and successfully locating the primary mission targets while coordinating with remote command. Tactical operators infiltrate a cartel-controlled building to locate and rescue high-value hostages. After successfully freeing the captives from their cell, an intense firefight erupts as enemy reinforcements swarm the location. The operators engage in close-quarters combat, utilizing assault rifles and grenades to hold their position and protect the civilians. During the skirmish, a team member is downed and requires immediate medical attention under heavy fire. The engagement transitions from the interior of the building to the surrounding compound as the operators systematically clear the area of hostiles. The mission concludes with a sweep of the perimeter and the securing of a vehicle to facilitate a safe extraction of the rescued family. Tactical operations continue under the cover of night as the team infiltrates a secure location to extract two high-value targets, Chui and Rosa. After navigating through a dark compound and securing the targets from a holding cell, a tense extraction follows. The targets are led to an SUV, and a long drive through the mountainous Bolivian terrain ensues. During the journey, a heavy dialogue highlights the friction between the local population's values and American intervention. Upon reaching a remote safe house, the rescued family members are reunited with El Yayo in the presence of Agent Bowman. A critical negotiation takes place where El Yayo agrees to cooperate in exchange for his family's safety. The mission concludes with a stylized cinematic summary detailing the subsequent collapse of the Santa Blanca Cartel's production pillar and the resulting economic hardship for the local coca farmers. Chapters: 0:00:00 - Helicopter approach to Bahia Floresta village 0:00:39 - Drone deployment for enemy identification and marking 0:01:12 - Scanning rooftop snipers and building interiors 0:01:45 - Marking high-value targets near a white van 0:02:22 - Ground-level stealth movement through dense vegetation 0:03:04 - Character appearance and gear modification via the menu 0:03:43 - Infiltration and takedowns inside a target residence 0:04:21 - Radio contact with Karen Bowman regarding the family 0:04:55 - Reaching the mission objective location 0:00:00 - Infiltrating the building and locating hostages 0:00:15 - Freeing Yayo's wife and son from the cell 0:00:45 - Firefight breaks out with Santa Blanca sicarios 0:01:15 - Using grenades and suppressing fire to hold the interior 0:01:45 - Reviving a downed teammate during the engagement 0:02:30 - Defending the house from external enemy waves 0:03:15 - Clearing the immediate area around the extraction point 0:04:00 - Securing a transport vehicle for the hostages 0:04:45 - Final perimeter sweep and preparation for departure 0:00:00 - Initial stealth approach to the target village 0:01:05 - Infiltration of the holding facility and target location 0:02:15 - Securing Chui and Rosa from their cell 0:03:30 - Escorting targets to the extraction vehicle 0:04:45 - Tactical night driving through mountainous terrain 0:06:15 - Arrival at the safe house and target handover 0:07:30 - Family reunion and confrontation with Agent Bowman 0:08:35 - Mission completion and narrative epilogue cinematic 0:09:45 - Final mission statistics and map review 📖 Interactive written walkthrough with clickable timestamps: https://pixelfungaming.com/videos/ghost-recon-wildlands-locate-chuwi-and-rosa-walkthrough

Ghost Recon Wildlands - Rebel Prisoner
Aerial reconnaissance begins over the village of Culta under the cover of night, with a helicopter surveying the layout and enemy presence. After finding a suitable landing zone, the team inserts on foot, moving toward a high-ground position. A tactical drone is deployed to scan the environment, successfully tagging multiple Santa Blanca cartel members for a coordinated strike. From a distant cliffside, the operative uses a suppressed rifle to systematically eliminate guards, maintaining a low profile. The team shifts positions to clear a path into the village, eventually descending from the heights to infiltrate the main complex. Moving with precision, they enter a stone church to find and secure a rebel prisoner, completing the tactical objective. Tactical operatives move cautiously through a dilapidated village toward a prison site. The squad identifies several Santa Blanca cartel members stationed inside a ruined church. After a brief period of reconnaissance, the team initiates an assault, eliminating a rooftop sniper and several guards at the entrance. Moving deeper into the structure, the lead Ghost operative clears a path through the main sanctuary and proceeds to the holding cells. The prisoner's cell door is unlocked by shooting the padlock, allowing for a safe extraction. During a brief debrief, the rescued rebel provides information about his torturers and their habitual locations. The mission concludes as the handler provides coordinates for the next objective based on this newly acquired intelligence. Chapters: 0:00:00 - Aerial survey of Culta village via helicopter 0:00:45 - Landing and initial on-foot approach 0:01:12 - Deploying drone for target marking 0:01:52 - Long-range sniping from the cliffside 0:02:54 - Stealthy advancement toward the village 0:03:52 - Squad regroup and objective infiltration 0:04:42 - Securing the rebel prisoner inside the church 0:00:00 - Initial stealthy approach to the prison ruins 0:00:15 - Detecting multiple hostiles inside the church structure 0:00:31 - Neutralizing a rooftop sniper and entering the building 0:00:43 - Firefight at the entrance involving close-range combat 0:00:54 - Forcing entry into the cell by shooting the padlock 0:01:10 - Coordinating squad fire to secure the church interior 0:01:25 - Dialogue with the rescued rebel regarding mission targets 0:01:55 - Mission success notification and experience reward 0:02:10 - Receiving updated intel on the hunting lodge location

HITMAN 2 - Chasing Ghosts - Proxy Killer Walkthrough
Agent 47 navigates the crowded streets and narrow alleys of Mumbai to complete mission objectives. The sequence begins with an infiltration into a residential building where a lockpick is used to gain access to a sniper's base of operations. After investigating the sniper equipment and gathering intelligence, the focus shifts to a local laundry business. Stealthy movement is employed to bypass guards and workers, eventually leading to the foreman's office. A new disguise is obtained to blend in with the staff, allowing for further investigation of the facility's records while avoiding detection from suspicious individuals. Agent 47 infiltrates the dense Mumbai slums with precision and stealth. The operation begins in a laundry facility where he quietly incapacitates workers and the local foreman, carefully hiding their bodies in bins and lockers to remain undetected. After assuming the foreman's identity and gathering essential tools like emetic poison, he navigates the vibrant, crowded streets of the city. Upon reaching the heavily guarded laundry district, he uses his disguise to gain access to restricted areas. An escort leads him through the industrial washing zones to a secluded bridge. There, he waits for his primary target, Vanya Shah. The encounter culminates in a tense conversation where Agent 47, maintaining his cover, discusses operational efficiency with the unsuspecting 'Queen of the Slums,' positioning himself perfectly for his next move. Agent 47 executes a complex mission in the vibrant and chaotic city of Mumbai, India. The objective involves eliminating multiple targets, including the self-proclaimed 'Queen of the Slums,' Vanya Shah. By infiltrating the local workforce and manipulating the actions of a rival assassin, 47 achieves his goals with calculated precision. The mission highlights intricate level design, ranging from bustling street markets to high-security industrial areas. Strategic disguise changes and careful observation of NPC behavior allow 47 to move undetected and orchestrate a proxy kill on a high-profile target. The aftermath sees him tracking his unknowing accomplice to further uncover the whereabouts of the elusive Maelstrom. Chapters: 0:00:00 - Navigating the Mumbai residential district 0:00:41 - Lockpicking the hideout door 0:00:54 - Investigating the Kashmiri's sniper nest 0:01:15 - Moving through the city towards the laundry 0:02:05 - Infiltrating the laundry facility via the rear entrance 0:02:15 - Eavesdropping on worker conversations for intel 0:02:34 - Reviewing mission intel on the laundry foreman 0:03:05 - Locating the foreman's office 0:03:55 - Incapacitating a target and assuming the foreman's disguise 0:04:25 - Using a distraction to search for laundry logs 0:04:55 - Neutralizing an interfering worker 0:05:00 - Subduing the first witness and hiding the body 0:05:22 - Incapacitating the foreman and taking his disguise 0:05:40 - Securing emetic rat poison for the mission 0:05:50 - Navigating the crowded streets of Mumbai 0:07:15 - Presenting credentials to the facility guard 0:07:30 - Escort through the laundry district 0:08:15 - Reaching the meeting point on the bridge 0:09:10 - Meeting and speaking with Vanya Shah 0:00:00 - Entry into the Mumbai mission area and initial briefing 0:02:30 - Infiltrating the slums to gather intel on target locations 0:05:00 - Locating the Kashmirian and assisting his sniper setup 0:07:30 - Assuming a foreman disguise to access the laundry facility 0:09:45 - Confrontation between Vanya Shah and her subordinates 0:10:50 - Elimination of Vanya Shah via a synchronized proxy strike 0:11:15 - Commencing the covert tail of the rival assassin 📖 Interactive written walkthrough with clickable timestamps: https://pixelfungaming.com/videos/hitman-2-chasing-ghosts-proxy-killer-walkthrough

Checking out the new Steam feature
The video opens on the Steam desktop interface before transitioning into the Steam Big Picture mode presentation. The character enters the Library section and scrolls horizontally through a list of recently played and owned titles, including Battlefield 4, Dead Rising 3, Grand Theft Auto IV, and Max Payne 3. Navigation then moves to the Store interface, highlighting current featured deals and new releases such as Sid Meier's Civilization: Beyond Earth and Wasteland 2. Following the store browsing, the character accesses their personal profile and friend activity feed, reviewing recent achievements unlocked by friends and announcements related to games like PAYDAY 2 and Life is Feudal. A brief status update is posted. The character navigates back to the store's new offers section and selects a deal for the game Outlast. The purchase process begins, adding the game to the shopping cart and proceeding to checkout. The payment is reviewed and processed successfully via the Steam Wallet. A confirmation screen appears, registering the digital delivery to the account. Finally, the character returns to the friend activity feed, where a new status update confirms the successful acquisition of Outlast, concluding the recording. Chapters: 0:00 - 0:08 - Steam Big Picture Mode Launch 0:08 - 0:34 - Browsing the Game Library and Recently Played Titles 0:34 - 0:58 - Exploring the Steam Storefront and Featured Deals 0:58 - 1:45 - Profile Navigation and Friend Activity Review 1:45 - 2:29 - Selecting and Purchasing the Game Outlast 2:29 - 3:15 - Reviewing Purchase Confirmation and Activity Feed Update 📖 Interactive written walkthrough with clickable timestamps: https://pixelfungaming.com/videos/checking-out-the-new-steam-feature

Hitman Freelancer: Isle of Sgail Saber Location
The mission begins with the character investigating a wall-mounted saber in a lavish red-walled room. A handheld camera scans the object for intel before the interface switches to a detailed mission map for a Syndicate Showdown. Strategic navigation through the map screens highlights various objective markers, suspect locations, and detailed floor plans within the Isle of Sgàil's complex structures. The planning phase concludes with a focused review of the target's proximity and movement patterns within the Constant's Office area. Chapters: 0:00:00 - 0:00:18 - Scanning environmental objects for intel 0:00:18 - 0:00:46 - Strategic map review for the Syndicate Showdown 📖 Interactive written walkthrough with clickable timestamps: https://pixelfungaming.com/videos/hitman-freelancer-isle-of-sgail-saber-location

Ready Or Not: Mission 5 | A lethal Obsession - Sullivan's Slope - A+ Rating
This analysis covers the complete duration of a Ready or Not mission titled 'A Lethal Obsession'. It begins with the mission select screen and an audio briefing detailing the suspect's background and the nature of the threat at Sullivan's Slope. Following a loading sequence, the video captures the SWAT team's insertion via a transport van and their initial trek through a dense forest towards the target structure. The core of the video showcases a high-stakes tactical intervention inside a cluttered, multi-level cabin. The team is shown utilizing specialized equipment like the optiwand to check for threats and booby traps before initiating breaches with flashbangs. The team methodically clears rooms, secures suspects, and gathers evidence, including sensitive federal documents. The video illustrates effective communication and tactical positioning as the team moves through narrow hallways and up staircases. The mission concludes with a successful 'soft complete' status, followed by a final debriefing screen showing an A+ performance rating and team status updates. Chapters: 00:00:00 - 00:01:38 - Mission selection and audio briefing for 'A Lethal Obsession' 00:01:38 - 00:01:56 - Loading screen and mission objectives review 00:01:56 - 00:02:10 - Insertion sequence inside the SWAT transport van 00:02:10 - 00:03:18 - Tactical approach through the woods towards the target house 00:03:18 - 00:04:26 - Team stack-up and breach of the primary basement entrance 00:04:26 - 00:05:13 - Clearing the basement laboratory and disarming booby traps 00:05:13 - 00:06:05 - Coordinated room breach and suspect apprehension 00:06:05 - 00:08:03 - Securing ground floor rooms and searching for evidence 00:08:03 - 00:09:48 - Clearing the stairwell and moving to secure the upper level 00:09:48 - 00:11:33 - Final objective completion and post-mission scoring screen 📖 Interactive written walkthrough with clickable timestamps: https://pixelfungaming.com/videos/ready-or-not-mission-5-a-lethal-obsession-sullivan-s-slope-a-rating

Ready Or Not: Stolen Valor | LETHAL HARD MODE | A Rank #readyornot
This detailed gameplay video features a complete S.W.A.T. mission titled 'Stolen Valor' within a tactical shooter environment. The content demonstrates professional-grade tactical maneuvers, including breaching, methodical room clearing, and suspect apprehension in a high-stakes, low-light apartment complex setting. The footage alternates between real-time first-person gameplay and cinematic replay mode to provide various perspectives on team coordination and tactical precision. Key elements covered include the careful disarming of booby traps, the use of specialized equipment like the mirror wand to scout rooms, and the successful detention of civilians and suspects. The mission concludes with a performance summary showing the achievement of an 'A' rank. Chapters: 00:00:00 - 00:02:30 - Initial Deployment and Building Entry 00:02:30 - 00:05:00 - First Floor Hallway and Apartment Clearance 00:05:00 - 00:07:30 - Tactical Equipment Usage and Exterior Checks 00:07:30 - 00:10:00 - Cinematic Replay Mode and Perspective Comparison 00:10:00 - 00:12:30 - Navigating Stairs and Disarming Door Traps 00:12:30 - 00:15:00 - Coordinated Multi-Point Room Breaching 00:15:00 - 00:17:30 - Replay Analysis of High-Intensity Encounters 00:17:30 - 00:20:00 - Secondary Sweep of Living Quarters 00:20:00 - 00:22:30 - Final Suspect Apprehension and Securing Civilians 00:22:30 - 00:24:35 - Mission Success and Performance Rating 📖 Interactive written walkthrough with clickable timestamps: https://pixelfungaming.com/videos/ready-or-not-stolen-valor-lethal-hard-mode-a-rank-readyornot

Ready Or Not: Narcos | S Rank | Non-Lethal #readyornot
This video provides a complete walkthrough of a high-stakes tactical operation in the game Ready or Not, specifically focusing on the 'Narcos' mission at 213 Park Homes. Viewers will observe a SWAT team employing professional tactics to breach and clear a series of residential buildings suspected of housing a drug distribution network. The gameplay demonstrates advanced tactical maneuvers, including the use of flashbangs, breaching charges, and fiber-optic cameras to safely neutralize suspects and secure evidence. Throughout the 16-minute duration, the content covers detailed room-clearing procedures, the discovery of hidden documents, the apprehension of several armed suspects, and the successful rescue of a key informant. The mission concludes with a full score breakdown, showing a perfect S-rank achievement. Chapters: 0:00:00 - 0:02:30 - Tactical Entry and Initial House Clearing 0:02:30 - 0:05:15 - Securing Evidence and Narcotics Discovery 0:05:15 - 0:08:00 - Exterior Engagement and Backyard Operations 0:08:00 - 0:10:45 - Breaching and Securing the Secondary Residence 0:10:45 - 0:13:30 - Navigating Alleyways and Neutralizing Perimeter Threats 0:13:30 - 0:16:00 - Final Building Assault and Informant Rescue 0:16:00 - 0:16:35 - Post-Action Mission Report and S-Rank Evaluation 📖 Interactive written walkthrough with clickable timestamps: https://pixelfungaming.com/videos/ready-or-not-narcos-s-rank-non-lethal-readyornot

Dead Island 2 : Quest | Resurrect The Rex | Walkthrough (No Commentary)
The mission Resurrect the Rex begins with a nighttime approach to a luxury estate, where the character immediately utilizes an environmental trap to electrocute a group of zombies in a swimming pool. Intense combat follows in the outdoor area, featuring encounters with standard walkers and electrified Shocking Runners. Upon breaching the producer's house, the character faces a massive Crusher zombie, neutralizing it with rapid-fire rifle shots. The search for the Gods and Whiskey master tapes leads through several blood-soaked rooms, involving close-quarters melee combat using a crowbar and a heavy sign pole. Farouk, a named zombie, is defeated in a brief but brutal skirmish inside the foyer. Navigating the upper floors requires careful movement to avoid live electrical wires and the deactivation of a generator to secure safe passage. A large fire trap is triggered on the balcony to clear a path through a dense crowd of undead. After collecting all three master tapes and an album original, the character returns to the safe zone to deliver the items to Rikkky. The mission concludes with a successful level up, unlocking a new Slayer Card and the rare Electrocutioner Pole Saw weapon. Chapters: 0:00:00 - 0:00:28 - Initial stealth and pool area trap 0:00:28 - 0:01:44 - Clearing the pool area of walkers and runners 0:01:44 - 0:02:02 - Melee combat against Shocking Runners 0:02:02 - 0:02:25 - Entering the mansion and Crusher encounter 0:02:25 - 0:02:50 - Combat with Farouk in the hallway 0:02:50 - 0:03:54 - Searching the ground floor for master tapes 0:03:54 - 0:04:47 - Ascending to the second floor and avoiding hazards 0:04:47 - 0:05:35 - Looting the kitchen and bar area 0:05:35 - 0:06:15 - Creating a massive fire trap on the balcony 0:06:15 - 0:07:45 - Disabling the generator and securing the second tape 0:07:45 - 0:08:28 - Retrieving the final session master tape 0:08:28 - 0:10:11 - Mission turn-in and dialogue with Rikkky 0:10:11 - 0:10:52 - Inventory management and mission rewards 📖 Interactive written walkthrough with clickable timestamps: https://pixelfungaming.com/videos/dead-island-2-quest-resurrect-the-rex-walkthrough-no-commentary

Goat Simulator PT 2 - Jetpack :)
The session begins with the goat navigating a suburban backyard before heading out into the streets. Initial gameplay focuses on earning points by headbutting pedestrians and scattering a crowd of protesters near a town square. After a brief exploration of the local park and trampoline area, the goat reaches a large construction site dominated by a massive yellow crane. A lengthy climb follows as the goat ascends several levels of ladders to reach the very top of the structure. Upon reaching the summit, the goat headbutts a bystander off a narrow beam and then leaps into a massive freefall, surviving the impact through ragdoll physics. The gameplay transitions into a new phase when the goat finds and equips a jetpack. The subsequent segments involve chaotic flight across the map, with the goat crashing into various structures including rooftops, billboards, and vehicles. A significant moment occurs at a local gas station, where a high-speed jetpack collision results in a massive explosion that sends the goat tumbling through the air. The remainder of the session involves repeated attempts to use the jetpack to reach high altitudes, stunts on a large outdoor water slide, and continued destructive antics throughout the industrial and residential zones of the map. Chapters: 0:00:00 - 0:00:10 - Main menu and initial loading screen 0:00:10 - 0:00:50 - Exploration and headbutting protesters in the town square 0:00:50 - 0:01:30 - Trampoline stunts and navigating through the neighborhood 0:01:30 - 0:02:45 - Ascending the giant construction crane to the summit 0:02:45 - 0:05:50 - Freefalling from the crane and exploring the industrial zone 0:05:50 - 0:07:00 - Locating and equipping the jetpack for flight 0:07:00 - 0:08:30 - High-speed jetpack crashes and gas station explosion 0:08:30 - 0:11:00 - Using the jetpack to fly through the suburbs and hit trucks 0:11:00 - 0:13:14 - Water slide stunts and final jetpack maneuvers across the map 📖 Interactive written walkthrough with clickable timestamps: https://pixelfungaming.com/videos/goat-simulator-pt-2-jetpack

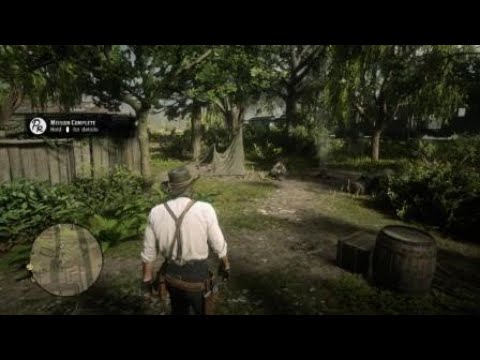
Red Dead Online: Capturing Player Bounty In Valentine #shorts
The mission begins with a fast-paced ride across the grassy plains toward a small, isolated cabin. As the character approaches the porch, a perfectly timed lasso throw in dramatic slow motion snags the bounty target right off his feet. Once on the ground, the character quickly dismounts and hogties the struggling outlaw. The mission transitions to the transport phase, where the character carries the captive to a nearby wagon. Driving the wagon into the bustling town of Valentine, the journey leads directly to the local Sheriff's office. A cutscene triggers, depicting the delivery of the prisoner into a jail cell. The Sheriff acknowledges the capture, and the mission concludes with a 'Bounty Complete' notification, showing the reward for a successful alive delivery. Chapters: 0:00:00 - 0:00:08 - Approaching the target's hideout 0:00:08 - 0:00:16 - Slow-motion lasso capture 0:00:16 - 0:00:26 - Hogtying the bounty target 0:00:26 - 0:00:34 - Securing the bounty for transport 0:00:34 - 0:00:42 - Driving the wagon through Valentine 0:00:42 - 0:00:52 - Handing over the prisoner to the Sheriff 0:00:52 - 0:00:58 - Mission success and reward summary 📖 Interactive written walkthrough with clickable timestamps: https://pixelfungaming.com/videos/red-dead-online-capturing-player-bounty-in-valentine-shorts

Sons Of The Forest: Hard Survival | Setting Up Traps and Fish Traps
This gameplay video showcases advanced base defense techniques and resource management in Sons of the Forest. Viewers will see the step-by-step process of constructing complex trap arrays, including Fly Swatter and Bone Maker traps, to fortify a cliffside base. The content demonstrates effective combat against cannibal groups, the strategic disposal of enemies, and the utilization of the AI companion Kelvin for automated tasks like fishing. Throughout the full duration, the video illustrates the progression of a well-fortified survival camp, highlighting the balance between building, defending, and gathering essential supplies in a hostile environment. Chapters: 0:00:00 - 0:02:15 - Initial Base Survey and Trap Blueprinting 0:02:15 - 0:04:30 - Perimeter Fortification and First Cannibal Skirmish 0:04:30 - 0:06:45 - Tactical Enemy Disposal and Sustained Base Defense 0:06:45 - 0:08:45 - Resource Gathering and Riverside Trap Construction 0:08:45 - 0:10:50 - Kelvin Interaction and Expanded Trap Fields 0:10:50 - 0:12:47 - Final Base Reinforcements and Survival Maintenance 📖 Interactive written walkthrough with clickable timestamps: https://pixelfungaming.com/videos/sons-of-the-forest-hard-survival-setting-up-traps-and-fish-traps
RDR2 - Capturing Test Subject For Electric Chair
The gameplay captures a bounty hunting mission in Red Dead Redemption 2 where Arthur Morgan tracks and captures a target named Mr. Daniels alive. Arthur initiates the encounter in a grassy field, using a bow and arrow to quickly neutralize Daniels' associates guarding a small camp and wagon. After subduing Daniels, Arthur ties him up and loads him onto his horse, beginning the long ride toward the designated drop-off point. During the journey, the bound target constantly complains and expresses confusion about where he is being taken, prompting Arthur to reveal that Daniels is being delivered to a professor for a bizarre scientific experiment involving a 'Humane Electric Ending Facilitator'—a concept that horrifies the captive. As Arthur rides across a set of train tracks near a marshy swamp, he is ambushed by additional gunmen attempting to free Daniels. Arthur uses his sawed-off shotgun and Dead Eye ability to dispatch the attackers while maintaining control of his horse and the bounty. The ride continues through the dark, swampy landscape, crossing a long wooden bridge. Arthur discusses the strange nature of electricity and its use in the professor's experiment, citing the effects of lightning on livestock. Finally, Arthur arrives at the professor's small settlement near the water, dismounts, and delivers the bound Mr. Daniels to the delighted Professor Andrew Bell the third, completing the mission and collecting the reward. Chapters: 0:00 - 0:45 - Bounty Target Tracking and Bow Combat Encounter 0:45 - 2:30 - Subduing, Tying, and Loading the Target onto Horse 2:30 - 4:10 - Horseback Journey and Dialogue About Scientific Execution 4:10 - 7:07 - Ambush Near Train Tracks and Continued Ride Through Swamp 7:07 - 9:55 - Arrival at Destination, Delivery to Professor, and Mission Completion 📖 Interactive written walkthrough with clickable timestamps: https://pixelfungaming.com/videos/rdr2-capturing-test-subject-for-electric-chair

Thief Gameplay - Part 1 - The Drop
The gameplay starts with an atmospheric cinematic of a dark, rain-soaked city. Master thief Garrett begins the prologue mission, 'The Drop,' inside an apartment on Auldale Bridge. He meticulously loots the room, gathering gold cups, knives, and portraits while navigating through open windows. The journey continues through an attic filled with hanging birdcages where Garrett moves slowly to avoid disturbing the birds. He discovers a hidden switch behind a painting frame that reveals a wall safe. After successfully picking the lock, he acquires a unique collectible necklace. Suddenly, the structure begins to fail, forcing Garrett to scramble across collapsing rooftops. He eventually regroups with his associate Erin, and the two engage in a fast-paced race across the city's 'Thieves' Highway.' They move through another apartment to scavenge more gold before reaching the heavily guarded Northcrest Manor. Garrett uses water arrows to extinguish light sources and shadows to bypass patrols. The mission culminates in a cinematic sequence where Garrett and Erin observe Baron Northcrest performing a dangerous ritual with a glowing blue stone. Tensions rise between the two thieves regarding the danger, ending in a catastrophic explosion that pulls Erin into a vortex of energy as Garrett fails to save her. Chapters: 0:00:00 - 0:01:10 - Main menu and initial loading screens 0:01:10 - 0:02:35 - Looting the starting apartment for valuables 0:02:35 - 0:04:10 - Infiltrating the bird attic and safe cracking 0:04:10 - 0:05:52 - Escaping the bridge collapse and meeting Erin 0:05:52 - 0:07:22 - Racing across the Thieves' Highway rooftops 0:07:22 - 0:09:10 - Back alley navigation and secondary apartment looting 0:09:10 - 0:11:21 - Infiltrating Northcrest Manor gardens and pickpocketing 0:11:21 - 0:12:46 - Observing the primal ritual and the prologue finale 📖 Interactive written walkthrough with clickable timestamps: https://pixelfungaming.com/videos/thief-gameplay-part-1-the-drop

HITMAN: Elusive Target ''The Disruptor'' Silent Assassin #connormcgregor
This video provides a comprehensive walkthrough of 'The Disruptor' elusive target mission in Hitman, featuring a target modeled after Conor McGregor. The gameplay begins with a detailed mission briefing explaining the target's background as a billionaire MMA fighter and the primary objectives. Viewers will see Agent 47 arrive at the Isle of Sgàil, navigate through dense crowds, and observe the initial round of a high-stakes duel. The video demonstrates a methodical stealth approach, showing the infiltration of restricted areas, the elimination of security personnel, and the strategic use of disguises. A critical moment occurs when Agent 47 persuades the target's opponent, Tim Quinn, to invoke the 'Right of Second,' allowing the assassin to enter the ring personally. The finale features a hand-to-hand combat sequence leading to the target's elimination, followed by the mission success screens and a mysterious post-mission cinematic. Chapters: 0:00:00 - 0:02:15 - Mission Briefing and Arrival at the Isle of Sgàil 0:02:15 - 0:05:00 - Observing the Initial Fight and Formulating a Strategy 0:05:00 - 0:08:30 - Stealth Infiltration and Neutralizing Security Personnel 0:08:30 - 0:11:45 - Backend Navigation and Disabling Surveillance Systems 0:11:45 - 0:14:30 - Strategic Disguise Acquisition and Reaching Tim Quinn 0:14:30 - 0:17:15 - Persuading Tim Quinn to Invoke the Right of Second 0:17:15 - 0:19:45 - Hand-to-Hand Combat and Target Elimination 0:19:45 - 0:21:20 - Mission Success Analysis and Outro Cinematic 📖 Interactive written walkthrough with clickable timestamps: https://pixelfungaming.com/videos/hitman-elusive-target-the-disruptor-silent-assassin-connormcgregor

RDR2 - Emmett Granger
The mission begins at night as Arthur Morgan approaches Emmet Granger’s pig farm to gather information for a biography. Granger insists that chores be completed before he will cooperate, so Arthur begins shoveling manure into a wheelbarrow while the former gunslinger boasts about his violent and cruel past. Once the manure is cleared and dumped at the pile, Arthur attempts to extract quotes about Jim Boy Calloway, but Granger remains uncooperative and eventually threatens Arthur with a knife. Arthur retaliates by planting a stick of dynamite on a large pile of manure, which explodes and showers Granger in filth. This provocation leads directly into a cinematic quick-draw duel where Arthur shoots Granger dead. The encounter concludes with Arthur looting a unique revolver and a silver pocket watch from the body, followed by taking a photograph of the deceased to provide proof of the encounter. Chapters: 0:00:00 - 0:01:18 - Confronting Emmet Granger and starting farm chores 0:01:18 - 0:01:43 - Shoveling and disposing of the hog manure 0:01:43 - 0:02:50 - Tense exchange of threats and refusal to cooperate 0:02:50 - 0:03:15 - Arthur triggers a manure explosion with dynamite 0:03:15 - 0:03:32 - The high-stakes quick-draw duel 0:03:32 - 0:04:14 - Looting the unique revolver and photographing the target 📖 Interactive written walkthrough with clickable timestamps: https://pixelfungaming.com/videos/rdr2-emmett-granger

Test livestream ( Sniper Elite V2 )
The mission begins with the selection of equipment for the Mittelwerk Facility operation. The character navigates through a dark, industrial landscape, using high-ground vantage points to identify enemy targets. Initial combat involves several precise sniper shots from a guard tower, showcasing the signature X-ray kill cam as bullets impact enemy soldiers. Stealth remains a priority as the character moves between cover, utilizing silence to thin out enemy numbers. Multiple attempts to infiltrate the facility result in intense firefights and eventual mission failures due to heavy enemy resistance. During the final push, the character successfully clears the courtyard and enters the underground tunnels, engaging in close-quarters combat with submachine guns before ultimately succumbing to enemy fire near the mission objective. Chapters: 0:00:00 - 0:02:38 - Menu navigation and mission briefing 0:02:38 - 0:05:05 - Initial infiltration attempt at Mittelwerk Facility 0:05:05 - 0:06:07 - Second sniping attempt from the guard tower 0:06:07 - 0:07:33 - Third attempt with aggressive long-range sniping 0:07:33 - 0:11:15 - Methodical clearing of the facility courtyard 0:11:15 - 0:13:30 - Infiltration into the underground tunnels 0:13:30 - 0:14:32 - Close-quarters combat and final mission failure 📖 Interactive written walkthrough with clickable timestamps: https://pixelfungaming.com/videos/test-livestream-sniper-elite-v2

MAFIA THE OLD COUNTRY: Enzo Takes The Oath #mafiaoldcountry
The video features a complete cinematic sequence from a video game, depicting the formal initiation of a character named Enzo into a criminal organization. The scene begins with Enzo reading a letter from Isabella, highlighting their secret relationship. He is then summoned by Cesare and Luca to an underground cellar where the family leaders are gathered. Viewers will observe a detailed portrayal of a traditional Mafia initiation ritual, including a solemn speech by Don Torrisi about brotherhood and honor. The sequence culminates in a ritual involving a blood oath and a burning religious icon, followed by a celebration among the men. The video concludes with Enzo leaving the meeting and sharing a silent, meaningful glance with Isabella from a distance, signifying the personal cost of his new life. Chapters: 0:00:00 - 0:01:00 - Introduction and Summons 0:01:00 - 0:02:30 - Enzo Enters the Family Cellar 0:02:30 - 0:04:00 - Don Torrisi's Speech on Honor 0:04:00 - 0:05:15 - The Initiation Ritual and Oath 0:05:15 - 0:06:30 - Welcome to the Family and Aftermath 📖 Interactive written walkthrough with clickable timestamps: https://pixelfungaming.com/videos/mafia-the-old-country-enzo-takes-the-oath-mafiaoldcountry

MAFIA: OLD COUNTRY | CHAPTER 10 | LA FESTA WALKTHROUGH #mafiaoldcountry #mafia
This video presents a complete narrative mission set in a beautifully realized early 20th-century Sicilian village during a saint's day festival. The gameplay begins with a cinematic drive through the countryside, establishing the relationship between the protagonist, Enzo, and his companion, Isabella. Upon arriving at the festival, viewers see an exploration of the vibrant market and a solemn baptism ceremony, which is abruptly interrupted by a deadly sniper attack. The content then shifts into high-intensity action, demonstrating cover-based movement through a chaotic piazza, intricate rooftop parkour during a pursuit, and cinematic melee combat. The mission's climax features a thrilling horseback chase through rural roads, culminating in a final dramatic confrontation with the assassin. Throughout the full duration, the video highlights the game's seamless blend of period-accurate atmosphere, character-driven storytelling, and diverse action mechanics. Chapters: 0:00:00 - 0:01:50 - Introduction and Mission Briefing in Sicily 0:01:50 - 0:04:17 - Scenic Driving Sequence and Character Dialogue 0:04:17 - 0:06:55 - Arrival at the Festival and Market Exploration 0:06:55 - 0:10:17 - Church Interior and the Baptism Ceremony 0:10:17 - 0:12:05 - Sniper Ambush and Immediate Aftermath 0:12:05 - 0:13:35 - Navigating the Piazza Using Mobile Cover 0:13:35 - 0:15:05 - Bell Tower Ascent and Initial Assassin Confrontation 0:15:05 - 0:18:25 - Rooftop Pursuit and Parkour Gameplay 0:18:25 - 0:21:40 - Intense Horseback Chase through Country Roads 0:21:40 - 0:24:26 - Final Duel and Mission Conclusion 📖 Interactive written walkthrough with clickable timestamps: https://pixelfungaming.com/videos/mafia-old-country-chapter-10-la-festa-walkthrough-mafiaoldcountry-mafia

Insurgency: Sandstorm | Checkpoint Breacher - Quick C4 Destruction Of 3rd Cache
Insurgency: Sandstorm gameplay features intense urban warfare and tactical maneuvers. The engagement begins in a sun-bleached street where the character utilizes concrete barriers and sandbags for cover, engaging distant enemies with a scoped rifle. Gunfire is persistent as the squad pushes toward a fortified building. A sudden grenade explosion near a derelict car momentarily disorients the character, but the advance continues. Upon breaching the ornate interior of a large structure, combat shifts to close quarters. The character navigates through hallways and up a grand staircase, using explosives to clear upper-level positions while maintaining communication with teammates. The mission emphasizes precision aiming and reactive movement in a high-lethal environment. Chapters: 0:00:00 - 0:00:15 - Initial Urban Skirmish and Cover-to-Cover Movement 0:00:15 - 0:00:30 - Pushing the Perimeter Under Heavy Fire and Explosions 0:00:30 - 0:00:45 - Breaching the Ornate Building and Stairwell Combat 0:00:45 - 0:01:00 - Room Clearing and Securing the Objective Interior 📖 Interactive written walkthrough with clickable timestamps: https://pixelfungaming.com/videos/insurgency-sandstorm-checkpoint-breacher-quick-c4-destruction-of-3rd-cache

Call Of Duty Ghosts : All or Nothing - Mission 15
The mission 'Loki' in Call of Duty: Ghosts opens with an orbital insertion as an elite assault team approaches a Federation space station. Zero-gravity combat begins immediately on the station's exterior, where soldiers engage in a lethal firefight among floating debris and structural segments. The team navigates the outer hull, clearing hostiles with specialized space-ready rifles to reach a primary access hatch. Following a massive breach explosion, the operation moves into the station's interior, leading to intense close-quarters combat within cramped, weightless corridors. Upon reaching the central command hub, the team secures the control console for the Loki satellite weapon system. The gameplay then shifts to a tactical targeting interface from orbit. Massive kinetic rods are deployed from the satellite to annihilate Federation armor battalions and infrastructure in a desert canyon below. The mission reaches its climax with a precise strike on a moving train, ending with a cinematic sequence depicting the devastating impact of the orbital bombardment on Earth's surface. Chapters: 0:00:00 - 0:00:45 - Orbital Insertion and Station Approach 0:00:45 - 0:01:50 - Exterior Zero-G Combat Initiation 0:01:50 - 0:03:00 - Breaching the Station Outer Hull 0:03:00 - 0:05:45 - Interior Station Firefight 0:05:45 - 0:06:40 - Securing the Loki Control Console 0:06:40 - 0:08:10 - Orbital Kinetic Rod Bombardment 0:08:10 - 0:09:11 - Mission Success and Final Impact 📖 Interactive written walkthrough with clickable timestamps: https://pixelfungaming.com/videos/call-of-duty-ghosts-all-or-nothing-mission-15

HITMAN: Elusive Target | ''The Drop'' Club Owner Disguise Walkthrough
This Hitman 3 gameplay video demonstrates a stealthy approach to eliminating the target Alexios Laskaridis in the Berlin level. The footage begins with Agent 47 entering the industrial-themed nightclub area and navigating towards a restricted zone. Viewers will see the retrieval of a concealed 5mm pistol from a briefcase and the careful infiltration of the club's back-of-house areas using environmental cover and the 'Instinct' mechanic to track NPC movements. The core of the video showcases the use of an old gramophone as a sound distraction to lure the target into a private office. Once isolated, the gameplay shows Agent 47 performing a silent takedown, hiding the body in a nearby crate, and assuming the target's disguise to blend in with the staff before concluding. Chapters: 0:00:00 - 0:00:25 - Initial infiltration and gear retrieval 0:00:25 - 0:01:03 - Navigating restricted stairwells and monitoring guards 0:01:03 - 0:01:35 - Entering the office and looting key items 0:01:35 - 0:02:35 - Setting and managing the gramophone distraction 0:02:35 - 0:03:02 - Eliminating Alexios Laskaridis and body disposal 0:03:02 - 0:03:15 - Acquiring disguise and video conclusion 📖 Interactive written walkthrough with clickable timestamps: https://pixelfungaming.com/videos/hitman-elusive-target-the-drop-club-owner-disguise-walkthrough

GTA 5 : The Fleeca Job WalkThrough (Driver)
Grand Theft Auto 5 - The Fleeca job (Driver) Chapters: 0:00:00 - 0:03:19 - Hacking the Fleeca Bank security system 0:03:20 - 0:03:35 - Vault door opening cutscene 0:03:36 - 0:06:07 - Bank entry and hostage intimidation 0:06:08 - 0:06:22 - Exiting the bank and initial police skirmish 0:06:23 - 0:07:42 - High-speed getaway through police roadblocks 0:07:43 - 0:07:49 - Mid-air vehicle extraction via Cargobob 0:07:50 - 0:09:02 - Mission completion and heist payout summary 0:09:03 - 0:09:12 - Post-heist celebration cutscene 📖 Interactive written walkthrough with clickable timestamps: https://pixelfungaming.com/videos/gta-5-the-fleeca-job-walkthrough-driver

MAFIA: THE OLD COUNTRY | Tremori | Escaping The Mines #mafia
The video provides a comprehensive cinematic gameplay look at 'Mafia: The Old Country,' set in 1904 Sicily. The narrative follows two miners, Enzo and Gaetano, as they navigate the brutal working conditions of a sulfur mine. Gameplay demonstrates environmental storytelling, stealth mechanics during a storehouse heist, and character interaction within the camp. The tension peaks during a mission into the 'Deep Mine' where a massive tremor and gas leak force a frantic escape sequence. The video culminates in a high-stakes knife fight between Enzo and a cruel overseer named Il Merlo, followed by a cinematic horse escape that reveals the game's title. Viewers will see the game's focus on character-driven drama, period-authentic settings, and the origins of the franchise's protagonist. Chapters: 0:00:00 - 0:01:20 - Introductory cinematic and discovery of the hidden cache 0:01:20 - 0:03:30 - Enzo and Gaetano navigate the dark mine tunnels 0:03:30 - 0:06:00 - Encounter with Il Merlo and exiting to the mine surface 0:06:00 - 0:08:30 - Surface camp life and the plan to steal supplies 0:08:30 - 0:10:30 - Stealth sequence in the storehouse and escape with food 0:10:30 - 0:13:30 - Reading the letter from America and Don Spadaro's arrival 0:13:30 - 0:16:50 - Descent into the Deep Mine to find missing workers 0:16:50 - 0:19:30 - Frantic escape from gas and cave-in during a major tremor 0:19:30 - 0:22:30 - Confrontation and brutal knife fight against Il Merlo 0:22:30 - 0:25:27 - Final horseback escape, title reveal, and credits

Ready Or Not: Stubborn Civilian #readyornot
The video showcases tactical gameplay from a police simulation title, demonstrating a night-time intervention by a SWAT team in an urban alleyway. Viewers see the team encounter a non-compliant female civilian who refuses to follow verbal commands. The content illustrates the use of non-lethal engagement, specifically a taser, to gain compliance from the resistant individual. The gameplay highlights the command interface for selecting non-lethal tools, the physical reaction of characters to taser deployment, and the subsequent restraint procedure carried out by a squad member. The video concludes with the successful completion of the 'Rescue all of the civilians' objective and a brief outro. Chapters: 0:00:00 - 0:00:05 - Initial Encounter and First Taser Deployment 0:00:05 - 0:00:15 - Navigating the Interaction Menu and Tactical Deployment Options 0:00:15 - 0:00:21 - Secondary Non-Lethal Engagement for Compliance 0:00:21 - 0:00:30 - Civilian Compliance and Squad-Assisted Restraint 0:00:30 - 0:00:36 - Objective Completion and Mission Wrap-Up

Ghost Recon Breakpoint - Finding Victor Coste
The mission begins with a stealthy approach through dense foliage as the character scouts a heavily guarded construction site. Tactical planning takes center stage as sync shots are coordinated with AI teammates to eliminate perimeter sentries. After securing an FRF2 sniper rifle from a fallen enemy, the team maneuvers through the skeletal structures of the base, using cover and high-ground advantages. Intense firefights erupt as the squad pushes into a shipping port area, requiring quick reflexes and the use of diverse gadgets like grenades and flashbangs. Amidst the chaos, the character provides field medicine to a downed teammate before reaching a critical rendezvous point. The operation culminates in a high-stakes meeting with Victor Coste, where a cinematic sequence reveals deeper plot layers involving Sentinel and a mysterious connection to past events in Bolivia, setting the stage for the next phase of the investigation. Chapters: 0:00:00 - 0:01:10 - Infiltration and Initial Scouting 0:01:10 - 0:01:40 - First Combat Encounter and Looting 0:01:40 - 0:03:20 - Stealthy Navigation Through Construction Zones 0:03:20 - 0:04:40 - Coordinated Team Tactics and Positioning 0:04:40 - 0:06:40 - Heavy Firefight at the Shipping Port 0:06:40 - 0:07:25 - Team Revival and Sector Clearing 0:07:25 - 0:07:48 - Reaching the Rendezvous Point 0:07:48 - 0:08:53 - Meeting with Victor Coste and Mission Briefing 📖 Interactive written walkthrough with clickable timestamps: https://pixelfungaming.com/videos/ghost-recon-breakpoint-finding-victor-coste

Assassins Creed: Shadows | The Wounded | Assassinate Wada Koretake Walkthrough
Naoe's journey begins with a stealthy infiltration of Gansenji Temple at night, transitioning quickly into an intense open brawl against several guards. Following the conflict, an extended cinematic sequence introduces Kyonyo and Yaya, who discuss their shared history and the threat posed by Oda Nobunaga's forces. The objective shifts to preparatory missions, including the elimination of an executioner at Nanatsumatsu and the recovery of a sacred statue in Toneyama Post Town to win over the monk Mitsumune. After securing these vital alliances, Naoe encounters a mysterious entity known as 'The Guide' within a digital Animus anomaly. The analysis concludes with a strategic rally and the initial, high-stakes assault on Amagasaki Castle as night falls, showcasing complex combat and environmental navigation. Naoe infiltrates Amagasaki Castle under the cover of night, skillfully eliminating snipers stationed along the perimeter. She moves with exceptional agility, scaling stone walls and navigating rooftops to maintain a tactical advantage. Utilizing a grappling hook, she traverses between high points and swings through trees to close distance on her enemies silently. In direct combat, she employs a fast-paced style, combining swift strikes with her kusarigama and lethal hidden blade finishes. After clearing the courtyard of defenders, she confronts her primary target, Wada Koretake. The encounter concludes with a dramatic assassination and a poignant cutscene where Naoe interacts with monks, discussing themes of justice and loss before successfully completing her mission. Chapters: 0:00:00 - Map navigation and initial quest objective 0:00:23 - Stealthy approach and scouting of Gansenji Temple 0:01:29 - Large-scale combat engagement in the temple courtyard 0:02:49 - Narrative cutscene discussing the 'one-eared demon' 0:07:45 - Quest menu management and mission tracking 0:08:18 - Infiltration of the executioner's camp at Nanatsumatsu 0:10:05 - Stealth traversal and takedowns in Toneyama Post Town 0:12:18 - Meeting with Mitsumune at Nunobiki Falls 0:13:57 - Interaction with 'The Guide' inside an Animus anomaly 0:15:02 - Final rallying call before the castle assault 0:16:39 - Commencement of the night attack on Amagasaki Castle 00:00:00 - Mission briefing and initial settlement infiltration 00:05:00 - Utilizing shadows and environment for stealth takedowns 00:10:00 - Scaling outer fortifications and scouting enemy patrols 00:15:00 - Open combat engagement showcasing shinobi weapon fluidity 00:20:00 - Infiltrating the inner castle grounds via rooftops 00:25:00 - Strategic navigation to bypass heavily armored samurai 00:30:00 - Final assault on snipers and courtyard guards 00:31:45 - Assassination of Wada Koretake and primary mission climax 00:33:00 - Story cinematic resolution and mission completion summary 📖 Interactive written walkthrough with clickable timestamps: https://pixelfungaming.com/videos/assassins-creed-shadows-the-wounded-assassinate-wada-koretake-walkthrough

Assassins Creed: Shadows | Kuji kiri Windy Shores | Before the Fall Walkthrough
This video provides an extensive look at the narrative and gameplay elements of a historical Japanese action-adventure game, likely Assassin's Creed Shadows. It begins with gameplay demonstrating traversal and infiltration techniques across rooftops in a night-time village setting. A unique meditation mini-game, involving a series of hand gestures known as Kuji-Kiri, is showcased. The content then shifts into substantial narrative cutscenes set in 1581 Iga Province, introducing the protagonist Naoe, her father Nagato, and legendary figures like Hattori Hanzo and Momochi Sandayu. Viewers will see the internal politics of the Iga shinobi as they face an impending invasion by Oda Nobunaga. Key moments include a dramatic council meeting, a traditional duel to prove worthiness, a sacred water-drinking oath ceremony, and further gameplay showing stealthy infiltration of a fortified castle to recover enemy plans. Chapters: 0:00:00 - 0:01:17 - Night-time Infiltration and Traversal Gameplay 0:01:17 - 0:02:25 - Naoe Performs the Kuji-Kiri Meditation Ritual 0:02:25 - 0:04:15 - Introduction to Iga Province and Narrative Setup 0:04:15 - 0:06:30 - Naoe and Nagato Discuss Training and Destiny at the Shrine 0:06:30 - 0:11:21 - The Iga Council Meeting and Hattori Hanzo's Warning 0:11:21 - 0:13:02 - Gameplay Duel: Naoe vs. Fujita Juro 0:13:02 - 0:15:34 - Sacred Oath Ceremony and the Start of the Invasion 0:15:34 - 0:17:18 - Stealth Infiltration of Hijiyama Fort to Recover Plans 📖 Interactive written walkthrough with clickable timestamps: https://pixelfungaming.com/videos/assassins-creed-shadows-kuji-kiri-windy-shores-before-the-fall-walkthrough

The Walking Dead: Destinies | Helpful Bug #thewalkingdeaddestinies #shorts
This gameplay video showcases intense combat sequences from a zombie survival game featuring characters from The Walking Dead. Viewers will see a group of survivors defending a farm area against waves of walkers, utilizing various firearms and tactical positioning. The footage highlights shooting mechanics, character interactions, and the challenges of managing ammunition while facing multiple threats. Key moments include the appearance of Daryl Dixon assisting in the fight and a focused engagement with a particularly resilient walker behind a barbed-wire fence. The video concludes with the survivors securing the immediate vicinity and preparing to investigate nearby structures. Chapters: 0:00:00 - 0:00:12 - Initial Engagement with Farm Walkers 0:00:12 - 0:00:25 - Daryl Dixon Joins the Firefight 0:00:25 - 0:00:45 - Tactical Shooting and Ammo Management 0:00:45 - 0:00:56 - Securing the Area and Final Cleanup 📖 Interactive written walkthrough with clickable timestamps: https://pixelfungaming.com/videos/the-walking-dead-destinies-helpful-bug-thewalkingdeaddestinies-shorts

Assassins Creed: Shadows Onryo Samurai and Unpayable Debt Walkthroughs
Naoe, a skilled shinobi, navigates through a misty landscape toward Katano Castle, determined to retrieve a mysterious red box. The journey involves a fast-paced horse ride followed by a stealthy infiltration of the castle's fortified walls. Using her grappling hook and keen sense of timing, she maneuvers across rooftops and eliminates guards silently. After searching several buildings, she eventually locates her target, Ido Yoshihiro, and executes a precision assassination from above. However, the retrieval takes a tragic turn during her escape when her father, Nagato, is fatally wounded by enemies led by a man in an Oni mask. The narrative then shifts to a flashback sequence two years prior in Iga Province, showing a younger Naoe training with her father and performing tasks for the local community, highlighting the origins of her skills and her deep connection to her homeland before it was devastated. Naoe engages in a heartfelt conversation with the elderly Matsu before her father, Nagato, arrives with urgent news of Oda Nobunaga’s approaching army. Despite Naoe's eagerness to join the fight, Nagato insists she remain safe, leading to a period of quiet reflection at Makinoodera Temple. Clad in her shinobi gear, Naoe explores the snowy grounds and participates in a Sumi-e painting activity involving a mischievous Tanuki. This artistic endeavor sparks a conversation with Junjiro about the parallels between art, practice, and her father’s music. A poignant montage follows, showcasing Naoe’s rigorous training and her effort to restore a broken ocarina using the Kintsugi method. Upon mending the instrument, she shares a musical moment that triggers memories of her father’s ultimate sacrifice. The sequence ends with Naoe resolving to settle a personal debt, completing her current quest and embarking on a new path. Chapters: 0:00:00 - Approaching Katano Castle 0:01:47 - Infiltrating the Castle Walls 0:03:18 - Stealth Takedowns and Investigation 0:04:18 - Tutorial: Light and Shadows 0:06:55 - Assassinating Ido Yoshihiro 0:07:32 - Escaping the Castle Alarms 0:08:06 - Confrontation and Tragedy 0:10:10 - Nagato's Last Stand and Death 0:15:18 - Naoe Recovers in a Safe House 0:16:17 - Flashback: Two Years Earlier in Iga 0:17:41 - Combat Training with Nagato 0:20:34 - Community Duties for Auntie Matsu 0:23:15 - Investigating the Troublemakers 0:26:22 - Battle Against the Poachers 00:30:00 - Nagato's Warning of Invasion 00:32:32 - Exploring Makinoodera Temple 00:33:20 - The Sumi-e Painting Challenge 00:36:30 - Memories of Nagato and Training 00:40:00 - Mending the Ocarina and Final Vow 📖 Interactive written walkthrough with clickable timestamps: https://pixelfungaming.com/videos/assassins-creed-shadows-onryo-samurai-and-unpayable-debt-walkthroughs

HITMAN 3: Elusive Target | The Crusher Gets Crushed #shorts
The mission begins in a rain-slicked alleyway in Chongqing, where the operative remains hidden behind crates to avoid detection by nearby guards. A screwdriver is thrown into the distance to create a noise distraction, successfully luring the target away from his post. As the target investigates the sound, the operative uses a silenced pistol to shoot the support chain of a heavy birdcage hanging above. The cage falls, crushing the target in what appears to be an unfortunate accident, satisfying the objective without raising an alarm. Following the elimination, the operative moves quickly through a nearby internet cafe and internal corridors to reach the street. The mission concludes with a cinematic escape on a motorcycle, leaving the area before the authorities can piece together the events. Chapters: 0:00:00 - 0:00:15 - Stealthy setup in the rainy alley 0:00:15 - 0:00:25 - Luring the target with a distraction 0:00:25 - 0:00:40 - Executing the accident kill with the birdcage 0:00:40 - 0:00:54 - Navigating to the extraction point 0:00:54 - 0:01:00 - Cinematic motorcycle escape 📖 Interactive written walkthrough with clickable timestamps: https://pixelfungaming.com/videos/hitman-3-elusive-target-the-crusher-gets-crushed-shorts

Assassins Creed: Shadows | Kuji-kiri Eboshigata Hachiman Shrine | Shinobi Warfare Walkthrough
This video provides a comprehensive look at the 'Shinobi Warfare' mission in Assassin's Creed Shadows, following the protagonist Naoe during the invasion of Iga Province in 1579. The content begins with a traditional Kuji-kiri ritual at a shrine, followed by a narrative-driven walk through a foggy forest with the elder Matsu, discussing the threat of the Oda clan. Viewers will see key story moments, including Naoe receiving a katana and preparing for a large-scale defense with Momochi Sandayu. The gameplay segment demonstrates stealth traversal through Nagano Pass, a poignant cutscene showing Naoe's first lethal encounter, and a cinematic representation of a massive ninja ambush. The video concludes with an intense boss fight against an Oda Brute in a waterfall pool and a post-battle dialogue reflecting on the start of the war between the Iga and the Oda forces. Chapters: 0:00:00 - 0:01:03 - Opening Kuji-kiri Ritual and Spiritual Transition 0:01:03 - 0:02:30 - Following Matsu and Discussing the Oda Clan's Ambition 0:02:30 - 0:04:18 - Meeting Momochi Sandayu and Preparing for the Defense of Iga 0:04:18 - 0:05:27 - Navigating Nagano Pass Using Stealth Mechanics 0:05:27 - 0:06:26 - Naoe's First Encounter and the Reality of Combat 0:06:26 - 0:08:25 - Infiltration Through Enemy Patrols at the Pass 0:08:25 - 0:10:35 - The Iga Ninjas Launch a Massive Ambush Cinematic 0:10:35 - 0:12:05 - Boss Battle Gameplay: Confronting the Oda Brute 0:12:05 - 0:14:21 - Battle Aftermath and the Declaration of War 📖 Interactive written walkthrough with clickable timestamps: https://pixelfungaming.com/videos/assassins-creed-shadows-kuji-kiri-eboshigata-hachiman-shrine-shinobi-warfare-walkthrough

Assassins Creed: Shadows | Character Naoe First 16 minutes
This comprehensive gameplay and narrative analysis of Assassin's Creed Shadows follows the shinobi protagonist, Naoe, during a pivotal night in Iga. The video demonstrates a wide range of gameplay systems, beginning with high-intensity horseback riding through burning environments. Viewers will see detailed combat showcases that highlight parrying, dodging, and light posture attacks against multiple opponents. The analysis further explores the game's stealth mechanics, illustrating how the protagonist utilizes environment-based concealment like tall grass, alongside tools for whistling and tagging enemies to perform silent takedowns. Narrative cutscenes provide context for Naoe's mission to protect a mysterious artifact within a mountain tomb (kofun), her dramatic encounter with a powerful masked samurai, and the emotional aftermath that sets her on a path of vengeance and discovery across feudal Japan. Chapters: 0:00:00 - 0:00:45 - Introductory narrative regarding fractured memories 0:00:45 - 0:01:30 - Cinematic introduction of Oda Nobunaga's invasion forces 0:01:30 - 0:02:30 - Horseback traversal through the burning Iga province 0:02:30 - 0:03:13 - Initial combat engagement and vulnerable state tutorial 0:03:13 - 0:04:42 - Large-scale skirmish in Aekuni Shrine Town 0:04:42 - 0:05:45 - Strategic discussion between Iga leaders post-battle 0:05:45 - 0:07:17 - Nagato entrusts Naoe with a secret mission at the kofun 0:07:17 - 0:09:31 - Detailed demonstration of shinobi stealth and assassination tactics 0:09:31 - 0:10:50 - Parkour navigation and approach to the mountain tomb 0:10:50 - 0:11:21 - Interaction with the tomb's hidden mechanism 0:11:21 - 0:12:31 - Dramatic encounter with the masked samurai artifact thief 0:12:31 - 0:13:18 - Cinematic montage of Naoe's rescue by her father 0:13:18 - 0:15:16 - Recovery and investigation of the mystery mask at Tomiko's homestead 0:15:16 - 0:16:17 - Naoe prepares to leave for Katano to pursue the samurai 📖 Interactive written walkthrough with clickable timestamps: https://pixelfungaming.com/videos/assassins-creed-shadows-character-naoe-first-16-minutes

Delta Force: Black Hawk Down | Defending Crashsite Walkthrough
This video features a high-intensity tactical gameplay session recreating the 'Black Hawk Down' scenario in Mogadishu. The footage begins with a cinematic introduction where ground troops are pinned down, leading into an air support phase where players fire from helicopters. After one helicopter is downed, the team inserts near the crash site and maneuvers through urban environments to establish a defensive perimeter. The majority of the video demonstrates a desperate and extended hold-out at the crash site against overwhelming waves of militia forces, highlighting team coordination, revive mechanics, and resource management. The session concludes with a poignant cinematic sequence as the team is eventually overrun, followed by a mission performance report. Chapters: 0:00:00 - 0:00:30 - Mission Introduction and Call for Backup 0:00:30 - 0:01:40 - Aerial Suppression and Helicopter Support Phase 0:01:40 - 0:02:12 - Deployment and Insertion Near the Crash Site 0:02:12 - 0:02:44 - Urban Navigation and Movement Toward the Downed Bird 0:02:44 - 0:04:10 - Establishing a Defensive Perimeter and Initial Rescues 0:04:10 - 0:06:30 - Sustained Firefight Against Encroaching Militia Forces 0:06:30 - 0:08:45 - Intense Close-Quarters Hold-out and Squad Revivals 0:08:45 - 0:10:30 - The Final Desperate Stand at the Crash Site 0:10:30 - 0:11:12 - Cinematic Conclusion: Team Overrun and Ending Monologue 0:11:12 - 0:11:22 - Mission Statistics and Performance Report 📖 Interactive written walkthrough with clickable timestamps: https://pixelfungaming.com/videos/delta-force-black-hawk-down-defending-crashsite-walkthrough

Assassins Creed: Shadows | Character Yasuke First 20 minutes
The video provides a detailed introduction to Assassin's Creed Shadows, specifically showcasing the narrative origin and gameplay mechanics of the protagonist Yasuke. It opens with a cinematic prologue set in March 1581, depicting Yasuke's arrival in Kyoto as part of a Jesuit mission. Viewers will see historical figures like Akechi Mitsuhide and Oda Nobunaga. The content demonstrates the cultural tensions and the formal audience where Yasuke is gifted to Nobunaga. After a narrative transition through a fractured memory sequence, the video shifts to six months later during the brutal siege of Iga Province. Gameplay demonstrates Yasuke's combat prowess as a heavily armored samurai, utilizing a kanabo and katana to engage numerous shinobi and defenders in a burning village. The demo highlights the game's focus on visceral, power-based combat, environmental destruction, and cinematic storytelling through post-battle dialogues about tyranny and conviction. Chapters: 0:00:00 - 0:02:45 - Historical context and arrival in 1581 Kyoto 0:02:45 - 0:05:45 - Navigating social hierarchies and meeting Akechi Mitsuhide 0:05:45 - 0:08:15 - Formal audience with Lord Oda Nobunaga and gift presentation 0:08:15 - 0:11:30 - Dialogue choices and Yasuke's recruitment into Nobunaga's service 0:11:30 - 0:15:15 - Time skip to the siege of Iga and samurai combat demonstration 0:15:15 - 0:18:47 - Battle progression at Mibuno Castle and narrative resolution 📖 Interactive written walkthrough with clickable timestamps: https://pixelfungaming.com/videos/assassins-creed-shadows-character-yasuke-first-20-minutes

Delta Force: Black Hawk Down | Chapters 2 and 3
The video presents an in-depth look at tactical gameplay from Delta Force, centered on the iconic Black Hawk Down scenario. Viewers will see two major mission segments. The first mission focuses on clearing a militia-infested route for a medical convoy, demonstrating urban combat, building clearing, and squad-based movement through narrow alleys and damaged structures. Following a cinematic crash of a Black Hawk helicopter, the second half of the video transitions to a rescue operation. This segment covers a squad's advancement through a dense shanty town and a chaotic market area to reach the crash site. Throughout the footage, gameplay highlights tactical elements such as utilizing cover, suppressing fire, reviving downed teammates under pressure, and neutralizing high-threat targets like snipers and RPG-wielding enemies. The video concludes with the successful extraction of survivors from the wreckage and a summary of mission performance. Chapters: 0:00:00 - 0:00:34 - Mission Briefing and Convoy Departure 0:00:35 - 0:03:15 - Clearing Urban Alleys and Militia Positions 0:03:16 - 0:05:45 - Building-to-Building Combat and Suppressive Fire 0:05:46 - 0:06:42 - Final Push to the Convoy's Main Road 0:06:43 - 0:07:08 - Cinematic: Black Hawk Helicopter Crash 0:07:09 - 0:07:51 - Mission Transition and New Rescue Objective 0:07:52 - 0:10:20 - Navigating the Shanty Town Toward the Crash Site 0:10:21 - 0:13:28 - High-Intensity Market Skirmish and Team Revivals 0:13:29 - 0:13:58 - Crash Site Secure and Survivor Extraction 0:13:59 - 0:14:18 - Performance Report and Final Outro 📖 Interactive written walkthrough with clickable timestamps: https://pixelfungaming.com/videos/delta-force-black-hawk-down-chapters-2-and-3

Ready Or Not: Hostage Rescue With Beanbag Shotgun
This gameplay analysis follows a tactical police unit during a night mission in a rainy industrial shipping yard. Viewers observe the player navigating between shipping containers using a flashlight-mounted weapon. The video demonstrates a high-pressure engagement where the player neutralizes a threat while avoiding a civilian bystander. Following the shootout, the content showcases the process of detaining suspects, securing a civilian in a yellow jacket, and collecting discarded weaponry as evidence. The player coordinates with the Tactical Operations Center (TOC) to report secured individuals and weapons, highlighting the procedural realism of the simulation. Chapters: 0:00:00 - 0:00:09 - Tactical engagement with suspects near shipping containers in heavy rain 0:00:09 - 0:00:19 - Forcing compliance of a suspect and a civilian using voice commands 0:00:19 - 0:00:34 - Reporting status to command and securing discarded weapons as evidence 📖 Interactive written walkthrough with clickable timestamps: https://pixelfungaming.com/videos/ready-or-not-hostage-rescue-with-beanbag-shotgun

Holey Mutant VS Roof Spikes & Finishing Layered Defenses | Sons Of The Forest #sonsoftheforest
This comprehensive gameplay video showcases advanced base building and defense strategies in Sons of the Forest. Viewers will see the construction of a lakeside fortress, followed by a dramatic encounter with a massive mutant during the winter season. The video highlights various trap designs, including the 'Flyswatter' and explosive traps, demonstrating their effectiveness against waves of cannibal attackers. Throughout the duration, the content emphasizes tactical positioning in towers and the use of long-range weapons like the crossbow to maintain base security. Chapters: 0:00:00 - 0:00:52 - Initial base tour and lakeside environment walkthrough 0:00:53 - 0:01:13 - Showcase of fortified structures and bridge design in winter 0:01:14 - 0:02:10 - Intense battle against a massive mutant attacking the tower 0:02:11 - 0:03:00 - Defeating the mutant and harvesting armor from the creature 0:03:01 - 0:03:46 - Strategic placement of stone walls and stick defenses 0:03:47 - 0:04:32 - Detailed construction of complex traps using the blueprint book 0:04:33 - 0:05:20 - Nighttime trap performance against cannibal raiding parties 0:05:21 - 0:06:10 - Daytime demonstration of trap resets and kill-box effectiveness 0:06:11 - 0:07:04 - Long-range combat highlights utilizing the crossbow and spears 0:07:05 - 0:08:27 - Final base defense showcase featuring explosive trap outcomes 📖 Interactive written walkthrough with clickable timestamps: https://pixelfungaming.com/videos/holey-mutant-vs-roof-spikes-finishing-layered-defenses-sons-of-the-forest-sonsoftheforest

Dying Light 2: Crossbow VS Melee Fight Be Like
This video presents a side-by-side thematic comparison between a gameplay sequence in Dying Light 2 and a classic cinematic moment from Raiders of the Lost Ark. The first half of the video shows the protagonist, Aiden, confronting a character named Gatsby. After Gatsby explains his reasons for betraying his former allies to join the bandits, the gameplay demonstrates a swift resolution where Aiden uses a crossbow to immediately defeat him. The second half of the video features the iconic movie clip where Indiana Jones, faced with an intimidating swordsman, simply pulls out his revolver and shoots him, highlighting the inspiration for the game's encounter. Chapters: 0:00:00 - 0:00:09 - Searching for the Armory Code 0:00:10 - 0:00:34 - Confrontation and Dialogue with Gatsby 0:00:35 - 0:00:48 - Quick Crossbow Takedown and Aftermath 0:00:49 - 0:01:06 - Cinematic Inspiration: Indiana Jones vs. The Swordsman 📖 Interactive written walkthrough with clickable timestamps: https://pixelfungaming.com/videos/dying-light-2-crossbow-vs-melee-fight-be-like

RDR2 - Train Wreck With Loot Box Location
The character initiates the process of locating a valuable stash, beginning by opening the map to pinpoint the destination near Cotorra Springs, situated by Granite Pass and the remnants of Bacchus Bridge. The sequence transitions to the gameplay environment where the character approaches the massive wreckage of a derailed train scattered across a steep, rocky ravine. Navigating through the dense foliage and twisted metal, the character locates a partially submerged train car wedged between rocks. The character climbs into the dark interior of the overturned car and quickly spots a chest hidden beneath debris. Upon inspection, the character unlocks the chest and loots several high-value items, including a Large Jewelry Bag, a Bill Fold, and a Coin Sack, totaling over $20 in immediate funds alongside the valuable contents. After successfully securing the treasure, the character exits the wrecked carriage and moves through the rugged landscape, navigating around boulders and discarded train wheels before calling the horse and concluding the segment. Chapters: 0:00 - 0:14 - Map Review and Location Confirmation 0:14 - 0:34 - Navigating the Train Wreck and Locating the Chest 0:34 - 0:52 - Looting the Hidden Chest for Valuables 0:52 - 2:21 - Exiting the Wreckage and Environmental Movement 📖 Interactive written walkthrough with clickable timestamps: https://pixelfungaming.com/videos/rdr2-train-wreck-with-loot-box-location

Trolling Players As Fake Yeti | GTA Online #gtaonline #gta5
This GTA Online gameplay video features a player wearing the Yeti outfit during a winter-themed event. The content begins with the character changing clothes in their apartment before traveling to the snowy wilderness of Paleto Bay. Throughout the full duration, viewers will see the player utilize stealth services like 'Off the Radar' and 'Out of Sight' to hunt other players using melee weapons. The footage demonstrates several successful takedowns across various terrains, including dense forests, riverbeds, and mountain peaks. A notable highlight is an encounter with the festive NPC known as 'The Gooch,' where the player successfully defends themselves and collects a reward. The video showcases strategic use of the Oppressor MK II for map traversal and culminates in a series of close-quarters combat sequences and final hunts in a rocky gully. Chapters: 0:00:00 - 0:00:21 - Changing into the Yeti costume in the apartment wardrobe 0:00:22 - 0:00:50 - Planning the route and traveling to Paleto Bay via SUV service 0:00:51 - 0:01:36 - Activating stealth abilities and flying towards the mountain area 0:01:37 - 0:02:13 - Tracking and engaging targets in the snowy forest using melee 0:02:14 - 0:03:03 - Registering as CEO and tracking new targets across the range 0:03:04 - 0:04:01 - Engaging players and NPCs near a parked ranger vehicle 0:04:02 - 0:04:32 - Melee pursuit and takedown of a player in Raton Canyon 0:04:33 - 0:05:00 - Respawning and resuming the attack in the riverbed area 0:05:01 - 0:05:35 - Aerial traversal to spot new targets over the snowy landscape 0:05:36 - 0:06:13 - Scouting the terrain on foot for a surprise melee attack 0:06:14 - 0:06:31 - Combat encounter and successful takedown of The Gooch NPC 0:06:32 - 0:07:17 - High-speed chase and witnessing unusual vehicle physics events 0:07:18 - 0:07:59 - Melee combat engagement on a steep mountain hiking path 0:08:00 - 0:08:56 - Final successful hunt in a rocky gully and gameplay conclusion 📖 Interactive written walkthrough with clickable timestamps: https://pixelfungaming.com/videos/trolling-players-as-fake-yeti-gta-online-gtaonline-gta5

Ready Or Not: 3 Letter Triad | A Rank
This comprehensive gameplay video showcases a full tactical SWAT operation within a coastal, dilapidated industrial facility. The content follows a high-stakes mission where a tactical team must infiltrate, clear numerous rooms, and secure objectives while adhering to strict rules of engagement. Viewers will observe realistic tactical procedures including door mirroring for reconnaissance, various breaching methods such as physical rams and C2 explosives, and coordinated room-clearing movements. Throughout the mission, the video demonstrates the use of tactical equipment like flashbangs and stingers to subdue suspects, the process of arresting individuals, and the collection of critical evidence. The operation concludes with the successful retrieval of a primary objective and a final mission summary screen detailing the performance rating. Chapters: 0:00:00 - 0:02:30 - Insertion and Initial Pier Approach 0:02:30 - 0:05:00 - Breaching Entry Points and Clearing Kitchen Areas 0:05:00 - 0:07:30 - Engaging and Arresting Suspects in the Main Hall 0:07:30 - 0:10:00 - Tactical Movement through Industrial Corridors 0:10:00 - 0:12:30 - Systematic Clearance of Storage and Utility Rooms 0:12:30 - 0:15:00 - Locating and Securing Primary Mission Objectives 0:15:00 - 0:17:30 - High-Intensity Explosive Wall Breaches and Combat 0:17:30 - 0:20:00 - Sweeping the Overgrown Upper Building Sections 0:20:00 - 0:22:37 - Final Suspect Neutralization and Mission Summary 📖 Interactive written walkthrough with clickable timestamps: https://pixelfungaming.com/videos/ready-or-not-3-letter-triad-a-rank

War Thunder: AA Vehicle VS Ground Vehicles Moments
This War Thunder gameplay video showcases the effectiveness and fast-paced nature of Soviet light anti-aircraft vehicles, specifically the GAZ-MM (72-K) and the BTR-152A. The content demonstrates these vehicles being used in a variety of combat scenarios across different environments, including urban streets, industrial ports, rural fields, mountain passes, and snowy landscapes. Viewers will see tactics for engaging armored targets with high-rate-of-fire autocannons, featuring moments of strategic positioning, close-range ambushes, and high-speed maneuvers. The gameplay covers multiple matches, highlighting both successful destructions of enemy tanks and the challenges of operating lightly armored vehicles on the front lines. Chapters: 0:00:00 - 0:01:28 - Urban combat maneuvers with the GAZ-MM (72-K) 0:01:28 - 0:03:10 - Industrial port engagement and tactical positioning 0:03:10 - 0:04:23 - Long-range sniping in rural field conditions 0:04:23 - 0:05:27 - Close-quarters village skirmish with the BTR-152A 0:05:27 - 0:07:15 - Mountain pass battle and multi-target engagement 0:07:15 - 0:09:15 - Snowy map chase and objective capture attempt 0:09:15 - 0:09:32 - Match summary and channel outro 📖 Interactive written walkthrough with clickable timestamps: https://pixelfungaming.com/videos/war-thunder-aa-vehicle-vs-ground-vehicles-moments

Star Wars: Outlaws | Tasharon Treasure Location #starwarsoutlaws
The video provides a brief gameplay demonstration from Star Wars Outlaws, showing how to locate a specific treasure on the planet Toshara. It starts by displaying a map waypoint in the Boulder Forest region. The footage then follows the protagonist, Kay Vess, as she travels by speeder bike across the rocky landscape. Upon reaching the destination, gameplay shows the use of a scanning pulse to identify a hidden Smuggler Cache tucked away behind large rock formations. The video concludes with the discovery and collection of the loot, which resolves a piece of game intel. Chapters: 0:00:00 - 0:00:04 - Map View and Waypoint Location 0:00:04 - 0:00:18 - Speeder Bike Travel through Boulder Forest 0:00:18 - 0:00:54 - Searching the Area and Using Scanning Pulse 0:00:54 - 0:01:01 - Discovering and Opening Smuggler Cache 37 0:01:01 - 0:01:07 - End Screen and Channel Information 📖 Interactive written walkthrough with clickable timestamps: https://pixelfungaming.com/videos/star-wars-outlaws-tasharon-treasure-location-starwarsoutlaws

Ready Or Not: Gas Station | All Hostages rescued in less than 3 minutes
This video features a complete tactical mission in a SWAT-style gameplay environment, specifically the 'Thank You Come Again' hostage rescue mission. The gameplay follows an entry team as they approach a 'Food 4U' diner at night. The sequence demonstrates a professional approach, dynamic entry using flashbangs, methodical clearing of the diner's interior, and the safe restraint of suspects and civilians. The mission wraps up with a sweep of the rear loading area and a final performance evaluation screen showing an 'A' rank. Chapters: 0:00:00 - 0:00:13 - Pre-Mission Briefing and Player Readiness 0:00:13 - 0:00:58 - Tactical Approach and Perimeter Infiltration 0:00:58 - 0:01:26 - Breaching the Main Entrance and Initial Engagement 0:01:26 - 0:02:18 - Clearing the Diner Floor and Securing Detainees 0:02:18 - 0:02:50 - Rear Loading Bay Sweep and Final Clearance 0:02:50 - 0:03:20 - Mission Summary and Performance Rating 📖 Interactive written walkthrough with clickable timestamps: https://pixelfungaming.com/videos/ready-or-not-gas-station-all-hostages-rescued-in-less-than-3-minutes

Ghost Recon Wildlands - Capture El Muro Walkthrough
The mission 'El Muro' kicks off with a high-altitude parachute jump into the Unidad base, F.O.B. Buitre, under the cover of night. Once on the ground, the squad navigates through small arms fire to locate the high-value target. Amidst a chaotic firefight between Unidad and Santa Blanca forces, the team captures El Muro and secures him in an armored Unidad SUV. The escape from the base involves a high-speed chase through rugged mountain terrain while dodging persistent patrols. During the long drive to the extraction point, San Mateo Alpha, a tense dialogue unfolds regarding El Muro's past loyalty to El Sueño and the death of his brother. The route takes the vehicle through narrow town streets and challenging off-road paths up a steep mountainside. Upon reaching the remote rebel camp, El Muro is delivered to Karen Bowman for interrogation. A dramatic cutscene follows where Bowman attempts to leverage his resentment to gain intel on the cartel leader. The mission concludes successfully once the target is officially handed over. Chapters: 0:00:00 - 0:00:45 - Parachuting into F.O.B. Buitre and landing 0:00:45 - 0:01:05 - Locating and capturing El Muro 0:01:05 - 0:02:15 - Base breakout and initial vehicle pursuit 0:02:15 - 0:04:00 - Navigating mountain roads and Acevedo Town 0:04:00 - 0:05:30 - Off-road ascent to San Mateo Alpha 0:05:30 - 0:07:26 - Karen Bowman interrogation cutscene 0:07:26 - 0:08:02 - Mission completion and handover 📖 Interactive written walkthrough with clickable timestamps: https://pixelfungaming.com/videos/ghost-recon-wildlands-capture-el-muro-walkthrough

Ready Or Not: Leviathan | S Rank #readyornot
This video provides a complete, start-to-finish walkthrough of the 'Leviathan' mission in the tactical shooter game, Ready or Not. Set on an offshore oil drilling platform during a stormy night, the gameplay demonstrates a highly methodical approach to room clearing and suspect apprehension. Viewers will see the implementation of various SWAT tactics, including the use of mirror guns to scout under doors, coordinated breaches using flashbangs and stinger grenades, and the employment of less-lethal weaponry like beanbag shotguns to secure civilians and suspects without casualties. The footage covers all major areas of the rig, including living quarters, industrial technical rooms, the galley, and central control stations, ending with a successful extraction at the helipad and a final mission performance summary showing an 'S' rank. Chapters: 0:00:00 - 0:02:45 - Mission Start and Initial Rig Boarding 0:02:45 - 0:05:30 - Clearing Lower Deck Corridors and Dormitories 0:05:30 - 0:08:15 - Methodical Search of Living Quarters and Evidence Collection 0:08:15 - 0:11:00 - Engagements in Industrial Technical Spaces 0:11:00 - 0:13:45 - Completing the Livestream Objective and Rescuing Civilians 0:13:45 - 0:16:30 - Coordinated Breaches of Central Operations Control Rooms 0:16:30 - 0:19:15 - Progressing Through Service Decks and Maintenance Halls 0:19:15 - 0:22:00 - Tactical Engagements in the Galley and Mess Hall Facilities 0:22:00 - 0:24:45 - Final Deck Sweeps and High-Priority Target Apprehension 0:24:45 - 0:26:36 - Helipad Extraction and Final Mission Score Debrief 📖 Interactive written walkthrough with clickable timestamps: https://pixelfungaming.com/videos/ready-or-not-leviathan-s-rank-readyornot

Six Days In Fallujah: Apartments Multiplayer | Mission Success
This video provides a comprehensive demonstration of tactical gameplay in the realistic shooter Six Days in Fallujah. Viewers will see a squad of Marines navigating a war-torn urban environment, performing systematic room-clearing operations, and engaging in intense close-quarters combat with insurgents. The content covers the entire mission from the initial briefing and deployment to the final successful objective, highlighting mechanics such as door breaching, medical treatment, tactical communication, and utilizing armored vehicles for support. Chapters: 0:00:00 - 0:00:20 - Mission Briefing and Cinematic Introduction 0:00:20 - 0:01:00 - Initial Tactical Movement and First Breach Attempt 0:01:00 - 0:02:15 - Intense Interior Firefights and Squad Medical Response 0:02:15 - 0:03:30 - Regrouping at the AAV and Advancing Toward the Main Complex 0:03:30 - 0:04:45 - Entering the Multi-Story Apartment Building and Lower Floor Clearing 0:04:45 - 0:06:00 - High-Stakes Combat Across Upper Corridors and Rooms 0:06:00 - 0:07:14 - Securing the Rooftop and Mission Success Report 📖 Interactive written walkthrough with clickable timestamps: https://pixelfungaming.com/videos/six-days-in-fallujah-apartments-multiplayer-mission-success

Sons Of The Forest: Building Humble Waterfall Base
This gameplay analysis covers a comprehensive survival and building session in an open-world forest environment. The footage begins with advanced traversal using a grapple gun to reach a high-altitude cliff near a waterfall, where a basic tent shelter is erected. Following a scenic glider flight down to the valley floor, the video demonstrates the intricate process of constructing a sturdy treehouse from start to finish. Viewers will observe resource gathering through tree-felling, defending the construction site against hostile encounters, and the step-by-step assembly of floors, walls, and interior shelving. The final segments showcase long-distance travel via glider to a coastal location, where a second established treehouse serves as a supply hub, highlighting the collection of various food items, medical supplies, and armor to enhance survival chances. Chapters: 0:00:00 - 0:02:00 - Climbing and establishing a cliffside camp near a waterfall 0:02:00 - 0:04:30 - Gliding into the forest and starting construction on a new treehouse 0:04:30 - 0:07:00 - Gathering resources, defending against threats, and completing the exterior 0:07:00 - 0:09:30 - Furnishing the interior and navigating the environment with tools 0:09:30 - 0:12:12 - Traveling to a coastal treehouse to gather essential survival supplies 📖 Interactive written walkthrough with clickable timestamps: https://pixelfungaming.com/videos/sons-of-the-forest-building-humble-waterfall-base

War Thunder: Trying Air Battle In First Person
This video is an extensive compilation of aerial combat gameplay from the flight simulator War Thunder. It showcases a variety of World War II-era aircraft, including fighters like the Yak-9 and Bf 109, as well as attackers and bombers. Throughout the footage, viewers will see intense dogfights across diverse environments, from snowy mountain ranges and lush valleys to arid deserts. The content highlights tactical maneuvers, precision gunnery, and energy management in various combat scenarios. Key highlights include successful interceptions of heavy bombers like the PBM-1 and Do 17, high-speed low-altitude pursuits through narrow canyons, and dramatic mid-air collisions. The video provides a comprehensive look at the cockpit perspective of different aircraft and the technical challenges of air-to-air engagements. Chapters: 00:00:00 - 00:01:21 - Initial Engagements: High-Altitude Bomber Interception and Valley Pursuits 00:01:21 - 00:02:38 - Desert Operations: Dogfighting and Targeting Heavy Aircraft 00:02:38 - 00:03:51 - Mountainous Terrain Combat: Close-Range Maneuvering in Snowy Peaks 00:03:51 - 00:05:30 - High-Speed Alpine Dogfights and Dramatic Mid-Air Collision 00:05:30 - 00:06:32 - Tactical Engagements in Rugged Mountainous Regions 00:06:32 - 00:07:19 - Precision Gunnery during Low-Altitude Canyon Runs 00:07:19 - 00:08:31 - Forested Region Sortie: Engaging P-51 Fighters 00:08:31 - 00:10:07 - Interception Missions against Attackers and SB2C-1 Aircraft 00:10:07 - 00:11:37 - Final Combat Sequence: Defending Territory against Multiple Targets 00:11:37 - 00:11:43 - Closing Outro and Channel Branding 📖 Interactive written walkthrough with clickable timestamps: https://pixelfungaming.com/videos/war-thunder-trying-air-battle-in-first-person

Six Days In Fallujah: Multiplayer Jolan Park | Mission Success
This video provides a full gameplay demonstration of the Jolan Amusement Park mission in Six Days in Fallujah. It begins with a cinematic briefing depicting the USMC 3/1 Kilo Company on November 10 at 0800. Viewers follow the squad as they navigate through the war-torn streets of Fallujah, engaging in high-stakes urban combat to locate and destroy concealed enemy mortars. The footage captures the intense atmospheric tension, tactical squad movements, and the use of suppressive fire near landmarks like the Ferris wheel. The mission concludes with a desperate defense of a rally point and a detailed After Action Report summarizing the combat statistics and mission outcome. Chapters: 0:00:00 - 0:02:30 - Mission briefing and initial patrol through the outskirts of the amusement park, ending with the first major insurgent contact. 0:02:30 - 0:05:00 - Intense firefights in narrow alleyways where the squad utilizes cover and provides medical aid to wounded teammates while pushing forward. 0:05:00 - 0:07:30 - The tactical approach to the amusement park center, featuring sustained machine gun fire and strategic positioning beneath the Ferris wheel. 0:07:30 - 0:10:00 - Locating and neutralizing the final enemy mortar positions while managing ammunition and coordinating with radio support. 0:10:00 - 0:11:18 - Defense of the designated rally point against final enemy waves, followed by the mission success screen and After Action Report. 📖 Interactive written walkthrough with clickable timestamps: https://pixelfungaming.com/videos/six-days-in-fallujah-multiplayer-jolan-park-mission-success

Hitman 3: Berlin | Security Disguise Location
Agent 47 navigates the shadowy underbelly of a Berlin industrial complex, moving stealthily through restricted maintenance corridors. The mission continues as he approaches a locked door marked for personnel only. Using his lockpicking tools, he gains entry into a quiet laundry and restroom area. He discovers a security guard disguise resting on a washing machine and immediately changes outfits to bypass further security checks. After securing the new identity, he moves into an adjacent kitchen space before pausing to review his tactical map and mission objectives, which include specific assassination challenges like 'Push Kill' and 'Poison Target'. Chapters: 0:00:00 - 0:00:10 - Infiltration of the restricted maintenance zone 0:00:10 - 0:00:20 - Navigating dark corridors behind the club 0:00:20 - 0:00:30 - Picking the lock to the laundry room 0:00:30 - 0:00:43 - Acquiring the security guard disguise 0:00:43 - 0:00:58 - Reviewing mission objectives and facility map 📖 Interactive written walkthrough with clickable timestamps: https://pixelfungaming.com/videos/hitman-3-berlin-security-disguise-location

Red Dead Online - Lake Sturgeon Location - Flat Iron Lake
The character stands on a snowy outcrop overlooking a misty body of water, preparing their fishing gear in the middle of a winter storm. After casting a river lure, the character carefully reels in the line to attract a catch. A large fish bites, triggering a brief struggle as the rod bends under the weight. Successfully reeling it in reveals a 14 lbs 15 oz Lake Sturgeon, completing a daily challenge. Carrying the heavy fish across the snowy terrain, the character whistles for their horse and stows the prize on its back. The sequence concludes with a detailed look at the in-game map, pinpointing the exact fishing location on the coastline of Flat Iron Lake, just south of Blackwater. Chapters: 0:00:00 - 0:00:15 - Preparing to fish during a snowstorm 0:00:15 - 0:00:28 - Casting the line and attracting fish 0:00:28 - 0:00:45 - Catching a large Lake Sturgeon 0:00:45 - 0:01:03 - Stowing the fish on the horse 0:01:03 - 0:01:41 - Displaying the map location near Blackwater 📖 Interactive written walkthrough with clickable timestamps: https://pixelfungaming.com/videos/red-dead-online-lake-sturgeon-location-flat-iron-lake

HITMAN Freelancer: DAK-DTI Submachine Gun | Dubai Location
Agent 47 infiltrates the Burj Al-Ghazali in Dubai, maintaining a maintenance worker disguise to bypass security. He stalks through the back hallways, observing guards through tinted glass panels. Upon finding an isolated penthouse guard, he performs a swift, non-lethal takedown from behind. The body is immediately concealed within a laundry hamper in a nearby storage area to prevent discovery. After securing the immediate vicinity, he locates a discarded gold-plated submachine gun on the ground and inspects its condition. The sequence concludes with a detailed review of the tactical map and current freelance objectives, which involve specific guard eliminations using the newly acquired firearm. Chapters: 0:00:00 - 0:00:15 - Maintenance corridor infiltration 0:00:15 - 0:00:26 - Stealth takedown of a penthouse guard 0:00:26 - 0:00:34 - Concealing the body in a storage room 0:00:34 - 0:00:49 - Acquiring the gold-plated SMG 0:00:49 - 0:01:00 - Mission objective and map review 📖 Interactive written walkthrough with clickable timestamps: https://pixelfungaming.com/videos/hitman-freelancer-dak-dti-submachine-gun-dubai-location

Star Wars: Outlaws | The Scavenger Walkthrough #starwarsoutlaws
The video provides a comprehensive walkthrough of 'The Scavenger' quest in Star Wars Outlaws. Viewers follow protagonist Kay Vess as she searches for Temmin Wexley to upgrade her speeder. The footage showcases initial dialogue with Temmin's family, followed by an action-packed speeder chase and ground combat against bandits. After meeting Temmin and learning about stolen parts, the video demonstrates the use of the speeder's hydro-repulsor to navigate a vast lake area known as The Great Basin. The final segments focus on stealth gameplay, where Kay infiltrates a Hutt Cartel restricted area on an island to retrieve durasteel struts, culminating in a successful quest completion and the beginning of the next mission, 'Viper'. Chapters: 00:00:00 - 00:01:00 - Initial meeting with Temmin's family to gather intel on his location 00:01:00 - 00:02:15 - Speeder traversal and ground combat against hostile bandits 00:02:15 - 00:03:15 - Meeting Temmin Wexley and identifying missing speeder components 00:03:15 - 00:05:40 - Navigating the Great Basin using speeder hydro-repulsor traversal 00:05:40 - 00:07:30 - Stealth infiltration of a Hutt Cartel restricted outpost 00:07:30 - 00:08:46 - Retrieval of durasteel struts and successful completion of 'The Scavenger' quest 📖 Interactive written walkthrough with clickable timestamps: https://pixelfungaming.com/videos/star-wars-outlaws-the-scavenger-walkthrough-starwarsoutlaws

Red Dead Online - Rescueing Friend From Kidnapping Player
The gameplay begins with a tense nighttime encounter in the town of Strawberry. After a brief mounted shooting on a bridge, the character engages in a brutal close-quarters grapple, successfully overcoming an opponent. The action quickly shifts to the outskirts as the character utilizes high ground for long-range sniper engagements. Using a combination of a sniper rifle and Dead Eye abilities, several enemies are picked off from distances as they attempt to maneuver through the surrounding hills and forests. Following a brief setback and respawn, the character returns to the ridge, executing precise headshots on rival players stationed across the valley. The session concludes with a final execution on a grassy hilltop and a series of social emotes shared with a posse member while scanning the horizon for remaining threats. Chapters: 0:00:00 - 0:00:45 - Strawberry Bridge Skirmish and Close Combat 0:00:45 - 0:02:15 - Long-Range Sniping from the Town Perimeter 0:02:15 - 0:03:15 - Forest Hill Gunfight and High-Stakes Duel 0:03:15 - 0:04:30 - Mountain Ridge Counter-Sniping and Respawn Action 0:04:30 - 0:05:12 - Hilltop Execution and Posse Interactions 📖 Interactive written walkthrough with clickable timestamps: https://pixelfungaming.com/videos/red-dead-online-rescueing-friend-from-kidnapping-player

Red Dead Online: Beating Up Mr Cripps #shorts
The protagonist engages in a series of physical altercations with an NPC merchant at a camp. These encounters take place over a supply table, showcasing various melee animations and combat sequences. The protagonist repeatedly approaches the merchant, delivers a flurry of punches, and occasionally slams the merchant's head onto the wooden workbench. The scenes transition between daytime and nighttime, demonstrating the relentless nature of the protagonist's attacks. Each segment ends with the protagonist walking away while the NPC shouts threats or expressions of pain. Chapters: 0:00:00 - 0:00:15 - Initial daytime melee encounter at the camp table 0:00:15 - 0:00:29 - Repeated heavy strikes over the supply workbench 0:00:29 - 0:00:37 - Environmental head-slam animation and retreat 0:00:37 - 0:00:53 - Nighttime camp assault and final departure 📖 Interactive written walkthrough with clickable timestamps: https://pixelfungaming.com/videos/red-dead-online-beating-up-mr-cripps-shorts

GTA Online: Serving & Protecting The Crap Out Of Player
The mission begins with an aerial approach over Los Santos at sunset, where the character pilots an Oppressor Mk II hoverbike. After gliding over the rooftops, the character lands near Vespucci Beach and dismounts in front of a mask shop. A quick selection from the weapon wheel brings up a taser and a nightstick. The character cautiously stalks an unsuspecting player standing by the shopfront, waiting for the right moment to strike. Combat starts at 0:00:44 when the character fires the taser, incapacitating the target. This is immediately followed by a series of strikes with the nightstick while the target is on the ground. Once the confrontation ends, the character runs back to the hoverbike and flies away into the sunset, leaving the area behind. Chapters: 0:00:00 - 0:00:13 - Aerial approach across Los Santos on an Oppressor Mk II 0:00:13 - 0:00:19 - Landing at Vespucci Beach and weapon selection 0:00:19 - 0:00:44 - Stealthy approach and stalking the target player 0:00:44 - 0:00:50 - Combat encounter using taser and nightstick 0:00:50 - 0:01:00 - Escape and flight during sunset 📖 Interactive written walkthrough with clickable timestamps: https://pixelfungaming.com/videos/gta-online-serving-protecting-the-crap-out-of-player

Star Wars: Outlaws | The High Roller Walkthrough #starwarsoutlaws
This video provides a complete walkthrough of 'The High Roller' mission in Star Wars Outlaws. The gameplay demonstrates the protagonist, Kay Vess, navigating the dense, snowy streets of Kijimi to locate a private gambling parlor. Viewers will see a cinematic encounter with Lando Calrissian, who tasks Kay with winning back a lucky token. The content covers a detailed session of Kessel Sabacc, showcasing the card game's mechanics and cheating strategies. Following the game, the video shows interplanetary travel to the jungle world of Akiva, including speeder bike navigation through lush environments. The final segment highlights an intense tactical combat sequence where Kay defends a rebel outpost against multiple waves of Imperial Stormtroopers, concluding with a successful mission handover. Chapters: 0:00:00 - 0:02:15 - Exploring Kijimi to Locate the Private Parlor 0:02:15 - 0:03:32 - Interaction with the Bouncer and Meeting Lando Calrissian 0:03:32 - 0:04:47 - Departing Kijimi and Transitioning to Space Flight 0:04:47 - 0:06:12 - Stealth Infiltration of the Crimson Dawn District 0:06:12 - 0:10:01 - Kessel Sabacc Gameplay and Winning the Lucky Token 0:10:01 - 0:12:15 - Interplanetary Navigation and Landing on Akiva 0:12:15 - 0:14:35 - Speeder Bike Navigation Through the Akiva Jungle 0:14:35 - 0:16:17 - Arriving at the Rebel Base and Initiating Combat 0:16:17 - 0:21:14 - Extended Firefight Against Imperial Forces and Mission Conclusion 📖 Interactive written walkthrough with clickable timestamps: https://pixelfungaming.com/videos/star-wars-outlaws-the-high-roller-walkthrough-starwarsoutlaws

Star Wars: Outlaws | Mountain Hideout Treasure Walkthrough #starwarsoutlaws
This gameplay video showcases the discovery and exploration of the Mountain Hideout on the planet Toshara in Star Wars Outlaws. The footage begins with the protagonist navigating a rugged, rocky landscape on foot after a brief speeder sequence. Viewers will see how to utilize the protagonist's blaster to overcome environmental obstacles, specifically by destroying rock formations that jam large industrial fans. The video demonstrates coordinated actions with the companion creature, Nix, to activate switches and unlock hidden areas. The final segment covers the rewards found within the secret hideout, including various crafting materials, currency, and a unique blaster key part, followed by a detailed map view showing the exact location in The Lost Steppe region. Chapters: 0:00:00 - 0:00:56 - Initial traversal and rock climbing through the landscape 0:00:56 - 0:01:44 - Using blaster fire to clear paths and navigating rocky crevices 0:01:44 - 0:02:14 - Solving the first fan puzzle and resolving Smuggler's Hideout intel 0:02:14 - 0:03:06 - Locating and disabling the second fan mechanism 0:03:06 - 0:03:35 - Infiltrating the Mountain Hideout and collecting treasure rewards 0:03:35 - 0:03:52 - Toshara map location reveal and outro 📖 Interactive written walkthrough with clickable timestamps: https://pixelfungaming.com/videos/star-wars-outlaws-mountain-hideout-treasure-walkthrough-starwarsoutlaws

HITMAN Freelancer: Mass Electrocution 🤣
Agent 47 executes a ruthless plan in the bustling markets of Marrakesh, focusing on a lethal electrical hazard near a puddle. The operation begins with 47 standing by a power switch, waiting for the opportune moment. Once a syndicate member and several civilians congregate near the exposed wire, the power is engaged, delivering a fatal shock to everyone in the vicinity. As more NPCs rush to investigate the bodies, 47 systematically toggles the power, lure after lure, creating a mounting pile of casualties. The mission objectives, including the elimination of syndicate members and collateral accident kills, are met with cold efficiency. Even after the primary targets are neutralized, the cycle of electrocution continues for any curious passerby or guard attempting to assist, showcasing a devastatingly effective trap that turns a public space into a death trap. Chapters: 0:00:00 - 0:00:10 - Initial setup and luring targets to the hazard 0:00:11 - 0:00:28 - First wave of electrocutions and syndicate member elimination 0:00:29 - 0:00:55 - Continued elimination of investigating civilians 0:00:56 - 0:01:25 - Systematic luring of guards into the electrical trap 0:01:26 - 0:02:00 - Massive pile of bodies accumulates from repeated shocks 0:02:01 - 0:02:25 - Final kills and mission objective completion 📖 Interactive written walkthrough with clickable timestamps: https://pixelfungaming.com/videos/hitman-freelancer-mass-electrocution

Zero Hour: Critical Response | Score 100
This video presents a comprehensive tactical analysis of a school siege mission within a realistic first-person shooter. The content follows an elite squad, designated as the MS Unit, as they execute 'Operation: Critical Response'. Viewers will see systematic room-clearing techniques, hostage rescue procedures, and coordinated engagements against multiple armed suspects throughout the school's classrooms, laboratories, and hallways. The gameplay emphasizes tactical patience, precise movement, and the effective use of non-lethal and lethal force to achieve mission objectives. The analysis covers the entire operation from the initial entry into the campus grounds to the final extraction, concluding with a detailed review of mission performance metrics and a recap of key tactical maneuvers. Chapters: 0:00:00 - 0:02:30 - Mission briefing and initial entry into the school campus 0:02:30 - 0:05:00 - Tactical clearing of the ground floor classrooms and side hallways 0:05:00 - 0:07:30 - High-risk engagements and first civilian hostage rescues 0:07:30 - 0:10:00 - Coordinated sweep of administrative offices and the library wing 0:10:00 - 0:12:30 - Intense hallway firefights and neutralizing primary threats 0:12:30 - 0:15:20 - Final room clearances and securing the perimeter for mission completion 0:15:20 - 0:18:29 - Mission results breakdown and tactical highlight recap 📖 Interactive written walkthrough with clickable timestamps: https://pixelfungaming.com/videos/zero-hour-critical-response-score-100
Star Wars: Outlaws | Outlaws Walkthrough #starwarsoutlaws
This gameplay footage from Star Wars Outlaws features protagonist Kay Vess and her companion Nix as they embark on a high-stakes mission to infiltrate a heavily guarded mansion on Canto Bight. The video begins with a cinematic overlook of the target location while Kay coordinates with her contact, Dennion. Gameplay demonstrates various traversal mechanics, including platforming along cliffside trails, manual climbing on rock faces, and the use of a grappling hook to swing across gaps. Upon reaching the mansion perimeter, viewers see the initiation of a 'fireworks' diversion that allows Kay to enter the grounds. The latter half of the video focuses on stealth and combat, showcasing Kay’s ability to use Nix for distractions, performing silent takedowns in tall grass, and engaging in open firefights using her blaster. The content highlights the tactical options available to players and the environmental detail of the Star Wars universe. Chapters: 0:00:00 - 0:01:20 - Mission briefing and overview of the Canto Bight mansion target 0:01:20 - 0:03:10 - Traversal gameplay showcasing climbing and grappling hook mechanics 0:03:10 - 0:03:45 - Reaching the mansion exterior and preparing for the infiltration 0:03:45 - 0:04:22 - Infiltration of the grounds during a fireworks diversion 0:04:22 - 0:05:53 - Stealth maneuvers and blaster combat against mansion enforcers 0:05:53 - 0:05:58 - Closing segment and channel branding 📖 Interactive written walkthrough with clickable timestamps: https://pixelfungaming.com/videos/star-wars-outlaws-outlaws-walkthrough-starwarsoutlaws

SWAT 4: Food Wall Restaurant #throwbackthursday #swat4
This video presents a comprehensive, start-to-finish walkthrough of the 'Food Wall Restaurant' mission in the tactical simulation game, SWAT 4. The content begins with the pre-mission phase, showing the tactical briefing, map study, and detailed equipment selection for each squad member. The gameplay then transitions to the actual operation, where a five-person SWAT team methodically breaches the restaurant at night. Viewers will see the team utilize a variety of tactical tools and maneuvers, including the use of optiwands to peek under doors, deploying flashbangs and non-lethal grenades to disorient hostiles, and coordinating room-clearing movements. Throughout the mission, the team encounters and secures various civilians while engaging in intense firefights with suspects. The analysis covers the entire duration of the raid, from the initial entry at the storefront to the final clearing of the upstairs storage areas and the recovery of critical evidence, concluding with a full mission debrief screen. Chapters: 0:00:00 - 0:00:35 - Mission Briefing and Equipment Selection 0:00:36 - 0:01:17 - Tactical Approach and Initial Breach 0:01:18 - 0:02:00 - Securing the Dining Area and First Civilian 0:02:01 - 0:03:00 - Clearing the Back Hallway with Flashbangs 0:03:01 - 0:03:50 - Methodical Movement into the Kitchen Sector 0:03:51 - 0:04:45 - Stairwell Firefight and Suspect Apprehension 0:04:46 - 0:06:00 - Clearing Upper Floor Rooms and Securing Hostages 0:06:01 - 0:07:40 - Systematic Room-by-Room Search with Tactical Gear 0:07:41 - 0:09:30 - Final Objective Recovery and Mission Completion 0:09:31 - 0:09:51 - Mission Results and Post-Action Review 📖 Interactive written walkthrough with clickable timestamps: https://pixelfungaming.com/videos/swat-4-food-wall-restaurant-throwbackthursday-swat4

Ready Or Not: Lawmaker | A Rank | Lethal
Tactical SWAT team operations are showcased as a five-man entry team methodically clears a luxurious mansion. The mission begins with an approach from the exterior gardens under the cover of night, where team members coordinate to secure perimeter doors using wedges. Upon breaching the main structure, the team transitions into high-intensity room-clearing maneuvers, utilizing optiwands to peak under doors and flashbangs to disorient potential threats. Throughout the operation, the team encounters multiple armed suspects and civilians, necessitating split-second decision-making between lethal force and tactical arrests. The footage highlights advanced tactical procedures including stacking, room dominance, and the use of non-lethal equipment to secure high-value targets in confined spaces like kitchens, expansive living areas, and master bedrooms. Tactical police units navigate through a dimly lit luxury residence, coordinating movements to clear rooms and secure objectives. The team utilizes flashlights and optics to maintain visibility while performing tactical breaches. After a series of room clears, the unit engages in a high-stakes firefight following a dynamic entry into a walk-in closet, successfully neutralizing threats. The operation concludes with the rescue of a civilian outdoors and a mission summary displaying an 'A' rating for the Lawmaker scenario. Chapters: 0:00:00 - Pre-mission briefing and tactical team insertion 0:00:15 - Stealthy approach and securing mansion perimeter doors 0:02:05 - Main entrance breach and initial foyer sweep 0:04:15 - Ground floor clearance of kitchen and dining areas 0:06:30 - Securing the grand living room and surveillance office 0:08:15 - Intense stairwell engagement and balcony standoff 0:09:40 - Final bedroom sweeps and securing the premises 0:00:00 - Initial movement through the upper floor hallway 0:00:15 - Tactical stack up and door mirroring procedure 0:00:30 - Breach and entry into the main living area 0:00:45 - Secondary breach preparation for the bedroom area 0:01:00 - Intense firefight and suspect neutralization in the closet 0:01:15 - Extraction to the outdoor garden for civilian rescue 0:01:30 - Mission complete summary and performance rating 📖 Interactive written walkthrough with clickable timestamps: https://pixelfungaming.com/videos/ready-or-not-lawmaker-a-rank-lethal
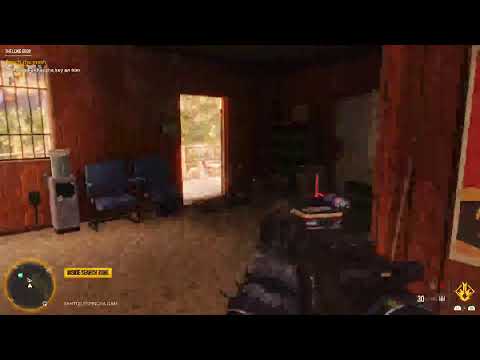
Farcry 6| El Este Region Treasure Hunt live #12
The mission begins with a flight in a buzzer towards the Santos Espinosa Dam in the La Joya region to investigate 'The Long Drop' Treasure Hunt. Upon arrival at the dam during the night, the objective is to reach a stash. A worker is found hanging precariously from a bridge over the rushing water; however, he falls before he can be rescued. Navigation through the dam's structures involves swimming through turbulent waters and climbing long service ladders to reach the control decks. Combat is minimal, focusing instead on environmental navigation and puzzle-solving. The character attempts several risky grapple maneuvers from the dam's underside to reach the fallen worker's body trapped in the spillway. After multiple attempts, the character successfully retrieves the Dam Shed Keycard from the body. The journey continues with a short flight to the dam's control building. Inside, notes provide clues on how to bypass the electronic locks and operate the dam's machinery. The sequence involves activating sluice controls, monitoring hydraulic systems, and turning pressure valves in a specific order found in scribbled instructions. Opening the sluice gates reveals a hidden area under the bridge where the final treasure is located. The mission concludes with the character grappling down to the newly accessible platform to open a large chest, completing the hunt and receiving the 'Excavation Execution' unique shotgun. Chapters: 0:00:00 - 0:02:30 - Arrival at Santos Espinosa Dam and initial exploration 0:02:30 - 0:05:30 - Navigating dam structures and checking equipment 0:05:30 - 0:08:20 - Retrieving the keycard from the spillway 0:08:20 - 0:11:30 - Entering the dam control building 0:11:30 - 0:14:00 - Solving the control panel sequence 0:14:00 - 0:17:30 - Adjusting valves and managing dam pressure 0:17:30 - 0:20:30 - Opening sluice gates and reaching the stash 0:20:30 - 0:23:18 - Collecting the reward and mission completion 📖 Interactive written walkthrough with clickable timestamps: https://pixelfungaming.com/videos/farcry-6-el-este-region-treasure-hunt-live-12

Red Dead Online: Stealing Trader Wagon In Heartland #Shorts #reddeadonline
The mission begins with identifying a target location near Riggs Station on the world map. A rider gallops across the open plains, tracking the movement of a guarded wagon through the wilderness. Upon intercepting the vehicle, a quick and precise exchange of gunfire results in the neutralization of the guards. The character then dismounts from their horse to seize control of the horse-drawn wagon. The journey continues through the countryside, steering the carriage alongside a passing train toward a rural ranch. Upon reaching the designated drop-off point at the farmstead, the wagon is successfully parked. The operation concludes with a mission success notification and the acquisition of materials. Chapters: 0:00:00 - 0:00:03 - Identifying the target location on the map near Riggs Station 0:00:03 - 0:00:13 - Pursuing the target wagon across the open fields on horseback 0:00:13 - 0:00:20 - Engaging in combat to eliminate the wagon guards 0:00:20 - 0:00:27 - Taking control of the horse-drawn wagon 0:00:27 - 0:00:39 - Driving the stolen wagon through the wilderness past a passing train 0:00:39 - 0:00:49 - Arriving at the ranch and delivering the goods 0:00:49 - 0:00:59 - Mission completion and material reward notification 📖 Interactive written walkthrough with clickable timestamps: https://pixelfungaming.com/videos/red-dead-online-stealing-trader-wagon-in-heartland-shorts-reddeadonline

RDR2 - Building Full Of Corpses - Mass Suicide?
Arthur Morgan explores a remote, derelict shack known as Hani's Bethel during the night. Upon entering, he discovers a chilling scene: multiple skeletal remains lying in beds, suggesting a mass suicide event. He approaches a central desk where a skeleton sits in a hooded robe, surrounded by candles and strange artifacts. Arthur retrieves and reads a 'Mysterious Sermon' document, which speaks of a voyage through time and galaxies and a promised return at Mount Shann. After reading the sermon, he thoroughly loots the interior, searching several nightstands for items like a Potent Miracle Tonic, cigarettes, and chewing tobacco. The exploration concludes with Arthur exiting the eerie cabin and riding off into the darkness on his horse. Chapters: 0:00:00 - 0:00:15 - Approaching the Abandoned Shack 0:00:15 - 0:00:33 - Entering Hani's Bethel and Finding the Skeletons 0:00:33 - 0:01:07 - Reading the Mysterious Sermon Document 0:01:07 - 0:02:10 - Looting the Cabin Interior 0:02:10 - 0:02:20 - Exiting the Location and Riding Away 📖 Interactive written walkthrough with clickable timestamps: https://pixelfungaming.com/videos/rdr2-building-full-of-corpses-mass-suicide

Farcry 6| El Este Region live #9
The player engages in high-octane guerrilla warfare across the tropical landscape of Yara. The mission begins with an intense ambush at a road junction, utilizing a variety of weapons including assault rifles and rocket launchers to take out military vehicles and personnel. After successfully completing the ambush and looting valuable supplies, the character drives through scenic coastal routes to reach a fortified anti-aircraft site. Sniper tactics are employed to clear the perimeter before sabotaging the heavy weaponry. The final phase involves a stealthy infiltration of a corporate office building, where guards are neutralized with precision to reach computer terminals for hacking. Dani Rojas infiltrates the McKay Global Offices to complete the 'Tourist Trap' mission. Intense firefights break out in the office corridors as computers are hacked to gather intelligence on Sean McKay's operations. After securing the necessary data, a tense video confrontation occurs between Dani and McKay in the conference room. Upon completion of the mission, the focus shifts to disrupting propaganda broadcasts by disabling various wave jammers scattered across the La Joya region. This involves navigating dense jungle environments at night, utilizing stealth to bypass guards, and employing heavy weaponry like rocket launchers to destroy mission-critical infrastructure. Exploration of the La Joya Local PDP Offices reveals more about the regime's control over the area, leading to further tactical strikes against armored vehicles and communication arrays. Chapters: 0:00:00 - Roadside Ambush and Initial Combat 0:02:15 - Outpost Clearance and Supply Looting 0:05:30 - Tropical Drive and Coastal Navigation 0:08:00 - Sabotaging Anti-Aircraft Sites and Building Infiltration 0:00:00 - Hacking the Second Floor Computer 0:02:30 - Infiltrating the Lower Levels 0:04:50 - Hacking the First Floor Computer 0:05:20 - Confrontation with Sean McKay 0:07:10 - Mission Complete and Jungle Exfiltration 0:10:15 - Entering the La Joya Local PDP Offices 0:13:00 - Tactical Review and Map Exploration 0:15:20 - Assault on the PDP Compound 0:17:30 - Destroying the First Wave Jammer 0:21:00 - Navigating to the Second Jammer 0:24:00 - Disabling the Second Wave Jammer 0:27:00 - Long-Range Recon and Sniping Guards 📖 Interactive written walkthrough with clickable timestamps: https://pixelfungaming.com/videos/farcry-6-el-este-region-live-9

Tomb Raider : Part 2 - Mountain Temple
Lara Croft begins by navigating a jungle environment, collecting salvage from crates and hunting deer for experience points and resources. She encounters Dr. Whitman, and together they approach a large gate covered in ritualistic markings. Realizing the axe is too fragile to open the crank, Lara collects more salvage to upgrade it at the nearby campsite. After strengthening the pry axe, she returns to the gate and successfully cranks it open. Upon entering the Mountain Temple, they find a large statue of Himiko, the Sun Queen. Their discussion about the queen's powers and the lost kingdom of Yamatai is interrupted when a hostile group of men, led by a man named Vladimir, captures them. Lara manages to break free from her bonds and engages in a tense quick-time event struggle where she grabs a pistol from the man holding her captive and shoots him, securing the semi-auto pistol as new gear. The sequence ends with the area engulfed in flames, prompting Lara to escape. Chapters: 0:00 - 0:45 - Exploration and Salvage Collection 0:45 - 1:33 - Approaching the Gate and First Wolf Attack 1:33 - 2:14 - Defeating Wolves and Collecting Arrows/XP 2:14 - 3:35 - Reaching The Gate and Cinematic with Dr. Whitman 3:35 - 4:44 - Attempting to Open the Gate; Axe Too Fragile 4:44 - 6:14 - Collecting More Salvage and Arrows to Upgrade Axe 6:14 - 10:38 - Upgrading Pry Axe at Day Camp 10:38 - 11:53 - Returning to Gate and Cranking it Open 11:53 - 12:44 - Himiko Statue Discovery and Ambush by Solarii 12:44 - 16:55 - Quick-Time Event Struggle and Acquiring Semi-Auto Pistol 16:55 - 17:49 - Lara Survives the Encounter and Acquires New Weapon 📖 Interactive written walkthrough with clickable timestamps: https://pixelfungaming.com/videos/tomb-raider-part-2-mountain-temple

Ready Or Not: Dorms | S Rank | Non-Lethal #readyornot
This video provides a complete walkthrough of a high-intensity tactical mission in Ready or Not. The gameplay demonstrates a SWAT team's methodical approach to clearing a multi-story, high-risk environment. Viewers will observe various tactical maneuvers, such as checking door thresholds with mirrors, executing room breaches with stinger grenades, and managing multiple suspects and civilians simultaneously. The footage highlights the importance of slow, deliberate movement and clear communication within a tactical unit. The mission demonstrates advanced mechanics including non-lethal force application, evidence collection, and comprehensive area sweeps, ultimately concluding with a detailed debriefing screen showing an 'S' rank performance. Chapters: 0:00:00 - 0:00:08 - Pre-mission briefing and loading phase 0:00:08 - 0:03:15 - Deployment and initial infiltration of the building exterior and lobby 0:03:15 - 0:06:30 - Methodical room-by-room clearing of the ground floor area 0:06:30 - 0:10:00 - Tactical descent into lower levels and securing dark corridors 0:10:00 - 0:13:45 - Coordination of multiple breach points and suspect neutralizations 0:13:45 - 0:17:30 - Intensive search for evidence and processing of detained individuals 0:17:30 - 0:21:15 - Navigation through high-clutter environments and managing lethal threats 0:21:15 - 0:25:00 - Continued systematic clearing of upper-level residential areas 0:25:00 - 0:28:45 - Final area containment and verification of cleared status 0:28:45 - 0:31:02 - Mission soft-complete and review of tactical performance metrics 📖 Interactive written walkthrough with clickable timestamps: https://pixelfungaming.com/videos/ready-or-not-dorms-s-rank-non-lethal-readyornot

HITMAN: Arcade Mode | Killing The Disruptor 8 different ways #connormcgregor #hitman
This video demonstrates eight distinct and creative assassination methods for 'The Disruptor' elusive target mission in Hitman, set on the Isle of Sgàil. The content showcases a variety of environmental and scripted kill techniques, ranging from high-tech sabotage to medieval-themed executions. Viewers will see detailed walkthroughs for electrocution, cannon fire, chandelier drops, and the use of an iron maiden. The video also covers tactical eliminations using propane tanks, bench press weights, pyrotechnics, and lethal poison. Each segment provides a full demonstration from initial setup to the target's neutralization and the subsequent hiding of the body, concluding with the mission performance screen and a final story cutscene. Chapters: 00:00:00 - 00:01:12 - Electrocution Trap Method 00:01:13 - 00:03:11 - Cannon Shot Strategy 00:03:12 - 00:04:42 - Chandelier Drop Assassination 00:04:43 - 00:05:37 - Medieval Iron Maiden Execution 00:05:38 - 00:06:51 - Propane Tank Explosion Takedown 00:06:52 - 00:09:25 - Weights and Bench Press Elimination 00:09:26 - 00:11:12 - Sabotaging Pyrotechnics for the Kill 00:11:13 - 00:14:44 - Lethal Poisoning Technique 00:14:45 - 00:15:41 - Mission Evaluation and Narrative Conclusion 📖 Interactive written walkthrough with clickable timestamps: https://pixelfungaming.com/videos/hitman-arcade-mode-killing-the-disruptor-8-different-ways-connormcgregor-hitman

RDR2 - Oil well - Corpse
Arthur Morgan rides across the rolling hills and rocky terrain of New Hanover, carrying a whitetail buck carcass on the back of his horse. He navigates through the wilderness, passing by wild horses and descending steep embankments until he reaches an abandoned oil derrick. After dismounting, he studies the wooden structure and records an entry in his journal. Exploration of the site leads him to a platform where he discovers a deceased man and loots a letter from Cornwall Kerosene & Tar. The letter details a rejected land sale offer. Arthur gathers remaining supplies from the campsite, including ground coffee, before mounting his horse and continuing his trek through the scenic open country. Chapters: 0:00:00 - 0:01:30 - Traversing the New Hanover wilderness 0:01:30 - 0:01:45 - Discovering the abandoned oil derrick 0:01:45 - 0:02:00 - Investigating the site and looting 0:02:00 - 0:02:21 - Reading the Cornwall Kerosene & Tar letter 0:02:21 - 0:02:35 - Gathering camp supplies 0:02:35 - 0:03:08 - Continuing the journey across the plains 📖 Interactive written walkthrough with clickable timestamps: https://pixelfungaming.com/videos/rdr2-oil-well-corpse

Titanfall : Campaign 6 - Here be Dragons ( Victory )
The 'Here Be Dragons' campaign mission on the Boneyard map begins with a cinematic briefing aboard a Militia dropship. Pilots descend into a dusty, canyon-filled environment littered with giant skeletons to engage in Hardpoint Domination. Initial gameplay involves rapid movement and wall-running to capture key terminals while engaging enemy grunts and rival pilots with the R-101C Carbine. Combat remains intense around Hardpoints Alpha and Bravo, requiring tactical use of grenades and parkour maneuvers. Mid-way through the match, Titans are deployed, escalating the scale of conflict. Pilots pilot their massive mechs, using 40mm cannons and defensive vortex shields to dominate the open areas. The Militia successfully maintains control over the hardpoints, securing a points victory. The mission ends with a high-stakes epilogue where the winning team hunts down fleeing IMC pilots before they can reach their extraction point. Chapters: 0:00:00 - 0:02:02 - Campaign Lobby and Mission Briefing 0:02:02 - 0:04:35 - Initial Drop and Hardpoint Skirmishes 0:04:35 - 0:06:55 - Defending Hardpoint Bravo and Pilot Combat 0:06:55 - 0:09:30 - Titan Combat and Dominating the Field 0:09:30 - 0:11:15 - Match Conclusion and Epilogue Hunt 📖 Interactive written walkthrough with clickable timestamps: https://pixelfungaming.com/videos/titanfall-campaign-6-here-be-dragons-victory

Rise Of The Ronin: Chapter 2 (Dusk Difficulty) Cities Of Darkness
The journey begins in Edo’s Azabu district, where political tensions between the Choshu clan and foreign influences reach a boiling point. Following a strategic planning session with Ryoma Sakamoto and Kogoro Katsura, the mission moves to a daring assassination attempt on Kaishu Katsu during a fireworks display on the Sumida River. Utilizing a glider and stealthy boat infiltration, the Ronin faces Katsu in a duel that leads to a mutual alliance focused on Japan's future. The action escalates with a fire attack on the British Legation and a confrontation against Rutherford Alcock and the mysterious Blade Twin. The path leads through Kodenmacho Prison to rescue Dr. Narasaki, involving silent takedowns and a battle with warden Asamon Yamada. In Asakusa, the protagonist joins forces with Tatsugoro Shinmon to protect Sensoji Temple and confronts Jules Brunet at a French-occupied fortification. To prove his worth to the Shogunate, the Ronin faces a gauntlet of masters: Tesshu Yamaoka, Deishu Takahashi, and Jigoro Kano. This trial culminates in a fierce battle against a mysterious samurai wielding a flaming katana, revealed to be the Shogun, Yoshinobu Tokugawa. In Kyoto, the Ronin infiltrates the Roshigumi and forms bonds with Shinsengumi leaders like Soji Okita and Toshizo Hijikata. Alliances are tested during the 'Ikeda Inn Incident' and the bloody 'Forbidden Gate Rebellion.' These climactic encounters involve duels against Isami Kondo and a final showdown with the Blade Twin amidst the burning streets, deciding the fate of the Choshu clan and the nation. Chapters: 0:00:00 - Meeting Ryoma Sakamoto 0:01:30 - Yoshiwara Pleasure District 0:02:44 - Kogoro Katsura encounter 0:04:28 - Assassination plot 0:07:05 - Azuma Bridge glider flight 0:07:56 - Genzui Kusaka briefing 0:08:39 - Sumida River infiltration 0:11:20 - Boat rooftop combat 0:14:15 - Searching vessels 0:17:30 - River obstacles & fireworks 0:21:00 - Katsu's Flagship 0:24:42 - Boss: Kaishu Katsu 0:26:15 - Establishing Katsu Bond 0:27:25 - British Legation fire plan 0:28:39 - Construction site assault 0:30:00 - 'The Fire Attack' mission 0:33:15 - Clearing reinforced positions 0:37:30 - Mountain ascent 0:40:30 - Boss: Rutherford Alcock & Blade Twin 0:43:45 - Compound fire combat 0:47:20 - Final Phase: Alcock 0:50:50 - Aftermath cinematic 0:52:15 - Duel: Sana Chiba 0:54:45 - Hachiro Kiyokawa dialogue 0:56:30 - Duel: Hachiro Kiyokawa 0:59:15 - Mission completion 1:00:00 - Physician's lab defense 1:03:55 - Boss: Masked Retainers 1:07:15 - Bond: Ine Kusumoto 1:09:05 - Prison gate arrest 1:10:15 - Kodenmacho Prison stealth 1:15:30 - Finding prison keys 1:22:00 - Boss: Asamon Yamada 1:30:00 - 'Powder Smoke at the Castle' 1:33:00 - Freeing Dr. Narasaki 1:33:52 - Boss: Jules Brunet 1:36:47 - Asakusa: Tatsugoro Shinmon 1:38:53 - Sensoji Temple arsonists 1:39:00 - Takeaki Enomoto operations 1:42:30 - French-occupied fort assault 1:43:35 - Archery & Stealth 1:47:35 - Rogue group encounters 1:50:00 - Trench warfare 1:52:15 - Rooftop traversal 1:56:00 - French elite forces 1:57:35 - Showdown: Tatsugoro Shinmon 1:59:45 - Asakusa faction loyalty 3:30:00 - Forbidden Gate briefing 3:32:15 - Kyoto burning streets 3:35:12 - Boss: Heisuke Todo 3:37:16 - Hijikata & Soji Okita 3:39:45 - Inner palace navigation 3:43:14 - Final Boss: Isami Kondo 3:44:19 - Choshu retreat 3:46:48 - Duel: Blade Twin 3:50:27 - Epilogue: Genzui Kusaka 3:53:02 - Rewards screen 4:00:00 - Meeting Tatsugoro Shinmon 4:01:42 - Bond: Tatsugoro Shinmon 4:02:56 - Duel: Tesshu Yamaoka 4:08:50 - Victory vs Tesshu 4:09:27 - Duel: Deishu Takahashi 4:14:50 - Victory vs Deishu 4:15:30 - Duel: Jigoro Kano 4:21:00 - Victory vs Jigoro 4:23:00 - Final Duel: Mysterious Samurai 4:29:40 - Shogun Identity Reveal 4:31:30 - Bond: Yoshinobu Tokugawa 4:32:00 - Denzuin Temple: Kiyokawa 5:00:00 - Roshigumi Recruitment 5:02:02 - Koishikawa Infiltration 5:07:34 - Duel: Country Samurai Duo 5:10:48 - Shinsengumi Leaders Intro 5:13:48 - Gambling Den Brawl 5:19:18 - Snowy Village & Katsura 5:23:01 - Choshu Alliance 5:24:04 - Harbor Skirmish 6:00:00 - Defeating Tsurunosuke Tachiki 6:02:15 - Kyoto Celebration 6:04:45 - Assassination & Rising Tensions 6:07:20 - Infiltrating Ikeda Inn 6:09:50 - Soji Okita confrontation 6:12:15 - Boss: Nagakura & Todo 6:14:40 - Miyabe's Sacrifice 6:17:50 - Duel: Isami Kondo 6:21:20 - Diplomatic Manoeuvres 6:25:30 - Choshu Strategy Session 6:28:45 - Preparing for War 📖 Interactive written walkthrough with clickable timestamps: https://pixelfungaming.com/videos/rise-of-the-ronin-chapter-2-dusk-difficulty-cities-of-darkness

Red Dead Online - Blackberry Location - Upper Montana River
A character navigates a misty landscape on horseback in the early morning light. The character stops at a blackberry bush to forage, leaning from the saddle to collect the fruit without dismounting. After gathering the resources, the character opens the main menu and transitions to the world map. The map displays the character's current position south of Riggs Station, along the banks of the Upper Montana River. The view pans out to show the surrounding regions of West Elizabeth, including Strawberry and Blackwater, providing geographical context to the character's location. Chapters: 0:00:00 - 0:00:13 - Foraging for blackberries on horseback 0:00:13 - 0:00:28 - Reviewing map and current location near Riggs Station 📖 Interactive written walkthrough with clickable timestamps: https://pixelfungaming.com/videos/red-dead-online-blackberry-location-upper-montana-river

War Thunder: Wiping Out Multiple Players With FAB 5000 Bombs
This War Thunder gameplay analysis demonstrates tactical combat scenarios featuring the Soviet Pe-8 heavy bomber and the T-34-85 tank across multiple maps. The content covers the strategic application of the FAB-5000 bomb, showcasing its immense blast radius and effectiveness in securing multi-kills, including several 4x and 5x target destruction streaks. Aerial sequences illustrate mission-critical maneuvers such as high-altitude bombing, airfield landings for repairs, and takeoffs under varying terrain conditions. Ground combat segments focus on the T-34-85, highlighting urban warfare tactics, target acquisition in city environments, and long-range engagements on winter terrain. Viewers will see a comprehensive look at Soviet mid-tier vehicular combat and the coordination required to dominate both the air and the ground. Chapters: 0:00:00 - 0:01:17 - Initial Pe-8 Aerial Maneuvers and 4-Target Bombing Strike 0:01:17 - 0:02:35 - T-34-85 Urban Combat Demonstration and Pe-8 Airfield Takeoff 0:02:35 - 0:03:55 - City Center Bombing Operation and Continued Ground Warfare 0:03:55 - 0:06:27 - Precision Triple-Kill Run and Bomber Maintenance Procedures 0:06:27 - 0:08:53 - Extended Tank Engagements and High-Impact 5-Kill Bomb Drop 0:08:53 - 0:11:34 - Winter Map Tactical Analysis: Tank Combat and Snow-City Bombing 0:11:34 - 0:14:10 - Aircraft Technical Operations: Field Landings and Terrain Navigation 0:14:10 - 0:15:52 - Final Mission-Winning Double Kill and Strategic Victory Summary 📖 Interactive written walkthrough with clickable timestamps: https://pixelfungaming.com/videos/war-thunder-wiping-out-multiple-players-with-fab-5000-bombs

Pine Harbor: Demo Walkthrough
This video provides a complete walkthrough of the Pine Harbor Demo, a first-person atmospheric horror game. Viewers will observe the exploration of a dark, derelict underground facility, demonstrating core gameplay mechanics such as flashlight management, map navigation, and inventory interaction. The content showcases puzzle-solving through finding and reading environment-based lore, specifically the Miner's Diary to uncover a safe combination. Intense combat encounters with various mutated creatures are highlighted, featuring both melee and ranged weapons. The walkthrough concludes with the restoration of power to the facility and a final escape via an elevator, offering a full preview of the game's eerie environment and survival horror elements. Chapters: 0:00:00 - 0:00:55 - Demo start and initial exploration of the dark industrial setting 0:00:55 - 0:01:45 - Map navigation and scripted atmospheric events 0:01:45 - 0:02:45 - Finding the Miner's Diary and examining environment details 0:02:45 - 0:03:50 - Stealth movement and first combat encounter with mutants 0:03:50 - 0:05:00 - Combat in the tiled restroom area and further facility exploration 0:05:00 - 0:06:00 - Locating the safe and retrieving the required fuel canister 0:06:00 - 0:07:15 - Encountering a bloated mutated creature in the maintenance tunnels 0:07:15 - 0:08:15 - Navigating through dark corridors and managing limited visibility 0:08:15 - 0:09:05 - Interacting with environmental hazards and suspended specimens 0:09:05 - 0:10:00 - Locating the generator room and restoring power to the facility 0:10:00 - 0:11:18 - Final escape through the facility towards the elevator exit 📖 Interactive written walkthrough with clickable timestamps: https://pixelfungaming.com/videos/pine-harbor-demo-walkthrough

RDR2 - Poison Moonshine (STEALTH) - Grizzlies Homestead
The character stealthily approaches a rival moonshine still, staying low in the brush to avoid detection. After scouting the perimeter and attempting to gain a height advantage on a nearby roof, the character moves toward the windows of the moonshine shack. Two guards inside are eliminated silently with well-placed bow shots. Upon entering the building, the character quickly poisons the moonshine still to sabotage the rival operation. Leaving the shack immediately, the character sprints uphill into the surrounding forest to clear the search area. The mission concludes successfully with a 'Mission Passed' notification, followed by a review of earned rewards and coupons in the game menu. Chapters: 0:00:00 - 0:00:34 - Stealthy approach and perimeter scouting 0:00:34 - 0:01:32 - Navigating the exterior of the moonshine shack 0:01:32 - 0:01:45 - Eliminating guards with silent bow shots 0:01:45 - 0:01:58 - Poisoning the rival moonshine still 0:01:58 - 0:02:33 - Escaping the area to avoid detection 0:02:33 - 0:02:43 - Mission completion and rewards summary 0:02:43 - 0:02:51 - Reviewing character offers and reward tickets 📖 Interactive written walkthrough with clickable timestamps: https://pixelfungaming.com/videos/rdr2-poison-moonshine-stealth-grizzlies-homestead

Pine Harbor: Part 3 | Mines Task #pineharbor
This comprehensive gameplay video showcases survival horror elements in Pine Harbor. The footage begins with the exploration and fortification of a dilapidated house, including inventory management and window barricading. The content then follows a journey across a foggy bridge into an expansive underground mining facility. Inside, the gameplay demonstrates a heavy focus on stealth, resource scavenging, and environmental storytelling through diaries. Viewers will see tense encounters with mutated humanoid creatures, requiring both careful avoidance and direct combat using melee weapons and firearms like a shotgun and pistol. The latter half of the video focuses on navigating the bunker complex, solving a safe combination puzzle based on found clues, and eventually escaping the facility to deliver information to a character named Kaya, revealing further plot details regarding the mining disaster. Chapters: 0:00:00 - 0:03:00 - House Exploration and Fortification 0:03:00 - 0:04:20 - First Enemy Encounter and Base Defense 0:04:20 - 0:06:20 - Journey to the Pine Harbor Mining Facility 0:06:20 - 0:09:30 - Entering the Underground Bunker and Initial Stealth 0:09:30 - 0:12:00 - Bunker Navigation and Scavenging Supplies 0:12:00 - 0:15:30 - Intense Combat and Creature Patrol Evasion 0:15:30 - 0:18:30 - Deep Facility Exploration and Finding Clues 0:18:30 - 0:21:00 - Safe Combination Puzzle and Facility Activation 0:21:00 - 0:23:01 - Escaping the Mines and Story Progression with Kaya 📖 Interactive written walkthrough with clickable timestamps: https://pixelfungaming.com/videos/pine-harbor-part-3-mines-task-pineharbor

Pine Harbor: Part 1 | Combat Tip & More #pineharbor
This video provides an extensive look at the opening gameplay of the survival horror title 'Pine Harbor'. The analysis begins with the protagonist, Josh, traveling by bus into the fog-shrouded town while reading a haunting letter from his father regarding a mysterious investigation. Viewers will observe the atmospheric world-building, including a tense conversation with the bus driver about the town's abandoned state. The gameplay demonstrates first-person exploration as Josh is caught in a trap and subsequently rescued by his estranged father, Richard, who reveals a corporate conspiracy involving chemical mutations and environmental collapse. The analysis follows Josh as he encounters another survivor named Kaya, acquires essential defensive tools like a baseball bat, and navigates the desolate, foggy streets. The footage covers core survival mechanics such as map navigation, systematic scavenging for medical supplies and fuel in locations like the general store and pharmacy, inventory management, and a visceral combat encounter with a mutated inhabitant. Chapters: 0:00:00 - 0:03:30 - Introductory bus journey and reading the father's letter 0:03:30 - 0:04:40 - Arrival at the bus stop and initial environmental exploration 0:04:40 - 0:06:00 - Trap encounter and introduction to Richard 0:06:00 - 0:09:00 - House interior exploration and lore exposition regarding the town's fall 0:09:00 - 0:11:00 - Meeting the survivor Kaya at the bus shelter 0:11:00 - 0:12:10 - Vehicle sequence showing the town's main roads and fog effects 0:12:10 - 0:14:30 - Acquiring the baseball bat and reviewing the area map 0:14:30 - 0:17:30 - Scavenging for supplies within the general store 0:17:30 - 0:18:40 - Street combat demonstration against a mutated enemy 0:18:40 - 0:19:57 - Pharmacy looting and final inventory management before the outro 📖 Interactive written walkthrough with clickable timestamps: https://pixelfungaming.com/videos/pine-harbor-part-1-combat-tip-more-pineharbor

Ready Or Not: Update 1.0 | Training
This video provides a comprehensive overview of the training mission in the tactical shooter 'Ready or Not'. The footage demonstrates the full sequence of SWAT operative training, beginning with fundamental firearm handling, reload mechanics, and marksmanship practice at an indoor range. It covers various shooting stances and the use of weapon attachments like lasers. The content progresses to tactical utility deployment, specifically flashbang training, before moving into room clearing operations. Viewers will see individual and team-based door breaching techniques, the execution of complex tactical commands, and the procedures for detaining civilians and arresting armed suspects. The analysis also covers specialized equipment like the Optiwand for scouting and coordinated multi-team breaches. The video concludes with evidence collection and a transition to the police headquarters hub. Chapters: 0:00:00 - 0:00:15 - Initial mission deployment and entry into the training facility 0:00:15 - 0:01:14 - Operative picks up primary rifle and prepares ammunition 0:01:14 - 0:03:07 - Fundamental marksmanship training at the indoor firing range 0:03:07 - 0:03:30 - High-speed tactical shooting challenge performance 0:03:30 - 0:05:08 - Less-lethal utility deployment and flashbang practice 0:05:08 - 0:05:48 - Individual door breaching techniques using kicking and mechanical tools 0:05:48 - 0:07:05 - Introduction to team command interface and civilian detainment 0:07:05 - 0:08:33 - Tactical surveillance and scouting using the Optiwand 0:08:33 - 0:10:00 - Coordinated room entry and suspect apprehension procedures 0:10:00 - 0:13:20 - Advanced multi-squad breaching and evidence collection training 0:13:20 - 0:14:58 - Completion of training course and return to police headquarters 📖 Interactive written walkthrough with clickable timestamps: https://pixelfungaming.com/videos/ready-or-not-update-1-0-training

Ghost Recon Breakpoint - Save Fugitive Walkthrough
The mission opens with a camouflaged armored vehicle descending a rugged, snow-dusted mountainside. The vehicle maneuvers through rocky outcrops and splashes through a shallow creek while approaching a massive industrial facility. After parking on a ridge, the character exits the vehicle and slides down a series of steep rock faces to reach the outer walls of the Auroa Survival Shelter. A quick check through a long-range scope identifies the presence of enemy sentries on the walkways. A reconnaissance drone then takes to the air to conduct a thorough sweep of the base. The drone flight covers several helipads with resting aircraft, identifies groups of soldiers, and pinpoints a commander designated for interrogation. The recon mission explores the facility's extensive parking structures and warehouses, providing a complete picture of the enemy's defenses before the ground infiltration begins. Chapters: 0:00:00 - 0:00:54 - Armored vehicle mountain descent 0:00:54 - 0:01:07 - Sliding down the rocky slope on foot 0:01:07 - 0:01:16 - Initial scouting with sniper rifle scope 0:01:16 - 0:02:00 - Drone recon of helipads and facility exterior 0:02:00 - 0:02:40 - Identifying high-value targets and interrogation objectives 0:02:40 - 0:03:15 - Finalizing the drone sweep and beginning base approach 📖 Interactive written walkthrough with clickable timestamps: https://pixelfungaming.com/videos/ghost-recon-breakpoint-save-fugitive-walkthrough

RDR2 - Dancing with Posse Members In Moonshine Bar
The scene opens in a dimly lit, atmospheric moonshine shack bar where a male character in a bowler hat and a female character in a rancher's hat take to the dance floor. The shack's band provides a rhythmic, upbeat backdrop as the pair experiments with various dance styles, ranging from the hesitant 'Awkward Dance' to the more energetic 'Carefree Dance.' They maintain a coordinated rhythm, occasionally performing flourishes to the music's tempo. As the session progresses, they transition into 'Bold Dance' moves, involving more vigorous steps and gestures. The social setting expands as other players join in, including a character wearing a poncho and a wide-brimmed hat. The group occupies the center of the room, their movements synchronized with the lively folk tunes of the fiddle and banjo. The atmosphere remains festive throughout, capturing the social essence of the frontier life in Red Dead Online as characters interact through these expressive emotes. Chapters: 00:00:00 - 00:00:45 - Initial dance pairing in the shack 00:00:45 - 00:01:30 - Switching to carefree and bold styles 00:01:30 - 00:02:15 - Continued solo and duo performances 00:02:15 - 00:03:14 - Group dancing with multiple participants 📖 Interactive written walkthrough with clickable timestamps: https://pixelfungaming.com/videos/rdr2-dancing-with-posse-members-in-moonshine-bar
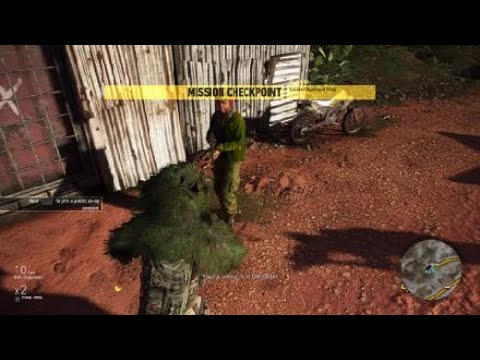
Ghost Recon Wildlands - Grab El Yayo Walkthrough
The gameplay begins with a helicopter flight over a lush, mountainous landscape towards the Huayani Farm. Upon landing, a stealthy approach is initiated, moving through tall crops to avoid detection by the Santa Blanca Cartel guards. A suppressed rifle is used to quietly neutralize immediate threats on the perimeter. The operative then deploys a drone to perform a comprehensive sweep of the large hacienda, marking several hostiles and successfully locating the primary objective, El Yayo, inside the main building. After scouting, the focus shifts to methodically picking off guards from a distance with a suppressed sniper rifle to clear a path for the extraction. The video showcases tactical patience, effective use of surveillance technology, and precision marksmanship in a high-stakes infiltration mission. The operative begins a covert infiltration of a heavily guarded villa to capture a high-value target known as El Yayo. Moving with precision through the estate's grounds, the interior is searched until the target is located and apprehended on the second floor. Following the capture, a tactical retreat is executed, leading the target through gardens to a standby helicopter. A low-altitude flight through the Bolivian mountains follows, ending at a remote rebel outpost. The mission concludes with a tense cinematic exchange where the target negotiates terms regarding his family's safety in exchange for cooperation. Chapters: 0:00:00 - Flying towards the Huayani Farm in a helicopter 0:00:13 - Landing and beginning the stealth approach through fields 0:00:48 - Quietly eliminating the first guard near the perimeter 0:01:06 - Tactical reconnaissance of the outer perimeter 0:01:39 - Deploying the drone for aerial scouting of the hacienda 0:01:50 - Locating the target El Yayo inside the mansion 0:03:22 - Systematic elimination of guards with a suppressed rifle 0:03:57 - Accessing the tacmap and loadout menu for mission details 0:04:15 - Precision sniping to clear the entrance area 0:05:00 - Infiltration of the villa grounds 0:05:15 - Searching the target's residence 0:05:28 - Apprehending El Yayo 0:05:55 - Escorting the target to the landing zone 0:06:40 - Boarding the extraction helicopter 0:06:52 - Aerial transit to the safe house 0:07:25 - Landing and final target hand-off 0:07:40 - Cinematic confrontation and negotiation 📖 Interactive written walkthrough with clickable timestamps: https://pixelfungaming.com/videos/ghost-recon-wildlands-grab-el-yayo-walkthrough

RDR2 - Bluegill Fishing Location
A quiet fishing session takes place at O'Creagh's Run in the Grizzlies East region. The character begins by selecting worm bait from the inventory wheel while standing on a rock overlooking the calm lake waters. After a successful cast, a period of patient waiting follows as small fish nibble at the line. Tension rises as a stronger bite occurs, leading to a brief struggle to reel in the catch. A 12oz Bluegill is successfully landed and added to the satchel. The session concludes with a review of the world map to confirm the exact location within the wilderness. 📖 Chapters: 0:00:00 - 0:00:15 - Bait selection and preparation 0:00:15 - 0:00:53 - Casting the line and waiting for a bite 0:00:53 - 0:01:17 - Reeling in a 12oz Bluegill 0:01:17 - 0:01:40 - Reviewing the map location at O'Creagh's Run

Destiny LiveStream #2
The playthrough begins on the mission select screen, showing the player's ship orbiting Earth. The Guardian launches the ship and travels to the Tower, the social hub of the Last City. Upon arrival, the player quickly checks the character menu before selecting a new destination: The Warmind story mission on Old Russia, Earth. The ship travels through the atmosphere, and the mission begins in the Terrestrial Complex (Darkness Zone). The Guardian immediately engages a large group of Fallen Dregs and Vandals in a derelict industrial area. The Ghost attempts to access machinery data while the Guardian defends the position against multiple waves of enemies, including shielded Servitors and Fallen Captains, relying on precision shooting and grenade abilities for crowd control. After successfully destroying the Fallen taps and defending the area, the mission completes. The player then returns to the Director, selects 'The Sword of Crota' mission on the Moon (Ocean of Storms), and initiates the next launch sequence. Upon landing on the Moon's desolate surface, the Ghost narrates the mission objective: finding and destroying the legendary Sword of Crota, guarded by the Swarm Princes. The Guardian traverses the barren, cratered landscape of Archer's Line toward the Hellmouth entrance. Entering the Gatehouse, the player encounters the Hive (Acolytes and Thralls). Intense close-quarters combat ensues within the Hive structure. The Guardian is killed by a Hidden Swarm Thrall and restarts from the last checkpoint, continuing the battle against the Hive forces in the confines of the Gatehouse. The Guardian navigates the dark, derelict corridors of the Gatehouse on the Moon, attempting to locate the Sword of Crota. Combat immediately begins against waves of Hive forces, including Knights and Acolytes, forcing the Guardian to rely heavily on automatic weapon fire and short bursts of cover. Following a heavy engagement in a circular chamber, the Guardian is overwhelmed by a Wizard and forced to restart from the checkpoint multiple times. Successfully clearing the initial waves, the Guardian finally retrieves the Sword of Crota, a powerful relic that replaces the primary weapon. The main objective shifts to eliminating the three Hive Swarm Princes. Wielding the relic sword, the Guardian engages the powerful Princes and their Thrall minions in close-quarters combat, utilizing the sword's devastating heavy attacks and aerial maneuvers to clear the enemies. After several intense battles and additional restarts due to the difficulty of the encounters, the Guardian successfully defeats all three Swarm Princes, completing the mission segment. The sequence concludes as the Ghost confirms the mission is complete, and the Guardian departs into orbit. Chapters: 0:00 - Main Menu and Launching to the Tower 1:40 - Ship Animation and Arrival at Tower Plaza 2:58 - Selecting 'The Warmind' Mission on Earth 3:43 - Starting Mission: The Warmind and Descent to Old Russia 4:04 - Combat in Terrestrial Complex against Fallen 5:50 - Defending against Fallen while Ghost accesses machinery 7:35 - Intense Combat: Resisting Waves of Fallen and Servitors 16:36 - Mission Complete and Activity Rewards Screen 17:30 - Selecting 'The Sword of Crota' Mission on the Moon 19:07 - Moon Landing and Navigation on Archer's Line 22:45 - Entering the Hellmouth/Gatehouse and First Hive Engagement 26:17 - Checkpoint Restart and Continued Hive Combat 30:00 - Initial Hive Encounter in the Gatehouse 30:35 - Advancing deeper into the derelict structure 31:13 - Major Hive Engagement and Guardian Down 31:37 - Restart and Second Push against Hive Forces 32:27 - Close Combat and Second Guardian Down 33:24 - Retrieving the Sword of Crota Relic 36:44 - Killing the First Swarm Prince with the Sword 37:18 - Engaging the Second Swarm Prince (Garok, Xol Prince) 39:05 - Final Attempts to Defeat the Swarm Princes 46:33 - Mission Completion and Return to Orbit 📖 Interactive written walkthrough with clickable timestamps: https://pixelfungaming.com/videos/destiny-livestream-2

Rise Of The Ronin: Blackship Mission
The video provides a comprehensive walkthrough of the 'Infiltrating the Black Ship' mission in the action RPG Rise of the Ronin. It opens with a cinematic mission briefing where the Bladesmith tasks the protagonists, known as the Blade Twins, with retrieving a secret message from Commodore Perry's ship anchored off Yokohama. Viewers will see the duo row through dense fog, board the massive vessel, and employ both stealth and direct combat to eliminate American sailors. The gameplay highlights various mechanics, including underwater takedowns, grappling, and parrying. After navigating the ship's complex interior and locating the message in the Commodore's cabin, a dramatic boss fight against Matthew Perry himself occurs on the main deck. The encounter takes a turn with the arrival of a powerful masked warrior, the Blue Demon, leading to a pivotal narrative choice where the player must decide which twin will take the secret message and escape. The video concludes with the chosen twin's escape and a time-jump showing the aftermath of their partner's sacrifice. Chapters: 0:00:00 - 0:01:22 - Mission briefing: The Bladesmith assigns the twins a mission to infiltrate the Black Ship. 0:01:22 - 0:02:25 - Cinematic sequence showing the protagonists rowing towards the American vessel in dense fog. 0:02:25 - 0:04:26 - Initial infiltration of the ship's perimeter using stealth and underwater takedowns. 0:04:26 - 0:06:45 - Direct combat encounter with American sailors on the ship's main deck. 0:06:45 - 0:08:52 - Stealthy navigation through the ship's lower decks and mechanical rooms. 0:08:52 - 0:10:47 - Battle in the hold to obtain the Black Ship's Hold Key from high-ranking enemies. 0:10:47 - 0:12:58 - Exploring the interior corridors and cabins while eliminating guards. 0:12:58 - 0:14:13 - Infiltrating Commodore Perry's private cabin to retrieve the secret message. 0:14:13 - 0:15:17 - Cutscene: The protagonists confront Commodore Matthew Perry on the deck. 0:15:17 - 0:17:41 - Boss fight demonstration against Commodore Matthew Perry. 0:17:41 - 0:18:27 - Intervention of the Blue Demon following Perry's defeat. 0:18:27 - 0:19:30 - A pivotal narrative choice is made between the protagonists. 0:19:30 - 0:20:43 - Final escape sequence and aftermath cinematic showing a time skip. 📖 Interactive written walkthrough with clickable timestamps: https://pixelfungaming.com/videos/rise-of-the-ronin-blackship-mission

RDR2 - Online - Collection Hunt
The mission begins with the character navigating the map near the Van Horn Trading Post to plan a route through the woods. While riding a chestnut horse through a foggy forest, an invitation for a 'Master Archer' event appears. Equipping the metal detector helps pinpoint a buried treasure near a beaver dam along the river. Digging at the site reveals a 1700 Draped Bust Silver Dollar. After another map check, a fast travel from a roadside post takes the character to the misty swamps of Lagras. The search continues through the Bayou Nwa, where the metal detector leads to a large tree. Excavation at the roots yields the final coin needed for the collection, the 1800 Gold Quarter. With the set complete, the character spots and hunts an American Alligator, skinning it for materials. The journey transitions into the night as navigation through the wetlands leads to a buried Metal Hairpin heirloom. Finally, entering a small, dilapidated church reveals a hidden Ainsworth Cross Necklace on a makeshift altar, further expanding the jewelry collection. The day ends with final inventory checks and planning for the next set of collectibles. Chapters: 0:00:00 - 0:00:48 - Initial Navigation and Riding Near Van Horn 0:00:48 - 0:01:35 - Finding the 1700 Draped Bust Silver Dollar 0:01:35 - 0:03:39 - Fast Traveling to the Lagras Swamps 0:03:39 - 0:04:30 - Searching the Bayou for Collectibles 0:04:30 - 0:05:43 - Unearthing the 1800 Gold Quarter to Complete the Set 0:05:43 - 0:06:30 - Hunting and Skinning an American Alligator 0:06:30 - 0:09:07 - Navigating the Wetlands at Night 0:09:07 - 0:09:34 - Recovering a Metal Hairpin Heirloom 0:09:34 - 0:10:08 - Discovering the Ainsworth Cross Necklace 0:10:08 - 0:11:42 - Final Map Coordination and Exploration 📖 Interactive written walkthrough with clickable timestamps: https://pixelfungaming.com/videos/rdr2-online-collection-hunt

Ready Or Not: S Rank | Greased Palms (No Mods)
This comprehensive gameplay video features a full tactical walkthrough of the 'Greased Palms' mission in the realistic police simulation game, Ready or Not. Viewers will observe a highly coordinated SWAT team as they infiltrate a Los Sueños Postal Service facility to neutralize suspects and rescue civilians. The video demonstrates advanced tactical maneuvers, including the use of optiwands for reconnaissance, various breaching techniques like using RAM and C2 explosives, and the deployment of non-lethal grenades for room clearing. Throughout the mission, the content highlights the importance of teamwork and slow, methodical progression to ensure the safety of officers and non-combatants. The playthrough showcases high-intensity firefights in a large-scale warehouse environment, careful evidence collection, and the successful apprehension of high-value targets. The video concludes with a mission summary demonstrating an 'S' rank achievement, reflecting a perfect score through non-lethal tactics and objective completion. Chapters: 0:00:00 - 0:00:11 - Pre-mission loading screen and team setup 0:00:11 - 0:02:10 - Initial approach to the postal facility and exterior clearing 0:02:10 - 0:05:22 - Entering side hallways and securing small office spaces 0:05:22 - 0:06:53 - Breach into the main building and initial suspect encounters 0:06:53 - 0:09:12 - Clearing administrative areas and the customer service lobby 0:09:12 - 0:11:21 - Entry into the main warehouse sorting floor and intense combat 0:11:21 - 0:14:10 - Coordinated sweep of the vast warehouse aisles and box stacks 0:14:10 - 0:16:38 - Breach and clear of back-office suites and server rooms 0:16:38 - 0:18:53 - Final internal sweep to secure remaining civilians 0:18:53 - 0:21:11 - Perimeter check of loading docks and exterior transport vehicles 0:21:11 - 0:22:31 - Re-entry to locate remaining mission objectives and evidence 0:22:31 - 0:23:44 - Apprehension of final targets and mission objective completion 0:23:44 - 0:24:43 - Mission summary, 'S' rank achievement, and results screen 📖 Interactive written walkthrough with clickable timestamps: https://pixelfungaming.com/videos/ready-or-not-s-rank-greased-palms-no-mods

Destiny Gamplay Part 1
This comprehensive video provides a complete overview of the initial stages of the video game Destiny. The footage begins with a cinematic prologue detailing the discovery of 'The Traveler' on Mars, setting the stage for the narrative. Following this, the content covers the first gameplay mission in Old Russia, Earth, where a Guardian is revived by a Ghost. Viewers will see detailed combat demonstrations against Fallen enemies, movement mechanics through industrial ruins, and the acquisition of the first jumpship. The second half of the video focuses on the social hub known as The Tower, showcasing various interactions with key NPCs such as Commander Zavala and Amanda Holliday. The analysis highlights inventory management, gear progression, and character customization for the Titan class. Chapters: 0:00:00 - 0:02:11 - Mars Cinematic Prologue and Traveler Discovery 0:02:11 - 0:03:16 - Menu Navigation and Character Loading Sequence 0:03:16 - 0:05:48 - Guardian Awakening in Old Russia, Earth 0:05:48 - 0:07:07 - Initial Movement and Navigating Through the Breach 0:07:07 - 0:11:41 - First Weapon Acquisition and Early Combat Skirmishes 0:11:41 - 0:14:13 - Exploring the Divide and Finding Collectibles 0:14:13 - 0:16:47 - Securing the Arcadia Jumpship in Dock 13 0:16:47 - 0:19:27 - Arrival at the Last City and Mission Summary 0:19:27 - 0:24:10 - Tower Plaza Exploration and Bounty NPC Interaction 0:24:10 - 0:28:30 - Vanguard Gear Upgrades and Character Subclass Analysis 0:28:30 - 0:33:14 - Shipwright Visit and Final Inventory Management 📖 Interactive written walkthrough with clickable timestamps: https://pixelfungaming.com/videos/destiny-gamplay-part-1
HITMAN 2 - New York - Rat Poison Location
Agent 47 navigates the breakroom of the Milton-Fitzpatrick Bank during the Golden Handshake mission. Disguised as a security guard, he discreetly collects a deposit box key from a storage rack while bank employees discuss internal logistics. The focus shifts to a thorough review of the bank's layout using the mission map. The tactical overview covers multiple floors, highlighting key areas such as the vault, the interview rooms, and VIP check-in zones. Objective markers guide the planning process as routes through the facility are analyzed for optimal stealth. The gameplay resumes as Agent 47 exits the planning phase, ready to proceed with the infiltration. 📖 Chapters: 0:00:00 - 0:00:08 - Gathering intel and items in the breakroom 0:00:08 - 0:00:49 - In-depth map analysis and mission route planning 0:00:49 - 0:00:54 - Exiting the map and resuming the mission

RDR2 - Posse Fun - 2 Wagons, 5 Captured Fugitives
A bounty hunting mission unfolds in the rugged terrain of Red Dead Online. The action starts with a desert shootout where multiple fugitives are cornered. Bolas and lassos serve as the primary tools for subduing and binding the targets. While most are captured alive, the intensity of the firefight leads to the death of one fugitive. Once the immediate area is cleared, the captives are loaded into a heavy bounty wagon. A treacherous journey follows as the wagon is driven across dusty trails and through rocky canyons toward the town of Tumbleweed. Enemy reinforcements attempt to intercept the transport, necessitating defensive maneuvers. Upon reaching Tumbleweed, the wagon pulls up to the local jail where the prisoners are handed over to the sheriff. The successful delivery concludes with the character earning rewards and a rank increase in the Bounty Hunter role. Chapters: 0:00:00 - 0:01:15 - Engaging and capturing the first desert fugitives 0:01:15 - 0:02:45 - Securing additional targets and reaching the bounty wagon 0:02:45 - 0:04:15 - Loading captives into the wagon under enemy fire 0:04:15 - 0:05:25 - Navigating the wagon through dangerous terrain to Tumbleweed 0:05:25 - 0:06:21 - Final delivery at the jail and mission completion 📖 Interactive written walkthrough with clickable timestamps: https://pixelfungaming.com/videos/rdr2-posse-fun-2-wagons-5-captured-fugitives

Ghost Recon Breakpoint - Investigate Polaris Residence Walkthrough
The mission objective is to find out what Paula Madera is planning at Polaris Residences, a location guarded by numerous enemy forces. An infiltration begins under the cover of night, using a helicopter for a covert approach. After scouting the area from above and identifying the specific building where intelligence might be found, a deliberate descent is made nearby. The surrounding environment is carefully navigated to maintain the element of surprise while closing in on the objective. An engagement with enemy patrols ensues, requiring precision and tactical awareness to eliminate threats efficiently while advancing towards the target location. The interior of the building is accessed, revealing a scene of civilian casualties, hinting at the severity of the situation. A laptop is discovered and used to gather critical information, which includes technical plans for a high-power battery cell. These plans suggest that the technology could be repurposed as a devastating explosive device. The gathered intelligence provides a clearer picture of the risks involved and the next steps needed to address the unfolding threat. Chapters: 0:00 - Initial scouting of Polaris Residences from a helicopter 0:20 - Identifying the target building and surrounding enemy presence 0:50 - Deciding on a landing zone and preparing for insertion 1:20 - Infiltrating the perimeter and neutralizing immediate threats 1:50 - Engaging enemy reinforcements and maintaining tactical advantage 2:20 - Advancing towards the objective while managing weapon efficiency 2:50 - Entering the building and searching for actionable intelligence 3:20 - Discovering evidence of recent events and potential hazards 3:50 - Accessing the laptop and extracting project data 4:20 - Reviewing technical plans for a potential energy-based weapon 4:50 - Completing the data extraction and preparing for exfiltration 5:20 - Evaluating the mission's findings and planning subsequent actions 5:50 - Observing the aftermath and preparing to leave the area 6:20 - Final checks of the obtained intelligence before departure 6:50 - Closing the mission log and transitioning to the next phase 7:20 - Securing the area and making a final assessment of the objective 📖 Interactive written walkthrough with clickable timestamps: https://pixelfungaming.com/videos/ghost-recon-breakpoint-investigate-polaris-residence-walkthrough

Ready Or Not: S Rank | Relapse (No Mods)
The video features a complete, high-level tactical gameplay session of the first-person shooter 'Ready or Not'. The footage follows a SWAT team's systematic operation to clear the Coastal Grove Medical Center of suspects, rescue civilians, and secure evidence. Viewers will observe advanced tactical maneuvers, including the use of mirror guns for room reconnaissance, coordinated breaches using flashbangs and stingers, and non-lethal engagement techniques. The video demonstrates the thoroughness required to achieve an 'S' rank, showing the team meticulously checking every room, securing weapons, and detaining all individuals found on-site. The operation covers multiple floors and specialized wings of the hospital, such as pediatrics, radiology, and surgery, concluding with a final performance summary and ranking. Chapters: 0:00:00 - 0:00:16 - Mission Briefing and Initial Deployment 0:00:16 - 0:04:30 - Securing the Entrance and Initial Corridor Clearing 0:04:30 - 0:08:10 - Systematic Room Clearing in the Primary Medical Wing 0:08:10 - 0:12:30 - Ascending to the Second Floor and Clearing Patient Wards 0:12:30 - 0:16:00 - Tactical Firefights and Suspect Neutralization in Corridors 0:16:00 - 0:20:00 - Clearing the Radiology and MRI Units 0:20:00 - 0:24:00 - Clearing Specialized Surgery Suites and Labs 0:24:00 - 0:28:00 - Backtracking for Remaining Evidence and Missing Objectives 0:28:00 - 0:31:18 - Final Room Clearings and Mission Completion 0:31:18 - 0:31:30 - Mission Performance Review and Final S-Rank Status 📖 Interactive written walkthrough with clickable timestamps: https://pixelfungaming.com/videos/ready-or-not-s-rank-relapse-no-mods

Sniper ELite 3 -Survival Gameplay
A marksman takes a strategic position on a rooftop overlooking a desert outpost. The engagement focuses on a long-distance target located on a high-tier structure across the map. After several ranging shots to account for bullet drop and windage, a precise shot is fired with the M1 Garand. The game's signature X-ray kill cam triggers, following the bullet's flight path in slow motion as it travels through the environment and strikes the target. The cinematic camera provides a detailed anatomical view of the internal damage, showing the projectile piercing the enemy's lung. Upon the successful elimination, the mission marks the completion of Wave 5, displaying experience point bonuses for 'Eagle Eyed', 'Long Distance', and 'Lung Shot' feats. Chapters: 0:00:00 - 0:00:10 - Aiming and Ranging Shots from the Rooftop 0:00:10 - 0:00:21 - Cinematic X-Ray Kill Cam Sequence 0:00:21 - 0:00:26 - Wave 5 Completion and Scoring Recap 📖 Interactive written walkthrough with clickable timestamps: https://pixelfungaming.com/videos/sniper-elite-3-survival-gameplay

FIFA 15 Demo
This video provides a complete walkthrough of a match in the FIFA 15 Demo on Xbox One. It begins with navigation through the Xbox dashboard to launch the demo. Viewers will see the cinematic intro featuring Lionel Messi, followed by a full Barclays Premier League match between Liverpool and Manchester City at Anfield. The gameplay footage covers both halves of the game, showcasing various tactical maneuvers, defensive plays such as sliding tackles, and multiple attempts on goal. The video also includes a detailed look at the in-game menus, match statistics at halftime and full-time, and a comprehensive review of the controller settings and basic game controls. The content concludes with a trophy celebration for Manchester City after they secure the league title despite a scoreless draw. Chapters: 0:00:00 - 0:00:34 - Launching the FIFA 15 Demo from the Xbox Dashboard 0:00:34 - 0:01:04 - Cinematic Intro and Language Selection 0:01:04 - 0:01:28 - Pre-Match Presentation at Anfield 0:01:28 - 0:02:30 - First Half Kick-off and Midfield Play 0:02:30 - 0:03:45 - Manchester City Pressure and Consecutive Corners 0:03:45 - 0:04:59 - Skrtel's Sliding Tackle and Near Misses 0:04:59 - 0:08:07 - End of First Half and Halftime Highlights 0:08:07 - 0:11:18 - Second Half Action and Tactical Substitutions 0:11:18 - 0:12:35 - Pause Menu: Match Facts and Settings Navigation 0:12:35 - 0:14:12 - In-Depth Look at Controller Layout and Basic Controls 0:14:12 - 0:16:42 - Tense Late-Game Moments and Defensive Stands 0:16:42 - 0:18:05 - Full-Time Whistle and League Title Celebration 0:18:05 - 0:18:26 - Post-Match Stats and Return to Dashboard 📖 Interactive written walkthrough with clickable timestamps: https://pixelfungaming.com/videos/fifa-15-demo

Sniper Elite 3 Highlight #1 - Survival - Multiple grenade kills
The mission continues with a high-precision heart shot from a rooftop using a sniper rifle, triggering a signature X-ray kill cam. Immediately after, the character accesses the weapon wheel to select M24 grenades. A barrage of grenades is launched towards a group of enemies hunkered down behind distant cover. The resulting explosions neutralize the targets, earning a multi-kill bonus. The character then vaults over the roof ledge, descends to the street level, and enters a nearby dwelling to reposition. Chapters: 0:00:00 - 0:00:04 - Initial sniper engagement resulting in an X-ray heart shot 0:00:04 - 0:00:11 - Preparation and deployment of M24 grenades against grouped enemies 0:00:11 - 0:00:18 - Grenade impact and execution of a multi-kill 0:00:18 - 0:00:27 - Relocation from the rooftop into a building for tactical repositioning 📖 Interactive written walkthrough with clickable timestamps: https://pixelfungaming.com/videos/sniper-elite-3-highlight-1-survival-multiple-grenade-kills

Sherlock holmes : Crimes and Punishments - Blood bath - Part 3
The investigation into the 'Blood Bath' case begins at 221B Baker Street. Sherlock Holmes performs chemical analyses on dirt and blood samples collected from the crime scene, identifying white London clay and discovering that the victim's blood was diluted with water. The search then moves to the Strand Lane Baths, where Holmes investigates Sir Rodney Bentcliffe's office, uncovering a missing photographic negative and evidence of archaeological work. Within the main bath area, Holmes retrieves a pair of cracked glasses and a piece of melted metal from a hot brazier. Returning to his lab, he confirms the metal is high-quality silver and researches the victim's recent professional activities. At Scotland Yard, Holmes meticulously recovers hidden writing from the victim's torn notebook, revealing a significant historical discovery. A detailed autopsy of Sir Rodney's body follows, revealing unusual knife wounds and bruising that suggests the use of a rope. The investigation concludes with the interrogation of Tristram Garrow, whose erratic behavior and claims of seeing a 'shining gold' knife suggest deep mental distress or a carefully constructed facade. Sherlock Holmes continues his investigation into the murder at the Roman Baths. The investigation leads to the police station, where Holmes interrogates the primary suspects: Sir Gregory Pitkin and Percival Blinkhorn. During these interrogations, he uses his keen observational skills to create character portraits, revealing hidden details about their personalities and wealth. He probes into their relationships with the victim, Sir Rodney Bentcliffe, and their activities on the morning of the crime. Between sessions, Holmes returns to his deduction board to piece together evidence, uncovering a 'mortal secret' and 'Sir Rodney's lie'. The search for truth moves to the evidence room, where he meticulously examines the personal belongings of the suspects and the victim, discovering crucial items like a drug phial, a repaired Egyptian ring, and a mysterious silver coin. Each clue brings him closer to unraveling the complex web of motives and identifying the true culprit. Chapters: 0:00:00 - Case selection and initial loading screen 0:01:02 - Analysis of soil samples at the Baker Street laboratory 0:02:12 - Examination of diluted blood samples 0:04:36 - Arrival at Strand Lane Baths and office search 0:06:12 - Reviewing historical documents and excavation logs 0:10:12 - Investigation of the bathhouse brazier 0:12:26 - Retrieving melted metal using specialized tools 0:14:40 - Archival research at 221B Baker Street 0:16:12 - Silver testing and quality verification 0:18:27 - Inspecting victim's personal belongings at Scotland Yard 0:19:15 - Recovering hidden messages from a torn notebook 0:21:51 - Autopsy of Sir Rodney Bentcliffe in the morgue 0:23:51 - Synthesizing clues in the deduction space 0:26:00 - Interrogation of suspect Tristram Garrow 0:28:35 - Final observations on suspect behavior and evidence 0:30:00 - Deduction Board Analysis: Possible Silver Weapon 0:30:18 - Escorting Suspects for Interrogation at the Police Station 0:30:29 - Interrogation of Sir Gregory Pitkin: Background and Motives 0:32:21 - Character Portrait: Sir Gregory Pitkin 0:33:32 - Bringing Percival Blinkhorn to the Interrogation Room 0:33:49 - Interrogation of Percival Blinkhorn: Archaeological Research 0:34:07 - Character Portrait: Percival Blinkhorn 0:37:22 - Connecting Clues: Uncovering Sir Rodney's Lie 0:38:01 - Navigating to the Evidence Room 0:38:14 - Examining Blinkhorn's Belongings: The Letter and Pencil 0:38:36 - Examining Garrow's Belongings: The Bloody Towel and Drug Phial 0:39:10 - Examining Pitkin's Belongings: Luxury Items 0:39:34 - Examining Bentcliffe's Belongings: The Egyptian Ring and Ancient Coin 📖 Interactive written walkthrough with clickable timestamps: https://pixelfungaming.com/videos/sherlock-holmes-crimes-and-punishments-blood-bath-part-3

Sniper Elite : Zombie Sniper Army Live
The mission 'Village of the Dead' begins in a dark, fog-covered German village overrun by Nazi zombies. The character starts on the outskirts, utilizing a Springfield M1903 sniper rifle to pick off zombies from a distance. Early encounters involve slow-moving undead, allowing for precise headshots and showcasing the game's iconic X-ray bullet-cam. As the character moves deeper into the village ruins, the density of zombies increases significantly. Combat shifts from methodical long-range sniping to frantic close-quarters engagements. Tools like the Thompson M1 submachine gun and Colt M1911 pistol become essential for managing the growing horde. The environment is eerie, filled with burning wrecks and occult symbols painted on crumbling walls. After clearing several waves in the open streets and utilizing grenades to thin out groups, the character attempts to locate a safe room. Upon entering a residential building, the character is quickly cornered and overwhelmed by zombies in the narrow hallways, leading to a mission failure screen. Chapters: 0:00:00 - 0:01:23 - Main Menu and Mission Setup 0:01:23 - 0:04:08 - Initial Infiltration and Sniper Combat 0:04:08 - 0:05:22 - Advancing Through the Village Outskirts 0:05:22 - 0:06:58 - Frantic Street Battle with Submachine Guns 0:06:58 - 0:09:08 - Clearing the Village Center and Wave Defense 0:09:08 - 0:10:23 - Final Stand in the Building and Mission Failure 📖 Interactive written walkthrough with clickable timestamps: https://pixelfungaming.com/videos/sniper-elite-zombie-sniper-army-live

War Thunder: Making Players Crash
This War Thunder gameplay video showcases various aerial combat scenarios featuring Soviet aircraft like the I-153 biplane and I-16. Viewers will see high-intensity dogfights against enemy bombers and fighters, precision low-altitude maneuvering through narrow canyons, and ground attack missions. The footage highlights both successful aerial takedowns and dramatic combat losses across diverse maps and lighting conditions, including a notable sequence of flying through a winding mountain pass and engagements over a valley town during sunset. Chapters: 0:00:00 - 0:02:40 - I-153 Biplane Dogfight vs SBD-3 0:02:40 - 0:04:45 - I-16 Precision Low-Altitude Canyon Maneuvering 0:04:45 - 0:05:00 - Mountain Slope Crash Sequence 0:05:00 - 0:06:45 - Sunset Aerial Combat and Interception 0:06:45 - 0:07:55 - Valley Town Chase and Final Engagement 0:07:55 - 0:08:08 - Outro and Channel Branding 📖 Interactive written walkthrough with clickable timestamps: https://pixelfungaming.com/videos/war-thunder-making-players-crash

Ready Or Not: Buy Cheap, Buy Twice 1.0 | (No Mods)
The tactical operation begins under the cover of night at a sprawling industrial and office complex. The team starts by securing the external perimeter and moving methodically through a large warehouse. Utilizing advanced tools like the optic wand, they carefully peek under doors to identify threats before initiating breaches. Throughout the warehouse phase, they encounter and detain several individuals, following standard operating procedures. The mission shifts intensity as the team transitions to a car dealership and subsequently a multi-story office building. Combat encounters increase in frequency, requiring the use of flashbangs and coordinated fire to neutralize armed suspects. Methodical room clearing continues through narrow hallways and cluttered cubicles, where the team secures vital evidence including trafficking records. The operation maintains a steady, professional pace, emphasizing squad cohesion and tactical precision. The mission concludes once all civilians are rescued and suspects are either neutralized or detained, followed by a final review of the mission performance metrics. Chapters: 0:00:00 - 0:03:00 - Initial approach and nighttime perimeter security 0:03:00 - 0:06:00 - Methodical clearing of the warehouse and initial detainments 0:06:00 - 0:09:00 - Securing illegal cargo and moving to the external dealership area 0:09:00 - 0:12:00 - Breaching the showroom and navigating vehicle-filled spaces 0:12:00 - 0:15:00 - Entering the office complex and conducting systematic room clears 0:15:00 - 0:18:00 - Tactical advancement through long office corridors 0:18:00 - 0:21:00 - High-intensity suspect engagements in narrow office hallways 0:21:00 - 0:24:00 - Detailed sweep of cubicle areas and evidence collection 0:24:00 - 0:27:00 - Final objective completion and securing high-value targets 0:27:00 - 0:28:03 - Mission conclusion and performance rating review 📖 Interactive written walkthrough with clickable timestamps: https://pixelfungaming.com/videos/ready-or-not-buy-cheap-buy-twice-1-0-no-mods
Sniper Elite 3 Multiplayer - DeathMatch
Experience a high-stakes tactical showdown in this complete multiplayer match of Sniper Elite III. Join the player, Eric.c, as they take on rival GhostWarrior117 in a tense one-on-one Team Deathmatch on the sun-drenched Beachhead map. This video provides a comprehensive look at the patient and methodical gameplay that defines the Sniper Elite series. Throughout the nearly 40-minute match, you'll witness the importance of map knowledge, positioning, and absolute stillness. Watch as Eric.c navigates the village rooftops, rocky shorelines, and ancient ruins to find the perfect vantage point. The cat-and-mouse dynamic is palpable as both snipers scan the horizon for the slightest glint of a lens or a momentary lapse in cover. Highlights of the match include several dramatic X-ray kill cams, including a precision 'Lung Shot' from high ground, and high-tension standoffs where both players utilize traps and environmental cover to outmaneuver one another. Beyond the combat, the video also captures the friendly sportsmanship between the two players as they communicate through the in-game text chat, discussing tactics and map features. Whether you're a fan of tactical shooters or looking to improve your own long-range game, this full-match walkthrough offers plenty of insight into the art of the stealthy kill in Sniper Elite III. Chapters: 0:00:00 - Multiplayer Lobby and Loadout Selection 0:00:33 - Match Start - Initial Spawn on Beachhead 0:03:15 - Taking Position in the Village Building 0:06:45 - Tactical Movement to the Outskirts 0:08:25 - First Defeat - Sniped by GhostWarrior117 0:10:20 - Flanking Through the Rocky Shoreline 0:13:35 - Retaliation: Successful Lung Shot 0:16:15 - Scaling the Heights - Rooftop Recon 0:19:40 - In-Game Chat and Tactical Standoff 0:23:25 - High-Altitude Snipe Duel 0:25:30 - Second Defeat - Rooftop Exposure 0:28:10 - Searching the Village Structures 0:31:45 - Holding the Perimeter building 0:34:45 - Third Defeat - Headshot from Afar 0:37:20 - Final Positioning and Late Game Scanning 0:39:28 - Match End - Final Score Review 📖 Interactive written walkthrough with clickable timestamps: https://pixelfungaming.com/videos/sniper-elite-3-multiplayer-deathmatch

Green Hell: Welcome To The Jungle | Day 1
The gameplay opens with an intense vertical climb up a mossy rock face, setting the survival tone in the Amazon. Communication with Mia over the walkie-talkie provides narrative context for the expedition as the character navigates through thick undergrowth to reach a established base camp. On the second day, survival mechanics come to the forefront; the character uses a machete to harvest sticks and logs for a small campfire structure. After discovering a lack of modern tools, the character crafts a primitive hand drill and successfully ignites the fire using tinder gathered from the surroundings. A quiet night by the fire allows for deep dialogue regarding tribal conflicts and scientific ambition. The narrative skips forward to Day 32, marked by a sudden crisis where the character wakes to Mia’s screams and a frantic search through the pitch-black jungle. Following a cinematic title reveal, the gameplay shifts to jungle exploration on Day 3, where a routine climb turns disastrous when a rope snaps. Injured and disoriented, the character applies a leaf bandage to a deep gash while navigating through a storm. The experience concludes with desperate radio calls for help as the search for Mia intensifies. Chapters: 0:00:00 - 0:01:10 - Initial climb and radio contact on Day 1 0:01:10 - 0:02:35 - Navigating the dense jungle to reach base camp 0:02:35 - 0:03:15 - Day 2 morning routine and supply organization 0:03:15 - 0:05:48 - Gathering wood and constructing the fire pit 0:05:48 - 0:08:33 - Primitive fire starting and evening reflections 0:08:33 - 0:09:53 - Day 32 jungle crisis and cinematic title reveal 0:09:53 - 0:10:45 - Day 3 awakening and Mia's departure 0:10:45 - 0:11:32 - Exploration leading to a dangerous rope accident 0:11:32 - 0:12:35 - Treating injuries and frantic search for help 📖 Interactive written walkthrough with clickable timestamps: https://pixelfungaming.com/videos/green-hell-welcome-to-the-jungle-day-1

Star Wars: Outlaws | Government Business (Battle Droid) Walkthrough #starwarsoutlaws
This gameplay video features a complete side mission in Star Wars Outlaws on the jungle planet of Akiva. The footage begins with the protagonist, Kay Vess, accepting a task from an individual claiming to be a government official who needs assistance purchasing a battle droid under the radar. Viewers will see Kay navigate through various city districts, including Satrap's Promenade and Artisan's Row, eventually using stealth to infiltrate the Hutt Cartel District. The video demonstrates stealth mechanics, takedowns, and interaction with NPCs like the droidsmith. The mission concludes with a return to the client, revealing their true affiliation with the Crimson Dawn syndicate and the actual purpose of the droid purchase. Chapters: 0:00:00 - 0:01:03 - Initial Meeting and Mission Briefing 0:01:03 - 0:01:45 - Traversal Through Satrap's Promenade and Artisan's Row 0:01:45 - 0:02:30 - Stealth Infiltration of the Hutt Cartel District 0:02:30 - 0:02:40 - Demonstration of a Stealth Takedown 0:02:40 - 0:03:25 - Navigating to the Droidsmith and Area Exploration 0:03:25 - 0:03:53 - Negotiating and Purchasing the Battle Droid 0:03:53 - 0:04:12 - Returning Through the City to the Client 0:04:12 - 0:05:02 - Mission Conclusion and Faction Reveal 📖 Interactive written walkthrough with clickable timestamps: https://pixelfungaming.com/videos/star-wars-outlaws-government-business-battle-droid-walkthrough-starwarsoutlaws

RDR2 - Player Picks A Fight & Loses
The session begins with a hunt as a whitetail buck is downed and collected. During the process of loading the game onto the horse, an unprovoked encounter with another player leads to a fierce melee confrontation. After a lengthy fistfight that results in a knockout, the player secures the opponent with a lasso. A long journey follows, dragging the unconscious body across the wilderness, over railway tracks, and through dense forests. The sequence culminates in a remote location where the player executes a final, brutal display using a sawed-off shotgun before departing the scene. Chapters: 0:00:00 - 0:00:15 - Hunting a whitetail buck in the woods 0:00:15 - 0:00:40 - Unprovoked melee encounter and fistfight 0:00:40 - 0:01:05 - Securing the buck and preparing the lasso 0:01:05 - 0:01:45 - Lassoing and dragging the opponent through ruins 0:01:45 - 0:02:40 - Continuous dragging across varied terrain and tracks 0:02:40 - 0:03:00 - Arriving at the final destination and offloading 0:03:00 - 0:03:35 - Dismemberment and execution with a sawed-off shotgun 0:03:35 - 0:03:51 - Departure from the scene of the encounter 📖 Interactive written walkthrough with clickable timestamps: https://pixelfungaming.com/videos/rdr2-player-picks-a-fight-loses

Titanfall : Campaign 9 - Made Men ( Defeat )
The "Made Men" mission in Titanfall begins with a strategic briefing in the campaign lobby, outlining the shift in power on the Frontier after the Battle of Demeter. Commanders Graves and Sarah discuss the IMC's reliance on robotic Spectres as their human reinforcements are delayed. The action kicks off with a cinematic drop from a Crow dropship directly onto the roof of a Hammond Robotics facility. Initial objectives focus on Hardpoint Domination. The pilot maneuvers through the high-tech interior, engaging both human grunts and robotic Spectres with an R-101C Carbine. Combat is fast-paced, utilizing wall-running and double-jumps to navigate the multi-leveled environment. Capturing Hardpoint Alpha involves clearing out defenders and hacking terminals to turn the facility's own security systems against the IMC. Mid-mission, the conflict intensifies as enemy pilots join the fray. Tensions rise through radio chatter between the defected Commander Graves and the IMC mercenary Blisk, highlighting their clashing ideologies. The gameplay shifts between tight corridor shooting and open-area skirmishes. After several intense firefights and objective captures, the pilot calls in a Titan. An Ogre-class Titan drops onto the battlefield, providing a massive power boost. The pilot embarks, engaging enemy Titans and infantry with a 40mm Cannon and Vortex Shield. The mission reaches its climax during the epilogue phase after a defeat is declared. The primary goal shifts to survival and reaching the extraction dropship. The pilot ejects from a doomed Titan and races across rooftops, dodging enemy fire. Despite a valiant final stand near the landing zone, the extraction fails as the dropship departs without the team. The video concludes with a somber message from the late James MacAllan regarding the ongoing struggle for the Frontier. Chapters: 0:00:00 - 0:01:57 - Mission Briefing and Lore Background 0:01:57 - 0:02:45 - Dropping Into the Hammond Robotics Facility 0:02:45 - 0:05:00 - Capturing and Defending Initial Hardpoints 0:05:00 - 0:07:30 - Intense Pilot Combat and Facility Navigation 0:07:30 - 0:09:15 - Titanfall and Heavy Mecha Warfare 0:09:15 - 0:10:49 - Final Stand and Failed Evacuation Phase 📖 Interactive written walkthrough with clickable timestamps: https://pixelfungaming.com/videos/titanfall-campaign-9-made-men-defeat

Zero Hour: Critical Response | Hardcore | Score 100 #zerohourgame
This gameplay video demonstrates a full mission walkthrough of the 'Critical Response' operation in a tactical first-person shooter. The content covers a methodical and high-stakes approach to an active shooter and hostage rescue scenario within a school environment. Viewers will see the demonstration of advanced room-clearing techniques, precise weapon handling, and the strategic use of equipment such as tactical drones, flashbangs, and optical devices. The video follows the operative from the initial breach through various sections of the school, including the library, science labs, administrative offices, and the outdoor playground, ending with the successful neutralization of all threats and a perfect mission score. Chapters: 0:00:00 - 0:02:15 - Mission Start and Initial Hallway Engagement 0:02:15 - 0:04:45 - Clearing Science Labs and Library with First Hostage Rescue 0:04:45 - 0:07:15 - Systematic Sweep of Ground Floor Classrooms 0:07:15 - 0:09:45 - Tactical Advancement to the Administrative Wing 0:09:45 - 0:12:15 - Securing the Headmistress and Courtyard Suppression 0:12:15 - 0:14:45 - Drone Scouting and High-Intensity Cafeteria Breach 0:14:45 - 0:17:40 - Final Target Neutralization and Mission Summary Results 📖 Interactive written walkthrough with clickable timestamps: https://pixelfungaming.com/videos/zero-hour-critical-response-hardcore-score-100-zerohourgame

Ready Or Not: (No Mods) Valley Of The Dolls - S Rating
The mission begins with the entry team approaching a high-end modern villa under the cover of daylight. After detaining a civilian in the courtyard and securing the perimeter, the squad stacks up at the primary entry point. Upon breaching the interior, the team systematically clears large, open living spaces, prioritizing suspect neutralization and civilian safety through coordinated movement. The operation progresses through multiple levels of the estate, including expansive balconies and intricate interior room layouts. Team members utilize tactical equipment such as stingers, flashbangs, and door rams to gain control of fortified areas. Frequent encounters with suspects result in swift apprehensions using compliance techniques and non-lethal deterrents. The tactical sweep continues into utility areas and bedrooms, ensuring every corner of the residence is accounted for. The operation concludes once all hostiles are in custody and critical evidence is secured throughout the premises. The elite SWAT team executes a high-stakes operation at a luxury estate known as the Voll House in the 'Valley of the Dolls' mission. Tactical movements characterize the approach as the team clears the expansive property room by room, focusing on identifying high-value targets and securing prohibited materials. Intense firefights break out on the upper patio and bar areas, where the team utilizes cover and coordinated fire to neutralize multiple armed suspects. The mission transitions into the dark subterranean levels of the house, where the team discovers a disturbing illegal photography studio and laboratory. Every room is methodically swept, with civilians being restrained and reported for extraction. The operation culminates in the successful capture of the primary target and the collection of all necessary evidence, resulting in a flawless S-rank performance rating. Chapters: 0:00:00 - Exterior approach and courtyard security 0:01:21 - Breaching the main villa entrance 0:03:04 - Upper-level balcony and hallway clearing 0:04:52 - Detailed sweep of bathrooms and storage areas 0:06:40 - Securing civilians on the outdoor terrace 0:08:12 - Tactical breach of the primary suite 0:10:00 - Final suspect apprehension and mission completion 0:00:00 - Initial perimeter breach and property approach 0:04:30 - Coordinated entry into the main residential floors 0:09:15 - Room-to-room clearing of the upper guest wings 0:14:45 - Securing key evidence and documents in the private offices 0:19:30 - Tactical engagement in the lower entertainment suite 0:24:00 - Methodical sweep of the kitchen and service areas 0:29:00 - Violent confrontation on the rear patio and outdoor bar 0:31:30 - Subterranean search and discovery of the illicit studio 0:33:45 - Final suspect capture and objective completion 0:34:11 - Mission debrief and S-rank performance summary 📖 Interactive written walkthrough with clickable timestamps: https://pixelfungaming.com/videos/ready-or-not-no-mods-valley-of-the-dolls-s-rating

Insurgency: Sandstorm | (BAB) Hardcore Checkpoint - Destroy Cache Quick & Easy
The mission unfolds in a snowy, urban combat zone where tactical precision is paramount. The engagement begins near a brick structure as the player utilizes a scoped assault rifle to eliminate targets across a snowy courtyard. Squad communication remains active throughout the encounter, with teammates coordinating fire while navigating around a parked delivery truck. The combat intensifies as the team pushes toward a set of concrete stairs, clearing out hostiles positioned on elevated ground. Moving with caution, the advance continues under a large archway into a street lined with multi-story buildings. Heavy resistance meets the team near a green-painted storefront, leading to a frantic exchange of fire in a narrow alleyway. The encounter reaches a climax as high-explosive ordinance disrupts the position, forcing a rapid tactical response in the final moments of the skirmish. Chapters: 0:00:00 - 0:00:15 - Initial Courtyard Engagement 0:00:15 - 0:00:32 - Stairwell Clearance and Team Coordination 0:00:32 - 0:00:50 - Advancing Through the Concrete Archway 0:00:50 - 0:01:00 - High-Intensity Alleyway Firefight 📖 Interactive written walkthrough with clickable timestamps: https://pixelfungaming.com/videos/insurgency-sandstorm-bab-hardcore-checkpoint-destroy-cache-quick-easy

The Walking Dead Game : Season 2 EP 5 - No going back
Experience the emotional and harrowing conclusion to Telltale's The Walking Dead Season 2 in this complete walkthrough of Episode 5: 'No Going Back.' Following a deadly shootout with Arvo's group, Clementine finds her remaining companions pushed to their absolute breaking points. As the survivors trek through the freezing wilderness towards an uncertain safe haven, internal conflicts and differing philosophies threaten to tear them apart forever. This playthrough captures every intense moment, from the frantic aftermath of the firefight to the quiet, introspective conversations around a rare campfire. Watch as Kenny's mental state further deteriorates and Jane's survival instincts lead to a shocking ultimate confrontation. Clementine is forced to make the most difficult choices yet, culminating in a heartbreaking showdown at a snowy rest stop that will determine the future for her and baby AJ. Featuring all major story choices, including the moving dream sequence with Lee Everett, this video showcases the consequences of your actions in this acclaimed choice-based narrative. Discover the various branching paths and emotional endings that have made Clementine's journey one of gaming's most memorable stories. The narrative picks up during a cold night in the woods where Jane shares a story about a childhood mishap before officially rejoining the group at their campfire. Clementine navigates the camp, speaking with a grieving Kenny and a fearful Arvo. Deep emotional conversations occur as Kenny reflects on his past and his hopes for the new baby. The next day, the group encounters walkers while moving through a snow-covered forest, leading to a tense shootout. They arrive at a frozen lake where they must carefully cross thin ice. Tragedy strikes as the ice breaks, leading to a desperate struggle to save Luke from the freezing depths. Inside a nearby house, tensions boil over as Kenny violently interrogates Arvo despite the group's protests. The aftermath involves tending to wounds and gathering supplies while Kenny focuses on repairing an old truck. After hours of work and character-building dialogue, the vehicle finally starts, prompting a final debate about heading to a rumored sanctuary called Wellington or heading south for warmth. Chapters: 0:00:00 - Recap and Firefight Aftermath 0:04:15 - A Desperate Crawl to baby AJ 0:08:30 - Tensions Rise and Arvo is Captive 0:12:45 - Assessing Luke's Battle Injuries 0:17:10 - Jane Returns to the Group 0:21:50 - Kenny's Volatile Confrontation 0:26:00 - Arriving at the Snowy Substation 0:30:00 - Jane shares a childhood story with Clementine 0:30:45 - Celebrating Luke's Birthday at Night 0:31:25 - Jane officially rejoins the group at the campfire 0:31:50 - Clementine speaks with Arvo and Kenny at the camp 0:34:15 - Kenny reflects on his family and past mistakes 0:35:15 - Late Night Conversations and Secrets 0:35:50 - The group shares a quiet moment and a drink by the fire 0:37:25 - An outburst from Arvo interrupts the peace 0:38:25 - The group sets out through the snowy woods 0:39:05 - Combat encounter with walkers in the forest 0:39:40 - Kenny Repairs the Abandoned Truck 0:39:47 - Arrival at the frozen lake and the unfinished house 0:40:20 - The dangerous crossing of thin ice begins 0:42:15 - Luke falls through the ice as it cracks 0:43:25 - Desperate attempt to rescue Luke as walkers approach 0:44:15 - The ice gives way and Luke perishes in the water 0:44:20 - The Shocking Midnight Betrayal 0:45:10 - The group enters the house to warm Clementine 0:45:35 - Kenny brutally beats Arvo in a fit of rage 0:46:40 - Supplies are found, confirming Arvo's claims 0:48:12 - Clementine and Jane share a moment of grief over Luke 0:48:55 - Clementine's Visionary Dream of Lee 0:50:35 - Clementine checks on Kenny working on the old truck 0:53:30 - The Desperate Journey North Begins 0:53:40 - Quiet conversation with Bonnie outside the house 0:56:05 - Clementine assists Kenny with the vehicle repairs 0:58:15 - Tragic Car Crash in the Blizzard 0:59:10 - The truck engine successfully turns over 0:59:25 - Final group discussion regarding their next destination 1:02:40 - Final Stand: The Brutal Rest Stop Fight 1:06:50 - The Final Choice & Closing Credits 📖 Interactive written walkthrough with clickable timestamps: https://pixelfungaming.com/videos/the-walking-dead-game-season-2-ep-5-no-going-back

Ready Or Not: Mission 2 | 23 Megabytes A Second
This video showcases a complete tactical mission in the game 'Ready or Not', set in the San Uriel Condominiums. Gameplay follows a SWAT team as they execute high-stakes room-clearing maneuvers, hostage rescue, and suspect neutralization. Viewers will see various tactical tools in use, including 'wands' for under-door surveillance, flashbangs for room entry, and non-lethal restraining techniques. The mission progresses from initial building entry through multiple apartment units, featuring a detailed 'gamer' room and a server farm setup, concluding with a comprehensive sweep of the premises and a final performance debrief. Chapters: 0:00:00 - 0:00:35 - Mission Selection and Briefing 0:00:36 - 0:01:29 - Initial Building Approach and Courtyard Entry 0:01:30 - 0:03:10 - Breaching First Apartment and Securing Civilians 0:03:11 - 0:04:40 - Tactical Clearing of Second Floor Balcony and Units 0:04:41 - 0:05:25 - High-Intensity Entry into Neon-Lit Gamer Apartment 0:05:26 - 0:06:40 - Interior Sweep and Detail Inspection of Resident Rooms 0:06:41 - 0:07:55 - Descending Spiral Stairs for Lower Level Scan 0:07:56 - 0:09:00 - Coordinated Breach and Clear of Ground Floor Sections 0:09:01 - 0:10:28 - Neutralizing Suspects in the Server and Mining Rig Area 0:10:29 - 0:11:34 - Final Building Sweep and Mission Objective Completion 0:11:35 - 0:12:31 - Mission Debriefing and Final Score Evaluation 📖 Interactive written walkthrough with clickable timestamps: https://pixelfungaming.com/videos/ready-or-not-mission-2-23-megabytes-a-second

Far Cry New Dawn | Gov Plane Wreck Expedition Walkthrough
The expedition to the Government Plane Wreck begins with a helicopter insertion into a dense forest in Iowa. The objective is to locate a specific package hidden within the wreckage of a massive cargo plane. Initial movement is stealthy, utilizing binoculars to scout the area and tag Highwaymen guards from a distance. Combat erupts near the plane's exterior, leading to a close-quarters shootout inside the cargo hold. After securing the package, the mission transitions into a high-octane escape. A semi-truck parked inside the plane is used to smash through the environment and reach the extraction zone. The drive turns into a fierce running battle through swampy terrain as enemy reinforcements pursue on bikes and in technicals. The mission culminates in a desperate sprint to the extraction helicopter while under heavy fire, followed by a successful takeoff. Chapters: 0:00:00 - 0:00:50 - Insertion and initial approach to the crash site 0:00:50 - 0:01:35 - Scouting enemy positions using binoculars 0:01:35 - 0:02:38 - Infiltrating the plane wreckage and engaging guards 0:02:38 - 0:03:12 - Securing the target package and finding transportation 0:03:12 - 0:05:25 - High-stakes vehicle chase through the swamps 0:05:25 - 0:06:01 - Extraction via helicopter and mission success 📖 Interactive written walkthrough with clickable timestamps: https://pixelfungaming.com/videos/far-cry-new-dawn-gov-plane-wreck-expedition-walkthrough

RDR2 - Legendary Bounty - Red Ben Clempson Walkthrough
The mission begins with a cinematic introduction to Red Ben Clempson, a notorious train robber known for his stylish attire and ruthless nature. The journey starts with a ride through the desert to Mercer Station to meet a former associate of Ben's who has turned informant. After a brief exchange, the trail leads toward Tumbleweed where a train robbery is underway. The pursuit heats up as the rider intercepts the moving train, engaging in a high-speed shootout with gang members guarding the tracks and the railcars. Upon boarding the train, combat intensifies within the narrow corridors, requiring precise gunplay to clear out the defenders. The search continues through several cars until Red Ben Clempson is located. A physical struggle ensues before Ben is subdued and bound. The capture involves carrying the high-value target off the moving train and securing him on horseback. The final stretch of the mission involves transporting the legendary bounty to the Tumbleweed jail while fending off any remaining hostiles. The operation concludes with the delivery of Red Ben to the local sheriff, followed by a summary of the rewards and experience earned. Chapters: 0:00:00 - 0:00:30 - Red Ben Clempson Introduction Cutscene 0:00:30 - 0:01:04 - Riding to Mercer Station 0:01:04 - 0:01:40 - Meeting the Informant 0:01:40 - 0:02:35 - Tracking the Robbed Train 0:02:35 - 0:03:30 - Boarding and Engaging the Train Guard 0:03:30 - 0:04:48 - Clearing the Train Cars 0:04:48 - 0:05:53 - Capturing Red Ben Clempson 0:05:53 - 0:06:58 - Riding to Tumbleweed Jail 0:06:58 - 0:07:40 - Bounty Delivery and Mission Success 0:07:40 - 0:07:57 - Mission Rewards and Summary 📖 Interactive written walkthrough with clickable timestamps: https://pixelfungaming.com/videos/rdr2-legendary-bounty-red-ben-clempson-walkthrough

Call Of Duty : Advanced Warfare Live
Experience the high-octane multiplayer action of Call of Duty: Advanced Warfare in this comprehensive gameplay session. This video showcases several complete matches across different game modes and maps, providing a deep dive into the fast-paced, vertical combat that defined this entry in the franchise. We start by exploring the multiplayer menus, including the Combat Readiness Program and various operator customization options, before jumping into the heat of battle. The gameplay kicks off with a Ground War: Kill Confirmed match on the map 'Ascend,' followed by intense Domination matches on 'Defender,' 'Riot,' and 'Comeback.' Watch as players utilize futuristic exo-abilities like boost jumping and dashing to gain the upper hand, deploy powerful scorestreaks such as the Assault Drone and Warbird, and master various weapons like the AK12 and Bal-27. From frantic close-quarters combat to strategic point captures, this video captures the full spectrum of the Advanced Warfare multiplayer experience, including rank-ups, new unlocks, and post-match summaries. Chapters: 0:00:00 - Intro & Initial Loading Screens 0:00:35 - Multiplayer Menu Navigation & Customization 0:02:45 - Match 1: Kill Confirmed on Ascend (Ground War) 0:05:30 - Ascend: High-Speed Combat & Tag Collection 0:08:15 - Ascend: Closing in on Victory 0:10:57 - Match 1 After Action Report & Unlocks 0:12:13 - Match 2: Domination on Defender 0:15:00 - Defender: Holding the High Ground 0:17:53 - Defender: Halftime Transition & Strategy 0:21:13 - Match 2 After Action Report & Rank Up 0:22:13 - Match 3: Domination on Riot 0:25:30 - Riot: Intense Flag Battles in the Prison Yard 0:28:47 - Riot: Halftime Update & Secondary Push 0:32:00 - Riot: Final Minute Climax 0:34:00 - Match 3 After Action Report & New Gear 0:35:25 - Match 4: Domination on Comeback 0:40:00 - Comeback: Mastering the Center Point 0:44:56 - Comeback: Final Halftime Stand 0:48:30 - Comeback: Match Conclusion 0:50:17 - Final Post-Match Summary and End of Video 📖 Interactive written walkthrough with clickable timestamps: https://pixelfungaming.com/videos/call-of-duty-advanced-warfare-live

GTA Online: (2020) PVP compilation | Taking Out Sniper With Drone & More
This comprehensive gameplay video showcases a series of high-intensity combat and tactical scenarios in Grand Theft Auto Online. The content begins with nighttime urban warfare where an armored Nightshark is used to fend off attackers with well-placed sticky bombs. Viewers will see impressive defensive maneuvers, including the mid-air destruction of an Oppressor Mk II using hand-thrown explosives. The video also demonstrates a business battle delivery involving a high-altitude jet flight and a precision parachute landing at a nightclub. Further segments cover strategic elements such as bounty placement and the use of a nano drone for remote target elimination. The final portion of the video features a dominant rampage with a TM-02 Khanjali tank, highlighting its destructive capabilities against both ground and air targets, before concluding with arcade-based drone operations. Chapters: 0:00:00 - 0:01:53 - Nighttime armored car combat and sticky bomb defense 0:01:53 - 0:03:47 - Daylight pursuit and aerial threat neutralization 0:03:47 - 0:05:02 - Jet-based weapon delivery mission and parachute descent 0:05:02 - 0:06:39 - Strategic menu management and nano drone deployment 0:06:39 - 0:07:03 - Nano drone reconnaissance and successful detonation 0:07:03 - 0:08:14 - Khanjali tank urban combat and vehicle destruction 0:08:14 - 0:10:40 - Tank-based anti-aircraft engagements and city-wide rampage 0:10:40 - 0:12:40 - Tactical on-foot combat and police evasion maneuvers 0:12:40 - 0:13:58 - Arcade command center drone strikes and target elimination 📖 Interactive written walkthrough with clickable timestamps: https://pixelfungaming.com/videos/gta-online-2020-pvp-compilation-taking-out-sniper-with-drone-more

Ready Or Not: Clearing Post Office
The mission begins with a tactical police unit preparing to breach a post office. The team uses a mirror under the door to check for threats before kicking down the main entrance. Immediately, the team engages in a firefight, neutralizing multiple armed suspects in the main lobby. After securing the initial area, the team moves through the cluttered post office, encountering and detaining civilians while continuing to neutralize hostile targets. They proceed to a back office, clearing rooms and apprehending more suspects. The team utilizes breaching tools like a multi-tool for locked doors and shotguns for forced entry. They encounter more resistance in various areas, including a restroom, a storage room filled with shelves, and a large warehouse-like loading dock. Throughout the operation, the team uses tactical flashbangs and C2 charges to clear rooms, disorienting and neutralizing multiple armed threats. They systematically clear different sections of the facility, including offices, a kitchen/break room, and additional warehouse spaces, continuously engaging hostile contacts and securing weapons. Civilians are found and restrained, some are wounded but unconscious, receiving medical assistance. The mission culminates in clearing the final areas of the warehouse and securing all remaining targets and evidence. The team successfully neutralizes all hostile threats and secures all persons of interest. Chapters: 0:00 - 0:05 - Pre-Mission Briefing 0:05 - 0:40 - Initial Breach Preparation and Reconnaissance 0:40 - 1:20 - Post Office Lobby Engagement and Clearance 1:20 - 2:00 - Securing the Main Lobby and Detaining Suspects 2:00 - 2:40 - Clearing Back Office and Civilian Encounters 2:40 - 3:10 - Door Breaching and Restroom Clearance 3:10 - 3:50 - Restroom and Corridor Clearance 3:50 - 4:40 - Breaching and Clearing a Secured Room 4:40 - 5:20 - Storage Room Clearance and Evidence Collection 5:20 - 6:00 - Warehouse Entry and First Contact 6:00 - 6:40 - Continuing Warehouse Clearance and Outdoor Engagement 6:40 - 7:30 - Outdoor Loading Dock Engagements and Apprehensions 7:30 - 8:20 - Breaching Back Office and Hostile Engagements 8:20 - 9:00 - Office Clearance, Apprehensions, and Evidence 9:00 - 9:40 - Stairwell Ascent and Upper Level Preparation 9:40 - 10:20 - Flashbang Breach and Office Hostile Take-down 10:20 - 10:50 - Office Clearance and Civilian Apprehension 10:50 - 11:30 - Door Reconnaissance and C2/Flashbang Preparation 11:30 - 12:20 - Kitchen/Break Room Breach and Hostile Neutralization 12:20 - 13:00 - Regrouping and Re-clearing Restroom 13:00 - 13:50 - Shotgun Breach, Hostile Engagements, and Civilian Detainment 13:50 - 14:20 - Hallway Clearance and Door Unlocking 14:20 - 14:50 - Office Hostile Take-down and Civilian Apprehension 14:50 - 15:20 - Warehouse Container Area Clearance 15:20 - 15:50 - Continued Warehouse Clearance and Suspect Restraint 15:50 - 16:20 - Forklift Area Hostile Engagements 16:20 - 16:50 - Warehouse Clearance, Evidence, and Apprehension 16:50 - 17:20 - Kitchen Mirror Reconnaissance and Flashbang Breach 17:20 - 18:20 - Kitchen Clearance and Hostile Engagements 18:20 - 18:50 - Bathroom Clearance and Civilian Restraint 18:50 - 19:20 - Continuing Clearance in Warehouse Section 19:20 - 19:50 - Forklift Area Hostile Engagements and Restraint 19:50 - 20:20 - Final Warehouse Area Clearance and Hostile Neutralization 20:20 - 20:39 - Final Suspect Engagements and Objective Completion 20:39 - 21:20 - Securing Final Suspects and Evidence in Loading Dock 21:20 - 22:25 - Mission Complete and Outro Screen 📖 Interactive written walkthrough with clickable timestamps: https://pixelfungaming.com/videos/ready-or-not-clearing-post-office

HITMAN: Elusive Target | Gunrunner Vito Đurić | Silent Assassin/Suit Only #shorts #hitman
The mission begins in a parking garage where Agent 47 meticulously neutralizes guards to clear a path. He starts by subduing a guard behind a red hatchback, ensuring no witnesses are present. Moving deeper into the facility, he uses the environment, including armored vehicles and stacked crates, to maintain stealth. He incapacitates a military officer and assumes his disguise, allowing for easier movement through restricted zones. The final approach involves navigating past a group of soldiers to reach the primary target standing near a weapons table. Agent 47 executes a swift takedown, eliminating the target and completing the objective. The mission concludes with a Silent Assassin rating, reflecting a perfectly executed hit without detections or civilian casualties. Chapters: 0:00:00 - 0:00:11 - Initial infiltration and subduing the first guard 0:00:11 - 0:00:24 - Navigating the garage and taking down a second guard near the armored vehicle 0:00:24 - 0:00:35 - Acquiring a military disguise from a patrolling officer 0:00:35 - 0:00:49 - Approaching and eliminating the primary target 0:00:49 - 0:00:59 - Mission complete screen and final scoring analysis 📖 Interactive written walkthrough with clickable timestamps: https://pixelfungaming.com/videos/hitman-elusive-target-gunrunner-vito-uric-silent-assassin-suit-only-shorts-hitman

Pine Harbor: Big Mistake #pineharbor #shorts
The video features a first-person perspective of survival horror gameplay within a dark, industrial basement setting. The content follows a character as they encounter a mutated creature resting on the floor. The gameplay demonstrates various combat mechanics, including melee attacks like kicking and punching, followed by the use of a firearm. As the encounter intensifies under a flickering red light, the creature becomes more aggressive, eventually lunging at the character. The video concludes with a fatal attack from the monster and a channel outro. Chapters: 0:00:00 - 0:00:07 - Character explores a dark hallway and finds a monster 0:00:07 - 0:00:16 - Initial melee combat with the creature on the floor 0:00:16 - 0:00:21 - The monster stands up as melee strikes continue 0:00:21 - 0:00:26 - Character switches to a handgun for ranged combat 0:00:26 - 0:00:35 - Monster chases the character through the dim corridor 0:00:35 - 0:00:39 - Fatal encounter and death sequence 0:00:39 - 0:00:44 - Channel outro and social media information 📖 Interactive written walkthrough with clickable timestamps: https://pixelfungaming.com/videos/pine-harbor-big-mistake-pineharbor-shorts

Ghost Recon Breakpoint - Shark Base Walkthrough
The mission begins with a detailed reconnaissance phase as a drone scouts the interior of the heavily guarded Shark Base. The operative identifies Elite Wolf riflemen and tags their positions within the dark, industrial facility. Moving on foot, the character infiltrates the base using night vision and suppressed weapons to maintain a stealthy profile. The progression through the sleeping quarters and barracks showcases tactical takedowns and the collection of vital intel and gear. Deeper into the base, the character navigates a complex network of hallways and industrial rooms, eventually transitioning into intense open combat as the presence is detected. The firefight involves a mix of precise marksmanship and the strategic use of grenades to clear tight corridors. The objective centers on sabotaging torpedo racks in the heavy armory room, which requires hacking several laptops positioned near the missiles. Once the sabotage is complete and Walker's plans are investigated, the operative moves to the base's interior dock. The mission concludes with a rapid exfiltration as the character boards a Bullshark boat and navigates the waterway out of the cavernous facility into the open sea. Chapters: 0:00:00 - 0:02:15 - Drone Reconnaissance and Target Marking 0:02:15 - 0:05:45 - Stealth Infiltration and Initial Takedowns 0:05:45 - 0:08:45 - Clearing the Barracks and Interior Hallways 0:08:45 - 0:11:30 - Intense Hallway Firefight and Tactical Combat 0:11:30 - 0:14:30 - Navigating the Industrial Hangar and Catwalks 0:14:30 - 0:17:15 - Securing the Heavy Armory and Torpedo Racks 0:17:15 - 0:18:45 - Sabotaging Walker's Torpedoes 0:18:45 - 0:20:19 - Exfiltration via Bullshark Boat 📖 Interactive written walkthrough with clickable timestamps: https://pixelfungaming.com/videos/ghost-recon-breakpoint-shark-base-walkthrough

Hitman Absolution Contract : The Ghost In The Upper Floor
Agent 47 infiltrates the Terminus Hotel with a focus on absolute stealth. He moves through the lobby and upper floors, carefully observing guard patterns. The mission involves the systematic elimination of security personnel and specific targets using a variety of non-lethal and lethal takedowns. Radios, glass bottles, and vases serve as crucial distractions to lure enemies away from their posts. Once neutralized, bodies are hidden in laundry chutes, storage bins, and closets to maintain the element of surprise. At one point, Agent 47 triggers a fire alarm to create mass confusion, allowing for easier movement through restricted zones. The operation concludes after several high-profile targets are eliminated silently, including one pushed through a high-story window, followed by a clean extraction from the building. Chapters: 0:00:00 - 0:01:30 - Hotel Lobby Infiltration and Observation 0:01:30 - 0:03:30 - Corridor Stealth and First Silent Takedown 0:03:30 - 0:05:30 - Entering Restricted Hotel Suites 0:05:30 - 0:08:00 - Clearing Targets on the Upper Floors 0:08:00 - 0:11:00 - Maneuvering Through Storage and Maintenance Areas 0:11:00 - 0:13:30 - Eliminating Key Targets via Environmental Hazards 0:13:30 - 0:15:23 - Final Target Neutralization and Mission Exit 📖 Interactive written walkthrough with clickable timestamps: https://pixelfungaming.com/videos/hitman-absolution-contract-the-ghost-in-the-upper-floor

Far Cry New Dawn Outpost | The Pantry - Undetected
The mission begins with a tactical scouting of 'The Pantry' outpost using binoculars to identify and tag Highwaymen guards. The character approaches the perimeter stealthily, utilizing high grass and structures for cover. Infiltration starts with a silent melee takedown on a rooftop guard. Precision shots from a suppressed rifle disable the outpost's alarm systems, preventing the arrival of reinforcements. Combat continues in a methodical fashion, alternating between long-range eliminations and close-quarters takedowns. The character moves through the interior of the structures, looting supplies and systematically clearing each room. The mission concludes as the final guard falls, resulting in the successful liberation of the outpost and the acquisition of valuable resources like Ethanol and Carbon Fiber. Chapters: 0:00:00 - 0:00:32 - Outpost Scouting and Enemy Tagging 0:00:32 - 0:01:00 - Rooftop Infiltration and First Takedown 0:01:00 - 0:01:40 - Alarm Sabotage and Long-Range Kills 0:01:40 - 0:02:30 - Ground Level Clearing and Interior Movement 0:02:30 - 0:03:20 - High-Vantage Reconnaissance and Looting 0:03:20 - 0:03:56 - Final Eliminations and Successful Liberation 📖 Interactive written walkthrough with clickable timestamps: https://pixelfungaming.com/videos/far-cry-new-dawn-outpost-the-pantry-undetected

Ghost Recon Breakpoint - How To easily Kill Walker
The mission begins with Nomad preparing gear and rations before infiltrating the high-security facility at Howard Airfield. After a biometric hand scan, a tense dialogue exchange takes place between Nomad and his former ally, Cole D. Walker. The encounter transitions into a tactical boss battle where Nomad must destroy defensive drones shielding Walker while simultaneously managing waves of elite Sentinel soldiers. Once the drones are neutralized, the confrontation reaches its climax. Following the battle, a poignant cutscene depicts Walker's death and his cryptic final words about 'Wonderland'. The narrative then shifts to a significant flashback in Bolivia, detailing the origins of their relationship and the philosophical differences that led to their conflict. Finally, Nomad stands over Walker’s body, reflecting on the man he once knew. Chapters: 0:00:00 - 0:00:54 - Preparation and Facility Entry 0:00:54 - 0:02:07 - Confrontation with Cole D. Walker 0:02:07 - 0:03:36 - Boss Battle: Neutralizing the Drone Shield 0:03:36 - 0:04:45 - The Death of a Brother-in-Arms 0:04:45 - 0:06:57 - Flashback: The Origins of Wonderland 0:06:57 - 0:07:11 - Nomad's Final Reflection 📖 Interactive written walkthrough with clickable timestamps: https://pixelfungaming.com/videos/ghost-recon-breakpoint-how-to-easily-kill-walker

Dead Island 2: Go For The Legs ( Need really Sharp Weapon ) #shorts
The mission begins in a sun-drenched suburban area where a Runner and Walker are neutralized with heavy blunt strikes. Combat shifts to a main road where multiple Shamblers are systematically maimed using a powerful club, demonstrating the detailed impact physics. The action moves to the Brentwood Water Project facility, where the character utilizes a combination of kicks and ground-shaking area-of-effect attacks to manage groups of Walkers. In an indoor bathroom, a seated zombie is finished off before engaging another enemy in the confined space. The final encounter takes place on a bright beach, where the character fights through several runners and zombies in military gear, ending with a brutal execution on the sand. Chapters: 0:00:00 - 0:00:15 - Suburban street combat and road maiming 0:00:15 - 0:00:31 - Industrial facility perimeter fighting and area-of-effect moves 0:00:31 - 0:00:44 - Indoor bathroom executions and close-quarters combat 0:00:44 - 0:01:00 - Beachfront zombie showdown against military variants 📖 Interactive written walkthrough with clickable timestamps: https://pixelfungaming.com/videos/dead-island-2-go-for-the-legs-need-really-sharp-weapon-shorts

The Walking Dead: Destinies | Mission 4 - Life Worth Living Walkthrough
This video features a full gameplay walkthrough of Episode 4, 'Life Worth Living,' from The Walking Dead Destinies. The content begins with a cinematic setup involving Shane and Lori before transitioning into a lengthy scavenging mission where Shane must find food for the group. The gameplay demonstrates core mechanics such as stealth through tall grass, environmental exploration, and combat, including an encounter with an 'Alarm Walker' that attracts nearby enemies. Viewers will see the implementation of distraction items like bottles to navigate past large herds of walkers. Following the mission, the video covers a pivotal story moment: Rick Grimes' return to the survivor camp and his emotional reunion with Lori and Carl. The final segment highlights camp management features, specifically a 'Group Conflict' event between Merle and Dale that Rick must resolve through dialogue choices to maintain camp morale and earn rewards. Chapters: 0:00:00 - 0:00:16 - Episode 4: Life Worth Living Intro Cinematic 0:00:16 - 0:01:20 - Shane Scavenging and Finding the Fire Axe 0:01:20 - 0:01:46 - Combat Encounter with an Alarm Walker 0:01:46 - 0:04:15 - Stealth Foraging and Resource Collection 0:04:15 - 0:06:34 - Navigating a Walker-Infested Camp via Stealth 0:06:34 - 0:07:37 - Mission Completion and Heading Back to Camp 0:07:37 - 0:08:02 - Shane and Lori Radio Dialogue and Loading Transition 0:08:02 - 0:09:15 - Cinematic: Rick Grimes Returns to the Survivor Camp 0:09:15 - 0:10:51 - Camp Exploration and Resolving Group Conflict 📖 Interactive written walkthrough with clickable timestamps: https://pixelfungaming.com/videos/the-walking-dead-destinies-mission-4-life-worth-living-walkthrough

The Walking Dead: Destinies | Mission 3 - Guts Walkthrough
Rick Grimes navigates the walker-infested streets of Atlanta, utilizing a mix of stealth and melee combat to survive. The journey begins with Rick moving through deserted thoroughfares, using his instincts to detect nearby walkers and avoiding large hordes by climbing over cars and buses. He traverses scaffolding and rooftops to bypass blocked paths, picking up essential supplies like first aid kits and distraction items along the way. When caught in the open, Rick engages in brutal combat with a baseball bat, triggering specialized states like 'Wrathful' to overcome multiple foes simultaneously. After a character switch, Glenn Rhee must escape a narrow alleyway, employing agile movements and clever distractions with glass bottles to slip past undead sentries. The two characters eventually converge on a high rooftop where they encounter Merle Dixon. A tense standoff leads to a critical player choice that determines how the group handles Merle's aggression, significantly impacting the narrative path as the mission concludes with a story summary. Chapters: 0:00:00 - 0:03:00 - Rick Grimes begins his stealthy infiltration of downtown Atlanta 0:03:00 - 0:06:00 - Navigating vertical pathways across buses and scaffolding 0:06:00 - 0:09:00 - Infiltration turns into intense melee combat with a baseball bat 0:09:00 - 0:12:00 - Rick reaches the fire truck and triggers a perspective shift 0:12:00 - 0:15:00 - Glenn Rhee escapes the walker-clogged alleys using distractions 0:15:00 - 0:18:00 - Glenn and Rick reunite on a rooftop for a tense survivor encounter 0:18:00 - 0:21:04 - A defining narrative choice involving Merle Dixon concludes the mission 📖 Interactive written walkthrough with clickable timestamps: https://pixelfungaming.com/videos/the-walking-dead-destinies-mission-3-guts-walkthrough

Ghost Recon Breakpoint Brother VS Brother Walkthrough FULL MISSION
The mission "Brother vs Brother" commences at Howard Airfield as the operative approaches a reinforced bunker. After a brief gear check, the operative accesses the facility through a biometric security door. Inside, a cinematic sequence depicts the tense confrontation between Nomad and Cole D. Walker, highlighting their fractured history and conflicting visions of the future. Intense combat follows in the central laboratory, where the operative utilizes a sniper rifle and tactical cover to neutralize defensive drones and elite guards. Following the successful elimination of these threats, a final encounter with a mortally wounded Walker takes place, concluding his path of betrayal. The narrative transitions into a flashback set in Bolivia, providing crucial context regarding the "Wonderland" project and the previous bond between the characters during their time as teammates. Returning to the present, the operative clears the area and collects high-value loot, including the Silver Stake Tactical rifle and the Sharp Thunder revolver. The mission reaches its climax as the operative hacks the main terminal to transmit a virus, resulting in the total destruction of the enemy's strategic submarine assets and securing a major victory for the resistance. Chapters: 00:00:00 - 00:00:55 - Facility approach and security breach 00:00:55 - 00:02:09 - Nomad and Walker confrontation cinematic 00:02:09 - 00:03:36 - High-stakes combat in the laboratory 00:03:36 - 00:04:45 - The death of Cole Walker 00:04:45 - 00:07:11 - Flashback: The origins of Wonderland in Bolivia 00:07:11 - 00:08:28 - Mission completion and loot collection 00:08:28 - 00:09:51 - Hacking the terminal and submarine destruction 📖 Interactive written walkthrough with clickable timestamps: https://pixelfungaming.com/videos/ghost-recon-breakpoint-brother-vs-brother-walkthrough-full-mission

Insurgency: Sandstorm | Crossing Checkpoint Insurgents - Destroy First Cache Quick & Easy #shorts
Tactical maneuvers begin with a sprint through an arid, rocky landscape toward an urban outpost. Precise shots from a scoped rifle neutralize several enemies positioned near a burning wreck and sandbag fortifications. The path leads through narrow streets and past traditional mud-brick houses, where additional hostiles are engaged in close-quarters combat. After ascending a set of stairs to gain a better vantage point, the focus shifts to a large building occupied by enemy forces. Deployment of a shoulder-fired rocket launcher results in a massive explosion, leveling the structure and creating a thick cloud of dust and debris. The push continues through the smoke-filled streets, maintaining constant pressure on the remaining opposition with rapid rifle fire. Chapters: 0:00:00 - 0:00:10 - Infiltration and approach to the village 0:00:10 - 0:00:22 - Long-range engagement with scoped rifle 0:00:22 - 0:00:41 - Urban navigation and street-level firefights 0:00:41 - 0:01:00 - Heavy weapon deployment and structural demolition 📖 Interactive written walkthrough with clickable timestamps: https://pixelfungaming.com/videos/insurgency-sandstorm-crossing-checkpoint-insurgents-destroy-first-cache-quick-easy-shorts
Hitman: Elusive Target #2 The Congressman playthrough
Welcome to a full playthrough of the fourth Elusive Target in Hitman (2016): The Congressman. In this mission, Agent 47 travels to the picturesque town of Sapienza, Italy, to eliminate Anthony L. Troutt, a corrupt US Congressman with a dark past. This video showcases a methodical approach to achieving the coveted Silent Assassin rating. Watch as we navigate the high-security Villa Caruso, avoid detection by dozens of guards, and find the perfect vantage point for a long-distance sniper kill. From the initial briefing to the final escape, this video covers every step of the operation, including key infiltration routes, disguise changes, and the importance of disabling camera systems. If you're looking for a professional stealth guide for this classic elusive target, look no further. Chapters: 0:00:00 - Mission Briefing and Planning 0:02:24 - Agent 47 Arrives in Sapienza 0:04:45 - Navigating the Streets of Sapienza 0:07:30 - Infiltrating the Underground Caves 0:10:00 - Securing a Disguise in the Lab Area 0:12:45 - Moving into the Mansion Interior 0:15:30 - Disabling Security Cameras 0:18:15 - Tracking the Target: Anthony L. Troutt 0:21:00 - Exploring the Upper Floors of the Mansion 0:24:00 - Scoping out the Grounds from the Balcony 0:27:15 - Finding a Suitable Sniper Perch 0:30:45 - Repositioning for the Perfect Angle 0:34:20 - Patiently Waiting for the Target to be Exposed 0:37:00 - Observing the Target's Movements 0:41:30 - Precise Sniper Assassination 0:42:15 - Making a Clean Escape to the Pier 0:42:35 - Mission Summary and Silent Assassin Rating 📖 Interactive written walkthrough with clickable timestamps: https://pixelfungaming.com/videos/hitman-elusive-target-2-the-congressman-playthrough

Assassins Creed Mirage: Assassinate Al Rabisu Walkthrough
The mission starts with Basim arriving at the House of Wisdom to attend the Great Symposium. After an initial conversation, he spends time mingling with scholars and eavesdropping on various groups to gather information about the target, Fazil Fahim. Basim meets with Nehal to examine mysterious diagrams in a workshop before observing Fazil during his controversial lecture. To find a way to get close to the target, Basim uses his eagle, Enkidu, to scout the area, leading him to discover a hidden basement entrance. Through a combination of parkour, stealth takedowns on the rooftops, and theft of a key, Basim infiltrates the underground facility. He adopts a patient's disguise to participate in a bizarre ritual, allowing him to deliver the final strike to Fazil Fahim and conclude the investigation in a post-assassination vision. Chapters: 00:00:00 - 00:01:25 - Basim enters the House of Wisdom and meets with the chief servant 00:01:25 - 00:02:22 - Eavesdropping on conversations regarding the poet Arib 00:02:22 - 00:03:45 - Nehal shows Basim unusual diagrams in a private workshop 00:03:45 - 00:06:40 - Investigating further clues and bribing Kahraman for entrance details 00:06:40 - 00:07:55 - The Great Scholar Fazil Fahim delivers his antediluvian lecture 00:07:55 - 00:09:10 - Scouting with Enkidu and identifying rooftop infiltration points 00:09:10 - 00:10:10 - Stealth combat on the rooftops to acquire the basement key 00:10:10 - 00:10:40 - Entering the basement and donning a patient's robe disguise 00:10:40 - 00:11:11 - Assassinating Fazil during the ritual and the concluding vision 📖 Interactive written walkthrough with clickable timestamps: https://pixelfungaming.com/videos/assassins-creed-mirage-assassinate-al-rabisu-walkthrough

Ghost Recon Breakpoint - Exploring/Clearing Spanish Fortress - STEALTH
The mission involves a stealthy infiltration of the Spanish Fortress on Treasure Island. The character begins by using a reconnaissance drone to tag enemy positions within the ruins from a distance. Moving through dense tropical vegetation, the character uses a suppressed sniper rifle to eliminate guards patrolling the perimeter and courtyard. Upon entering the fortress walls, the character navigates the stone corridors and staircases of the central lighthouse tower, clearing out remaining hostile forces with precise shots. The infiltration concludes with the elimination of guards on the upper balconies and roof, securing the location and collecting valuable gear like Wolf Armor. Chapters: 0:00:00 - 0:00:14 - Approaching the Spanish Fortress 0:00:14 - 0:01:06 - Aerial Reconnaissance with Drone 0:01:06 - 0:01:35 - Infiltration of the Outer Perimeter 0:01:35 - 0:01:41 - Long-Range Sniper Takedowns 0:01:41 - 0:02:22 - Stealthy Approach to the Courtyard 0:02:22 - 0:02:28 - Close Quarters Neutralization 0:02:28 - 0:02:58 - Exploring the Fortress Grounds 0:02:58 - 0:03:08 - Precision Shot on Tower Guard 0:03:08 - 0:03:28 - Breach and Clear of Tower Entrance 0:03:28 - 0:04:06 - Ascending the Lighthouse Stairs 0:04:06 - 0:04:15 - Balcony Guard Elimination 0:04:15 - 0:04:48 - Clearing the Tower's Interior Levels 0:04:48 - 0:04:54 - Final Roof Takedown 0:04:54 - 0:06:55 - Securing Loot and Final Sweep 📖 Interactive written walkthrough with clickable timestamps: https://pixelfungaming.com/videos/ghost-recon-breakpoint-exploring-clearing-spanish-fortress-stealth

RDR2 - Black Belle
Arthur Morgan tracks down the legendary gunslinger Black Belle at her secluded shack deep within the Bayou. The encounter begins with a tense standoff as Black Belle holds Arthur at gunpoint from her porch. Their conversation is quickly interrupted by the arrival of a large contingent of bounty hunters. Black Belle reveals she has rigged the surrounding area with explosives and instructs Arthur to detonate them as the attackers approach. A massive explosion thins the first wave, leading into an intense gunfight. Arthur defends the shack from multiple directions, picking off riders and foot soldiers. The battle escalates when a wagon equipped with a Gatling gun arrives, requiring Arthur to quickly neutralize the gunner before he can suppress their position. After clearing out the final reinforcements, the combat ends, and the two outlaws share a cigarette. Black Belle dismisses the romanticized legends of the Wild West, sharing her perspective on the harsh reality of a life on the run. Arthur captures a photograph of her to document his search for legendary gunslingers. The mission concludes as Black Belle rides off into the swamp, leaving Arthur to loot the remains of the fallen bounty hunters. Chapters: 0:00:00 - 0:01:03 - Standoff and Introduction to Black Belle 0:01:03 - 0:01:31 - Bounty Hunters Surround the Shack 0:01:31 - 0:02:08 - Explosive Detonation and Initial Gunfight 0:02:08 - 0:03:01 - Taking Down the Gatling Gun Wagon 0:03:01 - 0:04:14 - Post-Battle Dialogue and Gunslinger Legends 0:04:14 - 0:04:30 - Capturing Black Belle's Photograph 0:04:30 - 0:05:00 - Farewell and Mission Accomplished 📖 Interactive written walkthrough with clickable timestamps: https://pixelfungaming.com/videos/rdr2-black-belle

RDR2 - Let it Snow, Let it Snow, Let It Snow
The session begins at a foggy, snow-covered campsite in the Grizzlies. The character navigates through the slushy grounds toward their personal tent to access the wardrobe. Within the customization menu, the character browses various headwear options before selecting and equipping a thick Raccoon Hat, well-suited for the freezing temperatures. After finalizing the outfit, the character wanders through the camp, passing by horses and camp equipment. The next stop is the central campfire, where the character serves a bowl of superior quality stew to replenish energy and health cores. Following the meal, the character returns to the wardrobe to experiment with a different look, eventually choosing a clean white Woolen Hat. The gameplay concludes with a brief walk around the perimeter of the camp, observing the atmospheric winter environment and fellow posse members going about their business. Chapters: 0:00:00 - 0:00:19 - Navigating the snowy camp toward the wardrobe 0:00:19 - 0:00:34 - Selecting and equipping the Raccoon Hat 0:00:34 - 0:00:49 - Exploring the winter campsite 0:00:49 - 0:01:06 - Replenishing cores with a bowl of stew 0:01:06 - 0:01:25 - Swapping headwear for a white Woolen Hat 0:01:25 - 0:01:42 - Final walkthrough of the camp environment 📖 Interactive written walkthrough with clickable timestamps: https://pixelfungaming.com/videos/rdr2-let-it-snow-let-it-snow-let-it-snow

Assassins Creed Mirage: Secrets Spoken And Unspoken | Kill The King Of Thieves Walkthrough
The video provides a comprehensive walkthrough of the 'Secrets, Spoken and Unspoken' quest in Assassin's Creed Mirage. Viewers will see Basim assist Murjana after her father's death, dealing with the legendary Forty Thieves. The content covers urban stealth tactics as Basim marks houses to confuse enemies, an ambush sequence, and the eventual infiltration of a hidden desert hideout. The video concludes with a stealthy navigation through a treasure-filled cave, the defeat of the King of Thieves, and a final resolution between the characters. Chapters: 0:00:00 - 0:02:03 - Initial Meeting and Character Interaction 0:02:03 - 0:04:30 - Marking the Houses and Strategic Preparation 0:04:30 - 0:07:34 - Ambushing Thieves and Urban Combat 0:07:34 - 0:09:56 - Defending the Estate and Learning the Secret Watchword 0:09:56 - 0:13:38 - Locating the Desert Hideout and Outer Stealth 0:13:38 - 0:18:18 - Infiltrating the Treasure Cave and Defeating the King of Thieves 0:18:18 - 0:20:25 - Final Resolution and Quest Conclusion 📖 Interactive written walkthrough with clickable timestamps: https://pixelfungaming.com/videos/assassins-creed-mirage-secrets-spoken-and-unspoken-kill-the-king-of-thieves-walkthrough

Dead Island 2: SOLA DLC | Sound Of Violence CO-OP Walkthrough
This video features a complete walkthrough and cinematic presentation of the 'The Sound of Violence' mission from the Dead Island 2 SoLA DLC. It begins with a tense confrontation with Cadenza, which leads into a visually striking cutscene where the characters are pulled into a surreal musical landscape. The core of the video is a high-stakes final boss battle against 'The Dirge,' a monstrous transformation of the DJ. Viewers will see detailed gameplay showcasing various weapons, elemental effects, and strategic positioning required to survive waves of zombies while overloading massive speakers to weaken the boss. The video concludes with the final defeat of The Dirge, a post-battle debriefing between the surviving characters, and the successful completion of the story quest, including reward summaries. Chapters: 0:00:00 - 0:02:30 - Opening cutscene and confrontation with Cadenza 0:02:30 - 0:05:15 - The Dirge boss fight: Phase one and speaker overload mechanics 0:05:15 - 0:08:00 - Mid-battle combat against elite zombie variations 0:08:00 - 0:10:35 - Final phase of 'Defeat the Beat' and boss takedown 0:10:35 - 0:12:15 - Post-battle dialogue and fallout with Cadenza 0:12:15 - 0:14:07 - Final meeting with Grace and mission completion rewards 📖 Interactive written walkthrough with clickable timestamps: https://pixelfungaming.com/videos/dead-island-2-sola-dlc-sound-of-violence-co-op-walkthrough

Ghost Recon: Breakpoint - Part 3
The mission begins with Nomad navigating the treacherous, snowy peaks of Silent Mountain on the archipelago of Auroa. After testing various survival items like bandages and syringes, Nomad traverses long-stretching train tracks that cut through the mountain range. Along the way, he stops to customize his appearance, opting for a new goatee before continuing his trek. He reaches a high-tech facility known as the Battery Farm, where he employs stealth tactics to eliminate guards and secure a helicopter from the landing pad. A long aerial journey follows, showcasing the diverse biomes of Auroa as he flies toward the hidden resistance hub of Erewhon. Upon landing in the dense jungle, Nomad navigates a concealed entrance leading into a massive cavern. Inside, he meets with the rebel leader, Mads Schulz, and other survivors to discuss the military takeover by Sentinel and the elite 'Wolves' unit. Nomad then visits his wounded teammate, Holt, in the infirmary to plan their next move. The mission concludes with Nomad receiving rewards and spending time fine-tuning his tactical gear and accessories. Chapters: 0:00:00 - 0:00:35 - Loading screen and tactical gameplay tips 0:00:35 - 0:02:32 - Exploration of Silent Mountain and survival item testing 0:02:32 - 0:05:35 - Traversing the mountain train bridge and appearance customization 0:05:35 - 0:06:13 - Infiltration of the Battery Farm and securing a helicopter 0:06:13 - 0:08:08 - Helicopter flight across the Auroa wilderness 0:08:08 - 0:11:40 - Jungle trek to the hidden entrance of Erewhon 0:11:40 - 0:14:34 - Meeting Mads Schulz and survivors in the rebel base 0:14:34 - 0:17:07 - Interaction with Holt in the infirmary and mission completion 0:17:07 - 0:20:13 - Detailed character customization and gear management 📖 Interactive written walkthrough with clickable timestamps: https://pixelfungaming.com/videos/ghost-recon-breakpoint-part-3

Sherlock holmes : Crimes and Punishments - Blood bath -Part 5
This gameplay video of 'Sherlock Holmes: Crimes & Punishments' follows the renowned detective and his companion, Dr. Watson, as they delve into the 'Blood Bath' case. The investigation begins at the Strand Lane Roman Baths, a site of a recent gruesome murder. Players will see Sherlock meticulously search the crime scene, uncovering hidden details and collecting crucial evidence like broken glass and a mysterious mold. The video showcases the game's core mechanics, including the use of Sherlock's 'talents' for seeing hidden clues and the 'mind palace' for making complex deductions. Throughout the investigation, Sherlock travels between key locations such as his residence at Baker Street, the forensics lab at Scotland Yard, and an archaeological excavation site at St. Albans. Notable segments include a chemistry-based analysis of the discovered mold to reconstruct a potential murder weapon, a puzzle-solving sequence to piece together broken glass shards, and the development of an old photographic plate that reveals startling connections. The detective work leads to the interrogation of several suspects, each with their own motives and secrets related to the ancient Cult of Mithras. The video provides a comprehensive look at the deep narrative and challenging puzzles that define this acclaimed detective game, as Sherlock seeks to uncover whether the murder was a simple act of violence or something far more sinister involving ancient curses and hidden treasures. Chapters: 0:00:00 - Investigation at Strand Lane Baths begins 0:02:45 - Searching for clues in the pool area 0:05:15 - Exploring the office of Sir Rodney Bentcliffe 0:07:30 - Reviewing evidence and task log 0:10:20 - Carriage ride to the next location 0:12:45 - Forensic analysis at the Baker Street lab 0:15:10 - Reconstructing the ritual knife mold 0:17:40 - Solving the broken glass shard puzzle 0:20:15 - Developing the photographic plate 0:22:50 - Formulating deductions in the mind palace 0:25:30 - Experimenting with the ice knife theory 0:27:55 - Casting a silver weapon replica 0:30:15 - Interrogating suspect Percival Blinkhorn 0:32:40 - Interrogating suspect Tristram Garrow 0:35:10 - Arrival at the St. Albans excavation site 📖 Interactive written walkthrough with clickable timestamps: https://pixelfungaming.com/videos/sherlock-holmes-crimes-and-punishments-blood-bath-part-5

Ghost Recon Wildlands - Kill Boston Reed Walkthrough
Tactical operations unfold during a nighttime mission in a vast desert salt flat. A military helicopter lands silently, and a specialized squad, including a marksman in a ghillie suit, disembarks to begin their infiltration. Using thermal and night vision optics, the team carefully identifies and marks enemy combatants patrolling an improvised runway. The approach is slow and deliberate, with the marksman taking calculated shots from distance to eliminate guards without alerting the entire base. As the squad moves deeper into the outpost, they utilize synchronized shooting techniques to neutralize multiple targets simultaneously. After securing the perimeter, they reach a central command post where they access a laptop to intercept communications and set a trap for their high-value target. The operation concludes with the team tagging supply caches and preparing for the final phase of their mission. Tactical operations in the Koani salt flats focus on the elimination of Boston Reed, a key cartel smuggler. Initial phases involve high-altitude drone reconnaissance to mark enemy positions across the desolate landscape. Stealthy long-range engagements with a suppressed sniper rifle clear the path toward the landing strip. As the target approaches in a heavily guarded helicopter, precise fire from an assault rifle brings the aircraft down, resulting in the successful neutralization of the objective. The aftermath includes a heated firefight with surviving cartel members and a strategic debriefing regarding the disruption of the regional smuggling network. Chapters: 0:00:00 - Helicopter Insertion and Landing 0:00:22 - Initial Target Identification with Thermal Vision 0:00:48 - Stealthy Approach on Foot Across the Salt Flats 0:01:21 - Long-Range Reconnaissance of the Outpost 0:01:44 - Suppressed Sniper Engagements 0:02:16 - Neutralizing Perimeter Guards 0:02:40 - Infiltrating the Improvised Runway 0:03:18 - Coordinated Sync Shot Execution 0:03:32 - Final Cleanup of the Outpost 0:04:02 - Mission Briefing and Map Review 0:04:35 - Accessing the Smuggler's Laptop 0:04:47 - Tagging Supplies and Preparing for Ambush 0:00:00 - Initial reconnaissance and drone scouting of the salt flat base 0:01:45 - Precision sniping of perimeter guards from long range 0:03:20 - Infiltration of the inner airfield perimeter 0:04:55 - Target arrival: Boston Reed's helicopter enters the area 0:05:50 - Assault on the target aircraft and successful elimination 0:06:30 - Mission completion and radio debrief with Karen Bowman 0:08:15 - Securing the crash site and neutralizing remaining hostiles 0:09:40 - Final area sweep and inspection of the wreckage 📖 Interactive written walkthrough with clickable timestamps: https://pixelfungaming.com/videos/ghost-recon-wildlands-kill-boston-reed-walkthrough

Ghost Recon Wildlands - Capture Marcus Jensen Walkthrough
A team of elite operatives conducts a high-stakes mission in Libertad City to extract a key cartel asset. The operation begins with a low-altitude helicopter approach toward the Witch Market, where the target, a scientist named Marcus Jensen, is believed to be hiding. After a tactical landing, the team maneuvers stealthily through the narrow streets, avoiding patrolling Unidad forces. Upon identifying the target, they move in swiftly to apprehend him. Jensen, claiming American citizenship, attempts to resist but is quickly subdued and escorted back to the extraction vehicle. Under enemy fire, the team successfully loads the prisoner and takes off, engaging in a brief exchange about Jensen's role in the cartel's chemical processing of cocaine. The mission concludes with a safe landing at a remote rebel outpost, followed by a formal interrogation where Jensen is confronted with the legal and moral consequences of his actions. Marcus Jensen is interrogated in a dimly lit room by a special forces operative and a CIA handler. He initially attempts to deflect responsibility for his actions, but his attitude shifts when faced with the threat of execution. After agreeing to cooperate, the scene transitions to an extraction point where the team has captured Jensen. They immediately come under fire from cartel forces, including an attack helicopter, necessitating a tactical response to secure the area and protect the high-value target. Chapters: 0:00:00 - Helicopter insertion into Libertad City 0:00:35 - Reaching the outskirts of the Witch Market 0:01:00 - Stealthy movement through urban terrain 0:01:45 - Identifying and apprehending Marcus Jensen 0:02:15 - Fighting through hostile forces to the landing zone 0:03:00 - Taking off with the high-value target 0:03:30 - Aerial transit and target dialogue 0:04:15 - Landing at the rebel safe house 0:04:45 - Interrogation of the cartel scientist 0:05:00 - Interrogation of Marcus Jensen in a dark cellar 0:05:12 - Bowman orders execution to force cooperation 0:05:25 - Jensen agrees to a deal to provide information 0:05:43 - Transition from interrogation cutscene 0:05:54 - Gameplay resumes with Marcus Jensen captured 0:06:05 - Cartel helicopter engages the team at extraction

RDR2 - A Bright Bouncing Boy Part 1
The mission begins at a park lake in Saint Denis where John Marston encounters Professor Marko Dragic. During a cinematic exchange, Dragic expresses his disdain for his American investors before enlisting Marston to help demonstrate his latest invention: a remote-controlled miniature submarine. The professor leads Marston to a control station on the dock as a group of wealthy potential backers approaches. Gameplay involves navigating the small vessel across the water using radio wave controls. The first task requires Marston to sink stationary model battleships while carefully steering around magnetic sea mines. Dragic provides a running commentary, praising his own genius and the future of wireless technology. After successfully destroying the first set of targets, Marston returns the boat to the dock for a reload. The second phase of the trial increases the difficulty as Marston must now target moving sailboats while continuing to avoid the explosive mines. Once the demonstration concludes, the investors remain skeptical about the cost but intrigued by the immortality Dragic promises. Dragic invites Marston to visit his laboratory at Doverhill for more advanced experiments. After the mission concludes, Marston rides through the busy streets of Saint Denis, eventually encountering a suffragette advocating for women's voting rights outside a public building. A brief conversation about social progress follows before the session ends. Chapters: 0:00:00 - 0:01:40 - Meeting Professor Marko Dragic at the Lake 0:01:40 - 0:03:00 - Presenting the Invention to Potential Investors 0:03:00 - 0:04:40 - First Boat Trial: Destroying Stationary Battleships 0:04:40 - 0:06:10 - Second Boat Trial: Sinking Moving Sailboats 0:06:10 - 0:08:50 - Mission Completion and Navigating Saint Denis 0:08:50 - 0:10:13 - Encountering a Suffragette in the City Center 📖 Interactive written walkthrough with clickable timestamps: https://pixelfungaming.com/videos/rdr2-a-bright-bouncing-boy-part-1

Ghost Recon: Breakpoint Live Gameplay
The mission begins with a harrowing helicopter crash on the island of Auroa, leaving the protagonist, Nomad, wounded and isolated. Survival depends on immediate self-first aid using field dressings to patch up severe leg injuries. Navigation through the dense, swampy forest requires constant awareness of the surroundings to avoid detection by hostile patrols. Initial objectives focus on investigating various crash sites to find fellow Ghosts while scavenging for essential medical supplies, ammo, and gear in abandoned industrial buildings. Combat encounters at the Airship Air Station demonstrate the necessity of stealth, utilizing silenced handguns to neutralize sentries before they can raise an alarm. Scavenged crates provide character progression through new weapons like the Tavor assault rifle and improved tactical vests. A high-stakes cinematic sequence features a reunion with a teammate that quickly turns into a deadly ambush by a technologically superior unit known as the Wolves. The operation continues with high-speed vehicle traversal across the island's road networks, leading to a long-distance scouting mission at the Ancient Ruins before pushing deeper into the wilderness toward Twin Falls Mountain. The mission begins at an ancient ruins site where a chest is looted for skull credits before the character treks through dense jungle terrain to gather natural resources. Movement through the forest leads to a hidden cave entrance housing a multi-level structure where essential intel is recovered, providing access to the MP7 submachine gun blueprint. Exploration within the cave reveals several gear chests containing tactical apparel like specialized combat pants. Transitioning to vehicular transport, a buggy is used to navigate the steep, wooded hillsides and rocky paths across the island. Tactical infiltration of an ancient sacred site follows, involving the elimination of Sentinel enemies and the discovery of a new bivouac location. Character progression is managed through the skills menu, unlocking specialized abilities for the Ghost operative. Off-road driving continues through the Lake Mary region, testing vehicle handling against rugged terrain and river crossings. The journey concludes at the hidden cave sanctuary of Erewhon, where a meeting with a group of survivors triggers a briefing on the current situation and base of operations. Chapters: 0:00:00 - Character creation and customization 0:00:25 - Cinematic introduction and helicopter crash sequence 0:02:26 - Initial survival and field healing in the forest 0:03:50 - Infiltrating the Airship Air Station outskirts 0:04:10 - Stealth handgun combat and resource scavenging 0:06:45 - Eliminating hostile patrols at the station 0:07:35 - Searching industrial warehouses for tactical gear 0:11:50 - Navigating swamp terrain toward a secondary crash site 0:13:00 - Managing inventory and weapon loadouts 0:14:45 - Encountering Weaver and the Wolf ambush 0:16:10 - Scouting enemy positions from a cliffside vantage 0:17:05 - Off-road vehicle traversal across Auroa 0:18:00 - Reaching the Ancient Ruins objective 0:19:15 - Driving the buggy toward Twin Falls Mountain 00:00:00 - Exploring Ancient Ruins and looting supplies 00:02:30 - Navigating the dense forest terrain on foot 00:05:15 - Entering the hidden cave and gathering MP7 intel 00:09:45 - Looting equipment and exploring cave structures 00:12:50 - Off-road buggy driving through the jungle 00:16:30 - Tactical combat at the ancient sacred site 00:18:45 - Managing character skills and leveling up 00:21:40 - Off-road truck navigation and map exploration 00:25:15 - Crossing bridges and exploring the lakeside 00:29:30 - Reaching the Erewhon hideout and meeting survivors 📖 Interactive written walkthrough with clickable timestamps: https://pixelfungaming.com/videos/ghost-recon-breakpoint-live-gameplay

Assassins Creed Mirage: Abbasid Knight Dagger Location
Basim begins his infiltration of the Great Garrison by scaling the outer walls and navigating across rooftops in Karkh. He performs a swift stealth assassination on a patrolling guard before using Eagle Vision to identify further threats and mission opportunities. The gameplay involves precise parkour across horizontal poles and narrow ledges to bypass heavily guarded areas and reach higher vantage points. After sneaking into the upper levels of the structure, Basim neutralizes sentries blocking his path to the inner chambers. He encounters an environmental puzzle requiring him to strategically move heavy storage shelves to clear a path through a barricaded room. This maneuver allows him to reach a secure chamber containing a gear chest. Upon opening the chest, Basim acquires the Abbasid Knight Dagger, completing this objective of the raid. The footage concludes with an overview of the world map, highlighting the Great Garrison's location within the city. Chapters: 0:00:00 - 0:00:45 - Initial infiltration and perimeter stealth 0:00:45 - 0:01:30 - Navigating exterior scaffolding and guard patrols 0:01:30 - 0:02:15 - Entering the upper levels and neutralizing sentries 0:02:15 - 0:02:40 - Solving the shelf puzzle and looting the dagger 0:02:40 - 0:03:08 - Gear acquisition and map location overview 📖 Interactive written walkthrough with clickable timestamps: https://pixelfungaming.com/videos/assassins-creed-mirage-abbasid-knight-dagger-location

Assassin's Creed Mirage: Follow The Fiery Trail Walkthrough
The mission 'Follow the Fiery Trail' starts in the House of Wisdom. The protagonist uses Eagle Vision to identify guards and navigate the library halls stealthily. A discovery of a murdered Caretaker of Books provides a lead to a place called the Scriptorium. Navigating the rooftops of Baghdad involves extensive parkour and climbing. At the Scriptorium, a series of assassinations and direct combat encounters occur as the protagonist searches for a captured translator. After rescuing Hunayn and learning of a mysterious script, the investigation moves to the quarters of the scholar Zahra. Infiltration of the Scholar's Estate requires careful movement through flower beds and onto balconies. Inside, a hidden room reveals letters connecting Zahra to the Order of the Ancients and their 'Great Work'. The mission wraps up at the Hidden Ones' bureau, where a final briefing with the Rafiq Tabid identifies the target Fazil Fahim as the mastermind behind the Order's activities in the city. Chapters: 0:00:00 - 0:02:22 - Stealthily navigating the House of Wisdom 0:02:22 - 0:03:30 - Finding the dead Caretaker and receiving leads 0:03:30 - 0:05:05 - Rooftop traversal and parkour through Baghdad 0:05:05 - 0:06:20 - Infiltrating the Scriptorium and locating guards 0:06:20 - 0:07:22 - Rescuing the translator Hunayn 0:07:22 - 0:09:33 - Combat encounters and continued investigation 0:09:33 - 0:10:59 - Searching the translator's quarters for clues 0:10:59 - 0:12:48 - Infiltrating the Scholar's Estate 0:12:48 - 0:14:31 - Uncovering the secret room and Order letters 0:14:31 - 0:15:45 - Navigating the city back to the bureau 0:15:45 - 0:17:39 - Observing Zahra and concluding the investigation 0:17:39 - 0:18:21 - Returning to the Rafiq at the bureau 0:18:21 - 0:21:03 - Final mission briefing and target identification 📖 Interactive written walkthrough with clickable timestamps: https://pixelfungaming.com/videos/assassin-s-creed-mirage-follow-the-fiery-trail-walkthrough

Red Dead Online - Ambarino RAT Locations
The mission begins with a character arriving at a remote stone hut in the Grizzlies East region of Red Dead Online during the early morning hours. The primary objective involves tracking and collecting three rats to satisfy a daily challenge. Armed with a bow and small game arrows, the character immediately identifies several rats scurrying near the cabin's exterior. Using the Eagle Eye ability, the character tracks the rodents through the dense tall grass and wildflowers surrounding the structure. Precise shots with the bow ensure the carcasses remain in good condition for collection. After successfully hunting and picking up three rats, a notification confirms the completion of the daily challenge. The character briefly explores the interior of the hut, which contains a few basic supplies, before returning to their horse. The final sequence provides a detailed look at the world map, pinpointing the exact location of this hunting spot near O'Creagh's Run to assist others in finding it. Chapters: 0:00:00 - 0:00:10 - Arrival at the stone hut and dismounting 0:00:10 - 0:00:58 - Tracking and hunting rats in the tall grass using Eagle Eye 0:00:58 - 0:01:32 - Locating and picking up the final rats to complete the daily challenge 0:01:32 - 0:01:50 - Checking the hut interior and returning to the horse 0:01:50 - 0:02:30 - Showing the specific location on the world map near O'Creagh's Run 📖 Interactive written walkthrough with clickable timestamps: https://pixelfungaming.com/videos/red-dead-online-ambarino-rat-locations
RDR2 - Bounty Mission - Joaquin Arroyo
The mission begins in Tumbleweed as the character enters the local jail to secure a new bounty contract. After inspecting the poster for Joaquin Arroyo and discussing the terms with Sheriff Freeman, a long ride across the arid desert landscape of New Austin follows. Upon reaching Solomon's Folly, scouting with binoculars reveals a group of Del Lobos gang members holding a captive. A stealthy approach quickly escalates into a fierce shootout among the ruins. Interrogating a survivor reveals that Joaquin is currently near the railroad tracks planning a train robbery. The pursuit shifts to the tracks where Arroyo is spotted with his associates. A high-speed chase on horseback ends with the target being lassoed and hogtied. The long journey back to Tumbleweed is filled with hostile exchanges between the character and the captive. Back at the jail, Arroyo is delivered into a cell, and the $60 reward is collected from the Sheriff's desk, completing the contract. Chapters: 0:00:00 - 0:01:28 - Accepting the Joaquin Arroyo Bounty Contract 0:01:28 - 0:02:22 - Briefing with Sheriff Freeman at Tumbleweed Jail 0:02:22 - 0:04:10 - Riding Through the New Austin Desert 0:04:10 - 0:05:30 - Scouting the Del Lobos Hideout at Solomon's Folly 0:05:30 - 0:06:40 - Shootout and Interrogation for Target Intel 0:06:40 - 0:07:38 - Tracking the Gang to the Railroad Tracks 0:07:38 - 0:08:35 - Engaging the Outlaws and Capturing the Target 0:08:35 - 0:10:40 - Transporting Joaquin Arroyo Back to Tumbleweed 0:10:40 - 0:11:43 - Jailing the Bounty and Collecting the Reward 📖 Interactive written walkthrough with clickable timestamps: https://pixelfungaming.com/videos/rdr2-bounty-mission-joaquin-arroyo

Assassins Creed Mirage: The Toll Of Greed
Basim begins his mission by approaching the Tax Collector's mansion in Baghdad, quickly transitioning from horseback to a stealthy infiltration. He scales the outer walls and uses high vegetation to silently eliminate patrolling guards. After utilizing his eagle, Enkidu, to scout the area and mark threats, he navigates the rooftops with precision parkour. A direct confrontation ensues as Basim is spotted, forcing him into an intense melee battle against a large contingent of armored guards. He showcases his combat prowess through parries, dodges, and swift counterattacks to clear the courtyard. Upon entering the mansion's private quarters, Basim finds and assassinates his target, Al-Anqa. The mission continues as he searches the room for evidence, discovering letters that point to a larger conspiracy involving the Caliph's Treasurer. The mission concludes with Basim returning to the Hidden Ones' bureau to debrief with Roshan and Rebekah, planning their next move for the upcoming auction. Chapters: 0:00:00 - 0:01:28 - Mansion Infiltration and Stealth Kills 0:01:28 - 0:02:22 - Aerial Scouting and Rooftop Navigation 0:02:22 - 0:03:41 - Open Combat and Mansion Entry 0:03:41 - 0:05:20 - Assassination of Al-Anqa and Investigation 0:05:20 - 0:07:19 - Mission Debrief at the Karkh Bureau 📖 Interactive written walkthrough with clickable timestamps: https://pixelfungaming.com/videos/assassins-creed-mirage-the-toll-of-greed

Titanfall Last Titan Standing - Colony ( Victory )
The match begins on the Colony map in Last Titan Standing mode. An IMC Titan equipped with a Quad Rocket launcher drops into the combat zone. Early engagements focus on medium-range projectile exchanges and utilizing cover within the urban environment. The first round concludes quickly as the team focuses fire to dismantle the opposing Militia Titans. Round two sees increased aggression, with frequent use of the Vortex Shield to catch and return enemy fire. The pilot navigates narrow alleyways to flank targets, securing another team victory. Round three maintains the momentum, showing effective coordination with allied Titans to corner remaining enemies. After a brief halftime transition at 3-0, the final round commences. The team executes a final sweep of the Colony ruins, overwhelming the Militia forces to secure a decisive 4-0 match win. The video concludes with a display of the final scoreboard and player statistics. Chapters: 0:00:00 - 0:01:23 - Initial Drop and Round 1 Victory 0:01:24 - 0:03:14 - Round 2 Flanking Maneuvers and Combat 0:03:15 - 0:05:00 - Round 3 Tactical Coordination and Dominance 0:05:01 - 0:05:18 - Halftime Score Update and Switching Sides 0:05:19 - 0:07:13 - Final Round Sweep and Match Summary 📖 Interactive written walkthrough with clickable timestamps: https://pixelfungaming.com/videos/titanfall-last-titan-standing-colony-victory

Star Wars: Outlaws | Crashed Speeder Quest
This gameplay footage from Star Wars Outlaws showcases exploration and traversal on the moon of Toshara. The demonstration highlights the use of a speeder bike to navigate diverse landscapes, including wetlands and open fields, before transitioning to on-foot exploration within Kashuda Pit. Viewers will see the retrieval of loot from a crashed speeder and the mechanics involved in climbing and grappling to navigate vertical terrain. The video concludes with the resumption of speeder bike travel across the moon's surface. Chapters: 0:00:00 - 0:00:22 - Speeder traversal through Toshara wetlands 0:00:22 - 0:00:52 - Crossing The Grazing Fields toward Southern Falls 0:00:52 - 0:01:10 - Approaching and entering Kashuda Pit 0:01:10 - 0:01:30 - Looting the crashed speeder site 0:01:30 - 0:01:55 - Climbing and grappling out of the ravine 0:01:55 - 0:02:12 - Resuming speeder exploration 📖 Interactive written walkthrough with clickable timestamps: https://pixelfungaming.com/videos/star-wars-outlaws-crashed-speeder-quest

Assassins Creed Mirage: Of Toil And Taxes Walkthrough
Basim arrives at a merchant camp on the outskirts of Baghdad to investigate recent disturbances. After a brief conversation with a distressed merchant, an investigation begins. Using Eagle Vision, Basim tracks a blood trail and footprints to a severed horse head, a grim warning left for the traders. Further exploration of the camp reveals a set of guard instructions, hinting at a larger conspiracy involving extortion. After interviewing several fearful merchants, Basim decides to escort the caravan safely to the city's Karkh Gate. The journey is interrupted by an ambush from hostile soldiers. Combat ensues as Basim defends the merchants with his sword and hidden blade. Following the skirmish, he loots a 'Letter of Execution' from a fallen guard, which points toward an individual known as Al-Anqa. Upon reaching the safety of Baghdad, the lead merchant identifies Al-Anqa as a corrupt Tax Collector. The mission concludes as Basim updates his investigation menu to track the Tax Collector's mansion for his next move. Chapters: 0:00:00 - 0:01:10 - Arrival at the Merchant Camp and Initial Briefing 0:01:10 - 0:02:30 - Investigating the Scene and Gathering Clues 0:02:30 - 0:03:10 - Confronting the Lead Merchant and Planning the Escort 0:03:10 - 0:03:55 - Escorting the Caravan Towards Baghdad 0:03:55 - 0:04:45 - Combat Encounter: Defending the Merchants from Ambush 0:04:45 - 0:06:05 - Recovering Evidence and Continuing the Journey 0:06:05 - 0:07:26 - Arrival at Karkh Gate and Identifying the Tax Collector 📖 Interactive written walkthrough with clickable timestamps: https://pixelfungaming.com/videos/assassins-creed-mirage-of-toil-and-taxes-walkthrough

Red Dead Online - Chanterelle Lemoyne Location
The journey begins under the cover of night as Arthur Morgan guides his horse through a dimly lit forest. Moonlight filters through the trees, illuminating the path as the duo moves at a steady pace. Upon exiting the treeline, the landscape opens up into the vast, grassy fields of Lemoyne. The horse gallops across the terrain, passing quiet farm structures in the distance. A short pause allows for a check of the world map, focusing on the Eris Field area in the Scarlett Meadows region. With the destination set, the ride resumes through the dark, atmospheric countryside. Chapters: 0:00:00 - 0:00:13 - Horseback travel through the moonlit forest 0:00:13 - 0:00:24 - Transitioning into the open fields of Eris Field 0:00:24 - 0:00:35 - Pinpointing Eris Field on the world map 0:00:35 - 0:00:39 - Continuing the nighttime expedition 📖 Interactive written walkthrough with clickable timestamps: https://pixelfungaming.com/videos/red-dead-online-chanterelle-lemoyne-location

War Thunder: Top Ambush Moments (Realistic Ground Battle) #warthunder
This video showcases high-level tank combat in War Thunder across diverse environments, including snowy industrial ruins, arid desert landscapes, and lush tropical jungles. Viewers will observe strategic positioning, effective use of cover, and precise long-range and close-quarters shooting. Throughout the full duration, the content covers various armored vehicles, primarily focusing on Soviet designs like the T-34-85 and T-54, as they engage in objective-based matches, securing kills and capturing control zones while navigating complex terrains and avoiding aerial threats. The gameplay demonstrates advanced tactics such as firing through rubble, using water for flanking, and calling in artillery strikes to disrupt enemy positions. Chapters: 0:00:00 - 0:01:04 - Initial tank skirmishes on snowy and desert maps 0:01:04 - 0:03:30 - Tactical jungle warfare and triple kill streak demonstration 0:03:30 - 0:06:00 - Intense factory engagements and industrial zone combat 0:06:00 - 0:08:30 - Securing control zones and continued industrial map dominance 0:08:30 - 0:10:04 - Amphibious maneuvers and final combat sequence near bridge ruins 📖 Interactive written walkthrough with clickable timestamps: https://pixelfungaming.com/videos/war-thunder-top-ambush-moments-realistic-ground-battle-warthunder

Assassins Creed Mirage: Hidden One Dagger Upgrade Schematic Location/Walkthrough
Basim navigates the coastal outskirts of Anbar in the Wilderness region. The journey begins with agile parkour, as Basim climbs palm trees and swings across ropes to reach a series of large, dried tree branches overlooking the water. He moves carefully across these natural platforms to reach a strategic position facing a stone structure. To gain entry to a locked upper floor, Basim skillfully tosses a throwing knife through a barred window, detonating explosive jars inside that blast open a doorway. He then leaps into the building and scales internal wooden scaffolding to reach an ornate gear chest. Inside, he discovers the Hidden One Dagger Upgrade Schematic. After securing the loot, Basim exits back to the shoreline, and the map opens to provide a precise location for the gear chest near the northern edge of Anbar. Chapters: 0:00:00 - 0:00:15 - Parkour and rope swinging near the coast 0:00:15 - 0:00:35 - Traversing dried tree branches over the water 0:00:35 - 0:00:45 - Using a throwing knife to blow open building access 0:00:45 - 0:00:55 - Entering the building and climbing to the chest 0:00:55 - 0:01:05 - Looting the Hidden One Dagger Upgrade Schematic 0:01:05 - 0:01:17 - Exiting the building and exploring the immediate area 0:01:17 - 0:01:47 - Viewing the map location for the Anbar gear chest 📖 Interactive written walkthrough with clickable timestamps: https://pixelfungaming.com/videos/assassins-creed-mirage-hidden-one-dagger-upgrade-schematic-location-walkthrough

Red Dead Online - Alpine Goat Location
The gameplay takes place at Emerald Ranch in Red Dead Redemption 2. It begins with the character using a bow to hunt Alpine goats within their pens. After taking down two goats with precise shots, the character skins them to collect hides and meat, progressing toward daily challenges. The hides are carefully stowed on the back of the horse. The character then targets a large ox nearby, killing it and harvesting a perfect ox hide. While attempting to leap over a ranch fence on horseback, the character experiences a minor collision, causing the hide to fall. After repositioning the horse and retrieving the fallen cargo, the mission concludes with the character riding away into the open plains of the Heartlands and checking the map for the next destination. Chapters: 0:00:00 - 0:00:25 - Hunting and skinning the first Alpine goat 0:00:25 - 0:00:45 - Stowing the hide and locating the next target 0:00:45 - 0:01:05 - Harvesting the second goat to complete a daily challenge 0:01:05 - 0:01:40 - Hunting and skinning a large Ox for a perfect hide 0:01:40 - 0:02:15 - Recovering from a horse collision and repositioning 0:02:15 - 0:02:54 - Final hide stowing and departure from Emerald Ranch 📖 Interactive written walkthrough with clickable timestamps: https://pixelfungaming.com/videos/red-dead-online-alpine-goat-location

Red Dead Redemption 2 Clearing Lemoyne Raider Church Hideout
A night ride across the plains comes to a sudden halt when the horse stumbles over a low wooden fence. The character quickly recovers and scouts a nearby ruined church where a group of raiders has gathered around a campfire. Taking a tactical position behind a large rock, the character uses a scoped rifle to pick off enemies from a distance. As the remaining hostiles retaliate, the character switches to a pistol for more immediate defense, clearing the area with precise shots. Once the threat is neutralized, the character moves through the tall grass to loot the fallen enemies before exploring the interior of the burnt-out church. Chapters: 0:00:00 - 0:00:13 - Horse accident during a night ride 0:00:13 - 0:00:45 - Scouting the raider camp from the perimeter 0:00:45 - 0:01:30 - Stealthy repositioning near the church ruins 0:01:30 - 0:01:55 - Long-range engagement with a sniper rifle 0:01:55 - 0:02:23 - Close-range shootout to finish the fight 0:02:23 - 0:03:15 - Looting enemies and exploring the abandoned church 📖 Interactive written walkthrough with clickable timestamps: https://pixelfungaming.com/videos/red-dead-redemption-2-clearing-lemoyne-raider-church-hideout

RDR2 - Poisoning Moonshine (STEALTH) Dewberry Creek
The gameplay begins with the character riding a horse toward the mission objective at Dewberry Creek, which involves sabotaging a rival moonshine still. The character quickly dismounts and approaches the enemy encampment using extreme stealth, crouching through tall grass and bushes to avoid detection. The player equips a bow for quiet takedowns. Observing the area, the character locates a guard and eliminates him with a stealthy arrow shot. Continuing the clandestine infiltration, the character moves past old wagons and barrels, approaching a dilapidated wooden structure housing the still. A second guard is positioned near the still, and the character executes a close-range takedown using a hunting knife, earning an execution bonus. The character then interacts with the still, successfully poisoning the moonshine mash. With the sabotage complete, the objective switches to escaping the area. The character quickly flees the immediate vicinity and rides away on horseback through the misty woods, receiving confirmation that the rival still was sabotaged and mash ingredients cost is reduced, marking the mission as passed. Chapters: 0:00 - 0:03 - Arriving at Dewberry Creek and Dismounting 0:03 - 1:53 - Stealth Approach to the Moonshine Camp 1:53 - 1:56 - First Stealth Takedown with the Bow 1:56 - 3:15 - Infiltrating the Still and Second Stealth Kill 3:15 - 3:48 - Poisoning the Moonshine Still and Escape 3:48 - 4:11 - Mission Passed and Exiting the Area 📖 Interactive written walkthrough with clickable timestamps: https://pixelfungaming.com/videos/rdr2-poisoning-moonshine-stealth-dewberry-creek

Titanfall Last Titan Standing - Airbase ( Victory )
The match begins with a brief look at the pilot loadout before dropping into a Titan on the Airbase map for a game of Last Titan Standing. The primary focus is on an Atlas-class Titan equipped with Quad Rockets featuring the Rapid Fire mod. In the opening round, aggressive positioning and consistent rocket fire quickly dismantle the opposing team's Titans, leading to a swift round win. The second round showcases effective defensive play, utilizing the Vortex Shield to catch and redirect incoming ordnance while maintaining offensive pressure with the Quad Rockets. During the third round, combat becomes significantly more chaotic as multiple Titans clash in the central hangar. Despite heavy damage leading to a Titan ejection, the team manages to secure another victory. Following a brief halftime and side swap, the final round involves a desperate close-quarters struggle. Although the Titan is eventually destroyed, a successful rodeo attack on an enemy Titan contributes to the final team victory, resulting in a 4-0 clean sweep. The gameplay concludes with the final match scoreboard displaying top performance metrics. Chapters: 0:00:00 - 0:00:15 - Match Start and Loadout Selection 0:00:15 - 0:01:32 - Round 1: Securing the Initial Lead 0:01:32 - 0:02:49 - Round 2: Mastering the Quad Rockets 0:02:49 - 0:04:05 - Round 3: High-Stakes Combat and Ejection 0:04:05 - 0:04:13 - Halftime and Side Switching 0:04:13 - 0:06:21 - Round 4: Final Push and Match Victory 📖 Interactive written walkthrough with clickable timestamps: https://pixelfungaming.com/videos/titanfall-last-titan-standing-airbase-victory

RDR2 - California Condor (New Austin) Location
The character gallops across the rugged terrain of New Austin on horseback. A Californian Condor circles above, and a precise shot brings the bird down. After riding to the crash site, the character dismounts to pluck the bird, fulfilling a daily challenge requirement. The journey continues as the character mounts back up and checks the map, revealing a location near Tumbleweed and the San Luis River. The session concludes with a short ride through the desert landscape. Chapters: 0:00:00 - 0:00:12 - Hunting the Californian Condor from horseback 0:00:12 - 0:00:32 - Retrieving the bird and completing daily challenges 0:00:32 - 0:00:40 - Mounting the horse and riding forward 0:00:40 - 0:01:04 - Reviewing the world map for positioning 📖 Interactive written walkthrough with clickable timestamps: https://pixelfungaming.com/videos/rdr2-california-condor-new-austin-location

Red Crimes - Red Blood - Part 1
The investigation begins with a briefing from Detective Red about the murder of the District Chief. Exploration moves to the primary crime scene, where a hidden object search uncovers key evidence, including wads of cash and the victim's body. Following the initial sweep, administrative tasks lead to the enrollment of a new lead investigator and a strategic meeting with Mayor Charles Sharp. The focus then shifts to the morgue, where an intensive autopsy is performed. This process involves cleaning the body, documenting wounds, and surgically extracting bullet fragments. Laboratory analysis follows, featuring a minigame to reconstruct the shattered bullet and identify the caliber. After recruiting additional specialists to the team, the investigation returns to the crime scene for a targeted search for the murder weapon. A revolver is discovered, leading to a sophisticated forensic scan using UV light to identify blood spatter and file-off serial numbers. The session concludes with evidence processing and personnel management at headquarters. Chapters: 0:00:00 - 0:02:10 - Initial Crime Scene Search 0:02:10 - 0:04:15 - Agent Enrollment and Mayoral Briefing 0:04:15 - 0:06:10 - Victim Profile and Autopsy Preparation 0:06:10 - 0:07:30 - Forensic Autopsy and Evidence Collection 0:07:30 - 0:09:15 - Police Chief Confrontation and Case Board Review 0:09:15 - 0:11:35 - Lab Analysis and Team Recruitment 0:11:35 - 0:14:15 - Weapon Recovery and UV Forensic Scan 0:14:15 - 0:16:14 - Evidence Processing and Team Upgrades 📖 Interactive written walkthrough with clickable timestamps: https://pixelfungaming.com/videos/red-crimes-red-blood-part-1

Goat Simulator : How to Reset Achievements
A loading screen introduces the core controls for maneuvering a goat, including licking, jumping, and ragdoll physics. Navigation through the main menu leads to the options screen, where field of view, resolution, and audio levels are adjusted. Advanced settings allow for fine-tuning of shadows, motion blur, and physics quality. After a save reset and a brief loading period, the goat spawns in a residential neighborhood. A tutorial objective appears, requiring a jump over an obstacle. The goat successfully leaps over a white picket fence, completing the first challenge with its tongue lolling out. Chapters: 0:00:00 - 0:00:03 - Initial loading screen and title display 0:00:03 - 0:00:09 - Main menu navigation and news feed overview 0:00:09 - 0:00:15 - Adjusting basic game settings in the options menu 0:00:15 - 0:00:22 - Exploring advanced graphical and performance options 0:00:22 - 0:00:32 - Resetting saved progress and subsequent loading period 0:00:32 - 0:00:37 - Returning to the title screen and main menu 0:00:37 - 0:00:40 - Entering Goatville and completing the jumping tutorial 📖 Interactive written walkthrough with clickable timestamps: https://pixelfungaming.com/videos/goat-simulator-how-to-reset-achievements

Red Dead Online - Ox Location
A hunter tracks wildlife through the fields near Emerald Ranch in Red Dead Online. The activity begins with the character spotting and shooting an Eastern Wild Turkey from horseback using a rifle. The focus then shifts to a nearby farmstead where the character lassos an Angus Ox, brings it to the ground, and performs a clean kill with a hunting knife. After skinning the ox in a cornfield and stowing the hide on the horse's back, the character retrieves and skins several turkeys previously downed in the brush. The session includes a brief check of the world map, confirming the location within the Heartland Overflow region, before the character continues their journey across the open landscape. Chapters: 00:00:00 - 00:00:08 - Hunting wild turkey from horseback 00:00:08 - 00:00:23 - Lassoing and harvesting an Angus Ox 00:00:23 - 00:00:46 - Skinning the ox and stowing the hide 00:00:46 - 00:01:09 - Retrieving and skinning turkeys 00:01:09 - 00:01:26 - Map location overview in Heartland Overflow 00:01:26 - 00:01:35 - Departing the farm area 📖 Interactive written walkthrough with clickable timestamps: https://pixelfungaming.com/videos/red-dead-online-ox-location

Elusive Target #15 Explosion death
The mission unfolds in Marrakesh, where Agent 47 tracks down the elusive target known as the Angel of Death, Etta Davis. Disguised as a waiter, 47 initially blends in at a busy courtyard bar to observe his surroundings. He quickly moves into a restricted staff area, using instinct to locate the target behind a nearby door. After planting a Remote CX Demo Block, he triggers the explosion, successfully eliminating Etta Davis. The blast alerts nearby guards, forcing 47 to make a swift escape through the densely populated marketplace. He navigates through narrow alleys and avoids detection, reaching the extraction point just as local forces begin their search. The mission concludes with a successful extraction, revealing a mastery level increase and the unlocking of the Summer Suit with Gloves. Chapters: 0:00:00 - 0:00:30 - Blending in as a waiter in the courtyard 0:00:30 - 0:00:43 - Infiltrating the staff area and preparing the explosive 0:00:43 - 0:00:50 - Assassination of Etta Davis via remote explosion 0:00:50 - 0:01:08 - Escaping through the crowded Marrakesh market 0:01:08 - 0:01:27 - Mission extraction and reward screens 0:01:27 - 0:03:31 - Post-mission statistics and menu navigation 📖 Interactive written walkthrough with clickable timestamps: https://pixelfungaming.com/videos/elusive-target-15-explosion-death

Assassins Creed Mirage: Assassinate Admiral Nadir And General Jasoor Walkthrough
The mission begins with Basim arriving at Sharqiyah Harbor to investigate leads on Admiral Nadir. After navigating rooftops and collecting supplies, he engages in direct combat with harbor guards, utilizing parries and precise strikes. The investigation leads him underwater and into various structures where he recovers diagrams and clues about a prototype ship. Basim then travels by camel to the Admiral's southern camp, initiating a stealthy infiltration. He systematically eliminates guards using tall grass for cover and his eagle, Enkidu, for reconnaissance. To lure the Admiral out, Basim sabotages a prototype ship by igniting oil jars, creating a massive distraction. Following the successful assassination of Admiral Nadir, the objective shifts to Qasr Salih to eliminate General Jasoor. Basim carefully infiltrates the heavily guarded palace, taking out marksmen and obtaining a key to the General's private quarters. After assassinating General Jasoor, Basim returns to the Hidden Ones' bureau in Sharqiyah to report his findings to Fuladh and Ali, uncovering the identity of the next high-ranking target, Warlord Wasif al-Turki. Chapters: 0:00:00 - 0:01:30 - Harbor Arrival and Combat Encounter 0:01:30 - 0:03:00 - Gathering Harbor Intelligence and Clues 0:03:00 - 0:05:50 - Harbor Investigation and Prisoner Release 0:05:50 - 0:08:45 - Travel and Infiltration of the Southern Camp 0:08:45 - 0:11:40 - Stealthy Takedowns and Camp Sabotage Preparation 0:11:40 - 0:13:30 - Destroying the Prototype Ship 0:13:30 - 0:14:28 - Assassination of Admiral Nadir 0:14:28 - 0:18:00 - Infiltration of Qasr Salih 0:18:00 - 0:21:10 - Eliminating General Jasoor 0:21:10 - 0:23:28 - Reporting to the Bureau and Mission Conclusion 📖 Interactive written walkthrough with clickable timestamps: https://pixelfungaming.com/videos/assassins-creed-mirage-assassinate-admiral-nadir-and-general-jasoor-walkthrough
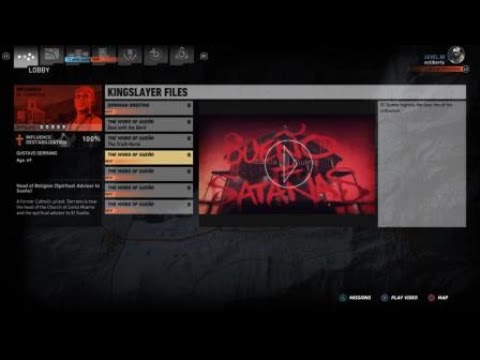
Ghost Recon Wildlands - Capture El Cardenal Walkthrough
This video showcases a full mission walkthrough of the 'El Cardenal' operation in Ghost Recon Wildlands. Viewers will see a strategic nighttime approach to the Holy Malca Base, followed by a stealthy infiltration of a massive church. The gameplay demonstrates advanced tactical maneuvers, including drone reconnaissance to mark cartel members and civilians. After a stealthy climb to the broadcast room, the station is hacked to expose the target's activities. The content then shifts into a high-intensity extraction sequence where the team must protect and transport El Cardenal through waves of hostile forces under heavy fire. The video concludes with a narrative cutscene featuring an interrogation by Bowman and a thematic monologue from the cartel leader, El Sueño, detailing the collapse of his influence. Chapters: 0:00:00 - 0:01:35 - Stealthy nighttime approach to the Holy Malca Base 0:01:35 - 0:02:38 - Drone reconnaissance and marking targets around the church 0:02:38 - 0:03:25 - Infiltrating the church interior and reaching the broadcast room 0:03:25 - 0:04:15 - Hacking the broadcast station and capturing El Cardenal 0:04:15 - 0:07:10 - Chaotic extraction battle while carrying the high-value target 0:07:10 - 0:08:18 - Utilizing mortar fire and squad commands to reach the helicopter 0:08:18 - 0:09:55 - Helicopter extraction and flight from the mission zone 0:09:55 - 0:11:15 - Interrogation cutscene between Bowman and El Cardenal 0:11:15 - 0:11:32 - Mission success summary and final cinematic sequence 📖 Interactive written walkthrough with clickable timestamps: https://pixelfungaming.com/videos/ghost-recon-wildlands-capture-el-cardenal-walkthrough

HITMAN 2: The Bank - Poison Location
Agent 47 navigates the upper levels of the Milton-Fitzpatrick investment bank in New York, tasked with eliminating Athena Savalas and retrieving a vault data core. Disguised in a professional plaid shirt and glasses—an outfit identified by NPCs as 'Mr. Mann'—the protagonist walks with purpose through the bank's executive corridors. He heads directly into a nearby restroom to secure a critical mission item. Once inside, he utilizes a lockpick on a wall-mounted medical cabinet, successfully breaking the lock to retrieve a jar of lethal poison pills. This poison serves as a key tool for a discreet assassination attempt. After pocketing the pills, he exits the restroom and passes a security guard who is discussing a current investigation. Agent 47 then proceeds into a high-security surveillance room filled with monitoring equipment and bank staff, maintaining his cover while moving deeper into the facility's restricted areas. Chapters: 0:00:00 - 0:00:10 - Navigating the bank's executive office floor 0:00:10 - 0:00:26 - Locating and lockpicking the medical cabinet for lethal poison 0:00:26 - 0:00:41 - Passing security and entering the surveillance hub 📖 Interactive written walkthrough with clickable timestamps: https://pixelfungaming.com/videos/hitman-2-the-bank-poison-location

Red Crimes - Hidden Murders - Case 2
The investigation begins with a district map overview where the detective monitors ongoing cases. A kidnapping assignment is quickly handled, followed by the introduction of a high-priority consultant case involving a death at a local motel. Detective Wilson Townsend and pathologist Violet debate the circumstances of victim Dylan Schmidt's death, initially suspected as a suicide. Gameplay shifts to an evidence search within a tool chest where various hidden objects like revolvers, floppy disks, and binoculars are located to advance the case. Following the search, the investigation moves to the morgue for an autopsy. The detective analyzes specific wounds on the body, revealing evidence that contradicts the suicide theory, particularly a deep stab wound in the victim's back. The search for clues continues at the motel crime scene, using specialized scanning equipment and blue lights to uncover hidden fingerprints and bloodstains. Forensic analysis becomes central as the team identifies fingerprints belonging to a suspect named Norman Barry. A fingerprint matching mini-game confirms the identity, leading to further questioning. The session concludes with the detective achieving a higher reputation rank, recruiting new staff members, and assigning personnel to protect sectors within the district. Chapters: 0:00:00 - 0:02:15 - Initial district management and kidnapping assignment 0:02:15 - 0:04:30 - Introduction to the motel homicide case 0:04:30 - 0:07:00 - Technical downtime and game restart 0:07:00 - 0:09:15 - Hidden object evidence search at the scene 0:09:15 - 0:11:45 - Autopsy analysis and character recruitment 0:11:45 - 0:14:15 - Forensic scanning for hidden fingerprints 0:14:15 - 0:16:45 - Fingerprint matching and suspect identification 0:16:45 - 0:18:12 - Case progression and district patrol assignment 📖 Interactive written walkthrough with clickable timestamps: https://pixelfungaming.com/videos/red-crimes-hidden-murders-case-2

HITMAN 2 - New York - Security Guard Disguise Walkthrough
The mission proceeds with Agent 47 navigating the marble corridors of a high-end bank. He enters a public restroom and initiates a distraction by turning on a sink faucet. After waiting for a staff member to investigate and leave, he lures a security guard into the room. Agent 47 performs a silent takedown, eliminates the guard, and assumes his identity by taking his uniform. After concealing the body in a laundry hamper, he exits back into the main bank lobby, now fully disguised and moving undetected past other security personnel. Chapters: 0:00:00 - 0:00:15 - Agent 47 approaches the restroom area in the bank 0:00:15 - 0:00:45 - Restroom distraction and waiting for the target 0:00:45 - 0:01:05 - Silent takedown and elimination of the security guard 0:01:05 - 0:01:15 - Body concealment and disguise acquisition 0:01:15 - 0:01:31 - Infiltration of the main bank lobby in guard disguise 📖 Interactive written walkthrough with clickable timestamps: https://pixelfungaming.com/videos/hitman-2-new-york-security-guard-disguise-walkthrough

HITMAN: Elusive Target | Mr Giggles
The mission begins with a detailed briefing outlining the objectives in Marrakesh: eliminate Philip Giggles, known as 'The Entertainer,' and retrieve a confidential client list. Agent 47 starts his infiltration in the dense night market, navigating through large crowds and armed patrols to reach the target's rooftop meeting. He utilizes environmental objects and disguises to bypass security, eventually reaching a position to observe Giggles meeting with a local businessman. To create a window of opportunity, 47 poisons the businessman’s drink, forcing him into a private restroom. After neutralizing the businessman and securing vital information, 47 shifts his focus to the VIP lounge. He tracks down Giggles' personal assistant, who carries the secondary objective. Using a combination of distractions and silent takedowns, he secures the client list from the assistant. With both objectives complete, Agent 47 avoids detection while navigating to a designated extraction point. The mission concludes with a clean exit and a review of the final performance rating. Chapters: 0:00:00 - 0:00:49 - Mission briefing and target overview 0:00:49 - 0:03:15 - Navigating the Marrakesh market at night 0:03:15 - 0:06:15 - Rooftop infiltration and target observation 0:06:15 - 0:09:05 - Creating a distraction with poison and neutralizing security 0:09:05 - 0:12:15 - Eliminating the contact in the restroom and obtaining keys 0:12:15 - 0:15:05 - Infiltrating the VIP area and tracking the assistant 0:15:05 - 0:17:15 - Securing the client list and reaching the extraction point 0:17:15 - 0:18:16 - Mission completion and score analysis 📖 Interactive written walkthrough with clickable timestamps: https://pixelfungaming.com/videos/hitman-elusive-target-mr-giggles

Assassins Creed Mirage: Tales Of Baghdad | A Life's Work Walkthrough
The mission 'A Life's Work' begins in the Abbasiyah district of Baghdad, where Basim encounters an elderly astronomer named Al-Mahani. The man, struggling with a failing heart, asks Basim to retrieve his three-page treatise on the stars from his study at the House of Wisdom before his rivals can claim it. Basim navigates through the city streets and onto the rooftops, using parkour to reach the destination. To gain entry to the locked room, Basim throws a knife through an open window to break the door's interior bolt. Once inside, he recovers the first page and reads letters revealing Al-Mahani's strained relationship with his son. Upon returning to the meeting point, Basim discovers Al-Mahani has collapsed and died, with his son mourning over the body. The search for the remaining two pages continues across the rooftops, guided by Eagle Vision to find them perched near astronomical equipment. The task concludes with a somber interaction between Basim and the son, where Basim delivers the father's life work and explains the circumstances of his passing. The encounter ends with the completion of the Tale of Baghdad and the acquisition of a skill point. Chapters: 0:00:00 - 0:01:07 - Starting the 'A Life's Work' quest with Al-Mahani 0:01:07 - 0:02:20 - Navigating to the House of Wisdom and unlocking the study 0:02:20 - 0:03:33 - Infiltrating the study and finding the first treatise page 0:03:33 - 0:04:12 - Returning to find Al-Mahani has passed away 0:04:12 - 0:05:29 - Tracking down the second page on the rooftops 0:05:29 - 0:06:14 - Locating the final page of the treatise 0:06:14 - 0:08:15 - Mission resolution with Al-Mahani's son 0:08:15 - 0:08:21 - Quest completion and reward summary 📖 Interactive written walkthrough with clickable timestamps: https://pixelfungaming.com/videos/assassins-creed-mirage-tales-of-baghdad-a-life-s-work-walkthrough

Ghost Recon Wildlands - Save/Capture La Gringa Doctor
This gameplay analysis showcases a complete tactical mission in Ghost Recon Wildlands titled 'La Gringa'. The footage demonstrates a coordinated infiltration of a cartel-held estate via helicopter, followed by a transition into ground combat. Viewers will see the character engage in an intense firefight around a luxury villa, utilizing both small arms and explosive weaponry to neutralize threats. The video concludes with the successful location of the target, an extraction sequence, and an aerial transport to a secondary objective. Chapters: 0:00:00 - 0:00:38 - Aerial Infiltration and Tactical Landing 0:00:38 - 0:01:12 - Initial Ground Engagement at the Villa Pool 0:01:12 - 0:01:43 - Clearing Reinforcements with Explosive Ordinance 0:01:43 - 0:02:08 - Villa Entry and Interior Navigation 0:02:08 - 0:03:08 - Target Interaction and Extraction Briefing 0:03:08 - 0:03:51 - Aerial Extraction and Transport to Rebel Doctor

Ghost Recon Wildlands - Optical Camo While Fighting predator
Ghost squad navigates a dense, atmospheric jungle while investigating the 'The Jungle Moved' mission in the Caimanes region. The investigation takes a deadly turn upon encountering the Predator, an extraterrestrial hunter using advanced cloaking technology and a lethal plasma caster. Combat involves tracking audio cues and shimmering visual distortions to land shots on the elusive enemy. The team utilizes heavy cover and constant squad revives to survive persistent laser-targeted attacks from the trees. Neon green blood marks the trail as the Predator takes significant damage over a sustained engagement. After an intense final exchange, the Predator falls, activating its wrist-mounted self-destruct sequence. This triggers a desperate sprint to safety through the foliage, concluding as a massive explosion levels the combat zone. Chapters: 0:00:00 - 0:01:15 - Investigating the jungle and initial encounter 0:01:15 - 0:03:30 - Engaging the Predator's hit-and-run tactics 0:03:30 - 0:05:45 - Sustained combat and squad coordination 0:05:45 - 0:08:00 - Final stand against the injured Hunter 0:08:00 - 0:09:20 - Defeating the Predator and escaping the explosion 📖 Interactive written walkthrough with clickable timestamps: https://pixelfungaming.com/videos/ghost-recon-wildlands-optical-camo-while-fighting-predator

#AssassinsCreedMirage Hiding bodies HITMAN style #shorts
Basim demonstrates advanced stealth and assassination techniques across the desert outposts and urban streets of Baghdad. The sequence begins with a tactical approach behind crates, leading to a swift leap assassination on an isolated guard. Basim promptly carries the body to a nearby closet to ensure no alarms are raised. In a different scenario, he utilizes dense foliage for concealment and health recovery before transitioning into a more built-up area. He masterfully uses wooden booths and bushes to stalk patrolling enemies, timing his movements perfectly to remain undetected. The gameplay highlights the importance of environmental awareness, concluding with a silent takedown in a narrow corridor before disappearing back into hiding. Chapters: 0:00:00 - 0:00:10 - Stealthy approach and leap assassination in a desert outpost 0:00:10 - 0:00:20 - Disposal of the guard's body in a nearby hiding spot 0:00:20 - 0:00:30 - Quick execution from behind cover followed by health regeneration 0:00:30 - 0:00:45 - Strategic use of environmental hiding spots like closets and foliage 0:00:45 - 0:00:52 - Surprise assassination of a patrolling guard in a narrow alleyway 📖 Interactive written walkthrough with clickable timestamps: https://pixelfungaming.com/videos/assassinscreedmirage-hiding-bodies-hitman-style-shorts

Sniper Elite 3 Siege of Tobruk part 2
The mission "Siege of Tobruk" begins, placing the character in a desert mountain pass. The primary objective is to find a route through the pass. The character navigates through a trench, then encounters and silently eliminates an enemy with a pistol headshot, initiating an optional objective to perform stealth takedowns. Advancing further, the character eliminates another enemy with a silent pistol headshot. The primary objective updates, requiring the destruction of Nebelwerfers or the elimination of their crews. The character utilizes a Welrod pistol for silent close-range headshots against multiple enemies. Using a radial menu, the character selects and throws a grenade, resulting in a triple kill and the destruction of the first Nebelwerfer. As the character moves through the environment, another enemy is silently dispatched with a pistol headshot. After clearing this section, the character collects dynamite. Upon encountering more enemies, a fierce firefight ensues, forcing the character to use a submachine gun, taking significant damage, and ultimately resulting in mission failure. The mission restarts from the last checkpoint. The character resumes with a stealthy approach, eliminating enemies with silent pistol headshots and collecting more dynamite. The character strategically eliminates two Nebelwerfer crew members with silent pistol headshots, destroying the second Nebelwerfer. A tutorial appears, explaining how to mask shots with loud environmental sounds. Using a scoped rifle, the character times shots to coincide with loud noises, systematically taking down multiple Nebelwerfer crew members with precise headshots, destroying a third Nebelwerfer. Continuing through the battleground, the character engages in open combat, eliminating several enemies with a submachine gun and sniper rifle while taking cover. The player is promoted to Private Mark 1, unlocking new weapons and items like the MP 40, Dynamite, and Flint & Steel. The character proceeds to eliminate the remaining Nebelwerfer crew members with a series of accurate headshots, successfully destroying the final Nebelwerfer and completing the primary objective. The mission concludes with a dramatic cutscene featuring an airplane and a tank, followed by mission statistics, rewards, and a return to the campaign menu. Chapters: 0:00 - 0:08 - Mission Loading: Siege of Tobruk 0:08 - 0:28 - Initial Stealth Engagements and Objectives 0:28 - 0:48 - Secondary Stealth Takedown and Hint 0:48 - 1:13 - Enemy Alert Tutorial and Grenade Preparation 1:13 - 1:40 - Grenade Triple Kill and Nebelwerfer Destruction 1:40 - 2:10 - Navigating Terrain and Stealth Takedowns 2:10 - 2:30 - Silent Kill and Dynamite Collection 2:30 - 3:00 - Traversing Fortified Enemy Territory 3:00 - 3:55 - Intense Firefight and Mission Failure 3:55 - 4:29 - Checkpoint Reload and Stealth Advance 4:29 - 5:12 - Nebelwerfer Crew Elimination (2/4 Complete) 5:12 - 6:30 - Masked Sniper Shots and Nebelwerfer Destruction (3/4 Complete) 6:30 - 7:29 - Combat Engagement and Destroying Nebelwerfer 7:29 - 8:54 - Long-Range Sniper Takedowns and Objective Progress 8:54 - 10:10 - Post-Objective Skirmishes and Area Clearance 10:10 - 11:29 - Eliminating Key Targets and Player Promotion 11:29 - 13:33 - Final Nebelwerfer Destruction and Mission Complete 13:33 - 14:23 - Concluding Cutscene and Mission Statistics 14:23 - 15:13 - Post-Game Screen and Campaign Menu 📖 Interactive written walkthrough with clickable timestamps: https://pixelfungaming.com/videos/sniper-elite-3-siege-of-tobruk-part-2

RDR2 - Yarrow (New Hanover) Location
The character begins at night in a grassy field near Citadel Rock with the goal of completing a daily challenge by gathering Yarrow. Using Eagle Eye to highlight nearby flora, the character successfully locates and picks the first few plants. After searching the immediate vicinity, the character mounts a horse and navigates across the dark landscape of the Heartlands toward a specific waypoint. The journey continues through the wilderness until reaching a hilltop where several more Yarrow plants are found. Picking the final required plant completes the daily challenge, awarding the character gold and experience. Chapters: 0:00:00 - 0:01:00 - Initial Yarrow Gathering and Field Exploration 0:01:00 - 0:02:15 - Continued Search and Mounting Horse 0:02:15 - 0:03:30 - Riding Through the Heartlands at Night 0:03:30 - 0:03:54 - Final Yarrow Collection and Challenge Completion 📖 Interactive written walkthrough with clickable timestamps: https://pixelfungaming.com/videos/rdr2-yarrow-new-hanover-location

Assassins Creed Mirage: Free The Rebels Walkthrough
Basim arrives at the Upper Harbor to meet with Beshi, the leader of a rebel group. Their conversation focuses on locating Beshi's captured men and a common target, the mysterious Al-Ghul. After the meeting, a comprehensive scouting phase begins as Basim utilizes his eagle, Enkidu, to survey the heavily guarded harbor. He systematically marks enemy positions, lookouts, and the cages where the prisoners are held. Upon concluding the aerial reconnaissance, Basim enters the restricted area of the docks. The mission transitions into a masterclass in stealth as he navigates rooftops and walks across narrow ropes to avoid detection. He uses throwing knives with precision to eliminate isolated guards and interacts with the environment to create distractions. Basim successfully infiltrates the prisoner holding areas, quietly freeing rebels while maintaining a low profile. When confronted on a larger vessel, he engages in direct combat, expertly parrying incoming attacks and delivering fatal counters. The operation concludes as Basim makes his way back to the docks to regroup with Beshi, receiving a Khidmah Token as a reward and gaining further insight into the hunt for Al-Ghul. Chapters: 0:00:00 - 0:02:15 - Meeting with Beshi and harbor reconnaissance 0:02:15 - 0:04:30 - Strategic aerial scouting of enemy positions 0:04:30 - 0:07:00 - Stealth infiltration and tactical guard removals 0:07:00 - 0:09:31 - Rebel rescue operations and final regrouping 📖 Interactive written walkthrough with clickable timestamps: https://pixelfungaming.com/videos/assassins-creed-mirage-free-the-rebels-walkthrough

Far Cry 5 : Hollan Valley Part 2
This comprehensive gameplay walkthrough of Far Cry 5 takes you through a massive journey in John Seed's region, Holland Valley. Experience high-intensity action as the Deputy works to build the resistance by dismantling cult operations across the map. The video covers numerous key objectives including the liberation of major cult outposts like the Copperhead Rail Yard, Green-Busch Fertilizer Co., and the Gardenview Packing Facility. You'll see tactical approaches to combat, the use of various 'Guns for Hire' specialists like Boomer and Nick Rye, and a variety of 'Prepper Stashes' solved, including the eerie O'Hara's Haunted House and the water-logged Dumpster Diving puzzle. The footage also showcases a range of side activities such as hunting the dangerous 'Judge Moose,' destroying Eden's Gate silos, and engaging in aerial dogfights. Whether you're looking for stealthy takedowns or all-out explosive chaos, this walkthrough provides a full look at the world of Hope County. Chapters: 0:00:00 - In-vehicle travel through Holland Valley 0:05:00 - Scouting a cult-controlled area near the grain elevator 0:10:00 - Initial skirmish with cult members on the roadway 0:15:30 - Discovery and start of the 'Vespiary' Prepper Stash 0:20:00 - Exploration of the grain elevator for supplies 0:25:00 - Strategic movement around cult outposts 0:30:15 - Intense combat encounter at the Fertilizer Store 0:35:00 - Navigating industrial structures for tactical advantage 0:40:00 - Clearing out remaining cultists in the immediate sector 0:45:00 - Climbing radio towers and searching for vantage points 0:50:00 - Looting high-value targets and preparing for the next mission 0:55:00 - Interacting with resistance members for new Intel 1:00:45 - Liberation of a key cult infrastructure point 1:05:00 - Managing the resistance roster and upgrading gear 1:10:00 - Driving engagement against a cult supply convoy 1:15:30 - Arrival at the location for 'The Judge Moose' mission 1:21:00 - Entering the old grain elevator for the Vespiary stash solution 1:26:00 - Navigating the interior of the elevator and dealing with hazards 1:32:00 - Completing the Vespiary Prepper Stash and collecting rewards 1:38:00 - Traveling cross-country to the next objective 1:44:00 - Destroying an Eden's Gate silo to disrupt cult power 1:50:20 - Beginning the assault on the Copperhead Rail Yard 1:55:00 - Sniper support and tactical clearance of the rail yard 2:01:00 - Copperhead Rail Yard Liberated - Victory sequence 2:06:00 - Engaging a cult aircraft in a high-stakes ground-to-air fight 2:12:00 - Rescuing civilians from a roadside execution attempt 2:17:30 - Entering the 'Hope County Clinic' for supplies and notes 2:23:00 - Tracking the Bliss-soaked 'Judge Moose' in the forest 2:28:45 - Final confrontation and hunt of the Judge Moose 2:34:00 - Assaulting a fortified cult roadblock with heavy explosives 2:39:15 - Starting the 'Dumpster Diving' Prepper Stash puzzle 2:41:30 - Solving the water and electricity puzzle for Dumpster Diving 2:43:09 - Final mission completion and exploration of the stashed loot 📖 Interactive written walkthrough with clickable timestamps: https://pixelfungaming.com/videos/far-cry-5-hollan-valley-part-2

Red Dead Online: Capturing Player Bounties Dead Or Alive #6
Action begins in Armadillo as a $9.00 player bounty alert triggers a hunt within the town limits. The target is quickly located, knocked unconscious during a brief struggle, and carried to the sheriff's office for a successful delivery. The mission shifts to the Great Plains for a $5.83 bounty pursuit. A relentless horse chase across the sprawling landscape leads to a tactical sniping position where the target is eliminated with precision marksmanship. The body is then secured and transported over a significant distance to a prison wagon waiting at Manzanita Post. The final pursuit occurs in Valentine, targeting a $5.40 player bounty. After tracking the target to a nearby farm, a gunfight ensues. The character eliminates the target during a high-speed pursuit and delivers the remains to the Valentine sheriff's office to complete the set of successful bounties. Chapters: 0:00:00 - 0:01:45 - Capturing a Player Bounty in Armadillo 0:01:45 - 0:03:15 - Tracking a Target Across the Great Plains 0:03:15 - 0:04:02 - Long-Range Pursuit and Tactical Elimination 0:04:02 - 0:05:35 - Delivering the Bounty to Manzanita Post 0:05:35 - 0:07:05 - Locating the Final Target in Valentine 0:07:05 - 0:08:30 - Intense Shootout and Cross-Country Pursuit 0:08:30 - 0:09:49 - Final Bounty Delivery and Mission Success 📖 Interactive written walkthrough with clickable timestamps: https://pixelfungaming.com/videos/red-dead-online-capturing-player-bounties-dead-or-alive-6

Assassin´s Creed Odyssey - Prometheus & Birth of Humankind, House of Pythia, & Amphikleia Military
The mission 'Snake in the Grass' begins with the character riding through the rugged terrain of Phokis towards a fortified location. Upon reaching 'Prometheus and the Birth of Humankind,' Ikaros provides aerial reconnaissance to tag multiple cultist guards stationed throughout the area. Infiltration starts with stealthy takedowns from the brush, but quickly escalates into a brutal confrontation with a high-level female combatant. After a fierce duel involving timed parries and powerful strikes, the area is cleared and looted for gear like the Spartan Soldier's Helmet. The journey continues to the Chora of Delphi, where a brief interaction with a woman initiates the 'Deserter Discovered' quest. The focus then shifts to the House of the Pythia, a high-security zone where the character navigates rooftops and interiors to eliminate guards and a captain named Proxenos. Movement then proceeds to the Amphikleia Military Camp, utilizing tall grass for assassinations and engaging in a massive skirmish against the remaining garrison. The final leg of the journey leads north into the region of Malis, exploring the Wild Lands of the North and climbing steep cliffs to reach the Persian Remnants. Chapters: 0:00:00 - 0:02:30 - Infiltrating Prometheus and the Birth of Humankind 0:02:30 - 0:05:00 - Combat with Cultist Guards and Area Looting 0:05:00 - 0:07:30 - Journey to Delphi and Starting Deserter Discovered 0:07:30 - 0:10:00 - Stealth and Combat at the House of the Pythia 0:10:00 - 0:12:30 - Clearing the Amphikleia Military Camp 0:12:30 - 0:14:30 - Exploring Malis and the Persian Remnants 📖 Interactive written walkthrough with clickable timestamps: https://pixelfungaming.com/videos/assassin-s-creed-odyssey-prometheus-birth-of-humankind-house-of-pythia-amphikleia-military

Titanfall Hardpoint domination gameplay 1 victory 1 defeat
The mission begins with a pre-match lobby where pilot loadouts are adjusted before deploying to the Lagoon map for Hardpoint Domination. The pilot immediately moves to secure Hardpoint Alpha, engaging in close-quarters combat inside a multi-level industrial building. After capturing the point, the pilot maintains a defensive position, utilizing grenades and the R-101C Carbine to repel enemy infantry. A Titan is called in to provide support, dominating the exterior pathways while the pilot continues to hold the interior. The match concludes with a victory for the IMC team, transitioning into an epilogue where the surviving pilots hunt down the fleeing Militia forces. The pilot uses an Archer heavy rocket to deal massive damage to the enemy dropship, successfully destroying it before it can escape. After reviewing the match results and reaching level 37, the scene shifts to the Boneyard map for a second round of Hardpoint Domination. The deployment begins with a dropship jump onto a desert facility filled with giant skeletal remains. The pilot navigates through rugged terrain and industrial structures to contest various hardpoints. Intense firefights break out in narrow corridors and open sand dunes, featuring both pilot-to-pilot skirmishes and large-scale Titan engagements. Despite several successful captures and defensive holds at Hardpoint Alpha, the match ends in defeat for the team. The final sequence focuses on the evacuation epilogue, where the pilot must sprint across the battlefield, dodging enemy fire and navigating vertical obstacles to reach the extraction dropship. The mission concludes with a successful hot zone extraction as the dropship departs the planet's surface. Chapters: 0:00:00 - 0:00:42 - Lobby and Pilot Loadout Selection 0:00:42 - 0:03:00 - Hardpoint Domination Commences on Lagoon 0:03:00 - 0:05:45 - Defending Hardpoint Alpha and Calling in Titan Support 0:05:45 - 0:07:38 - Final Push for Victory and Hardpoint Consolidation 0:07:38 - 0:09:14 - Victory Epilogue: Destroying the Enemy Dropship 0:09:14 - 0:11:45 - Match Summary and Deployment to Boneyard 0:11:45 - 0:14:30 - Initial Engagements and Hardpoint Captures in Boneyard 0:14:30 - 0:17:30 - Mid-Match Combat and Industrial Corridor Firefights 0:17:30 - 0:20:08 - Late Match Struggles and Final Hardpoint Defenses 0:20:08 - 0:22:15 - Defeat Epilogue: Successful Evacuation and Extraction 📖 Interactive written walkthrough with clickable timestamps: https://pixelfungaming.com/videos/titanfall-hardpoint-domination-gameplay-1-victory-1-defeat
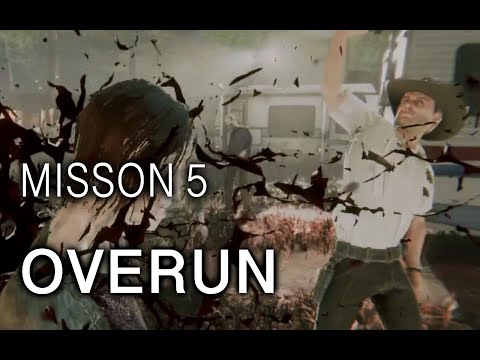
The Walking Dead: Destinies | Mission 5 - Overrun Walkthrough
This video features gameplay from The Walking Dead: Destinies, focusing on Rick Grimes as he survives encounters with walkers and defends his group. The footage begins with Rick navigating a foggy forest, utilizing melee combat with a baseball bat and crowbar while managing stamina and status effects like 'Wrathful' and 'Exhausted.' Viewers will observe various gameplay mechanics, including mission updates via radio from Daryl Dixon and objective-based progression. The content demonstrates an intensive escort sequence where Rick must protect Lori and Carl as they move toward an RV. Following the escort, the gameplay shows a timed defense mission where the group must hold off a large horde of walkers while the RV's engine is repaired. The video concludes with the group's successful escape in a pickup truck and a transition to a new roadside campsite on the following day. Chapters: 0:00:00 - 0:01:12 - Initial forest navigation and melee combat 0:01:12 - 0:02:30 - Demonstration of the 'Wrathful' state and reaching the camp perimeter 0:02:30 - 0:04:25 - Escort missions to safely move Lori and Carl to the RV 0:04:25 - 0:05:54 - Timed RV defense gameplay against the walker horde 0:05:54 - 0:07:15 - Final escape to the pickup truck and transition to Roadside HQ 📖 Interactive written walkthrough with clickable timestamps: https://pixelfungaming.com/videos/the-walking-dead-destinies-mission-5-overrun-walkthrough

Call Of Duty : Advanced Warfare Multiplayer Live
Multiplayer gameplay of Call of Duty: Advanced Warfare features two full Team Deathmatch matches. A cinematic montage kicks off the experience, showcasing various high-octane combat scenarios and exo-suit capabilities across different global locales. After navigating the multiplayer menus and connecting to Xbox Live, loadouts are customized before entering a lobby. The first match takes place on the 'Terrace' map, a luxury resort setting where exo-movements are utilized to navigate rooftops and poolside areas. Constant firefights occur as players use various weapons, primarily the AK12-G, to secure kills and earn killstreaks. This match ends in a decisive victory for the Sentinel team. Following the match, rank promotions and new item unlocks are displayed in the after-action report. The second match shifts to the war-torn urban environment of 'Detroit'. Combat is fast and vertical, with players maneuvering through derelict buildings and city streets. Despite several multi-kill streaks, this match concludes in a defeat for the Atlas team. The session wraps up with a final rank progression check. Exhilarating exoskeleton-enhanced combat defines these Team Deathmatch sessions in Call of Duty: Advanced Warfare. The action kicks off on the urban map, Comeback, where verticality and speed lead to a narrow Atlas victory. Rapid movement and precision aim are on full display during engagements in the map's narrow corridors and open plazas. Following a period of loadout adjustments and rank progression, the focus shifts to Detroit. This match features intense skirmishes around a medical center, emphasizing the tactical use of exo-dodging and double jumping. Despite a strong effort, the session ends with a Sentinel win. Finally, a jungle-themed engagement begins on the Instinct map, showcasing a completely different environment for tactical warfare. Chapters: 0:00:00 - High-intensity cinematic montage showing global combat and exo-suit mechanics 0:01:42 - Navigation through main menus and connecting to Xbox Live multiplayer services 0:02:40 - Loadout customization and weapon selection in the Team Deathmatch lobby 0:07:02 - Deployment to the 'Terrace' map for the first Team Deathmatch session 0:11:15 - Mid-match action on Terrace, utilizing exo-jumps for rooftop advantages 0:15:52 - Completion of the Terrace match resulting in a victory for the Sentinel team 0:16:16 - Post-match After Action Report detailing rank promotions and unlocked gear 0:17:32 - Transition and loading into the second match on the 'Detroit' urban map 0:18:07 - Commencement of combat operations on Detroit using the AK12-G rifle 0:20:08 - Conclusion of the Detroit match with a defeat for the Atlas team 0:20:26 - Final match results and review of further player rank progression 00:00:00 - Pre-match loadout review and customization 00:00:51 - Team Deathmatch begins on the Comeback map 00:01:17 - Initial urban firefights and traversal through the market area 00:03:10 - Combat intensifies inside urban structures 00:05:30 - Utilization of scorestreaks and high-ground advantage 00:07:25 - Atlas team achieves a victory on Comeback 00:07:51 - Post-match report, progression, and map voting 00:09:11 - Deployment to Detroit for a second match 00:09:37 - Team Deathmatch commences on the Detroit map 00:11:30 - Firefights through the medical clinic and surrounding streets 00:13:52 - Match conclusion on Detroit with a Sentinel victory 00:14:08 - Loading into the Instinct jungle map 00:14:38 - Combat initiates on the Instinct map 📖 Interactive written walkthrough with clickable timestamps: https://pixelfungaming.com/videos/call-of-duty-advanced-warfare-multiplayer-live

RDR2 Online - Wreckage & Injured Man Mystery
The character rides through an arid landscape, discovering a wrecked wagon and two dead horses. Utilizing specialized tracking abilities, he scans the area for clues before continuing to a nearby industrial site. Upon arrival, he finds an incapacitated man lying near another wagon. After a brief inspection, he draws a revolver and delivers a fatal shot to the individual's head. The character remains on-site for a few moments to observe the body from various angles as the sun shines over the frontier. Finally, he mounts his horse and rides away into the distant hills. Chapters: 0:00:00 - 0:00:28 - Investigation of the first wagon crash site 0:00:28 - 0:00:45 - Traveling to the secondary industrial location 0:00:45 - 0:01:28 - Discovery and inspection of the downed man 0:01:28 - 0:02:09 - Execution and departure from the scene 📖 Interactive written walkthrough with clickable timestamps: https://pixelfungaming.com/videos/rdr2-online-wreckage-injured-man-mystery

Red Dead Online: How To Dodge Panther/ Legendary Panther Attacks #shorts
The mission begins with the character tracking the Legendary Sapa Cougar across a rugged, open landscape. The character attempts to sedate the cougar using a tranquilizer rifle, firing multiple shots. The cougar responds aggressively, charging the character repeatedly. During these encounters, the cougar leaps and knocks the character to the ground, causing significant damage, indicated by a red screen tint. Despite the severe attacks, the character regains composure, continues to fire sedative rounds, and eventually incapacitates the cougar. Once the legendary animal is sedated and no longer a threat, the character approaches it and performs the skinning action, successfully completing the mission. Chapters: 0:00 - 0:08 - Character tracks and engages the cougar 0:08 - 0:24 - First cougar attack and character's struggle 0:24 - 0:38 - Character re-engages and endures another attack 0:38 - 0:46 - Final shots sedate the cougar 0:46 - 0:58 - Cougar skinned and mission completed 📖 Interactive written walkthrough with clickable timestamps: https://pixelfungaming.com/videos/red-dead-online-how-to-dodge-panther-legendary-panther-attacks-shorts

RDR2 - Attacked By Elk (Treasure Hunt)
The character runs across a grassy field under a cloudy sky, heading toward a cluster of trees and rocks where a treasure awaits. At the base of a dead tree sits a small lockbox. As the character approaches to open it, a Rocky Mountain Bull Elk suddenly charges from behind, headbutting the character into the grass. The character quickly recovers, draws an English Double-Barreled Shotgun, and shoots the elk twice, killing it instantly. Moving back to the tree, the character opens the lockbox to find $97.10 and 1.51 gold bars. Finally, the character walks over to the dead elk and skins it to obtain a poor pelt, antlers, and mature venison meat before the encounter concludes. Chapters: 0:00:00 - 0:00:05 - Searching for the treasure box 0:00:05 - 0:00:15 - Unexpected encounter with a bull elk 0:00:15 - 0:00:30 - Claiming the treasure rewards 0:00:30 - 0:00:45 - Harvesting materials from the elk 📖 Interactive written walkthrough with clickable timestamps: https://pixelfungaming.com/videos/rdr2-attacked-by-elk-treasure-hunt

The Walking Dead: Destinies | Mission 2 - Listen Up Walkthrough
This video showcases gameplay from Episode 2 of The Walking Dead: Destinies, titled 'Listen Up'. It begins with a cinematic sequence where Rick Grimes encounters his first 'walker' and is saved by Morgan Jones. The gameplay then demonstrates several core mechanics, starting with a stealth mission where Rick must retrieve his sheriff's uniform from a police vehicle while still in his hospital gown. Viewers will then see a series of combat tutorials led by Morgan's voiceover, covering stealth kills with a knife, melee combat using a baseball bat, and advanced moves like stunning enemies and performing high-adrenaline executions. The video concludes with Rick clearing a neighborhood of walkers to reach a functional police cruiser, where he attempts to make radio contact with other survivors before the episode summary appears. Chapters: 0:00:00 - 0:01:13 - Opening cinematic: Rick meets Morgan and learns about walkers 0:01:13 - 0:01:59 - First objective: Sneaking to the police vehicle to find clothes 0:01:59 - 0:03:22 - Navigating the neighborhood in the sheriff uniform 0:03:22 - 0:04:22 - Combat tutorial: Picking up the knife and performing backstabs 0:04:22 - 0:05:58 - Weapon tutorial: Using the baseball bat and light attack combos 0:05:58 - 0:07:50 - Advanced mechanics: Adrenaline meter and execution moves 0:07:50 - 0:09:50 - Clearing the final group of walkers near the police cruiser 0:09:50 - 0:10:35 - Ending cinematic: Rick uses the radio and hears a signal 0:10:35 - 0:10:59 - Episode summary and outro 📖 Interactive written walkthrough with clickable timestamps: https://pixelfungaming.com/videos/the-walking-dead-destinies-mission-2-listen-up-walkthrough

Ready Or Not: Lawmaker | S Rank | Non-Lethal #readyornot
The mission begins with a SWAT team inserting into the grounds of a large mansion under the cover of night. The team moves methodically towards the main entrance, carefully checking corners and securing the perimeter. Upon reaching the front door, the leader initiates a tactical breach, and the squad enters the opulent foyer. The gameplay emphasizes slow, deliberate room-clearing techniques, with the leader issuing frequent commands to the Red and Blue sub-teams to stack up, use mirrors to peek under doors, and provide overlapping fields of fire. Throughout the mansion's ground floor, the team encounters several civilians who are quickly restrained and secured. Methodical advancement continues through a large kitchen, service corridors, and grand living spaces. The tension escalates during a sudden firefight in a central hallway where suspects open fire from multiple directions. The team effectively uses cover and returns fire to neutralize the threats. As the operation moves to the second floor, the squad maintains its disciplined approach, using door wedges to manage potential flanking routes. Breaching tools are utilized to overcome locked doors, and tactical grenades disorient suspects in larger rooms. The mission concludes after the final bedrooms and offices are cleared, all suspects are neutralized or arrested, and all mission-critical evidence is secured. A final summary screen confirms the mission's success with a high tactical performance rating. Chapters: 0:00:00 - 0:00:15 - Pre-mission briefing and team assembly 0:00:15 - 0:00:53 - Insertion and approach to the mansion entrance 0:00:53 - 0:01:46 - Initial breach and foyer area clearance 0:01:46 - 0:03:06 - Methodical room-by-room clearing of the ground floor 0:03:06 - 0:03:40 - Securing civilians in the kitchen area 0:03:40 - 0:06:17 - Tactical advancement through main floor hallways 0:06:17 - 0:06:40 - Intense firefight and suspect neutralization in the central hall 0:06:40 - 0:08:29 - Securing the mansion core and gathering evidence 0:08:29 - 0:10:00 - Breaching the second floor and clearing upper corridors 0:10:00 - 0:11:46 - Final bedroom breaches and neutralizing remaining resistance 0:11:46 - 0:12:45 - Mission cleanup and final objective completion 0:12:45 - 0:13:08 - Mission summary and performance debrief 📖 Interactive written walkthrough with clickable timestamps: https://pixelfungaming.com/videos/ready-or-not-lawmaker-s-rank-non-lethal-readyornot

Elusive Target #23 The Paparazzo
This video features a full gameplay walkthrough of the 'The Paparazzo' Elusive Target mission in Hitman (2016). The mission takes place in Paris, France, at the Palais de Walewska during the Sanguine fashion show. The objective is to eliminate Kieran Hudson, a notorious tabloid journalist known for destructive rumors, who is currently stalking fashion designer Sebastian Sato. The video showcases multiple attempts as the player refines their strategy. In the final, successful run, Agent 47 meticulously navigates the sprawling mansion grounds. The gameplay demonstrates several stealth techniques, including acquiring various disguises (waiter, security guard) to access restricted areas, scouting the target's movement patterns, and using environmental distractions. The player eventually lures the target into a secluded bathroom using a thrown object distraction before executing a swift, silent elimination with a concealed knife. The walkthrough concludes with a successful exfiltration through the palace's main gates, resulting in a high mission rating. Chapters: 0:00:00 - Mission Briefing: The Paparazzo 0:00:35 - Loadout Planning and Strategy Selection 0:03:16 - Attempt 1: Initial Infiltration and Scouting 0:05:30 - Sneaking through the Basement staff areas 0:08:22 - Mission Failed/Restart Sequence 0:09:48 - Attempt 3: Successful Infiltration Path 0:12:00 - Neutralizing Guard and Acquiring Security Disguise 0:15:30 - Strategic Scouting of the Garden and Perimeter 0:20:00 - Locating Kieran Hudson in the Palace Crowd 0:24:00 - Trailing the Target through the Mansion 0:28:30 - Luring and Eliminating the Target in the Bathroom 0:31:10 - Mission Exit and Exfiltration 📖 Interactive written walkthrough with clickable timestamps: https://pixelfungaming.com/videos/elusive-target-23-the-paparazzo

HITMAN Marrakesh : Accidental death - Falling Moose
Agent 47 begins the mission disguised as a technician within the E-DOCX building, moving through the modern offices. He locates a hidden control room overlooking the main studio floor where target Claus Hugo Strandberg is being interviewed. 47 interacts with a winch mechanism holding a large taxidermied moose suspended above the stage. The moment the target mentions Moroccan law, 47 releases the winch, causing the moose to crash down onto Strandberg, resulting in an immediate accident kill and completing the 'A Room With A Moose' challenge. Following the elimination, 47 quickly exits the control room and navigates the upper floor, passing by decorative mounted deer heads and entering a cluttered storage area. He then observes the chaos ensuing on the main floor as security and crew react to the unexpected death. 47 stands near a stage lamp wire that could be exposed as a further distraction or hazard but opts to return to the utility closet, concluding the segment. Chapters: 0:00 - 0:25 - Setup and Elimination of Claus Hugo Strandberg 0:25 - 0:54 - Navigating the Office Floors After the Kill 0:54 - 1:26 - Observing the Aftermath and Mission Conclusion 📖 Interactive written walkthrough with clickable timestamps: https://pixelfungaming.com/videos/hitman-marrakesh-accidental-death-falling-moose

Red Dead Online: Hardcore Team Shootout | Taking Out 3 Rooftop Snipers #shorts
The mission begins in the final minutes of a team deathmatch, requiring the character to dispatch opponents. The character moves along the ground level of a town, using cover and surveying the surrounding area. The character locates a ladder and climbs onto the roof of a large brick building to gain a tactical height advantage. Upon reaching the rooftop, the character immediately encounters and engages three enemy players gathered on an adjacent elevated platform. Utilizing a powerful close-range weapon (likely a shotgun), the character rapidly executes a multi-kill streak, clearing the platform and bringing the team score into the lead. The character then secures one more kill before the timer expires. The action transitions to the final results screen, confirming the victory for 'The Coyote Pack' team, followed by the complete kill statistics and MVP information. Chapters: 0:00:00 - 0:00:15 - Initial Movement and Scaling the Building 0:00:15 - 0:00:39 - Rooftop Multi-Kill Combat Sequence 0:00:39 - 0:00:57 - Match Conclusion and Score Results 📖 Interactive written walkthrough with clickable timestamps: https://pixelfungaming.com/videos/red-dead-online-hardcore-team-shootout-taking-out-3-rooftop-snipers-shorts

RDR2 - Milkweed (Lemoyne) Location
The character navigates the murky terrain of Bluewater Marsh on horseback during the twilight hours. He dismounts near a cluster of vegetation to gather Milkweed, which triggers the completion of a daily challenge once the fifth plant is collected. After securing the necessary herbs, he remounts and explores further into the swampy landscape, using Eagle Eye vision to highlight more plants in the distance. He discovers another patch of Milkweed near a bridge and adds more stalks to his satchel. The session concludes with a detailed look at the world map, providing a precise location between Lagras and the Kamassa River to assist others in finding this specific resource. Chapters: 0:00:00 - 0:00:20 - Navigating Bluewater Marsh on horseback 0:00:20 - 0:00:44 - Gathering Milkweed and completing the daily challenge 0:00:44 - 0:01:10 - Scouting the swamp for additional plant clusters 0:01:10 - 0:01:34 - Collecting more Milkweed near the bridge area 0:01:34 - 0:02:05 - Reviewing the map for exact location coordinates 📖 Interactive written walkthrough with clickable timestamps: https://pixelfungaming.com/videos/rdr2-milkweed-lemoyne-location
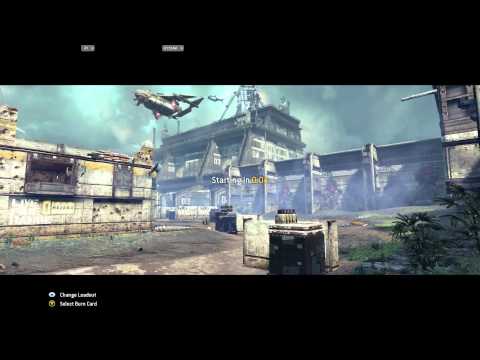
Titanfall last titan standing gameplay : Training Ground (Victory)
The Last Titan Standing match takes place on the Training Ground map, featuring intense mech-on-mech combat. Utilizing a Titan equipped with a Quad Rocket launcher, the mission focuses on eliminating all enemy Titans to secure round victories. Early rounds showcase strategic positioning and heavy fire exchanges, often resulting in direct Titan punches for final blows. As the match progresses, the gameplay shifts to high-stakes pilot action after a Titan ejection. From the safety of rooftops, the Archer heavy rocket provides critical long-range support against remaining enemy mechs. The final encounter concludes with a successful pilot kill on foot, securing a dominant match victory for the IMC team. Chapters: 0:00:00 - 0:01:57 - Match Start and Round 1 Victory 0:01:57 - 0:03:16 - Round 2 Quad Rocket Domination 0:03:16 - 0:04:20 - Round 3 Engagement and Titan Ejection 0:04:20 - 0:04:57 - Archer Rocket Rooftop Tactics 0:04:57 - 0:06:38 - Half-time Transition and Final Round Pilot Kill 📖 Interactive written walkthrough with clickable timestamps: https://pixelfungaming.com/videos/titanfall-last-titan-standing-gameplay-training-ground-victory

Assassin´s Creed Odyssey - 4 mercernaries at Sancturary of Athena Pronaia - Live stream #6
The journey begins in Phokis as Alexios calls his horse, Phobos, and sets out across the mountainous landscape towards Delphi. Navigation involves traversing winding paths and rocky outcrops, eventually reaching the historic site. Exploration centers on the Tomb of the First Pythia, where Alexios uses Ikaros to scout the area before entering the dark, torch-lit interior to retrieve an Ancient Stela. The mission then shifts to tactical combat, with Alexios infiltrating a Spartan military camp using stealthy bow shots and direct melee strikes against multiple guards. Extensive parkour is used to navigate the intricate rooftops of the Sanctuary of Delphi and the Sanctuary of Athena Pronaia, providing a vertical advantage for scouting and silent takedowns. A high-stakes encounter occurs against a powerful mercenary, Helios the Scorned, involving a protracted duel on a rooftop. Despite a valiant effort, the combat ends in desynchronization, prompting a reload and a more calculated, stealth-focused approach through the sanctuary's guarded corridors. The mission begins with a stealthy infiltration of the Sanctuary of Athena Pronaia. Movement through thick foliage allows for several silent assassinations of unsuspecting guards. Exploration leads deep into a temple structure where ancient treasures are looted. Combat eventually breaks out in the open courtyard, forcing a transition to dual-wielding daggers and the use of powerful combat abilities. After clearing the immediate area, a call to the horse leads to a scenic ride through the mountainous terrain of Phokis. An intense duel follows against a high-level mercenary, Theras the Flame-Haired, requiring precise dodges and timed counter-attacks. Following the victory, a journey begins toward Pharsalos Fort, utilizing Ikaros to scout and mark enemy positions from the sky. The infiltration of the fort involves scaling sheer cliffs and engaging in a massive rooftop brawl against overwhelming numbers and another elite mercenary. The encounter concludes with a desperate struggle against fire-wielding foes on the narrow rafters of the fort's towers. Chapters: 0:00:00 - Initial Loading and Journey to Delphi 0:02:58 - Exploring the Tomb of the First Pythia 0:05:45 - Stealth and Combat at the Spartan Camp 0:09:15 - Navigating the Sanctuary of Delphi 0:12:25 - Infiltrating the Sanctuary of Athena Pronaia 0:15:45 - Duel Against Helios the Scorned 0:18:55 - Desynchronization and Strategic Retry 0:00:00 - Infiltration of the Sanctuary of Athena Pronaia 0:02:30 - Open Combat in the Sanctuary Courtyard 0:05:00 - Boss Fight: Theras the Flame-Haired 0:08:45 - Gear Management and World Map Navigation 0:11:15 - Long-Range Bow Engagement at Delphi 0:13:45 - Initial Assault on Pharsalos Fort 0:16:30 - Scouting Perimeter Defenses with Ikaros 0:19:15 - Wilderness Trek and Mountain Scaling 0:22:00 - Stealth Entry into the High Fortification 0:25:30 - Rooftop Battle against Praxiteles the Cold-Hearted 0:28:45 - Final Combat Encounter and Desynchronization 📖 Interactive written walkthrough with clickable timestamps: https://pixelfungaming.com/videos/assassin-s-creed-odyssey-4-mercernaries-at-sancturary-of-athena-pronaia-live-stream-6

RDR2 - Vanilla Flower (Lemoyne) Location
The session takes place in the foggy marshlands of Bayou Nwa within Red Dead Online. The primary focus is completing a daily challenge to collect five Vanilla Flowers. The character traverses the swampy terrain, frequently using Eagle Eye to highlight the yellow glowing particles of the orchids growing on tree trunks. Between flower locations, the character navigates past several alligators, dispatching a few with a rifle when they come too close. The search spans from the outskirts of Lagras through the dense cypress forests. After picking the final Vanilla Flower, the daily challenge notification confirms completion. The gameplay concludes with a brief look at the world map, pinpointing the character's exact location near the Kamassa River. Chapters: 0:00:00 - 0:00:20 - Finding the first Vanilla Flower near Lagras 0:00:20 - 0:01:25 - Exploring the marsh using Eagle Eye to track plants 0:01:25 - 0:02:40 - Navigating through swamp settlements and murky water 0:02:40 - 0:04:00 - Searching the northern Bayou Nwa area for orchids 0:04:00 - 0:04:45 - Alligator encounters and combat in the shallows 0:04:45 - 0:06:05 - Final stretch of the plant gathering mission 0:06:05 - 0:06:20 - Picking the final flower and challenge completion 0:06:20 - 0:06:51 - Reviewing character location on the world map 📖 Interactive written walkthrough with clickable timestamps: https://pixelfungaming.com/videos/rdr2-vanilla-flower-lemoyne-location

Sherlock Holmes : Crimes and Punishments - Blood Bath - Part 2
The investigation begins at 221B Baker Street where Inspector Lestrade presents two new cases to Sherlock Holmes. Opting for a murder case at the Roman Baths, Holmes and Dr. Watson travel to Strand Lane. Upon arrival, they receive a briefing from Lestrade about the victim, Sir Rodney Bentcliffe, and the three main suspects who were present at the scene. Holmes conducts an initial interview with the bath attendant, Mr. Phillips, and performs a detailed character observation to gather clues about his background and recent activities. Exploration of the bathhouse follows, starting with the changing room where Holmes examines the suspects' belongings and finds a dirt sample. He then enters the steam room to investigate the gruesome crime scene. Detailed examination of the body and surrounding area reveals a blood-covered key, a fatal eye injury, and more dirt samples under the victim's fingernails. After discussing the initial findings with Watson and ordering the removal of the body, Holmes returns to interrogate Mr. Phillips. By presenting evidence of a sent telegram, Holmes catches the attendant in a lie and forces a confession about his brief absence during the time of the murder. The investigation then shifts back to Baker Street, where Holmes begins a microscopic analysis of the collected dirt samples to further trace the suspects' movements. Chapters: 0:00:00 - 0:01:52 - Consultation with Inspector Lestrade at Baker Street 0:01:52 - 0:03:09 - Carriage journey and case review with Watson 0:03:09 - 0:04:37 - Briefing on the Strand Lane Bath murder 0:04:37 - 0:06:57 - Initial interview and observation of Mr. Phillips 0:06:57 - 0:08:22 - Further questioning of the bath attendant 0:08:22 - 0:09:28 - Examining evidence in the changing room 0:09:28 - 0:11:50 - Crime scene investigation in the steam room 0:11:50 - 0:13:22 - Discussing findings and ordering body removal 0:13:22 - 0:15:53 - Interrogating Mr. Phillips about the steam room keys 0:15:53 - 0:18:24 - Reviewing case details and returning to Baker Street 0:18:24 - 0:18:54 - Commencing microscopic analysis of evidence 📖 Interactive written walkthrough with clickable timestamps: https://pixelfungaming.com/videos/sherlock-holmes-crimes-and-punishments-blood-bath-part-2

Metro Last Light LiveStream
The video starts with the player character, Artyom, and his companion, Pavel, navigating the war-torn Moscow surface, traveling from the Metro station Reich toward the Theater station. Pavel discusses the risks of traveling on the surface due to radiation and mutants. They discover a gas mask and filters needed to survive outside. Upon reaching the surface, they witness the desolate, snowy landscape of ruined Moscow, including the wreckage of a crashed airplane, which marks the entrance to the Theater station. A massive Demon mutant attacks them, forcing a tense fight involving the shotgun-like Duplet weapon. After surviving the encounter and traversing the treacherous environment, they enter the Theater station, a Communist-controlled area filled with people, shops, and even a cabaret show. Pavel negotiates their passage past Red Line guards, vouching for Artyom as a fellow Communist, though Artyom is hesitant due to Pavel's true loyalties. They enter a crowded theater area, where a performance is underway, showcasing dancers and a mutant being trained, highlighting the post-apocalyptic society's attempt at entertainment. The video ends as Artyom and Pavel meet at a dinner table, where Pavel proposes a toast to the Red Line, revealing his full commitment to the Communist faction and likely signaling a betrayal or conflict ahead. The mission begins with a chilling cinematic where Artyom is betrayed by Pavel, leading to his capture by Red Line forces. Pavel justifies his actions as following military orders. Artyom is dragged through a heavily fortified Red Line station and subjected to a brutal interrogation, first via physical torture and then through a hallucinogenic truth serum. This segment triggers a surreal, black-and-white sequence featuring mutated creatures and the Dark One child in the ruined city above. Following the failed interrogation, General Korbut and Pavel discuss their military objectives, revealing their plans to exploit Artyom's knowledge. Korbut orders Pavel to Venice for a mission regarding the Dark One. Korbut's son, Lonyia, expresses disgust at his father's brutality and helps Artyom escape through a maintenance grate. The perspective shifts to gameplay as Artyom navigates the dangerous, spider-infested catacombs and tunnels below Red Line territory. Artyom emerges into a military depot and uses stealth to take down patrolling guards, utilizing suppressed weapons and night vision to conserve ammunition. An intense, sustained firefight erupts near an armored train car, forcing Artyom to aggressively engage multiple Red Line soldiers. After surviving the close-quarters combat and looting the bodies, Artyom continues to move deeper into the Red Line infrastructure, eventually navigating toward a final exit point through caged tunnels, securing his escape from Red Line captivity. The gameplay focuses on navigating a dark, ruined underground area, likely a metro station or bunker, utilizing stealth and tactical movement. The player character, equipped with specialized weapons including a pneumatic rifle and a revolver with a scope and silencer, explores the environment, collecting resources such as ammunition and gas mask filters, and engaging in stealth takedowns or brief firefights against hostile human targets (likely enemy soldiers or scavengers). The video highlights the resource management and atmosphere common to the Metro series, emphasizing careful exploration and environmental interaction, such as opening vents and utilizing control panels to progress. The action culminates in a confrontation with multiple enemies, requiring the player to use both stealth and direct combat to survive. Chapters: 0:00 - Game paused at the main menu/options screen 0:50 - Gameplay resumes underground, player interacts with Pavel 1:07 - Loading screen showing the route from Reich to Theater station 1:32 - Pavel explains they must cross the surface due to a tunnel collapse 2:05 - Player finds and equips a gas mask filter 2:46 - Artyom and Pavel emerge onto the ruined Moscow surface near the crashed plane 3:25 - Player pauses to adjust game options (controller settings) 3:55 - Loud, dramatic environmental events occur, threatening the characters 4:43 - Pavel points out the metro entrance by the building where the plane crashed 5:08 - Artyom loots a dead body for more gas mask filters 5:30 - Pavel encourages Artyom to move quickly toward the light/surface exit 6:03 - Artyom finds and equips a Duplet shotgun and reloads it 6:13 - A Watchman mutant attacks, Artyom fights and kills it in close combat 6:44 - A Demon mutant appears in the sky, forcing Artyom and Pavel to take cover 7:10 - Achievement Unlocked: Mouse 7:25 - The pair reach the wreckage of the crashed airplane 7:40 - Artyom climbs into the wrecked plane fuselage 7:56 - Pavel warns Artyom not to touch the skeletal remains of passengers 9:33 - Flashback sequence showing the airplane crash from the cockpit perspective 10:30 - Artyom pulls himself out of the debris in the cockpit 10:53 - Pavel gives Artyom a filter, saving him from suffocation 11:38 - The Demon mutant attacks from the air again, a brief firefight ensues 12:15 - Artyom engages the Demon, using the Duplet shotgun 13:05 - Pavel urges Artyom to move faster toward the next corner, dealing with more mutants 13:46 - The group fights a Watchman mutant before reaching a metal barrier 14:52 - Player loads checkpoint after failing to pass the fight area 15:26 - Intense combat against mutants near the metal gate 16:38 - The group uses fire weapons to clear a path through a barricaded opening 16:50 - Pavel and Artyom enter the Theater station 17:26 - Pavel negotiates with the Red Line guards for passage 18:27 - Pavel discusses their plan to reach Polis through Revolution Square 19:15 - Artyom enters the main station area, exploring the market and residents 19:35 - Pavel and Artyom pass children being entertained by a shadow puppet show 20:06 - Artyom encounters the market vendors for weapons and supplies 20:25 - Artyom customizes his weapons (Bastard Assault Rifle and Duplet Shotgun) at the vendor 21:33 - Artyom purchases Pistol Rounds for military-grade ammo and continues through the market 22:00 - Pavel exits the market area toward the Theater entrance 22:18 - Artyom observes the main Theater entrance and the queue for the show 22:42 - Artyom enters the Theater auditorium, observing the crowd and the stage 23:09 - A short burlesque/cabaret performance of female dancers is shown on stage 23:41 - The Master of Ceremonies announces the next act, 'Extruded Air' with a mutant trainer 24:20 - The trainer attempts to showcase a trained mutant on stage 25:48 - The MC introduces an accordion player and dancers, who perform a musical number 26:38 - Artyom and Pavel enter the performers' dressing room, meeting two women 27:26 - Artyom moves through the living quarters of the station 27:40 - Pavel and Artyom share a drink at a table, discussing Red Line ideology and freedom 29:43 - Red Line guards appear, and Pavel confirms his betrayal of Artyom as he is taken prisoner. 30:00 - Artyom Betrayed by Pavel and Captured 30:31 - Artyom Led Through Red Line Station 31:38 - Meeting General Korbut and Moskvine 32:56 - Korbut Begins Interrogation and Torture 34:14 - Truth Serum Administered; Dark One Hallucination 35:28 - Vision of the Surface Ruins and the Dark One Child 36:24 - Lonyia Frees Artyom and Initiates Escape 38:09 - Red Line Depot: Stealth and Exploration 42:25 - First Major Firefight Near Armored Train 44:52 - Checkpoint Reload and Heavy Combat Continues 47:20 - Clearing the Depot and Moving to the Exit 52:27 - Final Stealth Section and Navigation 56:55 - Securing the Final Exit Gate 60:00 - Initial exploration and resource collection 60:11 - Switching primary weapon and continuing through the tunnels 60:29 - Finding medical supplies and ammunition next to a body 60:51 - Equipping a pneumatic rifle and navigating further into the abandoned station 61:15 - Exploring side rooms and confirming presence of resources/loot 61:46 - Moving through darker, cobweb-filled corridors 62:29 - Pausing the game to check menu options 62:36 - Resuming exploration and finding a map/note on the wall 62:53 - Attempting to open a locked cabinet and checking surroundings 63:15 - Collecting a note and other resources scattered around the room 63:44 - Continuing through dilapidated hallways 64:04 - Discovering hidden ammo and a gas lamp near shelves 64:23 - Inspecting a cooking area and nearby environmental details 64:47 - Climbing up a ladder to a higher level 65:10 - Collecting another note marked with an 'M' symbol 65:20 - Performing a stealth takedown on a patrolling enemy near a target practice wall 65:57 - Returning to the lower level and proceeding along the tracks 66:28 - Using a lighter near cobwebs and advancing through a dark section 67:13 - Identifying an enemy target using the scope and executing a stealth kill 67:23 - Finding and looting an enemy soldier 68:10 - Encountering a crane structure and identifying a control wheel 68:21 - Turning a large wheel to open a door 68:30 - Finding a gas mask filter and overhearing enemy conversations 69:35 - Targeting and killing an enemy soldier with a headshot using the scoped rifle 70:04 - Opening fire on alerted enemies, triggering heavy combat 70:38 - Throwing a molotov cocktail into a doorway to clear enemies 71:15 - Reloading under pressure and dealing with surviving enemies 72:00 - A close-range fight and takedown of the last remaining enemy 73:04 - Looting bodies and managing resources after the intense fight 74:05 - Dying due to lack of a gas mask filter during the loading screen 74:12 - Respawning at the last checkpoint and re-engaging the area 74:44 - Collecting a note near a control panel 76:30 - Finding another note and continuing exploration 78:27 - Interacting with an electrical panel labeled 'NO 2'

Insurgency Sandstorm| Checkpoints Live #2
This comprehensive gameplay video features extended sessions of Insurgency: Sandstorm, specifically showcasing the co-op Checkpoint mode. The footage begins with a tactical push through the 'Citadel' map, highlighting the importance of team coordination and methodical room clearing. Players utilize a variety of modern weaponry, with a heavy emphasis on the M16A4, demonstrating recoil control and effective semi-automatic fire. As the video progresses, the action shifts to the 'Hillside' map during both day and night cycles. The night operations provide a stark contrast, requiring the effective use of Night Vision Goggles (NVGs) and IR lasers to navigate the treacherous, snow-covered terrain. Throughout the recording, viewers can witness the high-stakes nature of the game, where quick reflexes and strategic positioning are vital for survival. The video showcases several objective captures, intense defensive holds against waves of AI enemies, and the devastating impact of fire support options like autocannon strafes and artillery barrages. Hardcore mode elements are also visible, featuring reduced HUD and more lethal damage models, emphasizing the tactical realism that Insurgency: Sandstorm is known for. The recording concludes with a series of high-intensity indoor engagements, highlighting the game's immersive sound design and detailed environment interaction. Chapters: 0:00:00 - Loadout and Class Selection 0:02:45 - Round Start: Pushing into Citadel 0:06:15 - Capturing Objective Alpha 0:10:30 - Urban Firefight near the Marketplace 0:14:00 - Defensive Stand at Objective Charlie 0:18:15 - New Match Initialization on Hillside 0:22:00 - Day Combat: Hillside Village Engagements 0:26:45 - Night Cycle Begins: Activating NVGs 0:31:15 - Silent Infiltration under Night Vision 0:35:45 - Heavy Resistance at the Excavation Zone 0:40:00 - Calling in A-10 Strafe Support 0:44:30 - Intense Indoor Defense at Objective Delta 0:48:00 - Final Push towards the Weapon Cache 0:51:30 - Round Wrap-up and Session Conclusion 📖 Interactive written walkthrough with clickable timestamps: https://pixelfungaming.com/videos/insurgency-sandstorm-checkpoints-live-2

Red Dead Online: PVP John Wick Moment - 6 KILL Streak #reddeadonline #shorts
The sequence opens with a character traversing high grass during a vibrant sunset. The combat begins immediately as the character utilizes a sniper rifle with a scope to pick off distant targets. After securing two precise long-range eliminations, the focus shifts to close-quarters combat. The character swaps to a shotgun and engages multiple enemies hidden within the brush. The action is fast-paced, featuring visceral shotgun blasts and tactical movement through the field. Successive kills are recorded, including an impressive shot on a mounted rider. The streak continues as the character moves toward a nearby wagon, taking out more opponents until a final encounter leads to their own elimination by another player using a Rare Shotgun. Chapters: 0:00:00 - 0:00:10 - Precision sniper combat at sunset 0:00:10 - 0:00:16 - Securing long-range sniper kills 0:00:16 - 0:00:30 - Transition to close-quarters shotgun combat 0:00:30 - 0:00:42 - Rapid shotgun eliminations in the brush 0:00:42 - 0:00:52 - Final kills in the combat sequence 0:00:52 - 0:01:00 - Final exchange and player elimination 📖 Interactive written walkthrough with clickable timestamps: https://pixelfungaming.com/videos/red-dead-online-pvp-john-wick-moment-6-kill-streak-reddeadonline-shorts

Red Dead Online: Stranger Mission - Hostage Rescue
A lone rider encounters a distressed stranger at a riverside camp during the dark hours of night. The stranger pleads for assistance, explaining that Lemoyne Raiders have kidnapped his companion and are demanding a ransom he cannot afford. Upon accepting the rescue mission, the journey begins across the moonlit landscape toward Bluewater Marsh. Reaching a secluded shack in the swamp, a cautious approach leads to a sudden breach. The rider neutralizes a guard at the door and engages in hand-to-hand combat inside to secure the area. After freeing the captive woman, a wave of bandit reinforcements arrives, initiating a fierce shootout from the cabin's interior. Precise shots aided by Dead Eye clear the opposition, allowing for a swift escape on horseback. The ride back through the marsh and forest involves protecting the survivor as she recounts the harrowing ordeal. Arriving back at the initial campsite, the woman is reunited with the stranger, and the successful mission concludes with a well-earned reward. Chapters: 0:00:00 - 0:00:50 - Encountering the stranger and accepting the rescue mission 0:00:50 - 0:01:55 - Nighttime journey across the landscape to Bluewater Marsh 0:01:55 - 0:03:00 - Infiltrating the kidnappers' swamp hideout 0:03:00 - 0:03:30 - Breaching the cabin and freeing the captive 0:03:30 - 0:04:15 - Defending against waves of bandit reinforcements 0:04:15 - 0:05:40 - Escorting the survivor back to the original camp 0:05:40 - 0:06:14 - Mission completion and reward collection 📖 Interactive written walkthrough with clickable timestamps: https://pixelfungaming.com/videos/red-dead-online-stranger-mission-hostage-rescue

Sniper Elite 3 - Ratte
A comprehensive walkthrough of the 'Ratte Factory' mission in Sniper Elite 3. The player takes on the role of Karl Fairburne as he infiltrates a Nazi super-tank construction facility nestled in the Middes Canyon. The video demonstrates stealth tactics, long-range sniping, and strategic sabotage. Key objectives include destroying the P.1000 Ratte super-tank, taking out the production lines by sabotaging power transformers on multiple levels, and finally confronting General Vahlen. The gameplay showcases various weapons like the M1 Garand and Welrod silenced pistol, highlighting the game's signature X-Ray Kill Cam that provides detailed anatomical views of long-distance shots. The video follows the mission from the initial cliffside approach through intense indoor firefights across hangar bridges to the explosive finale and mission completion summary screen. Watch as Karl navigates through heavily guarded areas, uses environmental sounds to mask his shots, and strategically places explosives to bring down the Reich's most ambitious weapon project. Chapters: 0:00:00 - Mission Briefing and Loadout 0:04:45 - Infiltrating the Canyon Cliffside 0:09:15 - First Stealth Takedowns 0:14:30 - Navigating the Outer Walkways 0:19:45 - Entering the Construction Facility 0:24:15 - Accessing the Production Lines 0:29:30 - Upper Hangar Firefight 0:34:00 - Sabotaging First Power Transformer 0:39:15 - Clearing the Maintenance Tunnels 0:44:45 - Engaging Guards Near the Elevator 0:49:00 - Lower Level Sabotage Operations 0:54:15 - Long Range Sniping Highlight 0:59:30 - Final Transformer Destroyed 1:04:00 - Setting Explosives on the Ratte 1:05:20 - Final Confrontation with General Vahlen 1:08:15 - Escape from the Exploding Hangar 1:13:30 - Mission Complete Results 📖 Interactive written walkthrough with clickable timestamps: https://pixelfungaming.com/videos/sniper-elite-3-ratte

War Thunder: Enemy Player Gets Stuck And Eliminated #shorts
The engagement begins as a T-34 medium tank traverses a lush, green landscape under clear skies. Team objectives are secured while the tank identifies an enemy Panzer IV partially concealed by the terrain. Initial long-range shots create a smoke screen, prompting a quick reposition. The tank maneuvers over a rocky ridge to gain a tactical advantage, eventually cornering the Panzer IV against a cliff face. Point-blank shots and heavy machine gun fire pepper the enemy hull, resulting in multiple confirmed hits. A critical strike follows, leading to a successful kill assist as the enemy vehicle erupts in flames. The T-34 then pulls back from the wreckage, navigating through a dense forest while enemy artillery strikes land in the immediate vicinity. Chapters: 0:00:00 - 0:00:12 - Initial positioning and first long-range engagement 0:00:12 - 0:00:23 - Maneuvering through rough terrain for tactical advantage 0:00:23 - 0:00:36 - Point-blank engagement with a cornered Panzer IV 0:00:36 - 0:00:46 - Scoring a critical hit and final destruction of the target 0:00:46 - 0:00:59 - Repositioning through the forest under artillery fire 📖 Interactive written walkthrough with clickable timestamps: https://pixelfungaming.com/videos/war-thunder-enemy-player-gets-stuck-and-eliminated-shorts

RDR2 - Susan Grimshaw‘s Grave Location
The gameplay focuses on locating the grave of Susan Grimshaw in Red Dead Redemption 2. The character approaches a secluded ridge overlooking a vast valley and a distant waterfall. A simple wooden cross marks the burial site, with the name 'Susan Grimshaw' clearly engraved on the horizontal beam. The camera pans around the site, highlighting the scenic and peaceful environment chosen for her final resting place. Following the close-up, the in-game world map opens to provide the exact coordinates. The marker is situated in the New Hanover region, specifically positioned between the letters 'V' and 'E' of the word 'HANOVER' on the map, south of the Elysian Pool and southwest of Annesburg. Chapters: 0:00:00 - 0:00:05 - Approaching the grave site on the ridge 0:00:05 - 0:00:25 - Close-up of the grave marker and surrounding landscape 0:00:25 - 0:00:41 - Pinpointing the exact map location 0:00:41 - 0:00:45 - Final view of the memorial site 📖 Interactive written walkthrough with clickable timestamps: https://pixelfungaming.com/videos/rdr2-susan-grimshaw-s-grave-location

Dead Island 2: Haus | The Deeper Walkthrough
This video showcases a complete walkthrough of the 'The Deeper' story quest in Dead Island 2's Haus DLC. Gameplay begins with exploration of a disturbing facility filled with mannequins and pools of blood. The content demonstrates navigating through various rooms, including bathrooms and television-lined corridors, while collecting quest-related items and battling different zombie types like Walkers, Runners, and the powerful Crusher. Viewers will see the discovery of Véronique's severed head in an ice bucket and the subsequent dialogue where she explains the motivations of the Haus cult. The final portion of the video shows the process of returning the head through a gauntlet of undead to reattach it to her body, successfully completing the quest and leading into the next objective, 'The Trial'. Chapters: 0:00:00 - 0:02:30 - Initial exploration and navigating the facility 0:02:30 - 0:05:00 - Searching the bathrooms and first quest item collection 0:05:00 - 0:07:30 - Intense combat against Walkers and a Crusher zombie 0:07:30 - 0:10:00 - Locating Véronique's head and initial dialogue 0:10:00 - 0:12:30 - Transporting the head through zombie-infested areas 0:12:30 - 0:14:57 - Reattaching the head and quest completion 📖 Interactive written walkthrough with clickable timestamps: https://pixelfungaming.com/videos/dead-island-2-haus-the-deeper-walkthrough

GTA 5 : Fireworks
The gameplay begins on a rooftop at night, where the character opens the weapon wheel to select a heavy weapon. A notification confirms that the weapon wheel is disabled due to active Passive Mode. The character selects the Firework Launcher. Moving into position, the character aims high into the starry sky above an illuminated city building and begins firing a rapid succession of firework rockets. The explosions fill the dark sky with bright bursts of red, white, and blue sparks. After depleting several rounds, the character accesses the weapon wheel again, switching first to the Heavy Shotgun, then equipping a Heavy Revolver. The character aims the revolver upward and fires two powerful shots, generating heavy smoke and muzzle flash, before the footage ends on the construction site rooftop. Chapters: 0:00 - 0:05 - Selecting the Firework Launcher on a rooftop 0:05 - 0:21 - Launching multiple fireworks into the night sky 0:21 - 0:41 - Switching to the Heavy Revolver and firing off the construction site 📖 Interactive written walkthrough with clickable timestamps: https://pixelfungaming.com/videos/gta-5-fireworks

Dead Island 2: Shambler Zombies Weak Spot #shorts
Combat sequences in Dead Island 2 highlight the brutal efficiency required to survive the zombie-infested beaches of Los Angeles. The encounter begins with a detailed look at the 'Shambler' zombie variant, setting the stage for the carnage to follow. Precise marksmanship with a pistol takes center stage first, as headshots and limb-targeting shots showcase the game's advanced dismemberment mechanics. The focus then shifts to raw power, utilizing heavy melee weapons to crush skulls and sever limbs with bone-crunching impact. The sequence concludes with a montage of swift knife takedowns and visceral finishing moves, demonstrating various ways to permanently neutralize the undead threat in the sand. Chapters: 0:00:00 - 0:00:05 - Zombie Variant Introduction: The Shambler 0:00:05 - 0:00:24 - Ranged Combat and Precision Dismemberment 0:00:24 - 0:00:44 - Heavy Melee Weaponry and Blunt Force Impact 0:00:44 - 0:00:59 - Lethal Knife Takedowns and Finishing Moves 📖 Interactive written walkthrough with clickable timestamps: https://pixelfungaming.com/videos/dead-island-2-shambler-zombies-weak-spot-shorts

HITMAN: Colorado 3D Printer
This gameplay recording from the video game Hitman demonstrates a tactical infiltration maneuver within the Colorado mission. The video shows Agent 47 utilizing a 3D printer located in a secure facility to create a facial mask. Viewers will observe the interaction with the computer terminal, the 3D printing animation of a target's face (Sean Rose), and the subsequent collection of the item which is necessary for bypassing biometric security. The footage concludes with the character moving toward the next objective, which involves infiltrating a tornado shelter. Chapters: 0:00:00 - 0:00:04 - Agent 47 approaches the 3D printer terminal and initiates the command 0:00:04 - 0:00:10 - The 3D printer produces a mask of Sean Rose's face 0:00:10 - 0:00:14 - Collection of the Sean Rose Mask and movement toward the mission objective

GTA Online: My Sticky Bomb VS F-160 Raiju Jet #shorts
The gameplay begins with a camouflaged Half-track equipped with a quad-cannon driving through the busy streets of Los Santos. An oncoming car is immediately vaporized by the rear-mounted weapon as the player briefly checks the map for positioning. The vehicle navigates through a construction zone and descends onto the railway tracks, eventually dropping into the concrete Los Santos storm drain. After driving through the shallow water and maneuvering under bridges, the Half-track enters a dark underpass tunnel. The vehicle is positioned to face the tunnel exit, and the anti-aircraft gun begins firing shells relentlessly. Suddenly, a high-speed jet attempts to fly through the narrow tunnel, but it is shredded by the heavy barrage of gunfire. The jet explodes in a massive fireball, sending debris flying past the Half-track. The kill is confirmed on the HUD as the player's rank increases to 472 while the wreckage of the aircraft slides away. Chapters: 00:00:00 - 00:00:10 - Street driving and vehicle weaponry demonstration 00:00:10 - 00:00:25 - Navigating to the Los Santos storm drain 00:00:25 - 00:00:45 - Entering the tunnel and defensive positioning 00:00:45 - 00:01:00 - Intercepting the tunnel-flying jet 📖 Interactive written walkthrough with clickable timestamps: https://pixelfungaming.com/videos/gta-online-my-sticky-bomb-vs-f-160-raiju-jet-shorts

RDR2 - Kiearn Duffy Grave Location
Arthur Morgan visits the final resting place of Kieran Duffy in a quiet, sun-drenched meadow. The simple wooden headstone marks the grave, nestled among long grass and yellow wildflowers. The camera provides a clear close-up of the inscription 'KIERAN DUFFY' carved into the weathered wood. Following this somber moment, the map interface opens to pinpoint the exact location of the gravesite. It is situated southeast of Bolger Blade and just north of Shady Belle, providing a precise reference for those navigating the Lemoyne region. Chapters: 0:00:00 - 0:00:25 - Finding Kieran Duffy's Grave 0:00:25 - 0:00:39 - Exact Map Location in Lemoyne 📖 Interactive written walkthrough with clickable timestamps: https://pixelfungaming.com/videos/rdr2-kiearn-duffy-grave-location

Ghost Recon Wildlands Rescue Rebel Engineer Walkthrough
This video features a full mission walkthrough of 'The Engineer' in Tom Clancy's Ghost Recon Wildlands. The footage showcases a tactical approach to rescuing a rebel engineer held captive by Santa Blanca cartel forces at the Olico Super Dam. Viewers will observe an aerial infiltration via helicopter, long-range scouting and target marking, an intense firefight on the dam's bridge, and the subsequent extraction of the VIP to a secure location. The video concludes with a narrative cutscene between the rescued engineer and CIA operative Karen Bowman, followed by mission success confirmation. Chapters: 0:00:00 - 0:00:41 - Aerial approach to the Olico Super Dam 0:00:41 - 0:01:16 - Helicopter landing and bridge infiltration 0:01:16 - 0:02:03 - Tactical scouting and enemy target marking 0:02:03 - 0:02:36 - Firefight with cartel guards at the outpost 0:02:36 - 0:03:12 - Locating and securing the rebel engineer 0:03:12 - 0:03:52 - Extraction flight to Pucara Alpha 0:03:52 - 0:05:04 - Mission completion and narrative cutscene 📖 Interactive written walkthrough with clickable timestamps: https://pixelfungaming.com/videos/ghost-recon-wildlands-rescue-rebel-engineer-walkthrough

RDR2 - Stranger Mission In The Grizzles
The mission begins with an encounter in the snowy mountains where Arthur Morgan meets a distressed hunter searching for his friend, Tucker. After agreeing to help, Arthur navigates through deep snow and dense forest, eventually discovering Tucker's gruesome remains near a rock formation. The evidence points to a violent animal attack. Arthur returns to the hunter to deliver the news, and the two travel back to the site of the discovery. Upon arrival, a massive grizzly bear emerges and attacks. Arthur quickly engages in combat, firing multiple rounds to bring down the powerful predator. The encounter ends with Arthur examining the aftermath, including the fallen hunter and the bear's carcass, amidst the quiet, frozen landscape. Chapters: 0:00:00 - 0:00:34 - Encountering the Distressed Hunter 0:00:34 - 0:01:13 - Searching the Snowy Wilderness 0:01:13 - 0:02:08 - Discovery of Tucker's Mauled Body 0:02:08 - 0:02:58 - Reporting Back to the Hunter 0:02:58 - 0:03:15 - Returning to the Scene of the Attack 0:03:15 - 0:03:45 - Grizzly Bear Ambush and Combat 0:03:45 - 0:04:58 - Examining the Aftermath 📖 Interactive written walkthrough with clickable timestamps: https://pixelfungaming.com/videos/rdr2-stranger-mission-in-the-grizzles

Far Cry 5 - VIETNAM - LT Col Trang - Undetected
The mission begins with scouting an NVA camp from a hillside using binoculars to mark targets and plan a tactical approach. Movement into the camp is cautious and stealthy, utilizing high grass and wooden structures for cover. A primary objective involves disabling alarm systems to prevent enemy reinforcements from arriving. Silent takedowns are executed on patrolling NVA soldiers to maintain an undetected status while progressing through the village. Exploration of camp buildings yields various supplies, including explosives and medical kits. The final phase involves a coordinated attack to neutralize the remaining garrison and its commander. After securing the area, the character locates and liberates a prisoner named Yokel, successfully completing the primary objectives of the operation and freeing an ally. Chapters: 0:00:00 - 0:00:55 - Scouting the NVA camp and marking targets 0:00:55 - 0:01:35 - Stealthy infiltration of the camp outskirts 0:01:35 - 0:02:30 - Disabling the first alarm and performing initial takedowns 0:02:30 - 0:03:15 - Gathering supplies and disabling the final alarm 0:03:15 - 0:03:45 - Neutralizing the NVA commander and securing the village 0:03:45 - 0:04:42 - Liberating the prisoner and final mission completion 📖 Interactive written walkthrough with clickable timestamps: https://pixelfungaming.com/videos/far-cry-5-vietnam-lt-col-trang-undetected

HITMAN:Marrakesh Accidental Death (Turret) Wakthrough
Agent 47 begins the mission disguised as a military officer in the Marrakesh consulate basement. He navigates a series of utility tunnels and storage rooms, avoiding immediate detection by patrolling guards. 47 locates critical intelligence, the 'Turret Access Code,' on a document near a locker bank. He then proceeds toward the parking garage area, moving through a door previously breached. In the garage, 47 places a remote breaching charge near the main door leading to the upper military floors. To initiate the elimination sequence, 47 triggers a fire alarm, initiating a 'Target Lockdown' as the targets (Claus Strandberg and General Reza Zaydan) and their entourage are alerted and begin moving. 47 retreats to a strategic position while the targets and their heavily armed security detail move through the bunker and up toward street level. Strandberg is escorted out through an alleyway in the market district, accompanied by a large squad of soldiers. The target group stops near an armored personnel carrier (APC) at a fortified position. 47 discreetly approaches the APC's computer terminal, which controls the mounted turret. Activating the terminal, 47 directs the armored vehicle’s turret to fire, resulting in a massive explosion that instantly eliminates both Reza Zaydan and Claus Hugo Strandberg, along with several nearby guards, classifying the incident as an 'Explosion Kill' and 'Accident Kill.' With both primary targets eliminated, 47 must quickly locate an exit while the remaining military personnel search the area. Chapters: 0:00 - 0:37 - Infiltration and Locating Turret Access Code 0:37 - 1:49 - Gaining Intel and Setting up the Distraction 1:49 - 2:58 - Triggering Lockdown and Initial Target Movement 2:58 - 4:22 - Following the Targets to Street Level 4:22 - 6:35 - Approach and Execution of the Turret Accident Kill 6:35 - 7:01 - Exfiltration Phase and Mission Completion 📖 Interactive written walkthrough with clickable timestamps: https://pixelfungaming.com/videos/hitman-marrakesh-accidental-death-turret-wakthrough

Dead Island 2: Missing Nadia Walkthrough | Tactical Sword Weapon Reward #deadisland2
Check out our website: https://pixelfungaming.com Follow our Facebook page: https://www.facebook.com/pixelfungames Chapters: 0:00:00 - 0:00:30 - Fast travel to the Metro and initial tunnel entry 0:00:30 - 0:01:45 - Combat within the subway cars and searching for clues 0:01:45 - 0:02:05 - Locating the first code digit (8) on the train ceiling 0:02:05 - 0:03:05 - Navigating maintenance corridors and fighting Vicious Butchers 0:03:05 - 0:04:15 - Finding the second code digit (2) and clearing utility areas 0:04:15 - 0:04:30 - Discovering the third code digit (6) on a wall 0:04:30 - 0:05:30 - Ventilation shaft navigation and returning to the main tracks 0:05:30 - 0:06:50 - Subway track combat against a Slobber and runner waves 0:06:50 - 0:07:30 - Finding the final code digit (0) in the utility room 0:07:30 - 0:07:51 - Breaching Nadia's door and completing the quest 📖 Interactive written walkthrough with clickable timestamps: https://pixelfungaming.com/videos/dead-island-2-missing-nadia-walkthrough-tactical-sword-weapon-reward-deadisland2

Red Dead Redemption 2 - Hermit Woman & Treasure Map Location
The journey begins with the character navigating through a dense forest on horseback, eventually arriving at a secluded cabin. Upon arrival, an elderly woman emerges from the cabin, aggressively demanding that her territory be respected. A brief confrontation ensues as the character defends against her and her dogs. After subduing the woman, the character searches the property, discovering a unique double-barreled shotgun. Entering the small cabin reveals further secrets, including a nightstand containing half of a torn treasure map. The character examines the mended map in the inventory, hinting at a hidden stash elsewhere. Before departing, a nearby journal entry is inspected, providing details about the inhabitant. The session concludes with a detailed view of the world map, pinpointing the cabin's location in the far northwestern reaches of the Grizzlies, near Alcott Shack. Chapters: 0:00:00 - 0:00:17 - Arrival at the Hermit's Cabin 0:00:17 - 0:00:35 - Confrontation with the Hermit Woman 0:00:35 - 0:00:58 - Subduing and looting the Hermit 0:00:58 - 0:01:21 - Exploring the cabin and finding the treasure map 0:01:21 - 0:01:53 - Reviewing the journal and surroundings 0:01:53 - 0:02:15 - Identifying the location on the world map 📖 Interactive written walkthrough with clickable timestamps: https://pixelfungaming.com/videos/red-dead-redemption-2-hermit-woman-treasure-map-location

HITMAN: Elusive Target | "The Drop'' Alexios Laskaridis
This video presents a comprehensive walkthrough of 'The Drop' elusive target mission in Hitman 3, set in the Berlin location. The gameplay showcases a strategic approach starting from the initial mission briefing about the target, Alexios Laskaridis. Viewers will see the infiltration into restricted club areas, the process of subduing staff and the club owner to acquire high-level disguises, and the eventual face-to-face meeting with the target. The video concludes with the target's elimination, a silent exfiltration through the surrounding forest, and the final mission performance screens. Chapters: 0:00:00 - 0:01:20 - Mission Briefing and Target Profile: Alexios Laskaridis 0:01:20 - 0:02:50 - Initial Club Infiltration and Area Navigation 0:02:50 - 0:05:00 - Acquiring Club Staff Disguise and Infiltrating the Private Office 0:05:00 - 0:06:15 - Subduing the Club Owner and Assuming His Identity 0:06:15 - 0:08:45 - Exploring Backstage Areas and Locating Relevant Tools 0:08:45 - 0:10:10 - Observing the Target in the VIP Lounge 0:10:10 - 0:13:00 - Meeting the Target and Engaging in Critical Dialogue 0:13:00 - 0:13:25 - Elimination of the Target and Immediate Escape 0:13:25 - 0:14:30 - Silent Exfiltration Through the Forest to the Extraction Point 0:14:30 - 0:15:07 - Mission Summary and Performance Rating Screens 📖 Interactive written walkthrough with clickable timestamps: https://pixelfungaming.com/videos/hitman-elusive-target-the-drop-alexios-laskaridis

Far Cry New Dawn - Treasure Hunt - Riddle Me Fish - Walkthrough
The mission begins with the discovery of a warning note at a small shed, initiating the 'Riddle Me Fish' treasure hunt. A quick investigation of the shed reveals a hatch leading to an underground bunker. Inside, a locked electronic door prevents access to the main stash, while a secondary note suggests searching the nearby house for a key or further clues. Transitioning to the main house, a skunk is dispatched before activating a generator in the living area. Turning on the power triggers a sequence of wiggling wall-mounted fish, providing the necessary code for the bunker door. After carefully observing the order, the journey back to the bunker follows. Interacting with the fish trophies in the bunker in the exact sequence observed earlier—starting from the green fish and moving through the numbered targets—successfully unlocks the vault. The treasure hunt concludes with the retrieval of perk points, ammunition, crafting materials, and Far Cry credits from the hidden stash. Chapters: 0:00:00 - 0:00:45 - Treasure Hunt Start and Bunker Entry 0:00:45 - 0:01:30 - Bunker Exploration and Finding Clues 0:01:30 - 0:02:30 - Clearing the House and Powering Up the Generator 0:02:30 - 0:04:15 - Decoding the Fish Puzzle Sequence 0:04:15 - 0:05:25 - Returning to the Bunker 0:05:25 - 0:06:21 - Solving the Puzzle and Looting the Stash 📖 Interactive written walkthrough with clickable timestamps: https://pixelfungaming.com/videos/far-cry-new-dawn-treasure-hunt-riddle-me-fish-walkthrough

Dead Island 2: Mowing Down Group Of Apex And Regular Zombies With Bodycount Rapid Fire Gun #shorts
Gameplay begins with an environmental trap setup where shooting a yellow generator electrifies a puddle, shocking an approaching zombie runner. A large group of undead, led by a massive Crusher, enters the courtyard, prompting a quick retreat over a nearby ledge for better positioning. Switching to a high-powered assault rifle, a sustained volley of fire quickly decimates the group and takes down the Crusher. A specialized Karaoke Bridesmaid zombie emerges from the house and is pinned down by repeated rifle fire and persistent electrical shocks from the trap. The encounter concludes with the swift elimination of one final runner before the area is successfully cleared and the weapon reloaded. Chapters: 0:00:00 - 0:00:10 - Triggering the electrical generator trap 0:00:10 - 0:00:19 - Tactical retreat to gain distance from the horde 0:00:19 - 0:00:26 - Assault rifle spray eliminates the Crusher and walkers 0:00:26 - 0:00:44 - Battle with the Karaoke Bridesmaid zombie 0:00:44 - 0:00:55 - Clearing the final runner and reloading 📖 Interactive written walkthrough with clickable timestamps: https://pixelfungaming.com/videos/dead-island-2-mowing-down-group-of-apex-and-regular-zombies-with-bodycount-rapid-fire-gun-shorts

Assassins Creed Odyssey - Bulis Military Camp
The character navigates the rugged terrain of Phokis on horseback, scouting enemy positions with the aid of the eagle Ikaros. A quiet arrival at the Hut of Hyleus transitions into a chaotic skirmish as the character uses fire torches to ignite tents and supplies, drawing out Spartan defenders. Combat consists of rapid sword strikes and defensive parries against multiple attackers. Following the destruction of the outpost, the mission shifts to the Bulis Military Camp. An initial infiltration attempt on a high wooden tower leads to a brutal encounter with elite guards, resulting in a desynchronization. After returning to the camp, a more methodical approach proves successful. The character utilizes tall grass for concealment, performing stealth takedowns and eventually knocking out and recruiting a high-ranking soldier. The operation ends with the burning of remaining war supplies, synchronization of a new viewpoint, and a swift exit from the camp. Chapters: 0:00:00 - 0:02:30 - Outpost Infiltration and Combat at the Hut of Hyleus 0:02:30 - 0:05:15 - Clearing the Outpost and Scouting Bulis Military Camp 0:05:15 - 0:07:35 - Failed Infiltration Attempt and Desynchronization 0:07:35 - 0:09:14 - Second Successful Infiltration and Lieutenant Recruitment 📖 Interactive written walkthrough with clickable timestamps: https://pixelfungaming.com/videos/assassins-creed-odyssey-bulis-military-camp

Sniper Elite 3 - Multiplayer Live - 3 kills - No Audio
The mission begins with navigating the multiplayer server list to find a suitable lobby. After joining a match on the Ruins map, loadout selection involves choosing the Gewehr 43 and various tactical equipment. Initial movement across the desert terrain leads to the first defensive position behind a crumbling wall. Binoculars are used frequently to scan the horizon and tag enemies. Combat encounters feature long-range sniper duels across sand dunes and ruined architecture. High-ground advantage is sought by climbing massive stone blocks, allowing for a broader view of the battlefield. Tactical adjustments are made as the tide of the match shifts, including several precise long shots and close-quarters maneuvers within the ruins. The match takes place on the Ruins map in Sniper Elite 3's multiplayer mode. Tactical movement is the primary focus as the character maneuvers through rocky desert terrain and ancient stone structures to find optimal sightlines on opposing players. Frequent use of binoculars and the Gewehr 43 sniper rifle allows for spotting and engaging targets from a distance, while an MP40 is kept ready for inevitable close-quarters encounters. Stealth remains a critical element throughout the session, with significant time spent prone or crouched behind large boulders to avoid detection while scanning the dunes and pyramids for movement. The match concludes with a decisive victory for the blue team, followed by an in-depth review of the mission statistics, including total shots fired, accuracy percentages, and final kill-to-death ratios. Chapters: 0:00:00 - Multiplayer server navigation and lobby selection 0:02:35 - Character selection and loadout customization 0:04:05 - Match deployment on the Ruins map 0:07:00 - Initial scouting and positioning among ruined walls 0:08:40 - Securing the first long-range kill across the dunes 0:12:00 - Maneuvering through rocky terrain to find new vantage points 0:17:30 - Extended long-range duel with enemy snipers 0:22:30 - Respawning and adjusting tactics for map control 0:26:00 - Climbing massive stone blocks for a high-ground advantage 0:30:30 - Final high-stakes combat encounters in the central ruins 0:34:05 - Match conclusion and session end 0:00:00 - Initial scouting from high rocky ground 0:04:15 - Repositioning through the desert dunes 0:08:30 - Stealthy movement near the ancient ruins 0:11:45 - Close-quarters skirmish and respawn 0:14:10 - Long-range sniping attempts near the pyramid 0:17:30 - Flanking maneuvers through the lower trenches 0:21:00 - Final firefights as the match timer winds down 0:23:40 - Match conclusion and scoreboard results 0:26:15 - Detailed mission statistics and performance review 0:29:10 - End-of-match summary and completion bonuses 📖 Interactive written walkthrough with clickable timestamps: https://pixelfungaming.com/videos/sniper-elite-3-multiplayer-live-3-kills-no-audio

Far Cry 5 -VIETNAM - Mine Bomb Fun - Blowing up vehicles
The mission proceeds through a murky, fog-drenched jungle environment. The character navigates through scorched earth and charred trees, utilizing an M16 equipped with an under-barrel grenade launcher. A well-placed explosive round destroys an enemy technical vehicle, illuminating the green-tinted mist with a bright orange fireball. Advancing deeper into the warzone, a second vehicle is neutralized with another grenade. The gameplay focuses on tactical movement through the debris-strewn landscape as red enemy markers appear on the HUD. The character approaches a burning wooden structure at the edge of an encampment, maintaining a low profile while surveying the area for remaining threats. Chapters: 0:00:00 - 0:00:07 - Initial jungle traversal and first vehicle destruction 0:00:07 - 0:00:18 - Advancing through the fog and engaging second target 0:00:18 - 0:00:37 - Surveying the aftermath and approaching the burning base 📖 Interactive written walkthrough with clickable timestamps: https://pixelfungaming.com/videos/far-cry-5-vietnam-mine-bomb-fun-blowing-up-vehicles

AC Valhalla - Defeating Zealot Osgar
Eivor rides through the moonlit English countryside on horseback, approaching a target on the main road. Upon identifying Osgar, a powerful Zealot of the Order of the Ancients, the rider dismounts and immediately engages with a bow. Multiple arrows find their mark before the distance closes for melee combat. Eivor wields dual flaming weapons and a shield, executing a series of aggressive strikes and dodges to overwhelm the opponent. The battle is fierce, with Eivor using powerful stomps and heavy attacks to keep Osgar off-balance. After a sustained exchange of blows, Eivor pins the Zealot against a stone wall for the final finishing sequence. Confirming the kill leads to a cinematic X-ray execution and a transition into the memory corridor. There, Eivor speaks with the dying warrior, known as Sword-Cloven, before returning to the physical world to loot an Order of the Ancients medallion and experience gain. Chapters: 0:00:00 - 0:00:05 - Approaching the Zealot on horseback 0:00:05 - 0:00:17 - Opening the fight with rapid archery 0:00:17 - 0:01:10 - Melee combat using flaming weapons and tactical dodges 0:01:10 - 0:01:21 - Final execution and kill confirmation 0:01:21 - 0:01:46 - Memory corridor dialogue with Sword-Cloven 0:01:46 - 0:01:59 - Post-battle looting and mission update 📖 Interactive written walkthrough with clickable timestamps: https://pixelfungaming.com/videos/ac-valhalla-defeating-zealot-osgar
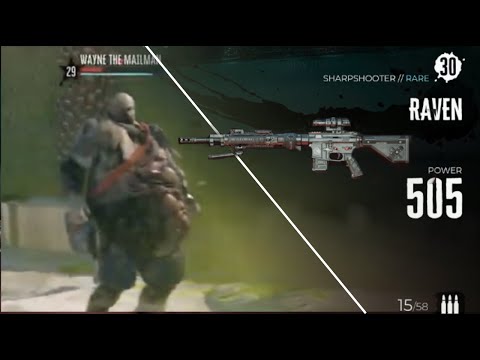
Dead Island 2: My Mailman Was A Zombie Quest Walkthrough | Raven Sharpshooter Reward #Deadisland2
The mission 'My Mailman was a Zombie!' unfolds in Bel-Air, starting with a review of the 'Return to Sender' journal entry. The pursuit of the missing mailman involves tracking undelivered packages across several high-end residential locations. The first stop on Alpine Drive leads to a swift encounter with a group of zombies near a delivery cart. Combat continues as the search moves toward Glitterati Corner, where more packages and a dangerous Grenadier Walker await. The trail eventually culminates at the GOAT Pen mansion. Here, the mailman, now a mutated Slobber named Wayne, must be defeated alongside a large horde of various undead types. After a fierce battle, Wayne drops the Mailman's Keys. These keys are used to unlock a 'Special Delivery' chest located near the original mail truck. The reward is the Raven tactical rifle, which is immediately put to use clearing out remaining zombies in the streets of Bel-Air, demonstrating its power and precision. Chapters: 0:00:00 - 0:00:20 - Quest start and map review 0:00:21 - 0:00:56 - Investigating the first delivery on Alpine Drive 0:00:57 - 0:01:46 - Clearing undead threats near the first stop 0:01:47 - 0:02:12 - Traveling to Glitterati Corner 0:02:13 - 0:02:29 - Finding packages and the Grenadier Walker 0:02:30 - 0:03:42 - Boss fight against Wayne the Mailman 0:03:43 - 0:04:05 - Unlocking the Special Delivery reward 0:04:06 - 0:04:54 - Testing the Raven rifle on street zombies 📖 Interactive written walkthrough with clickable timestamps: https://pixelfungaming.com/videos/dead-island-2-my-mailman-was-a-zombie-quest-walkthrough-raven-sharpshooter-reward-deadisland2

Red Dead Redemption 2: Secret Cave On Ambarino Side Of River (How to get inside) #shorts
The sequence begins with an examination of the world map, pinpointing a specific location near Bacchus Station. After closing the map, the character sprints through high brush toward a steep cliff edge during the late evening. He executes a series of controlled drops down the rocky face, navigating the terrain with agility. Upon reaching a lower ledge, he sidles along a narrow precipice until a cave entrance becomes visible. He steps inside the darkened interior, momentarily pausing to equip a lantern from the item wheel. Holding the light aloft, he ventures deeper into the damp, rocky tunnel, exploring the hidden cavern as the light flickers against the wet stone walls. Chapters: 0:00:00 - 0:00:15 - Pinpointing the target location on the world map near Bacchus Station 0:00:15 - 0:00:30 - Maneuvering down the dangerous cliffside ledges toward the hidden path 0:00:30 - 0:00:45 - Navigating the narrow cliff ledge and entering the dark cave mouth 0:00:45 - 0:01:00 - Equipping the lantern and delving into the deep interior of the cavern 📖 Interactive written walkthrough with clickable timestamps: https://pixelfungaming.com/videos/red-dead-redemption-2-secret-cave-on-ambarino-side-of-river-how-to-get-inside-shorts

RDR2 - Largemouth Bass (Lemoyne) Location
Fishing activities take place in the foggy Bluewater Marsh area. The character casts a line using a Special Swamp Lure and successfully hooks a fish after a short struggle. A 4lb 3oz Largemouth Bass is pulled from the water, completing a daily challenge and providing experience points along with a health level increase. Following the catch, the character opens the world map to display the precise fishing location situated north of Lagras and south of the Bluewater Marsh label. Chapters: 0:00:00 - 0:00:10 - Casting the line in Bluewater Marsh 0:00:10 - 0:00:25 - Reeling in the hooked fish 0:00:25 - 0:00:42 - Catching a Largemouth Bass and completing challenges 0:00:42 - 0:01:17 - Pinpointing the fishing location on the world map 📖 Interactive written walkthrough with clickable timestamps: https://pixelfungaming.com/videos/rdr2-largemouth-bass-lemoyne-location

Assassin´s Creed Odyssey - Desphina Fort and Bulis Military Camp -Live stream #5.5
Experience a detailed gameplay session of Assassin's Creed Odyssey, focusing on the exploration and liberation of key locations within the Phokis region. This video showcases a blend of stealthy infiltration, brutal open combat, and scenic world traversal. The journey begins with a focused assault on Desphina Fort, where the player must navigate high walls, eliminate guards silently, and destroy critical war supplies to weaken the enemy's grip. After successfully clearing the fort and collecting valuable loot, the adventure continues across the beautiful landscapes of ancient Greece. Watch as the player character travels by horseback through the rolling hills and forests of Phokis, eventually arriving at the Bulis Military Camp. Here, the action intensifies with an all-out battle against waves of Spartan soldiers and formidable mercenaries. The video highlights various gameplay mechanics including the use of Ikaros for tactical scouting, the depth of the combat system, and the rewarding exploration that defines the Assassin's Creed experience. Chapters: 0:00:00 - Infiltration of Desphina Fort begins 0:04:30 - Burning war supplies inside the fort 0:09:15 - Stealth assassinations on the ramparts 0:13:45 - Intense open combat with fort guards 0:18:20 - Looting chests and gathering resources 0:23:00 - Completing location objectives at Desphina Fort 0:27:45 - Traveling through the wilderness of Phokis 0:32:15 - Reviewing map and active quests 0:37:00 - Horseback journey towards the coast 0:41:30 - Scouting Bulis Military Camp with Ikaros 0:46:00 - Large-scale battle at Bulis Military Camp 0:50:56 - Exploration continues after clearing the camp 📖 Interactive written walkthrough with clickable timestamps: https://pixelfungaming.com/videos/assassin-s-creed-odyssey-desphina-fort-and-bulis-military-camp-live-stream-5-5

Dead Island 2: End Of The Line PART 1 | CO-OP Walkthrough (No Commentary) #DeadIsland2
The mission begins with a conversation in a modern hillside villa where Jacob receives instructions to find his companions in the local sewer system. Jacob exits the property and sprints through the streets of Hell-A, eventually reaching a service entrance guarded by the undead. A fierce battle breaks out at the tunnel entrance against Burning Runners and a massive Firestorm Slobber. After clearing the area, Jacob ventures into the dark, narrow sewer pipes, navigating through muck and debris. Deep within the tunnels, Jacob locates a hidden survivor sanctuary. Here, he meets Patton and reunites with Emma and Sam B. A cinematic sequence unfolds as they convince Patton to help them pilot a helicopter to safety. The group moves deeper into the infrastructure, reaching the metro station entrance. A sudden zombie surge at a quarantine gate separates Jacob from the others. He enters a hazardous maintenance zone filled with leaking gas and roaring flames. Jacob works through the room, turning specific valves to equalize pressure and extinguish the fires blocking the path. Jacob reaches the primary metro tracks and begins a long trek through the subterranean tunnels. He scavenges through abandoned train cars while fending off persistent walkers. The intensity peaks as Jacob encounters a Vicious Butcher, requiring precise dodges and heavy counter-attacks. Navigating side corridors, Jacob locates circuit breakers to restore power to locked security doors. The gameplay reaches its climax at a massive tunnel collapse involving a crashed helicopter. Jacob engages in a large-scale defensive battle against waves of elemental zombies, including Firefighter Runners and an Inferno Crusher, to protect his allies and clear the way forward. Chapters: 0:00:00 - 0:01:45 - Briefing with Andrea and Departure 0:01:45 - 0:04:30 - Combat at the Sewer Entrance 0:04:30 - 0:07:30 - Navigating Sewers and Meeting Patton 0:07:30 - 0:10:00 - Reaching the Metro and Pressure Valve Puzzle 0:10:00 - 0:13:00 - Subway Track Exploration and Butcher Fight 0:13:00 - 0:16:00 - Restoring Power with Circuit Breakers 0:16:00 - 0:18:43 - Final Metro Skirmish and Helicopter Crash 📖 Interactive written walkthrough with clickable timestamps: https://pixelfungaming.com/videos/dead-island-2-end-of-the-line-part-1-co-op-walkthrough-no-commentary-deadisland2

Dead Island 2: Redacted | Bodycount Weapon Location Walkthrough
The mission begins at Venice Beach with the objective to follow a paper trail leading to a classified asset. Initial exploration leads through the Krab Grill and out to a beachfront area infested with various zombie types. Combat involves using a modified katana to dismember and decapitate enemies while navigating through military installations and sand dunes. A search of shipping containers reveals the first journal entry, providing clues for the next stage of the search. Progress continues through a heavily guarded military evacuation zone where encounters with Grenadier Walkers and armored variants require strategic use of melee combos. Navigating through environmental hazards like high-voltage areas and pools of acid adds tension to the constant skirmishes. After uncovering a second journal entry with an audio log, the search moves towards specifically numbered containers near the body disposal pits. The intensity ramps up in the center of the zone, featuring a duel against a fast-moving Butcher. Finally, a massive Crusher blocks the path near the final target. Once the threat is neutralized, container 66 is breached, revealing the legendary 'Bodycount' assault rifle. The quest concludes with the acquisition of this high-tier weapon and a brief testing of its rapid-fire capabilities against lingering threats. Chapters: 0:00:00 - 0:01:20 - Initial Exploration and Starting the Redacted Quest 0:01:20 - 0:03:00 - Beachfront Combat and Searching Shipping Containers 0:03:00 - 0:05:30 - Infiltrating the Military Evacuation Zone 0:05:30 - 0:07:50 - Intense Battles with Riot Gear Walkers and a Butcher 0:07:50 - 0:09:06 - Final Boss Encounter and Claiming the Legendary Asset 📖 Interactive written walkthrough with clickable timestamps: https://pixelfungaming.com/videos/dead-island-2-redacted-bodycount-weapon-location-walkthrough

Dead Island 2: The Final Gauntlet | CO-OP Walkthrough (No Commentary)
The mission begins with an approach to the Serling Hotel on Ocean Avenue. Heavy combat erupts at the hotel entrance as multiple walkers and a crusher attempt to block the way. The character uses a katana to dispatch enemies with precision strikes while navigating through pools of oil and fire. Upon entering the hotel, the gameplay transitions into the upper mall area where intense skirmishes continue against shocking walkers and firefighter runners. After clearing the immediate threats, the character reaches the Serling Hotel reception, leading to a pivotal meeting with Dr. Reuben Reed and his survivors behind a fortified door. A long cutscene unfolds where Dr. Reed discusses the potential for a vaccine and his plans to contact the CDC in Colorado. Tension rises between Reed and his daughter Tisha over dwindling supplies and safety. The mission concludes with the character resting in a secure room, unlocking the Surgical Focus ability and transitioning into the next phase of the story. Chapters: 0:00:00 - 0:00:28 - Approaching the Serling Hotel 0:00:28 - 0:02:08 - Serling Hotel Entrance Combat 0:02:08 - 0:04:45 - Serling Mall Upper Level Skirmish 0:04:45 - 0:06:50 - Exploring the Interior and Finding the Safe Zone 0:06:50 - 0:08:40 - Meeting Dr. Reuben Reed and Denise 0:08:40 - 0:10:40 - Tisha's Argument and Evacuation Plans 0:10:40 - 0:11:18 - Mission Completion and Surgical Focus Unlock 📖 Interactive written walkthrough with clickable timestamps: https://pixelfungaming.com/videos/dead-island-2-the-final-gauntlet-co-op-walkthrough-no-commentary

RDR2 Online - Flatneck Station Prisioner Breakout Mission
The gameplay follows a mission titled 'Early Release' in Red Dead Online. It begins at Mama Watson's cabin, where the character receives instructions to liberate a prisoner from a wagon outside of Strawberry. After setting off on horseback, the journey is interrupted by a deadly ambush from outlaws that results in a temporary setback. After a quick recovery, the character returns to the site of the attack to revive their fallen horse before continuing the pursuit of the objective. The mission intensifies as the character reaches the moving prison wagon. A fierce shootout breaks out with the guards, ending with the character shooting the padlock to free the prisoner. The liberated prisoner hops onto the back of the character's horse, initiating a long, dangerous escort toward Flatneck Station. Throughout the ride, lawmen and marshals relentlessly pursue the pair. The character utilizes Dead Eye and precise marksmanship to thin the ranks of the attackers while navigating various terrains and crossing a river. The mission concludes successfully upon reaching the drop-off point at Flatneck Station. Chapters: 0:00:00 - 0:00:59 - Mission Briefing at Mama Watson's Cabin 0:00:59 - 0:02:03 - Traveling Through the Wilderness Toward Strawberry 0:02:03 - 0:03:12 - Outlaw Ambush and Character Defeat 0:03:12 - 0:04:48 - Horse Recovery and Resuming the Pursuit 0:04:48 - 0:05:33 - Attacking the Prison Wagon and Releasing the Prisoner 0:05:33 - 0:07:00 - Fleeing the Law Toward Flatneck Station 0:07:00 - 0:08:20 - High-Stakes Horseback Shootout to the Drop-off Point 0:08:20 - 0:09:13 - Mission Completion and Final Rewards 📖 Interactive written walkthrough with clickable timestamps: https://pixelfungaming.com/videos/rdr2-online-flatneck-station-prisioner-breakout-mission

GTA 5 : Hitman (Agent 47) goes bounty hunting
The gameplay opens with the character waking up in an apartment bedroom. The character proceeds to change their clothing from casual wear to a black suit with a white shirt and red tie, utilizing the in-game wardrobe menu to select and save the formal outfit. The character then exits the apartment and enters a private, luxury garage containing multiple customized vehicles, selecting a vibrant green sports sedan. Driving through the streets of Paleto Bay, the character arrives at a barbershop. Inside, the character receives a 'Close Shave,' rendering them bald and transforming their look into that of a classic assassin or agent. After leaving the barbershop, the character briefly takes photos of the new look and their customized car. The action shifts as the character engages in spontaneous, stylized close-quarters combat on a sunny pier, eliminating multiple opponents in a melee sequence that earns a temporary wanted level. The character quickly uses Lester's services to remove the police wanted level. Switching to a sleek black electric sports car, the character drives at high speed through the city and into the Vinewood Hills, navigating traffic and off-road terrain. During this high-speed traversal, the character uses a sticky bomb to destroy a traffic light. The pursuit continues onto the beach where the sports car drives aggressively across the sand before flipping violently. The character escapes the crash and immediately takes down another player, claiming a significant bounty, and ranking up to 'Kingpin.' The character then calls Pegasus for a vehicle delivery and obtains a Buzzard Attack Chopper from Los Santos International Airport. Flying the helicopter over the Grand Senora Desert wind farm, the character completes another player bounty. The video transitions, showing the character inside a high-end apartment, pouring and drinking wine before walking to the bedroom and finally getting back into bed. Chapters: 0:00 - 2:34 - Apartment Wake Up and Customizing Formal Wear 2:34 - 3:15 - Exiting Garage and Driving to Barbershop 3:15 - 4:10 - Character Hairstyle Transformation to Bald Look 4:10 - 5:25 - Taking Selfies and Melee Combat on the Pier 5:25 - 6:55 - Acquiring New Vehicle and Clearing Wanted Level on Pier 6:55 - 11:45 - High-Speed Driving, Traffic Destruction, and Off-Road Chase 11:45 - 13:21 - Beach Drive, Vehicle Crash, Bounty Collection, and Interaction Menu Use 13:21 - 16:26 - Helicopter Flight and Bounty Hunting over Los Santos 16:26 - 17:42 - Apartment Relaxation (Drinking Wine) and Entering New Garage 17:42 - 19:30 - Aggressive Driving in Green Sports Car 19:30 - 22:50 - Evasive Maneuvers and Collecting Multiple Bounties 22:50 - 24:32 - Helicopter Acquisition (Pegasus) and Flight to Desert Area 24:32 - 27:48 - Driving Back to Vinewood, Entering Garage, and Ending Gameplay 📖 Interactive written walkthrough with clickable timestamps: https://pixelfungaming.com/videos/gta-5-hitman-agent-47-goes-bounty-hunting

Dead Island 2 : Quest | It Came From Monarch Studios | Walkthrough (No Commentary)
The mission begins with a conversation between Jacob and Sarah Sheppard atop a trailer in the Monarch Studios lot. Sarah tasks Jacob with finding Sebastian and provides a bag containing DD-09, a robotic decoy. Jacob picks up the bag and navigates through the studio backlot, passing large movie sets and props until reaching Sound Stage 3. Upon entering the stage, the DD-09 decoy begins beeping loudly, triggering a red alert that draws a large horde of zombies. Jacob engages in intense melee combat using a katana, utilizing electrical hazards on the floor to stun and eliminate groups of walkers and shamblers. During the skirmish, Jacob reaches level 17 and unlocks a new special attack skill card. Once the area is cleared, Jacob retrieves the decoy and exits the stage, following the objective marker to a different part of the studio complex. He eventually finds Sebastian perched on a high scaffolding. The footage concludes just as Jacob prepares to defend Sebastian from another wave of approaching zombies. Chapters: 0:00:00 - 0:01:16 - Dialogue with Sarah Sheppard 0:01:17 - 0:02:17 - Navigating to Sound Stage 3 0:02:18 - 0:05:15 - Defending the DD-09 Decoy 0:05:16 - 0:06:27 - Searching the studio backlot 0:06:28 - 0:06:31 - Locating Sebastian on the scaffolding 📖 Interactive written walkthrough with clickable timestamps: https://pixelfungaming.com/videos/dead-island-2-quest-it-came-from-monarch-studios-walkthrough-no-commentary

Dead Island 2: Kwon With The Wind | Walkthrough (No Commentary)
The mission 'Kwon with the Wind' begins in Beverly Hills with the objective of finding Jessie at a construction site. The journey involves navigating sun-drenched hills and suburban streets, encountering various zombie types along the way. Upon reaching a luxurious mansion under renovation, a large group of undead waits on the grand staircase, leading to a frantic melee battle. Strategic use of the environment becomes key as a generator is activated to electrify a large fountain, effectively neutralizing a wave of fast-moving Shocking Runners. After clearing the courtyard, the exploration continues inside the mansion, where deadly tripwires connected to shotguns and live wires present environmental hazards. Combat intensifies on the upper floors, requiring precise melee strikes and defensive maneuvers to clear rooms packed with Shamblers and Walkers. The mission culminates in finding Jessie hiding in a safe room, followed by a trek to Monarch Studios to complete the quest and unlock new abilities. Chapters: 0:00:00 - 0:01:11 - Mission Start and Navigation Through Beverly Hills 0:01:11 - 0:01:55 - Mansion Staircase Skirmish 0:01:55 - 0:02:42 - Setting the Electric Fountain Trap 0:02:42 - 0:04:05 - Shocking Runner Courtyard Battle 0:04:05 - 0:05:21 - Navigating Mansion Traps and Hazards 0:05:21 - 0:06:54 - Upper Floor Room Clear and Melee Combat 0:06:54 - 0:07:20 - Rescuing Jessie and Quest Update 0:07:20 - 0:07:48 - Arrival at Monarch Studios and Quest Completion 📖 Interactive written walkthrough with clickable timestamps: https://pixelfungaming.com/videos/dead-island-2-kwon-with-the-wind-walkthrough-no-commentary

Red Dead Online: Capturing Player Bounties Dead Or Alive #5 #RedDeadOnline
The mission begins in the dark streets of Blackwater, where a player bounty notification triggers an immediate pursuit. The chase leads through the outskirts of town, resulting in a swift horseback confrontation and a close-quarters gunfight. After successfully hogtying the target, the bounty wagon is summoned to secure the prisoner for transport. The delivery is completed at the Blackwater Police Department, followed by a transition to Valentine. In Valentine, a new target is identified, leading to another high-speed chase through the fields. This capture involves the precise use of bolas to bring down the fleeing outlaw. The prisoner is loaded into the wagon and delivered to the local sheriff's office. The final segment focuses on a third target located on the rooftops of Valentine. An intense sniper duel ensues, ending with the target being neutralized. The bounty hunter retrieves the body and delivers it to the authorities to collect the final reward. Chapters: 0:00:00 - 0:00:31 - Introduction and First Bounty Pursuit in Blackwater 0:00:31 - 0:01:55 - Chasing and Capturing SKIPPE50_23 0:01:55 - 0:02:32 - Delivering the Target to Blackwater Police Department 0:02:32 - 0:04:10 - Relocating to Valentine and Identifying a New Target 0:04:10 - 0:05:10 - Horseback Takedown and Capture of JEFFWA604 0:05:10 - 0:06:04 - Transporting and Delivering the Second Bounty 0:06:04 - 0:08:28 - Tracking the Third Bounty Target through Valentine 0:08:28 - 0:09:15 - Rooftop Sniper Duel and Neutralizing BENBRO297 0:09:15 - 0:10:44 - Final Delivery to Valentine Sheriff and Conclusion 📖 Interactive written walkthrough with clickable timestamps: https://pixelfungaming.com/videos/red-dead-online-capturing-player-bounties-dead-or-alive-5-reddeadonline

Dead Island 2: O Michael Where Art Thou | Walkthrough (No Commentary)
The mission 'O Michael, Where Art Thou?' begins with a confrontation between Jacob and Andrea in Michael's room at the Halperin Hotel. After learning Michael has fled to his home in Beverly Hills, the journey takes the survivors into the affluent, zombie-infested hills. Upon arrival at Michael's residence, combat erupts as swarm walkers and runners besiege the property. The investigation moves indoors, searching through blood-stained hallways for spare keys and clues to Michael's whereabouts. Finding a note from Jessie and address cards reveals a lead on Jessie Kwon's nearby house. The path leads through gardens and over fences to meet new survivors, Rikky and Roxanne, who are hunkered down in a fortified mansion. To gain their trust and entry, the task involves repairing the house's electrical gates using circuit breakers found in the garage. A major defensive battle follows, featuring a powerful Crusher zombie and various burning variants around the backyard pool. Once the area is cleared, the survivors regroup inside to discuss their next move, concluding the quest and transitioning to the next objective. Chapters: 0:00:00 - 0:02:08 - Confronting Andrea in Michael's Room 0:02:08 - 0:03:22 - Arriving in Beverly Hills and Clearing Michael's Porch 0:03:22 - 0:04:45 - Investigating Michael's House for Clues and Spare Keys 0:04:45 - 0:05:40 - Discovering Jessie Kwon's Address in the Bedroom 0:05:40 - 0:07:05 - Locating Jessie's House and Meeting Rikky and Roxanne 0:07:05 - 0:08:30 - Securing the Perimeter and Defending the Gates 0:08:30 - 0:09:32 - Final Stand at the Pool and Mission Completion 📖 Interactive written walkthrough with clickable timestamps: https://pixelfungaming.com/videos/dead-island-2-o-michael-where-art-thou-walkthrough-no-commentary

MAFIA 3 | Definitive Edition Live #9
The mission opens with Lincoln Clay interrogating an informant about a hijacking operation. After a tense exchange, Lincoln recruits the man into his crew. He then exits the alleyway and gets into a sleek black car to track down Purdue's shipments. The drive through the rain-slicked streets of New Bordeaux leads to a guarded warehouse in the Southdowns district. Upon arrival, Lincoln sneaks into the facility, executing a silent takedown on a guard near a parked semi-truck. Stealth quickly gives way to a fierce firefight as more guards are alerted. Lincoln uses cover effectively, swapping between his pistol and a rifle to neutralize enemies across the yard and inside the warehouse. The combat is brutal and fast-paced as he systematically clears out the hostile forces to disrupt the black market operation. Chapters: 0:00:00 - 0:00:15 - Interrogating and recruiting the informant 0:00:15 - 0:01:47 - Navigating the rainy city streets toward the objective 0:01:47 - 0:02:10 - Infiltrating the warehouse yard via stealth 0:02:10 - 0:02:45 - Initiating the firefight against Purdue's men 0:02:45 - 0:03:11 - Clearing out remaining hostiles in the warehouse area 📖 Interactive written walkthrough with clickable timestamps: https://pixelfungaming.com/videos/mafia-3-definitive-edition-live-9

Hitman: The hexagon protocol - The Disarm Device Location
The agent, initially compromised, quickly subdues a security guard near a cafeteria entrance to steal the security uniform and secure a disguise. Now blending in, the agent proceeds toward a secure area, entering a surveillance control room filled with monitors and large server banks. Two security guards are actively monitoring the feeds. The agent uses a suppressed pistol to swiftly eliminate both security guards at their posts, resulting in a 'Non-Target Kill' notification and the detection of a 'Crime Noticed.' The agent then moves to a locked server cabinet. After reviewing his options, the agent selects the crowbar to forcibly break open the storage unit, creating noise but gaining access. He retrieves the Zero Stream Device from the cabinet. The agent ensures the immediate area is secure and prepares to exit the now-disabled surveillance room. Chapters: 0:00 - 0:03 - Subduing a Guard and Acquiring the Security Disguise 0:03 - 0:11 - Infiltrating the Surveillance Room 0:11 - 0:18 - Silent Elimination of Control Room Guards 0:18 - 0:26 - Breaking Open the Cabinet and Disabling Surveillance 0:26 - 0:44 - Securing the Area and Retrieval of the Device 📖 Interactive written walkthrough with clickable timestamps: https://pixelfungaming.com/videos/hitman-the-hexagon-protocol-the-disarm-device-location

Dead Island 2: Room Service For Major Booker Walkthrough (No Commentary)
Welcome to this complete gameplay walkthrough of Dead Island 2, focusing on the main story quest 'Room Service for Major Booker.' In this video, we follow Jacob as he infiltrates the luxurious but infested Halperin Hotel in Bel-Air. The mission begins with a tense investigation of the hotel's pool area, where we discover a gruesome chemical disposal operation involving 'meat slurry.' After fighting off waves of walkers and runners, Jacob enters the hotel's interior, navigating through blood-soaked corridors, scavenging for vital resources, and utilizing workbanks to enhance his arsenal. The journey takes us through the back-of-house areas, including laundry rooms and ventilation shafts, to bypass blocked paths and fire hazards on the upper floors. The climax of the mission occurs in the hotel's grand ballroom, beautifully decorated for a wedding that never finished. Here, Jacob faces a formidable boss: Becki the Bride, a powerful Crusher variant. Witness the intense strategy used to take her down, including the use of environmental hazards like electrified water. Following the battle, Jacob finally reaches Room 307 to find the fate of Major Booker and acquires her master keys. The video concludes with a pivotal story moment as Jacob uses the hotel's radio to establish contact with Dr. Reed, revealing his unique status as an 'immune' survivor. This walkthrough provides tips on combat, weapon upgrading, and effective exploration in Hell-A. Chapters: 0:00:00 - Quest Start: Room Service for Major Booker 0:02:10 - Investigating the Toxic Hotel Pool 0:05:00 - Defending the Pump against Zombie Waves 0:08:45 - Entering the Halperin Hotel Interior 0:12:15 - Corridor Combat and Resource Scavenging 0:15:30 - Weapon Upgrades at the Workbench 0:18:20 - Ventilation Shaft Navigation 0:22:00 - Navigating the Third Floor Fire Hazard 0:25:40 - Entering the Ballroom & Boss Introduction 0:27:15 - Becki the Bride Boss Fight 0:31:30 - Clearing the Ballroom Aftermath 0:33:50 - Finding Major Booker in Room 307 0:35:45 - Radio Contact with Dr. Reed 0:37:14 - Mission Accomplished and Level Up 📖 Interactive written walkthrough with clickable timestamps: https://pixelfungaming.com/videos/dead-island-2-room-service-for-major-booker-walkthrough-no-commentary

Dead Island 2: Bel Air Brawl Walkthrough (No Commentary)
The journey begins amidst the wreckage of a plane crash where Jacob attempts to aid fellow survivors, only to witness them transform into aggressive zombies. After a desperate struggle, Jacob loses consciousness and awakens in the affluent neighborhood of Bel-Air. He navigates through luxurious estates, battling walkers and shamblers with found melee weapons like a heavy pipe wrench. The mission 'Desperately Seeking Emma' leads him to a celebrity's mansion, requiring him to solve environmental puzzles involving circuit breakers and security keycards. Along the way, he encounters unique 'celebrity' zombies and learns to utilize new combat skills like dodging. Upon arriving at Emma Jaunt's residence, he experiences a tense confrontation with the residents before a large-scale zombie assault begins. Jacob defends the pool area and driveway, eventually securing the perimeter by repairing a gate mechanism. The encounter concludes with the introduction of Sam B, a legendary survivor from Banoi who claims immunity to the virus. Chapters: 0:00:00 - 0:02:11 - Crash Site Nightmare and Infection 0:02:11 - 0:02:45 - Awakening in Sun-Drenched Bel-Air 0:02:45 - 0:04:05 - Investigating the Mansion Perimeter 0:04:05 - 0:05:16 - Finding the Circuit Breaker 0:05:16 - 0:06:42 - Gate Breach and Courtyard Combat 0:06:42 - 0:07:20 - Infiltrating the Swanson Estate 0:07:20 - 0:07:48 - Boss Fight: Eliminating Colt Swanson 0:07:48 - 0:09:36 - Clearing the Grounds and Scavenging 0:09:36 - 0:10:19 - Accessing the Main Residence Lobby 0:10:19 - 0:11:02 - Close-Quarters Brawl in the Games Room 0:11:02 - 0:11:58 - Searching for an Exit Route 0:11:58 - 0:13:03 - Locating the Back Gate Security Code 0:13:03 - 0:14:08 - Approaching Emma Jaunt's Mansion 0:14:08 - 0:15:21 - First Meeting with Emma and Residents 0:15:21 - 0:16:42 - The Gym Interrogation 0:16:42 - 0:18:35 - Defending the Poolside 0:18:35 - 0:20:06 - Driveway Skirmish and Electric Traps 0:20:06 - 0:21:28 - Securing the Gate and Meeting Sam B 📖 Interactive written walkthrough with clickable timestamps: https://pixelfungaming.com/videos/dead-island-2-bel-air-brawl-walkthrough-no-commentary

GTA Online: Dropping Godmode Van Into Ocean #shorts
The mission begins with a camouflage-painted Cargobob heavy-lift helicopter flying low over the neon-lit streets of Los Santos at night. Intense aerial combat erupts as a pursuing helicopter opens fire with heavy machine guns, illuminating the dark sky with tracers. The pilot of the Cargobob maneuvers through narrow gaps and under highway overpasses to evade the incoming fire while maintaining stability. The helicopter successfully grapples a white delivery van, carrying it across the city towards the harbor. Gunfire continues to strike the fuselage of the Cargobob as it makes its final approach over the water. Upon reaching the target destination near the docks, the pilot releases the cargo, dropping the van into the harbor. The helicopter then bank sharply and accelerates away from the scene, successfully escaping the persistent pursuers amidst a hail of bullets and flares. Chapters: 0:00:00 - 0:00:12 - Initial night flight and city navigation 0:00:12 - 0:00:25 - Pursuit begins with heavy aerial gunfire 0:00:25 - 0:00:38 - Lifting and transporting the target vehicle 0:00:38 - 0:00:50 - Approach to the harbor under intense fire 0:00:50 - 0:00:58 - Cargo release and tactical extraction 📖 Interactive written walkthrough with clickable timestamps: https://pixelfungaming.com/videos/gta-online-dropping-godmode-van-into-ocean-shorts

Far Cry 5 - VIETNAM - Awesome molotov cocktail helicopter take down
The mission begins with an intense jungle firefight where an enemy helicopter is targeted with sustained rifle fire. The aircraft eventually loses control and crashes into a nearby structure, erupting in a large explosion. Ground combat immediately follows as the character navigates through tall grass to engage enemy infantry near a parked truck and another hovering helicopter. During the skirmish, a fellow soldier is downed and requires a quick revival to stay in the fight. After securing the immediate area and looting fallen enemies for ammunition, the movement continues through the foggy Vietnam landscape. The final moments involve pushing toward a village while taking fire from distant hostiles, maintaining a tactical advance through the brush and mud. Chapters: 0:00:00 - 0:00:20 - Taking Down the Enemy Helicopter 0:00:20 - 0:00:43 - Reviving a Downed Ally under Fire 0:00:43 - 0:01:05 - Clearing Ground Forces and Scavenging Ammo 0:01:05 - 0:01:26 - Advancing through the Jungle Marsh 📖 Interactive written walkthrough with clickable timestamps: https://pixelfungaming.com/videos/far-cry-5-vietnam-awesome-molotov-cocktail-helicopter-take-down

Assassin's Creed Valhalla - First 30 minutes
The experience begins with a cinematic narration by a Seer, recounting the Norse creation myth of Ymir and the formation of the world from fire and ice. The story shifts to a winter settlement in 9th-century Norway, where a young Eivor finds a ceremonial ring intended as a gift. Eivor enters a vibrant, crowded longhouse filled with music, dancing, and feasting. He navigates the hall, witnessing the jovial atmosphere and interacting with key clan members like the skald and the blacksmith Gunnar. His father, Varin, coaches him on presenting the gift to King Styrbjorn to cement an alliance between their clans. The celebration reaches its peak with a series of toasts and a traditional song, but is suddenly and violently interrupted as the settlement comes under attack by the rival Kjotve clan. Warriors breach the hall, setting fire to the structures. Eivor's mother, Rosta, engages in brutal hand-to-hand combat to protect her child, eventually placing Eivor on a horse with Sigurd to facilitate their escape. The sequence ends tragically as Varin surrenders to Kjotve the Cruel in a desperate attempt to save his people, only for Kjotve to betray the oath and execute him as Eivor and Sigurd ride away into the snowy night. Chapters: 0:00:00 - 0:01:34 - Norse Creation Myth Cinematic 0:01:34 - 0:03:00 - Young Eivor Enters the Festive Hall 0:03:00 - 0:04:30 - Interacting with Clan Members and Dancing 0:04:30 - 0:06:15 - Preparation for the Peace Gift Ceremony 0:06:15 - 0:07:45 - Varin's Toast and Presentation to the King 0:07:45 - 0:09:00 - The Kjotve Clan Attack and Hall Breach 0:09:00 - 0:10:01 - Varin's Final Sacrifice and the Escape 📖 Interactive written walkthrough with clickable timestamps: https://pixelfungaming.com/videos/assassin-s-creed-valhalla-first-30-minutes

HITMAN: Elusive Target | Serial Killer | Silent Assassin
The mission begins with a briefing on 'The Censor,' a notorious serial killer active in Whittleton Creek, Vermont. Agent 47 arrives in the quiet suburban neighborhood and begins his search for the target, Joseph Gorski. Stealthily navigating through backyards and avoiding local security, Agent 47 identifies the target at a neighborhood garden party. The target moves through the house and yard, condescendingly evaluating guests as if they were his victims. Agent 47 observes Gorski's routine, trailing him through the kitchen, living room, and garage. To isolate the target, Agent 47 subdues a few residents and a chef in the garage area, hiding their bodies in a nearby freezer to maintain a clean area of operation. Eventually, the target enters the garage alone. Agent 47 seizes the opportunity, eliminating Joseph Gorski with a precise headshot. With the contract complete, Agent 47 exits the premises and makes a clean getaway via a local bus. The mission concludes with a 'Silent Assassin' rating and a summary of the operative's performance. Chapters: 0:00:00 - 0:00:37 - Mission Briefing: The Serial Killer 0:00:37 - 0:02:16 - Arrival and Infiltration of Whittleton Creek 0:02:16 - 0:04:40 - Identifying and Tracking Joseph Gorski 0:04:40 - 0:07:20 - Observing Target Routines and Dialogues 0:07:20 - 0:09:00 - Setting Up the Kill Zone in the Garage 0:09:00 - 0:10:58 - Subduing Witnesses and Isolating the Target 0:10:58 - 0:11:29 - Target Elimination and Extraction 0:11:29 - 0:11:53 - Mission Complete and Performance Review 📖 Interactive written walkthrough with clickable timestamps: https://pixelfungaming.com/videos/hitman-elusive-target-serial-killer-silent-assassin

HITMAN Freelancer: Dartmoor | Bartoli Hunting Shotgun Location
The mission unfolds within the grand interior of the Dartmoor estate. Disguised as a security guard, the protagonist navigates through the mahogany-paneled hallways, passing by staff and guests unnoticed. He enters a trophy room and approaches a glass-enclosed cabinet containing high-powered rifles. He smashes the glass, triggering a brief alert, and quickly secures a Bartoli Hunting Shotgun. Following the weapon acquisition, the tactical map opens to reveal the precise locations of syndicate members across the grounds, including the gardens, library, and sitting room. The overview provides a comprehensive look at the sprawling manor layout and target proximity, allowing for strategic planning of the upcoming assassinations. Chapters: 0:00:00 - 0:00:15 - Navigating the Dartmoor mansion hallways in a security disguise 0:00:15 - 0:00:30 - Breaking the display case and acquiring the Bartoli Hunting Shotgun 0:00:30 - 0:00:49 - Reviewing the mission map and identifying syndicate targets 📖 Interactive written walkthrough with clickable timestamps: https://pixelfungaming.com/videos/hitman-freelancer-dartmoor-bartoli-hunting-shotgun-location

HITMAN: Elusive Target | The Forger Suffers Freak Accident #short
Agent 47 navigates a lavish mansion during a high-stakes mission in Paris. The operation begins with a tactical assessment of the ballroom using heightened instincts to track the movements of targets and guards through the walls. After surveying the environment, a coin is retrieved from the inventory and tossed onto the floor to lure a specific target into a vulnerable position. As the target investigates the noise, Agent 47 moves swiftly to a mechanical winch located behind a nearby partition. The winch is released, causing a massive crystal chandelier to plummet from the ceiling. The resulting impact secures an accident kill on both the primary target and an accompanying guard. With the objective complete, Agent 47 moves through the corridors toward the extraction point. The mission concludes as he walks calmly through the front gates of the estate, leaving the scene undetected. Chapters: 0:00:00 - 0:00:10 - Initial scouting and target tracking 0:00:10 - 0:00:25 - Distraction setup and item deployment 0:00:25 - 0:00:40 - Triggering the chandelier trap and elimination 0:00:40 - 0:00:51 - Extraction and mission completion 📖 Interactive written walkthrough with clickable timestamps: https://pixelfungaming.com/videos/hitman-elusive-target-the-forger-suffers-freak-accident-short

GTA Online: Griefer Hides In Apartment After I Turn Tables On Him #shorts
The mission begins inside a Suburban clothing store as the character browses various apparel options. The calm is shattered when an armed assailant bursts through the entrance and opens fire. A frantic shootout ensues within the shop, with the character utilizing the store's interior for cover while returning fire with an automatic weapon. After neutralizing the immediate threat, the character exits the store to find a rival player on an Oppressor Mk II hoverbike waiting outside. A brief confrontation occurs on the sidewalk before the scene transitions to a high-speed driving segment through the city streets. As the character maneuvers through traffic, a mission notification confirms that a target has been assassinated. The journey concludes as the character pulls the vehicle over to the curb and exits to assess the surroundings. Chapters: 0:00:00 - 0:00:08 - Browsing clothes at Suburban store 0:00:08 - 0:00:15 - Indoor shootout with armed attacker 0:00:15 - 0:00:28 - Street confrontation against a hoverbike 0:00:28 - 0:00:48 - High-speed city driving and target assassination update 📖 Interactive written walkthrough with clickable timestamps: https://pixelfungaming.com/videos/gta-online-griefer-hides-in-apartment-after-i-turn-tables-on-him-shorts

HITMAN Freelancer: New York | Tanto Location #shorts
The gameplay begins with Agent 47 infiltrating a secure office environment. He immediately locates a supply crate near a window and searches it, uncovering a baseball for his inventory. Moving further into the room, he briefly monitors a set of security screens displaying various corridors and NPC movements. He then interacts with a wall panel before discovering a Tanto resting on a small side table. After securing the blade, he takes a moment to use his camera for a closer inspection of the weapon. The final portion involves a strategic pause where the mission map is consulted, detailing the layout of the conference rooms and private chambers as tactical planning continues. Chapters: 0:00:00 - 0:00:10 - Searching for supplies and crate looting 0:00:10 - 0:00:20 - Monitoring security feeds and panel interaction 0:00:20 - 0:00:35 - Acquiring the Tanto and inventory management 0:00:35 - 0:00:55 - Tactical map review and objective planning 📖 Interactive written walkthrough with clickable timestamps: https://pixelfungaming.com/videos/hitman-freelancer-new-york-tanto-location-shorts

Insurgency: Sandstorm - Mowing Down Unexpected Group Of Enemies Before Blowing Up Weapons
The mission begins in a desolate, snow-covered urban environment. The character takes immediate cover behind a rusted van while exchanging fire with distant hostiles. Pushing forward, the character confronts a group of enemies clustered near a building's entrance, eliminating several targets with rapid, accurate rifle fire from an optic-equipped weapon. After clearing the doorway, an incendiary grenade is deployed into a narrow passage to deny enemy entry. The character navigates around a corner, maintaining focus on potential threats across a small bridge and courtyard. The sequence concludes with the character securing the immediate vicinity, leaving a path of neutralized enemies behind in the snow. Chapters: 0:00:00 - 0:00:05 - Initial Firefight and Cover 0:00:05 - 0:00:15 - Clearing the Building Entrance 0:00:15 - 0:00:25 - Incendiary Deployment and Flanking 0:00:25 - 0:00:34 - Securing the Courtyard and Bridge 📖 Interactive written walkthrough with clickable timestamps: https://pixelfungaming.com/videos/insurgency-sandstorm-mowing-down-unexpected-group-of-enemies-before-blowing-up-weapons

HITMAN Freelancer: Assasination Syndicate | Miami - Final Showdown
Agent 47 arrives at the vibrant Miami marina to track down a high-ranking Syndicate Leader. The mission begins with a meticulous search of the bustling crowd, utilizing a suspect camera to identify potential targets based on physical descriptions and behavioral traits. Agent 47 navigates the sunny docks and race spectator areas, listening for clues that match the leader's profile as a foodie with a sweet tooth. The infiltration moves into a parking garage security hub, where 47 strategically disables a fuse box to lure and neutralize a guard, securing a disguise and disabling the facility's surveillance network. After clearing the cameras, the hunt intensifies within the Kronstadt facility and the exclusive VIP lounges. 47 weaves through the dense crowds and restricted maintenance halls, ultimately cornering the target in a kitchen storage area. A swift and precise elimination of the Syndicate Leader concludes the contract, followed by a calm and professional exit from the race grounds as the campaign successfully finishes. Chapters: 0:00:00 - 0:02:24 - Initial Scouting and Suspect Identification 0:02:24 - 0:03:46 - Security Infiltration and Surveillance Sabotage 0:03:46 - 0:06:25 - Navigating the Facility and Crowded Stands 0:06:25 - 0:08:49 - VIP Lounge Investigation and Target Tracking 0:08:49 - 0:10:52 - Syndicate Leader Elimination and Mission Exit 📖 Interactive written walkthrough with clickable timestamps: https://pixelfungaming.com/videos/hitman-freelancer-assasination-syndicate-miami-final-showdown

Red Dead Online - Cholla Springs Red Sage Location
The character navigates the arid landscape of New Austin on horseback under the cover of night. Upon reaching a cluster of vegetation near Mercer Station, the character dismounts to forage for Red Sage. Each plant is meticulously gathered, leading to the successful completion of a daily challenge. After finishing the harvest, the character remains stationary while a map view provides the precise geographical context of the location. The map highlights the proximity to Mercer Station and Fort Mercer, offering a clear reference for finding these specific plants in the wild. Chapters: 0:00:00 - 0:00:04 - Navigating the desert on horseback 0:00:04 - 0:00:18 - Gathering Red Sage stalks 0:00:18 - 0:00:36 - Completing the daily challenge 0:00:36 - 0:01:05 - Detailed map overview of the location 📖 Interactive written walkthrough with clickable timestamps: https://pixelfungaming.com/videos/red-dead-online-cholla-springs-red-sage-location

State Of Decay : Year One #9
The gameplay session begins with the title screens and main menu for State of Decay: Year-One Survival Edition. After selecting the profile, the character, Marcus Campbell, loads into the base, the Church of the Ascension. A conversation with Sam Hoffman reveals a demoralized community, prompting a Morale Mission called "Lead the Way." Marcus and Sam leave the base in a muscle car. Driving along rural roads, they quickly encounter a small zombie horde. Marcus exits the car and engages the zombies in intense melee combat using a rolling pin and knife, accompanied by Sam. The combat is graphic, resulting in multiple quick kills and a skill increase for Marcus's Fighting ability. A large group of zombies attacks the pair near a rock formation, leading to a sustained and messy brawl where Marcus utilizes Powerhouse moves, achieving a level increase in Powerhouse skill. After clearing the area, Sam feels better, completing the initial morale mission. Back at the base, Marcus checks the supply locker, managing existing ammunition (taking .45 caliber rounds) and medical supplies. Lily Ritter offers advice on constructing a Work Area facility to repair and craft weapons. Marcus opens the map to locate a new scavenging mission target, an office building. Driving a blue pickup truck towards the target area at dusk, the player navigates winding roads and avoids obstacles, including abandoned, burning vehicles. Upon arriving at a small crossroads store, Marcus and Jack enter the Office to scavenge, finding food and a small backpack. Jack then initiates a shared supply run mission, offering to escort Marcus back to base. Marcus drives the blue truck, running over zombies blocking the road and expertly navigating the cluttered streets at night. The journey back is challenging, encountering multiple zombie hordes and destroyed vehicles, often relying on the truck's headlights in the dense, dark fog. They successfully return to the Church of the Ascension, delivering the resources to the supply locker, which completes the mission and improves base Morale. Driving a damaged pickup truck through the dense fog at night, the character navigates around wrecked vehicles and runs over several roaming zombies to complete a supply delivery mission. Upon arrival at a garden supply store, the character fights off zombies attacking the vehicle using close-quarters combat before successfully delivering the materials to Jack. The community receives a radio broadcast from Judge Lawton about maintaining order in Marshall, followed by a new mission regarding military insubordination. The character swaps to a sturdy SUV and drives toward the location, repeatedly engaging massive zombie hordes on the open road. The character investigates a military situation where Sgt. Erik Tan is defying orders to stand down, choosing instead to protect civilians. The character and the military squad team up, engaging in intense hand-to-hand combat against multiple zombie waves to secure the farmstead and rescue the survivors. Sgt. Tan rewards the character for their assistance, offering artillery support in the future. The character heads to an orchard and scavenges honey for food resources, boosting community morale. The next morale mission, 'Lead the Way,' involves partnering with Jack to clear a local auto repair shop of zombies. The pair successfully fights the horde using melee weapons and blunt force, securing the area. Finally, the character returns to the main base at the Church of the Ascension, reviewing the community's improved status and available facilities like the Watchtower and Medical Area. Chapters: 0:00:00 - Game Introduction and Main Menu 0:49:00 - Profile Selection and Game Menu Navigation 1:44:00 - Loading into the Church of the Ascension Base 2:54:00 - Starting 'Lead the Way' Morale Mission with Sam Hoffman 4:10:00 - Driving to the Initial Combat Zone 5:00:00 - Engaging Large Zombie Group in Melee Combat 6:21:00 - Completing the Combat Encounter and Skill Increase 7:25:00 - Managing Inventory and Healing 8:30:00 - Returning to Base and Discussing Facility Upgrades 10:59:00 - Checking Base Status and Facilities Map 13:24:00 - Starting Scavenging Mission: Driving to the Office 16:15:00 - Driving Through Canyon Roads at Night 17:34:00 - Arriving at the Office and Scavenging Supplies 19:57:00 - Starting Shared Supply Run Mission: Truck Drive 21:48:00 - Clearing Zombie Horde on the Main Road 23:05:00 - Navigating Obstructed Roads and Low Visibility 26:00:00 - Final Approach and Vehicle Storage at Church 27:11:00 - Delivering Resources and Mission Completion 29:30:00 - Concluding Gameplay Segment and Base Interaction 30:00 - Delivering Supplies and Running Over Zombies 30:45 - Supply Run Completion and Local Combat 31:36 - Judge Lawton Broadcasts a Warning 32:24 - Encountering Zombie Horde and Starting 'Insubordination' Mission 34:28 - Heavy Zombie Resistance on the Road 36:06 - Resources Delivered and New Combat Training Mission 37:16 - Meeting Sgt. Tan and Joining the Fight 38:46 - Mission 'Insubordination' Completed and Artillery Support Offered 39:48 - Scavenging Food at the Orchard 41:40 - Driving Encounters and Mission 'Fear Itself' Update 44:45 - Morale Mission 'Lead the Way': Clearing Zombies with Jack 45:40 - Returning Home and Mission Completion 46:20 - Reviewing Home Base Status and Facilities 48:37 - Game Menu and Exit

HITMAN Freelancer: Mumbai | Queens Guard Disguise Location #shorts
Agent 47 navigates the dense, vibrant crowds of a Mumbai marketplace, seeking a tactical advantage for his mission. He slips into a secluded back alley where an unsuspecting guard rests near some laundry. With a swift, silent takedown, he incapacitates the guard and immediately assumes his identity by donning the Elite Guard uniform. After securing the new disguise, he pauses to review his control map and study the intricate layout of the slums and marketplace. This strategic pause allows for a thorough assessment of the surrounding area and target locations, ensuring a smooth continuation of the operation within the complex urban environment. Chapters: 0:00:00 - 0:00:06 - Navigating the dense Mumbai marketplace 0:00:06 - 0:00:15 - Stealth takedown of an isolated guard in an alleyway 0:00:15 - 0:00:21 - Acquiring the Elite Guard disguise 0:00:21 - 0:00:45 - Reviewing control settings and the mission map 0:00:45 - 0:01:00 - Final tactical assessment and objective tracking 📖 Interactive written walkthrough with clickable timestamps: https://pixelfungaming.com/videos/hitman-freelancer-mumbai-queens-guard-disguise-location-shorts

HITMAN Freelancer: PSY OPS Leader Takedown
Agent 47 navigates the upper floors of a luxurious mansion during a Freelancer mission. He moves through a bathroom and enters a sitting area, preparing for an encounter. By activating instinct vision, he monitors the silhouettes of suspects through the walls to identify the Syndicate Leader. After tracking the movements, Agent 47 draws a suppressed pistol and waits for the target to become isolated. A precise headshot eliminates the leader instantly. Following the primary objective, he enters a nearby bathroom to neutralize an assassin bodyguard. With both targets down, the mission objective updates to extract from the area. Chapters: 0:00:00 - 0:00:12 - Infiltration of the mansion's private quarters 0:00:12 - 0:00:43 - Tracking the Syndicate Leader using instinct vision 0:00:43 - 0:00:48 - Elimination of the primary target with a suppressed pistol 0:00:48 - 0:01:00 - Neutralizing the assassin accomplice and mission progress 📖 Interactive written walkthrough with clickable timestamps: https://pixelfungaming.com/videos/hitman-freelancer-psy-ops-leader-takedown

Red Dead Online - Black Currant Location (New Austin) #1
The character navigates the rugged, twilight-lit desert terrain of New Austin, specifically near the town of Tumbleweed. While maintaining a wanted status as an outlaw, the journey focuses on the practical task of foraging for wild herbs in the arid environment. The trek involves identifying and harvesting several patches of Blackcurrant and Oregano scattered throughout the landscape. A detailed view of the world map highlights the specific location northwest of Tumbleweed for these botanical resources. As night falls, the character moves toward a small homestead perched on a hill, gathering final supplies of Blackcurrant under the rising moon. This sequence illustrates the resource-gathering aspects of survival and crafting within the open-world Western setting. Chapters: 0:00:00 - 0:00:15 - Traversing the desert at dusk 0:00:15 - 0:00:45 - Harvesting Blackcurrant bushes 0:00:45 - 0:00:52 - Foraging for wild Oregano 0:00:52 - 0:01:18 - Consulting the map for location coordinates 0:01:18 - 0:01:41 - Continued collection of Oregano 0:01:41 - 0:02:13 - Navigating toward the hilltop ranch house 0:02:13 - 0:02:38 - Final Blackcurrant gathering at nightfall 📖 Interactive written walkthrough with clickable timestamps: https://pixelfungaming.com/videos/red-dead-online-black-currant-location-new-austin-1
RDR 2 Online - Stranger Mission - Paid Killing (Fort Brennand)
The mission begins with a meeting inside a dark cabin, where a nervous individual provides details about a group of targets located at Fort Brennand. After accepting the task, a nighttime ride through the woods follows as the objective marker leads to the old fort. Upon arrival, combat erupts immediately as the character engages the outlaws from horseback using a repeater. The shootout intensifies as the character moves closer to the fort's walls, eventually dismounting to methodically pick off the remaining targets from cover. Precision shots and tactical positioning lead to the successful elimination of all threats. Following the 'Mission Passed' notification, the character spends time looting the fallen enemies for supplies and valuables before the mission concludes. Chapters: 0:00:00 - 0:01:13 - Briefing with a nervous informant in a cabin 0:01:14 - 0:02:01 - Travel to Fort Brennand on horseback through the woods 0:02:02 - 0:02:45 - Initial skirmish with outlaws outside the fort walls 0:02:46 - 0:04:10 - Systematic clearing of targets within Fort Brennand 0:04:11 - 0:04:51 - Mission completion and post-combat looting 📖 Interactive written walkthrough with clickable timestamps: https://pixelfungaming.com/videos/rdr-2-online-stranger-mission-paid-killing-fort-brennand

Red Dead Revolver: Part 4 RailRoaded (Train Robbery Shootout)
The mission begins with a tense dialogue inside a train carriage as an old man expresses his weariness with the journey to Brimstone. A group of bandits suddenly interrupts the peace, sparking a standoff that transitions into a cinematic duel. The protagonist, Red, draws his revolver and utilizes slow-motion precision to eliminate the lead bandit. Following a brief period of weapon selection and equipment repairs, the action shifts to the exterior of the moving train. Red navigates the roofs of the carriages, engaging multiple enemies with throwing knives and long-range rifles. The intensity heightens as combat involves dodging low-hanging bridges and leaping over obstacles while maintaining a steady fire on outlaws attacking from all sides. Upon reaching the train's engine, Red rescues the engineer from a captor, initiating a high-stakes defense objective. For the next three minutes, Red must protect the engineer from waves of the Pedroza brothers' gang attacking from horseback and adjacent carriages. The mission concludes with a successful arrival at the station, followed by a summary of rewards and unlocked weapon upgrades. Chapters: 00:00:00 - 00:01:07 - Introductory cutscene and bandit confrontation 00:01:07 - 00:01:45 - Duel sequence against the train robber 00:01:45 - 00:02:57 - Weapon preparation and character cinematic 00:02:57 - 00:05:08 - Initial combat on the train roof 00:05:08 - 00:07:20 - Intense firefight with explosive-throwing bandits 00:07:20 - 00:10:12 - Navigating obstacles and clearing carriages 00:10:12 - 00:12:21 - Defending the engineer from the Pedroza brothers 00:12:21 - 00:12:59 - Mission completion and rewards summary 📖 Interactive written walkthrough with clickable timestamps: https://pixelfungaming.com/videos/red-dead-revolver-part-4-railroaded-train-robbery-shootout

Red Dead Revolver: Part 2 - Bounty Hunter
The mission begins with a cutscene as a bounty hunter named Red encounters a traveling merchant near a broken wagon in a desolate desert landscape. After a brief interaction, the gameplay transitions to a shop menu where various items like knives, whiskey, and clothing are available for purchase. The story continues as a group of aggressive outlaws led by Bloody Tom arrives to harass the merchant, prompting Red to intervene. Combat breaks out, initiating a series of tutorial segments that explain essential mechanics such as using environmental objects for cover and switching between different firearms. Following the initial skirmish, the gameplay introduces the 'Deadeye' ability, a specialized skill that slows down time to allow for precise targeting of multiple enemies. This leads directly into a major boss encounter against Bloody Tom and his gang. Red must navigate the rocky terrain, utilizing the learned cover system to survive while systematically eliminating the outlaws. The battle culminates in the defeat of Bloody Tom's gang, followed by a cutscene where Red claims the merchant's wagon as his own. The mission wraps up with a summary screen detailing performance stats like accuracy and bounty collected, before returning to a shop for further weapon upgrades and showcasing a character introduction for Red. Chapters: 0:00:00 - 0:00:25 - Opening Cutscene and Merchant Encounter 0:00:25 - 0:01:07 - Initial Shop Visit and Item Selection 0:01:07 - 0:01:28 - Bloody Tom and the Outlaw Confrontation 0:01:28 - 0:01:44 - First Combat Encounter with Outlaw Grunts 0:01:44 - 0:03:20 - Cover Mechanics Training and Positioning 0:03:20 - 0:04:29 - Engaging Enemies from Distance using Cover 0:04:29 - 0:05:04 - Deadeye Ability Tutorial and Demonstration 0:05:04 - 0:05:13 - Boss Introduction: Bloody Tom's Gang Emerges 0:05:13 - 0:06:19 - Boss Fight: Defeating Tom, Oaf, and George 0:06:19 - 0:06:42 - Mission Conclusion and Wagon Claim 0:06:42 - 0:07:03 - Bounty Hunter Mission Summary and Stats 0:07:03 - 0:08:20 - Post-Mission Upgrades and Red Character Intro 📖 Interactive written walkthrough with clickable timestamps: https://pixelfungaming.com/videos/red-dead-revolver-part-2-bounty-hunter

RDR2 - Rams Head Location Near Strawberry
The mission involves gathering Ram's Head mushrooms in the wild during the night. The character navigates through a dense, dark forest area, carefully picking the required plants to complete a daily challenge. A horse with a lantern stands nearby, providing a small pool of light in the darkness. Once the challenge is met, the world map opens to reveal the exact location near the Upper Montana River, situated between Strawberry and Blackwater. The focus remains on efficient foraging and geographic orientation within the vast game world. Chapters: 0:00:00 - 0:00:17 - Gathering Ram's Head Mushrooms 0:00:17 - 0:00:37 - Reviewing Map Location 📖 Interactive written walkthrough with clickable timestamps: https://pixelfungaming.com/videos/rdr2-rams-head-location-near-strawberry

RDR2 - Chance Encounter With Rains Fall At Train Station
John Marston encounters Rains Fall at the Annesburg train station during a heavy downpour. The two men recognize each other through their shared history with Arthur Morgan. As they converse on the platform, John delivers the somber news of Arthur's passing, emphasizing that Arthur gave his life to save John's. Rains Fall reflects on his people's new life in Canada and the tragic loss of his son, Eagle Flies. John offers his condolences, drawing from his own experiences as a father. Their brief but meaningful reunion concludes with a respectful handshake before Rains Fall boards his train. John remains on the platform, watching the locomotive pull away into the distance, marking a final closure to their shared past. Chapters: 0:00:00 - 0:00:23 - A Chance Encounter in the Rain 0:00:24 - 0:00:39 - Sharing News of Arthur's Fate 0:00:40 - 0:01:00 - Discussion of the Wapiti Tribe's Future 0:01:01 - 0:01:35 - Bonding over Fatherhood and Loss 0:01:36 - 0:01:54 - The Train Leaves Annesburg 📖 Interactive written walkthrough with clickable timestamps: https://pixelfungaming.com/videos/rdr2-chance-encounter-with-rains-fall-at-train-station

Red Dead Redemption 2 - Wrecked Wagon Location
Arthur Morgan rides his horse across a wooden bridge and navigates a winding mountain trail near the town of Strawberry. The path leads through a pine-covered hillside as he approaches a scenic lookout. At the edge of a steep cliff, he encounters a broken, abandoned wagon left stranded over the valley below. After dismounting from his horse, he consults his map to verify his position, revealing the location to be just south of Owanjila Dam. The journey concludes with a quiet moment as he stands at the vantage point, overlooking the sprawling landscape and the river winding through the mountains. Chapters: 0:00:00 - 0:00:15 - Crossing the bridge and starting the ascent 0:00:15 - 0:00:25 - Navigating the wooded mountain path 0:00:25 - 0:00:28 - Discovering the abandoned wagon at the cliff edge 0:00:28 - 0:00:41 - Checking the world map for exact location 0:00:41 - 0:00:47 - Observing the valley view from the vista 📖 Interactive written walkthrough with clickable timestamps: https://pixelfungaming.com/videos/red-dead-redemption-2-wrecked-wagon-location

Sniper Elite 3 DLC - Hunt the gray wolf (Killing Hitler)
Welcome to a complete, stealth-focused walkthrough of the 'Hunt the Grey Wolf' DLC mission for Sniper Elite 3. In this intense night-time operation, you'll witness a masterclass in tactical infiltration and precision sniping. The video takes you through every step of the mission, from the initial desert insertion to the high-stakes assassination attempt on one of history's most notorious figures. Throughout the gameplay, you'll see a variety of skills in action, including silent close-quarter takedowns, expert use of the Welrod silenced pistol, and long-range sniper shots timed perfectly with environmental noises to remain undetected. We explore the intricate town ruins of Tobruk, carefully gathering intel from hidden documents and intercepted messengers to confirm the target's identity and arrival. The highlight of the mission is the dramatic arrival of the 'Grey Wolf' in his armored motorcade, followed by the iconic X-ray kill cam sequence that Sniper Elite is famous for. After the objective is met, the gameplay shifts into a desperate exfiltration, as you must fight your way through alerted German forces to reach safety. This guide covers all primary objectives and provides a roadmap for players looking to achieve a ghost-like presence in this challenging DLC content. Key features in this walkthrough include: - Full stealth approach for the majority of the mission. - Locations for all critical intel documents. - Tactical positioning for the final assassination shot. - Comprehensive coverage of the exfiltration route while under heavy fire. - Analysis of the mission stats and final results. Whether you're a series veteran or a newcomer looking for tips on how to handle the night-time environments and urban combat of Sniper Elite 3, this video offers a detailed look at everything 'Hunt the Grey Wolf' has to offer. Chapters: 0:00:00 - Mission Start: Infiltrating the Night Outpost 0:02:45 - Stealthy Takedowns & Welrod Precision 0:05:30 - Long-Range Sniping with Sound Masking 0:08:15 - Navigating the Ruined Town Perimeter 0:11:15 - Intel Discovery: The Führer's Visit Documents 0:14:20 - Rooftop Scouting & Balcony Silent Kills 0:17:15 - Gathering Officer Perspectives on the Target 0:20:00 - Intercepting the Messenger in Market Square 0:23:15 - Reaching the Final Sniper Vantage Point 0:24:30 - Cinematic: The 'Grey Wolf' Arrives in Tobruk 0:26:45 - The Decisive Shot & X-Ray Kill Cam Sequence 0:29:30 - High-Alert Exfiltration: Urban Firefights 0:32:15 - Final Combat Push to the Extraction Point 0:35:05 - Mission Conclusion & Final Escape Cutscene 0:35:20 - Mission Complete: Stats and Results Screen 📖 Interactive written walkthrough with clickable timestamps: https://pixelfungaming.com/videos/sniper-elite-3-dlc-hunt-the-gray-wolf-killing-hitler

My Sister is a weapon in a cult that controls Greece!
Alexios prepares for a dangerous undercover mission to infiltrate a secret gathering of the Cult of Kosmos. After donning a ritual mask and robes, he enters the Serpent's Lair, moving cautiously past heavily armed guards. Inside the subterranean sanctuary, he navigates through crowds of chanting cultists to gather intelligence. He eavesdrops on conversations revealing the cult's influence over Greek politics and their specific interest in his family bloodline. Throughout the infiltration, he discovers secret correspondence that exposes the vast reach of the organization. A tense encounter with a sadistic member torturing a prisoner forces a difficult moral choice before Alexios reaches the central chamber. There, he places a mysterious artifact fragment on a glowing pyramid, which triggers a powerful reaction. The ritual is interrupted by the dramatic arrival of Deimos, who presents the severed head of a traitor. In a climactic sequence, Deimos uses the artifact's power to scan the cultists, inadvertently uncovering Alexios' identity through shared childhood memories. Following a narrow escape, Alexios reunites with Herodotus to plan their journey to Athens, aiming to warn Perikles and track down his mother. Chapters: 0:00:00 - 0:02:30 - Alexios disguises himself and enters the Serpent's Lair 0:02:30 - 0:05:15 - Investigating cultist plans and gathering initial intel 0:05:15 - 0:07:45 - Eavesdropping on internal cult debates regarding Athens 0:07:45 - 0:10:15 - Uncovering secret letters and exploring the cavern depths 0:10:15 - 0:12:45 - Confronting the torturer and placing the artifact fragment 0:12:45 - 0:15:20 - Deimos arrives and demands a test of cultist loyalty 0:15:20 - 0:18:00 - Artifact revelation and the exposure of Alexios' identity 0:18:00 - 0:20:27 - Rejoining Herodotus and plotting the course for Athens 📖 Interactive written walkthrough with clickable timestamps: https://pixelfungaming.com/videos/my-sister-is-a-weapon-in-a-cult-that-controls-greece

Red Dead Redemption 2 - Getting Inside Wrecked Wagon (FUNNY)
The gameplay takes place in the rugged wilderness of Red Dead Redemption 2. The character approaches a derelict blue supply wagon perched precariously on the edge of a steep, rocky cliff overlooking a river valley. After a brief inspection of the exterior, the character steps onto the back of the wagon. The shift in weight causes the vehicle to tip backward and plummet over the precipice. The character is thrown from the wagon and undergoes a violent, ragdoll-physics-driven tumble down the jagged mountainside, sustaining injuries but ultimately surviving the impact. After coming to a rest at the base of the slope, the character stands up, brushes off the dust, and looks back up at the wreckage now lodged on a ledge above. The session concludes with a slow walk along the scenic riverbank, surveying the vast mountainous landscape. Chapters: 0:00:00 - 0:00:13 - Inspecting the precarious wagon on the cliff edge 0:00:14 - 0:00:25 - Wagon tips over and the character falls down the mountainside 0:00:26 - 0:00:33 - Recovering from the fall and surveying the wreckage 0:00:34 - 0:00:51 - Walking through the scenic river valley 📖 Interactive written walkthrough with clickable timestamps: https://pixelfungaming.com/videos/red-dead-redemption-2-getting-inside-wrecked-wagon-funny

Ready Or Not: Mission 3 | Twisted Nerve - 213 Park Homes
The mission begins with an extensive briefing at the Los Sueños Police Department regarding a raid on two properties in the 213 Park Homes district. Detectives provide intel on a methamphetamine production operation run by a local gang, with specific objectives to arrest suspects, rescue civilians, and locate crystal meth laboratories. The deployment starts in the dead of night as the SWAT entry team approaches the derelict residential complex. Tactical coordination is paramount as the team utilizes mirror wands to scan under doors before initiating breaches. Throughout the incursion, the team encounters multiple high-stress scenarios, including close-quarters firefights and the discovery of crude narcotics labs. The operation progresses through the first house, clearing every room with precision while detaining erratic suspects and documenting evidence. The team then moves through the interconnected structures, facing resistance in narrow hallways and cluttered bedrooms. Key moments include the recovery of large quantities of processed drugs and the grim discovery of an incapacitated minor, highlighting the human cost of the illegal trade. The mission concludes once the entire perimeter and all interior rooms of both residences are fully secured and all objectives are reported to tactical command. A specialized tactical unit executes a high-risk warrant at a dilapidated property suspected of housing a major narcotics operation. The mission starts with a methodical breach of the main structure, where officers utilize coordinated movements to sweep every room. Suspects are neutralized and civilians are secured as the team meticulously logs evidence found throughout the cluttered interior. The operation takes a turn as the team uncovers a concealed passage leading to an extensive, dark underground tunnel network. Navigating these narrow corridors requires high levels of discipline and constant communication. Multiple intense gunfights occur in these tight quarters, testing the unit's speed and accuracy. Officers move deeper into the subterranean complex, eventually locating a large-scale meth lab. After securing the remaining hostile elements and ensuring the perimeter is safe, the unit completes the mission, followed by a detailed debriefing and tactical evaluation. Chapters: 0:00:00 - Mission Briefing and Objectives 0:01:40 - Tactical Map Review 0:02:47 - Insertion and Approach 0:03:52 - Initial Breach of the First House 0:04:10 - First Firefight and Room Clearing 0:04:58 - Locating the Primary Meth Lab 0:07:10 - Kitchen and Dining Area Incursion 0:08:24 - Neutralizing Suspects in the Den 0:10:00 - Stairwell Advance and Hallway Sweep 0:11:27 - Upstairs Firefight and Suspect Detainment 0:13:35 - Breaching the Secondary Lab Facility 0:15:10 - Corridor Sweep and Rear Room Clear 0:16:55 - High-Stakes Bedroom Breach 0:18:30 - Final Room Clearing and Perimeter Security 0:30:00 - Tactical entry and initial room clearing 0:33:15 - Securing the first suspect and searching for evidence 0:36:30 - Clearing the second floor and bathroom areas 0:39:45 - Discovery of hidden narcotics storage 0:43:00 - Entering the dark underground tunnel network 0:46:15 - First major firefight within the tunnels 0:49:30 - Navigating through narrow passageways and traps 0:52:45 - Briefly returning to the surface to secure the courtyard 0:56:00 - Re-entering the deeper sections of the cave system 0:59:15 - Locating the primary drug production laboratory 1:02:30 - Final suspect apprehension in the lower levels 1:05:28 - Mission summary and final rating screen 📖 Interactive written walkthrough with clickable timestamps: https://pixelfungaming.com/videos/ready-or-not-mission-3-twisted-nerve-213-park-homes

Dying Light 2: Find Inhibitors inside the GRE Dark Zone
The mission begins with a stealthy infiltration into a GRE Dark Zone, where the character utilizes a crossbow to silently eliminate infected sleepers. The gameplay transitions into direct combat as the survivor employs a machete and Molotov cocktails to manage large groups of aggressive infected. A significant portion of the exploration involves navigating chemical-heavy environments that drain immunity, requiring the frequent use of UV shroomz and immunity boosters. Detailed lockpicking sequences show the character opening high-level security chests to recover inhibitors, rare gear, and medical supplies. Throughout the facility, the survivor manages resources by looting containers and crafting essential items while clearing multiple floors of the hazardous medical research center. Chapters: 0:00:00 - 0:02:30 - Stealthy infiltration and crossbow eliminations in the GRE Dark Zone 0:02:30 - 0:05:00 - Intense melee combat and clearing infected groups with Molotovs 0:05:00 - 0:07:45 - Navigating chemical hazards and lockpicking high-security GRE chests 0:07:45 - 0:10:15 - Medical ward exploration and neutralization of infected sleepers 0:10:15 - 0:12:45 - Strategic door clearing with fire and looting rare medical supplies 0:12:45 - 0:15:15 - Vertical navigation between facility floors and immunity management 0:15:15 - 0:17:55 - Final resource gathering and GRE facility cleanup 📖 Interactive written walkthrough with clickable timestamps: https://pixelfungaming.com/videos/dying-light-2-find-inhibitors-inside-the-gre-dark-zone

Dead Space Gameplay: Chapter 1 part 1 - New Arrivals
The experience begins with the start of a new game in the survival horror classic, Dead Space. After a cinematic introduction featuring a message from Nicole and the crew's approach to the massive USG Ishimura, the USG Kellion shuttle suffers a catastrophic crash during docking. Following the crash, Isaac Clarke and his crew recover and begin exploring the seemingly abandoned Flight Lounge. The atmosphere turns hostile when a quarantine lock triggers, and the crew is ambushed by Necromorphs. Isaac is forced into a desperate escape through maintenance tunnels and elevators. He soon acquires the iconic Plasma Cutter and learns to utilize strategic dismemberment to neutralize threats. The mission progresses to the Tram Station, where Isaac must navigate dark corridors, manage limited resources, and solve mechanical puzzles. He utilizes the Stasis module to slow down malfunctioning machinery and successfully repairs the tram system, allowing for further exploration into the depths of the Ishimura. Chapters: 0:00:00 - 0:01:05 - Main Menu and Opening Credits 0:01:05 - 0:03:23 - USG Kellion Approach and Communications Failure 0:03:23 - 0:04:45 - Docking Bay Crash and Crew Recovery 0:04:45 - 0:07:32 - Exploring the Docking Bay and Flight Lounge 0:07:32 - 0:08:44 - Quarantine Ambush and Escape to the Elevator 0:08:44 - 0:11:12 - Acquiring the Plasma Cutter and First Combat 0:11:12 - 0:14:15 - Navigating the Tram Station and Finding Supplies 0:14:15 - 0:17:30 - Tram Repair Mission and Stasis Tutorial 0:17:30 - 0:18:52 - Completing Tram Repairs and Continuing Exploration 📖 Interactive written walkthrough with clickable timestamps: https://pixelfungaming.com/videos/dead-space-gameplay-chapter-1-part-1-new-arrivals

Red Dead Redemption 2 - Stranger Encounter - Bear Hunting
Arthur Morgan and Hosea Matthews embark on a mission to track and hunt a legendary grizzly bear in the mountains. The hunt begins with the duo dismounting and tracking the animal through tall grass, identifying fresh droppings and other signs of the massive creature's presence. As they move deeper into the territory, the tension rises until the legendary bear suddenly emerges from the brush. A brief, intense confrontation ensues where the bear charges. Arthur quickly reacts, drawing his weapon and firing multiple shots to take down the beast. After the successful hunt, Arthur skins the bear to collect the valuable pelt and loots the surrounding area before loading the heavy skin onto his horse to conclude the encounter. Chapters: 0:00:00 - 0:00:45 - Initial tracking through the mountainside 0:00:45 - 0:01:20 - Finding fresh clues and approaching the lair 0:01:20 - 0:01:40 - Legendary bear encounter and combat 0:01:40 - 0:02:20 - Skinning the bear and loading the pelt 📖 Interactive written walkthrough with clickable timestamps: https://pixelfungaming.com/videos/red-dead-redemption-2-stranger-encounter-bear-hunting

Titanfall last titan standing : Lagoon (Victory)
The match begins on the Lagoon map in the Last Titan Standing mode as an IMC Titan pilot. Initial movements involve navigating through the industrial structures and shallow waters of the coastline. Heavy engagements follow, with Titans utilizing Quad Rockets and Vortex Shields to trade fire. Upon being doomed, the pilot ejects high into the air and continues the fight on foot using an Archer heavy rocket to harass remaining enemy Titans. Each round follows a similar pattern of tactical positioning, heavy mechanical warfare, and subsequent pilot-on-Titan skirmishes after ejection. The team maintains a consistent lead through coordinated fire and aggressive flanking maneuvers. The final round concludes with a total victory, showcasing the end-game scoreboard and team stats. Chapters: 0:00:00 - 0:01:49 - Last Titan Standing - Round 1 0:01:50 - 0:04:04 - Strategic Positioning - Round 2 0:04:05 - 0:06:18 - Heavy Combat - Round 3 0:06:19 - 0:08:05 - Final Victory - Round 4 📖 Interactive written walkthrough with clickable timestamps: https://pixelfungaming.com/videos/titanfall-last-titan-standing-lagoon-victory

Sherlock Holmes : Crimes and Punishments -Riddle at the rails - Part 3
Join Sherlock Holmes and Dr. Watson as they unravel the baffling 'Riddle on the Rails' in this full gameplay walkthrough of Sherlock Holmes: Crimes & Punishments. The investigation begins at Doncaster Train Station, where a train has seemingly vanished into thin air. Holmes meticulously examines the tracks and uncovers evidence of foul play involving the station master's financial struggles. The trail leads them to a remote mine where they discover a deliberate collapse used to hide the missing train. Through a series of intricate puzzles, including opening a specialized cylinder safe, and a tense interrogation with a mysterious cigar smoker, Holmes pieces together a conspiracy involving rival South American mining companies. Watch as the master detective uses his deduction board to connect clues, visualize the crime, and ultimately decide the fate of the perpetrators in a final moral choice. The video covers the entire case from initial clues to the final resolution and statistical overview of the player's choices. Chapters: 0:00:00 - Main Menu and Case Selection 0:00:56 - Arrival at Doncaster Train Station 0:02:27 - Investigating the Warehouse and Postal Bags 0:04:09 - Initial Deductions: Station Master's Motive 0:05:14 - Interrogating the Doncaster Station Master 0:06:16 - Carriage Travel and Deduction Board Analysis 0:08:18 - Examining the Railway Switch 0:10:40 - Visualizing the Train's Redirection 0:11:59 - Arrival at the Abandoned Mines 0:12:49 - Discovering the Collapsed Mine Entrance 0:13:14 - Connecting Clues: Stolen Rails and Blasting 0:15:19 - Finding and Detonating the Dynamite Package 0:17:18 - Investigating the Mine Guard's Shack 0:17:34 - Puzzle: Opening the Cylinder Safe 0:18:21 - Uncovering Corporate Rivalry Clues 0:19:14 - Finalizing Mining Company Connections 0:21:17 - Confronting the Suspicious Cigar Smoker 0:22:00 - Interrogation and Character Portrait 0:24:10 - Requesting Information from Mycroft Holmes 0:24:54 - Final Deduction Session: Solving the Mystery 0:28:54 - The Final Moral Choice: Blind Justice 0:30:13 - Case Conclusion and Epilogue 0:31:18 - Case Statistics and Player Ranking 0:32:01 - Teaser: The Next Case - Blood Bath 📖 Interactive written walkthrough with clickable timestamps: https://pixelfungaming.com/videos/sherlock-holmes-crimes-and-punishments-riddle-at-the-rails-part-3

State Of Decay Gameplay - Part 1
Welcome to a comprehensive gameplay walkthrough of the opening sequence in State of Decay: Year-One Survival Edition. In this video, we follow protagonists Marcus Campbell and Ed Jones as they find themselves in the middle of a sudden zombie outbreak while camping at Mt. Tanner. Watch as they navigate the dangerous terrain, learn the ropes of survival combat, and scavenge for vital supplies in nearby cabins. The journey takes them to the Mt. Tanner Ranger Station, where they meet Thomas Ritter, only to realize the situation is far worse than imagined. The action picks up as they investigate distant gunshots and perform a daring rescue of a fellow survivor, Maya Miranda. After a shocking return to a now-overrun Ranger Station, the trio must make a break for it. The final act of this video showcases their escape from Mt. Tanner, a drive through the desolate valley, and their arrival at the Church of the Ascension in Spencer's Mill, where they encounter a group of desperate survivors led by Lily Ritter and Pastor William. Stick around for a tour of their new makeshift home and see how the foundation for a community is built in this post-apocalyptic world. Chapters: 0:00:00 - Main Menu and Prepper's Pack Unlocked 0:02:10 - Initial Encounter: Fighting Off the First Wave 0:05:41 - Reaching the Mt. Tanner Ranger Station 0:08:23 - Scavenging Operations at the Ridge Cabins 0:11:15 - Combat Training: Marcus Levels Up Fighting 0:13:50 - Waterfront Exploration and Scouting the Lake 0:16:20 - Rescue Mission: Saving Maya by the Creek 0:19:10 - Group Dialogue: Planning the Next Move 0:22:20 - Return to the Ranger Station: A Grim Discovery 0:26:15 - Escaping Mt. Tanner: Journey to Spencer's Mill 0:31:05 - Arriving at the Church of the Ascension 0:33:15 - Base Orientation: Lily Ritter's Tour of the Church 📖 Interactive written walkthrough with clickable timestamps: https://pixelfungaming.com/videos/state-of-decay-gameplay-part-1

RDR2 - Botched Electric Chair Execution
Arthur Morgan rides into the heart of Saint Denis and approaches a gathered crowd at Guiteau Square. The scene centers on Professor Bell, who is conducting a public demonstration of his newly invented electric chair with a convict strapped into the device. Bell delivers a speech claiming his invention offers a humane and peaceful end, but this is immediately undermined by the convict's horrific screams and visible agony as the machine is repeatedly triggered. The demonstration reaches a chaotic conclusion when the chair malfunctions, sending a lethal electrical surge back through the Professor, killing him instantly. While the Professor lies dead, the convict remains alive in the chair, suffering from severe burns and pleading for someone to end his life. Arthur explores the aftermath, looting Professor Bell's body to acquire the electric chair blueprints. The surrounding townsfolk offer mixed reactions of horror and approval as they slowly disperse from the square while Arthur examines the technical drawings of the failed invention. Chapters: 0:00:00 - 0:00:12 - Arrival at Guiteau Square 0:00:12 - 0:00:58 - Professor Bell's Electric Chair Demonstration 0:00:58 - 0:01:21 - Invention Malfunction and Professor Bell's Death 0:01:21 - 0:01:48 - Crowd Reactions and the Convict's Suffering 0:01:48 - 0:02:03 - Mission Completion: The Mercies of Knowledge 0:02:03 - 0:02:25 - Looting Professor Bell and Reading Blueprints 0:02:25 - 0:03:41 - Aftermath and Scene Observation 📖 Interactive written walkthrough with clickable timestamps: https://pixelfungaming.com/videos/rdr2-botched-electric-chair-execution

Payday 2 : Bank heist - Stealth walkthrough
The mission begins with a tactical overview and crew readiness check for the Harvest & Trustee Bank Heist Pro Job. Entering casing mode, the objective focuses on locating and retrieving the thermal drill from the back of a nearby pickup truck. Once the heist turns loud, the character navigates into the bank, managing civilian control and neutralizing security guards in the hallway. The thermal drill is deployed on the main vault door, requiring periodic maintenance as it cuts through the steel. After the vault opens, bagging of large stacks of cash and gold commences immediately. A coordinated loot extraction begins, moving numerous bags from the vault through the rear parking lot to the escape van. The bulk of the operation involves a continuous relay of carrying and securing loot bags to maximize the payout. The mission concludes unexpectedly when a network disconnection occurs, resulting in a failure screen just as the final bags are being secured. Chapters: 0:00:00 - 0:00:30 - Heist Briefing and Initial Deployment 0:00:30 - 0:01:30 - Thermal Drill Retrieval and Entry 0:01:30 - 0:02:10 - Vault Drilling and Crowd Control 0:02:10 - 0:03:00 - Looting the Vault and Bagging Cash 0:03:00 - 0:05:30 - Initial Loot Extraction Phase 0:05:30 - 0:08:40 - Extended Bag Transport and Securing Loot 0:08:40 - 0:08:53 - Connection Lost and Mission Failure 📖 Interactive written walkthrough with clickable timestamps: https://pixelfungaming.com/videos/payday-2-bank-heist-stealth-walkthrough

#Hitman Elusive Target #25 The Fugitive
Experience the intense stealth action of Hitman's Elusive Target mission, 'The Fugitive', set in the high-tech GAMA facility in Hokkaido, Japan. This comprehensive walkthrough showcases the meticulous planning and execution required to identify and eliminate a high-profile target who has undergone facial reconstruction surgery. Watch as Agent 47 navigates restricted areas, utilizes a variety of disguises—from patient robes to security uniforms and chef attire—and gathers critical intelligence to pinpoint the correct individual among several candidates. The gameplay highlights the importance of environmental awareness, NPC patterns, and strategic distractions in achieving a successful mission completion. Whether you're a seasoned assassin or new to the World of Assassination, this video provides a detailed look at the challenging mechanics and immersive atmosphere of the Hokkaido mission. Chapters: 0:00:00 - Mission Briefing and Loadout Selection 0:02:05 - Mission Start: Infiltrating the Patient Suite 0:04:30 - Initial Scouting of the Hospital Facility 0:07:15 - Acquiring the Resort Security Disguise 0:10:00 - Navigating Restricted Medical Corridors 0:13:30 - Exploring the Morgue and Staff Areas 0:17:00 - Subduing NPCs for Better Access 0:21:15 - Investigating Patient Intelligence and Records 0:25:00 - Scouting the Restaurant and Public Zones 0:28:45 - Observing Potential Targets with Facial Bandages 0:32:00 - Strategy Adjustment: Acquiring the Chef Disguise 0:36:15 - Stealthily Moving Through the Kitchen and Spa 0:40:30 - Avoiding Enforcer Detection in Sensitive Zones 0:45:00 - Using Eavesdropping to Gather More Clues 0:49:15 - Tracking Target Movements Across the Level 0:54:00 - Setting Up Distractions to Isolate the Target 0:58:30 - Final Target Identification and Confirmation 1:03:00 - Positioning for the Perfect Assassination 1:07:15 - Eliminating the Fugitive Target 1:12:00 - Evading Security and Planning the Escape 1:17:30 - Reaching the Extraction Point 1:20:45 - Mission Accomplished: Final Rating and Score 📖 Interactive written walkthrough with clickable timestamps: https://pixelfungaming.com/videos/hitman-elusive-target-25-the-fugitive

Insurgency: Sandstorm | Hillside CO-OP - Destroy Cache Quick & Easy (Demolitions)
The mission begins with a tactical advance across a snow-covered hill toward a fortified yellow building. After entering a damaged structure with green walls, the character takes a position behind a large breach in the masonry. From this vantage point, precise semi-automatic fire from a scoped M16A4 suppresses enemies positioned near a distant gas station. To neutralize the primary objective, the character switches to an anti-tank rocket launcher, takes careful aim, and delivers a devastating direct hit to an enemy weapon cache. The resulting explosion levels the immediate structure and clears the path. With the cache destroyed, the character moves out of the building and advances into the open street to secure the area and push toward the next objective. Chapters: 0:00:00 - 0:00:10 - Tactical approach across snow-covered terrain 0:00:10 - 0:00:22 - Suppressing enemy positions with precision rifle fire 0:00:22 - 0:00:31 - Deployment of rocket launcher and destruction of weapon cache 0:00:31 - 0:00:37 - Advancing to the next objective point 📖 Interactive written walkthrough with clickable timestamps: https://pixelfungaming.com/videos/insurgency-sandstorm-hillside-co-op-destroy-cache-quick-easy-demolitions

Funny/Brutal Animal Attacks in Far Cry 5
Wilderness chaos takes center stage as various predatory and territorial animals clash with the Eden's Gate cult across Hope County. American bison ram cult vehicles into rivers and cause massive explosions by charging parked vans, while black bears maul patrol units near outposts. Stealthy cougars and aggressive moose also participate in the carnage, tossing cultists into the air or hunting them through tall grass. The gameplay demonstrates how these unpredictable wildlife encounters can be utilized to weaken enemy positions, leading up to the liberation of the Gardenview Packing Facility. Combat ranges from long-distance observation with binoculars to frantic close-quarters shotgun blasts against charging beasts and hostile cultists. Chapters: 0:00:00 - 0:01:22 - Bears and bison initiate attacks on cult patrols near outposts 0:01:22 - 0:03:03 - Bison ram vehicles and cause environmental explosions during river skirmishes 0:03:03 - 0:04:30 - Moose and large bison herds disrupt cult operations as cougar attacks begin 0:04:30 - 0:06:31 - Strategic infiltration of outposts using trained predators for stealth kills 0:06:31 - 0:07:37 - Failed attempt to liberate an outpost amidst chaotic wildlife crossfire 0:07:37 - 0:09:05 - Successful liberation of the Gardenview Packing Facility led by a rampaging bear 0:09:05 - 0:09:39 - Final predatory encounters as bears and cougars harass remaining cultists 📖 Interactive written walkthrough with clickable timestamps: https://pixelfungaming.com/videos/funny-brutal-animal-attacks-in-far-cry-5

MAFIA 3 | Definitive Edition Live #10
The mission begins with a high-stakes cinematic sequence where Sal Marcano and his son Giorgi discuss their failing empire and the impending threat of Lincoln Clay. Following a final briefing with John Donovan, the action moves to the streets of New Bordeaux as Lincoln drives through the night toward the Hotel Paradiso. Upon arrival, the objective shifts to infiltrating the casino and locating Giorgi Marcano. Lincoln navigates the hostile environment, initially using stealth and cover to thin out the guard presence before transitioning into intense, open firefights. The journey through the hotel is a gauntlet of heavily armed security, requiring precise gunplay and strategic movement through various service corridors and lush casino halls. As the battle escalates, Lincoln utilizes assault rifles and handguns to clear room after room, eventually reaching the heart of the Marcano stronghold for the final confrontation. The gameplay highlights the seamless blend of driving, stealth, and third-person shooting mechanics that define the experience. Chapters: 0:00:00 - 0:02:02 - Cinematic Briefing and Planning 0:02:03 - 0:04:25 - Night Drive to Hotel Paradiso 0:04:26 - 0:06:40 - Hotel Infiltration and Stealth Combat 0:06:41 - 0:09:10 - Escalating Shootout in Service Areas 0:09:11 - 0:11:00 - Clearing the Upper Casino Levels 0:11:01 - 0:13:07 - Final Push Through the Casino Floor 📖 Interactive written walkthrough with clickable timestamps: https://pixelfungaming.com/videos/mafia-3-definitive-edition-live-10

State Of Decay : Year One #11 - Infestations
Manage the survival of an enclave at the Church of the Ascension in this State of Decay playthrough. Marcus Campbell and Jack Stockton undertake critical morale missions, scavenge for ammunition in derelict gun shops, and navigate the social challenges of a low-morale community. The stakes rise as Judge Lawton announces a firearms ban and massive hordes threaten the base. This session highlights the progression from early-game survival to advanced base management. Key moments include clearing infestations at the Tartan Mart, raiding Big Daddy Auto Repair, and an intense expedition to Marshall for medical supplies. Encounter deadly Ferals and Screamers, rescue stranded survivors, and level up fighting skills through close-quarters combat. The playthrough culminates in a desperate defensive stand against a coordinated zombie siege and final preparations for the days ahead. Chapters: 0:00 - Game Startup and Main Menu 2:06 - Starting Gameplay and Accepting Morale Mission 3:32 - Driving Out to Mission Objective and Running Over Zombies 4:16 - Melee Combat at Gun Shop Location 5:28 - Scavenging Ammunition and Supplies from Gun Shop 7:27 - Driving Back to Base and Completing Morale Mission 8:12 - Resource Management and Receiving 'Too Many Hordes' Warning 9:00 - Zombie Horde Alert and Preparing Home Defense 10:12 - NPC Morale Dialogue and Home Status Check 12:49 - Defending the Home from Incoming Hordes (Shooting Phase) 14:01 - Destroying Multiple Zombie Hordes 15:24 - Looting for Resources and Ammo 17:35 - Horde Attack and Melee Combat from Lookout Post 18:44 - Switching Control to Jack Stockton 20:19 - Radio Announcement Regarding Civilian Firearms 22:19 - Switching Back to Marcus and Driving Out 23:36 - Melee Combat with Karen and Fighting Skill Increase 26:48 - Clearing Public Restroom Infestation 28:43 - Final Resource Check and Driving Towards New Mission 30:00 - Overwhelmed by a Zombie Horde 30:30 - Character Death and Game Over 31:16 - Post-Death Loading Screen and Transition 31:32 - Managing Home Base Morale After Loss 32:06 - Preparing for a Mission as Marcus Campbell 33:40 - Morale Mission: Lead the Way - Stealth Introduction 36:24 - Clearing an Infestation at Tartan Mart 38:15 - Vehicle Combat and Escape 39:57 - Returning Home and Mission Completion 41:20 - Accepting Combat Training Mission 45:45 - Training Mission: Clearing a Campsite Infestation 49:35 - Driving Back to Base after Training 52:50 - Combat Training Mission Completed 53:36 - Supply Management and New Mission Prep 57:07 - Driving Out for Resource Run in Sheriff Car 58:24 - Scavenging Minimart for Food 59:22 - Leaving Minimart to Find Materials 1:00:00 - Initial arrival at home base and resource check 1:01:40 - Driving to Big Daddy Auto Repair for scavenging 1:05:15 - Raiding the wilderness campsite for military ammo 1:12:30 - Clearing an infestation in the residential district 1:18:45 - Expedition to Marshall for specialized medicine 1:25:20 - Intense Feral zombie encounter in the warehouse district 1:32:10 - Rescuing a stranded survivor from a rooftop 1:38:55 - Base management and facility construction begins 1:44:30 - Defending the base against a major zombie siege 1:52:15 - Nighttime stealth run for food and construction materials 1:58:20 - Final inventory sorting and character swap for rest 📖 Interactive written walkthrough with clickable timestamps: https://pixelfungaming.com/videos/state-of-decay-year-one-11-infestations

COD Ghosts Multiplayer: Free for all - 21 kills - 2nd place :)
The match begins in the pre-match lobby for a Free-for-all engagement on the map Strikezone in Call of Duty: Ghosts. After the initial countdown, the character deploys with an SA-805 assault rifle and immediately enters the fray within the map's tight urban corridors. Early success leads to the acquisition of the SAT COM and Guard Dog killstreaks, which the character uses to gain a tactical edge over opponents. The gameplay shifts between intense indoor firefights in the bar and grill area and long-range encounters across the central marketplace. The character manages several multi-kill streaks while navigating the debris-strewn streets. As the match reaches its conclusion, the score limit is hit, triggering a devastating KEM strike that completely levels the map in a massive explosion. The video finishes by showing the final scoreboard and reward unlocks. Chapters: 0:00:00 - 0:01:10 - Lobby navigation and map loading sequence 0:01:10 - 0:02:15 - Match start and initial urban engagements 0:02:15 - 0:04:30 - Killstreak deployment and mid-match combat 0:04:30 - 0:06:50 - Intense firefights and close-quarters battles 0:06:50 - 0:07:55 - Final engagements and match conclusion 0:07:55 - 0:08:37 - KEM strike aftermath and final scoreboard 📖 Interactive written walkthrough with clickable timestamps: https://pixelfungaming.com/videos/cod-ghosts-multiplayer-free-for-all-21-kills-2nd-place

RDR2 - Billy Midnight
Arthur Morgan enters the Rhodes train station and questions the clerk about the location of the legendary gunslinger, Billy Midnight. Following the clerk's tip, Arthur boards the incoming train and navigates through the crowded passenger cars until he reaches the bar car. There, he finds Billy Midnight nursing a drink and attempts to initiate a conversation about his past. The paranoid gunslinger reacts with fear and hostility, fleeing from Arthur. A chase ensues through the interior of the train, eventually leading both men onto the roof of the moving cars. Amidst the rush of wind and the rumble of the tracks, a tense standoff occurs. Billy draws his weapon, forcing Arthur into a high-stakes quickdraw duel. Arthur fires first, ending the gunslinger's life. After the confrontation, Arthur retrieves Billy's unique gold-plated pistol and uses his camera to document the encounter for his mission log. The mission concludes as the train continues its journey across the landscape. Chapters: 0:00:00 - 0:00:32 - Inquiry at the Rhodes Station 0:00:32 - 0:01:14 - Searching the passenger train cars 0:01:14 - 0:01:51 - Confrontation with Billy Midnight in the bar car 0:01:51 - 0:02:04 - High-speed chase through the train 0:02:04 - 0:02:31 - Rooftop pursuit and standoff 0:02:31 - 0:02:40 - Quickdraw duel on the moving train 0:02:40 - 0:03:02 - Looting Billy Midnight's rare pistol 0:03:02 - 0:03:19 - Taking the proof of kill and mission completion 📖 Interactive written walkthrough with clickable timestamps: https://pixelfungaming.com/videos/rdr2-billy-midnight

Destiny LiveStream (Twitch)
Join this full walkthrough of Destiny's early-game story missions on Earth and the Moon. This video showcases a Level 6-7 Titan as they navigate the desolate landscapes of Old Russia and the cavernous depths of the Moon. Experience high-octane gunplay against the Fallen and Hive, including key missions like 'The Last Array' and 'The World's Grave'. Watch as we uncover ancient technologies, defend vital signal arrays from waves of enemies, and infiltrate the massive Hive fortress on the lunar surface. The gameplay features a mix of auto rifle combat, fusion rifle precision, and heavy machine gun power, along with the iconic Titan 'Striker' abilities. We also stop by the Tower to manage inventory and pick up new bounties to further power up our Guardian. Whether you're a returning veteran or a new player looking to see how it all started, this comprehensive gameplay session captures the atmospheric world-building and satisfying combat loop of Bungie's legendary looter-shooter. Chapters: 0:00:00 - Xbox One Dashboard and Game Launch 0:01:30 - Installing Updates and Loading Screen 0:03:15 - Character Selection: Level 6 Titan 0:04:30 - Selecting Mission: The Last Array (Old Russia, Earth) 0:05:45 - Landing in Mothyards and Initial Combat 0:08:15 - Joining Public Event: Eliminate the Target 0:10:45 - Navigating toward Skywatch Area 0:13:30 - Entering the Lunar Complex 0:16:00 - Fighting Through Hive in the Darkened Halls 0:19:00 - Terrestrial Complex: Reaching the Control Station 0:21:15 - Securing the Array Outdoors 0:24:30 - Defending Against Waves of Hive Thralls and Knights 0:27:45 - Final Stand Against Hive Wizards 0:29:30 - Mission Complete and Tower Visit 0:32:00 - Selecting Mission: The World's Grave (Ocean of Storms, Moon) 0:34:15 - Arrival at Archer's Line on the Moon 0:37:00 - Combat on the Lunar Surface Against Fallen 0:40:30 - Entering the Hive Fortress 0:43:15 - Descending into the Deep Moon Caverns 0:46:00 - The Circle of Bones: Intense Firefight 0:48:45 - Infiltrating the World's Grave Chamber 0:50:30 - Securing the Archive and Final Rewards 📖 Interactive written walkthrough with clickable timestamps: https://pixelfungaming.com/videos/destiny-livestream-twitch

COD Ghosts : Prison break - Taking out some snipers :)
The mission begins with a swift traverse through a dense jungle environment filled with tropical flora and parked transport trucks. The character navigates toward a multi-story concrete structure and begins a steady ascent up a long yellow ladder to reach the upper balcony. Upon entering the building's interior, immediate combat ensues as two enemies are neutralized in a narrow hallway using an assault rifle. After securing the room and reloading, the character assumes a tactical defensive position at the top of a stairwell, monitoring the lower entrance while distant explosions shake the structure. The engagement continues when another hostile player attempts to rush up the stairs and is quickly eliminated, which triggers a SAT COM point streak reward. The sequence concludes with the character moving toward an open doorway to survey the surrounding exterior grounds. Chapters: 0:00:00 - 0:00:08 - Sprinting through the jungle toward the objective building 0:00:08 - 0:00:15 - Ascending the external ladder to the upper floor 0:00:15 - 0:00:21 - Close-quarters combat encounter and double kill 0:00:21 - 0:00:44 - Holding a defensive position at the stairwell 0:00:44 - 0:00:53 - Final elimination and moving to exit the building 📖 Interactive written walkthrough with clickable timestamps: https://pixelfungaming.com/videos/cod-ghosts-prison-break-taking-out-some-snipers

Far Cry New Dawn - Treasure Hunt - Going Haywire Walklthrough
The mission begins with an intense firefight at an overgrown outpost in Hope County. Combat encounters include engaging Highwaymen using a variety of weapons, including scoped rifles, assault rifles, and pistols. After neutralizing the hostile forces on the ground and rooftops, exploration of the area leads to the discovery of a note that initiates the 'Going Haywire' treasure hunt. The objective requires finding a way into a locked bunker protected by an active electrical field. Navigation involves searching nearby shacks for clues and eventually climbing onto the roof of the main structure. From a skylight on the roof, a precise shot through the metal grating breaks a padlock on the door inside. After entering the building and collecting various crafting materials, a switch is activated to shut down the power. This action allows safe access to the underground bunker. The mission concludes inside the vault, where many valuable items, including perk magazines and Far Cry credits, are collected while uncovering the story of the site's previous inhabitants through their journals. Chapters: 0:00:00 - 0:01:05 - Infiltrating the outpost and initial firefight 0:01:05 - 0:02:25 - Clearing remaining hostiles from the rooftops 0:02:25 - 0:03:15 - Initiating the 'Going Haywire' treasure hunt 0:03:15 - 0:04:05 - Searching for a way to bypass the electrical security 0:04:05 - 0:05:05 - Breaking into the main building via the rooftop skylight 0:05:05 - 0:05:35 - Deactivating the power and entering the hidden bunker 0:05:35 - 0:07:09 - Looting the bunker and mission completion 📖 Interactive written walkthrough with clickable timestamps: https://pixelfungaming.com/videos/far-cry-new-dawn-treasure-hunt-going-haywire-walklthrough

MAFIA 3 | Definitive Edition Live #5
The mission begins with an objective to steal a semi-truck located deep within the Bayou Phantom territory. Navigation leads through dense marshlands at night to reach an enemy camp. Stealth plays a key role as the area is heavily guarded; the character utilizes cover and silent takedowns to thin the enemy ranks. Once the perimeter is cleared, the semi-truck is commandeered and driven back into the city of New Bordeaux. The journey involves navigating tight turns and heavy traffic under the cover of darkness. Upon delivery to one of Vito Scaletta's rackets, a mission-complete screen appears, and income is collected. A cinematic sequence follows involving Alma Diaz, where she discusses her past in Cuba and the impact of the revolution on her family. Following the meeting, the gameplay shifts to dismantling enemy rackets in the city, involving high-stakes gunfights and brutal melee takedowns. The character navigates through various menus to review associate biographies for Vito, Alma, and Nicole Burke, highlighting their backstories and available upgrades. The final segment focuses on meeting with Lennie Davis at a local bar to gather critical intelligence on Tony Derazio, setting the stage for future underworld operations. Chapters: 0:00:00 - 0:02:12 - Initial Mission Briefing and Navigation 0:02:12 - 0:05:58 - Stealth Infiltration of the Bayou Enemy Camp 0:05:58 - 0:08:12 - Stealing the Semi and City Delivery 0:08:12 - 0:10:27 - Mission Completion and Return to Rigolet's 0:10:27 - 0:12:15 - Cinematic Dialogue with Alma Diaz 0:12:15 - 0:14:47 - Warehouse Combat and Racket Sabotage 0:14:47 - 0:16:19 - Reviewing Associate Bios and Upgrades 0:16:19 - 0:20:32 - Meeting Lennie Davis for Intel on Tony Derazio 📖 Interactive written walkthrough with clickable timestamps: https://pixelfungaming.com/videos/mafia-3-definitive-edition-live-5

MAFIA 3 | Definitive Edition Live #4
Welcome to Part 22 of our complete Mafia III walkthrough on PS4. In this episode, Lincoln Clay continues his mission to dismantle Sal Marcano's criminal empire by targeting the rackets in the River Row district. We start by sabotaging the Union Trailers to weaken the extortion racket, leading to an intense shootout at the docks. Lincoln then tracks down and eliminates key Union enforcers through a mix of stealth and brute force. The path leads to the Union Hall for a final confrontation with Andy Turetto. After a massive firefight, Lincoln manages to corner and recruit Turetto to run the racket for Vito Scaletta. We also dive into the contraband smuggling racket, where Lincoln infiltrates a heavily guarded warehouse to steal the stash and eventually confronts the manager, Roy Thibideaux. Witness the brutal takedowns, tactical combat, and the growing influence of Lincoln's criminal organization as he secures more territory for his associates. This video features high-octane gameplay, including stealth infiltrations, car chases, and epic gun battles through the streets of 1968 New Bordeaux. Chapters: 0:00:00 - Introduction and Game Setup 0:01:27 - Mission Start: Sabotage the Union Trailers 0:04:22 - Infiltrating the Northeast Trailer Yard 0:07:15 - Brutal Building Takedowns 0:11:30 - Intense Shootout at the Dockyard 0:15:45 - Escaping the Scene and Mission Update 0:20:15 - Mission: Kill Union Enforcers - Stealth Approach 0:24:45 - Warehouse Combat and Firefight 0:29:30 - Clearing Out the Remaining Enforcers 0:33:00 - Briefing with Jock Blanchard 0:37:15 - Arrival at Union Hall to Confront Turetto 0:41:00 - Major Firefight Inside Union Hall 0:44:30 - Recruiting Andy Turetto for the Racket 0:47:00 - Vito Scaletta's Background and New Mission 0:51:30 - Mission Start: Rob the Warehouse 0:55:00 - Infiltrating the Loading Docks 0:58:30 - Final Showdown with Roy Thibideaux 1:01:00 - Racket Secured and Mission Wrap-up 📖 Interactive written walkthrough with clickable timestamps: https://pixelfungaming.com/videos/mafia-3-definitive-edition-live-4

Walking Dead Game: Season 2 episode 3 - In Harms Way PT 4
Clementine and the surviving group members begin their day at Howe’s Hardware under the strict surveillance of Carver’s guards. The group secretly plans an escape, with Clementine tasked to deliver a stolen radio to Luke. As Troy enters to move the group, Kenny helps Clementine hide the device through a quick-thinking diversion. Clementine accompanies Bonnie through the warehouse, eventually convincing her to look the other way while she sneaks out to find Luke. Upon reaching a nearby comic store, Clementine finds bloodstains and signs of a struggle before Troy captures her and returns her to the yard. Carver reveals he has captured Luke and demands the missing radio, prompting Kenny to step forward and take the blame. Carver brutally beats Kenny as the rest of the group is forced to watch in horror. Despite the trauma, the group decides they must proceed with the escape that night. Clementine sneaks into the main office to activate the outdoor PA system, navigating through the building’s upper levels and discovering a dying Alvin along the way. The mission concludes as she successfully flips the switches to draw a walker herd toward the facility. Chapters: 0:00:00 - 0:01:15 - Morning roll call and secret planning 0:01:15 - 0:02:11 - Kenny helps Clementine hide the stolen radio 0:02:11 - 0:04:11 - Navigating the warehouse with Bonnie 0:04:11 - 0:05:39 - Searching for Luke in the comic store 0:05:39 - 0:08:00 - Carver's confrontation and Kenny's sacrifice 0:08:00 - 0:08:43 - Aftermath of the brutal beating 0:08:43 - 0:10:43 - The group debates the immediate escape plan 0:10:43 - 0:12:08 - Finalizing the PA system distraction 0:12:08 - 0:13:21 - Clementine climbs to the upper office 0:13:21 - 0:15:01 - Infiltrating the office and activating the PA 📖 Interactive written walkthrough with clickable timestamps: https://pixelfungaming.com/videos/walking-dead-game-season-2-episode-3-in-harms-way-pt-4

HITMAN:The Showstopper -Safe Room Explosion kill
Agent 47 begins the mission outside the Paris fashion show, stealthily bypassing security near the delivery van and stage equipment. He uses a crowbar to break into a locked basement maintenance entrance. Once inside the tunnels, he enters a staff changing room, quickly subdues a staff member, and acquires a waiter disguise. Navigating the wine cellar and kitchen areas in the staff disguise, he locates Ematic Rat Poison and uses it to contaminate the food station intended for the targets. 47 proceeds to the main mansion level, where he identifies his first target, Viktor Novikov, who soon consumes the poisoned food. As Novikov retreats to a secluded area (a bathroom) due to the poison's effect, 47 follows, subdues him, and acquires his clothing and phone. Now disguised as Novikov, 47 moves deeper into the palace. He encounters and subdues a second guard on the main staircase to acquire a secondary disguise (Event Crew Member). Moving to the upper levels of the mansion (the attic staging area), he destroys the security camera evidence. He then finds a remote explosive device and enters the main office area, placing the remote explosive under a desk (the designated safe room). Stepping onto the balcony, 47 uses the bodyguard's phone to call in 'Code 17,' initiating the target lockdown procedure. This forces both targets, Viktor Novikov and Dalia Margolis, into the safe room. 47 immediately detonates the explosive, resulting in an explosion kill that successfully eliminates both primary targets and completes the mission objectives. 47 quickly exits the office and makes his way back through the basement to successfully exfiltrate. Chapters: 0:00 - 0:44 - Infiltration and Basement Access 0:44 - 1:11 - Acquiring Staff Disguise in Locker Room 1:11 - 2:24 - Main Floor Ascent and Reviewing Objectives 2:24 - 3:14 - Poisoning Setup in the Kitchen 3:14 - 4:14 - Eliminating Viktor Novikov and Acquiring Disguise 4:14 - 6:43 - Eliminating Bodyguard, Disguise Change, and Mansion Navigation 6:43 - 7:44 - Passing Security Frisk and Navigating Upper Floors 7:44 - 9:48 - Destroying Evidence and Placing Remote Explosive 9:48 - 12:45 - Calling Code 17, Target Lockdown, and Dual Explosion Kill 12:45 - 14:52 - Exfiltrating the Mission Area 📖 Interactive written walkthrough with clickable timestamps: https://pixelfungaming.com/videos/hitman-the-showstopper-safe-room-explosion-kill

Call Of Duty Ghosts : Multiplayer - Team death match
This comprehensive gameplay video features a deep dive into the multiplayer world of Call of Duty: Ghosts. Over the course of more than an hour, the footage showcases a series of intense Team Deathmatch games across several popular maps, including Overlord, Warhawk, Flooded, Tremor, and Strikezone. The gameplay highlights various tactical strategies, from aggressive close-quarters combat with the Bizon submachine gun to precision mid-range engagements using the SA-805 assault rifle. Viewers can witness the use of various perks and strike packages, such as Sat Coms and Guard Dogs, and observe how different environments dictate the flow of combat. Beyond the action, the video provides a thorough look at the multiplayer interface, including loadout customization in the barracks, the map voting process in the lobby, and detailed post-match summaries showing scoreboards and rank progression. Whether you're looking to relive the competitive atmosphere of Call of Duty: Ghosts or seeking tactical insights for these classic maps, this video offers a complete overview of the game's multiplayer experience. Chapters: 0:00:00 - Match Start: Team Deathmatch on Overlord map 0:04:30 - Mid-match tactical engagements around Area-01 0:08:52 - Overlord match concludes; reviewing final scoreboard 0:11:30 - Multiplayer lobby: Map voting and player wait 0:14:33 - Joining a match in progress on Warhawk 0:17:15 - Menu navigation and loadout adjustments 0:21:12 - Quick Team Deathmatch session on Flooded map 0:24:00 - Reviewing Operations and Rank progress in menu 0:26:24 - Fast-paced combat on the Tremor map 0:30:00 - Lobby downtime and map selection countdown 0:34:41 - Action-packed gameplay on the Strikezone map 0:39:00 - Barracks: Customizing soldier loadouts and perks 0:43:32 - Return to the Flooded map for another round 0:47:00 - Waiting for players and server hosting in lobby 0:51:57 - In-depth firefights on Warhawk with SMGs 0:56:00 - Lobby interactions and map voting 1:01:24 - High-intensity Team Deathmatch on Tremor 1:05:00 - Post-match summary and lobby waiting period 1:10:05 - Final match session starts on Overlord 1:11:15 - Gameplay concludes and video ends 📖 Interactive written walkthrough with clickable timestamps: https://pixelfungaming.com/videos/call-of-duty-ghosts-multiplayer-team-death-match

Call Of Duty : Advanced Warfare Live
Experience the intense action and gripping narrative of Call of Duty: Advanced Warfare in this comprehensive gameplay video spanning several key missions. The journey begins with an introduction to the powerful Atlas Corporation, a private military company led by the ambitious Jonathan Irons. We follow the protagonist through the derelict streets of Detroit in the mission 'Aftermath,' where the team hunts for a high-value target amidst a global crisis. The action then shifts to the beautiful but deadly island of Santorini, Greece, in 'Manhunt.' Here, players must utilize advanced drone technology to identify and track key members of the KVA terrorist organization, leading to a high-speed chase and a climactic confrontation with the elusive leader, Hades. The video concludes with the mission 'Utopia' in New Baghdad, a city rebuilt by Atlas. However, a shocking discovery reveals the dark truth behind Irons' intentions, forcing a desperate escape from the very organization the team once served. This video showcases advanced exoskeleton abilities, futuristic weaponry, and cinematic storytelling that defined a new era for the franchise. Chapters: 0:00:00 - Game Introduction and Main Menu 0:02:11 - Atlas Corporation: The Way Forward Cinematic 0:03:41 - Mission: Aftermath - Arrival in Detroit 0:06:45 - Navigating the Refugee Camps 0:10:15 - Entering the Derelict School Building 0:14:30 - Stealth Movement and Target Tracking 0:19:00 - Intense Firefight in the Office Complex 0:23:15 - Pushing Through to the Hospital Entrance 0:27:40 - Final Engagement and Mission Extraction 0:29:45 - Post-Mission Briefing and Story Development 0:30:44 - Mission: Manhunt - Santorini, Greece 0:35:10 - Marketplace Reconnaissance and Target Scanning 0:39:20 - Infiltrating the KVA Safehouse 0:44:00 - Tactical Room Clearing with Exoskeleton Abilities 0:49:15 - Deploying the WASP Drone for Surveillance 0:54:30 - Monitoring the KVA Meeting via Drone 0:59:45 - Intercepting the Hades Convoy - The Ambush 1:03:20 - High-Speed Combat Chase Through Santorini Streets 1:08:45 - Final Stand Against Hades' Forces 1:13:10 - Hades' Death and Final Cinematic Discovery 1:16:15 - Mission: Utopia - Arrival in New Baghdad 1:19:30 - The Hidden Truth: Betrayal by Jonathan Irons 1:21:45 - Desperate Escape and High-Rise Combat 1:23:30 - Evacuation and Transition to Next Chapter 📖 Interactive written walkthrough with clickable timestamps: https://pixelfungaming.com/videos/call-of-duty-advanced-warfare-live

GTA 5 Online - Making A Clown Outfit
The customization process begins in a high-end apartment's bedroom. The character walks into a spacious walk-in closet to update their appearance. They first navigate through various clothing categories, starting with tops. After browsing through several service and tucked shirts, they select a crisp white tucked shirt. Next, they move on to the pants section, eventually choosing a pair of vibrant red leather low crotch shorts. The focus then shifts to accessories, where they look through ties and settle on a matching red tie. To complete the eccentric look, they browse the masks collection and equip a menacing red clown mask. Finally, they choose a pair of red tip oxford shoes to perfectly coordinate with the rest of the outfit. The final result is a distinctive and thematic clown-inspired ensemble, showcased within the apartment's closet. Chapters: 0:00:00 - 0:00:05 - Entering the walk-in closet 0:00:05 - 0:00:31 - Selecting a white tucked shirt 0:00:31 - 0:00:41 - Choosing red leather shorts 0:00:41 - 0:00:57 - Adding a red tie accessory 0:00:57 - 0:01:12 - Equipping the red clown mask 0:01:12 - 0:01:30 - Finishing with red smart shoes 0:01:30 - 0:01:39 - Reviewing the final clown outfit 📖 Interactive written walkthrough with clickable timestamps: https://pixelfungaming.com/videos/gta-5-online-making-a-clown-outfit

Call Of Duty Ghosts : Extinction Gameplay - Mayday
This video features a full session of the Call of Duty: Ghosts - Extinction mode on the 'Mayday' DLC map. The footage begins with the dramatic opening cinematic that establishes the lore, featuring characters discovering an ancient tombstone and the subsequent massive alien outbreak. The players land on a derelict ship and immediately begin the core mission: destroying alien hives using a specialized portable drill. The gameplay showcases a variety of tactical decisions, including weapon upgrades from pistols to high-tier assault rifles and light machine guns, the deployment of sentry guns, and the strategic use of IMS traps and specialized ammo. As the team moves deeper into the ship, the challenge ramps up significantly with more aggressive Cryptid variants like Scouts, Seeders, and Hunters, alongside environmental hazards triggered by the giant Kraken. The video tracks the team's coordination and survival tactics over nearly an hour of real-time play. After a series of intense battles across multiple ship zones, the team is eventually overwhelmed at the ninth hive, resulting in a 'Mission Failed' screen. The video concludes with a detailed scoreboard showing the final statistics for all four players, including kills, revives, and total score. Chapters: 0:00:00 - Intro Cinematic and Lore Setup 0:04:30 - Destroying the First Hive on the Ship's Deck 0:09:15 - Moving to the Lower Decks and Initial Upgrades 0:14:45 - Establishing Defensive Perimeters with Sentry Guns 0:19:30 - Intense Combat Waves and Drill Protection 0:24:00 - Reaching the Cargo Hold and Mid-Game Milestone 0:29:00 - Firefight Near the Laboratory Entrance 0:34:15 - Avoiding Attacks from the Massive Kraken Tentacles 0:39:00 - Desperate Resource Management During Hive Defense 0:44:30 - Pushing into the Final High-Difficulty Ship Sections 0:49:15 - Intense Battle at Hive 8 with Advanced Cryptids 0:53:00 - Final Desperate Stand at Hive 9 0:54:29 - Mission Failed: Match Summary and Scoreboard 📖 Interactive written walkthrough with clickable timestamps: https://pixelfungaming.com/videos/call-of-duty-ghosts-extinction-gameplay-mayday

Walking Dead Game: Season 2 episode 3 - In Harms Way PT 1
The group of survivors settles into the harsh reality of Carver's community at Howe's Hardware. The segment begins with a somber discussion regarding the fates of Pete and Nick, followed by Reggie's attempt to highlight the perceived benefits of the settlement, such as electricity and security. Clementine navigates the yard during a period of relative freedom, interacting with fellow prisoners like Kenny, Rebecca, and Sarah to gauge their morale and plans for escape. As night falls, the group discusses their distrust of Reggie and the necessity of finding a way out. The following morning brings a chilling address from Carver, who emphasizes redemption through labor while threatening the group with the proximity of a massive walker herd. Tensions peak when Carver forces Carlos to physically discipline Sarah for her perceived insolence. The mission shifts to daily labor assignments, where Clementine is paired with Bonnie in the armory. During their work, Bonnie attempts to apologize for her betrayal at the ski lodge and justifies Carver's authoritarian rule as a means of ensuring survival. Chapters: 0:00:00 - 0:02:15 - Discussing losses and Reggie's pitch 0:02:15 - 0:04:30 - Skepticism and plans for escape 0:04:30 - 0:07:15 - Exploring the yard and survivor check-ins 0:07:15 - 0:08:45 - Night lockdown and morning wake-up call 0:08:45 - 0:11:20 - Carver's speech and Sarah's discipline 0:11:20 - 0:12:16 - Labor begins and Bonnie's apology 📖 Interactive written walkthrough with clickable timestamps: https://pixelfungaming.com/videos/walking-dead-game-season-2-episode-3-in-harms-way-pt-1

Ghost Recon Wildlands : Take Out Network Station #1
The mission begins with a stealthy approach to a heavily guarded network station. The objective is to sabotage the station's operations to assist rebel forces. Tactical movement is used to navigate through a series of shacks and outbuildings, avoiding detection by patrolling cartel soldiers. A remote-detonated C4 charge is planted at the main entrance, followed by a coordinated explosion that breaches the facility. Combat starts immediately as the interior is cleared room-by-room using silenced assault rifles and thermal vision to spot enemies through smoke and darkness. After securing the ground floor, a laptop is hacked to disrupt cartel communications, completing the first phase of the operation. A brief regrouping period follows as intel is gathered from nearby documents, revealing further cartel plans. The character then navigates through the jungle terrain to locate a parked helicopter. Aerial transport provides a quick transition to the second target location, showcasing the vast open-world environment. Upon arrival at the second network station, the same tactical breaching procedure is applied. Night vision goggles are deployed for a precision assault on the darkened interior. Intense close-quarters combat ensues as the final cartel holdouts are neutralized. The second hacking sequence successfully shuts down the local network, and the mission concludes with the retrieval of a high-value weapon accessory from a storage crate. Chapters: 0:00:00 - 0:01:16 - Infiltration and C4 Placement 0:01:17 - 0:02:43 - Breaching First Station and Initial Hack 0:02:44 - 0:05:21 - Gathering Intel and Searching for Documents 0:05:22 - 0:07:29 - Audio Log Analysis and Vehicle Recovery 0:07:30 - 0:08:32 - Helicopter Extraction and Flight to Second Objective 0:08:33 - 0:09:55 - Breaching Second Station with Night Vision 0:09:56 - 0:11:00 - Final Hack and Accessory Collection 📖 Interactive written walkthrough with clickable timestamps: https://pixelfungaming.com/videos/ghost-recon-wildlands-take-out-network-station-1

Far Cry New Dawn Outpost: Water Hole Undetected
The mission to liberate The Watering Hole outpost begins with a silent approach through the surrounding brush. A first enemy falls to a stealth takedown near the perimeter. Infiltration continues through shallow water as the objective shifts to disabling the outpost's alarm system. After neutralizing a guard near the main building, the alarm is successfully deactivated. The approach remains methodical, utilizing tall grass and sunflowers for concealment while tracking enemy patrols. Several guards are eliminated using silent takedowns across various levels of the facility, including rooftops and interiors. The process concludes with the final enemy being neutralized from a vantage point, resulting in a successful undetected liberation and the acquisition of ethanol rewards. Chapters: 0:00:00 - 0:00:30 - Initial Infiltration and First Contact 0:00:30 - 0:01:05 - Disabling the Outpost Alarm 0:01:05 - 0:02:35 - Stealth Navigation and Positioning 0:02:35 - 0:03:15 - Clearing the Interior and Rooftop Guard 0:03:15 - 0:04:45 - Systematic Takedowns of Remaining Enemies 0:04:45 - 0:05:16 - Final Liberation and Rewards 📖 Interactive written walkthrough with clickable timestamps: https://pixelfungaming.com/videos/far-cry-new-dawn-outpost-water-hole-undetected
Zero Hour Update: Using New Drone In Terror House
This video presents a comprehensive playthrough of a tactical first-person shooter mission set in a location titled 'Terror House'. The content begins with a detailed mission planning phase, where equipment selection and entry points are established using a 3D tactical map. Throughout the operation, the video demonstrates advanced tactical maneuvers, including cautious alleyway movement, rooftop clearing, and systematic room-to-room breaches. Key highlights include the effective use of a reconnaissance drone to scout interior threats from the safety of a hallway and high-intensity firefights involving ballistic shields and flashbangs. Viewers will see the operative neutralize multiple armed suspects, secure dropped weapons as evidence, and arrest surrendering hostiles. The operation concludes with a final sweep of the premises and a mission success summary showcasing tactical performance metrics. Chapters: 00:00:00 - 00:02:15 - Mission loadout selection and initial alleyway infiltration 00:02:15 - 00:05:00 - Rooftop suspect engagements and reconnaissance drone deployment 00:05:00 - 00:07:45 - Systematic floor-by-floor room clearing and weapon securing 00:07:45 - 00:10:30 - Intense corridor fights, explosive breaching, and target neutralizations 00:10:30 - 00:13:15 - Clearing large residential units and engaging entrenched suspects 00:13:15 - 00:16:00 - Final room breaches, suspect surrenders, and arresting hostiles 00:16:00 - 00:17:42 - Post-action sweep for evidence and mission completion summary 📖 Interactive written walkthrough with clickable timestamps: https://pixelfungaming.com/videos/zero-hour-update-using-new-drone-in-terror-house

Far Cry 5 - VIETNAM - Colonel Banh (No Alarms)
The mission begins with a stealthy approach through a dense, misty jungle towards a fortified enemy encampment. Binoculars are utilized to scout the area and tag hostile positions from a high vantage point. Stealth remains the priority as the character moves into the camp, performing a silent takedown of a guard within a bamboo structure. The path leads underground into a dimly lit network of tunnels and bunkers, where the atmosphere shifts to tense interior exploration. Combat encounters intensify as the character navigates the narrow passages alongside allies, clearing out enemy resistance with precise gunfire. After ascending a cliffside ladder and neutralizing sentries on the upper levels, the team pushes deep into the primary bunker. An intense firefight erupts in a large cavernous chamber, resulting in the elimination of the NVA Commander, Colonel Banh. The mission concludes with the collection of valuable intel and the exploration of the newly revealed East Sector Bunker. Chapters: 0:00:00 - 0:00:48 - Jungle Infiltration and Scouting with Binoculars 0:00:48 - 0:01:15 - Stealth Takedown and Entering the Hut 0:01:15 - 0:02:00 - Navigating the Underground Tunnel Network 0:02:00 - 0:02:50 - Allied Combat and Interior Cave Movement 0:02:50 - 0:03:20 - Cliffside Ladder Climb and Upper Ledge Ambush 0:03:20 - 0:04:10 - Eliminating Colonel Banh in the Command Bunker 0:04:10 - 0:04:40 - Mission Completion and Bunker Looting 📖 Interactive written walkthrough with clickable timestamps: https://pixelfungaming.com/videos/far-cry-5-vietnam-colonel-banh-no-alarms

Farcry 6| live #17 Valle de oro (Eye Valley)
Witness the thrilling conclusion of the revolution in Yara with this comprehensive Far Cry 6 gameplay walkthrough. This video covers critical late-game operations, starting with 'Surgical Extraction,' where we track down and protect Big Papi in the chaotic jungle, leading to a high-stakes investigation at Orquídea Villa. Follow the action as we infiltrate the BioVida facility in 'Ángel de la Muerte' to confront the sinister Dr. Edgar Reyes and escape his deadly poison traps. Finally, join the ultimate assault on Esperanza in 'The Lion's Den.' Experience the stealthy approach through the capital city's streets, the brutal climb up Torre del León, and the final, heart-wrenching confrontation with the dictator Antón Castillo, played by the legendary Giancarlo Esposito. The video includes full cutscenes, tactical combat highlights, boss encounters, and the game's dramatic ending sequence. Chapters: 0:00:00 - Game Intro and Main Menu 0:03:33 - Operation: Surgical Extraction - Finding Big Papi 0:07:45 - Defending the Crash Site from FND Forces 0:12:15 - Escorting Big Papi to Safety 0:15:30 - Infiltrating Orquídea Villa 0:19:00 - Investigating Sergio Estévez's Office 0:22:30 - High-Speed Quad Bike Chase to the Marina 0:25:45 - Confrontation and the Fate of Sergio 0:28:15 - Operation: Ángel de la Muerte - Facility Infiltration 0:32:00 - BioVida Lab Combat and Sabotage 0:36:30 - Confronting Dr. Edgar Reyes 0:40:15 - Gas Chamber Escape and Interior Gunfight 0:44:00 - Securing the Helipad for Extraction 0:48:30 - Escaping BioVida via Helicopter 0:52:45 - The Lion's Den: Planning the Final Assault 0:57:30 - Infiltrating Esperanza via Boat 1:02:15 - Stealth Navigation through the Capital City 1:07:00 - Reaching the Torre del León Perimeter 1:11:45 - Breaching the Tower and Interior Assault 1:16:30 - Intense Combat in the Tower Corridors 1:21:00 - Fighting through Elite Special Forces 1:25:30 - The Final Climb to Castillo's Penthouse 1:30:15 - Final Confrontation with Antón Castillo 1:35:00 - Ending Cutscene and Revolutionary Aftermath 1:39:45 - Post-Game Exploration and World Map Review 1:45:17 - Final Gameplay and Video Conclusion 📖 Interactive written walkthrough with clickable timestamps: https://pixelfungaming.com/videos/farcry-6-live-17-valle-de-oro-eye-valley

Red Dead Redemption 2 - Arrest & Execution Of Killer Prostitute
Arthur Morgan encounters a familiar stranger in Valentine who requests help hiding a body in a hotel room. After following her to the scene of the crime and hearing her claim of self-defense, Arthur decides to turn her over to the law. He hogties her and carries her through the night streets to the Sheriff's office. Sheriff Malloy identifies her as a serial killer and compensates Arthur for the arrest. The mission concludes during the following day as Arthur witnesses her public execution by hanging at the Valentine gallows, where the Sheriff addresses the townspeople about the importance of law and order. Chapters: 0:00:00 - 0:00:54 - Encountering the stranger in Valentine 0:00:54 - 0:01:23 - Investigating the crime scene in the hotel room 0:01:23 - 0:02:05 - Apprehending the suspect 0:02:05 - 0:03:00 - Transporting the suspect to the Sheriff's office 0:03:00 - 0:03:48 - Collecting the reward and the suspect's incarceration 0:03:48 - 0:04:40 - Witnessing the public execution 0:04:40 - 0:05:18 - Conclusion of the encounter 📖 Interactive written walkthrough with clickable timestamps: https://pixelfungaming.com/videos/red-dead-redemption-2-arrest-execution-of-killer-prostitute

Sniper Elite 3 - Fort Rifluglo Part 2
Experience a full stealth and tactical walkthrough of the Fort Rifugio mission in Sniper Elite 3. This gameplay highlights the intricate balance between silent infiltration and intense long-range sniping. We begin by sneaking through the dark corners of the fort, utilizing non-lethal and silent takedowns with the Welrod to remain undetected. The primary mission is to locate a captured informant, which leads into a high-stakes objective to recover keys from a heavily guarded commanding officer. After successfully freeing our ally, the gameplay shifts to the fort battlements. Here, the player must provide critical covering fire for the informant's escape, facing off against waves of enemy infantry and vehicles. Watch for incredible X-ray kill cams, strategic use of the Panzerschreck for area clear, and precise marksmanship from over 100 meters away. The video concludes with the successful extraction of the informant and a full breakdown of mission results and XP earned. Chapters: 0:00:00 - Infiltration into Fort Rifugio 0:03:30 - Stealthy Takedowns and Navigation 0:08:17 - Locating the Informant's Cell (Cutscene) 0:12:00 - Searching for the Commanding Officer 0:15:35 - Recovering the Prison Keys 0:18:29 - Freeing the Informant 0:21:15 - Taking Position on the Battlements 0:24:20 - Clearing the Courtyard with Panzerschreck 0:28:45 - Long-Range Cover Support 0:33:15 - Defending the Escape Route 0:37:50 - Final Enemy Waves and Sniper Duels 0:41:45 - Ensuring the Informant's Final Extraction 0:42:47 - Mission Accomplished and Result Screens 📖 Interactive written walkthrough with clickable timestamps: https://pixelfungaming.com/videos/sniper-elite-3-fort-rifluglo-part-2

Farcry 6 live #4
Experience the intense guerrilla warfare of Far Cry 6 as Dani Rojas takes on the Montero family's struggle against the Castillo regime. This walkthrough covers several critical operations across Yara, beginning with an assault on a Lozanía checkpoint and a tactical infiltration of Revmira to rescue Alejandro Montero. Following the rescue, witness the raw power of a C-68 tank during a destructive coastal rampage to secure military supplies in the 'Packing Heat' operation. The stakes rise in Verdera during a mission to stop a public execution. After a botched assassination attempt, Dani must navigate a high-stakes escort mission through intense urban combat, leading to the tragic loss of a key resistance leader. The journey for justice continues with the retrieval of a symbolic weapon and the 'Death Warrant' operation, where Dani hunts down the lieutenants responsible for the Montero family's suffering. Final segments showcase tactical sniper gameplay at Casa del Viento and explosive combat at De Francisca Ranch using the Supremo. Utilizing the 'Señor Pinga' tank, Dani clears FND roadblocks to reach an underground radar bunker. After hacking critical systems and surviving waves of reinforcements in 'Open Skies,' the mission concludes with a nighttime drive to coordinate the next phase of the revolution with Philly. 📖 Interactive written walkthrough with clickable timestamps: https://pixelfungaming.com/videos/farcry-6-live-2 0:00:00 Mission Start: Esperanza 0:00:11 Stealth City Navigation 0:01:51 FND Roadblock Firefight 0:03:11 Hijacking FND Tank 0:05:30 Tank Combat & Destruction 0:07:04 Clandestine Hideout Arrival 0:08:15 Assassination Strategy 0:09:50 Planting Hotel Explosives 0:12:30 Sniper Engagement 0:15:54 Heading to Hotel District 0:18:00 Clearing Hotel Perimeter 0:19:44 Hotel Paraiso Lobby Assault 0:21:30 Fighting to Upper Floors 0:24:43 Penthouse Confrontation 0:26:53 Hotel Garage Escape 0:28:41 City Exfiltration 0:00:00 Navigating Aguas Lindas 0:01:45 Meeting Philly Barzaga 0:02:45 Stabilizing Diesel Daisy 0:04:30 Defending Cave Base 0:07:00 Heavy Machine Gun Combat 0:10:00 Machine Destruction Sequence 0:12:00 Return to Montero Farm 0:14:45 Fetch Quest with Chorizo 0:16:30 Collecting Chorizo's Stashes 0:18:30 Bandido Operations Overview 0:21:00 Avispa Buzzer Flight 0:23:45 Infiltrating the Cathedral 0:25:30 Stadium Perimeter Sniping 0:28:15 Scouting the Stadium 0:00:00 Velazco Airstrip Stealth 0:05:00 Supremo & Vehicle Combat 0:10:00 Securing the Airfield 0:15:00 Stealing the Military Plane 0:20:00 Aerial Transit 0:25:00 Philly Hangar Cutscene 0:30:00 Montero Justice Story 0:35:00 Preparing Napalm Niño 0:40:00 Aerial Bombing Run 0:45:00 Dogfighting Enemy Airspace 0:50:00 Assaulting Airbase Tower 0:55:00 Boss: José Castillo's Helicopter 0:59:00 Mission Resolution Chapters: 0:00:00 - Introduction to Esperanza and initial stealth navigation 0:02:29 - Rescue of a civilian and escalation of street combat 0:03:12 - Tank hijacking and destructive rampage through city streets 0:05:23 - Breaching FND checkpoints and abandoning the armored vehicle 0:08:14 - Mission briefing for Operation Paradise Lost in the hideout 0:10:43 - Infiltrating the hotel perimeter and sabotaging generators 0:13:58 - Navigating hotel security and planting final explosives 0:19:49 - Intense shootout in the Hotel Paraiso lobby and hallways 0:24:48 - Confrontation in the penthouse and Diego Castillo interaction 0:27:31 - High-speed car escape through Esperanza and mission completion 0:00:00 - Driving through the Aguas Lindas region 0:02:15 - Entering Susurro Caves to meet Philly Barzaga 0:04:45 - Delivering machine parts to the guerrilla workbench 0:06:30 - Defending the Diesel Daisy machine from FND waves 0:09:45 - Switching to an LMG for sustained defensive fire 0:12:50 - Final explosion and escaping the napalm facility 0:15:20 - Arriving at Montero Farm and starting Fetch Quest 0:18:10 - Following Chorizo to discover hidden camp stashes 0:21:30 - Ordering and boarding the Avispa Buzzer helicopter 0:24:15 - Flying across the Yaran coastline toward Lozanía 0:26:50 - Infiltrating the military-occupied baseball stadium 0:29:25 - Clearing out the FND garrison and securing the objective 0:00:00 - FND Base Assault at Velazco Airstrip 0:01:06 - Neutralizing Helicopters with the Supremo 0:02:25 - Piloting the Makeshift Plane to Philly's Hangar 0:04:30 - Stealth and Infiltration at Martinez Airstrip 0:06:51 - Completion of Operation 'Fly Ball' 0:08:21 - Cinematic: Justice for the Monteros 0:10:45 - Aerial Napalm Strike on Tobacco Fields 0:12:47 - Assaulting the Main Airbase Headquarters 0:13:30 - Boss Fight: José Castillo's Attack Helicopter 0:14:50 - Final Confrontation with José Castillo 0:15:37 - Operation Success and Region Liberation 📖 Interactive written walkthrough with clickable timestamps: https://pixelfungaming.com/videos/farcry-6-live-4

Farcry 6| El Este Region live #9
Dani Rojas arrives at the Gran Roca Telecom Station, checking the map and arsenal to switch the primary weapon from an MG21 light machine gun to an AK-M rifle. After confirming the mission objectives on the map, Dani fast travels across the island of Yara to the Mirador Cape Checkpoint. Dani deploys a wingsuit high above the tropical terrain of the Conuco region, gliding towards the designated rally point. After a steep descent, Dani lands and navigates the dense jungle foliage toward the sounds of music and celebration. Dani arrives at a lively, decorated beach bar and approaches Yelena Morales to discuss the operation, 'Our Right to Party.' Yelena reveals that she just spoke with Castillo and mentions that if she turns Dani in, all outcasts in El Este will be released. They debate the morality of the situation playfully, and Yelena drives Dani in a yellow classic American car towards Casa Tejeda to meet Jonrón. Yelena shares the tragic story of Jonrón's brother, Gerardo, who was executed after Yelena chose to free Jonrón following a botched rebel checkpoint smash-and-grab during the early days of La Moral. They arrive at the location, and Jonrón challenges Dani and Yelena to a race to La Reina Island. Dani grabs a jetski and speeds across the water toward the small island, arriving quickly at the beach party. Jonrón and Yelena argue good-naturedly about the race. The primary objectives shift to preparing food for the barbecue: finding the grill and gathering food. Dani collects carrots from a small garden. Jonrón instructs Dani to find the grill in the water near the bull sharks. Dani switches to a sniper rifle and dives into the ocean, successfully hunting three bull sharks using the scoped weapon to collect meat. Dani finds the submerged BBQ grill and retrieves it. After surfacing and returning to the shore, Dani interacts with the campsite to place the grill over the fire. Dani and Yelena discuss the need for more food. Dani then finds a wooden dock and begins fishing, catching multiple Parrotfish (French Grunt Meat) to fulfill the remaining food requirement. Dani gathers the final fish, completing the food collection objective, and heads back toward the campfire to put the food on the grill, concluding the video. The gameplay begins with a peaceful party sequence on La Reina Island as Dani prepares food and sets off fireworks for the celebratory mission, "Our Right to Party." After the spectacular display, Dani wakes up alone on the beach the next morning amidst discarded debris. Yelena contacts Dani, revealing their base was compromised by Gilberto, leading Dani to mount a jetski and head toward the new rendezvous point, the Grand Hotel Caballero in Concepcion. Before meeting Yelena, Dani stops to repair a classic car and then visits a makeshift Resolver Workbench to modify the SKS rifle with armor-piercing rounds and a Specter Sight. Dani then uses the Avispa Buzzer gyrocopter to fly across the jungle landscape toward the Grand Hotel Caballero, which is immediately under heavy military assault upon arrival. Dani grabs an MG21 light machine gun and joins the defense of the hotel against enemy trucks and soldiers. Dani successfully neutralizes an enemy tank by killing its driver through the hatch. When a military helicopter arrives, Dani switches to the El Pequeno Desorden Supremo (rocket launcher) and destroys the aircraft. The main hotel building takes heavy fire and the group suffers casualties. Yelena orders a retreat to the top floor of the main building, but El Tigre and Jonron are soon incapacitated by red poison gas or explosions. Dani and Yelena flee the ruined hotel. Later, at Patriotas Peak, Dani and the remaining allies mourn the losses. Lorenzo Censeco, the leader of the group, asks Dani to deliver a letter of apology to his former love, Miguelina, initiating the Yaran Story "The First Love." Dani flies a gyrocopter toward Casa Molina, descending into the rural area where Miguelina lives. Dani navigates a flooded, heavily booby-trapped area, disarming tripwires and avoiding crocodile-shaped landmines. Dani eventually reaches Miguelina, who distrusts Dani and attempts to flee via a zipline, triggering explosions and more traps. Dani pursues her through the explosive chaos, sustaining heavy damage, before finally catching up to deliver the emotional letter. Dani approaches Casa Molina to deliver Lorenzo's apology letter to Migueilina, finding the approach heavily secured with booby traps. The protagonist uses a sniper rifle to remotely detonate proximity explosives marked by red laser tripwires, clearing the path through the dense jungle environment. Migueilina, a fierce guerrilla leader, initially refuses to accept the letter, running through the camp and triggering more traps and explosions. Dani sustains injuries from a blast but quickly heals and pursues Migueilina. The chase involves using explosives to breach a barricade and an intense sequence climbing a ladder into a hut, only for Migueilina to drop a barrel grenade. Dani then utilizes a zipline across a stream before wading through the water, dodging more hazards. Finally cornering Migueilina inside a small wooden structure, Dani manages to hand over the letter. Migueilina reads the apology, experiencing a strong emotional reaction, which completes the 'The First Love' Yaran Story mission. Dani reads a note revealing a new Treasure Hunt location and receives a call from Lorenzo, who asks for another favor. The protagonist then summons the customized red muscle car, known as Chorizo’s ride, and begins driving toward the next objective, navigating the muddy roads of Sierra Perdida. Chapters: 0:00 - Far Cry 6 Title Sequence and Menu Access 0:20 - Start of Operation and Weapon Selection 0:37 - Map Navigation and Fast Travel to Conuco 1:25 - Wingsuit Gliding to the Mission Area 2:16 - Arriving at the Party and Meeting Yelena 3:08 - Driving with Yelena and Dialogue on Rebellion and Sacrifice 4:11 - Reaching Casa Tejeda and Racing Jonrón on Jetskis 5:38 - Arriving at La Reina Island and Confronting Yelena/Jonrón 7:01 - Mission Update: Find Grill and Get Food for BBQ 8:16 - Hunting Bull Sharks Underwater for Meat 11:26 - Retrieving the BBQ Grill and Placing it on the Fire 12:48 - Dialogue on Gerardo's Fate and Gathering Carrots 16:53 - Switching Weapons and Hunting Crocodile 18:23 - Fishing for Parrotfish (First Attempt) 20:00 - Extended Fishing Sequence Begins 24:25 - Fishing from the Dock at Night 29:31 - Objective Complete: Returning to the Grill 30:00 - Starting the Beach Party and Grilling Food 30:36 - Setting Off Fireworks to Celebrate Libertad 31:15 - Waking Up After the Party on La Reina Island 31:50 - Yelena Reports the Guerrilla Base is Compromised 32:10 - Traveling on a Jetski Toward the Grand Hotel Caballero 33:04 - Repairing a Classic Car with the Repair Tool 33:41 - Modifying the SKS Rifle at the Resolver Workbench 36:19 - Arriving at Concepcion and Flying the Avispa Buzzer 39:10 - The Lion's Roar: Defending the Grand Hotel 40:26 - Engaging Enemy Soldiers and Armored Vehicles 41:40 - Destroying an Enemy Tank 42:59 - Retreating to the Main Building and Engaging Helicopter 46:42 - Destroying the Attack Helicopter and Mission Completion 47:00 - Cutscene: Retreating Through Smoke and Battle Damage 48:23 - Mourning Casualties and Receiving New Mission from Lorenzo 52:13 - Flying the Gyrocopter to Casa Molina 53:43 - Encountering Miguelina and Disarming Traps 56:26 - Miguelina Escapes on Zipline; Dani Gives Chase 57:40 - Navigating Explosive Traps and Swampland 59:22 - Delivering the Letter to Miguelina 60:00 - Navigating the booby-trapped entrance 61:00 - Dealing with multiple booby traps and pursuing Migueilina 62:40 - Breaching the barricade and avoiding grenade trap 63:44 - Zipline escape and chase across the water 65:30 - Delivering Lorenzo's apology letter to Migueilina 67:05 - Yaran Story completed and receiving a call from Lorenzo 68:44 - Summoning and driving the custom vehicle

RDR2 - Execution Of Random Man In Valentine
The scene opens in a muddy frontier town where a crowd gathers around a wooden gallows. A lawman stands atop the platform, addressing the citizens before two condemned men. One prisoner remains defiant, shouting his lack of remorse, while the other sobs and begs for his life. Upon the lawman's signal, the trapdoor drops, and the execution is carried out. The executioner then delivers a stern message about community standards and the necessity of justice. Arthur Morgan walks beneath the gallows to observe the deceased more closely as a woman nearby steers a young boy away from the grim sight. A deputy quickly intervenes, ordering Arthur to leave the area as the crowd begins to disperse. Chapters: 0:00:00 - 0:00:23 - The lawman's final address and the prisoners' last words 0:00:23 - 0:00:30 - The execution takes place as the trapdoor drops 0:00:30 - 0:00:41 - The executioner speaks to the crowd about justice 0:00:41 - 0:00:45 - Arthur Morgan inspects the scene and is told to move along 📖 Interactive written walkthrough with clickable timestamps: https://pixelfungaming.com/videos/rdr2-execution-of-random-man-in-valentine

Red Dead Online - Wintergreen Berry Locations - Cumberland Forest
Red Dead Online gameplay focuses on completing a daily challenge in Cumberland Forest. The character traverses the forested terrain at night on horseback, stopping at specific locations to gather Wintergreen Berries. Navigating through the dense trees, the horse Napoleon carries the character between known foraging spots. Map checks are performed regularly to pinpoint the exact locations of the flora. The mission concludes successfully once all five Wintergreen Berries are collected, triggering the completion notification for the daily challenge and awarding experience points. Chapters: 0:00:00 - 0:00:30 - Locating and picking the first Wintergreen Berry 0:00:30 - 0:00:45 - Checking the map for nearby flora locations 0:00:45 - 0:01:25 - Navigating to a second harvest point on horseback 0:01:25 - 0:01:45 - Collecting subsequent berries to progress the challenge 0:01:45 - 0:02:00 - Strategic map navigation for final berry locations 0:02:00 - 0:02:14 - Completing the daily challenge in Cumberland Forest 0:02:14 - 0:02:47 - Final map overview showing gathered berry locations 📖 Interactive written walkthrough with clickable timestamps: https://pixelfungaming.com/videos/red-dead-online-wintergreen-berry-locations-cumberland-forest

MAFIA 3 | Definitive Edition Live #2
The mission follows Lincoln Clay as he navigates the complex criminal underworld of New Bordeaux. It begins with a drive through the city to locate a warehouse where Lincoln performs a stealthy infiltration. After interrogating an informant and clearing out guards in a brief shootout, he travels to the Pierced Heart voodoo shop. There, a major story cutscene unfolds as Lincoln meets Cassandra, discussing a mutual interest in taking down Sal Marcano and Ritchie Doucet. Following this alliance, Lincoln gains access to an arms dealer, allowing for a review of various weapon upgrades and equipment. The focus then shifts to the Delray Hollow district, where Lincoln consults with Laveau, 'The Voice,' to target a prostitution racket. The final portion of the gameplay involves a tactical approach to the Perla brothel, including swimming across a canal and sneaking through back alleys before launching a direct assault. An intense firefight ensues inside the club as Lincoln fights his way toward the upper floors to disrupt the operation. Chapters: 0:00:00 - 0:01:34 - New Bordeaux Navigation and Warehouse Approach 0:01:34 - 0:03:12 - Interrogation and Warehouse Firefight 0:03:12 - 0:05:04 - Travel to Pierced Heart Voodoo Shop 0:05:04 - 0:06:23 - Investigating the Voodoo Shop Interior 0:06:23 - 0:10:00 - Forming an Alliance with Cassandra 0:10:00 - 0:13:12 - Recruiting the Arms Dealer and Gear Review 0:13:12 - 0:15:24 - Briefing with Laveau Regarding Perla's 0:15:24 - 0:18:13 - Infiltration of the Industrial Zone 0:18:13 - 0:20:15 - Assault on the Perla Brothel 📖 Interactive written walkthrough with clickable timestamps: https://pixelfungaming.com/videos/mafia-3-definitive-edition-live-2

MAFIA 3 | Definitive Edition Live #9
The mission begins in the Southdowns district of New Bordeaux as Lincoln Clay coordinates a vehicle delivery to start his assault on a local black market operation. He navigates a Smith Moray through rain-slicked streets to reach a large warehouse serving as the Black Market Superstore. Upon arrival, Lincoln utilizes stealth tactics, moving through the facility with suppressed weapons and performing silent takedowns on guards. After successfully securing a $10,000 money stash from within the warehouse, the objective shifts to eliminating Artie's hijackers located in a nearby residential neighborhood. A fierce backyard shootout ensues, where Lincoln uses automatic weapons to clear the area before evading police. Following a brief resupply at a mobile arms dealer van to upgrade his equipment, Lincoln tracks down and interrogates an informant through high-speed, aggressive driving. This lead takes him to the final confrontation with Artie Higgins. The encounter concludes with an intense firefight inside a building, resulting in Artie's brutal execution. With the operation dismantled, Lincoln officially secures the Black Market racket and assigns its management to Vito Scaletta. Chapters: 0:00:00 - 0:02:15 - Infiltration of the Black Market Superstore 0:02:15 - 0:04:30 - Stealth Takedowns and Securing the Money Stash 0:04:30 - 0:07:30 - Hunt for Artie's Hijackers and Backyard Shootout 0:07:30 - 0:09:45 - Resupplying and Upgrading at the Arms Dealer 0:09:45 - 0:12:15 - Informant Interrogation and Artie's Location Hunt 0:12:15 - 0:13:45 - Final Confrontation with Artie and Racket Assignment 📖 Interactive written walkthrough with clickable timestamps: https://pixelfungaming.com/videos/mafia-3-definitive-edition-live-9

RDR2 - Helping Injured Murderer Before His Execution
The sequence begins with the character discovering a severely injured man in the swamps at night near Saint Denis. After assisting the man onto a horse, a frantic ride into the city ensues to reach a doctor. Upon arrival at the pharmacy, the character carries the man inside where a medical professional determines an immediate amputation is necessary to combat a severe infection. The character watches as the doctor performs the gruesome surgery. Following a time skip to daylight, the character returns to the city square to witness a public execution. In a dark twist of fate, the man who was recently saved from death is hanged on the gallows for the murder of a young woman, concluding his story with a tragic public death. Chapters: 0:00:00 - 0:00:38 - Finding and Rescuing the Injured Stranger 0:00:39 - 0:01:40 - Frantic Horse Ride to the Saint Denis Doctor 0:01:41 - 0:02:43 - Arrival and Medical Consultation 0:02:44 - 0:04:10 - The Gruesome Arm Amputation 0:04:11 - 0:04:53 - Post-Surgery Recovery and Departure 0:04:54 - 0:06:25 - Witnessing the Public Hanging in Guiteau Square 📖 Interactive written walkthrough with clickable timestamps: https://pixelfungaming.com/videos/rdr2-helping-injured-murderer-before-his-execution

Red Dead Online - Rams Head Location Near Riggs Station
The character starts in a dimly lit forest during the night, focusing on gathering wild plants. Several Ram's Head mushrooms are harvested from the ground near a tree, adding to the character's inventory. After completing the collection, the character approaches their horse, Napoleon, and mounts up. The scene transitions to the world map, providing a clear view of the current location in West Elizabeth, specifically south of Riggs Station and east of Strawberry. The map cursor highlights the rugged terrain and nearby trails before the analysis concludes. Chapters: 0:00:00 - 0:00:10 - Gathering Ram's Head mushrooms in the woods 0:00:10 - 0:00:13 - Mounting the horse, Napoleon 0:00:13 - 0:00:27 - Reviewing the world map for navigation near Riggs Station 📖 Interactive written walkthrough with clickable timestamps: https://pixelfungaming.com/videos/red-dead-online-rams-head-location-near-riggs-station

Red Dead Online: Explosive Noobs Get Destroyed - PART 2
Combat begins with long-range sniping from a rocky ridge at night. The character uses a Rolling Block Rifle to eliminate distant targets with precision. As dawn breaks, the action shifts to a river valley where intense sniper duels occur. Mid-range encounters follow, featuring rapid repeater and revolver play against multiple opponents. A brief excursion leads to the discovery and successful hunting of a legendary Gabbro Horn Ram. The character then takes up tactical positions on high cliffs overlooking Benedict Point, engaging enemies with precision rifle fire from extreme elevations. Thick fog rolls in, challenging visibility, yet the sniper continues to pick off targets near a ranch area. The gameplay concludes with a social interaction at a fellow player's camp before a final, fatal fall from a cliffside ends the session. Chapters: 0:00:00 - 0:01:30 - Nighttime sniping from rocky ridges 0:01:30 - 0:03:15 - Long-range rifle duels in the river valley at sunrise 0:03:15 - 0:04:45 - Mid-range combat using revolvers and repeaters 0:04:45 - 0:06:30 - High-elevation sniping from the desert cliffs 0:06:30 - 0:08:00 - Hunting the legendary ram and combat in the fog 0:08:00 - 0:09:30 - Precision sniping around the Benedict Point settlement 0:09:30 - 0:10:43 - Final skirmishes and social interaction at camp 📖 Interactive written walkthrough with clickable timestamps: https://pixelfungaming.com/videos/red-dead-online-explosive-noobs-get-destroyed-part-2

AC Valhalla - Favorite Boat Song
The mission Rathdown Build Up begins with a longship navigating through foggy waters toward Lambay Abbey. As the crew sings, the ship approaches the shoreline under the cover of night. Eivor stands at the helm until the vessel reaches shallow water, then sounds the raiding horn to signal the attack. The Viking crew leaps from the boat and charges onto the beach, heading toward the abbey gates. Combat erupts immediately at the entrance, where Eivor engages several Irish soldiers with swift axe strikes and shield blocks. The skirmish moves into the courtyard, leading to a challenging confrontation with an Elite Warrior. Eivor utilizes parries, dodges, and a powerful stomp ability to wear down the armored opponent. The battle concludes with a final execution of the Elite Warrior as the raid continues to secure resources for the trade post. Chapters: 0:00:00 - 0:01:47 - Sailing Through the Fog Toward Lambay Abbey 0:01:48 - 0:02:15 - Sounding the Horn and Storming the Shore 0:02:16 - 0:02:40 - Initial Skirmish at the Monastery Gates 0:02:41 - 0:03:29 - Duel with the Elite Warrior in the Courtyard 📖 Interactive written walkthrough with clickable timestamps: https://pixelfungaming.com/videos/ac-valhalla-favorite-boat-song

AC Valhalla : King Killer
The mission begins in a Viking camp in Sciropescire where Eivor meets with allies to plan the final assault on Caustow Castle. After a brief planning phase, the Viking forces march on the fortress to confront King Rhodri. The siege starts with a challenging escort mission, protecting an oil-laden cart from heavy Briton resistance to blast through the main gates. Intense combat follows in the castle courtyards, where Eivor uses a mix of archery and melee combat to eliminate defenders and disable gate mechanisms. After breaching the inner keep, a cutscene depicts the capture of King Rhodri and a fierce scuffle that leaves Ivarr injured but victorious. The aftermath involves a long trek as Eivor carries the wounded king through the castle ruins to a scenic overlook. At the cliff's edge, Ivarr performs the brutal 'Blood Eagle' ritual, a gruesome Viking execution. The encounter reaches a climax when Ivarr reveals his true role in the death of Ceolbert, leading to an immediate duel between Eivor and the treacherous Viking leader. Chapters: 0:00:00 - 0:02:34 - Preparations and Rallying at the Camp 0:02:34 - 0:05:15 - Assaulting the Caustow Castle Gates 0:05:15 - 0:07:45 - Infiltrating the Inner Courtyards 0:07:45 - 0:10:10 - Breaching the Keep and Capturing the King 0:10:10 - 0:12:45 - Transporting Rhodri Through the Ruins 0:12:45 - 0:14:15 - Climbing to the Execution Grounds 0:14:15 - 0:15:47 - The Blood Eagle and Ivarr's Betrayal 📖 Interactive written walkthrough with clickable timestamps: https://pixelfungaming.com/videos/ac-valhalla-king-killer

AC Valhalla, Hilda Order Member Eliminated
The mission "Plucking the Quill" begins with Eivor infiltrating a dark, underground hideout in Wincestre. Eivor navigates through narrow corridors, avoiding detection and discovering rooms where children are kept. These children speak of their harsh lives and their allegiance to "The Quill." Using Odin's Sight, Eivor tracks enemy positions and proceeds to eliminate guards with precise bow shots from the shadows. After climbing to an upper level, a confrontation ensues with Hilda, who is revealed as The Quill. She attempts to justify exploiting children for The Order of the Ancients' goals before ordering her guards to attack. Combat erupts in the main chamber, with Eivor facing off against a powerful Goliath and several cutthroats. Eivor eventually corners Hilda, defeating her in a final struggle. Upon confirming the kill, Eivor enters the deathroom to speak with Hilda's spirit. They engage in a philosophical debate about knowledge, sacrifice, and the corruption of innocence. Eivor returns to the physical world as the mission concludes, collecting an Order medallion and clues for the next target. Chapters: 0:00:00 - 0:01:21 - Infiltrating the hideout and discovering the children's quarters 0:01:21 - 0:03:05 - Stealthily eliminating guards using bow and arrow 0:03:05 - 0:03:33 - Encountering Hilda (The Quill) and the initial confrontation 0:03:33 - 0:05:35 - Engaging in combat against guards and Hilda in the main chamber 0:05:35 - 0:06:07 - Finishing the battle and confirming the kill on Hilda 0:06:07 - 0:08:31 - Deathroom sequence and philosophical dialogue between Eivor and Hilda 0:08:31 - 0:08:56 - Mission completion and collecting loot from the target 📖 Interactive written walkthrough with clickable timestamps: https://pixelfungaming.com/videos/ac-valhalla-hilda-order-member-eliminated

AC Valhalla : A Fury From The Sea
Eivor arrives at the forward camp to meet Finnr and finalize the strategy for assaulting Burgh Castle. A war council reveals a united front of Saxons and Danes, inspired by the perceived sacrifice of Oswald. Eivor delivers a motivational speech to the assembled warriors, rallying them to reclaim East Anglia. The assault transitions to a dramatic naval approach under the cover of a storm, with longships braving a barrage of fire arrows and incendiary pots launched from the fortress ramparts. Upon reaching the shore, Eivor leads a ground assault through the shipyard, coordinating with allies to deploy a battering ram and breach multiple fortified gates. The siege leads to a confrontation with Rued on the high walls. Following a fierce duel involving Rued and his loyal wolf, Eivor emerges victorious. At the request of a surviving Oswald, Eivor grants Rued mercy, leading to a celebration of victory and the unification of the region. Chapters: 0:00:00 - 0:00:50 - Arriving at the forward camp and meeting Finnr 0:00:50 - 0:03:22 - Assault planning and Eivor's speech to the united forces 0:03:22 - 0:04:15 - Fleet transition and deployment for the naval siege 0:04:15 - 0:07:20 - Naval approach under heavy fire and beach landing 0:07:20 - 0:08:35 - Storming the shipyard and breaching fortress gates 0:08:35 - 0:09:10 - Duel with Rued and victory celebration 📖 Interactive written walkthrough with clickable timestamps: https://pixelfungaming.com/videos/ac-valhalla-a-fury-from-the-sea

RDR2 - Feuding With Salty Player Bounty
The gameplay features intense PvP combat in Red Dead Online, beginning with night-time skirmishes in a small town using sniper rifles and shotguns. The action quickly shifts to open fields and hills as a feud challenge begins, leading to a series of long-range sniper duels under the moonlight. Combat intensifies with closer-range encounters where dual-wielded pistols and repeaters come into play. Navigation through rocky terrain and dense vegetation provides tactical advantages while hunting the opponent. After multiple exchanges and strategic maneuvers, the feud concludes with a decisive victory. The final moments show a quiet trek back towards the town of Valentine as the night transitions into early morning. Chapters: 0:00:00 - 0:01:10 - Initial Skirmishes in Town 0:01:10 - 0:02:45 - Field Combat and Feud Initiation 0:02:45 - 0:04:45 - Sniper Duels in the Hills 0:04:45 - 0:06:50 - Mixed-Range Combat and Firefights 0:06:50 - 0:08:40 - Feud Conclusion and Final Exploration 📖 Interactive written walkthrough with clickable timestamps: https://pixelfungaming.com/videos/rdr2-feuding-with-salty-player-bounty

GTAV: Cayo Perico heist - Elite Challenge (Helicopter Approach)
The mission begins with a high-altitude stealth helicopter insertion over the Cayo Perico island. A rapid rappel from the aircraft leads to the ground where a military truck is commandeered for a cross-country drive. Reaching a communication tower, a long climb enables the retrieval of essential grappling equipment. The path continues on foot through dense fields, utilizing suppressed rifle fire to neutralize sentries without alerting the base. At a secure warehouse, a small torch melts a lock to allow looting of secondary targets including narcotics and stacks of cash. Driving a vintage jeep across the island allows for a quick approach to the heavily guarded mansion. Grappling hooks facilitate an over-the-wall entry into the interior gardens. Moving cautiously through the mansion, personal bodyguards are dispatched silently with headshots. A hidden safe behind a wall painting provides additional funds before heading to the vault. A multi-stage fingerprint hack bypasses the electronic locks of the underground chamber. Inside, a plasma cutter carefully opens the display case containing the Sinsimito Tequila. The escape route involves a daring climb back over the compound walls and a plunge into the ocean. Swimming away from the immediate search zone leads to a patrol boat which is hijacked for a high-speed getaway into the open sea. The mission concludes with a successful delivery and a massive financial payout. Chapters: 0:00:00 - 0:01:25 - Stealth Helicopter Approach and Insertion 0:01:25 - 0:02:22 - Island Infiltration and Vehicle Command 0:02:22 - 0:04:22 - Tower Scouting and Equipment Procurement 0:04:22 - 0:05:43 - Looting Secondary Targets at the Warehouse 0:05:43 - 0:07:54 - Off-Road Transit to the Main Compound 0:07:54 - 0:09:59 - Scaling Mansion Walls and Garden Stealth 0:09:59 - 0:10:47 - Hidden Safe Discovery and Extraction 0:10:47 - 0:12:17 - Vault Hacking and Primary Target Theft 0:12:17 - 0:13:48 - Exfiltrating the Mansion and Ocean Escape 0:13:48 - 0:15:24 - High-Speed Boat Getaway and Mission Success 📖 Interactive written walkthrough with clickable timestamps: https://pixelfungaming.com/videos/gtav-cayo-perico-heist-elite-challenge-helicopter-approach

HITMAN 3 : End Of The Line - Cinematic Scene
The mission begins with Agent 47 and Lucas Grey meeting on a foggy cliffside overlooking the Dartmoor estate. Their conversation centers on the impending end of their long pursuit and the nature of their target, Alexa Carlisle. A stylized briefing reveals Carlisle's recent reappearance after a faked death, detailing her role as a formidable leader within Providence. The narrative traces the Carlisle family's rise to power, establishing their influence over global industry and media. Intelligence emphasizes Carlisle's cold demeanor and her possession of a sensitive file regarding the Constant. The objective is set to eliminate the matriarch and secure the data within her ancestral home. The briefing concludes with the mission becoming active as the sun sets over the manor. Chapters: 0:00:00 - 0:00:13 - Arrival at the Dartmoor Overlook 0:00:13 - 0:00:40 - Dialogue Between Agent 47 and Lucas Grey 0:00:40 - 0:01:10 - Briefing on Alexa Carlisle's Resurfacing 0:01:10 - 0:01:30 - History of the Carlisle Family Empire 0:01:30 - 0:01:51 - Profiling the Target and Birthplace of Providence 0:01:51 - 0:02:18 - Mission Objectives and Activation 📖 Interactive written walkthrough with clickable timestamps: https://pixelfungaming.com/videos/hitman-3-end-of-the-line-cinematic-scene

AC Valhalla Stream
The journey begins with Eivor riding through the misty woods towards the town of Colcestre. Upon entering the distrusted area, a fierce battle erupts against local guards and soldiers. Eivor demonstrates mastery of both melee combat with a flail and shield, and ranged precision with the bow. After clearing the initial resistance, Eivor uses the raven, Synin, to scout the surroundings before moving stealthily through the streets. A successful assassination target, Heika of Friesland, also known as The Sickle, is eliminated, followed by a profound dialogue in the vision world exploring her motives. Combat continues in the market area before Eivor takes a moment to consult the map and the list of Order targets. A fast travel takes the Viking to the docks of Folcanstan, from where a long ride leads to the historic city of Canterbury. Infiltration of a grand church follows, where Eivor maneuvers through the rafters to strike down Sister Blaedswith, known as The Rake. Another vision world encounter unfolds, revealing her inner conflicts and secret beliefs. Returning to Glowecestre via fast travel, Eivor navigates the nighttime festivities of Samhain to reunite with Gunnar. They share a conversation about Gunnar's upcoming marriage to Brigid. The group then meets with the current ealdorman, Cynon, and his successor, Tewdwr. The interaction highlights the cultural and religious tensions between the Saxon leaders and the Norse newcomers as they prepare for the fire-lit celebrations of Samhain. Eivor accompanies Tewdwr to the shrine of St. Kenhelm, engaging in philosophical debate about faith and leadership as they ride through the misty countryside. The quiet journey is suddenly interrupted by a fierce pack of wild animals that Eivor must fend off with precise combat to protect the future ealdorman. Following the successful defense and Tewdwr's subsequent prayer, Eivor returns to Glowecestre to participate in the local Samhain festivities. After a brief reunion with Gunnar and Brigid at their temporary home, Eivor adopts the eerie Mari Lwyd disguise—a cloak topped with a horse's skull—to partake in the ancient hoodening tradition. The night concludes with Eivor navigating the village streets, knocking on doors to engage in rhyming challenges with the townspeople in exchange for treats. Chapters: 0:00:00 - Introductory static screen 0:00:20 - Eivor rides towards Colcestre 0:00:46 - Combat breaks out in Colcestre 0:01:23 - Intense melee and ranged battle in the town 0:05:04 - Scouting the area with Synin the raven 0:06:26 - Assassination of Heika of Friesland (The Sickle) 0:07:13 - Further combat in the market district 0:08:53 - Reviewing Order targets and map menus 0:10:40 - Arrival at Folcanstan docks 0:11:30 - Traveling towards Canterbury on horseback 0:12:13 - Aerial scouting of Canterbury 0:12:55 - Stealthy approach to the Canterbury church 0:14:45 - Infiltrating the church rafters 0:15:33 - Assassination of Sister Blaedswith (The Rake) 0:17:11 - Reviewing progress and fast traveling back to Glowecestre 0:19:06 - Navigating Glowecestre during Samhain festivities 0:21:18 - Reuniting with Gunnar and meeting Brigid 0:24:22 - Meeting with Ealdorman Cynon and Tewdwr 1:00:00 - Escorting Tewdwr on horseback 1:01:05 - Arrival at St. Kenhelm's Falls 1:02:08 - Defending Tewdwr from wild animal attacks 1:03:35 - Return journey to Glowecestre 1:04:11 - Meeting with Gunnar and Brigid 1:05:51 - Donning the Mari Lwyd disguise 1:06:35 - Participating in the hoodening ritual 📖 Interactive written walkthrough with clickable timestamps: https://pixelfungaming.com/videos/ac-valhalla-stream

RDR2 - Flanking opponents in Overrun Takeover Series
The match begins with an introduction to the 'The Coyote Pack' team before diving into the 'Overrun' game mode on the Dakota River map. The objective is to capture and hold the most territories marked by colored smoke. The gameplay consists of three intense bouts where the character sprints through the rugged terrain, crossing the river and utilizing natural cover to secure capture points. Combat involves a mix of long-range engagements with a bolt-action rifle and close-quarters skirmishes using dual sawed-off shotguns. The character frequently activates Dead Eye for increased accuracy during high-pressure gunfights and consumes tonics to maintain health and stamina. Throughout the matches, the character successfully eliminates numerous opponents and captures multiple territories, leading the team to a decisive 3-0 victory. Each bout concludes with a brief summary of individual performance before transitioning into the next round, and the final segment features a victory celebration and a comprehensive scoreboard. Chapters: 0:00:00 - 0:00:42 - Match Intro and Team Reveal 0:00:42 - 0:02:28 - Bout 1: Capturing Territories at Dakota River 0:02:28 - 0:04:14 - Bout 2: Defensive Plays and High-Intensity Combat 0:04:14 - 0:06:06 - Bout 3: Final Push and Match Victory 0:06:06 - 0:06:30 - Victory Celebration and Final Scoreboard 📖 Interactive written walkthrough with clickable timestamps: https://pixelfungaming.com/videos/rdr2-flanking-opponents-in-overrun-takeover-series

Ghost Recon Breakpoint - Saving Van Dyke
The mission commences with a tactical insertion into the Liberty province via helicopter. Upon landing, a drone is deployed to conduct aerial reconnaissance of the entomologist Wyn Van Dyke's residence, identifying enemy patrol paths and defensive positions. The team moves toward the house, utilizing long-range precision fire to eliminate guards before breaching the interior. A firefight breaks out within the home as the squad clears the second floor and discovers the body of Rhonda Van Dyke along with a critical ID card and field notes. Investigation then turns to the 'Beehive' technological pillars located on the property, which provide a signal to track the missing entomologist. The trek leads through open fields and along mountain roads where a hostile transport vehicle is ambushed and destroyed with explosives. Tactical movement continues through a forested river valley, where the team engages a group of guards at a small riverside camp to rescue a civilian informant. The search culminates at a nearby facility where the remaining Sentinels are neutralized, and Wyn Van Dyke is successfully rescued. A concluding dialogue reveals the location of vital research stored at a local solar plant, setting the stage for the next phase of the operation. Chapters: 0:00:00 - 0:02:15 - Helicopter insertion and drone scouting of the entomologist's house 0:02:15 - 0:04:30 - Infiltrating the residence and recovering field intelligence 0:04:30 - 0:07:15 - Tracking technological signals and ambushing an enemy patrol 0:07:15 - 0:09:45 - Tactical movement through the valley and clearing riverside hostiles 0:09:45 - 0:11:30 - Locating and rescuing the mission target, Wyn Van Dyke 0:11:30 - 0:14:12 - Mission briefing with Van Dyke and planning the solar plant objective 📖 Interactive written walkthrough with clickable timestamps: https://pixelfungaming.com/videos/ghost-recon-breakpoint-saving-van-dyke

Call OF Duty : Advanced Warfare Live #2
This is a comprehensive gameplay walkthrough of several high-octane missions from the Call of Duty: Advanced Warfare campaign. The video begins with a cinematic introduction featuring Jonathan Irons (played by Kevin Spacey) delivering a bold speech at the United Nations, signaling a shift in global power. Following the intro, the gameplay moves into Mission: 'Collapse,' set in San Francisco. Players engage in a frantic vehicle chase followed by intense on-foot combat across a crumbling Golden Gate Bridge against Atlas corporation forces. The action continues with Mission: 'Armada,' where the player must defend an aircraft carrier and use its powerful railguns to neutralize enemy cargo ships. Finally, the video showcases Mission: 'Throttle,' beginning with an immersive jet dogfighting sequence through deep mountain canyons before transitioning into a brutal ground assault in New Baghdad. The footage includes various weapon demonstrations and shows the player overcoming challenging combat scenarios and retries throughout the missions. Chapters: 0:00:00 - Introduction: Jonathan Irons UN Speech 0:01:14 - Mission Briefing: Threat in San Francisco 0:02:14 - Mission Start: 'Collapse' - San Francisco Chase 0:05:00 - On-Foot Combat: Golden Gate Bridge Assault 0:08:45 - Pushing Forward Against Atlas Resistance 0:12:30 - Intense Firefights on the Bridge Structure 0:16:00 - Defending Against Enemy Reinforcements 0:20:00 - Strategic Movement Through Crashed Vehicles 0:24:30 - Clearing Atlas Drones and Personnel 0:28:00 - The Final Push to the Target Van 0:30:15 - Cinematic: The Golden Gate Bridge Collapse 0:32:24 - Mission Start: 'Armada' - Aircraft Carrier Defense 0:35:45 - Navigating the Carrier Interior with Night Vision 0:39:30 - Heavy Combat on the Carrier Decks 0:43:15 - Securing the Railguns and Bridge Control 0:45:00 - Railgun Action: Sinking Enemy Cargo Ships 0:48:24 - Mission Start: 'Throttle' - High-Speed Jet Dogfight 0:52:00 - Canyon Navigation and Air Combat 0:55:30 - Ground Assault: Street Fighting in New Baghdad 0:59:15 - Urban Combat and Manticore Virus Exposure 1:02:19 - Mission Wrap-up and Final Statistics 📖 Interactive written walkthrough with clickable timestamps: https://pixelfungaming.com/videos/call-of-duty-advanced-warfare-live-2

Red Dead Online - Noobs quickly regret picking on friend
Combat erupts in the lush forests of the Heartlands as multiple players engage in a high-stakes firefight. The encounter moves through dense brush into a hillside where long-range rifle shots and dual-wielded revolvers dominate the action. After a brief defeat, a tactical approach leads back to a small wooden cabin where the skirmish intensifies. Players utilize a variety of weapons, including sniper rifles and fire bottles, creating chaotic scenes around the homestead. Eventually, a parlay shifts the tone from deadly combat to expressive taunts and emotes, with characters laughing and gesturing amidst ongoing explosions and fire. The gameplay concludes with further interactions around the cabin and a final survey of the surrounding landscape. Chapters: 0:00:00 - 0:00:22 - Initial ambush and gunfight in Heartlands 0:00:22 - 0:00:41 - Respawning and flanking through the hills 0:00:41 - 0:01:05 - Combat encounter near the wooden cabin 0:01:05 - 0:01:32 - Sniper gameplay and dual-wielding revolvers 0:01:32 - 0:01:52 - Parlay and emote interactions with other players 0:01:52 - 0:02:25 - Using explosives and fire bottles during a standoff 0:02:25 - 0:03:00 - Taunting rivals with emotes near the cabin porch 0:03:00 - 0:03:52 - Final skirmish and exploring the cabin surroundings 📖 Interactive written walkthrough with clickable timestamps: https://pixelfungaming.com/videos/red-dead-online-noobs-quickly-regret-picking-on-friend

Battlefield Hardline Beta Live
Experience over an hour of intense urban warfare in the Battlefield Hardline Beta. This comprehensive gameplay video showcases the 'High Tension' map located in the heart of downtown Los Angeles. Watch several full rounds across different game modes, primarily focusing on 'Heist' and 'Blood Money.' The footage provides a deep dive into the various classes available, specifically the Mechanic and Enforcer, demonstrating their unique gadgets and weapons like the repair tool and heavy machine guns. Key highlights include high-speed vehicular combat featuring squad cars, interceptors, and motorcycles, alongside tactical infantry engagements in multi-story skyscrapers and cluttered construction sites. You'll see coordinated team efforts to crack vaults, secure packages, and transport loot while fending off opposing forces. The video also showcases the importance of verticality in Hardline, with snipers taking advantage of tall buildings and teams using elevators and helicopters for strategic maneuvers. Each match concludes with a look at the progression system, scoreboards, and the rewards earned during the beta period. Chapters: 0:00:00 - Session start and initial match results 0:02:30 - Deployment as Police on High Tension - Heist 0:05:15 - Urban warfare: Firefight at the construction site 0:08:45 - Objective defense and tactical positioning 0:12:00 - Final push and match conclusion 0:14:30 - Loadout customization and class setup 0:18:00 - New round: Defending the vault as Police 0:22:15 - Vehicular combat and city street maneuvers 0:26:00 - Indoor close-quarters combat and floor clearing 0:30:30 - Mid-game tactical repositioning and re-spawning 0:35:00 - Rooftop engagements and aerial support overview 0:40:15 - Round end stats and progression overview 0:44:00 - Heist mode: Team coordination near the objective 0:49:15 - Intense firefight in the downtown financial district 0:54:30 - Strategic extraction attempt via helicopters 0:59:45 - Elevator tactics and skyscraper building battle 1:03:15 - Final objective scramble and last stand 1:06:00 - Final match results and complete session wrap-up 📖 Interactive written walkthrough with clickable timestamps: https://pixelfungaming.com/videos/battlefield-hardline-beta-live

State Of Decay : Year One - Live
Survive the apocalypse in State of Decay: Year-One Survival Edition. This session follows Maya Torres and Raymond Castillo as they manage 'The Vet Clinic' home base, fend off relentless zombie hordes, and navigate the treacherous landscape of Spencer's Mill and Marshall. From high-speed vehicular combat to stealthy supply runs, experience essential survival tactics, community management, and key story missions. Maya begins by investigating Army sightings at Spencer's Mill, where she learns from Sgt. Erik Tan that survivors are on their own under quarantine. The action intensifies with defensive stands at the base, where Raymond Castillo utilizes his rifle to protect the gates. Witness deep-dives into base management, including resource stockpiling, morale resolution, and character skill progression. Key highlights include a high-stakes medicine run to a local clinic, scavenging a gun shop in downtown Marshall, and completing the 'Lead the Way' morale mission. Chapters: 0:00:00 - Xbox Dashboard and Game Launch 0:01:52 - Title Screens and ESRB Rating 0:02:26 - Main Menu and Loading 0:03:34 - Initial Home Base Gameplay: The Vet Clinic 0:04:12 - Mission: Army Sighting (Lily Dialogue) 0:05:27 - Driving to Spencer's Mill & Horde Combat 0:06:46 - Sgt. Erik Tan Dialogue (Mission Complete) 0:08:53 - Home Defense Prep and Morale Issues 0:12:14 - Raymond Castillo: Home Defense Combat 0:14:45 - Maya Torres: Supply Run & Status Check 0:17:05 - Driving Scavenge Run & Vehicle Combat 0:18:44 - Radio Dialogue: Captain Montressor's Warning 0:22:15 - Looting Food Resources & Melee Combat 0:25:57 - Anger Management & Returning to Base 0:28:15 - Raymond's Rifle Defense vs. Horde 0:30:00 - Skill Checks and Base Maintenance 0:31:46 - Mission: 'Lead the Way' with Brendan 0:34:02 - Street Clearing and Melee Combat 0:36:40 - Scavenging Local Residence 0:40:42 - Mission Completion & Swap to Raymond 0:42:12 - Mission: 'The Vet Clinic' (Medicine Run) 0:44:58 - Clinic Breach and Resource Defense 0:51:30 - Narrative Interaction: Sam and Pastor William 0:53:45 - Base Management: Facilities and Stockpiles 0:56:00 - Watchtower Inspection & Perimeter Walk 0:58:15 - Survivor Stats and Community Log Review 60:00 - Community Assets and Home Status 60:11 - Mapping Infestations and Resources 61:29 - Driving to Marshall & Judge Lawton's Broadcast 62:27 - Scouting and Looting the Gun Shop 64:18 - Mission: 'The Law' 65:13 - Morale Mission: Lead the Way (Sam Hoffman) 67:00 - Final Scavenging and Area Clearing 68:26 - Game Exit 📖 Interactive written walkthrough with clickable timestamps: https://pixelfungaming.com/videos/state-of-decay-year-one-live

Red Dead Online - English Mace Location - Hennigan's Stead
The gameplay begins with the character dismounting a horse laden with a pronghorn buck to forage for English Mace. After gathering a few stalks, a horse-drawn carriage approaches on the nearby road. The character quickly remounts and uses a rifle to eliminate the occupants of the carriage before checking the map to confirm the current location near MacFarlane's Ranch. A period of riding through the grassy plains follows as the search for more flora continues. Upon finding another cluster of yellow flowers, the character gathers the remaining required English Mace to successfully complete a daily challenge. The session concludes with a detailed look at the world map and some final movements across the terrain. Chapters: 0:00:00 - 0:00:15 - Gathering English Mace and dismounting 0:00:15 - 0:00:27 - Combat encounter with a passing carriage 0:00:27 - 0:00:44 - Checking the world map near MacFarlane's Ranch 0:00:44 - 0:01:05 - Riding across the open fields 0:01:05 - 0:01:23 - Completing the English Mace daily challenge 0:01:23 - 0:02:02 - Final map review and exploration 📖 Interactive written walkthrough with clickable timestamps: https://pixelfungaming.com/videos/red-dead-online-english-mace-location-hennigan-s-stead

The Walking Dead: Destinies | ACT 3 - Episodes 11-14 Walkthrough
Experience the intense struggle for survival in this comprehensive gameplay walkthrough of 'The Walking Dead: Destinies'. This video covers major chapters centered around the iconic prison location. Watch as we step into the boots of Rick Grimes to clear the dangerous prison yard, then shift perspective to Carol Peletier as she stealthily navigates the interior to secure the perimeter. The gameplay showcases a blend of brutal melee combat, tactical gunplay, and critical stealth mechanics used to outmaneuver waves of walkers, including specialized armored and helmeted variants. Beyond the action, delve into the high-stakes narrative where your decisions fundamentally alter the course of the story. Witness the pivotal moment involving Andrew and the choice that determines his fate within the group. We also explore group dynamics and tensions at the HQ, resolving conflicts between fan-favorite characters like Merle and Glenn. Finally, join Hershel Greene on a desperate supply run through the dark prison basement in Episode 12: 'Sick', culminating in one of the most heartbreaking and iconic scenes in the series. Whether you're a long-time fan of the franchise or a newcomer to this action-adventure survival game, this analysis provides deep insight into the mechanics and story beats of 'The Walking Dead: Destinies'. Chapters: 0:00:00 - Rick Grimes: Clearing the Prison Perimeter 0:04:15 - Dealing with Helmeted Walkers 0:08:30 - Strategic Combat in the Prison Yard 0:13:45 - Final Waves and Objective Completion 0:17:47 - Carol's Mission: Securing the Interior 0:22:10 - Stealth and Distraction Tactics 0:26:30 - Encountering Armored Vest Walkers 0:31:00 - Navigating the Prison Courtyard 0:36:20 - The Andrew Encounter: A Defining Choice 0:41:00 - Group Tensions: Resolving Merle vs. Glenn 0:45:30 - HQ Strategy and Mission Planning 0:50:15 - Episode 12: Sick - Hershel's Basement Run 0:55:00 - Navigating the Dark for Supplies 1:00:20 - Finding the Armory Stash 1:03:14 - The Bit: Hershel's Tragic Turning Point 📖 Interactive written walkthrough with clickable timestamps: https://pixelfungaming.com/videos/the-walking-dead-destinies-act-3-episodes-11-14-walkthrough

RDR2 - Trader Wagon/Goods Stealing Compilation
The mission begins with the character navigating the rugged terrain of New Austin, where a precise sniper shot eliminates a distant driver and initiates a wagon heist. After seizing the vehicle, the character drives through the desert to a secluded campsite to complete the delivery. The action then moves to Lemoyne, where a rival mission is intercepted on a wooded trail. A swift headshot from horseback allows the character to commandeer the supplies and deliver them to a rural farmstead. Combat intensifies near Saint Denis as the character rides across a bridge to halt a high-value wagon, dispatching the guards before maneuvering through the foggy marshes to a bayou drop-off. In the Heartlands, a long-range engagement leads to a dramatic chase where the target wagon crashes down a steep cliff into a creek. The final sequence takes place during a stormy night in a dense forest. The character engages in a long-range firefight, retrieves a bag of goods from a destroyed wagon, and outruns pursuers through the rain-soaked woods to reach a remote barn for the final delivery. Chapters: 0:00:00 - 0:01:00 - Wagon Heist in New Austin 0:01:00 - 0:01:45 - Intercepting Rival Goods near Rhodes 0:01:45 - 0:03:18 - Saint Denis Bridge Ambush and Bayou Delivery 0:03:18 - 0:04:53 - Heartlands Sniper Chase and Creek Crash 0:04:53 - 0:07:31 - Night Forest Firefight and Stormy Delivery 📖 Interactive written walkthrough with clickable timestamps: https://pixelfungaming.com/videos/rdr2-trader-wagon-goods-stealing-compilation

Red Dead Online - Wild Feverfew Location
The mission begins with the character riding through the open fields near MacFarlane's Ranch in Red Dead Online. Gameplay focuses on completing a daily challenge to gather Wild Feverfew. The character dismounts to pick the first few plants, checking the satchel periodically to monitor inventory space and progress. Eagle Eye is utilized to highlight the glowing trails of nearby herbs in the tall grass. A brief travel to a nearby hill reveals more patches of the required flora. Combat is non-existent as the focus remains on exploration and gathering. The session concludes once the final plant is picked, triggering the daily challenge reward and notification of gold earned. The character then reviews the map and menu before the gameplay ends. Chapters: 0:00:00 - 0:00:40 - Initial gathering of Wild Feverfew near MacFarlane's Ranch 0:00:40 - 0:01:00 - Inventory management and using Eagle Eye to locate plants 0:01:00 - 0:01:35 - Navigating the map and traveling to the next collection spot 0:01:35 - 0:02:10 - Collecting the final Wild Feverfew plants for the challenge 0:02:10 - 0:02:46 - Daily challenge completion and menu review 📖 Interactive written walkthrough with clickable timestamps: https://pixelfungaming.com/videos/red-dead-online-wild-feverfew-location

Red Dead Online - Roanoke Ridge Small Birds Location
Small bird hunting commences at dawn near the Kamassa River in the Roanoke Valley. The character uses a Varmint Rifle to pick off birds like American Tree Sparrows and Baltimore Orioles perched on river rocks. Precise aiming ensures clean kills, followed by wading into the shallow water to retrieve the carcasses. Eagle Eye tracking identifies more targets, including Scarlet Tanagers and Northern Cardinals, which are shot from the air and nearby perches. After collecting several bird carcasses along the rocky shoreline, the map interface reveals the specific hunting location north of Annesburg for future reference. Chapters: 0:00:00 - 0:00:27 - Hunting Birds on River Rocks 0:00:27 - 0:00:58 - Using Eagle Eye for Aerial Targets 0:00:58 - 0:01:19 - Collecting Carcasses Along the Shore 0:01:19 - 0:01:42 - Map Location Reveal Near Annesburg 📖 Interactive written walkthrough with clickable timestamps: https://pixelfungaming.com/videos/red-dead-online-roanoke-ridge-small-birds-location

RDR2 - Player Bounty #2
The mission begins with the character traversing the rocky terrain of New Austin on foot before mounting a horse to track a high-value target across the desert. A pursuit unfolds across the arid landscape, leading to a long-range engagement where the character uses a sniper rifle with precision to thin out the target's defenses. After closing the distance, an intense shootout occurs on a rugged hillside, resulting in the target's capture and neutralization of hostiles. The character secures the bounty on their horse and begins the trek toward the town of Tumbleweed. During the ride, the character maintains stamina and navigates the dusty trails of the frontier. Upon reaching the sheriff's office, the captive is delivered, successfully completing the bounty hunter contract and securing the rewards. The mission concludes as the character prepares for the next venture into the wild west. Chapters: 0:00:00 - 0:00:45 - Initial tracking and desert navigation on foot 0:00:45 - 0:02:00 - High-speed pursuit on horseback through the plains 0:02:00 - 0:02:40 - Long-range sniper engagement with the target's group 0:02:40 - 0:03:30 - Hillside shootout and securing the bounty target 0:03:30 - 0:04:45 - Transporting the captive through the New Austin wilderness 0:04:45 - 0:05:41 - Delivery to the Tumbleweed Sheriff and mission completion 📖 Interactive written walkthrough with clickable timestamps: https://pixelfungaming.com/videos/rdr2-player-bounty-2

#Hitman : Elusive Target #11
This video features a comprehensive gameplay walkthrough and multiple strategic attempts at the elusive target 'The Fixer' (Xander Haverfoek) in Hitman's Marrakesh location. Watch as Agent 47 navigates the tense atmosphere of Marrakesh during a political crisis to track down a rogue lawyer involved in a high-stakes conflict diamond deal. The video covers several tactical approaches, from deep infiltration of the Swedish consulate to high-vantage sniping from the surrounding rooftops. You'll see detailed tracking of the courier to recover the stolen diamonds and the careful observation required to pinpoint the target's movements within the secure consulate building. The player demonstrates the patience and precision needed to achieve a Silent Assassin rating, including camera sabotage, disguise changes, and finding the perfect window of opportunity for the final elimination. Chapters: 0:00:00 - Mission Briefing: Target Xander Haverfoek 'The Fixer' 0:00:45 - Mission Planning and Loadout Selection 0:01:52 - Mission Start: Arrival at Marrakesh Bazaar 0:03:30 - Tracking the Courier to the Shisha Cafe 0:05:34 - Approaching the Swedish Consulate Grounds 0:07:54 - Securing a Guard Disguise for Infiltration 0:10:23 - Sabotaging the Consulate Security System 0:15:58 - Target Located: Observing Xander Haverfoek 0:20:30 - Analyzing Target Security and Route Patterns 0:25:35 - Mission Restart: Rethinking the Tactical Approach 0:30:40 - Following the Courier to Identify Diamond Hand-off 0:41:40 - Objective: Locating the Conflict Diamonds 0:46:00 - Infiltrating General Zaydan's Compound 0:51:15 - Setting up the Long-Range Sniping Nest 1:05:00 - Waiting for the Target to Enter the Kill Zone 1:12:44 - Execution: Long-Range Elimination of The Fixer 1:15:30 - Alternate Run: Testing Infiltration Strategies 1:24:10 - Second Successful Strike and Retrieval 1:30:24 - Mission Accomplished: Final Ratings and Score 📖 Interactive written walkthrough with clickable timestamps: https://pixelfungaming.com/videos/hitman-elusive-target-11

Sniper Elite 3 Multiplayer Survival Gameplay - Beach head
Experience intense co-op tactical sniping in this complete walkthrough of Sniper Elite 3's Survival mode on the Beachhead map. Join players GhostWarrior117 and Eric.c as they take on waves of enemy forces across multiple rounds of increasing difficulty. This video showcases high-stakes long-range combat, stealth tactics, and the game's iconic X-ray kill cams. Watch as the duo coordinates their efforts to hold down positions, manage limited resources, and pick off targets from afar in the arid North African landscape. Whether you're a fan of the Sniper Elite series or tactical shooters in general, this gameplay footage offers a comprehensive look at the strategies required to survive the relentless onslaught of the Axis powers. Chapters: 0:00:00 - Loadout Selection and Game Start 0:00:38 - Round 1, Wave 1 Begins 0:03:47 - Wave 1 Cleared 0:04:28 - Round 1, Wave 2 Begins 0:07:25 - Wave 2 Cleared 0:08:15 - Round 1, Wave 3 Begins 0:11:22 - Round 1 Completed 0:11:37 - Round 2 Intermission 0:12:09 - Round 2, Wave 4 Begins 0:14:18 - Wave 4 Cleared 0:14:59 - Round 2, Wave 5 Begins 0:18:53 - Wave 5 Cleared 0:19:35 - Round 2, Wave 6 Begins 0:21:24 - Round 2 Completed 0:21:44 - Round 3 Intermission 0:22:15 - Round 3, Wave 7 Begins 0:25:28 - Wave 7 Cleared 0:26:09 - Round 3, Wave 8 Begins 0:29:41 - Wave 8 Cleared 0:30:22 - Round 3, Wave 9 Begins 0:33:40 - Round 3 Completed 0:34:02 - Round 4 Intermission 0:34:33 - Round 4, Wave 10 Begins 0:38:23 - Wave 10 Cleared 0:39:04 - Round 4, Wave 11 Begins 0:42:25 - Wave 11 Cleared 0:43:06 - Round 4, Wave 12 Begins 0:46:11 - Round 4 Completed 0:46:27 - Round 5, Wave 13 Begins and Gameplay Through Finish 📖 Interactive written walkthrough with clickable timestamps: https://pixelfungaming.com/videos/sniper-elite-3-multiplayer-survival-gameplay-beach-head

RDR2 - Duck Flyover Location (Heartlands) #1
The mission begins with an intensive hunt as a character uses a shotgun to down a large flock of ducks flying over a plain in The Heartlands. Following the initial barrage, the focus shifts to resource gathering. The character methodically moves through the tall grass near a small camp, skinning each bird to collect feathers and animal fat. A brief pause occurs to check the world map, confirming the location between Twin Stack Pass and Emerald Ranch. Back in the field, the gathering continues alongside a friendly dog that follows closely. The segment concludes with more efficient skinning of the remaining waterfowl, showcasing a productive collection of crafting materials. Chapters: 0:00:00 - 0:00:18 - Rapid duck hunting in the open field 0:00:18 - 0:01:18 - Methodical resource collection and skinning 0:01:18 - 0:01:37 - Establishing location via the world map 0:01:37 - 0:02:10 - Continued gathering and dog interaction 📖 Interactive written walkthrough with clickable timestamps: https://pixelfungaming.com/videos/rdr2-duck-flyover-location-heartlands-1

RDR2 - Completing a player bounty
The mission begins with the character navigating through the rainy streets of Valentine on horseback. After dismounting and briefly exploring the town's outskirts, a player bounty notification appears for a target named TIBBLESBRC. The pursuit starts immediately as the character runs toward the blacksmith area where the target is located. A short but intense firefight breaks out, resulting in the successful elimination of the bounty target with rifle fire. After securing the area, the character uses a lasso to position the body before hoisting it onto their shoulder. The journey continues on foot as the character carries the deceased bounty through the muddy main street of Valentine. The mission culminates at the Valentine Sheriff's Office, where the character delivers the body to the sheriff and receives the bounty reward. Chapters: 0:00:00 - 0:00:30 - Exploring Valentine on horseback 0:00:30 - 0:00:50 - Accepting the player bounty for TIBBLESBRC 0:00:50 - 0:01:15 - Engaging in a shootout with the bounty target 0:01:15 - 0:01:35 - Confirming the kill and looting 0:01:35 - 0:01:55 - Securing the body with a lasso 0:01:55 - 0:02:30 - Transporting the bounty to the Sheriff's Office 0:02:30 - 0:02:49 - Delivering the bounty and mission completion 📖 Interactive written walkthrough with clickable timestamps: https://pixelfungaming.com/videos/rdr2-completing-a-player-bounty

RDR2 - Poisoning Moonshine (STEALTH) Cumberland Forest
The mission begins with a ride through the rugged terrain of the Grizzlies East under the dim light of dawn. The objective is to reach a rival moonshiner's hideout and sabotage their production. Upon arrival, the character dismounts and carefully scouts the camp from a high rocky outcrop to identify guard positions. Moving with caution, the character sneaks into the camp, utilizing a bow and arrow to silently eliminate guards and avoid detection. After clearing a path to the equipment, the character poisons the moonshine still, effectively ruining the batch. With the sabotage complete, the character quickly retreats from the hideout area on foot, successfully finishing the mission without alerting the remaining enemies. Chapters: 0:00:00 - 0:00:12 - Approaching the rival moonshiner hideout 0:00:12 - 0:00:28 - Scouting guard positions from the ridge 0:00:28 - 0:01:05 - Executing stealth takedowns with the bow 0:01:05 - 0:01:23 - Poisoning the moonshine still 0:01:23 - 0:01:40 - Escaping the area and mission completion 📖 Interactive written walkthrough with clickable timestamps: https://pixelfungaming.com/videos/rdr2-poisoning-moonshine-stealth-cumberland-forest

State Of Decay : Year One - Live #5
Marcus Campbell begins the night at 'The Old Farmhouse' base in State of Decay, focusing on base management and survivor interactions with Pastor William, Ed Jones, and Jacob Ritter. After scouting from the watchtower and preparing for a supply run, he heads through the dark countryside of Trumbull Valley toward the town of Marshall. He initiates the 'Stranger in Trouble' mission with Quentin Barnes, earns the 'Vehicular Zombicide' achievement through intense street clearing, and eventually swaps to a black pickup truck as the sun rises. The search for a missing survivor named Jack leads the team through zombie-infested streets in a red pickup. Key stops include scavenging a commercial office for food and ammo, and looting the local Police Department for advanced weaponry like a Tactical Police SMG and Grenade Launcher ammo. After a brief melee skirmish at a donut shop, Marcus rescues Jack from an office building and escorts him back to Big Jake's Garden Supply, where Jack reunites with Becca, improving community reputation and trust. The final leg of the session focuses on high-stakes morale missions and supply drops. Marcus takes on the 'Anger Management' and 'Lead the Way' objectives alongside Alan Gunderson. This segment features intense combat from a truck bed, navigating off-road terrain to bypass obstacles, and a dramatic vehicle flip that forces a desperate melee fight against a zombie horde. After switching to a gray SUV and returning to base, the session concludes with a Cleo Signal supply drop investigation. Chapters: 0:00:00 - Main menu navigation and campaign selection 0:01:08 - Game loading screen with gameplay tips 0:02:04 - Spawning at The Old Farmhouse and checking status 0:03:52 - Map overview and mission objective assessment 0:05:59 - Survivor dialogue and inventory management 0:08:38 - Scouting surroundings from the watchtower lookout 0:11:00 - Radio transmission regarding the Marshall courthouse 0:13:11 - Target practice and base security maintenance 0:15:54 - Departing base in a yellow hatchback 0:18:45 - Entering the town of Marshall at night 0:21:00 - Slow traversal and clearing street-level infestations 0:22:33 - Discovering the storage site and meeting Quentin 0:25:00 - Starting the 'Stranger in Trouble' mission 0:27:07 - Earning the 'Vehicular Zombicide' achievement 0:28:28 - Switching to a black pickup truck for town clearing 0:30:00 - Driving and Initial Scavenging in Town 0:31:40 - Leaving Town and Driving Rural Roads 0:32:39 - Navigating the Rural Highway 0:34:00 - Driving Towards Missing Survivor Location 0:35:19 - Arriving at The Grange Outpost and Stashing Supplies 0:36:50 - Driving to New Search Area: Marshall City Center 0:40:22 - Scavenging the Police Department 0:44:02 - Melee Combat and Donut Shop Scavenge 0:49:40 - Finding and Rescuing the Missing Survivor, Jack 0:54:57 - Escorting Survivors Back to Base 0:58:20 - Mission Complete: Arriving at Big Jake's Garden Supply 1:00:00 - Starting 'Anger Management' Mission and Heading Out 1:00:15 - Encountering Zombies and Driving Through Obstacles 1:00:33 - Off-Road Navigation and New Survey Point Discovery 1:01:01 - Reaching the Farm area and Zombie Encounters 1:01:31 - Zombie Horde Alert and Highway Driving 1:02:02 - Driving Through the Town and Receiving New Mission Alerts 1:02:56 - Arriving at Home Base and Delivering Resources 1:03:17 - Starting Morale Mission 'Lead the Way' with Alan 1:03:55 - Engaging Zombie Horde from the Truck Bed 1:04:25 - Ramming Zombies and Clearing the Area 1:05:39 - Truck Flips Over: Forced Melee Combat 1:07:08 - Switching Vehicles and Returning to Base 1:08:19 - Mission Complete and Supply Management 1:09:01 - Receiving Cleo Signal for Supply Drop Investigation 1:09:35 - End Game Status and Session Conclusion 📖 Interactive written walkthrough with clickable timestamps: https://pixelfungaming.com/videos/state-of-decay-year-one-live-5

RDR2 - Campsite Massacre
The sequence begins with the character rowing a small boat along a river towards a shoreline. Upon landing and disembarking, the character approaches a nearby campsite that has been ravaged by violence. Multiple corpses lie scattered around the site, surrounded by blood and overturned supplies. A dog remains at the scene, barking distressedly over one of the victims. The character engages in a series of violent kicks against the animal before drawing a revolver and firing a final shot. The encounter concludes as the character loots one of the fallen bodies in the center of the camp. Chapters: 0:00:00 - 0:00:07 - Rowing the boat to the river shore 0:00:07 - 0:00:18 - Discovering the gruesome scene at the campsite 0:00:18 - 0:00:30 - Attacking the surviving dog near the bodies 0:00:30 - 0:00:35 - Shooting the dog with a revolver 0:00:35 - 0:00:41 - Looting a corpse among the carnage 📖 Interactive written walkthrough with clickable timestamps: https://pixelfungaming.com/videos/rdr2-campsite-massacre

MAFIA 3 | Definitive Edition Live #7
Lincoln Clay secures the PCP Racket in Frisco Fields by confronting and eliminating the boss, Bobby Bastian, inside the DuVall Hall Science Center. The mission begins with Lincoln obtaining supplies and ammunition from an Arms Dealer van. He enters the hostile zone and uses stealth takedowns and automatic weaponry (Trench 1938 Drum) to clear the ground floor lobby. Combat escalates as he moves to the upper floors, requiring him to call in a Hit Squad for backup against multiple armed enemies. A major explosion clears a section of the laboratory/office area, followed by Lincoln using an adrenaline shot to recover from damage. He tracks down and brutally interrogates Bobby Bastian, securing the PCP Racket and assigning it to Vito. Following the assignment, a cinematic flashback features Father James discussing his past. Lincoln then meets with Jackie Grimaldi to discuss the Southern Union and their connection to Chester Moreau. He begins disrupting the Southern Union's operations by infiltrating locations in Frisco Fields, activating wiretapping nodes, destroying racist propaganda, and engaging in multiple firefights and interrogations to gather intelligence and secure control of the territory, including a large compound and a laundromat, before restocking supplies. Lincoln Clay undertakes several missions in the Frisco Fields district to dismantle the Southern Union racket. The mission begins with Lincoln resupplying equipment and driving to the first objective: interrogating Southern Union Brothers. He infiltrates a suburban home's backyard, using explosives to initiate a fierce gunfight and eliminate several enemies. Lincoln successfully captures and interrogates an injured informant (Cornell 4B), learning a key location, before killing him and collecting cash. The next objective is to kill Uncle Bartholomew at a waterfront industrial area. Lincoln drives there and engages in heavy combat using an assault rifle, resulting in multiple casualties and exploding vehicles, completing the first enforcer objective. He then drives to kill Uncle James under a bridge, employing both stealth takedowns and direct firefights to clear the area and eliminate the second enforcer. After depositing a large sum of cash, the mission changes focus to raiding Southern Union gatherings. Lincoln executes a destructive raid on a Southern Union Camp in a remote, wooded area at dusk, using Molotov cocktails to ignite vehicles and eliminate the camp's defenders. He later raids a Southern Union Residence, again neutralizing all hostiles and collecting money and propaganda materials. The final task of the video involves investigating Bellaire's Grocery Store. Lincoln enters the dark supermarket after lockpicking a back door, moves silently through the interior, collects a tactical vest upgrade, and gathers critical intelligence about the organization's activities and future plans before the video concludes. Lincoln Clay infiltrates Bellaire's Grocery Store, a Southern Union front, to dismantle the racket. He enters through a rear door, performing a stealth takedown on a guard. Moving inside, Lincoln overhears dialogue about the Southern Union's business dealings. He encounters and eliminates multiple guards in the back office area, escalating the operation into a Hostile Zone firefight. Lincoln uses a Molotov cocktail and his submachine gun to quickly neutralize the initial wave of enemies near a staircase. Upon reaching the upper floor, he engages in brutal close-quarters combat, interrogating and executing the leader, Mason Carter. The primary objective updates to rescuing human trafficking victims, showing the success of dismantling the immediate threat. However, the store quickly becomes inundated with Marcano reinforcements, forcing Lincoln to defend the main floor and eliminate incoming enemies. He exits the building and gets into a high-powered muscle car, escaping the reinforcement pursuit through the city streets at night while listening to the radio. Lincoln drives to meet Jackie Grimaldi at a small diner. Jackie provides information, revealing that the Southern Union is operating a massive slave trade ring, implicating Chester Moreau. Lincoln accepts the mission to kill Chester Moreau. Lincoln visits the Arms Dealer van parked nearby, depositing cash and acquiring new weaponry (the Pasadena AR30 assault rifle) and equipment. He activates a nearby wiretapping node, gaining intelligence. Lincoln then drives to Moreau's hideout, Bellair's Supermarket, and infiltrates the premises. He engages in a sharp, close-quarters gun battle inside the market's backrooms, ultimately confronting and executing Chester Moreau, thus securing the Slave Trade racket. Following the confrontation, the game transitions to a cinematic sequence where Detective Jonathan Maguire narrates the background of Remy Duvall, detailing his wealth, racist activism, and connection to the Southern Union. Donovan then provides Lincoln with further intel regarding Duvall's network, identifying key contacts to target. The final objective is set to find a Southern Union Deacon to continue hunting Remy Duvall. Chapters: 0:00:00 - Restocking Supplies and Weapon Check 0:01:00 - Infiltrating DuVall Hall Science Center 0:02:05 - Initial Gunfight and Brutal Takedowns in Lobby 0:03:45 - Sustained Interior Combat and Calling Hit Squad Support 0:04:50 - Confronting and Interrogating Bobby Bastian 0:05:47 - PCP Racket Secured and Racket Assignment to Vito 0:06:05 - Dialogue with Burke and Story Interlude (Father James) 0:07:35 - Gaining Associate Perks and Objectives Unlocked 0:09:56 - Meeting Jackie Grimaldi (IRS Agent) 0:12:23 - Disrupting Southern Union Racket: Interrogation and Takedowns 0:14:15 - Driving to Next Racket Disruption Location 0:18:40 - Intense Firefight and Racket Damage near the Pool 0:21:50 - Interrogating Informants at the Laundromat 0:24:30 - Destroying Supplies and Eliminating Enforcers at Rural Outpost 0:27:35 - Final Southern Union Supply Destruction and Resupply 30:00 - Resupplying Equipment and Beginning First Interrogation Drive 30:31 - Infiltrating Residence and Initiating Gunfight 31:00 - Interrogating Cornell 4B and Gathering Intelligence 31:35 - Driving to Eliminate Uncle Bartholomew 32:28 - Intense Combat and Killing Enforcer Uncle Bartholomew 34:27 - Killing Enforcer Uncle James and Completing Moreau's Racket Damage 36:49 - Depositing Cash and Preparing for Rackets Raid 38:55 - Driving to Raid Southern Union Camp and Police Contact 41:15 - Raid on Southern Union Camp and Residence 48:55 - Raid on Southern Union Heritage Center 54:11 - Investigating Bellaire's Grocery Store and Stealth Combat 58:30 - Mission Complete and Final Intel Cutscene 60:00 - Infiltrating Bellair's Grocery Store 60:47 - Initiating Combat and Clearing Upper Floor 61:29 - Interrogating Mason Carter and Objective Update 61:45 - Dealing with Marcano Reinforcements Inside 63:15 - Engaging Reinforcements in the Parking Lot 64:33 - Driving to Meet Jackie Grimaldi 65:35 - Meeting Jackie Grimaldi and New Objective: Kill Chester Moreau 67:33 - Depositing Cash and Restocking Weapons at the Arms Dealer Van 68:42 - Wiretapping Node Activated 69:19 - Infiltrating Bellair's Supermarket and Hostile Engagement 70:25 - Confronting and Killing Chester Moreau 71:48 - Racket Secured and Associate Upgrades 72:34 - Maguire Discusses Remy Duvall's Background and Racism 74:25 - Driving to Meet Donovan 77:12 - Donovan Briefing: Remy Duvall and Olivia Marcano 80:05 - Final Objective Set: Find a Southern Union Deacon

Red Dead Online - Alternative Way To Complete Wagon Daily Challenge
The pursuit begins as the character sprints across a grassy field to intercept a passing horse-drawn wagon. Upon leaping onto the back, a brief verbal confrontation with the driver ensues before the driver is forcibly removed from the vehicle. The character then takes aim and fires at the horses, leading to a frantic, uncontrolled descent down a nearby hillside. Throughout this chaotic ride, the character remains in the rear of the wagon, discharging their weapon into the sky. Once the wreckage comes to a halt near a railway, the character exits the wagon, mounts their own horse, and gallops away. Chapters: 0:00:00 - 0:00:09 - Pursuing the moving wagon across the fields 0:00:09 - 0:00:23 - Boarding the wagon and confronting the driver 0:00:23 - 0:00:31 - Eliminating the driver and shooting the horses 0:00:31 - 0:01:04 - Enduring a chaotic ride in the runaway vehicle 0:01:04 - 0:01:15 - Dismounting and departing on horseback 📖 Interactive written walkthrough with clickable timestamps: https://pixelfungaming.com/videos/red-dead-online-alternative-way-to-complete-wagon-daily-challenge

RDR2 - Legendary Bounty - "Wolf Man" Walkthrough
The mission begins with a cinematic briefing introducing the Wolf Man, a feral recluse living among wolves near Lake Isabella. The character rides through the treacherous snow-covered mountains, navigating rocky paths towards the frozen lake. Periodic wolf pack attacks break the silence of the wilderness, demanding quick gunplay to protect the horse and rider. Upon reaching Lake Isabella, the search leads to a small camp where the Wolf Man resides with his pack. A chaotic battle ensues as numerous wolves protect their leader. After defeating the beasts, the character captures and hogties the Wolf Man. The descent back to the delivery point is fraught with danger, as persistent wolf packs pursue the party while the bounty rants about the laws of nature. The journey concludes with the successful delivery of the captive to the bounty wagon. Chapters: 0:00:00 - 0:00:50 - Cinematic introduction for the Wolf Man bounty 0:00:50 - 0:02:02 - Initial mountain trek through deep snow 0:02:02 - 0:03:15 - First wolf pack encounter on the frozen lake 0:03:15 - 0:04:25 - Searching the shoreline and navigating rocky terrain 0:04:25 - 0:05:30 - Locating the bounty's camp and intense combat 0:05:30 - 0:06:50 - Subduing the target and starting the descent 0:06:50 - 0:08:12 - Perilous escort under constant wolf pursuit 0:08:12 - 0:08:31 - Bounty delivery and mission completion 📖 Interactive written walkthrough with clickable timestamps: https://pixelfungaming.com/videos/rdr2-legendary-bounty-wolf-man-walkthrough

RDR2 - Hummingbird Sage Flower Location
The character navigates through a wooded region near the Kamassa River, focusing on a specific daily objective. Spotting several clusters of hummingbird sage, the character begins harvesting the plants one by one. Progress towards the daily challenge updates with each successful pick. Amidst the gathering, an invitation for a Lake Fishing Challenge Free Roam Event appears. The character persists until the fifth plant is secured, fulfilling the daily requirement. A few additional stalks are harvested before the world map is accessed, showing the patch's location west of Bluewater Marsh to aid in future foraging runs. Chapters: 0:00:00 - 0:00:25 - Discovery and initial harvesting of hummingbird sage 0:00:25 - 0:00:45 - Continued collection and free roam event notification 0:00:45 - 0:01:00 - Completion of the daily challenge objective 0:01:00 - 0:01:15 - Map reveal of the herb patch location 📖 Interactive written walkthrough with clickable timestamps: https://pixelfungaming.com/videos/rdr2-hummingbird-sage-flower-location

RDR2 - Legendary Bounty Etta Doyle Walkthrough
The mission begins with a cinematic overview of Etta Doyle, a notorious gang leader targeted by Leviticus Cornwall. Upon arrival at the Cornwall freight yard in Saint Denis, a meeting takes place with local contacts who explain the ambush plan. The character finds a hiding spot within the freight station and uses binoculars to observe the gang's arrival. After several minutes of careful observation as the gang searches the premises, Etta Doyle realizes they are being set up. Combat immediately erupts, and the character identifies and pursues Etta through the rail yard. Once captured and bound, she is loaded onto a horse. The escape from the freight yard involves intense gunfights with remaining gang members on horseback through the streets of Saint Denis. Finally, Etta Doyle is delivered to the Saint Denis police station, and the bounty reward is collected. Chapters: 0:00:00 - 0:01:44 - Mission Introduction and Ambush Briefing 0:01:44 - 0:04:00 - Infiltrating the Freight Yard and Finding Cover 0:04:00 - 0:05:46 - Identifying Etta Doyle through Observation 0:05:46 - 0:07:00 - Firefight and Successful Capture 0:07:00 - 0:08:32 - Delivery to Saint Denis Jail and Reward 📖 Interactive written walkthrough with clickable timestamps: https://pixelfungaming.com/videos/rdr2-legendary-bounty-etta-doyle-walkthrough

RDR2 - Legendary Bounty - Yukon Nik Walkthrough
The hunt for 'Yukon' Nikoli Borodin begins with a recount of his violent history as a trapper and his recent capture of a US Marshal. The journey starts at dusk, riding through the rugged terrain toward Fort Riggs. Upon arrival, the initial approach involves stealth, using throwing knives to silently eliminate guards on the outskirts of the camp. Positioned on a high ridge, a long-range rifle provides a tactical advantage to pick off outlaws from a distance while they remain unaware. The engagement intensifies as the camp becomes alerted, leading to a sustained firefight from behind sandbag fortifications. Various firearms, including repeaters and sniper rifles, are utilized to thin out the remaining gang members scattered throughout the fort. A caged bear within the camp adds an element of danger and distraction during the siege. After clearing the majority of the outlaws, Yukon Nik emerges from a cabin, using the captured Marshal as a human shield. A precise application of Deadeye allows for a non-lethal shot to Nik's weapon hand, followed by several rounds to his legs to incapacitate him without ending his life. Once Nik is bound and loaded onto a horse, the return trip to Strawberry commences. Despite Nik's constant taunts and protests during the ride, the trek concludes at the local jail. The mission ends with the prisoner being handed over to the sheriff, securing the bounty reward. Chapters: 0:00:00 - 0:01:05 - Introduction to 'Yukon' Nikoli Borodin 0:01:05 - 0:01:35 - Traveling to Fort Riggs at Dusk 0:01:35 - 0:02:15 - Initial Stealth Takedowns on the Perimeter 0:02:15 - 0:03:00 - Long-Range Reconnaissance and Sniping 0:03:00 - 0:04:15 - High-Vantage Shootout from the Fort Overlook 0:04:15 - 0:05:45 - Tactical Engagement and Camp Infiltration 0:05:45 - 0:06:44 - Final Push to Clear the Remaining Outlaws 0:06:44 - 0:07:01 - Hostage Standoff with Yukon Nik 0:07:01 - 0:07:20 - Precise Deadeye Rescue of the Marshal 0:07:20 - 0:07:45 - Capturing and Securing the Legendary Bounty 0:07:45 - 0:08:45 - Escorting the Prisoner to Strawberry Jail 0:08:45 - 0:09:00 - Delivering Yukon Nik to Justice 📖 Interactive written walkthrough with clickable timestamps: https://pixelfungaming.com/videos/rdr2-legendary-bounty-yukon-nik-walkthrough

Ghost Recon Breakpoint - Investigate Antares District Walkthrough
The mission "Show Me The Way" begins with an infiltration of a modern Skell Technology facility in the Antares district. Initial movement focuses on stealthy navigation through neon-lit corridors and outdoor patios to identify enemy positions while avoiding detection. Tactical combat ensues as thermal vision is activated to clear a path through the building's interior, systematically taking down guards. After neutralizing the immediate threats, the focus shifts to gathering intelligence by interrogating civilian employees found hiding within the complex. These interactions provide crucial leads regarding the Director of the Natural Hazard Control Center. The search continues across the facility's expansive grounds, leading to further conversations that pinpoint the director's private villa near the coast. Once the location is confirmed and updated on the tactical map, the journey across the rugged terrain towards the next objective commences. Chapters: 0:00:00 - 0:01:00 - Infiltration of the Skell Technology facility 0:01:00 - 0:02:15 - Tactical combat and room clearing with thermal vision 0:02:15 - 0:03:00 - Interrogating facility staff for mission intel 0:03:00 - 0:04:30 - Scouting the outer perimeter for additional leads 0:04:30 - 0:05:05 - Finalizing the location of the Director's residence 0:05:05 - 0:05:50 - Exfiltration and travel toward the coastal villa 📖 Interactive written walkthrough with clickable timestamps: https://pixelfungaming.com/videos/ghost-recon-breakpoint-investigate-antares-district-walkthrough

Ghost Recon Breakpoint - Find Sergeant Kent Walkthrough
The mission 'A Man of Confidence' in Ghost Recon Breakpoint unfolds as the character infiltrates Camp Viper in Lake Country. The operation begins with long-range reconnaissance from a snowy ridge, where the character uses a scoped rifle to tag enemies and identify key defensive structures. After deactivating an automated turret, the character systematically eliminates guards from a distance before moving into the base. The gameplay shifts between silent takedowns in the barracks and intense firefights when the character is discovered. Inside the command center, the character interrogates a high-ranking officer to extract critical intelligence regarding Sergeant Kent's location. The session concludes with a thorough sweep of the facilities to gather clues and a review of the tactical map to plan the next phase of the investigation. Chapters: 0:00:00 - 0:00:45 - Initial Scouting and Turret Deactivation 0:00:45 - 0:02:15 - Tactical Reconnaissance and Target Tagging 0:02:15 - 0:03:40 - Precision Sniper Engagements 0:03:40 - 0:05:00 - Infiltrating the Camp Perimeter 0:05:00 - 0:06:25 - Close-Quarters Combat and Firefight 0:06:25 - 0:08:20 - Clearing Buildings and Searching for Clues 0:08:20 - 0:09:00 - Hacking Defense Systems 0:09:00 - 0:10:00 - Officer Interrogation and Intel Extraction 0:10:00 - 0:11:45 - Gathering Data in the Command Center 0:11:45 - 0:13:40 - Objective Board Review and Map Analysis 📖 Interactive written walkthrough with clickable timestamps: https://pixelfungaming.com/videos/ghost-recon-breakpoint-find-sergeant-kent-walkthrough

Ghost Recon Breakpoint - Kill Flycatcher Walkthrough
Nomad infiltrates the Arrow Testing Zone within Restricted Area 01 to track down and eliminate Flycatcher, a high-ranking member of the Wolves. The mission begins with a stealthy approach through the surrounding forest and an ascent onto the facility's rooftops. Initial actions involve neutralising snipers in control towers and sabotaging automated missile turrets to secure the exterior perimeter. The operative then moves through the control rooms and helipad areas, systematically clearing guards with suppressed fire. Upon entering the facility's interior, Nomad navigates dark corridors using night vision before engaging in a heavy firefight with defensive drones in the main operations center. The mission concludes with a tactical breach into Flycatcher's final position, where the target is eliminated and crucial intel regarding Omega Operations is recovered. Chapters: 0:00:00 - 0:00:40 - Initial Infiltration and Ascent 0:00:40 - 0:01:15 - Control Tower Neutralization 0:01:15 - 0:02:10 - Exterior Perimeter and Turret Sabotage 0:02:10 - 0:03:15 - Command Center Breach and Overlook 0:03:15 - 0:04:40 - Helipad Perimeter Sweep 0:04:40 - 0:06:15 - Facility Interior Stealth Movement 0:06:15 - 0:07:30 - Resource Retrieval and Hallway Clearance 0:07:30 - 0:08:30 - Tactical Drone Engagement 0:08:30 - 0:09:20 - Flycatcher Elimination and Intel Collection 0:09:20 - 0:10:07 - Mission Intel Review and Completion 📖 Interactive written walkthrough with clickable timestamps: https://pixelfungaming.com/videos/ghost-recon-breakpoint-kill-flycatcher-walkthrough

Walking Dead Game: Season 2 episode 3 - In Harms Way PT 2
The narrative begins with a quiet moment between Clementine and Bonnie, where they discuss the complexities of Carver’s leadership and the group’s history. Bonnie offers a gesture of kindness by giving Clementine a colorful new jacket before Tavia escorts her to the greenhouse. Work starts under the supervision of Reggie, where Clementine finds a distraught Sarah struggling with the emotional aftermath of a violent encounter with her father. Reggie attempts to teach them the meticulous task of pruning berry bushes, emphasizing the importance of high-quality work to appease Carver. Tension escalates rapidly when Carver arrives, finds the progress insufficient, and brutally executes Reggie by pushing him off the roof in a chilling display of authority. Following the tragedy, Bonnie tasks Clementine with delivering supplies to an expansion site. This journey leads her through the compound, eventually resulting in a desperate combat encounter alongside Kenny and Mike when walkers breach a storefront. Clementine manages to fend off multiple threats using makeshift weapons before being saved by Troy. The mission takes a secretive turn when Clementine discovers Luke hiding within a nearby building. They share a hushed conversation about the group’s precarious situation and the encroaching walker herd, leading Luke to request help in securing a radio for their escape. The segment concludes with Troy discovering Clementine and ordering her to report to Carver’s office immediately. Chapters: 00:00:00 - 00:01:32 - Discussion with Bonnie and receiving the new jacket 00:01:32 - 00:03:06 - Arriving at the greenhouse and comforting Sarah 00:03:06 - 00:05:30 - Reggie provides instructions on pruning berry plants 00:05:30 - 00:07:37 - Carver's arrival and the shocking execution of Reggie 00:07:37 - 00:09:18 - Receiving supply delivery orders from Bonnie 00:09:18 - 00:11:52 - Fending off a walker breach at the hardware store 00:11:52 - 00:14:30 - Secret meeting with Luke to plan an escape 00:14:30 - 00:15:02 - Confrontation with Troy and summons to Carver's office 📖 Interactive written walkthrough with clickable timestamps: https://pixelfungaming.com/videos/walking-dead-game-season-2-episode-3-in-harms-way-pt-2

Ghost Recon: Breakpoint - Part 3
This extensive gameplay video for Tom Clancy's Ghost Recon Breakpoint follows Nomad as he arrives at the hidden rebel base, Erewhon, and begins his tactical missions across the archipelago of Auroa. The video starts with the initial connection and arrival at the base, where we witness a key narrative moment during a meeting with the resistance leader, Mads Schulz. Nomad is tasked with finding a way off the island or gathering support to take on the treacherous Wolves led by Cole D. Walker. Viewers will see a variety of gameplay elements, including character customization and loadout management, before Nomad heads out into the diverse biomes of Auroa. A significant portion of the video showcases the use of helicopters for traversing the vast landscape, providing stunning aerial views of waterfalls and dense forests. The core of the experience is tactical stealth. Nomad is shown meticulously scouting outposts using recon drones to tag enemies before engaging in silent takedowns with suppressed weapons. We see intense combat sequences in the swampy Fen Bog region and precise long-range marksmanship. Nomad must also contend with the high-tech surveillance of the Sentinel forces, including evading the deadly Azrael drones that patrol the skies. The journey takes the player through research facilities, farmlands, and ancient ruins, concluding with a tense night-time infiltration of a fortified base near a cemetery. This video is a comprehensive look at the atmosphere, mechanics, and open-world scope of Ghost Recon Breakpoint. Chapters: 0:00:00 - Loading and Server Connection 0:01:30 - Arriving at the Erewhon Base 0:03:20 - Cutscene: Meeting Mads Schulz 0:08:20 - Preparing for Infiltration 0:11:30 - Aerial Recon: Flying across Auroa 0:15:45 - Entering the Fen Bog Region 0:18:55 - Tactical Stealth in the Swamps 0:23:30 - Drone Scouting: Longford Farm 0:28:40 - Long-Range Sniper Engagement 0:33:40 - Evading Azrael Patrol Drones 0:38:15 - Vehicle Travel through the Forest 0:43:00 - Assaulting the Sentinel Outpost 0:48:30 - Exploring Ancient Ruins 0:52:15 - Bunker Infiltration and Combat 0:57:00 - Swamp Skirmish and Repositioning 1:01:30 - Night Raid at the Ancient Village 📖 Interactive written walkthrough with clickable timestamps: https://pixelfungaming.com/videos/ghost-recon-breakpoint-part-3
Far Cry New Dawn - Music Player Location Near Lake
The video begins with navigation through the main menu, starting on the Roster screen before shifting to the expansive world map. The character uses the map interface to zoom out, observing the geography of the open world, marked by blue location icons. The map focuses on a region featuring a lake and connecting roads, and a blue waypoint is established near the center of the lake. Exiting the map, the perspective transitions to first-person inside a dimly lit, confined space resembling a bunker or safe room. A quest objective displays prominently, identifying the mission 'Audiophile' and instructing the character to find all the music players in Hope County, noting a current progress of 5 out of 10 finds. The character stands near a wooden bookshelf and some scattered gear, concluding the segment. Chapters: 0:00 - 0:03 - Menu Navigation and Map Access 0:03 - 0:13 - Exploring the World Map and Setting Waypoint 0:13 - 0:16 - In-Game Environment and Audiophile Objective Display 📖 Interactive written walkthrough with clickable timestamps: https://pixelfungaming.com/videos/far-cry-new-dawn-music-player-location-near-lake

Red Dead Online - 3m Jump Challenge - Citadel Rock
The gameplay focuses on completing a specific daily challenge in Red Dead Online. The mission begins with the character riding through the grassy hills near Citadel Rock, scouting for a suitable ledge. After positioning the horse at the base of a cliff, the character climbs the rocky terrain to gain sufficient height. The first attempt at jumping onto the horse from the ledge is unsuccessful. Undeterred, the character maneuvers the horse into a better position and climbs back up the steep incline. The second attempt is a success, as the character leaps from the cliff and lands perfectly in the saddle. A notification appears confirming the completion of the 'Jumped onto a horse from a 3m height' daily challenge. The session concludes with a look at the world map to pinpoint the exact location near Valentine, while a steam train whistles and passes by in the valley below. Chapters: 0:00:00 - 0:00:15 - Scouting the jump location near Citadel Rock 0:00:15 - 0:00:27 - First attempt at the high-altitude horse jump 0:00:27 - 0:00:43 - Re-positioning the horse and climbing the cliffside 0:00:43 - 0:00:55 - Successful jump and Daily Challenge completion 0:00:55 - 0:01:12 - Reviewing map location and viewing the landscape 📖 Interactive written walkthrough with clickable timestamps: https://pixelfungaming.com/videos/red-dead-online-3m-jump-challenge-citadel-rock

Ghost Recon Breakpoint - Save Madera Walkthrough
The mission begins with the tactical extraction of an injured VIP from the Omega R&D Center. Combat starts immediately as the protagonist, while carrying the casualty, neutralizes several security guards using a suppressed sidearm. After successfully navigating through the facility and reaching the exterior, the casualty is loaded into a waiting transport helicopter. A night flight follows, taking the team across the rugged terrain of Aurora toward a safe zone. During the flight, a detailed conversation occurs regarding the threat posed by the antagonist Flycatcher and his specialized drone technology. Upon landing at the South Cape Station rebel base, the protagonist carries the injured woman to a medical facility and hands her over to rebel leaders. Following the delivery, the focus shifts to exploring the rebel encampment. The protagonist searches through various supply crates and hidden caches, acquiring new tactical gear, collecting intel documents, and discovering high-tier weaponry including a new sniper rifle and an assault rifle to upgrade the loadout. Chapters: 0:00:00 - 0:01:25 - Extraction from Omega R&D Center 0:01:25 - 0:02:45 - Securing the Helipad and Boarding 0:02:45 - 0:05:15 - Night Transport Flight and Intel Briefing 0:05:15 - 0:06:15 - Arrival at South Cape Station 0:06:15 - 0:07:10 - Delivering Paula Madera to Haruhi Ito 0:07:10 - 0:09:58 - Base Exploration and Gear Looting 📖 Interactive written walkthrough with clickable timestamps: https://pixelfungaming.com/videos/ghost-recon-breakpoint-save-madera-walkthrough

RDR2 - Canada Goose (Ambarino) Location
Hunting begins at Cattail Pond in Red Dead Online as the character tracks local wildlife using Eagle Eye. The character takes aim and fires upon a group of Canada Geese and a Rocky Mountain Bighorn Ram near the water's edge. After the initial engagement, the character navigates the marshy terrain to retrieve and skin the carcasses, successfully completing a daily challenge for geese. The hunt continues as a Common Loon is spotted and shot down from the sky. Finally, the map is displayed to show the exact hunting location within the Grizzlies West region, north of Valentine. Chapters: 0:00:00 - 0:00:17 - Tracking Wildlife at Cattail Pond 0:00:17 - 0:00:43 - Hunting Geese and Bighorn Ram 0:00:43 - 0:01:04 - Retrieving Carcasses from the Shore 0:01:04 - 0:01:44 - Skinning Geese and Challenge Completion 0:01:44 - 0:02:25 - Taking Down and Skinning a Common Loon 0:02:25 - 0:02:49 - Map Overview of the Hunting Location 📖 Interactive written walkthrough with clickable timestamps: https://pixelfungaming.com/videos/rdr2-canada-goose-ambarino-location

Call Of Duty Ghosts : Mission 2 & 3
The mission begins inside a heavily damaged building, likely an auditorium, where the player, Hesh, and Riley navigate through debris and collapsed seating. The squad exits into a ruined, overgrown urban environment, confirming their safety after meeting local wildlife. They move towards a fortified wall, making radio contact with other friendly units and coordinating a rendezvous. After meeting Corporal Davis, the team initiates a sweep, engaging and eliminating a Federation recon team near destroyed cars. A heavy firefight ensues as the squad pushes toward a gas station, encountering numerous Federation troops and an attack helicopter. The player uses an assault rifle to provide suppressive fire and eliminate ground targets while taking cover near an ambulance. The objective shifts to destroying the enemy air support, requiring the player to utilize the MAAWS rocket launcher to successfully eliminate the helicopter. The team regroups at a checkpoint, and the player boards an MATV, taking the gunner position. The scene transitions to a secure command center at Fort Santa Monica for a mission briefing with Elias. Elias assigns Hesh and the player a high-priority recon mission into 'No Man's Land'—the heavily destroyed zone between LA and San Diego created by the Odin strikes. The mission then moves to a dense, overgrown forest area within No Man's Land. The player switches to Riley's POV (K9 tactical camera) to scout and perform stealth takedowns on Federation patrols. They successfully neutralize multiple enemies silently using Riley. The squad navigates through the hostile wilderness, encountering more entrenched enemy forces near wrecked vehicles and structures, leading to several intense firefights. The team pushes toward Firebase Charlie, engaging a large contingent of Federation troops positioned in buildings and behind barricades. After clearing the area, the team completes the objective, and the scene transitions to a cinematic depicting the Ghosts' reputation, ending the video. Chapters: 0:00:00 - 0:28:00 - Navigating the Ruined Theater and Exterior Transition 0:28:00 - 1:19:00 - Exiting the Interior and Meeting Allied Forces 1:19:00 - 2:37:00 - Initial Engagement with Federation Recon Team 2:37:00 - 3:54:00 - Firefight near Gas Station and Helicopter Arrival 3:54:00 - 6:53:00 - Air Defense and Acquiring the MAAWS Rocket Launcher 6:53:00 - 8:57:00 - Destroying the Second Helicopter and Entering the MATV 8:57:00 - 11:25:00 - Fort Santa Monica Briefing and Mission Assignment to No Man's Land 11:25:00 - 12:40:00 - Loading Sequence and Mission Start: No Man's Land 12:40:00 - 14:33:00 - Stealth Recon with Riley (K9 Tactical Camera) 14:33:00 - 17:20:00 - House Clearing and Intense Close-Quarters Combat 17:20:00 - 21:55:00 - Tunnel Advance and Engagement at Derelict Shipwreck 21:55:00 - 24:38:00 - Rally Point and Utilizing Riley for Stealth Kills 24:38:00 - 26:54:00 - Approaching Firebase Charlie Through the Forest 26:54:00 - 29:26:00 - Heavy Firefight at Firebase Charlie and Objective Complete 29:26:00 - 31:04:00 - Final Cinematic and Mission Conclusion 📖 Interactive written walkthrough with clickable timestamps: https://pixelfungaming.com/videos/call-of-duty-ghosts-mission-2-3

Red Dead Online - Virginia Opossum Location
Tracking begins in the dark marshes near Van Horn, targeting Virginia Opossums for a daily challenge. The first opossum falls quickly to a repeater shot, followed by a second hunt that completes the objective. After consulting the map, the journey leads to a hidden bandit camp nestled by the Kamassa River. The assault on the hideout is fierce, utilizing cover and high-precision shooting to eliminate the outlaw gang under the cover of night. Once the camp is nearly cleared, the leader surrenders, facing a grim end that results in a loss of honor. The mission concludes with a systematic looting of the bodies and the campsite before departing the area. Chapters: 0:00:00 - 0:00:39 - Tracking and hunting the first Virginia Opossum at night 0:00:39 - 0:01:07 - Locating and skinning the second opossum to finish the daily challenge 0:01:07 - 0:01:53 - Navigating the map and riding toward the Kamassa River bandit hideout 0:01:53 - 0:02:44 - Engaging in a high-stakes shootout with the outlaw gang at their camp 0:02:44 - 0:03:55 - Systematically looting the fallen enemies for supplies and valuables 0:03:55 - 0:04:16 - Final combat phase ending with the execution of the bandit leader 0:04:16 - 0:04:40 - Clearing the remaining loot and walking back to the horse 📖 Interactive written walkthrough with clickable timestamps: https://pixelfungaming.com/videos/red-dead-online-virginia-opossum-location

RDR2 - Burning Lemoyne Raiders
The action kicks off with an intense gunfight in a lush, foggy clearing as the character swiftly eliminates several attackers using a rifle and then proceeds to hogtie survivors. Strategic movement behind trees provides cover from incoming fire from mounted enemies. After subduing multiple foes, the character meticulously drags and arranges the bound bodies into a circular formation on the grass. A fire bottle is then deployed, igniting the circle in a brutal display. Combat continues as more enemies arrive on horseback, leading to further gunfights and close-quarter executions. The mission concludes after a final enemy is dispatched with a hatchet and added to the grim arrangement in the clearing. Chapters: 0:00:00 - 0:01:00 - Initial open field shootout and first kills 0:01:00 - 0:02:30 - Subduing survivors and gathering them together 0:02:30 - 0:03:20 - Meticulously preparing the circular body arrangement 0:03:20 - 0:03:45 - Igniting the fire bottle for a brutal execution 0:03:45 - 0:04:45 - Engaging enemy reinforcements on horseback 0:04:45 - 0:05:45 - Close-quarter combat with hatchet and pistols 0:05:45 - 0:06:21 - Final scene and surveying the aftermath 📖 Interactive written walkthrough with clickable timestamps: https://pixelfungaming.com/videos/rdr2-burning-lemoyne-raiders

RDR2 - Beaver Location
A focused hunting expedition unfolds in the wetlands of Red Dead Redemption 2. The hunt begins with a stealthy approach toward a beaver lodge on the Kamassa River. The character carefully tracks a North American Beaver near its dam, utilizing a bow for a silent and clean kill. After retrieving the carcass from the water's edge, a detailed skinning process follows, yielding a good quality pelt, scent glands, and stringy meat. Following the harvest, a survey of the surrounding environment reveals the density of beaver activity in this specific region. The gameplay concludes with a comprehensive look at the world map, pinpointing the exact location south of the Elysian Pool and west of the Van Horn Trading Post, establishing this area as a primary habitat for those seeking crafting materials. Chapters: 0:00:00 - 0:00:06 - Stalking the target at the dam 0:00:06 - 0:00:13 - Executing a clean bow shot 0:00:13 - 0:00:30 - Skinning and collecting materials 0:00:30 - 0:00:47 - Observing the hunting grounds 0:00:47 - 0:01:24 - Identifying the map location 📖 Interactive written walkthrough with clickable timestamps: https://pixelfungaming.com/videos/rdr2-beaver-location

Hitman Sniper : Primary Target Markus Krug
The video opens with the game's loading screen, displaying tips related to silent kills and audio immersion. The mission selection screen appears, highlighting Chapter 1, Mission 4 of 10, with the objectives being to dispose of a body in the jacuzzi and eliminate the primary target, Markus Krug. After viewing the upgrade path for weapon parts, the mission begins. The character assumes a sniper position overlooking a luxurious mountain villa at night. Using the scope, the character identifies the primary target, Markus Krug, near a large circular jacuzzi. The first objective involves disposing of a body in the jacuzzi. The character waits for a nearby guard to approach the edge of the jacuzzi and takes a clean headshot, causing the body to fall directly into the water, successfully completing the body disposal objective. Attention then shifts to securing the remaining targets. The character quickly eliminates another guard standing near the dining area. A third target, disguised in a Santa costume, patrols the main interior balcony. The character lines up a shot and eliminates the Santa target with a headshot. The primary target, Markus Krug, appears shortly after, standing near the window. The character executes a perfect shot on Krug, neutralizing the high-value target. A final guard is swiftly taken out as the extraction sequence begins. The mission concludes with a successful extraction, displaying the final score based on stealth, efficiency, kill type bonuses, and rewards earned, including weapon parts for the EREBUS sniper rifle blueprint. The gameplay ends, followed by a brief loading screen and the video closing out on the mobile device's home screen. Chapters: 0:00 - 0:17 - Game Loading and Initial Tips 0:17 - 0:45 - Mission Briefing and Weapon Intel Screen 0:45 - 1:50 - Mission Start and Jacuzzi Body Disposal 1:50 - 2:56 - Eliminating Secondary Targets and Primary Target: Markus Krug 2:56 - 3:14 - Mission Success, Score Tally, and Rewards Unlocked 3:14 - 3:25 - Post-Mission Loading and Outro 📖 Interactive written walkthrough with clickable timestamps: https://pixelfungaming.com/videos/hitman-sniper-primary-target-markus-krug

Red Dead Online: Banks Don't Rob Themselves Walkthrough
The mission "Banks Don't Rob Themselves" begins with a briefing from Samson Finch as he coordinates a high-stakes bank heist. The crew dons formal attire and boards a stagecoach to pose as employees from the express company. After navigating the morning fog of Saint Denis, the group reaches the bank and gains entry under the manager's guidance. Once inside the vault area, the outlaws quickly hogtie the manager and begin the delicate process of cracking the safes. The situation escalates rapidly as lawmen discover the robbery, leading to a fierce shootout within the bank's grand lobby. Fighting their way out, the team finds their stagecoach horses killed, forcing a desperate retreat on foot through the city's streets and back alleys. Constant waves of police and lawmen ambush the group as they push toward the Saint Denis cemetery for a tactical stand. After holding out against the law amongst the graves, a train whistle signals their final chance at escape. The outlaws sprint through the slums, reaching the tracks just in time to leap onto a moving locomotive. A final cutscene shows the group reuniting with Finch on the train, celebrating their successful escape with a drink as they leave the city behind. The experience concludes as the team returns to the open world of Saint Denis. Chapters: 0:00:00 - 0:01:07 - Heist briefing with Samson Finch 0:01:07 - 0:02:13 - Stagecoach travel to the Saint Denis bank 0:02:13 - 0:03:10 - Gaining entry to the bank and subduing the manager 0:03:10 - 0:04:18 - Cracking the safe and looting bank bonds 0:04:18 - 0:05:28 - Initial shootout and escape from the bank building 0:05:28 - 0:07:36 - Intense urban combat through Saint Denis streets 0:07:36 - 0:09:06 - Tactical stand in the Saint Denis cemetery 0:09:06 - 0:09:59 - Running through the slums to reach the escape train 0:09:59 - 0:11:43 - Final escape cutscene on the locomotive 0:11:43 - 0:13:31 - Mission completion and post-mission free roam 📖 Interactive written walkthrough with clickable timestamps: https://pixelfungaming.com/videos/red-dead-online-banks-don-t-rob-themselves-walkthrough

RDR2 - Van Horn Dual
John Marston navigates the muddy streets of Van Horn, coming across a stranger who issues a bold challenge. Upon accepting the duel, John prepares by donning his bandana and facing off against his opponent in the middle of the thoroughfare. The duel commences as both men stand ready; John draws his sidearm with precision and delivers multiple shots to the challenger's chest. The stranger collapses onto the dirt road as onlookers watch. John holsters his weapon and walks toward the defeated gunman to survey the scene. Chapters: 0:00:00 - 0:00:08 - Initial encounter and verbal challenge in Van Horn 0:00:08 - 0:00:15 - Acceptance of the duel and combat preparation 0:00:15 - 0:00:22 - Standoff positioning and rising tension 0:00:22 - 0:00:27 - Quick-draw sequence and lethal gunfire 0:00:27 - 0:00:38 - Outcome of the duel and aftermath inspection 📖 Interactive written walkthrough with clickable timestamps: https://pixelfungaming.com/videos/rdr2-van-horn-dual

Red Dead Online - Banded Gila Monster Location
The hunt for a Banded Gila Monster begins in the arid plains of New Austin under the cover of night. Using Eagle Eye, the character tracks the reptile through the sparse vegetation. Once the target is located, a precise shot takes down the lizard. The character then approaches the specimen to collect the hide and meat. After skinning the creature, the pelt is stowed on the horse. A brief look at the world map reveals the exact hunting location situated between Mercer Station and Fort Mercer. The session concludes as the character rides off across the desert landscape. Chapters: 0:00:00 - 0:00:18 - Tracking the Banded Gila Monster using Eagle Eye 0:00:18 - 0:00:28 - Locating and killing the animal 0:00:28 - 0:00:45 - Skinning the reptile and gathering resources 0:00:45 - 0:00:58 - Stowing the pelt on the horse 0:00:58 - 0:01:12 - Reviewing the world map for the hunting location 0:01:12 - 0:01:19 - Departing the area on horseback 📖 Interactive written walkthrough with clickable timestamps: https://pixelfungaming.com/videos/red-dead-online-banded-gila-monster-location

HITMAN 2: The Bank - Poison Kill Walkthrough
Agent 47 infiltrates the high-security Milton-Fitzpatrick bank in New York to neutralize Director Athena Savalas. The mission begins with 47 systematically subduing security guards and concealing their bodies to secure a base of operations. He then navigates through the public and restricted areas of the bank to reach the primary security hub. In the security room, 47 erases all surveillance recordings to maintain his anonymity. Adopting the disguise of an IT technician, he gains entry to the Director's private office. While the Director is occupied, 47 waits for a precise opening to lace her drink with lethal poison. He discreetly retreats to a side room to monitor the outcome. The target eventually consumes the poisoned beverage and collapses, completing the elimination objective without raising an alarm. Agent 47 then exits the office to proceed with the remaining mission goals. Chapters: 0:00:00 - 0:00:50 - Subduing security and hiding evidence 0:00:50 - 0:01:40 - Navigating to the upper bank levels 0:01:40 - 0:02:10 - Erasing surveillance footage in the security room 0:02:10 - 0:02:40 - Arriving at the executive reception desk 0:02:40 - 0:03:30 - Entering the Director's office as IT support 0:03:30 - 0:04:15 - Observation of target movements 0:04:15 - 0:04:40 - Manipulating the executive workstation 0:04:40 - 0:06:10 - Waiting for the target's phone conversation to end 0:06:10 - 0:06:30 - Lacing the target's drink with lethal poison 0:06:30 - 0:07:30 - Monitoring the target until the poison takes effect 0:07:30 - 0:07:42 - Objective complete and extraction from the office 📖 Interactive written walkthrough with clickable timestamps: https://pixelfungaming.com/videos/hitman-2-the-bank-poison-kill-walkthrough

Red Dead Online - Northern Pike Fishing Location
The gameplay begins with the character casting a fishing line into a shallow, clear river nestled within a rocky valley. He carefully reels in the river lure, attracting the attention of a large Northern Pike lurking in the water. After a brief struggle to land the catch, he pulls the fish from the water and inspects it, revealing a significant 18lb 5oz specimen. Choosing to keep the catch, he carries the large fish across the rocky riverbank towards his waiting horse. Upon reaching the mount, he stows the Northern Pike securely on the back of the saddle. The session concludes with a transition to the world map, providing a detailed view of the fishing location within the Roanoke Valley region, situated just north of Annesburg. Chapters: 0:00:00 - 0:00:30 - Casting the lure into the river and waiting for a strike 0:00:30 - 0:00:45 - Hooking and reeling in a large Northern Pike 0:00:45 - 0:01:05 - Carrying the heavy fish along the shoreline 0:01:05 - 0:01:15 - Securing the Northern Pike onto the horse 0:01:15 - 0:01:35 - Pinpointing the fishing location on the world map 📖 Interactive written walkthrough with clickable timestamps: https://pixelfungaming.com/videos/red-dead-online-northern-pike-fishing-location

Red Dead Redemption 2 - Skull Mask Location
The protagonist navigates a dilapidated, partially submerged shack in the heart of the Lakay swamps. After wading through thick, green murky water, a brief check of the world map confirms the location within the Bayou Nwa region. Returning to the interior of the ruin, the character finds a weathered skull resting on a wooden plank near the back wall. This unique item, the Cat Skull Mask, is retrieved and immediately equipped, replacing the character's hat. The sequence concludes with a close-up examination of the mask's eerie bone texture and markings as the character stands amidst the sun-drenched remains of the building. Chapters: 0:00:00 - 0:00:13 - Exploring the abandoned shack in Lakay 0:00:13 - 0:00:23 - Confirming map location in Bayou Nwa 0:00:23 - 0:00:30 - Retrieving the Cat Skull Mask 0:00:30 - 0:00:50 - Showcasing the mask appearance and details 📖 Interactive written walkthrough with clickable timestamps: https://pixelfungaming.com/videos/red-dead-redemption-2-skull-mask-location

Sniper Elite 3 - Halfaya pass - Part 2
Embark on a high-stakes mission in Sniper Elite III as we tackle the challenging Halfaya Pass. This complete walkthrough showcases tactical stealth, precision sniping, and the game's signature X-ray kill cams in a mission to disrupt enemy forces in North Africa. Watch as we navigate through treacherous canyon paths, eliminate key targets from massive distances, and complete primary objectives like destroying heavily guarded artillery batteries. This video also covers optional objectives, including the sabotage of a motor pool to cripple enemy mobility. Experience the full tension of WWII tactical sniping, from careful planning and relocation to the explosive final exfiltration. Whether you're looking for a complete guide or just some intense sniping action, this Halfaya Pass walkthrough has you covered. Chapters: 0:00:00 - Mission Start: Infiltrating Halfaya Pass 0:04:19 - Precise X-Ray Double Kill Highlight 0:09:30 - Navigating the Upper Ridge Patrols 0:15:15 - Optional Objective: Sabotaging the Motor Pool 0:20:45 - Clearing the Canyon Watchtowers 0:25:30 - Infiltrating the Motor Pool Base 0:27:40 - Motor Pool Sabotage: Major Explosion 0:32:00 - Locating the Final Artillery Battery 0:38:15 - Tactical Sniper Duel in the Valley 0:44:50 - Completing the Final Primary Objective 0:49:12 - Mission Complete: Exfiltration and Results Stats 📖 Interactive written walkthrough with clickable timestamps: https://pixelfungaming.com/videos/sniper-elite-3-halfaya-pass-part-2

RDR2 - Violet Snowdrop (Roanoke Ridge Location )
The character rides a horse through the foggy hillside of Ambarino during the early morning hours. After dismounting, the focus shifts to gathering flora for a Daily Challenge. Using Eagle Eye, the character identifies several Violet Snowdrop plants nestled against rocky outcrops and picks them. Throughout the search, various animal tracks like deer and rabbits are highlighted in the environment. The gathering continues until the fifth Violet Snowdrop is harvested, successfully completing a Daily Challenge. During the foraging, an invitation for a Master Archer event appears on the screen. The character then accesses the player menu to review the Daily Challenges and confirms the completion of a 28-day streak. A special gold buckle award is granted for this long-term consistency in gameplay. Finally, the character remounts the horse as the sun begins to peek over the mountain ridges, continuing the journey across the open world. Chapters: 0:00:00 - 0:00:10 - Initial ride through the morning fog 0:00:11 - 0:00:54 - Locating and picking Violet Snowdrops 0:00:55 - 0:01:45 - Using Eagle Eye to forage on the hillside 0:01:46 - 0:02:10 - Master Archer event invite and environment scanning 0:02:11 - 0:02:22 - Completing the gather Daily Challenge 0:02:23 - 0:02:54 - Menu navigation and 28-day streak award confirmation 📖 Interactive written walkthrough with clickable timestamps: https://pixelfungaming.com/videos/rdr2-violet-snowdrop-roanoke-ridge-location

RDR2 - Arthur Morgan Grave Location
John Marston traverses a rugged, rocky incline in the Grizzlies East region, heading toward a high vantage point. Upon reaching the summit, he finds the grave of Arthur Morgan perched precariously on a cliff edge overlooking a vast valley. John stands in quiet contemplation before the wooden cross, which bears the inscription 'Blessed are those who hunger and thirst for righteousness.' The map indicates the grave's precise position east of Donner Falls and north of Bacchus Bridge. After examining the burial site, John takes a moment to survey the scenic landscape of the surrounding mountains and forests before the scene concludes. Chapters: 0:00:00 - 0:00:17 - Climbing the rocky ridge in Grizzlies East 0:00:17 - 0:00:33 - Arriving at Arthur Morgan's grave site 0:00:33 - 0:00:46 - Map view of the grave's exact location 0:00:46 - 0:01:01 - Surveying the mountain vista from the cliffside 📖 Interactive written walkthrough with clickable timestamps: https://pixelfungaming.com/videos/rdr2-arthur-morgan-grave-location

RDR2 - Evergreen Huckleberry Location
The character navigates the swampy terrain of Bluewater Marsh under a stormy night sky. Harvesting begins with Oleander Sage near the riverbank as lightning flashes across the horizon. The journey continues to nearby bushes to gather Evergreen Huckleberries, successfully completing a daily challenge and resulting in a rank increase to 53. After securing the necessary herbs, the character moves through the dense vegetation to find another cluster of plants for harvesting. The session concludes with a detailed check of the world map, pinpointing the exact gathering location in the marshland north of Saint Denis. Chapters: 0:00:00 - 0:00:15 - Gathering Oleander Sage during a thunderstorm 0:00:15 - 0:00:25 - Completing the Evergreen Huckleberry daily challenge 0:00:25 - 0:00:42 - Navigating through the Bluewater Marsh landscape 0:00:42 - 0:01:05 - Harvesting additional herb samples in the woods 0:01:05 - 0:01:26 - Checking the world map for precise location 📖 Interactive written walkthrough with clickable timestamps: https://pixelfungaming.com/videos/rdr2-evergreen-huckleberry-location
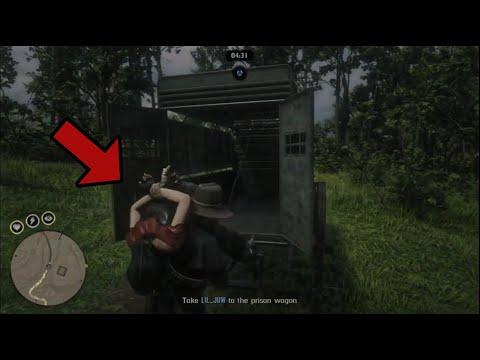
Red Dead Online: Capturing Player Bounties ALIVE
The gameplay features a series of high-stakes player bounty hunts across the diverse landscapes of Red Dead Online. Each mission involves tracking down real players who have accrued significant bounties. Tactics range from precision long-distance sniping while galloping on horseback in Lemoyne to intense close-quarters combat using bolos and shotguns in the dusty town of Tumbleweed. The character frequently utilizes a bounty wagon to securely transport captured targets over long distances. Environmental hazards, such as a sudden grizzly bear attack in the forests of Tall Trees, add unpredictable challenges to the pursuits. Successful captures are delivered to various drop-off points, including prison wagons in the field and local sheriff's offices, earning rewards and increasing bounty hunter rank. Chapters: 0:00:00 - 0:01:45 - Pursuit of LIL_JUW through Scarlett Meadows 0:01:45 - 0:02:45 - Capturing the target and summoning the bounty wagon 0:02:45 - 0:04:06 - Driving and delivering the bounty to the prison wagon 0:04:06 - 0:05:15 - Grizzly bear encounter during the search for Enzo 0:05:15 - 0:06:45 - High-speed sniping and capture of COB1991 0:06:45 - 0:07:47 - Bounty wagon transport through Great Plains 0:07:47 - 0:09:46 - Intense hunt and capture of AKUL___GHOST in Tumbleweed 📖 Interactive written walkthrough with clickable timestamps: https://pixelfungaming.com/videos/red-dead-online-capturing-player-bounties-alive

RDR 2 Online - Wrong Side Of The Tracks
The mission 'The Right Side of the Tracks' begins with a preparation phase where players restock ammunition before entering the world. A cutscene introduces Clinton Arnsdale, a wealthy man demanding the Sheriff recover his stolen luxury goods. When the Sheriff refuses due to lack of resources, Arnsdale hires the group to capture the thief Bob Crawfish and his associates alive. Players ride out to a remote, derelict hideout where a fierce gunfight breaks out against Crawfish's numerous guards. Once the area is clear, the primary targets attempt a desperate escape on horseback. A high-speed pursuit follows along the riverbanks, where players use lassos to snag the fleeing outlaws and hogtie them. The captured thieves are stowed on horses and transported to a section of railway tracks at Fort Riggs. There, Arnsdale confronts them and extracts the location of his stolen property. After paying the group, he orders them to leave the men tied to the tracks. Faced with a moral dilemma, the players choose to execute the thieves personally as a train approaches in the distance, completing the mission with a significant loss of honor. Chapters: 0:00:00 - 0:01:26 - Mission Lobby and Resource Preparation 0:01:27 - 0:02:31 - Contracting with Clinton Arnsdale 0:02:32 - 0:03:05 - Infiltrating the Crawfish Hideout 0:03:06 - 0:04:18 - Shootout at the Abandoned Settlement 0:04:19 - 0:05:40 - High-Speed Horse Pursuit and Capture 0:05:41 - 0:06:30 - Transporting Captives to Fort Riggs 0:06:31 - 0:09:07 - Arranging the Thieves on the Tracks 0:09:08 - 0:10:25 - Final Confrontation and Execution Decision 0:10:26 - 0:11:10 - The Train Arrives and Mission Conclusion 📖 Interactive written walkthrough with clickable timestamps: https://pixelfungaming.com/videos/rdr-2-online-wrong-side-of-the-tracks

Red Dead Redemption 2 - Collecting Ingredients For Moonshine
The mission begins with the character searching a lush forest for specific flora. He locates several Indian Tobacco plants and carefully gathers them. Once enough plants are collected, the objective shifts to returning to a nearby moonshine camp. Navigating through the dense woods and over small trails, the character reaches a secluded campsite where a group of moonshiners is working. Upon arrival, a moonshiner instructs the character to add the gathered plants to the brewing still. The character approaches the large copper vessel and adds the Indian Tobacco, causing a puff of steam to rise from the hatch. The head moonshiner samples the new batch, commenting on its potent, prickly flavor. As a reward for the assistance, he permits the character to loot a nearby supply chest. The character opens the chest and retrieves bottles of Aged Pirate Rum and Moonshine before preparing for the next move. Chapters: 0:00:00 - 0:00:35 - Gathering Indian Tobacco in the forest 0:00:35 - 0:01:20 - Running back to the hidden moonshine camp 0:01:20 - 0:01:50 - Interacting with the moonshiners at the campsite 0:01:50 - 0:02:10 - Adding ingredients to the copper still 0:02:10 - 0:02:53 - Sampling the batch and receiving a reward 0:02:53 - 0:03:15 - Looting the supply chest for rum and moonshine 📖 Interactive written walkthrough with clickable timestamps: https://pixelfungaming.com/videos/red-dead-redemption-2-collecting-ingredients-for-moonshine

RDR2 - Oleander Sage (Lemoyne) Location
The gameplay focuses on completing a daily challenge in Red Dead Online by foraging for Oleander Sage in the Bluewater Marsh region. The character meticulously searches the swampy undergrowth to find the purple-flowered plants, successfully picking multiple specimens to meet the challenge requirement. Following this, the character mounts their horse and navigates the dense, foggy wetlands, moving through thick foliage toward the riverbank. Frequent map checks are utilized to pinpoint additional herb locations and navigate the complex terrain. The journey showcases the detailed environment of the marsh, including various local flora and the winding paths along the Kamassa River, ending with a final survey of the area to locate more resources. Chapters: 0:00:00 - 0:00:17 - Completing the Oleander Sage Daily Challenge 0:00:17 - 0:00:40 - Mounting the horse and checking the map for locations 0:00:40 - 0:01:26 - Navigating the swampy terrain of Bluewater Marsh 0:01:26 - 0:01:41 - Harvesting additional Oleander Sage plants 0:01:41 - 0:02:13 - Exploring the riverbank and final map consultation 📖 Interactive written walkthrough with clickable timestamps: https://pixelfungaming.com/videos/rdr2-oleander-sage-lemoyne-location

HITMAN Patient Zero : Brother Akram - Silent Assassin
Agent 47 infiltrates a high-security residential area in Sapienza under the cover of night. The mission begins with a brisk walk through the cobblestone streets to a specific apartment building. After picking the lock on the front door, 47 meticulously disables security cameras with suppressed pistol fire to remain undetected. He navigates through various rooms, utilizing balconies and windows to move between units with expert agility. In one apartment, he overflows a sink to lure a guard into a bathroom for a silent takedown, securing the area. Moving into the kitchen, he stealthily adds a poison vial to a simmering pot of food on the stove. He then retreats to a tactical hiding spot, patiently waiting for his primary target, Brother Akram, to take the bait. Once Akram enters the bathroom, 47 executes a swift drowning kill and hides the body to prevent discovery. The operation continues as 47 moves to a neighboring building, using thrown objects as distractions to bypass residents and security before picking another lock to reach the final objective of the mission. Chapters: 0:00:00 - 0:01:15 - Sapienza Street Navigation and Initial Infiltration 0:01:15 - 0:02:45 - Security Camera Sabotage and Apartment Maneuvers 0:02:45 - 0:04:30 - Neutralizing Guards and Setting Kitchen Traps 0:04:30 - 0:06:05 - Tactical Waiting and Target Observation 0:06:05 - 0:07:15 - Elimination of Brother Akram and Body Disposal 0:07:15 - 0:08:45 - Secondary Building Infiltration and Mission Progression 📖 Interactive written walkthrough with clickable timestamps: https://pixelfungaming.com/videos/hitman-patient-zero-brother-akram-silent-assassin

Farcry 6 live #3
Experience over 40 minutes of intense tank-focused gameplay in Far Cry 6. This walkthrough showcases the raw power of armored warfare as we navigate the treacherous roads of Yara, specifically targeting and liberating key FND checkpoints and bases around the Esperanza region. Watch as we take control of a heavily armored tank to dismantle enemy blockades, engage in fierce duels with enemy armor, and bring down pesky helicopters with precision cannon fire. Throughout the video, we explore various regions including Lozania, Noventarmas, and Barrial, completing multiple objectives such as capturing the Esperanza South and East checkpoints, as well as the Oku Creek checkpoint. You'll see strategic combat tactics, vehicle hijacking mechanics, and the importance of field repairs to keep your war machine running. Whether it's long-range shelling of fortified positions or close-quarters coaxial machine gun fire against infantry, this video covers the comprehensive tank experience in Far Cry 6. Don't miss the high-stakes action as we push back against Castillo's forces one checkpoint at a time. Chapters: 0:00:00 - Introduction and Mission Briefing 0:02:45 - Tank Deployment and Initial Road Combat 0:05:20 - Approaching Esperanza South Checkpoint 0:08:15 - Intense Siege of the South Checkpoint 0:09:32 - Esperanza South Checkpoint Captured 0:12:40 - Looting and Resupply at the Captured Site 0:15:15 - Pushing Northward Through Noventarmas 0:18:50 - Engaging Enemy Reinforcements and Armor 0:21:20 - Tactical Maneuvering in Botanical Gardens 0:24:15 - High-Speed Tank Hijacking Maneuver 0:27:30 - Assault on Esperanza East Checkpoint 0:30:12 - Esperanza East Checkpoint Secured 0:33:45 - Advancing on Oku Creek Checkpoint 0:36:10 - Neutralizing Anti-Aircraft Site Delta 0:39:20 - Oku Creek Checkpoint Capture and Final Looting 📖 Interactive written walkthrough with clickable timestamps: https://pixelfungaming.com/videos/farcry-6-live-3

RDR2 - Wild Animal Kills Challenge (1st Place)
The session opens with a player scouting a dense forest area as a countdown timer for a free-roam event ticks down. Before the competition officially begins, several small animals like squirrels and rabbits are tracked and hunted to warm up. Once the Wild Animal Kills Challenge starts, the hunter quickly gains points by picking off small game on foot before whistling for a horse. Mounting up allows for much faster traversal across the rolling hills and wooded valleys, leading to encounters with higher-value targets. The hunter stays on the move, frequently spotting and taking down rare animals like white wolves and black bears, which provide significant point boosts on the leaderboard. Other players are seen nearby, but the focus remains on efficient hunting and maintaining a high score. As the weather shifts to a heavy rainstorm, the hunter continues the pursuit, navigating through thick brush and steep terrain to find remaining targets. The event concludes with the player securing the top spot on the leaderboard, followed by a victory animation and a final display of the competition results. Chapters: 0:00:00 - 0:00:55 - Pre-challenge scouting and practice hunting in the woods 0:00:55 - 0:01:35 - Start of the Wild Animal Kills Challenge on foot 0:01:35 - 0:03:00 - Transitioning to horseback hunting to cover more ground 0:03:00 - 0:04:45 - Tracking and taking down high-value rare animals 0:04:45 - 0:05:55 - Final hunting push through rain before the time limit 0:05:55 - 0:06:42 - Challenge completion and final results leaderboard 📖 Interactive written walkthrough with clickable timestamps: https://pixelfungaming.com/videos/rdr2-wild-animal-kills-challenge-1st-place

RDR2 - Hosea & Lenny's Grave Location
Arthur Morgan stands in the misty wetlands of Bluewater Marsh as the sun sets over the horizon. He approaches two somber gravesites marked by simple wooden crosses. The first headstone marks the resting place of Hosea Matthews, while the adjacent grave belongs to Lenny Summers. As a train whistles and chugs along the nearby tracks, the camera lingers on each name, capturing a quiet moment of reflection. The scene transitions to the world map, pinpointing the exact location between Lagras and Saint Denis, providing a guide for others to find this hidden story location. The footage concludes with a final view of the lonely burial ground amidst the swamp grass. Chapters: 0:00:00 - 0:00:08 - Arthur approaches the burial site in Bluewater Marsh 0:00:08 - 0:00:16 - Close-up view of Hosea Matthews' grave 0:00:16 - 0:00:28 - Close-up view of Lenny Summers' grave 0:00:28 - 0:00:48 - Map view showing the specific coordinates of the graves 0:00:48 - 0:00:52 - Final look at the gravesites 📖 Interactive written walkthrough with clickable timestamps: https://pixelfungaming.com/videos/rdr2-hosea-lenny-s-grave-location

Hitman: The Hexagon Protocol - Level 4 Walkthrough
Agent 47 undertakes a challenging mission in Paris, focused on eliminating two targets, Cédric Gendron and Donatien Marleau, while disguised as a security guard. The mission has complications including 'Extreme Security' and 'No Ballistics,' meaning non-target kills result in a penalty, and bullets are restricted. The gameplay starts by infiltrating the restricted area outside the palace, avoiding guards. 47 locates a public restroom and subdues a maintenance worker, acquiring a crowbar. Using the crowbar, 47 breaks into a surveillance room and destroys the security evidence to avoid being compromised by cameras. 47 then takes out a security guard in the basement to acquire the required disguise. Posing as a security guard, 47 navigates the basement storage area, utilizing a fuse box to lure and neutralize two additional security guards, collecting a remote mine disarm device. 47 then heads back outside, navigating the gardens and avoiding patrolling guards. The first target, Cédric Gendron, is found talking on his phone by the river. 47 uses a fiber wire to silently eliminate the target and dumps the body into the water. With the first target eliminated, 47 moves toward the second target, Donatien Marleau, who is discussing the event near a parked helicopter. 47 lures and subdues Marleau, snapping his neck with the fiber wire and successfully completing the elimination objectives. 47 exfiltrates the mission area by escaping through the helicopter. The mission ends with a successful debriefing and a high score, despite the penalty for non-target kills. Chapters: 0:00:00 - 0:01:38 - Mission Briefing and Start 0:01:38 - 0:04:30 - Initial Infiltration and Acquiring the Crowbar 0:04:30 - 0:08:24 - Subduing Security Guard for Disguise and Entering the Basement 0:08:24 - 0:10:07 - Disabling Surveillance and Collecting the Mine Disarm Device 0:10:07 - 0:13:42 - Navigating the Grounds and Eliminating Cédric Gendron 0:13:42 - 0:19:48 - Moving to the Second Target and Avoiding Compromise 0:19:48 - 0:23:11 - Eliminating Donatien Marleau and Mission Exit 0:23:11 - 0:24:23 - Mission Accomplished and Scoring Screen 📖 Interactive written walkthrough with clickable timestamps: https://pixelfungaming.com/videos/hitman-the-hexagon-protocol-level-4-walkthrough

HITMAN 3: Elusive Target | The Collector - Silent Assassin
The mission "The Collector" begins with a detailed briefing on Kody Haynes, an obsessive art collector and the high-profile target for Agent 47 at Thornbridge Manor in Dartmoor. Agent 47 arrives on a motorcycle and immediately begins a stealthy infiltration of the manor grounds, navigating through tall grass and scaling stone walls to bypass heavy guard patrols. After finding a secluded drainpipe, he scales the building and enters through a second-story window. Inside, he uses his instinct to monitor the movements of the manor's inhabitants. He quickly locates a specific painting and carefully cuts it from its frame to fulfill a secondary objective. To facilitate movement within the building, 47 lures a staff member into a bathroom, knocks him out, and assumes his waiter disguise. Now blending in, he tracks Haynes, who is moving through the manor under the guise of a wildlife inspector. The pursuit leads to a secluded area where 47 uses a coin toss to lure the target into a small side room. Once isolated, 47 eliminates Haynes with a silent takedown and hides the body in a nearby crate. After collecting the target's personal intel, 47 makes a clean exit from the manor. He returns to his motorcycle and escapes the area undetected, completing the mission with a perfect Silent Assassin rating and unlocking various rewards. Chapters: 0:00:00 - 0:01:01 - Mission briefing and target overview 0:01:01 - 0:02:18 - Infiltration of the Thornbridge Manor grounds 0:02:18 - 0:03:15 - Scaling the exterior wall and entering the manor 0:03:15 - 0:04:42 - Luring a staff member to acquire a waiter disguise 0:04:42 - 0:06:58 - Scouting the interior and identifying target movements 0:06:58 - 0:07:05 - Stealing the target artwork from the manor wall 0:07:05 - 0:09:18 - Shadowing Kody Haynes through the upper floors 0:09:18 - 0:12:45 - Executing a silent elimination and hiding the body 0:12:45 - 0:13:25 - Stealthy exfiltration through the manor grounds 0:13:25 - 0:13:40 - Mission completion and escape cinematic 0:13:40 - 0:14:32 - Final mission results and Silent Assassin rating 📖 Interactive written walkthrough with clickable timestamps: https://pixelfungaming.com/videos/hitman-3-elusive-target-the-collector-silent-assassin
HITMAN 2: New York - Disable Surveillance System Walkthrough
This video demonstrates a stealthy infiltration mission in a high-security bank vault environment. It showcases various gameplay mechanics including using security keycards to access restricted areas, navigating through complex laser-based security systems by timing movements, neutralizing security personnel silently, hiding bodies to avoid detection, and interacting with security terminals to erase surveillance evidence and disable systems. The gameplay highlights the importance of timing and environmental awareness in a high-stakes stealth scenario. 📖 Chapters: 0:00:00 - 0:00:10 - Accessing the high-security vault area using a keycard 0:00:10 - 0:00:30 - Navigating through active laser security grids in the hallway 0:00:30 - 0:00:55 - Silent neutralization of a security guard in the control room 0:00:55 - 0:01:10 - Concealing the neutralized body in a nearby container 0:01:10 - 0:01:21 - Erasing security recordings and disabling surveillance systems

RDR2 Online - Stranger Mission - Horse Theft
The mission begins with a cutscene where a man named Alden provides details for a horse theft job at Braithwaite Manor. He explains the value of the target and the intended delivery location. Once the dialogue concludes, the character mounts their horse and travels across the countryside under the cover of night. Upon reaching the manor grounds, the character dismounts and utilizes stealth, moving through dense shrubbery and crops to avoid detection by guards. The character successfully reaches the stables, neutralizes a groom with a silent takedown, and steals the target horse. A journey through varied terrain follows as the character rides the stolen animal to Hill Haven Ranch while contending withpursuers. The gameplay concludes with the character hitching the horse at the destination, leading to mission completion and a reward screen. Chapters: 0:00:00 - 0:01:15 - Mission briefing with Alden regarding horse theft 0:01:15 - 0:02:35 - Night-time travel toward Braithwaite Manor 0:02:35 - 0:03:25 - Stealth infiltration of the manor grounds and stables 0:03:25 - 0:04:15 - Stealing the target horse and beginning the escape 0:04:15 - 0:05:10 - Delivery ride to Hill Haven Ranch through forests and fields 0:05:10 - 0:05:39 - Successful delivery and mission completion rewards 📖 Interactive written walkthrough with clickable timestamps: https://pixelfungaming.com/videos/rdr2-online-stranger-mission-horse-theft

RDR2 - Annoying The Monk
Arthur Morgan encounters a mysterious meditating monk perched on a treacherous cliff edge high in the mountains of Ambarino. He initially attempts to engage the monk in conversation, offering sarcastic advice about focusing and staying balanced near the steep drop. When the monk maintains his vow of silence, the interaction turns violent as Arthur draws his sidearm and fires a shot into the monk's back. Remarkably, the monk survives and immediately flees, leading Arthur on a frantic chase across the rugged mountain ridge. Arthur continues to fire his revolver while pursuing the robed figure through tall grass and rocky outcrops. The chase eventually ends with Arthur standing at a high vantage point, catching his breath while surveying the expansive landscape as the monk disappears from view. Chapters: 0:00:00 - 0:00:30 - Arthur approaches the silent meditating monk 0:00:30 - 0:00:58 - Arthur antagonizes the monk with sarcastic remarks 0:00:58 - 0:01:05 - Arthur draws his revolver and shoots the monk 0:01:05 - 0:01:35 - The monk flees across the ridge with Arthur in pursuit 0:01:35 - 0:02:00 - Arthur continues firing shots during the mountain chase 0:02:00 - 0:02:20 - Arthur surveys the valley as the monk escapes 📖 Interactive written walkthrough with clickable timestamps: https://pixelfungaming.com/videos/rdr2-annoying-the-monk

MAFIA 3 | Definitive Edition Live #8
The mission begins with the character driving a black muscle car at sunset toward the objective marker: Kill Remy Duvall and Find a Southern Union Deacon. The character drives along a major highway, passing through industrial areas and into the city, maintaining high speed while listening to classic rock music. Arriving downtown, the character intentionally rams an enemy vehicle, triggering a 'Retaliation' state and heavy vehicle damage. A high-speed police chase ensues immediately. The character attempts to evade multiple police units, weaving through traffic and taking continuous gunfire, visible through blood splatters on the screen and further car damage. The character uses an Adrenaline injection to restore health while continuing the intense pursuit. The character eventually drives the heavily damaged car onto an elevated overpass, where multiple police vehicles converge. The character is forced to exit the vehicle and continues the evasion on foot, running rapidly along the concrete barrier of the highway as police broadcast warnings about the extremely dangerous suspect. The character descends from the overpass and runs through the downtown streets and sidewalks, attempting to shake off the pursuit. The police lose visual contact, initiating a localized search phase. The character proceeds on foot through a city park area, dodging civilians while closing in on the final objective location to locate and interrogate the Deacon. Chapters: 0:00 - 1:57 - High-Speed Drive to Objective 1:57 - 2:14 - Target Engagement and Initial Vehicle Damage 2:14 - 3:47 - Intense Police Chase and Vehicle Evasion 3:47 - 4:43 - Bailing out and Foot Pursuit on the Overpass 4:43 - 6:23 - Downtown Evasion and Searching for the Deacon 📖 Interactive written walkthrough with clickable timestamps: https://pixelfungaming.com/videos/mafia-3-definitive-edition-live-8

Red Dead Redemption 2 - Found Corpse Of Escaped Slave
A lone rider navigates the foggy riverbanks of the Lannahechee River on horseback during a heavy downpour. After dismounting, a discovery awaits on the muddy shore—a decomposed corpse washed up by the rising waters. The character loots the body, uncovering a poignant document titled 'Letter to Uncle Lewis from Elijah.' This letter provides deep environmental storytelling, detailing a harrowing escape from slavery and a desperate journey toward freedom in Canada. The exploration concludes with a detailed look at the map, pinpointing the exact location of this somber discovery south of Shady Belle for those seeking to find it themselves. Chapters: 0:00:00 - 0:00:13 - Riding along the Lannahechee Riverbank 0:00:13 - 0:00:25 - Discovery of a decomposed corpse 0:00:25 - 0:00:41 - Looting the Letter to Uncle Lewis from Elijah 0:00:41 - 0:01:13 - Reading the tragic letter's contents 0:01:13 - 0:01:36 - Revealing the exact map location 📖 Interactive written walkthrough with clickable timestamps: https://pixelfungaming.com/videos/red-dead-redemption-2-found-corpse-of-escaped-slave

Red Dead Redemption 2 - Discovering Shack Where Slave Was Chained
The journey begins at a map marker for Old Harry Fen, located south of Braithwaite Manor in Lemoyne. Arthur Morgan rides his horse through the woods and approaches a small, dilapidated wooden cabin. After dismounting, he enters the cramped interior which contains old shackles bolted to the walls, revealing its past as a slave pen. Arthur discovers a loose floorboard near the back wall and pries it up to reveal a hidden stash. From this hiding spot, he retrieves a family photograph and several newspaper clippings. Arthur examines the photograph, showing a family standing in front of the very shack he is currently searching. He then explores the rest of the dwelling, finding a cluttered table with canned goods and a small cot. The investigation concludes as Arthur reads a 'Slave Catcher Newspaper Scrap,' a reward notice for a runaway named Curtis Gayle, providing grim historical context to the site. Chapters: 0:00:00 - 0:00:10 - Black screen intro 0:00:10 - 0:00:25 - Locating Old Harry Fen on the map 0:00:25 - 0:00:38 - Riding to the abandoned cabin 0:00:38 - 0:00:59 - Searching the shack and finding the floorboard 0:00:59 - 0:01:23 - Examining the family photograph 0:01:23 - 0:02:14 - Exploring the slave pen interior 0:02:14 - 0:03:21 - Reading the Slave Catcher reward notice 📖 Interactive written walkthrough with clickable timestamps: https://pixelfungaming.com/videos/red-dead-redemption-2-discovering-shack-where-slave-was-chained

Dying light Stream - Looting
Experience an extensive gameplay session of Dying Light 2: Stay Human, focusing on high-stakes exploration and scavenging within the imposing Metro: Cathedral area. The video begins with a cinematic overview of the world after the Harran virus outbreak, setting the stage for Aiden Caldwell's journey as a Pilgrim. We then dive into active gameplay, starting from a survivor safe zone and utilizing the game's signature parkour mechanics to navigate the treacherous rooftops of Villedor. The core of this session takes place inside a massive, converted cathedral, now a GRE quarantine zone. Watch as we methodically search for rare loot, crafting materials, and vital inhibitors. The gameplay demonstrates detailed lockpicking of high-tier chests, uncovering safe codes, and navigating complex internal structures using ropes, ladders, and agile parkour moves. Along the way, we manage Aiden's inventory, utilize boosters to survive chemical hazards and maintain immunity in the dark, and engage in both stealthy takedowns and direct combat with various infected types. The session concludes with a visit to a survivor vendor to trade gathered valuables and craft essential supplies for future missions. Chapters: 0:00:00 - Intro Cinematic: The Fall of Civilization 0:02:10 - Main Menu and Loading into Villedor 0:03:10 - Gameplay Start: Departing the Safe Zone 0:04:30 - Rooftop Parkour and City Navigation 0:07:45 - Entering the Metro: Cathedral Quarantine Area 0:10:45 - Scavenging Supplies and Cracking a Safe 0:14:15 - Navigating Internal Scaffolding and Rafters 0:18:30 - Exploring Darkened Basement Levels 0:22:15 - Scavenging Side Rooms for Crafting Parts 0:26:00 - Combating the Infected in the Main Hall 0:30:15 - Looting Chest Containers and Valuable Finds 0:34:00 - Lockpicking High-Tier Resource Chests 0:38:30 - Navigating Chemical Hazard Zones Safely 0:43:00 - Inventory Management and Using Immunity Boosters 0:48:00 - Detailed Exploration of the Cathedral Interior 0:53:15 - Advanced Parkour Maneuvers Between Pillars 0:57:45 - Stealth Takedowns on Stray Infected 1:02:00 - Gathering Rare Crafting Materials and Valuables 1:06:45 - Climbing the Upper Rafters for Hidden Loot 1:11:30 - More High-Tier Looting and Scavenging 1:16:00 - Exploring External Rooftop Structures 1:21:00 - Returning to the Main Cathedral Hall 1:25:30 - Final Scavenging Round Before Departure 1:30:15 - Trading with the Vendor and Final Crafting 1:33:00 - Wrapping Up the Gameplay Session 📖 Interactive written walkthrough with clickable timestamps: https://pixelfungaming.com/videos/dying-light-stream-looting

Titanfall expedition gameplay : Swampland - Attrition
The Attrition match on the Swampland map begins with a high-altitude drop into the foggy forest. The Pilot quickly moves through the ancient ruins, using wall-running and high-ground positioning to eliminate grunts and spectres with the R-101C Carbine. These early kills rapidly reduce the Titan build timer. At the 3:51 mark, the first Atlas Titan is called in, shifting the combat focus to heavy mech warfare. Equipped with Quad Rockets and a Vortex Shield, the Titan engages enemy mechs and clears clusters of infantry. After the first Titan is destroyed, the Pilot returns to on-foot tactics, utilizing the Archer Heavy Rocket to deal significant damage to enemy Titans from cover. A second Titan deployment occurs near the seven-minute mark, leading to an intense close-quarters brawl in the industrial zone. The Militia team reaches the score limit, securing a victory and triggering the Epilogue. The final phase involves hunting down remaining IMC Pilots as they attempt to reach their evacuation dropship. The gameplay concludes with a display of the final match statistics. Chapters: 0:00:00 - 0:00:17 - Loadout Selection and Dropship Sequence 0:00:17 - 0:02:30 - Initial Pilot Skirmishes and Grunt Hunting 0:02:30 - 0:03:51 - Traversing Swampland and Building Titan Meter 0:03:51 - 0:04:48 - First Titan Deployment and Combat 0:04:48 - 0:07:20 - Anti-Titan Tactics and Pilot Combat 0:07:20 - 0:08:01 - Second Titan Combat and Final Brawl 0:08:01 - 0:09:07 - Securing the Win and Map Navigation 0:09:07 - 0:10:19 - Victory Epilogue and Final Scoreboard 📖 Interactive written walkthrough with clickable timestamps: https://pixelfungaming.com/videos/titanfall-expedition-gameplay-swampland-attrition

Hitman Freelancer: Smoking Kills 😅 #shorts
Agent 47 navigates a quiet suburban neighborhood, approaching a cordoned-off construction zone guarded by several workers. Carrying a propane tank as a makeshift tool, he slips behind a large oak tree to maintain cover and avoid detection. He frequently utilizes instinct mode to track the movements of nearby guards and highlight environmental hazards. After surveying the area, he focuses on a specific construction worker standing near a parked SUV. The worker, revealed to be a syndicate target, stands dangerously close to a gas leak while attempting to smoke. Agent 47 uses his camera to zoom in and observe the target's actions from a safe distance. The target's cigarette ignites the leaking propane, causing a violent explosion that immediately eliminates him. While guards and bystanders rush toward the flaming wreckage in a state of alarm, Agent 47 calmly walks away from the scene, his mission objective successfully completed without direct confrontation. Chapters: 0:00:00 - 0:00:08 - Approaching the restricted construction zone 0:00:08 - 0:00:30 - Taking cover and tracking targets with instinct 0:00:30 - 0:00:42 - Monitoring the target's proximity to explosive hazards 0:00:42 - 0:00:52 - Assassination via accidental propane explosion 0:00:52 - 0:01:01 - Calmly exiting the scene during the chaos 📖 Interactive written walkthrough with clickable timestamps: https://pixelfungaming.com/videos/hitman-freelancer-smoking-kills-shorts

RDR2 - lemoyne Raider hideout - Guy Shoots Himself
Arthur Morgan and John Marston descend upon Shady Belle to seize it from the Lemoyne Raiders. The mission begins with a swift firefight on the front porch before Arthur pushes into the dilapidated manor. He systematically clears each room, utilizing Dead Eye to eliminate holdouts on the second-floor balcony. In the master bedroom, the Raiders' leader delivers a final defiant speech before taking his own life. Following the victory, John insists on hiding the bodies to avoid upsetting the gang. Arthur spends several minutes hauling corpses out of the house and dumping them into the gator-infested swamp. The effort pays off as the gang's caravan arrives shortly after, with Dutch Van der Linde officially claiming the manor as their new headquarters. Chapters: 0:00:00 - 0:00:18 - Initial shootout at the Shady Belle entrance 0:00:18 - 0:01:00 - Clearing Raiders from the manor's ground floor 0:01:00 - 0:01:40 - Combat encounters on the second-floor balcony 0:01:40 - 0:02:15 - Final encounter with the Lemoyne Raider leader 0:02:15 - 0:04:05 - Moving corpses from the house to the swamp 0:04:05 - 0:06:06 - Completing the cleanup and hiding the remaining bodies 0:06:06 - 0:06:51 - The Van der Linde gang arrives at their new home 📖 Interactive written walkthrough with clickable timestamps: https://pixelfungaming.com/videos/rdr2-lemoyne-raider-hideout-guy-shoots-himself

Assassin's Creed Odyssey - Delsphina Fort
The mission begins with a stealthy nighttime infiltration into Desphina Fort. The character maneuvers across wooden platforms and rooftops, systematically burning war supplies to weaken the region's control. Stealth transitions into open combat on a stone staircase as guards alert the fort to the intrusion. A grueling boss encounter against a powerful enemy named Theos dominates the central part of the gameplay, requiring precise dodges, parries, and the strategic use of fire-based abilities. The battle rages across the battlements until Theos is finally defeated. Following the boss fight, the character explores the remaining sections of the fort, using both stealth takedowns and archery to clear out the remaining garrison. The mission concludes with the collection of valuable gear from chests and the successful completion of all location objectives. Chapters: 0:00:00 - 0:00:08 - Channel Intro and Logo Animation 0:00:08 - 0:01:15 - Stealth Infiltration and Sabotage at Desphina Fort 0:01:15 - 0:02:10 - Initial Tactical Combat with Fort Guards 0:02:10 - 0:04:51 - Intense Boss Battle Against Theos 0:04:51 - 0:05:56 - Final Fort Clearance and Objective Completion 0:05:56 - 0:06:07 - Outro and Channel Subscription Prompt 📖 Interactive written walkthrough with clickable timestamps: https://pixelfungaming.com/videos/assassin-s-creed-odyssey-delsphina-fort

Red Dead Redemption 2 - Arthur Listening To Leo Delibes Song - The Flower Duet
Arthur Morgan explores the interior of a tent while an opera recording plays on a nearby gramophone. He briefly comments on his activity before moving toward the opening to join Dutch van der Linde. Outside, the sun sets over a wide lake, casting deep oranges and purples across the sky and water. Dutch greets Arthur, and the two men stand in contemplative silence, their figures silhouetted against the brilliant horizon. The soaring operatic music reaches a peak as they watch the fading light from the safety of their camp. This tranquil interlude highlights the atmospheric detail of the world as the day transitions into night. Chapters: 0:00:00 - 0:00:27 - Arthur explores the tent as the sun begins to set 0:00:27 - 0:00:45 - Dutch greets Arthur and they watch the sunset together 0:00:45 - 0:01:16 - A moment of peaceful observation of the landscape and music 📖 Interactive written walkthrough with clickable timestamps: https://pixelfungaming.com/videos/red-dead-redemption-2-arthur-listening-to-leo-delibes-song-the-flower-duet
#Hitman Colorado : Kill everyone Challenge
Agent 47 infiltrates a high-security militia training camp in Colorado to eliminate four primary targets: Sean Rose, Maya Parvati, Penelope Graves, and Ezra Berg. The mission begins with 47 navigating through the orchard to reach a strategic vantage point on a water tower. Equipped with a suppressed sniper rifle, he executes a series of environmental kills to maintain stealth. He triggers a haystack drop to crush Maya Parvati, ignites a gas cylinder to eliminate Penelope Graves, and uses tactical shots to neutralize Sean Rose and Ezra Berg. Following the assassinations, 47 descends from the tower and sneaks into the farmhouse to access a secured basement. After scanning Sean Rose's face to unlock a hidden bunker and retrieving critical data, he exfiltrates the compound undetected, completing the mission with a Silent Assassin, Suit Only rating. Chapters: 0:00:00 - 0:00:15 - Mission planning and gear selection 0:00:15 - 0:01:05 - Infiltration through the orchard toward the water tower 0:01:05 - 0:01:25 - Scaling the water tower to reach the sniping position 0:01:25 - 0:02:05 - Eliminating Maya Parvati with a falling haystack accident 0:02:05 - 0:03:05 - Sniping a gas canister to eliminate Penelope Graves 0:03:05 - 0:03:45 - Neutralizing Sean Rose using an environmental explosion 0:03:45 - 0:04:20 - Sniper elimination of Ezra Berg near the chemistry shed 0:04:20 - 0:05:25 - Infiltrating the farmhouse and reaching the basement 0:05:25 - 0:06:00 - Scanning the target's face and final exfiltration 0:06:00 - 0:06:17 - Mission completion and Silent Assassin rating screen 📖 Interactive written walkthrough with clickable timestamps: https://pixelfungaming.com/videos/hitman-colorado-kill-everyone-challenge
HITMAN: Colorado - Explosives expert disguise walkthrough
The video demonstrates a stealth-focused gameplay sequence within a rural industrial compound at dusk. It begins with the character infiltrating a barn and exiting through a window to avoid detection. To progress, the character sets up a distraction using a radio to lure a nearby guard. Once the guard is isolated, the character subdues them and assumes their identity by taking an 'Explosives Specialist' disguise. The operative then disposes of the body in an industrial shredder to remove any trace of the encounter. The final portion of the video shows the operative navigating through various high-security zones of the compound, successfully blending in with other personnel and observing testing areas without triggering alarms. Chapters: 0:00:00 - 0:00:15 - Infiltration and Area Entry 0:00:15 - 0:00:35 - Distraction Setup and Guard Luring 0:00:35 - 0:00:48 - Neutralizing the Guard and Identity Theft 0:00:48 - 0:01:05 - Evidence Disposal and Equipment Collection 0:01:05 - 0:02:11 - Stealthy Navigation of the Compound in Disguise 📖 Interactive written walkthrough with clickable timestamps: https://pixelfungaming.com/videos/hitman-colorado-explosives-expert-disguise-walkthrough

Red Dead Redemption 2 - West Elizabeth Dinosaur Bone Location
The journey begins in the rugged terrain of Big Valley within the Grizzlies West region. A quick check of the map confirms the location just north of Wallace Station. Approaching a prominent rock formation reveals a hidden cave entrance. Inside the dimly lit cavern, a massive prehistoric dinosaur bone lies partially buried in the stone. Arthur Morgan approaches the fossil and meticulously records its location in his journal, marking progress for the 'A Test of Faith' stranger mission. He then explores the interior of the cave further, checking his surroundings with binoculars. Transitioning to his handheld camera, he captures detailed photographs of the ancient remains, adjusting his position to get the best angle. Finally, he puts away his equipment and makes his way back toward the cave's exit. Chapters: 0:00:00 - 0:00:15 - Mapping the location in Big Valley 0:00:15 - 0:00:45 - Discovery and inspection of the dinosaur bone 0:00:45 - 0:01:10 - Navigating the cave and testing gear 0:01:10 - 0:01:44 - Photographing the fossil and exiting 📖 Interactive written walkthrough with clickable timestamps: https://pixelfungaming.com/videos/red-dead-redemption-2-west-elizabeth-dinosaur-bone-location

Almost died killing 3 sharks to get couple a sacred necklace - A.C.O. Shark the Vagrant
The gameplay features Alexios in Assassin's Creed Odyssey as he completes the 'Shark the Vagrant' side quest in Kephallonia. The mission begins with a scouting phase where Ikaros is used to identify predatory sharks and a sunken chest containing a stolen necklace near the Islet of Zeus. After a brief detour to secure loot from the 'Wreckage of the Lost Bandit,' Alexios rows a small boat out to the ruins. He strategically thins the shark population using his bow from atop stone pillars before diving into the depths. Underwater exploration leads to a tense confrontation with a shark, which Alexios eventually defeats. After retrieving Prokris's Necklace from the seabed, the journey continues back to the mainland. The quest concludes in a local village where Alexios returns the heirloom to a pair of vegetable merchants, earning experience points and Drachmae. Chapters: 0:00:00 - 0:00:08 - Introduction and Channel Branding 0:00:08 - 0:01:03 - Scouting the Sunken Temple with Ikaros 0:01:03 - 0:02:27 - Reaching the Islet of Zeus and Clearing Initial Sharks 0:02:27 - 0:03:20 - Detour to Wreckage of the Lost Bandit 0:03:20 - 0:04:30 - Navigating a Skiff to the Underwater Ruins 0:04:30 - 0:05:08 - Long-Range Archery from the Stone Pillars 0:05:08 - 0:06:30 - Intense Underwater Shark Combat 0:06:30 - 0:07:35 - Retrieving Prokris's Necklace from the Deep 0:07:35 - 0:08:26 - Traveling Back to Kephallonia Village 0:08:26 - 0:09:11 - Returning the Necklace and Completing the Quest 📖 Interactive written walkthrough with clickable timestamps: https://pixelfungaming.com/videos/almost-died-killing-3-sharks-to-get-couple-a-sacred-necklace-a-c-o-shark-the-vagrant

RDR2 - Feral Man Encounter
The journey starts with a ride along a stony riverbank, ending abruptly as the horse bucks the rider. A dash into the woods reveals a feral man living among wolves. Combat breaks out as the wolves defend their master, leading to a quick shootout. Once the threats are neutralized, the feral man is lassoed and hoisted onto a shoulder for transport. The path leads deep into a limestone cave where the captive is eventually released. He bolts for freedom, triggering a relentless chase across rugged terrain, through thick brush, and across winding streams. The pursuit ends in a forest clearing where the man is tackled and tied up once more. Chapters: 0:00:00 - 0:00:15 - Riding and horse bucking event 0:00:15 - 0:00:45 - Locating the Feral Man and his wolf pack 0:00:45 - 0:01:20 - Combat with wolves and initial capture 0:01:20 - 0:02:05 - Transporting the captive to the hidden cave 0:02:05 - 0:02:50 - Cave exploration and releasing the captive 0:02:50 - 0:04:00 - Escape and high-speed forest chase 0:04:00 - 0:05:10 - Persistent foot pursuit across the river 0:05:10 - 0:06:00 - Final recapture and conclusion of the encounter 📖 Interactive written walkthrough with clickable timestamps: https://pixelfungaming.com/videos/rdr2-feral-man-encounter

RDR2 - Burning Murfree Brood Corpses
The sequence follows the grim aftermath of an encounter in the woods. Arthur Morgan systematically collects the corpses of Murfree Brood members scattered around a campsite and near a cave entrance. He carries each body individually, tossing them into a growing pile on a wooden cart. After searching the immediate vicinity and retrieving a final body from his horse, he steps back to prepare for disposal. He selects a fire bottle from his inventory and hurls it into the center of the corpse pile. The incendiary explodes, instantly igniting the mass of bodies. Large flames and thick black smoke fill the air as the fire consumes the remains. The character stands by, watching the blaze intensify and slowly char the corpses until only scorched remains are left in the smoldering pile. Chapters: 0:00:00 - 0:00:25 - Beginning the collection of Murfree Brood corpses 0:00:25 - 0:00:55 - Searching the campsite for additional bodies 0:00:55 - 0:01:25 - Adding more remains to the central pile 0:01:25 - 0:01:45 - Unloading a final body from the horse 0:01:45 - 0:02:15 - Positioning and preparing a fire bottle 0:02:15 - 0:03:30 - Igniting the pile and watching the fire burn 📖 Interactive written walkthrough with clickable timestamps: https://pixelfungaming.com/videos/rdr2-burning-murfree-brood-corpses

Call Of Duty Ghosts : Struck Down - Mission 4
The mission begins in a destroyed urban landscape where Ghost squad soldiers, including the player character, navigate debris-strewn streets toward a rescue objective. The team loads into a military truck and drives through the devastated city toward a large stadium. Upon approaching an enemy checkpoint, the character attempts to blow explosive charges attached to a barricade, successfully creating a diversion after an initial failure. The truck continues, serving as a mobile gun platform, and the character uses an assault rifle to eliminate enemy infantry attempting to block the path. The squad breaches the stadium exterior and moves into the concourse, engaging in intense close-quarters combat against fortified Federation soldiers, supported by Riley, the military working dog. The team pushes past market stalls and up a ruined staircase, continuing to take heavy fire from multiple directions. Upon reaching a closed door where Ajax is suspected to be held, the character deploys a remote sniper drone to neutralize hostile targets inside and outside the building, including enemy RPG operators, clearing the immediate vicinity for the main force. After securing the immediate area, the squad discovers Ajax wounded and begins a tactical retreat through a flooded, dark underground section. The character uses tear gas and a gas mask to continue the assault in low visibility, clearing multiple rooms filled with enemy resistance. After finding Ajax again and learning about a kill list, the squad reaches the extraction point. The character utilizes the remote sniper drone one last time, providing covering fire for Merrick and Keegan by destroying enemy helicopters and armored vehicles, ensuring a successful extraction. The mission concludes with a cinematic sequence highlighting the chaos of the battle and the team's escape by helicopter, followed by a transition to the mission complete screen. Chapters: 0:00 - 1:36 - Initial Approach and Diversion Attempts 1:36 - 2:30 - Clearing the Stadium Exterior and Mobile Combat 2:30 - 4:20 - Stadium Interior Firefight and Escalation 4:20 - 6:22 - Securing the Upper Concourse and Remote Sniper Prep 6:22 - 7:38 - Locating Ajax and Tactical Retreat 7:38 - 9:35 - Fighting Through Flooded Tunnels 9:35 - 12:27 - Breaching the Final Room and Extraction Preparation 12:27 - 14:47 - Providing Aerial Support and Evacuation 14:47 - 16:07 - Cinematic and Mission Completion 📖 Interactive written walkthrough with clickable timestamps: https://pixelfungaming.com/videos/call-of-duty-ghosts-struck-down-mission-4

RDR2 - Lemoyne Raider Hideout Robbery
Arthur Morgan and Lenny Summers carry out a covert nighttime assault on the Lemoyne Raider stronghold at Shady Belle. The mission starts with Arthur positioned as a sniper, providing cover as he instructs Lenny on the move. Arthur initiates the chaos by shooting a crate of dynamite, followed by a series of precise long-range kills to thin out the guard presence. A heavy machine gunner appears on the upper balcony, but Arthur quickly neutralizes the threat. The duo then moves into the main courtyard to finish off the remaining Raiders. Once the area is secured, they begin a search of the plantation grounds, checking several wagons for supplies. They eventually discover a wagon loaded with a crate of new military rifles. Arthur takes the reins while Lenny provides lookout as they flee the scene. Along the path, they encounter a group of Raiders on horseback, resulting in a swift shootout. The journey back to camp involves a long drive through the swampy landscape during which Arthur and Lenny discuss the gang's future. The mission concludes with the successful delivery of the weapon cache to their hideout, unlocking the bolt action rifle for the player's arsenal. Chapters: 0:00:00 - 0:01:15 - Initial Sniper Assault and Ambush 0:01:15 - 0:02:45 - Courtyard Combat and Clearing Shady Belle 0:02:45 - 0:03:55 - Searching for the Weapon Stash 0:03:55 - 0:05:45 - Wagon Escape and Lemoyne Raider Encounter 0:05:45 - 0:06:53 - Returning to Camp and Mission Completion 📖 Interactive written walkthrough with clickable timestamps: https://pixelfungaming.com/videos/rdr2-lemoyne-raider-hideout-robbery

RDR2 - Capturing The 2 Escaped Prisioners
The mission 'The Ties That Bind Us - II' begins as the character approaches a secluded campsite in the woods at night. Two escaped convicts, known as Mr. Black and Mr. White, are found arguing by a fire. After a brief conversation about their supposed innocence and the price on their heads, the character chooses to capture them for the bounty. The first convict is immediately tackled and hogtied on the spot. The second fugitive takes the opportunity to flee into the dark forest, prompting a high-speed foot chase. The character quickly tracks him down, uses a lasso to bring him to the ground, and secures him with rope. With both men captured, the character loads the first prisoner onto the horse and begins the trek toward the town of Rhodes. Upon reaching the outskirts, the character retrieves the second prisoner and carries them into the sheriff's office one by one. Both convicts are locked securely in the jail cells while they continue their bickering. The sheriff acknowledges the successful capture and provides a cash reward, bringing the encounter to a close. Chapters: 0:00:00 - 0:01:00 - Confronting the convicts and capturing the first fugitive 0:01:00 - 0:02:15 - Chasing down and hogtying the second escapee 0:02:15 - 0:03:30 - Transporting the prisoners through the outskirts of Rhodes 0:03:30 - 0:04:45 - Delivering both prisoners to the sheriff's office jail cells 0:04:45 - 0:05:19 - Collecting the bounty reward and mission completion 📖 Interactive written walkthrough with clickable timestamps: https://pixelfungaming.com/videos/rdr2-capturing-the-2-escaped-prisioners

Far Cry New Dawn - I.S.S. Crash Site Walkthrough
The mission "I.S.S. Crash Site Expedition" begins in a desolate desert canyon. The objective is to locate a package hidden within the wreckage of a space station. Initial progress is stealthy, with the character navigating rocky outcrops and using a zipline to descend into the site. After reaching the search zone, a quick takedown of a guard allows for the package to be secured. Immediate extraction is required as the package's GPS activates, alerting the Highwaymen. Combat ensues as the character runs through the canyon, utilizing a variety of weapons including a makeshift rifle and dynamite to clear a path. Upon reaching the extraction zone, a defensive stand is necessary. Waves of enemies attack from multiple directions, including snipers and ground troops. A shotgun becomes the primary tool for close-quarters defense until the extraction helicopter arrives. Once the helicopter lands, a final dash leads to boarding and a successful departure under enemy fire. The mission concludes with a successful return to Prosperity, providing valuable resources like titanium and components. Chapters: 0:00:00 - 0:00:26 - Preparation and Initial Drop 0:00:26 - 0:01:24 - Infiltration of the Crash Site 0:01:24 - 0:01:45 - Securing the Package 0:01:45 - 0:02:40 - Flight to the Extraction Point 0:02:40 - 0:04:14 - Defending the Extraction Zone 0:04:14 - 0:04:42 - Helicopter Extraction and Departure 0:04:42 - 0:05:44 - Mission Success and Resource Rewards 📖 Interactive written walkthrough with clickable timestamps: https://pixelfungaming.com/videos/far-cry-new-dawn-i-s-s-crash-site-walkthrough

Red Dead Redemption 2 - FUNNY MOMENTS
This compilation of Red Dead Redemption 2 captures various chaotic, humorous, and dark moments across the frontier. The sequence begins at a lighthouse where a fire bottle is tossed into a doorway before a stranger is kicked off the high railing. The action moves to a roadside encounter where a poorly aimed stick of dynamite leads to a catastrophic explosion, claiming the lives of the character, bystanders, and horses alike. A brief moment of mounted aggression follows as a pedestrian is kicked while riding past. During a nighttime sequence, rifle fire disrupts a quiet campfire gathering, leading to panic and an accidental fire. In a busy town, a sudden brawl escalates into a deadly shootout with a shotgun, ending in the theft of a stagecoach as lawmen are alerted. One of the more surreal moments features a group of Chelonian cultists chanting before leaping off a massive cliff in unison, followed immediately by the character walking off the same edge. The footage concludes with two NPCs having a fatal accident during a gun demonstration and a grim scene where a steam locomotive runs over several hogtied individuals left on the tracks. Chapters: 0:00:00 - 0:00:12 - Lighthouse fire and confrontation 0:00:12 - 0:00:38 - Failed dynamite attack on a wagon 0:00:38 - 0:00:53 - Mounted kick on a traveling stranger 0:00:53 - 0:01:16 - Disrupting a nighttime campfire 0:01:16 - 0:01:30 - Town brawl, shootout, and stagecoach theft 0:01:30 - 0:02:19 - The Chelonian cultist cliff leap 0:02:19 - 0:02:44 - Character falls from the cliff edge 0:02:44 - 0:03:19 - Accidental gunshot wound during gun check 0:03:19 - 0:04:09 - Train track execution of captives 📖 Interactive written walkthrough with clickable timestamps: https://pixelfungaming.com/videos/red-dead-redemption-2-funny-moments

Far Cry New Dawn Photograph Location - Chateu Boshaw
The mission begins as the character approaches a scenic overlook near a polluted river and a large industrial structure. The character interacts with a collectible note titled "Tracey's Travels," which provides post-apocalyptic lore about the collapse and seeking water sources. After exiting the lore entry, the character initiates a Treasure Hunt objective, requiring the alignment of a photograph with the surrounding environment. The character moves slightly to find the precise angle, causing the photograph to merge with the background landscape, confirming the discovery of a hidden location and awarding a perk point. Following this, the character accesses the in-game map, confirming the location as Chateau Boshaw, and reviews the General Progression screen, noting that 10 out of 10 Treasure Hunts are complete. The character scrolls briefly through inventory and resource counters before exiting the menu and returning to the open world environment. Chapters: 0:00:00 - 0:00:10 - Discovering and Reading 'Tracey's Travels' Collectible 0:00:10 - 0:00:36 - Solving the Treasure Hunt Photo Alignment Puzzle and Earning a Perk Point 0:00:36 - 0:01:04 - Accessing Menus, Checking Map, and Reviewing Progression 📖 Interactive written walkthrough with clickable timestamps: https://pixelfungaming.com/videos/far-cry-new-dawn-photograph-location-chateu-boshaw

Call Of Duty Ghosts : Legends Never Die - Mission 6
The campaign mission begins with a cinematic detailing the history of the Federation's military rise in South America 12 years earlier and the Ghosts' initial mission led by Rorke to eliminate General Almagro in Caracas. The gameplay starts in the middle of a massive firefight in a destroyed urban environment. The player, Elias, and the squad (including Rorke and Merrick) are dropped into the conflict zone to locate Almagro. They immediately engage Federation troops amidst burning tanks and rubble. The squad advances through the devastated streets, taking cover and returning fire. They spot a heavy enemy convoy running parallel to their position, focusing on eliminating enemy infantry guarding the area. Elias is directed to disable a mobile rocket launcher truck, requiring a close-quarters takedown of the crew. After successfully disabling the first launcher, another missile barrage impacts the area, flooding the entire street from a dam breach. The squad is swept away by the flood and must navigate the submerged, debris-filled building interiors and parking garages to reach higher ground. They use stealth and melee combat to eliminate enemies patrolling the flooded floors. Reaching the rooftop area of a hotel, heavy firefights resume against Federation troops and hostile helicopters. The Ghosts push through the destroyed hotel floors, clearing the path toward Almagro. They finally locate General Almagro boarding a helicopter. Rorke intercepts Almagro, leading to a dramatic struggle inside the helicopter bay. Elias executes Almagro with a pistol shot, completing the objective, but Rorke is thrown from the helicopter into the torrent of water below. Elias watches helplessly as Rorke plunges, and the mission ends with the narrative confirmation that Rorke was captured and turned by the Federation, setting up the main conflict. Chapters: 0:00 - 1:11 - Cinematic Introduction and Mission Briefing 1:11 - 2:30 - Initial Urban Combat and Locating Almagro 2:30 - 3:37 - Disabling the Mobile Rocket Launcher 3:37 - 4:48 - Dam Breach, Major Explosion, and Flood Onslaught 4:48 - 6:14 - Navigating the Flooded Interior and Morale Check 6:14 - 7:56 - Stealth Takedowns in Submerged Area 7:56 - 9:56 - Ascending the Building and Rooftop Firefight 9:56 - 13:43 - Pushing Through Flooded Parking Garage and Hotel 13:43 - 14:41 - Breaching Almagro's Location and Helicopter Takedown 14:41 - 16:15 - Rorke's Fall and Narrative Conclusion 📖 Interactive written walkthrough with clickable timestamps: https://pixelfungaming.com/videos/call-of-duty-ghosts-legends-never-die-mission-6

Red Dead Redemption 2 - Stranger Encounter - Horse Race Walkthrough
The mission begins with a chance encounter with a stranger on horseback who challenges Arthur Morgan to a race to the Owanjila Dam. The race starts immediately, winding through thick forests and along rocky paths. Arthur maintains a steady lead, expertly navigating the uneven terrain and crossing a wooden bridge. Upon reaching the finish line first at the overlook, the stranger expresses frustration over his horse's performance, even striking the animal in anger before departing. Arthur earns a permanent boost to his horse bonding speed as a reward for his victory in the contest. Chapters: 0:00:00 - 0:00:05 - Race Challenge and Starting Line 0:00:05 - 0:01:30 - High-Speed Racing Through Wilderness Terrain 0:01:30 - 0:02:00 - Victory, Post-Race Dialogue, and Rewards 📖 Interactive written walkthrough with clickable timestamps: https://pixelfungaming.com/videos/red-dead-redemption-2-stranger-encounter-horse-race-walkthrough

Farcry 6 live #2
Experience the intense guerrilla warfare of Far Cry 6 as Dani Rojas takes on the Montero family's struggle against the Castillo regime. This walkthrough covers several critical operations across Yara, beginning with an assault on a Lozanía checkpoint and a tactical infiltration of Revmira to rescue Alejandro Montero. Following the rescue, witness the raw power of a C-68 tank during a destructive coastal rampage to secure military supplies in the 'Packing Heat' operation. The stakes rise in Verdera during a mission to stop a public execution. After a botched assassination attempt, Dani must navigate a high-stakes escort mission through intense urban combat, leading to the tragic loss of a key resistance leader. The journey for justice continues with the retrieval of a symbolic weapon and the 'Death Warrant' operation, where Dani hunts down the lieutenants responsible for the Montero family's suffering. Final segments showcase tactical sniper gameplay at Casa del Viento and explosive combat at De Francisca Ranch using the Supremo. Utilizing the 'Señor Pinga' tank, Dani clears FND roadblocks to reach an underground radar bunker. After hacking critical systems and surviving waves of reinforcements in 'Open Skies,' the mission concludes with a nighttime drive to coordinate the next phase of the revolution with Philly. 📖 Interactive written walkthrough with clickable timestamps: https://pixelfungaming.com/videos/farcry-6-live-2 Chapters: 0:00:00 - Infiltration and checkpoint combat in Lozania 0:00:24 - Engaging enemy soldiers with automatic weapons 0:01:05 - Consulting the map for the Montero Farm objective 0:01:51 - Calling the Avispa Buzzer at the Montero Farm helipad 0:02:04 - Aerial travel across the coast of Madrugada 0:02:51 - Landing and repairing the buzzer near Revmira 0:03:09 - Scouting the Revmira site with Espada 0:03:55 - Ziplining into the construction site 0:04:31 - Tactical sniping of perimeter guards 0:05:06 - Eliminating enemy snipers on the rooftops 0:05:42 - Sniping ground forces and helicopter support 0:06:09 - Long-range engagement of military personnel 0:07:34 - Entering the laboratory facility with Espada 0:07:48 - Rescuing Alejandro Montero cinematic 0:09:35 - Operation 'Blood Ties' completed 0:10:35 - Boarding a military tank for the next phase 0:10:44 - Driving and firing the tank's main cannon 0:11:47 - Intense road combat while driving the tank 0:12:16 - Destroying military transport vehicles 0:12:58 - Downing an enemy helicopter with the tank gun 0:14:15 - Navigating to the Ocaso Marina checkpoint 0:15:37 - Infiltrating to steal the military supply truck 0:17:05 - Initial mission failure and retry 0:18:10 - Second attempt at clearing the Marina with the tank 0:18:46 - Full-scale vehicular battle at the checkpoint 0:21:11 - Seizing the military supply truck 0:21:15 - High-speed truck escape to Montero Farm 0:22:30 - Driving through mountainous jungle roads 0:23:34 - Delivering the stolen supplies to the camp 0:24:22 - Operation 'Packing Heat' completed 0:24:45 - Inventory management at the Montero Farm 0:26:47 - Carlos and Espada Montero story cinematic 0:00:00 - Gear preparation and flight to Verdera 0:01:12 - Stealthy infiltration of the Verdera church 0:04:54 - Reaching the bell tower for the execution ceremony 0:07:38 - Chaos erupts after the sniper rifle jams 0:14:10 - High-speed truck escape and vehicular combat 0:21:10 - Returning to Montero Farm and memorial scene 0:25:35 - Night mission to retrieve the stolen machete 0:27:12 - Clearing La Raja Bar to reclaim the hero's blade 0:29:40 - Placing the machete at the memorial 00:00:00 - Meeting with Clara at the guerrilla camp 00:00:32 - Accepting the Death Warrant operation from Espada 00:01:23 - Interacting with Alejandro for the Open Skies mission 00:02:10 - Reviewing mission map and objective locations 00:03:25 - Departing the camp via the Buzzer aircraft 00:04:47 - Arriving at the Casa del Viento hotel perimeter 00:05:43 - Sniper engagement with hotel guards 00:07:18 - Infiltrating the hotel interior 00:07:44 - Assassination of Lieutenant Horacio 00:08:12 - Disabling the security alarm 00:10:00 - Collecting intel from the guest check-in desk 00:10:50 - Firefight with hotel security reinforcements 00:12:15 - Searching bedrooms for additional target clues 00:14:00 - Clearing guards on the upper balconies 00:16:30 - Discovery of the second target's location at the ranch 00:17:35 - Flying toward the De Francisca Ranch 00:18:40 - Reconnaissance of the ranch from the hills 00:20:25 - Approaching the ranch perimeter on foot 00:20:45 - Contacting the guerrilla scout near the checkpoint 0:00:00 - Beginning the Death Warrant mission at the ranch 0:15:30 - Strategic positioning and scouting enemy targets 0:35:45 - Tactical sniping and taking out ranch guards 0:55:20 - Direct combat encounter inside the ranch buildings 1:04:11 - Meeting with Camila 'La Espada' Montero and mission turn-in 1:07:07 - Transitioning to the Open Skies operation 1:15:50 - Navigating the coastal regions of Yara 1:23:44 - Calling for the Señor Pinga tank at the checkpoint 1:24:45 - Tank rampage and destruction of enemy assets on the road 1:28:15 - Breaching the FND Radar Bunker entrance 1:30:30 - Fighting through the bunker corridors using the tank 1:31:45 - Hacking the server and defending the upload 1:33:13 - Escaping the bunker and beginning the night drive
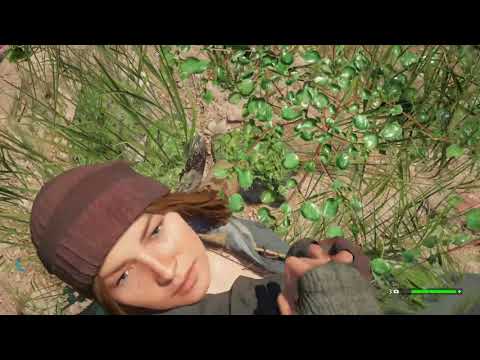
Far Cry New Dawn - Losing Streak Walkthrough
The mission begins with the character traversing a grassy, mountainous region using a specialized crossbow. The character arrives at a small outpost and meets Bean, the creator of 'Wiki-Bean-ia.' Bean explains that his key business assets, including maps and intel, have been lost by his employee, Richard, due to a bad gambling habit with the Highwaymen. Bean tasks the character with finding Richard, who will lead the way to the hidden assets. The character takes a motorcycle with a sidecar and travels toward the objective, reaching a farm location marked on the map. Upon arrival, the character and their companion, Carmina Rye, engage in intense combat against several Highwaymen and a savage dog, utilizing the explosive saw launcher crossbow and automatic rifle fire. After neutralizing the immediate threat, the character locates Richard, who is stripped down to his underwear near a turquoise lake, confirming that he lost everything in a card game. Richard reveals that Bean's business plan is hidden in a nearby bunker. Richard attempts to flee into the water but is briefly stunned by a non-lethal round. The character proceeds to the bunker entrance, eliminating a few remaining Highwaymen guarding the area. The character enters the bunker through a culvert, finding the interior ablaze. Navigating the fiery, confined space, the character locates a safe, picks the lock, and retrieves Bean’s business plan along with titanium resources. Climbing out of the bunker, the character meets Bean again, delivering the retrieved plan. Bean is elated, confirming that with the plan secured, Wikibeania will establish its headquarters in Prosperity and go global, concluding the mission. Chapters: 0:00 - 0:26 - Approach and Dialogue Setup with Bean 0:26 - 1:39 - Mission Initiation: Losing Streak 1:39 - 2:45 - Travel to the Farm Search Zone 2:45 - 3:23 - First Combat Encounter at the Farm 3:23 - 4:29 - Chasing Richard to the Riverbank 4:29 - 6:25 - Richard's Confession and Final Combat before Bunker Entry 6:25 - 7:04 - Bunker Navigation and Retrieval of Business Plan 7:04 - 8:59 - Returning the Plan to Bean and Mission Completion 📖 Interactive written walkthrough with clickable timestamps: https://pixelfungaming.com/videos/far-cry-new-dawn-losing-streak-walkthrough

Far Cry New Dawn - Treasure Hunt - Go With The Flow Walkthrough
The mission begins with the discovery of a journal page inside a small rocky crevice, hinting at a hidden stash located further down the river. Emerging from the initial cave, the character immediately encounters and neutralizes an aggressive pack of wolves using rapid machine gun fire. The journey continues downstream through a vibrant, rocky landscape. After swimming across a clear river and passing a fallen bear, a second journal entry is discovered at a makeshift campsite, providing final clues to the hideout's location. The character navigates along the water's edge and utilizes a grappling hook to reach higher ground near a waterfall. A narrow, submerged cave entrance is located behind a carcass, leading into a dark passage. Unlocking an iron gate reveals a hidden bunker filled with valuable supplies. The 'Go With The Flow' treasure hunt concludes as the character loots a variety of resources, ammunition, Far Cry credits, and perk magazines from the secure hideout. Chapters: 0:00:00 - 0:00:10 - Discovering the first journal clue 0:00:10 - 0:00:25 - Wolf pack encounter and combat 0:00:25 - 0:01:20 - Downstream navigation and riverside exploration 0:01:20 - 0:01:45 - Finding the second journal entry 0:01:45 - 0:02:45 - Grappling across the waterfall and river path 0:02:45 - 0:03:00 - Entering the hidden cave hideout 0:03:00 - 0:03:41 - Looting the treasure stash and completion 📖 Interactive written walkthrough with clickable timestamps: https://pixelfungaming.com/videos/far-cry-new-dawn-treasure-hunt-go-with-the-flow-walkthrough

Far Cry New Dawn - Treasure Hunt - Burning Souls Waklkthrough
The 'Burning Souls' treasure hunt begins at Eden's Pyre in Hope County. A New Eden note left by a dying follower initiates the task of gathering five chosen martyrs and placing them on a final pyre to bless their bodies with holy flame. The character navigates the wooden structures and surrounding forest, locating the fallen followers while looting crates for valuable crafting materials. Sudden wolf attacks punctuate the search, requiring quick reflexes and accurate handgun fire to survive the encounters. After successfully depositing all five bodies into the central pit, a Molotov cocktail ignites the bonfire. The resulting explosion of pink flames clears the way to a hidden cave behind the pyre. Inside the sanctuary, the character collects a substantial stash of gears, springs, duct tape, and several perk magazines, completing the treasure hunt and uncovering a final somber note. Chapters: 0:00:00 - 0:00:20 - Arriving at Eden's Pyre and starting the quest 0:00:20 - 0:01:00 - Locating and moving the first few martyrs 0:01:00 - 0:01:15 - Defending against a pack of aggressive wolves 0:01:15 - 0:02:15 - Scouring the camp for supplies and remaining bodies 0:02:15 - 0:02:40 - Intense close-quarters combat with more wolves 0:02:40 - 0:03:45 - Finding the final followers on elevated platforms 0:03:45 - 0:04:12 - Filling the pyre pit with the gathered corpses 0:04:12 - 0:04:30 - Igniting the pyre to reveal the hidden stash 0:04:30 - 0:05:47 - Looting the treasure cave and finishing the hunt 📖 Interactive written walkthrough with clickable timestamps: https://pixelfungaming.com/videos/far-cry-new-dawn-treasure-hunt-burning-souls-waklkthrough

Sniper Elite 3 - Halfaya Pass - Part 1
The mission begins with loadout selection and a briefing on the strategic importance of Halfaya Pass in North Africa. The objective is to infiltrate the pass and neutralize Axis artillery positions. After a cinematic introduction, the character enters the rocky canyon, immediately employing the M1 Garand for a long-distance suppressed headshot, showcasing the iconic X-ray kill cam. The gameplay emphasizes tactical stealth, with the character navigating narrow ledges and sun-drenched canyons. Throughout the mission, the Welrod silenced pistol serves as the primary tool for close-range eliminations, while melee takedowns are used to quietly clear guards. The character meticulously hides bodies in foliage and behind crates to maintain a ghost-like presence. Strategic elements include sabotaging generators to mask the sound of high-caliber rifle fire, allowing for undetected long-range kills. As the character moves deeper into the mountain settlement, the tension increases, requiring careful observation of enemy patrol patterns and frequent relocation after taking shots to avoid detection by search parties. The mission concludes with the character reaching and beginning to sabotage the heavy Flak 88 artillery pieces. Chapters: 00:00:00 - 00:01:20 - Mission Briefing and Initial Objectives 00:01:20 - 00:02:50 - Infiltration and Canyon Navigation 00:02:50 - 00:06:00 - First Long-Range Engagement and Stealth Movement 00:06:00 - 00:08:45 - Clearing the Mountain Settlement Entrance 00:08:45 - 00:11:30 - Stealth Takedowns and Hiding Evidence 00:11:30 - 00:14:15 - Strategic Vantage Point Positioning 00:14:15 - 00:17:00 - Generator Sabotage and Noise Masking 00:17:00 - 00:20:00 - Infiltrating the Settlement Interior 00:20:00 - 00:23:00 - Neutralizing High-Priority Targets 00:23:00 - 00:25:40 - Final Approach to Artillery Sabotage 📖 Interactive written walkthrough with clickable timestamps: https://pixelfungaming.com/videos/sniper-elite-3-halfaya-pass-part-1

Ghost Recon Breakpoint - How to Open Locked Doors 1st Method
The mission begins with the character cautiously approaching a small military structure near Checkpoint Tiger Golf in Sinking Country. Clad in tactical gear and carrying a suppressed weapon, the operative moves toward a dark-colored modular building. Stealth is maintained while entering the facility through a side door. Once inside, a guard is quickly incapacitated using a non-lethal knockout maneuver. The character then proceeds to methodically search the interior for mission clues and supplies. Multiple storage containers and lockers are opened, yielding rocket launchers and mines. The search continues through the desks and storage racks as the operative looks for intelligence related to Operation Greenstone. The sequence concludes with the character scanning the room one last time before preparing to exit back into the field. Chapters: 0:00:00 - 0:00:11 - Stealthy approach to the target building 0:00:11 - 0:00:21 - Building infiltration and stealth takedown 0:00:21 - 0:00:45 - Looting crates and searching for mission clues 0:00:45 - 0:00:54 - Final room sweep and mission objective update 📖 Interactive written walkthrough with clickable timestamps: https://pixelfungaming.com/videos/ghost-recon-breakpoint-how-to-open-locked-doors-1st-method

The Walking Dead: Destinies | ACT 5 - Episodes 20-23 Walkthrough
Welcome to the intense conclusion of The Walking Dead: Destinies! This full game walkthrough covers the final episodes where every choice matters. Experience the devastating flu outbreak at the West Georgia Correctional Facility as Daryl Dixon and the group fight off a new kind of infected. Watch as Rick Grimes returns to King County on a desperate supply run, leading to a tension-filled encounter with Morgan Jones. Follow Glenn and Michonne through a harrowing mission inside a pitch-black pharmacy to secure life-saving antibiotics. The journey culminates in a massive, choice-driven finale at the prison gates, featuring a dramatic 'what-if' showdown against a familiar face turned foe. Will the survivors find sanctuary, or is it too far gone? Witness the fall of the prison and the group's uncertain future in this complete gameplay experience. Chapters: 0:00:00 - Episode 20: Daryl clears the prison fence 0:02:18 - The flu outbreak begins inside the prison 0:05:30 - Escorting survivors through Block C 0:09:15 - Intense hallway combat against eye-bleeding walkers 0:12:45 - Securing the control booth 0:16:30 - Fighting infected in the cafeteria 0:18:51 - Maggie and Rick plan a supply run 0:21:40 - Rick returns to King County, GA 0:26:00 - Navigating the sniper-controlled streets 0:30:30 - Approaching the sniper's nest 0:34:45 - Rick's dramatic confrontation with Morgan Jones 0:38:15 - Glenn's stealth mission in the dark pharmacy 0:43:00 - Glenn finds the antibiotics and faces a trap 0:47:05 - Michonne's rescue mission begins 0:52:10 - Michonne clears waves of walkers with her katana 0:56:45 - Securing the medicine and escaping 1:00:30 - Preparing for the final assault on the prison 1:03:00 - The showdown at the prison gates begins 1:05:20 - Final battle against T-Dog and the tank 1:07:45 - The fall of the prison and the search for Terminus 📖 Interactive written walkthrough with clickable timestamps: https://pixelfungaming.com/videos/the-walking-dead-destinies-act-5-episodes-20-23-walkthrough

Red Dead Redemption 2 - Hunting (Story Mission)
Arthur Morgan joins Charles Smith on a critical hunting mission in the freezing mountains near Colter. The mission begins with a long trek through deep snow as the two outlaws discuss their dire situation following the Blackwater incident. Upon reaching a suitable hunting ground, Arthur uses his tracking skills and a bow to silently take down deer, ensuring the gang has enough meat to survive the winter. After securing the carcasses, they navigate the treacherous terrain back to camp, narrowly avoiding a dangerous grizzly bear along the way. Upon their return, Arthur delivers the meat to Pearson and assists with the butchering process. The sequence concludes with a visit to a wounded John Marston and a pivotal meeting where Dutch van der Linde reveals his ambitious plan to rob a train owned by the wealthy Leviticus Cornwall, setting the stage for the gang's next major move. Chapters: 0:00:00 - 0:00:08 - Opening Intro 0:00:08 - 0:01:48 - Riding Through the Blizzard 0:01:48 - 0:03:09 - Cinematic Mountain Trek 0:03:09 - 0:04:02 - Preparing the Bow for Hunting 0:04:02 - 0:06:23 - Tracking Deer in the Snow 0:06:23 - 0:07:52 - Hunting the Herd with Silent Kills 0:07:52 - 0:09:02 - Retrieving the Carcasses 0:09:02 - 0:11:15 - Close Encounter with a Grizzly Bear 0:11:15 - 0:12:12 - Return to the Colter Settlement 0:12:12 - 0:13:10 - Butchering the Meat with Pearson 0:13:10 - 0:14:35 - Visiting a Recovering John Marston 0:14:35 - 0:15:52 - Dutch Outlines the Train Robbery Plan 0:15:52 - 0:16:15 - Outro and Credits 📖 Interactive written walkthrough with clickable timestamps: https://pixelfungaming.com/videos/red-dead-redemption-2-hunting-story-mission

Call of duty : Raid
The gameplay immerses the player in an intense, modern military first-person shooter campaign, likely a mission from the Call of Duty series. The mission begins with the character deployed from a helicopter, observing allied aircraft and heavy fighting in a war-torn urban coastal environment. The immediate objective involves securing an area while helicopters engage enemy positions overhead, providing cover fire. The character utilizes a scoped assault rifle, engaging enemy combatants across streets and behind rubble. Action quickly transitions to close-quarters combat inside narrow alleys and interior building spaces, relying heavily on quick aiming and precision fire against aggressive enemy AI. The player frequently takes heavy damage and experiences numerous mission failures, indicated by the screen flashing red and the 'Killed by a grenade' message, requiring frequent restarts from checkpoints. Combat involves navigating debris-filled streets, dodging incoming explosions, and clearing buildings floor by floor, often encountering immediate resistance upon breaching doorways. Later sections focus on clearing a large, multi-story structure, engaging enemies within retail or office spaces, necessitating careful movement and utilization of cover before the game is paused mid-mission. Chapters: 0:00:00 - 0:01:11 - Opening Sequence and External View 0:01:11 - 0:03:00 - Initial Urban Deployment and CQC Engagement 0:03:00 - 0:06:40 - Intense Firefights and Repetitive Checkpoint Restarts 0:06:40 - 0:11:40 - Street Battles and Grenade Encounters 0:11:40 - 0:14:25 - Clearing Interior Spaces and Hallway Combat 0:14:25 - 0:18:10 - Continued Assault to the Second Floor Objective 0:18:10 - 0:18:53 - Game Paused and End Screen 📖 Interactive written walkthrough with clickable timestamps: https://pixelfungaming.com/videos/call-of-duty-raid

Zero Hour: New Storm Harbor Map | Hardcore Mode
Check out our website: https://pixelfungaming.com Follow our Facebook page: https://www.facebook.com/pixelfungames Chapters: 0:00:00 - 0:00:13 - Mission briefing and loadout selection 0:00:13 - 0:01:24 - Initial harbor yard breach and firefights 0:01:24 - 0:03:00 - Navigating shipping container lanes under fire 0:03:00 - 0:04:15 - Tactical entry and clearing of office interiors 0:04:15 - 0:05:10 - Methodical sweep of multi-level warehouse 0:05:10 - 0:05:27 - Final suspect neutralization and extraction 0:05:27 - 0:05:38 - Mission success summary and rewards 📖 Interactive written walkthrough with clickable timestamps: https://pixelfungaming.com/videos/zero-hour-new-storm-harbor-map-hardcore-mode

RDR2 Online - Macfarlane Ranch Recovery Mission
The mission 'Recovery' begins at MacFarlane's Ranch with a meeting with Bonnie MacFarlane. She explains that a wagon has gone missing, likely taken by thieves, and offers a reward for its return. The protagonist mounts their horse and travels to the designated search area. Upon arrival, a group of outlaws is found guarding the stolen cart. A shootout ensues, with the protagonist using a repeater to eliminate the enemies from a distance. After clearing the area and looting the bodies for supplies, the protagonist hitches the cart to their horse and begins the journey back to the ranch. During the return trip, several groups of riders ambush the cart, requiring precise shooting to fend them off while maintaining control of the wagon. The mission concludes with the successful delivery of the cart to MacFarlane's Ranch, though a crime report shortly after results in a 'Wanted' status. Chapters: 0:00:00 - 0:01:32 - Meeting with Bonnie MacFarlane 0:01:32 - 0:02:35 - Traveling to the Search Area 0:02:35 - 0:03:07 - Engaging Outlaws at the Camp 0:03:07 - 0:03:45 - Looting Enemies and Securing the Cart 0:03:45 - 0:04:15 - Starting the Cart Delivery 0:04:15 - 0:05:07 - Defending the Cart from Ambushers 0:05:07 - 0:05:32 - Mission Completion and Wanted Status 📖 Interactive written walkthrough with clickable timestamps: https://pixelfungaming.com/videos/rdr2-online-macfarlane-ranch-recovery-mission

Red Dead Redemption 2 - Finding John
Arthur Morgan and Javier Escuella embark on a search for John Marston through the treacherous, snow-laden peaks of the Grizzlies. The journey begins on horseback, navigating through deep drifts and narrow mountain passes. Upon finding John's mauled horse, the search intensifies on foot as the duo scales steep cliffs and traverses precarious ledges. They eventually locate a severely wounded John, his face scarred by wolves. The rescue mission turns into a fight for survival as a pack of wolves ambushes them on the descent. Arthur holds off the predators with his firearms, protecting Javier as he carries John to safety. A high-stakes horseback pursuit follows, with Arthur fending off more wolf attacks through the thick winter fog. The mission concludes as they successfully return to the camp at Colter, where John receives medical attention while the gang leaders deliberate their next move in the harsh wilderness. Chapters: 0:00:00 - 0:00:07 - Intro logo sequence 0:00:07 - 0:00:45 - Navigating snowy mountain trails on horseback 0:00:45 - 0:01:21 - Discovery of John Marston's dead horse 0:01:21 - 0:03:00 - Dismounting and preparing weapons for the climb 0:03:00 - 0:05:58 - Navigating narrow cliff ledges and scaling icy rock faces 0:05:58 - 0:07:05 - Locating an injured John Marston 0:07:05 - 0:07:38 - Ambush by a pack of wolves on the ridge 0:07:38 - 0:08:15 - Ground combat against wolves while protecting the group 0:08:15 - 0:08:52 - Mounting up and beginning the horseback escape 0:08:52 - 0:09:48 - Fending off more wolf attacks during a high-speed chase 0:09:48 - 0:10:20 - Riding through a stream to mask their trail 0:10:20 - 0:11:09 - Returning to the Colter camp with John Marston 0:11:09 - 0:11:45 - Post-mission dialogue and gang leaders' discussion 0:11:45 - 0:11:58 - Outro and channel end card 📖 Interactive written walkthrough with clickable timestamps: https://pixelfungaming.com/videos/red-dead-redemption-2-finding-john

Titanfall Expedition Gameplay : War Games - Capture the flag
The mission begins with Militia pilots deploying into the virtual simulation of the War Games map for a high-stakes Capture the Flag match. Initial movements involve rapid wall-running and parkour maneuvers as both teams rush to secure the opposing flag. Early skirmishes take place in the tight corridors and multi-leveled structures of the digital city. Combat transitions into heavy mechanical warfare as pilots earn and call down their Titans. An Atlas-class Titan equipped with Quad Rockets dominates several mid-match encounters, providing crucial area denial. The first half concludes with a tied score of 1-1 after intense back-and-forth captures. The second half sees the IMC team gain a strategic advantage, utilizing superior Titan positioning to pressure the Militia base. Despite several desperate recovery attempts by Militia pilots, the IMC secures a decisive 3-1 lead. The engagement ends with an IMC victory, triggering an epilogue where surviving Militia forces attempt a frantic retreat to an evacuation dropship while being hunted through the simulation's streets. Chapters: 0:00:00 - 0:02:30 - Initial Deployment and Opening Skirmishes 0:02:30 - 0:04:54 - High-Speed Pilot Flag Defense 0:04:54 - 0:07:25 - Titan Engagement and Halftime Transition 0:07:25 - 0:10:00 - Second Half Opening and Flag Contention 0:10:00 - 0:12:30 - Late-Game Titan Combat and IMC Momentum 0:12:30 - 0:14:33 - Final Flag Pushes and Match Conclusion 0:14:33 - 0:15:53 - Extraction Epilogue and Evacuation Attempt 📖 Interactive written walkthrough with clickable timestamps: https://pixelfungaming.com/videos/titanfall-expedition-gameplay-war-games-capture-the-flag

Red Dead Redemption 2 - Lemoyne Raider Gang Encounters
Intense combat sequences unfold across the diverse landscapes of the frontier. The action begins with a woodland skirmish against a group of hostiles near a wagon using a repeater. Shifting to the foggy swamps, long-range marksmanship eliminates distant threats before a nocturnal confrontation breaks out at a train station. Here, brutal melee takedowns and close-quarters gunplay define the struggle against Lemoyne Raiders. Deep in the woods at night, a rescue mission ensues as Murfree Brood members are dispatched to free a captive tied to a tree. A swift quick-draw encounter on a dusty path precedes the final rainy ambush, where a Lemoyne Raider transport is intercepted from horseback. The sequence concludes with the systematic looting of fallen foes and a strategic retreat to avoid law enforcement after the crimes are witnessed. 📖 Chapters: 0:00:00 - 0:00:18 - Woodland wagon ambush 0:00:18 - 0:00:35 - Long-range swamp engagement 0:00:35 - 0:01:22 - Nighttime train station confrontation 0:01:22 - 0:02:19 - Rescuing a hostage from the Murfree Brood 0:02:19 - 0:02:44 - Rapid path-side gunfight 0:02:44 - 0:03:42 - Rainy horseback ambush and looting

HITMAN 3: Elusive Target | Sully ''The Crusher'' Bowden (Gets Crushed)
Check out our website: https://pixelfungaming.com Follow our Facebook page: https://www.facebook.com/pixelfungames Chapters: 0:00:00 - 0:00:50 - Mission Briefing: Sully 'The Crusher' Bowden 0:00:50 - 0:01:55 - Arrival in Rainy Chongqing 0:01:55 - 0:03:35 - Infiltration and Rooftop Navigation 0:03:35 - 0:05:25 - Silent Takedowns and Hiding Evidence 0:05:25 - 0:07:30 - Building Interior Infiltration 0:07:30 - 0:08:30 - Target Observation and Area Scouting 0:08:30 - 0:11:10 - Strategic Lures and Path Clearing 0:11:10 - 0:12:40 - Monitoring Bowden's Routine 0:12:40 - 0:14:10 - Final Setup and Target Luring 0:14:10 - 0:14:40 - Accident Assassination and Escape 0:14:40 - 0:15:15 - Mission Rating and Completion 📖 Interactive written walkthrough with clickable timestamps: https://pixelfungaming.com/videos/hitman-3-elusive-target-sully-the-crusher-bowden-gets-crushed

Far Cry New Dawn - Breakout Walkthrough
The mission begins with a drive through the vibrant but dangerous landscape of Hope County toward the Blacklung Mine. Upon arrival, a stealthy approach quickly transitions into a fierce firefight against the Highwaymen occupying the industrial site. Searching the area leads to the discovery of the coal mine key, which grants access to the dark, cavernous interior of the mine. Deep within the tunnels, a rescue operation unfolds to free Thomas Rush from his captors. Once liberated, the escape turns into a high-octane chase on a modified vehicle. Defending the vehicle from the turret seat involves repelling waves of enemy pursuit vehicles and foot soldiers through winding forest roads. The journey culminates at the gates of Prosperity, where a cutscene depicts Rush's return to the settlement and his initial medical treatment, setting the stage for the resistance's next moves. Chapters: 0:00:00 - 0:01:45 - Traveling to the Blacklung Mine location 0:01:45 - 0:04:15 - Assaulting the Highwaymen outpost at the mine entrance 0:04:15 - 0:05:30 - Securing the mine key and entering the facility 0:05:30 - 0:07:45 - Infiltrating the tunnels and rescuing Thomas Rush 0:07:45 - 0:09:45 - Escaping the mine and boarding the getaway vehicle 0:09:45 - 0:11:45 - Defending the vehicle during a high-speed chase 0:11:45 - 0:13:30 - Arriving at Prosperity and completing the mission 0:13:30 - 0:15:36 - Thomas Rush's return and mission wrap-up 📖 Interactive written walkthrough with clickable timestamps: https://pixelfungaming.com/videos/far-cry-new-dawn-breakout-walkthrough

Assassins Creed Mirage: Help Makira | Steal The Book Walkthrough
The video presents a complete walkthrough of the 'The Servant and the Imposter' quest in Assassin's Creed Mirage. Viewers will follow Basim as he infiltrates a restricted Harem area to retrieve a specific book for a character named Makira. The footage emphasizes stealth-focused gameplay, showing the use of environment-based cover like flower beds to navigate past guards. It also demonstrates various game mechanics such as eagle vision for tracking objectives, silent assassinations, body concealment, and the game's signature parkour system for scaling palace walls. The video concludes with Basim successfully finding the book 'The Garden and its Mysteries' and delivering it to the target room. Chapters: 0:00:00 - 0:00:15 - Initial infiltration into the Harem restricted zone 0:00:15 - 0:00:48 - Utilizing garden foliage for stealth and neutralizing guards 0:00:48 - 0:01:17 - Clearing the garden path and hiding bodies to remain undetected 0:01:17 - 0:01:36 - Scaling the exterior palace walls using parkour to reach upper levels 0:01:36 - 0:01:54 - Searching the inner quarters and retrieving the quest book 0:01:54 - 0:02:35 - Navigating back through the palace interior toward the objective 0:02:35 - 0:03:07 - Returning to Makira's room and completing the delivery 📖 Interactive written walkthrough with clickable timestamps: https://pixelfungaming.com/videos/assassins-creed-mirage-help-makira-steal-the-book-walkthrough

Goat Simulator - PT 3 Front flip
Gameplay begins with menu navigation before entering the open world of Goat Simulator. The goat starts in a suburban backyard, performing basic jumps and flips to rack up score points. It then moves through residential streets, jumping over fences and knocking into objects to maintain a combo. The action shifts to a construction site where the goat climbs a massive yellow crane, eventually reaching the very top. From this height, it performs a series of flips while falling, landing in a pile of containers. The goat continues its path of destruction by smashing backyard furniture and boxes. It utilizes backyard trampolines to gain significant airtime, completing the 'Airtime Easy' and 'Flipping Easy' quests. The highlight occurs at a gas station where the goat headbutts a car, triggering a chain reaction of massive explosions that grant the 'Michael Bay' achievement. The session concludes with a high-speed dash along the highway, dodging traffic and getting launched into the air by passing vehicles. Chapters: 0:00:00 - 0:01:15 - Menu Setup and Initial Exploration 0:01:15 - 0:02:45 - Construction Site and Crane Climbing 0:02:45 - 0:04:15 - High-Altitude Base Jumping and Stunts 0:04:15 - 0:05:45 - Trampoline Questing and Backyard Chaos 0:05:45 - 0:06:31 - Gas Station Explosion and Highway Dash 📖 Interactive written walkthrough with clickable timestamps: https://pixelfungaming.com/videos/goat-simulator-pt-3-front-flip

Rainbow Six Siege Multiplayer : Good hiding/ambush spot-2 kills
The gameplay opens during Round 2 of a defensive match in Rainbow Six Siege, with the score 0-1. The character, positioned defensively in the Laundry Room, holds an MP5K. Combat immediately begins as an attacker breaches the entrance; the defender quickly eliminates the target with sustained fire, resulting in a 4 VS 4 state. The character reloads while teammates call out enemy positions above. Another attacker pushes the position, resulting in a trade that leaves the round at 3 VS 3, then quickly 3 VS 2. The character deploys C4 in a strategic defensive spot. A discussion occurs about the armor and headshot mechanics after a teammate is eliminated. An attacker attempts to drop or rappel near the position; the defender immediately detonates the C4, eliminating the threat and shifting the round to 3 VS 1. The character holds the door angle, listening for footsteps. After a moment of silence and positioning, the final attacker is located. The defender engages the last enemy, securing the final kill and winning the round for the team. Chapters: 0:00 - 0:15 - Initial Engagement and Trading Kills 0:15 - 0:33 - C4 Deployment and Countering the Drop Attack 0:33 - 0:53 - Holding the Angle and Securing the Round Victory 📖 Interactive written walkthrough with clickable timestamps: https://pixelfungaming.com/videos/rainbow-six-siege-multiplayer-good-hiding-ambush-spot-2-kills

Red Dead Redemption 2 - Stranger Encounter - Putting Injured Man Out Of His Misery
The scene opens with a ride through a dense forest on horseback, drawn toward desperate cries for help in Spanish. A man lies on the ground, struggling against two attacking wolves. Rapid gunfire neutralizes the predators, and the character dismounts to investigate the survivor. The injured man groans in pain, and while prompts for medicine or whiskey appear, the situation takes a sudden and dark turn. The character executes the wounded man with a single headshot. Following the killing, the character loots the body, acquiring gun oil and an opossum pelt, then stands briefly over the remains in the quiet woods. Chapters: 0:00:00 - 0:00:10 - Responding to distress calls and neutralizing the wolf threat 0:00:10 - 0:00:25 - Dismounting and interacting with the injured survivor 0:00:25 - 0:00:35 - Execution of the wounded man 0:00:35 - 0:00:54 - Looting the body and surveying the aftermath 📖 Interactive written walkthrough with clickable timestamps: https://pixelfungaming.com/videos/red-dead-redemption-2-stranger-encounter-putting-injured-man-out-of-his-misery

RDR2 - Epilogue - Old Habits
The mission begins at Pronghorn Ranch, where Jim Milton intervenes as members of the Laramie Gang harass a young farmhand. A tense standoff quickly escalates into a brutal fistfight after the gang leader mocks Jim's status. Combat involves a series of punches, dodges, and grapples in a field of wildflowers, with Jim eventually pinning his opponent to the ground and delivering several heavy blows. Abigail Milton rushes onto the scene to stop the fight, pulling Jim away before further harm is done. The Laramie Gang members retreat on horseback, shouting threats of retaliation as they ride off. The encounter concludes with a brief dialogue where Abigail expresses her deep frustration with Jim's recurring violent behavior, highlighting the tension between his past life and their current attempt at a peaceful existence. Chapters: 00:00:00 - 00:00:31 - Confrontation with the Laramie Gang 00:00:31 - 00:01:03 - Fistfight at Pronghorn Ranch 00:01:03 - 00:01:52 - Abigail Intervenes and Gang Retreats 00:01:52 - 00:02:07 - Abigail's Frustration with Jim Milton 📖 Interactive written walkthrough with clickable timestamps: https://pixelfungaming.com/videos/rdr2-epilogue-old-habits

Sniper Elite 3 - Kasserine Pass
Welcome to a full mission walkthrough of Sniper Elite 3, featuring the Kasserine Pass level. In this tactical stealth operation, Karl Fairburne infiltrates the rugged mountains of North Africa to locate General Vahlen's personal headquarters. The objective is to uncover the nature of the mysterious 'Project Seuche' and gain intel on the massive 'Ratte' tank. The gameplay emphasizes precision sniping, environmental awareness, and silent infiltration. Throughout the video, you'll see various tactical approaches, including high-ground sniping, close-quarters stealth takedowns, and the strategic use of explosives to clear enemy outposts. Key highlights include the destruction of Nebelwerfer artillery units, a tense approach to the ancient temple structure serving as the HQ, and numerous signature x-ray kill cams that showcase the game's detailed ballistics. Watch as we navigate the treacherous pass, eliminate elite German snipers, and finally breach Vahlen's office to secure critical intelligence for the Allied cause. Chapters: 0:00:00 - Campaign Menu and Mission Selection 0:00:20 - Mission Briefing: Kasserine Pass Intro 0:01:26 - Karl Fairburne Arrives at the Pass 0:02:14 - Objective: Infiltrate Vahlen's HQ Begins 0:04:12 - Explosive Double Kill Highlight 0:05:13 - New Optional Objective: Nebelwerfers 0:07:05 - Precision Liver Shot X-Ray Cam 0:09:32 - Spectacular Sniper Headshot 0:10:07 - Destroying the First Nebelwerfer Unit 0:13:40 - Stealth Navigation through Mountain Ruins 0:17:15 - Long-Range Tactical Sniping from the Ridge 0:21:08 - Silent Bush Takedown and Stealth Movement 0:24:21 - Relocation Successful: Evading Enemy Detection 0:27:30 - Approaching the Temple Headquarters 0:31:14 - Clearing the Temple Guard Posts Silently 0:33:51 - Sniper Duel: Engaging Long-Range Targets 0:35:52 - Double Kill X-Ray Highlight Sequence 0:39:42 - Precision Shot Through Halftrack Window 0:42:20 - Locating the Safe Combination Document 0:44:44 - Breaching Vahlen's Private Office 0:45:12 - Mission Complete and Final Results 📖 Interactive written walkthrough with clickable timestamps: https://pixelfungaming.com/videos/sniper-elite-3-kasserine-pass

Alien Slayer 3D : Mission 2
The gameplay begins with the character initiating a mission on Level 2, tasked with destroying 10 alien eggs in a futuristic, metallic corridor environment. The character immediately engages small, crab-like alien enemies using a futuristic machine gun, earning XP for each kill. Initial movement involves navigating short corridors and encountering doors that require specific keycards (Green, Red, Yellow) or skills. During the first attempt, the character aggressively pushes through encounters, successfully killing several aliens and collecting rifle bullets and health packs, but eventually succumbs to a larger, winged alien creature, resulting in a 'Mission Failed' screen. After reloading and starting Level 2 again, the character efficiently re-clears the initial rooms, obtaining an RPG and rifle bullets early on. The character navigates through various sections of the base, fighting waves of both small and winged aliens. Key combat moments involve rapid-fire bursts to dispatch multiple enemies simultaneously. The character successfully obtains the Green Key after defeating a large alien, enabling further progression. They continue the objective of destroying alien eggs throughout the level while collecting necessary keycards (Yellow and Blue) and ammunition. Upon defeating more enemies and locating the final eggs, the primary objective is completed. The character uses the Blue Key to unlock the final door, clearing the last section of enemies before the Level Completed screen displays the mission results and overall score. Chapters: 0:00:00 - 0:04:00 - Game Startup and Initial Level Entry 0:04:00 - 1:10:00 - Early Combat Encounters and Initial Exploration 1:10:00 - 2:28:00 - Advancing Through Corridors and Collecting Items 2:28:00 - 3:44:00 - Intense Alien Combat and Mission Failure 3:44:00 - 5:58:00 - Level 2 Start, Key Collection, and Renewed Combat 5:58:00 - 7:37:00 - Acquiring Keys and Completing Primary Objective 7:37:00 - 11:38:00 - Final Combat and Level Completion Screen 📖 Interactive written walkthrough with clickable timestamps: https://pixelfungaming.com/videos/alien-slayer-3d-mission-2

Titanfall : Campaign 2 - The Colony ( Victory )
The match takes place on "The Colony" map in Attrition mode, featuring a conflict between the Militia and the IMC. Gameplay begins with a dropship insertion into a rain-slicked urban environment. The character immediately engages hostile Spectres and enemy pilots using an R-101C Carbine. Throughout the engagement, the character utilizes advanced mobility like wall-running and double-jumping to navigate between rooftops and cramped building interiors. Tactical decisions involve hacking enemy robotic units to bolster the Militia's numbers. Combat shifts frequently between close-quarters pilot shootouts and providing support fire against enemy Titans from elevated positions. Following a Militia victory, the match transitions into an epilogue phase where the objective becomes hunting down fleeing IMC pilots before they can reach their extraction point. The experience concludes with a review of the final performance stats and a cinematic transition back to the fleet. Chapters: 0:00:00 - 0:01:10 - Campaign Lobby and Mission Briefing 0:01:10 - 0:02:07 - Initial Deployment and Urban Combat 0:02:07 - 0:03:15 - Tactical Maneuvers through the Colony 0:03:15 - 0:04:33 - Building Defense and Titan Engagement 0:04:33 - 0:05:02 - Rooftop Traversal and Nuclear Ejection 0:05:02 - 0:06:36 - Final Push and Enemy Interception 0:06:36 - 0:07:15 - Militia Victory and Epilogue Start 0:07:15 - 0:08:13 - Hunting IMC Pilots and Spectating Titans 0:08:13 - 0:08:26 - Match Results and Post-Game Stats 📖 Interactive written walkthrough with clickable timestamps: https://pixelfungaming.com/videos/titanfall-campaign-2-the-colony-victory

HITMAN Sapienza : "Accidental death" Electrocution
Exposing the wire of a cord with a screw driver and turning on the water hose witll cause the target to get electrocuted HITMAN™ https://store.playstation.com/#!/en-us/tid=CUSA02976_00 Chapters: 0:00:00 - 0:00:26 - Infiltration of the Mansion Interior 0:00:26 - 0:00:52 - Accessing the Security Room and Deleting Evidence 0:00:52 - 0:01:15 - Sabotaging the Terrace Floor Fan 0:01:15 - 0:01:52 - Waiting for the Target Arrival 0:01:52 - 0:02:08 - Target Eliminated: Francesca De Santis 0:02:08 - 0:03:04 - Guards Investigate Scene while Agent 47 Evades 📖 Interactive written walkthrough with clickable timestamps: https://pixelfungaming.com/videos/hitman-sapienza-accidental-death-electrocution

RDR 2 Online - Tumbleweed Caravan Escort
The mission 'Caravan Escort' begins with a stern briefing from Sheriff Freeman in the Tumbleweed jail. He emphasizes his commitment to bringing civilization to New Austin through any means necessary and recruits the character to protect a supply caravan. The journey starts with a pair of horse-drawn wagons navigating the dusty trails toward Fort Mercer. Along the way, the wagon driver reflects on human nature until an ambush suddenly erupts from the surrounding cliffs. Outlaws open fire from elevated positions, forcing the character into an intense shootout. During the chaos, one of the drivers is killed, necessitating a quick takeover of the wagon's reins. The character successfully repels the attackers and continues the treacherous drive through the desert. After navigating several miles of winding paths and maintaining a defensive posture, the caravan finally reaches the fortified gates of Fort Mercer. The mission concludes with a successful delivery and the character exploring the interior of the historic fort. Chapters: 0:00:00 - 0:01:42 - Briefing with Sheriff Freeman in Tumbleweed 0:01:42 - 0:03:22 - Beginning the Escort through New Austin 0:03:22 - 0:04:47 - Repelling an Outlaw Ambush on the Cliffs 0:04:47 - 0:07:32 - Final Delivery to Fort Mercer 0:07:32 - 0:07:49 - Mission Completion and Aftermath 📖 Interactive written walkthrough with clickable timestamps: https://pixelfungaming.com/videos/rdr-2-online-tumbleweed-caravan-escort

RDR2 - My Last Boy Walkthrough
The mission My Last Boy begins at the Beaver Hollow camp, where Arthur Morgan and Dutch van der Linde engage in a tense argument over the gang's failing leadership. The arrival of Eagle Flies and his Native American war party shifts the focus, as they prepare to attack the Cornwall oil refinery. Despite a moving plea for peace from Rains Fall, his son leads the warriors into battle. Arthur, Charles, and other gang members decide to follow, riding out toward the smoke-filled horizon. Upon arriving at the Cornwall Kerosene & Tar facility, they find it engulfed in flames and heavily guarded. A massive firefight erupts as the gang charges in on horseback, eventually dismounting to clear the area on foot. Arthur pushes through intense gunfire and explosions, taking out snipers and soldiers to reach the heart of the refinery and rescue Eagle Flies from the chaos. Chapters: 0:00:00 - 0:02:15 - Tensions at camp and the warriors' departure 0:02:15 - 0:04:30 - Arthur rallies the gang and rides toward the oil fields 0:04:30 - 0:06:45 - Initial assault and horseback charge into the burning refinery 0:06:45 - 0:08:11 - Intense ground combat and the search for Eagle Flies 📖 Interactive written walkthrough with clickable timestamps: https://pixelfungaming.com/videos/rdr2-my-last-boy-walkthrough
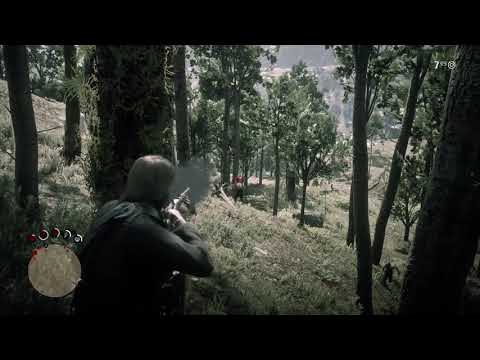
RDR2: Ambushed By Murfree Brood and Kill Them All
A high-stakes gunfight erupts on a densely wooded hillside as a gunslinger faces off against the Murfree Brood. The encounter begins with rapid shots fired while descending steep terrain, forcing a quick transition to cover behind nearby rocks. Precise rifle fire picks off enemies hidden among the trees below. As the battle shifts, movement continues through the undergrowth, leading to the looting of a fallen opponent. The skirmish concludes near a tranquil lake where the remaining threats are neutralized with steady aim. The final moments involve a cautious survey of the area through the forest canopy. Chapters: 0:00:00 - 0:00:15 - Initial Hillside Skirmish 0:00:15 - 0:00:45 - Tactical Firefight from Cover 0:00:45 - 0:01:00 - Looting and Weapon Re-evaluation 0:01:00 - 0:01:16 - Final Engagement Near the Lake 📖 Interactive written walkthrough with clickable timestamps: https://pixelfungaming.com/videos/rdr2-ambushed-by-murfree-brood-and-kill-them-all

Titanfall expedition gameplay : Run off - Attrition
The mission begins with a rapid deployment from a dropship into the industrial sectors of the Runoff map. Initial combat involves high-speed skirmishes against enemy Grunts and Pilots using the R-101C Carbine. Navigation through narrow corridors and open industrial yards showcases seamless wall-running and parkour maneuvers. Following several intense firefights and tactical respawns, a Titan becomes ready for deployment. The transition to mechanized combat introduces the Quad Rocket and Vortex Shield, which are used to engage enemy Titans in a fierce multi-front battle across the water treatment facility. After the Titan is eventually destroyed in a heavy engagement, the fight continues on foot through the final minutes of the match as both sides push for attrition points. The encounter concludes with a frantic epilogue where surviving forces attempt to reach an extraction dropship while under heavy fire from the winning team. The mission ends with a detailed breakdown of player performance and match statistics. Chapters: 0:00:00 - 0:00:15 - Dropship Deployment 0:00:15 - 0:01:16 - Initial Skirmishes on Foot 0:01:16 - 0:02:42 - Interior Combat and Tactical Maneuvers 0:02:42 - 0:03:52 - Preparing for Titanfall 0:03:52 - 0:05:27 - Heavy Titan Warfare 0:05:27 - 0:07:09 - Final Pilot Stand 0:07:09 - 0:08:15 - Epilogue: The Scramble to Evacuate 0:08:15 - 0:08:31 - Match Results and Statistics 📖 Interactive written walkthrough with clickable timestamps: https://pixelfungaming.com/videos/titanfall-expedition-gameplay-run-off-attrition

Red Dead redemption 2 - Treasure Hunting
Welcome to another immersive session of Red Dead Online! In this video, we embark on a dual treasure-hunting expedition across the vast landscapes of the frontier. We start by analyzing our maps and setting our sights on the first objective: the Backbone Forest treasure. The journey is far from peaceful. As night falls, the wilderness proves its lethality when a pack of hungry wolves ambushes us. Shortly after dealing with the canine threat, we cross paths with a massive grizzly bear in the deep woods, leading to a tense and dangerous encounter. Along the way, we take some time to loot abandoned wagons and hunt local wildlife like raccoons and turkeys to make the trip profitable. After successfully uncovering the hidden lockbox in Backbone Forest, we make a pitstop in the bustling town of Valentine. Here, we visit the local butcher to trade our hard-earned pelts and meat for cash before heading to the general store to restock our supplies for the next leg of the journey. The second part of our adventure takes us towards Bard's Crossing. On the way, we pull off an impressive takedown of a whitetail buck. The search area at Bard's Crossing is challenging, but with the help of Eagle Eye, we eventually track down the second treasure chest perched on a precarious cliffside. Join us for this comprehensive walkthrough of treasure hunting, survival, and life on the trail in Red Dead Online. Chapters: 0:00:00 - Video starts with loading screens 0:00:36 - Beginning the hunt and checking the map 0:01:35 - Studying the Backbone Forest Treasure Map 0:03:00 - Intense wolf pack attack defense 0:05:00 - Crossing the river under the moonlight 0:07:48 - Dangerous grizzly bear encounter in the woods 0:09:48 - Investigating and looting the abandoned wagon 0:12:30 - Tracking clues in the dense forest 0:15:00 - Searching the burnt-out forest area 0:17:15 - Small game hunting: Raccoon and Turkey 0:19:05 - Finding and opening the Backbone Forest Treasure 0:21:00 - Long scenic ride toward the town of Valentine 0:24:46 - Selling pelts and meat at the Valentine Butcher 0:28:42 - Restocking supplies at the General Store 0:31:07 - Impressive takedown of a Whitetail Buck 0:34:00 - Exploring the Bard's Crossing search area 0:36:31 - Collecting the Bard's Crossing Treasure reward 0:37:19 - Video concludes 📖 Interactive written walkthrough with clickable timestamps: https://pixelfungaming.com/videos/red-dead-redemption-2-treasure-hunting

Red Dead Redemption 2 - Appaloosa
The mission begins with an intense horseback pursuit through a dense forest as Arthur Morgan and Sadie Adler trail Anthony Foreman's gang. Upon reaching a scenic shoreline, a fierce shootout erupts. Arthur efficiently eliminates the gang members while remaining mounted, eventually singling out Anthony Foreman. As Foreman attempts a desperate escape, Arthur pursues him across open fields, expertly using a lasso to pull him from his horse and hogtie him. After securing the prisoner, Arthur rides back to the gang's hideout at Shady Belle, ignoring Foreman's attempts at intimidation and bribery along the way. Upon arrival, Arthur delivers the captive to Tilly Jackson, leading to a tense confrontation where Tilly's dark past with Foreman is revealed. Dutch van der Linde intervenes, leaving Foreman's ultimate fate in Arthur's hands. Choosing a path of mercy, Arthur spares Foreman's life, cutting his bonds and warning him never to return before watching him flee into the wilderness. Chapters: 0:00:00 - 0:00:21 - High-Speed Forest Pursuit 0:00:21 - 0:00:37 - Shoreline Gunfight and Combat 0:00:37 - 0:01:25 - Capturing Anthony Foreman 0:01:25 - 0:03:00 - Escorting the Prisoner to Shady Belle 0:03:00 - 0:04:35 - Arrival and Confrontation with Tilly 0:04:35 - 0:05:40 - Dutch Intervenes and Tilly's Ultimatum 0:05:40 - 0:06:44 - Final Choice and Mission Conclusion 📖 Interactive written walkthrough with clickable timestamps: https://pixelfungaming.com/videos/red-dead-redemption-2-appaloosa

RDR2: Murdering A KKK Leader
Arthur Morgan encounters a group of robed men attempting to raise a large wooden cross in a grassy field. The heavy cross falls over unexpectedly, crushing two of the participants under its weight. Arthur quickly moves in, lassoing and hogtying the surviving leader dressed in black robes. After looting a letter from one of the deceased, Arthur heaves the captive onto the back of his horse. The journey proceeds through the sprawling wilderness, crossing streams and climbing hills until reaching a secluded ridge with a scenic overlook. Arthur dismounts, unloads the prisoner, and cuts his bonds. When the man tries to plead for his life, Arthur tackles him to the ground and chokes him to death in the tall grass, ultimately searching the body for valuables. Chapters: 0:00:00 - 0:00:13 - A failed cross-raising ceremony 0:00:13 - 0:00:41 - Capturing the leader and looting the scene 0:00:41 - 0:00:59 - Loading the captive onto the horse 0:00:59 - 0:01:40 - Traveling through the open countryside 0:01:40 - 0:02:11 - Arriving at a secluded ridge for the execution 0:02:11 - 0:02:41 - Final struggle and terminal confrontation 📖 Interactive written walkthrough with clickable timestamps: https://pixelfungaming.com/videos/rdr2-murdering-a-kkk-leader

RDR2 : Throwing Murfree Brood Off A Cliff
Arthur Morgan encounters a hostile member of the Murfree Brood in the rugged wilderness. After a swift struggle, Arthur overpowers the man and hogties him on the forest floor. He loots the captive, retrieving some Potent Snake Oil while the bandit continues to hurl insults. Arthur then hoists the bound man onto his shoulder and navigates through the dense brush toward the edge of a steep cliff. Upon reaching the precipice overlooking a rushing river, Arthur hurls the screaming captive into the depths below. He remains at the edge for several moments, watching as the current carries the man away before the scene fades. Chapters: 0:00:00 - 0:00:10 - Subduing the Murfree Brood bandit 0:00:10 - 0:00:25 - Looting the captive for supplies 0:00:25 - 0:00:45 - Transporting the prisoner to the cliffside 0:00:45 - 0:01:03 - Executing the final drop into the river 📖 Interactive written walkthrough with clickable timestamps: https://pixelfungaming.com/videos/rdr2-throwing-murfree-brood-off-a-cliff

Far Cry 5 - Death From Above - School Bus, US Auto
The gameplay starts with scouting a cultist-controlled outpost from a rocky overlook. After identifying a target standing on a bus, a tactical jump initiates an aerial takedown. The character plunges a knife into the cultist, securing a quiet kill. The sequence concludes with scavenging rifle ammo from the fallen enemy before moving further into the outpost. Chapters: 0:00:00 - 0:00:04 - Scouting the cult outpost from a rocky vantage point 0:00:04 - 0:00:07 - Jumping down to engage the target on the bus 0:00:07 - 0:00:11 - Executing an aerial takedown and looting the enemy 📖 Interactive written walkthrough with clickable timestamps: https://pixelfungaming.com/videos/far-cry-5-death-from-above-school-bus-us-auto

Far Cry 5 - VIETNAM - Lighter location near Prison Camp
The mission begins with a tactical overview of the map, pinpointing the location of a collectible lighter near a prison camp. Gameplay transitions to a first-person perspective as the character traverses through dense jungle brush and over rocky terrain. An objective marker appears, signaling that a crashed US pilot is located nearby. After navigating past thick foliage, the character finds a downed pilot lying on the ground next to a parachute at the edge of a cliff. The character approaches and loots the body, recovering a USMC fighter pilot's lighter along with rifle ammunition. This action completes the 'Lighters Collected' collection task, reaching the final count of eight out of eight. Chapters: 0:00:00 - 0:00:11 - Map navigation and objective scouting 0:00:11 - 0:00:22 - Exploring the jungle environment near the crash site 0:00:22 - 0:00:30 - Finding the downed pilot and collecting the final lighter 📖 Interactive written walkthrough with clickable timestamps: https://pixelfungaming.com/videos/far-cry-5-vietnam-lighter-location-near-prison-camp

Red Dead Redemption 2 - Stranger Encounter - Rescuing Stranger From Robbers
Arthur Morgan encounters a stagecoach robbery in progress on a scenic coastal road. He immediately intervenes, engaging in a physical brawl with one of the bandits while another attempts to flee. After knocking the first assailant to the ground, Arthur uses his lasso to hogtie him. He then catches up to and subdues a second bandit, binding him as well. The rescued stagecoach driver offers his thanks and suggests that Arthur take the contents of the lockbox since the company will report it as stolen anyway. After the driver departs on horseback, Arthur executes the bound outlaws with his revolver. He proceeds to loot the bodies and inspect the stagecoach before the scene concludes. Chapters: 0:00:00 - 0:00:08 - Channel intro sequence 0:00:08 - 0:00:20 - Intervening in the stagecoach robbery 0:00:20 - 0:00:35 - Engaging and subduing the first bandit 0:00:35 - 0:00:50 - Capturing and hogtying the second outlaw 0:00:50 - 0:01:15 - Dialogue with the rescued driver 0:01:15 - 0:01:30 - Executing the captured outlaws 0:01:30 - 0:01:40 - Looting the bodies and exploring the area 0:01:40 - 0:01:51 - Social media links and outro 📖 Interactive written walkthrough with clickable timestamps: https://pixelfungaming.com/videos/red-dead-redemption-2-stranger-encounter-rescuing-stranger-from-robbers

Red Dead Redemption 2 - Old Friends - Capturing The O'driscoll
Arthur Morgan pursues an O'Driscoll gang member through a harsh, snowy landscape. Upon catching the fleeing rival, Arthur uses his lasso to bring him down and promptly hogties him. He then loads the prisoner onto his horse and begins the long trek back to the gang's temporary camp. During the ride, the captive identifies himself as Kieran Duffy and pleads for his life, while Arthur remains sternly focused on the path. Upon reaching the camp, Arthur delivers Kieran to Dutch van der Linde. A tense confrontation follows as the gang members decide the captive's fate, ultimately tying him up outside for future interrogation. The mission concludes as Arthur steps back out into the cold mountain air to prepare for the next objective. Chapters: 0:00:00 - 0:00:07 - EC Gaming Channel Intro 0:00:08 - 0:00:25 - High-Speed Snow Pursuit 0:00:26 - 0:00:38 - Lassoing the Fleeing O'Driscoll 0:00:39 - 0:01:02 - Capturing and Stowing the Prisoner 0:01:03 - 0:02:48 - Returning to Camp Through the Blizzard 0:02:49 - 0:03:28 - Delivering the Prisoner to the Cabin 0:03:29 - 0:04:26 - Gang Confrontation and Interrogation Cutscene 0:04:27 - 0:04:46 - Mission Complete: Old Friends 0:04:47 - 0:04:58 - Channel Outro and Call to Action 📖 Interactive written walkthrough with clickable timestamps: https://pixelfungaming.com/videos/red-dead-redemption-2-old-friends-capturing-the-o-driscoll

The Walking Dead Game Season 2 : Episode 1 Chapters 4-7
Experience the beginning of Clementine's harrowing journey in this full gameplay walkthrough of The Walking Dead: Season 2, Episode 1: 'All That Remains.' This video covers the intense first chapter where a young Clementine must navigate a brutal world alone after being separated from her companions. Witness the key moments that define this season, starting with Clementine's desperate search for food in the wilderness and her tragic encounter with a hungry dog at an abandoned campsite. Following a severe injury, she is discovered by a new group of survivors led by Luke and Pete, but her safety is far from guaranteed. Suspected of being bitten by a walker, she is locked away in a shed without medical attention. The walkthrough details the tense sneaking mission into the group's cabin to scavenge for medical supplies and her first interaction with Sarah. Watch the iconic and visceral self-surgery scene as Clementine is forced to stitch her own wound to survive the night. The episode concludes with an unexpected fight for her life within the shed, setting the stage for her integration into this new, complex group of survivors. This video showcases the choice-driven gameplay and emotional storytelling that Telltale Games is known for, emphasizing Clementine's growth from a protected child into a capable survivor. Chapters: 0:00:00 - Episode 1: All That Remains - Intro 0:05:25 - Clementine Alone in the Woods 0:10:15 - Exploring the Riverbank & Campsite 0:15:30 - Encounter with Sam the Dog 0:20:10 - Scavenging the Abandoned Camp 0:25:40 - The Dog Attack & Injury 0:31:45 - Walker Pursuit and Rescue 0:35:10 - Meeting the New Group: Luke and Pete 0:40:20 - Locked in the Shed 0:45:30 - Sneaking into the Cabin for Supplies 0:50:15 - Meeting Sarah Inside the House 0:55:40 - Intense Self-Surgery Scene 1:00:10 - Defending the Shed from a Walker 📖 Interactive written walkthrough with clickable timestamps: https://pixelfungaming.com/videos/the-walking-dead-game-season-2-episode-1-chapters-4-7

RDR2 : Train Robbery - Best Place To Park A Hijacked Train
Arthur Morgan gallops alongside a moving passenger train and leaps from his horse onto the rear platform. He navigates forward through the cars, eventually reaching the locomotive where he neutralizes the engineer and seizes control. The train speeds onto the Bards Crossing bridge as lawmen converge on the location. Arthur climbs to the roof and engages in a prolonged gunfight with the pursuing authorities, using a combination of a shotgun and a repeater to clear the area. After securing the train, he moves into the passenger cars to systematically rob the travelers, brandishing his revolver to extract cash and jewelry. Between cars, he searches storage compartments, cabinets, and desks for more loot. He also scavenges the bodies of fallen guards, throwing several over the side of the bridge. The mission concludes as Arthur drives the train away into the dark countryside. Chapters: 0:00:00 - 0:00:15 - Hijacking the train from horseback 0:00:15 - 0:00:40 - Taking control of the locomotive 0:00:40 - 0:03:00 - Gunfight with lawmen on the train roof 0:03:00 - 0:05:30 - Robbing passengers in the forward cars 0:05:30 - 0:07:00 - Robbing passengers in the rear cars 0:07:00 - 0:08:20 - Searching cabinets and safes for loot 0:08:20 - 0:09:45 - Scavenging bodies and clearing the tracks 0:09:45 - 0:10:26 - Driving the stolen train into the night 📖 Interactive written walkthrough with clickable timestamps: https://pixelfungaming.com/videos/rdr2-train-robbery-best-place-to-park-a-hijacked-train

Hitman Absolution : Shaving Lenny - Mission 9
The video begins with a cinematic showing a clandestine operations room receiving intelligence that Agent 47 is located in Hope, South Dakota, but his protective target is missing. The leader gives the order to eliminate 47 to force the girl to resurface. The mission objective, 'Shaving Lenny,' starts with Agent 47 arriving in the dilapidated town of Hope, South Dakota. He is tasked with eliminating Lenny’s gang, who are responsible for holding the girl. Agent 47 uses stealth to infiltrate a building, acquiring explosive devices and silencing one target, Tyler Calvin, with a headshot. Moving to an upper window, Agent 47 uses a sniper rifle to eliminate the second target, Gavin LeBlond, who is guarding the entrance outside. He subsequently obtains a police officer disguise. Now disguised, Agent 47 enters a junk-filled outdoor area behind a barbershop and uses a remote explosive on a power box to eliminate Mason McCready. Agent 47 re-enters the main building and engages in intense close-quarters combat, eliminating several guards and Luke Wheely on the balcony and stairs using dual silenced pistols. Finally, Agent 47 locates Lenny and subdues him via a non-lethal takedown to complete the mission objective of kidnapping the target. The mission ends with a final cinematic showing Agent 47 securing Lenny in a vehicle trunk. Chapters: 0:00:00 - 1:14:00 - Cinematic: ICA Briefing and Agent 47's Status 1:14:00 - 2:18:00 - Cinematic: Arrival in Hope and Gang Dialogue 2:18:00 - 3:54:00 - Stealth Infiltration and Tyler Calvin Elimination 3:54:00 - 5:15:00 - Acquiring Sniper Rifle and Eliminating Gavin LeBlond 5:15:00 - 7:42:00 - Disguise and Remote Explosive Kill (Mason McCready) 7:42:00 - 9:09:00 - Upper Floor Assault and Eliminating Luke Wheely 9:09:00 - 11:27:00 - Barbershop Shootout and Clearing Remaining Hostiles 11:27:00 - 12:12:00 - Subduing and Kidnapping Lenny; Mission Complete 📖 Interactive written walkthrough with clickable timestamps: https://pixelfungaming.com/videos/hitman-absolution-shaving-lenny-mission-9

Red Dead Redemption 2 - First 25 minutes
The mission begins with Dutch's gang struggling through a heavy blizzard in wagons, eventually reaching the abandoned mining town of Colter. After settling into a derelict building and mourning the loss of a comrade, Arthur Morgan and Dutch Van der Linde ride out to scout for supplies. They navigate the treacherous mountain paths on horseback, discussing the gang's recent misfortunes until they encounter Micah Bell. Micah leads them to a nearby homestead where a group of rival outlaws, the O'Driscolls, are holed up. A tense confrontation quickly escalates into a shootout as Arthur and his companions clear the ranch of enemies using revolvers and cover tactics. Arthur then investigates the barn, subduing a remaining O'Driscoll through hand-to-hand combat and claiming a new horse. Inside the main house, they discover Sadie Adler hiding in the cellar. After a brief scuffle and her home accidentally catching fire, the gang rescues her. The segment concludes with the group returning to Colter with Sadie and the stolen supplies, where Arthur prepares to search for the missing John Marston. Chapters: 0:00:00 - 0:01:13 - Traveling through the Blizzard 0:01:13 - 0:04:10 - Settling in at Colter 0:04:10 - 0:06:42 - Riding through the Snow 0:06:42 - 0:09:07 - Meeting Micah Bell 0:09:07 - 0:10:35 - Approaching the Homestead 0:10:35 - 0:11:44 - Shootout at the Ranch 0:11:44 - 0:13:30 - Investigating the Barn 0:13:30 - 0:15:42 - Rescuing Sadie Adler and Returning to Camp 📖 Interactive written walkthrough with clickable timestamps: https://pixelfungaming.com/videos/red-dead-redemption-2-first-25-minutes

Red Dead Redemption 2 Live!!!
The journey begins at the Horseshoe Overlook camp where Arthur Morgan takes a moment to survey the landscape before opening the map to chart a course. He spends time reviewing his journal, focusing on sketches and notes regarding Blackwater. After checking the current mission log, Arthur calls for his mount and sets off from the camp. The ride leads through the vast, open fields of New Hanover as the day begins to fade. On the trail, a chance encounter with other riders quickly turns into a violent confrontation. Arthur engages in a high-speed horseback shootout, firing his sidearm while maneuvering through the brush. Following the skirmish, he attempts to navigate a steep, rocky incline. The horse loses its footing on the loose scree, resulting in a tumble that throws Arthur to the ground. He quickly recovers, remounts, and continues to struggle against the difficult terrain until the footage concludes. Chapters: 0:00:00 - 0:00:23 - Exploring Horseshoe Overlook and Map Navigation 0:00:23 - 0:00:40 - Reviewing Arthur's Journal and Blackwater Sketches 0:00:40 - 0:00:50 - Checking Mission Log and Summoning the Mount 0:00:50 - 0:01:30 - Departure from Camp into the Heartlands 0:01:30 - 0:02:00 - Traversing the Open Wilderness at Dusk 0:02:00 - 0:02:40 - Intense Horseback Shootout on the Trail 0:02:40 - 0:02:58 - Navigating Steep Rocky Terrain 0:02:58 - 0:03:20 - Horse Accident and Final Ascent Attempt 📖 Interactive written walkthrough with clickable timestamps: https://pixelfungaming.com/videos/red-dead-redemption-2-live

Titanfall Hardpoint Gameplay: Training Ground
The mission begins with a high-velocity drop into the Training Ground map via dropship. The primary objective centers on Hardpoint Domination, requiring the capture and defense of three key locations: Alpha, Bravo, and Charlie. Initial movements focus on securing Hardpoint Alpha, utilizing parkour techniques and wall-running to navigate the urban environment quickly. Infantry combat breaks out early as the pilot uses an R-101C Carbine to clear out IMC grunts and spectres near the capture points. Defensive maneuvers involve holding the interior of Alpha while tracking enemy movements on the minimap. As the match progresses, the pilot engages enemy Titans from the ground using an Archer Heavy Rocket, emphasizing hit-and-run tactics. After a respawn, the pilot calls in an Ogre-class Titan. The gameplay shifts to heavy mechanized combat, utilizing Quad Rockets for area damage and the Vortex Shield to catch and return incoming projectiles. The Titan-on-Titan skirmishes become intense, resulting in the destruction of several enemy units. Following the Titan's destruction, the fight continues on foot through the final stages of the match, leading to a Militia victory. The encounter concludes with an epilogue phase where the remaining Militia forces attempt to intercept fleeing IMC pilots at their extraction point. Chapters: 0:00:00 - 0:00:15 - Match Intro and Deployment 0:00:15 - 0:01:45 - Capturing and Defending Hardpoint Alpha 0:01:45 - 0:03:30 - Infantry Skirmishes and Pilot Engagements 0:03:30 - 0:05:00 - Anti-Titan Tactics and Ground Combat 0:05:00 - 0:06:15 - Hardpoint Rotation and Field Maneuvers 0:06:15 - 0:08:45 - Ogre Titan Gameplay and Heavy Combat 0:08:45 - 0:09:50 - Final Objectives and Militia Victory 0:09:50 - 0:11:03 - Epilogue: IMC Extraction Interception 📖 Interactive written walkthrough with clickable timestamps: https://pixelfungaming.com/videos/titanfall-hardpoint-gameplay-training-ground

Farcry 6| live #15 Valle de oro
Experience a massive, uncut gameplay session of Far Cry 6, focusing on the liberation efforts in the Valle de Oro region. Join Dani Rojas as he aligns with the revolutionary rap group Máximas Matanzas to dismantle the propaganda machine of Antón Castillo’s regime. This video covers several major operations including 'Guerrilla Radio,' 'Firebrand,' and 'Words Like Bullets.' Witness high-octane action as we capture enemy checkpoints, engage in intense urban warfare, and use heavy machinery like tanks to level regime monuments. You'll see the full 'Guerrilla Radio' concert sequence where the group takes over the airwaves to broadcast the truth to Yara, followed by the chaotic defense of their stage. Beyond the combat, enjoy the more character-driven moments like the 'Bottle Episode' side mission, where Dani and Bicho embark on a drunken spree of vandalism and cow-finding. Finally, the segment culminates in a daring infiltration of the Botanical Gardens of Yara, where Dani and Talia pose as reporters to get up close and personal with the Minister of Culture, Maria Marquessa. This complete walkthrough provides a deep look at the mission design, world-building, and diverse gameplay systems that define Far Cry 6. Chapters: 0:00:00 - Capturing Diamante Checkpoint E 0:02:19 - Meeting Máximas Matanzas at Camp Maximas 0:03:51 - Operation: Guerrilla Radio - Mission Start 0:05:51 - Completing FND Ambush (Codename: Macaw) 0:07:42 - Approaching Marquessa Villa 0:11:42 - Stealth Infiltration of the Villa Grounds 0:14:40 - Clearing the Inner Courtyard Guards 0:17:15 - Securing the Main Villa Building 0:21:40 - Coordinating with Bicho for the Concert Setup 0:24:43 - The Máximas Matanzas Broadcast Performance Begins 0:28:00 - Defending the Speaker Systems and Antenna 0:31:40 - Heavy Combat: Repelling FND Reinforcements 0:35:10 - Operation Guerrilla Radio Completed 0:37:37 - Operation: Firebrand - Mission Start 0:41:40 - Tank Rampage through FND Checkpoints 0:44:40 - Assault on the Marquessa Rum Distillery 0:48:40 - Destroying the Distillery's Infrastructure 0:52:10 - Pushing into El Presidente Square 0:56:10 - Toppling the Statue of Antón Castillo 0:58:30 - Operation Firebrand Completed 1:02:22 - Side Operation: Bottle Episode - Meeting Bicho 1:05:30 - Acquiring Rum for the Celebration 1:11:30 - Drunken Hallucinations in the Park 1:15:30 - The Search for Bicho and his 'Cow' 1:21:20 - Vandalizing Propaganda Billboards with Graffiti 1:28:28 - Breaking into the FND Recruitment Office 1:33:30 - Trashing Maria Marquessa's Office 1:36:30 - Operation: Words Like Bullets - Mission Briefing 1:41:10 - Aerial Insertion via Avispa Buzzer 1:45:10 - Undercover as Reporters at the Botanical Gardens 1:51:10 - Following the Press Tour to Maria Marquessa 1:54:40 - The Final Confrontation with Maria Marquessa 1:57:37 - Mission Conclusion and End of Session 📖 Interactive written walkthrough with clickable timestamps: https://pixelfungaming.com/videos/farcry-6-live-15-valle-de-oro

Red Dead Redemption 2 - O'driscoll Ranch Shootout (Sniper)
The mission begins with a sprint across the plains of West Elizabeth toward Hanging Dog Ranch. Combat starts as the character takes cover behind a large rock, initiating a long-range sniper duel against a group of outlaws. Arthur Morgan systematically eliminates guards positioned on the farmhouse porch and in the barn windows using a scoped rifle. As the shootout intensifies, the character maneuvers around the cover to maintain line of sight while avoiding return fire. After clearing a significant number of hostiles, the character relocates to the steep ridge overlooking the ranch. From this superior vantage point, he identifies and neutralizes the remaining threats scattered across the camp and buildings. The encounter concludes with Arthur moving down toward the cleared ranch after demonstrating high-stakes precision shooting and tactical positioning. Chapters: 0:00:00 - 0:00:22 - Approaching Hanging Dog Ranch across the plains 0:00:22 - 0:01:30 - Initial sniper engagement from the meadow 0:01:30 - 0:02:45 - Sustained shootout using rock cover 0:02:45 - 0:04:15 - Tactical repositioning and clearing closer targets 0:04:15 - 0:06:00 - Ascending the ridge for a high-ground advantage 0:06:00 - 0:07:51 - Final cleanup of the ranch from the cliffside 📖 Interactive written walkthrough with clickable timestamps: https://pixelfungaming.com/videos/red-dead-redemption-2-o-driscoll-ranch-shootout-sniper

HITMAN 2 - Elusive Target #1 (Sniper)
Agent 47 arrives in Miami for a high-stakes mission to eliminate the elusive Mark Faba, also known as 'The Undying.' The operation begins with a rendezvous at the Kronstadt reception area to meet an informant named Dave Ready. After a brief briefing, a change of clothes becomes necessary to bypass security checkpoints. Agent 47 infiltrates the coat check area to neutralize a staff member and assume their identity. This disguise provides access to the executive floors where Faba awaits. Following Dave Ready leads to a direct confrontation and conversation with the target in a heavily guarded conference room. Subsequent tactical maneuvers involve navigating the complex maze of the Kronstadt facility, including subterranean tunnels and backstage race track areas. Stealth remains paramount as Agent 47 systematically disables surveillance systems and neutralizes key personnel to secure a vantage point. The mission culminates in a calculated sniper strike from a nearby tech room, utilizing a distraction to lure the target into the line of fire. Once the objective is confirmed, Agent 47 exits the premises through the main race gate, completing the contract with precision. Chapters: 0:00:00 - 0:02:15 - Initial Meeting and Disguise Acquisition 0:02:15 - 0:04:30 - Infiltrating the Executive Floor and Meeting Mark Faba 0:04:30 - 0:07:45 - Facility Navigation and Engineering Disguise 0:07:45 - 0:10:30 - Disabling Surveillance and Reaching the Race Track 0:10:30 - 0:13:15 - Luring Security and Clearing the Path 0:13:15 - 0:16:13 - Sniper Assassination and Mission Extraction 📖 Interactive written walkthrough with clickable timestamps: https://pixelfungaming.com/videos/hitman-2-elusive-target-1-sniper
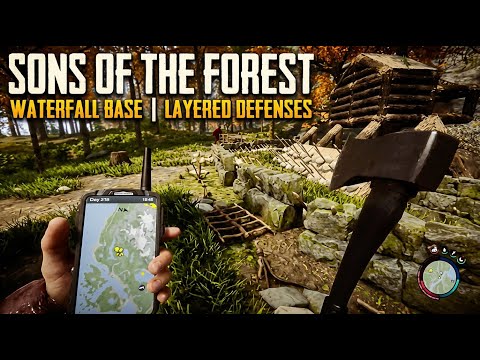
Sons Of The Forest: Waterfall Base | Adding Layered Defenses
This video provides an extensive look at advanced base building, defensive engineering, and survival combat in Sons of the Forest. Viewers will observe the meticulous construction of a large-scale fortress positioned near a waterfall, featuring reinforced stone walls, multi-level log platforms, and complex trap systems. The gameplay demonstrates effective combat techniques using a compound bow against various cannibal archetypes and specialized mutants like 'Fingers.' Additional footage highlights resource gathering logistics through the use of a hang glider to scout the map for supplies, concluding with a comprehensive tour of the completed, illuminated base defenses. Chapters: 0:00:00 - 0:00:38 - Initial base wall construction and timber harvesting 0:00:38 - 0:01:07 - Defensive combat engagement with a cannibal group 0:01:07 - 0:04:18 - Development of primary log platforms and riverside structures 0:04:18 - 0:04:51 - Skirmish with armored mutants near the waterfall base 0:04:51 - 0:07:10 - Installation of roofing elements and defensive perimeter spikes 0:07:10 - 0:08:37 - Placement and assembly of blueprint-based survival traps 0:08:37 - 0:10:13 - Intense defense against multiple 'Fingers' mutants 0:10:13 - 0:11:12 - Expansion of the bone maker trap line along the main wall 0:11:12 - 0:12:24 - Aerial scouting and resource gathering via hang glider 0:12:24 - 0:14:43 - Trap system completion and combat with heavy cannibals 0:14:43 - 0:16:24 - Construction of rope bridges and final platform additions 0:16:24 - 0:17:26 - Final base tour showcasing torch placement and completed defenses 📖 Interactive written walkthrough with clickable timestamps: https://pixelfungaming.com/videos/sons-of-the-forest-waterfall-base-adding-layered-defenses

HITMAN 2 - Multiple Guard Kills With Grenade
The mission begins in the dark, stone cellars of the Isle of Sgail. Agent 47, disguised in a tuxedo and white mask, crouches behind a pillar to observe a group of guards. He initiates combat by triggering an explosion that neutralizes several enemies at once. Moving swiftly with an ICA19 Silverballer, he executes a series of precise headshots on the surviving guards. The sequence continues through the wine storage areas where he methodically clears out security personnel using both firearms and environmental awareness. After navigating a set of stairs and checking secondary corridors, Agent 47 returns to the main red-carpeted hall. He identifies a VIP dressed in ceremonial red robes and eliminates him with a single shot. The encounter concludes as he gathers ammunition and proceeds through a rocky tunnel towards the next objective. Chapters: 0:00:00 - 0:00:15 - Stealth Positioning and Distraction 0:00:15 - 0:00:45 - Cellar Explosion and Initial Combat 0:00:45 - 0:01:15 - Clearing the Wine Storage and Side Rooms 0:01:15 - 0:01:39 - VIP Elimination and Tunnel Navigation 📖 Interactive written walkthrough with clickable timestamps: https://pixelfungaming.com/videos/hitman-2-multiple-guard-kills-with-grenade

GTA Online: F-160 Vertical Takeoff #shorts
The flight sequence begins at a coastal airport runway with a sleek, grey stealth fighter jet idling on the tarmac. The pilot initiates a vertical takeoff, lifting the aircraft steadily into the air using its VTOL capabilities. As the jet gains altitude, the landing gear retracts and the propulsion system transitions from hover to forward flight. The aircraft accelerates rapidly, engaging its afterburners which emit a vibrant purple glow. The session concludes with the jet performing high-speed banking maneuvers and rolls over a rugged mountain range, flying directly toward a bright sunset on the horizon. Chapters: 0:00:00 - 0:00:03 - Aircraft preparations on the runway 0:00:03 - 0:00:08 - Vertical takeoff and initial lift 0:00:08 - 0:00:15 - Landing gear retraction and hover transition 0:00:15 - 0:00:22 - Full flight mode and afterburner ignition 0:00:22 - 0:00:33 - High-speed maneuvers over mountain terrain 📖 Interactive written walkthrough with clickable timestamps: https://pixelfungaming.com/videos/gta-online-f-160-vertical-takeoff-shorts

RDR2 Story - The Herbalist
The mission begins as John Marston rides across the open wilderness and encounters a botanist named William at a small campsite. William shares his deep appreciation for the healing potential of plants and requests assistance in gathering Yarrow for his ongoing research. John accepts the task and sets off across the rolling hills to locate the red-flowered herb. He navigates the grassy terrain, dismounting to harvest several specimens while simultaneously progressing through an in-game herbalist challenge. After successfully collecting the required amount of Yarrow, John returns to the campsite. He presents the herbs to William, who immediately prepares a medicinal mixture. Impressed with the quality of the plants, William rewards John with a specialized horse medicine and expresses his gratitude before returning to his studies. Chapters: 0:00:00 - 0:00:22 - Meeting William at the Wilderness Camp 0:00:22 - 0:01:23 - Discussing the Study of Botanical Nature 0:01:23 - 0:02:09 - Accepting the Yarrow Collection Task 0:02:09 - 0:02:28 - Gathering the First Set of Yarrow 0:02:28 - 0:03:32 - Searching the Fields for Additional Samples 0:03:32 - 0:03:45 - Completing the Herbalist Challenge 0:03:45 - 0:04:44 - Returning to the Camp with Collected Plants 0:04:44 - 0:05:37 - Delivering the Herbs and Receiving a Reward 📖 Interactive written walkthrough with clickable timestamps: https://pixelfungaming.com/videos/rdr2-story-the-herbalist

Red Dead redemption 2 Live Action
The gameplay session begins in a vast open field during the golden hour of sunset. The character mounts a horse and begins traversing the rolling hills of the wilderness. As night falls, the journey continues under the moonlight, occasionally interrupted by brief, high-stakes combat encounters. The character eventually reaches the outskirts of Blackwater, navigating through the town's illuminated streets and past its various establishments. The pace quickens as the horse gallops through the town center, showcasing the detailed nocturnal environment of the frontier settlement before the session concludes. Chapters: 0:00:00 - 0:02:15 - Wilderness traversal and sunset exploration 0:02:15 - 0:04:30 - Nighttime riding and initial combat encounters 0:04:30 - 0:06:45 - Approaching and entering the town of Blackwater 0:06:45 - 0:08:23 - High-speed navigation through Blackwater's streets 📖 Interactive written walkthrough with clickable timestamps: https://pixelfungaming.com/videos/red-dead-redemption-2-live-action

Brothers in Arms Hells highway : The Rabbit Hole
The mission starts with a somber cutscene at the entrance of a hospital where a young woman is fatally shot. Matt Baker then takes command outside, with the primary objective to find his squad mate, Franky. He immediately engages German patrols in the foggy, dimly lit courtyard, utilizing tactical cover behind vehicles and sandbags. After clearing the exterior, Baker enters the hospital, where the atmosphere becomes increasingly tense. He navigates through dark, derelict wards and corridors, searching for any sign of his friend. The discovery of Franky's jacket on the floor confirms he is close. Baker encounters more German resistance inside, leading to frantic close-quarters firefights in the narrow hallways. Eventually, he finds a critically wounded Franky in a large ward. A dramatic and emotional cutscene unfolds, revealing Franky's final moments and his tragic fate. As fire rapidly consumes the building, Baker must join another squad member to navigate through the smoke and collapsing debris to escape. The video concludes with the squad driving away from the scene, reflecting on their loss in a series of poignant aftermath cutscenes. Chapters: 00:00:00 - 00:00:45 - Intro cutscene at the hospital entrance 00:00:45 - 00:02:42 - Combat outside the hospital against German patrols 00:02:42 - 00:06:03 - Entering the hospital and starting the search 00:06:03 - 00:06:11 - Finding Franky's jacket as a clue 00:06:11 - 00:10:40 - Navigating the interior and fighting German squads inside 00:10:40 - 00:13:54 - Finding Franky and his final story moments 00:13:54 - 00:14:42 - Escaping the burning hospital building 00:14:42 - 00:16:41 - Mission conclusion and aftermath cutscenes 📖 Interactive written walkthrough with clickable timestamps: https://pixelfungaming.com/videos/brothers-in-arms-hells-highway-the-rabbit-hole

Insurgency Sandstorm: Outskirts | Insurgents CO-OP Checkpoint No Deaths
The video features a complete match of tactical first-person shooter gameplay, showcasing intense urban combat and team coordination. Viewers will see the progression through multiple objectives, from initial capture at Alpha to the final victory at Echo. The footage demonstrates realistic weapon mechanics, the effective use of tactical equipment like gas masks and grenades, and the critical role of calling in fire support such as mortar strikes. Throughout the match, the gameplay highlights room-clearing techniques, long-range engagements with scoped rifles, and defensive strategies against enemy waves in various environments including interiors, narrow alleys, and open construction areas. Chapters: 0:00:00 - 0:00:45 - Initial Push and Capturing Objective Alpha 0:00:45 - 0:01:21 - Loadout Customization and Resupply 0:01:21 - 0:02:40 - Defending Objective Alpha from Enemy Waves 0:02:40 - 0:04:05 - Advancing Through Urban Streets to the Next Zone 0:04:05 - 0:05:25 - Coordinating Fire Support and Mortar Strikes 0:05:25 - 0:06:55 - Tactical Building Clearance and Defensive Stand 0:06:55 - 0:08:10 - High-Intensity Firefight at Objective Echo 0:08:10 - 0:08:58 - Final Push and Securing Victory 0:08:58 - 0:09:43 - Match Statistics and Post-Game Lobby 📖 Interactive written walkthrough with clickable timestamps: https://pixelfungaming.com/videos/insurgency-sandstorm-outskirts-insurgents-co-op-checkpoint-no-deaths

GTA Online: F-160 Jet Survives Crash After Accidental Ejection shorts
The sequence begins with an F-160 Raiju stealth jet cruising high above the mountainous terrain of San Andreas. Suddenly, the pilot ejects from the cockpit, plummeting into a freefall while the aircraft continues its steady flight path on its own. After a brief descent, the parachute deploys, allowing for a controlled glide towards a dusty road in the desert below. The pilot lands smoothly on the dirt path and quickly sprints toward the jet, which has landed itself perfectly further down the road. Upon reaching the aircraft, the pilot climbs back into the cockpit as the canopy seals shut. The jet activates its VTOL thrusters, lifting off vertically from the dirt road before pivoting its engines for a high-speed departure into the clear blue sky, leaving a purple trail from the afterburners. Chapters: 0:00:00 - 0:00:08 - Jet ejection and initial freefall 0:00:08 - 0:00:21 - Parachute deployment and descent to the desert floor 0:00:21 - 0:00:34 - Landing on the road and re-entering the cockpit 0:00:34 - 0:00:58 - VTOL vertical takeoff and high-speed departure 📖 Interactive written walkthrough with clickable timestamps: https://pixelfungaming.com/videos/gta-online-f-160-jet-survives-crash-after-accidental-ejection-shorts

Red Dead Redemption 2 Online Live Action
The session begins with a series of aggressive lasso takedowns and melee brawls in the fields surrounding Blackwater. Combat quickly moves into the town itself, featuring high-stakes skirmishes in the streets and alleys. As dusk falls, the action shifts towards a player camp, resulting in repeated cycles of engagement and respawns. The character utilizes a combination of lasso tactics, revolver executions, and close-quarters grappling. Nighttime brings even more chaotic encounters, including a massive multi-player brawl at the main campsite. Skirmishes also break out near the waterfront and in residential backyards. The session culminates in an intense posse-based fight at the camp, emphasizing the high-energy PvP nature of the Free Roam session. Chapters: 0:00:00 - 0:00:55 - Initial Lasso Skirmish and Takedowns 0:00:55 - 0:01:45 - Skirmishing through Blackwater Streets 0:01:45 - 0:02:40 - Sunset Run and Camp Area Combat 0:02:40 - 0:03:55 - Tactical Neighborhood Maneuvers and Gunplay 0:03:55 - 0:05:25 - Nighttime Pursuit and Town Skirmishes 0:05:25 - 0:06:25 - High-Intensity Brawl at the Main Camp 0:06:25 - 0:07:10 - Respawning and Returning to Action 0:07:10 - 0:08:40 - Posse Melee Skirmish and Camp Chaos 0:08:40 - 0:09:45 - Riverbed Confrontation and Lasso Ambush 0:09:45 - 0:10:50 - Final Multi-Player Melee Engagement 📖 Interactive written walkthrough with clickable timestamps: https://pixelfungaming.com/videos/red-dead-redemption-2-online-live-action

RDR2 Story - Discovery Of Widow & Soldiers Remains
The journey begins at Martha’s Swain, where a lone cabin sits tucked away in the woods. Entering the dimly lit room reveals a somber scene of a long-abandoned life. On a small table lies a letter from Garfield to Martha, dated August 1864. The letter recounts the brutal realities of the Civil War, Garfield's deep disillusionment with the Southern cause, and his enduring love for Martha. It speaks of a final, desperate battle in Scarlett Meadows and his hope to survive. Nearby, the skeletal remains of Martha lie on the wooden floor, marking a tragic end to her wait. Following the clues in the letter leads to the battlefield of Scarlett Meadows, specifically near Bolger Glade. A skeleton rests against a weathered tree, a rifle and bayonet thrust through its ribcage. This is Garfield, the author of the first letter. Tucked behind him is a second piece of correspondence. This letter is from Martha to Garfield, dated October 1864. In it, she begs him to stop fighting and return home, expressing her fear that he will be killed for nothing. Together, these two artifacts tell a poignant and tragic story of love and loss during the American Civil War. Chapters: 0:00:00 - 0:00:12 - Investigating the Cabin at Martha's Swain 0:00:12 - 0:02:30 - Reading Garfield's Final Letter to Martha 0:02:30 - 0:03:05 - Discovering Martha's Remains and Traveling to Scarlett Meadows 0:03:05 - 0:03:45 - Finding Garfield's Corpse at Bolger Glade 0:03:45 - 0:04:52 - Reading Martha's Desperate Letter to Garfield 📖 Interactive written walkthrough with clickable timestamps: https://pixelfungaming.com/videos/rdr2-story-discovery-of-widow-soldiers-remains

GTA Online: F-160 Stealth Mode To Weapons #shorts
The mission begins with an F-160 Raiju fighter jet cruising over a scenic mountain range during sunset. The perspective shifts to the cockpit, revealing the intricate flight instruments as the aircraft glides through the hazy atmosphere. A warning message appears on the display, indicating that all weapons remain unavailable while the vehicle operates in stealth mode. The pilot quickly disengages the stealth system and initiates a steep, aggressive dive toward a desert road below. Upon reaching the target area, the jet unleashes a devastating barrage of explosive rounds from its machine guns. The camera then returns to a third-person rear view, showcasing the aircraft's sleek design and engine glow against the twilight sky. The sequence concludes as the pilot cycles through the weapon selection wheel, transitioning from explosive cannons back to homing missiles while maintaining a steady flight path. Chapters: 0:00:00 - 0:00:08 - High-altitude flight over the mountains 0:00:08 - 0:00:16 - Cockpit perspective and flight instrumentation 0:00:16 - 0:00:25 - Stealth mode transition and air-to-ground engagement 0:00:25 - 0:00:34 - Weapon cycling and cruising at sunset 📖 Interactive written walkthrough with clickable timestamps: https://pixelfungaming.com/videos/gta-online-f-160-stealth-mode-to-weapons-shorts

Goat Simulator PT 4
The gameplay starts with a goat equipped with a jetpack navigating a suburban street before entering a construction yard. A significant portion of the session involves the goat meticulously climbing a towering construction crane ladder to gain altitude. Once at the summit, the goat launches into the air, utilizing the jetpack to perform various spins and flips before descending back to the ground. This cycle of climbing and aerial stunting repeats several times, highlighting the game's physics-driven movement. Later, the goat discovers a trampoline in a backyard and uses it to perform high-velocity jumps, eventually launching itself into a small wooden structure, causing it to collapse. The chaos escalates as the goat moves toward a gas station, where it intentionally flies into the fuel pumps, triggering a massive, cinematic explosion. Following the blast, the goat traverses through fields of tall grass and a crowded outdoor party, knocking over guests, tables, and food to earn bonuses. The session concludes with the goat discovering a long blue water slide, sliding down its length at high speed before performing final aerial maneuvers over a forested area. Chapters: 0:00:00 - 0:01:43 - Exploration of the construction yard and initial crane climb 0:01:43 - 0:03:55 - Aerial stunts from the crane summit and returning to the base 0:03:55 - 0:06:10 - Repeated crane ascents and navigating suburban roadways 0:06:10 - 0:08:10 - Backyard trampoline jumping and wooden tower destruction 0:08:10 - 0:10:05 - Gas station arrival and massive fuel pump explosion 0:10:05 - 0:12:30 - Roaming through wheat fields and approaching the backyard party 0:12:30 - 0:14:29 - Disrupting the outdoor gathering and riding the water slide 📖 Interactive written walkthrough with clickable timestamps: https://pixelfungaming.com/videos/goat-simulator-pt-4

Dead Island 2: Clean and Snatch | Pool Guy Location Walkhrough
Jacob maneuvers through a luxury estate in Bel-Air, sprinting past high-end vehicles and navigating rooftops with parkour agility. The hunt for Obi the Pool Guy leads through modern architecture and sun-drenched courtyards as Jacob tracks the mailman's paper trail. Upon locating the target near a service entrance behind a gated wall, Jacob engages in swift melee combat, using a blade to eliminate the shamblers. After securing Obi's key from the remains, the trek continues to a poolside location at another residence where a locked container waits. Jacob dives into the pool to unlock the chest, retrieving a powerful Electrocutor Officer's Sword and successfully completing the 'The Clean and Snatch' quest. Chapters: 0:00:00 - 0:00:15 - Parkour and rooftop navigation through Bel-Air 0:00:15 - 0:00:32 - Navigating the mansion's tiered courtyards 0:00:32 - 0:00:50 - Locating Obi the Pool Guy near the service entrance 0:00:50 - 0:01:12 - Melee combat and securing Obi's key 0:01:12 - 0:01:28 - Reaching the pool with the locked chest 0:01:28 - 0:01:40 - Unlocking the Electrocutor Officer's Sword 📖 Interactive written walkthrough with clickable timestamps: https://pixelfungaming.com/videos/dead-island-2-clean-and-snatch-pool-guy-location-walkhrough
State Of Decay #8
The gameplay focuses on community management and zombie survival in State of Decay. The initial segment shows the character managing the home base, addressing the 'Too Many Infestations' morale issue by constructing a Sleeping Area. After the construction completes, the character leaves the base in an SUV to perform scavenging runs and respond to missions. Driving sequences involve maneuvering through the zombie-infested world, often resulting in vehicle combat to clear hordes and infestations. The character successfully loots two resource locations, securing fuel and construction materials, and establishes an Outpost. The player then participates in a 'Lead The Way' morale mission with an NPC companion, requiring them to clear a local infestation using melee combat and tactical driving. Upon eliminating multiple zombie threats and a zombie horde using vehicles, the character returns to the home site, delivers gathered resources, and successfully completes the morale mission, improving the community's status and morale. Chapters: 0:00 - 6:45 - Base Management: Constructing a Sleeping Area 6:45 - 10:47 - Initial Scavenging Run and Resource Gathering 10:47 - 14:04 - Driving Through Hordes and Clearing Infestations 14:04 - 21:46 - Morale Mission 'Lead the Way' and Clearing an Infestation 21:46 - 27:59 - Further Combat, Morale Mission Completion, and Game End 📖 Interactive written walkthrough with clickable timestamps: https://pixelfungaming.com/videos/state-of-decay-8

Assassins Creed Mirage: Zanj Uprising Outfit Upgrade Schematic | 2nd Location
This gameplay analysis provides a walkthrough for finding the Zanj Uprising Outfit Upgrade Schematic in Assassin's Creed Mirage. The video demonstrates the navigation through the Prince's Palace in the Harbiyah district, showing the precise location of the gear chest. Viewers will see the character move through the palace corridors, use Eagle Vision to highlight the objective, and collect the upgrade. The content also includes a detailed look at the world map to help pinpoint the location within Baghdad. Chapters: 0:00:00 - 0:00:24 - Navigating the Prince's Palace courtyard and interior corridors 0:00:24 - 0:00:33 - Locating and looting the Zanj Uprising Outfit Upgrade Schematic chest 0:00:33 - 0:00:50 - Moving through palace rooms toward the main gate 0:00:50 - 0:00:54 - Aerial scouting of the surrounding area using Enkidu 0:00:54 - 0:01:07 - World map overview highlighting the Prince's Palace location 0:01:07 - 0:01:17 - Final views of the palace and concluding screen 📖 Interactive written walkthrough with clickable timestamps: https://pixelfungaming.com/videos/assassins-creed-mirage-zanj-uprising-outfit-upgrade-schematic-2nd-location
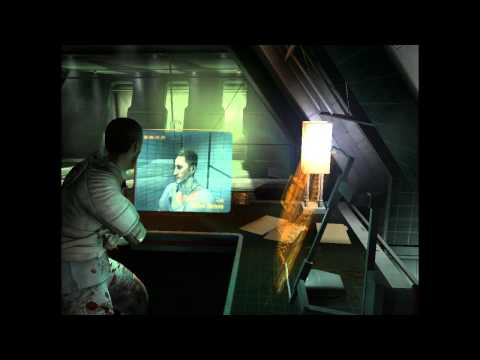
Dead Space 2 PT 1
The experience begins with the game's initial setup and navigation through the main menu, where the difficulty level is set to normal. A distorted transmission from Nicole Brennan initiates the story, leading into a psychological interrogation of Isaac Clarke regarding his experiences with the Marker. Tension escalates when a medical officer named Franco attempts to rescue Isaac from his restraints, only to be brutally transformed by an Infector Necromorph. Still restrained by a straightjacket, Isaac must navigate a chaotic and blood-soaked hospital ward as the Necromorph outbreak consumes the facility. After narrowly escaping several close encounters, Isaac finds temporary safety and is freed from his restraints. He then explores the dimly lit medical corridors, discovering video logs that detail the mental deterioration and interrogation of another patient, Nolan Stross. Isaac eventually encounters a traumatized survivor who provides him with a flashlight and a small med pack before tragically taking his own life. The sequence concludes with Isaac navigating the dark, desolate wards of the Sprawl's medical wing and securing his progress at a save station. Chapters: 0:00:00 - 0:01:37 - Game Launch and Menu Configuration 0:01:37 - 0:03:00 - Fragmented Transmission and Nicole's Message 0:03:00 - 0:04:28 - Psychological Interrogation and Marker Hallucinations 0:04:28 - 0:05:26 - Fatal Rescue Attempt and Necromorph Outbreak 0:05:26 - 0:07:27 - High-Stakes Restrained Escape from the Hospital Ward 0:07:27 - 0:09:00 - Reviewing Nolan Stross Interrogation Logs 0:09:00 - 0:10:36 - Encounter with a Deranged Patient and Equipment Acquisition 0:10:36 - 0:11:00 - Dark Corridor Navigation and Progress Save 📖 Interactive written walkthrough with clickable timestamps: https://pixelfungaming.com/videos/dead-space-2-pt-1

Six Days In Fallujah: Escort Tank Multiplayer | Mission Success
The video presents a comprehensive playthrough of a mission in 'Six Days in Fallujah' titled 'Objective Virginia'. Viewers will observe a USMC fireteam as they execute a high-stakes escort mission, guiding an M1 Abrams tank through a dense urban combat zone. The footage covers tactical maneuvers such as street-to-street clearing, the identification and marking of roadside IEDs, and the neutralization of various threats including snipers, RPG teams, and VBIEDs (suicide car bombs). The analysis follows the squad from the initial mission briefing through intense firefights, concluding with the successful securement of the objective and a final after-action report detailing combat statistics. Chapters: 0:00:00 - 0:00:21 - Mission intro and historical context for Objective Virginia 0:00:21 - 0:01:31 - Escort mission begins through the narrow streets of Fallujah 0:01:31 - 0:02:25 - First VBIED engagement and neutralization by the fireteam 0:02:25 - 0:03:47 - Locating and marking roadside IEDs with spray paint 0:03:47 - 0:05:58 - Tactical clearing of multi-story buildings and suppressing enemy fire 0:05:58 - 0:06:35 - Locating and eliminating a hostile sniper stalling the advance 0:06:35 - 0:08:15 - High-intensity street fighting and defensive smoke deployments 0:08:15 - 0:10:15 - Final push through the urban center alongside the M1 Abrams tank 0:10:15 - 0:11:40 - Objective secured and extraction signaling with green smoke 0:11:40 - 0:12:12 - Mission success screen and detailed After Action Report 📖 Interactive written walkthrough with clickable timestamps: https://pixelfungaming.com/videos/six-days-in-fallujah-escort-tank-multiplayer-mission-success
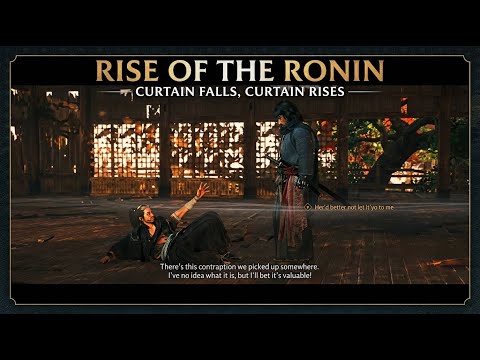
Rise Of The Ronin: Curtain Falls, Curtain Rises
The video features gameplay from a samurai-themed action RPG, showcasing exploration, stealthy infiltration, and intense combat. It begins with the characters navigating a scenic mountain path and temple grounds, engaging in several skirmishes with bandit enemies. The core of the video is a multi-phase boss encounter against Gonzo, the bandit chief, which demonstrates various sword techniques, parries, and environmental effects like fire. Following the battle, the gameplay highlights the game's choice-driven narrative as the protagonist decides to spare the boss's life to gain access to a storehouse. The final segment shows the acquisition of a vital travel permit and a cinematic introduction to the historical figure Ryoma Sakamoto, concluding with the establishment of a character bond. Chapters: 0:00:00 - 0:01:15 - Infiltration and Initial Skirmishes 0:01:15 - 0:03:18 - Temple Exploration and Group Combat 0:03:18 - 0:05:22 - Boss Battle: Confronting Gonzo at the Temple 0:05:22 - 0:07:02 - Post-Battle Negotiation and Sparing the Chief 0:07:02 - 0:08:02 - Looting the Storehouse for the Checkpoint Permit 0:08:02 - 0:09:08 - Narrative Climax and Establishing a Bond with Ryoma 📖 Interactive written walkthrough with clickable timestamps: https://pixelfungaming.com/videos/rise-of-the-ronin-curtain-falls-curtain-rises

#Assassinscreedmirage Soldier Awkwardly Photobombs Cutscene After Mission. #shorts
The video provides a look at gameplay and narrative elements from Assassin's Creed Mirage. It begins with a combat sequence where the protagonist, Basim, engages a guard in a courtyard, showcasing the game's parry and swordplay mechanics. Following the encounter, the content demonstrates Basim moving through an urban environment filled with remnants of a previous battle. The central focus of the video is a cinematic dialogue between Basim and a novice Hidden One named Naaji. Basim offers mentorship, commending Naaji on completing his first official assignment and providing encouragement regarding the challenges of being an assassin. The video concludes with a brief return to gameplay, highlighting a stealth opportunity. Chapters: 0:00:00 - 0:00:07 - Combat demonstration against a city guard 0:00:07 - 0:00:15 - Basim traverses a restricted area littered with fallen enemies 0:00:15 - 0:00:29 - Dialogue begins as Basim congratulates Naaji on his first mission 0:00:29 - 0:00:44 - Basim provides mentorship and advice on gaining confidence 0:00:44 - 0:00:51 - Naaji departs and gameplay resumes with a stealth prompt 📖 Interactive written walkthrough with clickable timestamps: https://pixelfungaming.com/videos/assassinscreedmirage-soldier-awkwardly-photobombs-cutscene-after-mission-shorts

Far Cry 5 - VIETNAM - Step It Up - POW Camp - Undetected
The mission begins with a stealthy approach toward a heavily guarded NVA camp nestled in the Vietnamese jungle. Binoculars are deployed to scout the perimeter and mark enemy positions. Moving through thick vegetation, the character maintains a low profile to avoid detection. Entry into the camp is achieved by navigating through a series of underground tunnels where the primary objective is to locate and rescue prisoners. Inside the dark corridors, guards are systematically neutralized using silent takedowns and a compound bow. Caution is exercised at every turn to prevent alarms from being raised. After successfully liberating a South Vietnamese prisoner, the mission 'Step It Up' reaches completion. The escape from the underground facility leads back out into the open air, where a regrouping with allied forces takes place as they prepare for the next objective. Chapters: 0:00:00 - 0:00:42 - Scouting the NVA camp perimeter with binoculars 0:00:42 - 0:01:10 - Entering the camp and approaching the tunnel entrance 0:01:10 - 0:01:40 - First silent takedown and initial tunnel exploration 0:01:40 - 0:02:10 - Navigating the underground complex and tracking enemy movements 0:02:10 - 0:02:40 - Engaging guards with melee attacks and the compound bow 0:02:40 - 0:03:12 - Finding and liberating the South Vietnamese prisoner 0:03:12 - 0:03:53 - Mission completion and exiting the tunnel network to regroup 📖 Interactive written walkthrough with clickable timestamps: https://pixelfungaming.com/videos/far-cry-5-vietnam-step-it-up-pow-camp-undetected

Rise Of The Ronin: The Setting Sun
This video features gameplay from Rise of the Ronin, focusing on a pivotal sequence in the 'The Setting Sun' mission. Viewers will see the protagonist navigate a burning village under the cover of night and snow, utilizing stealth to eliminate shogunate assassins. The content covers open combat encounters that demonstrate the game's parry-based swordplay and the integration of ranged weapons. The latter half of the video is dedicated to an intense and emotional boss battle against the Bladesmith, followed by cinematic story resolutions that highlight the relationship between the characters and the consequences of their actions. Chapters: 0:00:00 - 0:01:57 - Stealth navigation through the burning village and initial takedowns 0:01:57 - 0:03:02 - Combat demonstrations against shogunate guards and introduction of sub-weapons 0:03:02 - 0:04:39 - Further exploration and skirmishes within the village outskirts 0:04:39 - 0:06:34 - Journey across the bridge to join the Bladesmith in battle 0:06:34 - 0:07:29 - Cinematic dialogue revealing the conflict between the protagonist and the Bladesmith 0:07:29 - 0:11:23 - Extended boss fight sequence showcasing parry and counter-attack mechanics 0:11:23 - 0:12:12 - Conclusion of the duel and transition to the final cinematic 0:12:12 - 0:15:11 - Narrative resolution, emotional farewell, and sweeping landscape shots 📖 Interactive written walkthrough with clickable timestamps: https://pixelfungaming.com/videos/rise-of-the-ronin-the-setting-sun

Assassins Creed Mirage: Find Qabiha's Hidden Chamber Walkthrough
This video showcases a complete walkthrough of 'The Serpent's Nest' mission in Assassin's Creed Mirage, specifically focusing on the solution to the book puzzle required to find Qabiha's hidden chamber. The gameplay demonstrates how to interpret a poem found in the room to correctly place four colored books on specific pedestals. Viewers will see the character, Basim, interact with each pedestal, placing the blue book for the ocean, the yellow book for the desert, the black book for the cobra, and the white book for the dove. Following the successful placement of all books, the video shows the dramatic reveal of a hidden passage and the character's descent into the secret chamber to continue the mission. Chapters: 0:00:00 - 0:00:21 - Identifying puzzle clues and reciting the poem 0:00:21 - 0:00:56 - Placing the blue book on the first pedestal (Ocean) 0:00:56 - 0:01:35 - Placing the yellow book on the second pedestal (Desert) 0:01:35 - 0:01:52 - Placing the black book on the third pedestal (Cobra) 0:01:52 - 0:02:04 - Placing the white book on the fourth pedestal (Dove) 0:02:04 - 0:02:34 - Unlocking the secret passage and entering the hidden chamber 📖 Interactive written walkthrough with clickable timestamps: https://pixelfungaming.com/videos/assassins-creed-mirage-find-qabiha-s-hidden-chamber-walkthrough

Dead Island 2: Bodycount Weapon VS Apex Variants #shorts #DeadIsland2
The gameplay begins with an encounter against a Crusher zombie in a sunny outdoor park. The character uses an assault rifle to deliver precise shots to the head and torso, quickly taking down the heavy-hitting undead. Next, a similar encounter follows against another Crusher variant near a fountain, resulting in explosive gore as the zombie is defeated. A Screamer zombie then appears, emitting a powerful sonic blast that disorients the character before being silenced by a barrage of gunfire. The action moves toward an evacuation gate where a Slobber zombie attempts to vomit acid, but it is intercepted and destroyed with rapid rifle fire. A Mutator is then shown transforming from a standard walker into a grotesque, multi-limbed beast, leading to a frantic shootout in a park-like area. Finally, the combat moves to the sandy beach for a showdown with a Butcher, a fast and agile enemy with blade-like arms. The character manages to dodge its swipes and land critical shots until the Butcher is defeated, leaving behind various loot and biological parts on the sand. Chapters: 0:00:00 - 0:00:07 - Combat against the first Crusher zombie 0:00:07 - 0:00:15 - Defeating a second Crusher variant near the fountain 0:00:15 - 0:00:21 - Encountering and silencing a Screamer zombie 0:00:21 - 0:00:29 - Fighting a Slobber zombie at the evacuation checkpoint 0:00:29 - 0:00:40 - Mutator transformation and combat in the field 0:00:40 - 0:00:59 - Intense duel with a Butcher zombie on the beach 📖 Interactive written walkthrough with clickable timestamps: https://pixelfungaming.com/videos/dead-island-2-bodycount-weapon-vs-apex-variants-shorts-deadisland2

Assassins Creed Mirage: Blade In The Crowd, Tool In The Shed Walkthrough
This video showcases a complete side mission gameplay sequence from Assassin's Creed Mirage. The footage begins with Basim meeting an informer named Naaji in a bustling Baghdad marketplace. The gameplay demonstrates stealth navigation and the use of eagle vision to identify targets among a crowd. Viewers will see Basim engage in tactical combat, including hidden blade assassinations and direct swordplay against corrupt guards. The video also covers the dialogue following the initial encounter, which leads into a surprise ambush, requiring further combat skills and the use of throwing knives to eliminate the remaining threats before finally looting the area. Chapters: 0:00:00 - 0:00:43 - Basim meets Naaji to discuss the corrupt guard problem 0:00:43 - 0:01:03 - Stealth navigation through the marketplace using eagle vision 0:01:03 - 0:01:38 - Initial combat engagement and marketplace assassination 0:01:38 - 0:02:16 - Mission completion dialogue interrupted by an ambush 0:02:16 - 0:03:17 - Final combat encounter and looting defeated enemies 📖 Interactive written walkthrough with clickable timestamps: https://pixelfungaming.com/videos/assassins-creed-mirage-blade-in-the-crowd-tool-in-the-shed-walkthrough

Far Cry 5 - VIETNAM - Sniper rifle with suppressor (Silencer) location
The operation begins with a stealthy ascent of a wooden watchtower to survey the surrounding rice paddies. From this vantage point, binoculars are used to identify and mark enemy soldiers stationed throughout the outpost. A tactical airstrike is called down upon a central building, effectively neutralizing initial resistance and creating an opening for a ground assault. Combat transitions into the muddy fields, where precise gunshots and careful positioning are used to overcome the remaining forces. Movement through the village involves searching various huts for supplies and mission-critical intelligence. The engagement concludes once the area is secured and the specific location related to Major Vong is successfully investigated. Chapters: 0:00:00 - 0:00:45 - Tactical Reconnaissance from the Watchtower 0:00:45 - 0:01:30 - Airstrike Deployment and Initial Breach 0:01:30 - 0:02:50 - Engaging Hostile Forces in the Rice Paddy 0:02:50 - 0:04:15 - Infiltrating and Clearing Village Structures 0:04:15 - 0:05:00 - Securing the Perimeter and Searching for Intel 0:05:00 - 0:05:28 - Objective Completion and Location Secured 📖 Interactive written walkthrough with clickable timestamps: https://pixelfungaming.com/videos/far-cry-5-vietnam-sniper-rifle-with-suppressor-silencer-location

Dead Island 2: Bodycount Weapon VS Regular Zombies
The action starts immediately with a precision shot taking down a Walker near a public parking sign. The character moves quickly through the bright, blood-stained streets of a coastal city, engaging a Shambler with sustained rifle fire. After a quick reload, more Walkers fall as the character navigates past abandoned vehicles. A Spiky Walker poses a threat, prompting a quick weapon switch via the radial menu to maintain efficiency. The combat intensifies as a Screamer enters the fray, requiring immediate focus to prevent its disorienting shout. Larger, bloated zombies and fast-moving Runners attempt to flank the position, but they are met with consistent, high-damage shots to the head and limbs. The sequence concludes with a final sweep of the immediate area, leaving the sun-drenched street littered with defeated enemies and blood spatters. Chapters: 0:00:00 - 0:00:15 - Early encounters with Walkers and Shamblers 0:00:16 - 0:00:24 - Engaging a Spiky Walker and using the weapon wheel 0:00:25 - 0:00:35 - Combat against a Screamer and bloated Walker variants 0:00:36 - 0:00:48 - Defeating a Runner and cleaning up survivors 0:00:49 - 0:00:56 - Final kills on the sun-drenched street 📖 Interactive written walkthrough with clickable timestamps: https://pixelfungaming.com/videos/dead-island-2-bodycount-weapon-vs-regular-zombies

Far Cry New Dawn | Alcatraz Island Expedition Walkthrough
The Alcatraz Island expedition begins with a helicopter insertion into the fog-shrouded ruins of the infamous prison. Initial gameplay involves navigating the perimeter, looting essential crafting materials, and avoiding detection by Highwaymen patrols. Stealth becomes paramount as the mission moves into the interior cell blocks, where tactical takedowns clear a path to the high-value supply package. Once the package is secured, the situation escalates into intense open combat as a GPS tracker alerts nearby hostiles. The return journey to the extraction point requires a mix of aggressive gunfire, use of explosives against enemy vehicles, and careful positioning. The climax features a desperate holdout at the docks against waves of reinforcements before a successful helicopter extraction. The session concludes with a breakdown of acquired resources and mission rewards. Chapters: 0:00:00 - 0:01:25 - Helicopter Insertion and Perimeter Search 0:01:25 - 0:02:40 - Infiltrating the Prison Cell Blocks 0:02:40 - 0:03:40 - Locating and Securing the Package 0:03:40 - 0:05:40 - Combat Breakout and Path to Extraction 0:05:40 - 0:06:50 - Holding the Extraction Point and Departure 0:06:50 - 0:07:52 - Mission Summary and Rewards Breakdown 📖 Interactive written walkthrough with clickable timestamps: https://pixelfungaming.com/videos/far-cry-new-dawn-alcatraz-island-expedition-walkthrough

Assassins Creed Mirage: A Dance With Thieves Walkthrough
This gameplay video provides a complete walkthrough of the 'A Dance with Thieves' mission in Assassin's Creed Mirage. The content follows the protagonist, Basim, as he receives a request for help from Murjana, the daughter of the legendary Ali Baba. Viewers will see the journey from the Harbiyah Bureau to the city of Karkh, where Basim synchronizes with a local viewpoint and uses his eagle, Enkidu, to scout for the target location. The video demonstrates a mix of narrative cutscenes, traversal on horseback through the desert, and extensive stealth gameplay. Gameplay highlights include Basim infiltrating the Forty Thieves Hideout by using tall grass for cover, performing stealth assassinations, and using environmental hazards like explosive jars to eliminate guards. The walkthrough concludes with a dramatic story beat as Basim and Murjana discover the fate of Ali Baba at the hideout entrance. Chapters: 0:00:00 - 0:01:12 - Initial quest briefing and traveling to the Karkh region 0:01:12 - 0:01:58 - Using Enkidu to scout the Pomegranate Gate and locating Murjana 0:01:58 - 0:03:00 - Cinematic meeting with Murjana regarding her father, Ali Baba 0:03:00 - 0:05:00 - Horseback journey across the desert and dialogue about the Forty Thieves 0:05:00 - 0:06:00 - Arrival at the ambush site and tracking Murjana to the hideout 0:06:00 - 0:08:30 - Stealth gameplay: systematically eliminating guards near the hideout entrance 0:08:30 - 0:09:24 - Clearing the remaining thieves at the cave entrance using environmental kills 0:09:24 - 0:11:21 - Final mission cutscene and discovery of Ali Baba's body 📖 Interactive written walkthrough with clickable timestamps: https://pixelfungaming.com/videos/assassins-creed-mirage-a-dance-with-thieves-walkthrough

Far Cry 5 - Clean Water Act Walkthrough
The mission begins with a tactical assessment of an Eden's Gate water treatment facility. After selecting Adelaide Drubman to provide aerial support, a stealthy approach through sub-aquatic drainage pipes allows for undetected infiltration. Inside the first building, sabotage starts by destroying heavy machinery and water pumps with explosives. Emerging back into the facility grounds, combat intensifies as cultists scramble to respond. Intense firefights break out on the upper platforms, where a sniper rifle is used to neutralize guards while Adelaide's helicopter provides constant covering fire. The navigation continues through more submerged tunnels to reach the final pump room. After clearing out the remaining defenders and destroying the last set of pumps, the 'Clean Water Act' mission concludes successfully. The aftermath involves a brief period of strategic planning via the world map before a helicopter flight across the scenic but dangerous landscape of Hope County toward the next objective at the Lamb of God Church. Chapters: 0:00:00 - 0:01:26 - Mission planning and stealthy facility infiltration 0:01:26 - 0:02:23 - Sabotaging the primary pump station 0:02:23 - 0:04:23 - Long-range engagement with aerial support 0:04:23 - 0:05:39 - Clearing out outdoor facility defenses 0:05:39 - 0:06:54 - Diving through underwater tunnels to the final objective 0:06:54 - 0:08:55 - Final combat encounter and mission completion 0:08:55 - 0:10:06 - Strategic map review and objective selection 0:10:06 - 0:11:41 - Aerial transit across Holland Valley 0:11:41 - 0:12:41 - Approaching the next mission site 📖 Interactive written walkthrough with clickable timestamps: https://pixelfungaming.com/videos/far-cry-5-clean-water-act-walkthrough

Farcry 6| live #15 Valle de oro
Mega Man enters the vibrant Boing-Boing Park to challenge Bounce Man. The stage features complex physics-based platforming where Mega Man must navigate rooms filled with multi-colored bouncy balls and balloon-themed enemies. Precise jumping and timing are required to bounce off surfaces while avoiding spikes and bottomless pits. Along the way, Mega Man uses the Mega Buster to clear out Pompon and Boyon enemies that obstruct his path. A mid-boss encounter with the Frog Ballon requires careful positioning to strike its weak point while dodging its tongue attacks and smaller balloon spawns. The navigation intensifies in the latter half with vertical climbing sections and high-speed bouncing sequences. The stage culminates in a confrontation with Bounce Man, who uses his elastic body to bounce erratically around the arena. Mega Man utilizes the Power Gear to increase his damage output and maneuvers through the boss's split-apart attacks. Upon Bounce Man's defeat, Mega Man acquires the Bounce Ball weapon and completes the mission. Chapters: 0:00:00 - 0:01:15 - Initial Stage Entry and Bouncy Room Navigation 0:01:15 - 0:02:10 - Frog Ballon Mid-Boss Encounter 0:02:10 - 0:03:30 - Vertical Platforming and Advanced Hazard Navigation 0:03:30 - 0:04:15 - Final Corridor and Path to the Boss Chamber 0:04:15 - 0:04:47 - Bounce Man Boss Battle and Victory 📖 Interactive written walkthrough with clickable timestamps: https://pixelfungaming.com/videos/farcry-6-live-15-valle-de-oro

HITMAN: Colorado - Explosion accident kill walkthrough
The mission unfolds within a heavily guarded militia compound in Colorado. The operative, disguised as a militia member, navigates through the facility's outdoor areas to locate a specific explosives laboratory. At a workstation equipped with laptops and chemical vials, the operative carefully adds nitroglycerin to a volatile mixture, successfully completing the 'Overpowered' challenge. After this sabotage, the operative relocates to a concealed vantage point behind several large hay bales near a designated testing range. From this position, the operative monitors the surrounding guards and waits for the primary target, Sean Rose, to arrive. Once Rose reaches the range and begins his demonstration, he triggers the testing device. The sabotaged explosive detonates with lethal force, eliminating him instantly and completing the 'Bouncing Betty' challenge. The video concludes with the compound guards entering an alerted state and searching for the cause of the fatal accident while the operative remains undetected. Chapters: 0:00:00 - 0:00:42 - Infiltrating the militia compound and scouting the explosives lab 0:00:42 - 0:01:05 - Sabotaging the explosive mixture with nitroglycerin 0:01:05 - 0:03:32 - Taking cover and waiting for Sean Rose at the testing range 0:03:32 - 0:03:59 - The explosive test detonation and elimination of Sean Rose 📖 Interactive written walkthrough with clickable timestamps: https://pixelfungaming.com/videos/hitman-colorado-explosion-accident-kill-walkthrough

Assassins Creed Mirage: ENDING Cinematic Scene
A detailed cinematic analysis of the ending to Assassin's Creed Mirage. The footage follows Basim as he enters a forgotten Isu temple beneath Alamut to uncover the truth of his nightmares. Viewers will see the revelation that Nehal is a manifestation of his own consciousness and Loki's memories. The video demonstrates Basim's journey through a mental void to confront the Jinni, his acceptance of his past life, and the subsequent fallout with his mentor, Roshan. The analysis concludes with a summary of the post-credits atmosphere and Basim's new outlook on his role within the Hidden Ones as he gazes over Baghdad with his eagle, Enkidu. Chapters: 00:00:00 - 00:02:15 - Discovery of the Hidden Isu Chamber 00:02:15 - 00:04:30 - Activation of the Isu Machine and Nehal's Truth 00:04:30 - 00:06:45 - The Mental Void and Confrontation with the Jinni 00:06:45 - 00:08:30 - Acceptance of Loki's Memories and Merging with Nehal 00:08:30 - 00:10:15 - Roshan's Confrontation and Departure from the Hidden Ones 00:10:15 - 00:12:21 - Final Monologue and End Credits Sequence 📖 Interactive written walkthrough with clickable timestamps: https://pixelfungaming.com/videos/assassins-creed-mirage-ending-cinematic-scene

Sherlock Holmes : Crimes and Punishments - The Fate of Black Peter - Part 4
Sherlock Holmes pursues the final clues in the murder of Peter Carey during the conclusion of 'The Fate of Black Peter' case. The investigation centers on Patrick Cairns at the Sea Witch pub, where a high-stakes arm-wrestling match serves as a cover for gathering information. Holmes performs a detailed visual analysis of the suspect, identifying key physical traits and habits. Through a calculated deception involving a tobacco pouch, Holmes confirms Cairns's presence at the crime scene. The action shifts to the Deduction Space, where various clues are linked to establish Cairns's guilt and determine his moral judgment. After a period of reflection in a carriage ride back to Baker Street, Holmes and Inspector Lestrade prepare an ambush. The encounter culminates in a violent physical struggle and a boxing match as the suspect attempts to escape justice. The case concludes with a full breakdown of the investigation's success and the player's overall performance ranking. Chapters: 0:00:00 - 0:00:45 - Opening sequence and case loading 0:00:45 - 0:01:08 - Meeting Patrick Cairns at the pub 0:01:08 - 0:03:32 - The arm-wrestling challenge minigame 0:03:32 - 0:07:00 - Interrogation regarding Black Peter and the mysterious sailor 0:07:00 - 0:09:11 - Detailed character portrait analysis of the suspect 0:09:11 - 0:10:33 - Confirming evidence through the tobacco pouch trick 0:10:33 - 0:11:23 - Connecting clues in the Deduction Space 0:11:23 - 0:12:49 - Carriage transition and case file review 0:12:49 - 0:14:03 - Preparing the ambush with Inspector Lestrade 0:14:03 - 0:14:32 - Boxing confrontation with Patrick Cairns 0:14:32 - 0:16:11 - Case completion statistics and final ranking 📖 Interactive written walkthrough with clickable timestamps: https://pixelfungaming.com/videos/sherlock-holmes-crimes-and-punishments-the-fate-of-black-peter-part-4

Far Cry 5 - Destroying Statue via Airstrike
The mission begins with a scenic helicopter flight towards the massive statue of Joseph Seed, a landmark known as 'Joseph's Word' overlooking the Hope County landscape. Upon reaching a suitable cliffside vantage point, the character disembarks from the helicopter to initiate an assault on the cult's monument. Using a radio to call in aerial assistance from Nick Rye, a series of devastating bombing runs begins. The colossal white statue gradually crumbles under repeated explosive impacts, shedding its outer concrete layer to reveal a hollow interior and a complex internal metal scaffold. Debris falls in large chunks as the figure of the 'Father' is systematically dismantled by precise air strikes. Throughout the process, the character maintains a safe distance, monitoring the destruction from various angles while moving through the rugged terrain. The mission progress steadily increases as the iconic structure is reduced to a skeletal frame against the Montana skyline. Chapters: 0:00:00 - 0:00:21 - Helicopter approach to Joseph's Word 0:00:21 - 0:00:35 - Landing and preparing for the assault 0:00:35 - 0:01:12 - Calling in Nick Rye for air support 0:01:12 - 0:01:45 - Initial bombing runs and statue damage 0:01:45 - 0:02:15 - Progressive destruction of the statue torso 0:02:15 - 0:02:50 - Final major sections of the statue collapse 0:02:50 - 0:03:32 - Relocating during the final stages of demolition 📖 Interactive written walkthrough with clickable timestamps: https://pixelfungaming.com/videos/far-cry-5-destroying-statue-via-airstrike

Ready Or Not: Rust Belt 1.0 | (No Mods)
The video demonstrates a full mission playthrough of Ready or Not, specifically the Rust Belt operation. Gameplay begins with a tactical entry into a rural farm property, where the SWAT team clears outdoor areas and stables using precise coordination and flashbangs. The team then moves inside a small residential building before descending into an extensive and dark underground tunnel network. Throughout the full duration, viewers will see detailed tactical procedures, including the use of mirror guns to peek under doors, careful room clearing, and engagement of hostile suspects in narrow corridors. The footage covers the successful completion of all primary and soft objectives, such as rescuing civilians and securing evidence like confiscated passports. The video concludes with a debriefing screen showing the team's overall performance and a B mission rating. Chapters: 0:00:00 - 0:02:25 - Tactical entry and initial suspect encounters at the farm property 0:02:25 - 0:05:00 - Clearing the stables and setting up for the farm house breach 0:05:00 - 0:07:30 - Entry into the underground tunnel network and initial firefight 0:07:30 - 0:11:00 - Methodical progression through dark tunnels using mirror guns for recon 0:11:00 - 0:14:30 - Intense corridor combat and securing evidence in hidden underground rooms 0:14:30 - 0:18:00 - Navigating complex cave sections and neutralizing hostile threats 0:18:00 - 0:21:40 - Final room clearing and mission objective completion 0:21:40 - 0:22:08 - Mission summary results and video conclusion 📖 Interactive written walkthrough with clickable timestamps: https://pixelfungaming.com/videos/ready-or-not-rust-belt-1-0-no-mods

HITMAN patient zero Brother Akram Sniper Assassin
The mission begins in the coastal town of Sapienza under the cover of night. Agent 47 navigates through a series of underground tunnels to reach a hidden equipment stash, retrieving a Sieger 300 sniper rifle. From the tunnels, he emerges onto a secluded beach and cautiously ascends stone stairs leading toward the town's cemetery and church district. He maintains a low profile, utilizing tall grass and stone walls for cover while tracking patrol patterns with heightened instinct. After distracting a gardener near the cemetery gates, he moves deeper into the grounds, eventually reaching the side entrance of the local church. He systematically disables several security cameras using his silenced sniper rifle to ensure his path remains unrecorded. Once inside the church, he picks the lock on a restricted door and climbs the winding wooden stairs of the bell tower. Upon reaching the vantage point, he neutralizes a guard stationed at the top and sets up his shot. He monitors the movements of the target, Brother Akram, as he walks through the town square below. As the target steps onto a balcony, Agent 47 fires a precise headshot, successfully eliminating the primary objective before preparing for the next phase of the operation. Chapters: 0:00:00 - 0:00:45 - Mission Start and Tunnel Navigation 0:00:45 - 0:01:35 - Retrieving Sniper Stash and Beach Infiltration 0:01:35 - 0:02:55 - Cemetery Stealth and Guard Distractions 0:02:55 - 0:03:30 - Precision Camera Disabling 0:03:30 - 0:04:50 - Church Exterior Maneuvers and Entry 0:04:50 - 0:05:35 - Ascending the Church Bell Tower 0:05:35 - 0:06:21 - Elimination of Brother Akram 📖 Interactive written walkthrough with clickable timestamps: https://pixelfungaming.com/videos/hitman-patient-zero-brother-akram-sniper-assassin

Red Dead Redemption 2 - Rooftop Show Down
This video showcases high-intensity PvP gameplay in Red Dead Redemption 2 Online, set in the desert town of Tumbleweed. The footage demonstrates strategic positioning as a character secures the high ground on a barn rooftop to engage multiple opponents. Viewers will see the effective use of various weapons including dual Navy Revolvers and the Bolt Action Rifle, as well as the 'Dead Eye' mechanic for precision shots. The gameplay covers tactical movement, weapon swapping, and long-range marksmanship, concluding with a character respawn and a return to the combat zone through the desert landscape. Chapters: 0:00:00 - 0:00:15 - Approaching the Barn in Tumbleweed 0:00:15 - 0:00:40 - Securing the Rooftop and Initial Close-Range Kills 0:00:40 - 0:01:05 - Weapon Selection and Tactical Positioning 0:01:05 - 0:01:35 - Long-Range Rifle Engagements Using Dead Eye 0:01:35 - 0:02:10 - Intense Mid-Range Shootout and Aerial Eliminations 0:02:10 - 0:02:20 - Combat Climax and Character Defeat 0:02:20 - 0:02:40 - Respawn and Navigation Through the Desert 📖 Interactive written walkthrough with clickable timestamps: https://pixelfungaming.com/videos/red-dead-redemption-2-rooftop-show-down

Farcry 6 live #5
This video is an extensive gameplay walkthrough of Far Cry 6, specifically focusing on the missions and exploration in the El Este region of Yara. The journey begins with the protagonist, Dani Rojas, taking over key FND checkpoints to secure the roads. The action intensifies as Dani infiltrates and captures the Santo Gusto Coffee Factory, a critical strategic location for the regime's control. A significant portion of the video follows the 'Meet The Legends' operation, where Dani scales the rugged mountain peaks to make contact with the legendary revolutionaries of '67—El Tigre, Lucky Mama, and Lorenzo Canseco. This alliance leads into the 'Take Your Medicine' mission, involving a high-stakes supply run and an introduction to the younger, more radical rebel faction known as La Moral, led by Jonrón and Yelena Morales. The walkthrough culminates in a daring rescue operation aboard the cargo ship CSS Viateur, featuring intense naval combat and hostage extraction, finally concluding with a strategic meeting at La Moral's hidden headquarters, El Agujero. Throughout the video, viewers can see various gameplay mechanics in action, including stealth tactics, heavy weapon combat, diverse vehicle use ranging from quads and classic cars to helicopters, and dynamic wingsuit navigation across the island's beautiful but dangerous landscape. Chapters: 0:00:00 - Capturing Nueva Vida Checkpoint W 0:03:30 - Entering the El Este Region 0:06:15 - Successful Capture of the Checkpoint 0:11:58 - Infiltrating the Santo Gusto Coffee Factory 0:15:31 - Mission Start: Meet The Legends 0:18:25 - Scaling the mountain peaks toward Patriotas Peak 0:22:26 - Arrival at Patriotas Peak and the Legends' Camp 0:23:18 - Cutscene: Meeting El Tigre 0:24:14 - Cutscene: Meeting Lorenzo Canseco and Lucky Mama 0:25:30 - Mission Start: Take Your Medicine 0:26:40 - Wingsuit traversal to the supply drop location 0:28:17 - Encounter with Jonrón and La Moral 0:29:58 - Defending the supply site from enemy forces 0:33:28 - Infiltrating the CSS Viateur cargo ship 0:35:01 - Intense firefight on the ship's deck 0:37:55 - Mission Start: The New Revolution 0:38:43 - Aerial combat and helicopter transport 0:43:18 - Searching for the secret entrance to El Agujero 0:46:18 - Meeting Yelena Morales and La Moral leadership 0:52:15 - Planning the next stage of the revolution 0:58:45 - Tactical exploration of the coastal regions 1:04:20 - Engaging FND naval patrols near Conuco 1:06:05 - Operation Completed: The New Revolution 1:12:30 - Final combat encounter and securing the perimeter 1:19:37 - Video Conclusion and Summary 📖 Interactive written walkthrough with clickable timestamps: https://pixelfungaming.com/videos/farcry-6-live-5

Sherlock Holmes : Crimes and Punishments - The Fate of Black Peter - Part 2
The investigation begins in a police evidence room where Sherlock Holmes examines the personal belongings of a suspect, John Neligan. Items under scrutiny include a gold ring with an inscription, a handkerchief, a notebook, and a pocket knife. Following the inspection, Holmes proceeds to an interrogation room to question Neligan, using the gold ring as leverage to uncover the suspect's true identity and connections to the victim. The detective carefully observes the suspect's physical appearance to make deductions about his background and social status. The scene shifts to the crime scene at Woodman's Lee, a small cabin where the body of Peter Carey lies impaled on a wall by a harpoon. Holmes meticulously examines the body, blood patterns, and ship logs from the 'Sea Unicorn' to establish a timeline of events and potential motives. Back at Baker Street, the detective utilizes his extensive archives, specifically searching old newspapers to find information on the bankruptcy of Dawson and Neligan, which provides crucial context for the current investigation. Returning to Scotland Yard, Holmes meets with Inspector Lestrade, who presents a new suspect named Liam Hurtley. The detective examines Hurtley’s belongings, including stained boots and a mysterious letter, before conducting another interrogation. To reveal the contents of the ink-stained letter, Holmes performs a chemical analysis at his laboratory table, carefully mixing reagents to create a clearing agent. The mission concludes with Holmes using a telescope to locate Wiggins and commissioning the Baker Street Irregulars to track down missing crew members of the Sea Unicorn. Sherlock Holmes examines a complex chemical mixing puzzle in his laboratory, following a handwritten recipe with specific constraints. The mission requires using seven different reagents in a precise sequence: the orange reagent must be added as the third one after the blue reagent, and the colorless reagent must immediately follow the orange one. Gameplay involves selecting colored liquids—blue, green, orange, and colorless—and carefully pouring them into a large flask. Incorrect sequences result in a chemical failure indicated by a burst of white smoke, prompting a full reset of the experiment. Several attempts are made, with frequent references back to the recipe to verify the logical conditions and order of operations. The investigative process highlights the detective's trial-and-error methodology as he attempts to achieve the correct chemical reaction. The segment concludes with a pause on an exit prompt within the game menu. Chapters: 0:00:00 - Game start and evidence room inspection 0:01:35 - Interrogating John Neligan about the gold ring 0:04:52 - Mental deduction during carriage travel 0:06:14 - Investigation of the crime scene at Woodman's Lee 0:08:29 - Reviewing case details and evidence in transit 0:09:22 - Returning to Scotland Yard for further evidence 0:11:21 - Researching Dawson and Neligan in the archives 0:12:43 - Discussion with Inspector Lestrade regarding a new suspect 0:13:51 - Examining Liam Hurtley's personal effects 0:15:03 - Interrogating Liam Hurtley at the police station 0:16:26 - Chemical analysis of the ink-stained letter 0:19:13 - Recruiting Wiggins and the Baker Street Irregulars 00:00:00 - Reviewing the chemical recipe and mixing conditions 00:00:23 - Initial attempt at mixing reagents in the flask 00:01:02 - Re-examining the three specific rules for the mixture 00:02:12 - Resetting the experiment after an incorrect sequence 00:03:17 - Detailed study of the reagent order guidelines 00:04:12 - Failed reaction produces smoke and triggers a restart 00:05:03 - Consulting the recipe for a fourth time to solve the puzzle 00:06:23 - Another sequence failure leads to a chemical reset 00:07:05 - Navigating the system menu to potentially exit the task 00:09:06 - Footage ends on the game exit confirmation screen 📖 Interactive written walkthrough with clickable timestamps: https://pixelfungaming.com/videos/sherlock-holmes-crimes-and-punishments-the-fate-of-black-peter-part-2

PixelFunGaming Live Stream
The session begins with a comprehensive review of character stats and resource management within the Vault Hunters modpack. Initial preparation focuses on organizing the inventory, crafting necessary consumables, and finalizing the vault crystal modifiers for the upcoming runs. The first vault expedition starts with rapid movement through various chambers, where combat encounters against custom mobs occur frequently while searching for gilded chests and rare ores. Tactical deployment of abilities like Dash and Vein Miner allows for efficient looting and navigation across challenging vertical terrain. After a successful extraction from the first vault, the focus shifts to processing the earned loot, identifying new gear pieces, and upgrading the vault altar to prepare for a subsequent, more difficult challenge. The second vault run introduces higher-tier modifiers and more complex room puzzles, requiring careful health management and strategic pathing to maximize rewards before the timer reaches zero. The journey concludes with a final tally of the acquired wealth and a strategic update on the character's skill tree progression. Chapters: 0:00:00 - 0:04:15 - Base Management and Gear Preparation 0:04:15 - 0:08:50 - Initial Entry and First Vault Exploration 0:08:50 - 0:13:20 - Gilded Chest Hunting and Mob Combat 0:13:20 - 0:17:45 - Objective Completion and Vault Extraction 0:17:45 - 0:22:10 - Loot Identification and Resource Processing 0:22:10 - 0:26:30 - Crafting the Second Vault Crystal 0:26:30 - 0:31:00 - High-Stakes Exploration in the Second Vault 0:31:00 - 0:35:45 - Advanced Puzzle Rooms and Elite Mob Encounters 0:35:45 - 0:39:42 - Final Extraction and Rewards Summary 📖 Interactive written walkthrough with clickable timestamps: https://pixelfungaming.com/videos/pixelfungaming-live-stream

SWAT Commander: Breaking Point | Perfect score #swat
This video provides a complete walkthrough of the 'Breaking Point' mission in the tactical shooter game Ready or Not. The footage showcases a SWAT team's systematic approach to clearing a large, multi-room office complex. Viewers will observe various tactical maneuvers including door stacking, room breaching with flashbangs and C2 explosives, and the use of tactical cameras for reconnaissance. Throughout the video, the squad navigates high-stakes environments like open-plan offices, a library, storage facilities, and a lounge area, successfully neutralizing multiple armed suspects while rescuing numerous civilians. The gameplay concludes with a full mission debriefing, achieving a 'Captain' rank with all objectives completed. Chapters: 0:00:00 - 0:01:45 - Tactical Entry and Office B Clearance 0:01:45 - 0:03:50 - Main Office Engagement and Civilian Securing 0:03:50 - 0:05:45 - Library Sweep and Tactical Camera Reconnaissance 0:05:45 - 0:07:30 - Securing Restrooms and Corridor Firefights 0:07:30 - 0:09:45 - Reception Area Breach and High-Risk Takedowns 0:09:45 - 0:12:00 - Methodical Clearing of Storage and Utility Rooms 0:12:00 - 0:13:45 - Lounge Area Breach and Mass Hostage Rescue 0:13:45 - 0:14:55 - Final Server Room Clearance and Mission Completion 📖 Interactive written walkthrough with clickable timestamps: https://pixelfungaming.com/videos/swat-commander-breaking-point-perfect-score-swat

HITMAN: Holiday Hoarders - Santa Assassin
Agent 47 dons a Santa Claus costume to infiltrate the wine cellars of a lavish estate during a festive event. He moves with calculated precision, utilizing his instinct to track the movements of guards and his marks, Harry 'Smokey' Bagnato and Marv 'Slick' Gonif. After carefully navigating through the dark corridors, he reaches the brightly lit hall and executes both targets with rapid-fire headshots. A cheeky 'Ho, ho, ho' punctuates the successful hit before he vanishes back into the shadows. The mission concludes as he escapes through a hidden tunnel, achieving a high mission rating and completing several challenges. Chapters: 0:00:00 - 0:00:45 - Agent 47 navigates the wine cellar in a Santa outfit 0:00:45 - 0:01:30 - Stealthy movement and monitoring of guards using instinct 0:01:30 - 0:02:15 - Approaching the targets' location while staying out of sight 0:02:15 - 0:02:45 - Positioning for the final strike near the festive hall 0:02:45 - 0:03:00 - Fast elimination of both targets followed by a festive quip 0:03:00 - 0:03:36 - Swift extraction from the area and mission completion summary 📖 Interactive written walkthrough with clickable timestamps: https://pixelfungaming.com/videos/hitman-holiday-hoarders-santa-assassin
Far Cry 5 - Death From Below - Marina Outpost
The mission begins near a cult outpost under the cover of night. A character sneakily approaches an unaware cultist guarding a high wooden platform. A precise stealth takedown follows, where the enemy is grabbed and thrown from the ledge into the shallow water below. The character falls alongside the target, hitting the water and immediately swimming to recover rifle ammo from the body. The infiltration continues as the character prepares for further engagement within the outpost. Chapters: 0:00:00 - 0:00:02 - Infiltration and approach of the cultist 0:00:02 - 0:00:04 - Stealth takedown and fall into water 0:00:04 - 0:00:07 - Looting the fallen enemy in the water 📖 Interactive written walkthrough with clickable timestamps: https://pixelfungaming.com/videos/far-cry-5-death-from-below-marina-outpost

RDR2 - Sean Mcguire Grave Location
The journey leads to a secluded spot near the water where a simple wooden cross stands atop a pile of stones. Upon closer inspection, the inscription reveals this to be the final resting place of Sean MacGuire. After a moment of silence, the map opens to pinpoint the exact location on the western shore of Lemoyne, just north of Clemens Point. This hidden location serves as a poignant reminder of the gang's journey through the region. Chapters: 0:00:00 - 0:00:10 - Approaching Sean MacGuire's Grave 0:00:10 - 0:00:26 - Inspecting the Grave Marker 0:00:26 - 0:00:46 - Map Location Breakdown 📖 Interactive written walkthrough with clickable timestamps: https://pixelfungaming.com/videos/rdr2-sean-mcguire-grave-location

#Hitman: Shooting The Dictator
The mission begins in a luxury hotel hallway where the protagonist, dressed in a safari uniform, monitors targets within the Camberwell Lounge. Using thermal-like instinct, he tracks the movement of his primary mark, Richard Ekwensi, who is engaged in a tense conversation. After carefully timing the door opening, he slips into the room behind the target. A single, silenced shot to the head eliminates the first objective instantly. The character quickly retreats from the scene, closing the door and moving toward the next target, Inez Ekwensi, without alerting nearby security or bystanders. The execution is swift and silent, maintaining the element of surprise. Chapters: 0:00:00 - 0:00:10 - Tracking targets through walls using instinct 0:00:10 - 0:00:18 - Positioning outside the Beauty Camberwell Lounge 0:00:18 - 0:00:25 - Entering the room and eliminating Richard Ekwensi 0:00:25 - 0:00:31 - Exiting the room and proceeding to the next objective 📖 Interactive written walkthrough with clickable timestamps: https://pixelfungaming.com/videos/hitman-shooting-the-dictator
Ready Or Not: Mission 1 | 4U Gas Station
This video showcases a full mission playthrough of the tactical shooter 'Ready or Not', specifically the gas station level. The footage follows a SWAT team as they execute a high-stakes operation to rescue civilians and neutralize suspects within a convenience store and attached diner. Viewers will see detailed tactical procedures, including room clearing, the use of tactical equipment like optical wands and flashbangs, and the systematic apprehension of suspects. The mission progresses from the initial exterior approach to clearing the grocery aisles, the main diner area, back offices, and finally the exterior loading docks, concluding with a comprehensive mission debrief and performance rating. Chapters: 0:00:00 - 0:02:15 - Initial Approach and Storage Room Breach 0:02:15 - 0:04:45 - Breaching the Main Store and Securing Suspects 0:04:45 - 0:07:30 - Clearing the Diner Area and Detaining Civilians 0:07:30 - 0:10:15 - Backroom Exploration and Systematic Room Clearance 0:10:15 - 0:13:00 - Tactical Hallway Progression and Office Engagement 0:13:00 - 0:16:00 - Final Area Search and Objective Completion 0:16:00 - 0:17:16 - Mission Debriefing and Performance Rating 📖 Interactive written walkthrough with clickable timestamps: https://pixelfungaming.com/videos/ready-or-not-mission-1-4u-gas-station

Ghost Recon Wildlands - El Seuno
The final mission begins with a high-stakes flight to a pre-Colombian necropolis to locate rebel allies. Upon landing, the team discovers the body of the rebel leader Amaru, signaling a dark turn in the conflict. Communication with Karen Bowman confirms a massive betrayal by Pac Katari, forcing an immediate relocation to Pucara. After navigating through a snowy rebel base, the team finds an injured Bowman, who reveals that the rebels have abandoned their alliance in a desperate bid to kill El Sueño themselves. Intense combat immediately erupts as the team fights their way through former allies, using tactical cover and heavy firepower to clear a path. A final helicopter insertion brings the Ghosts to the massive Mausoleum of El Sueño. Inside the structure, a tense final standoff occurs between the Ghost team, Bowman, and the cartel leader. El Sueño reveals he has negotiated an immunity deal with the US government, leading to a shocking and unauthorized response from Bowman. The experience concludes with a cinematic epilogue detailing the aftermath of the cartel's collapse and the permanent changes to the political landscape of Bolivia. Chapters: 0:00:00 - 0:01:28 - Investigating the RV and Discovering Betrayal 0:01:28 - 0:02:58 - Navigating the Base to Find Bowman 0:02:58 - 0:03:48 - Confronting the Reality of Rebel Betrayal 0:03:48 - 0:06:27 - Intense Combat Engagement with Rebel Forces 0:06:27 - 0:07:06 - Final Approach to El Sueño's Mausoleum 0:07:06 - 0:09:58 - The Final Stand-off and Execution 0:09:58 - 0:10:39 - Mission Epilogue and Narrative Conclusion 📖 Interactive written walkthrough with clickable timestamps: https://pixelfungaming.com/videos/ghost-recon-wildlands-el-seuno

HITMAN: Colorado - Drowning death accident kill
Agent 47 hides inside a small storage shed on the Colorado militia farm, preparing for a stealthy elimination of a high-value target. He activates his Instinct ability to track the movement of guards and primary targets through the walls of the compound, waiting for the perfect window of opportunity. Sean Rose, a key target with obsessive-compulsive tendencies, begins to experience a severe panic attack outside, triggered by Agent 47's prior manipulation of the environment. Rose breaks away from his security detail and rushes toward the shed in a frantic state, muttering about being covered in germs and filth. He bursts into the shed and immediately heads toward a small water basin to wash his face. As Rose leans over the water, Agent 47 emerges from the shadows, grabs him from behind, and drowns him in the basin. This successful assassination completes both the 'Cleaning Up' and 'Hold My Hair' challenges. The mission segment concludes with 47 concealing the body and preparing to exit the area. Chapters: 0:00:00 - 0:00:45 - Monitoring targets from the shed 0:00:45 - 0:01:45 - Tracking Sean Rose's patrol via Instinct 0:01:45 - 0:02:45 - Sean Rose approaches in a panicked state 0:02:45 - 0:03:25 - The target enters the shed to wash 0:03:25 - 0:03:58 - Executing the drowning assassination 📖 Interactive written walkthrough with clickable timestamps: https://pixelfungaming.com/videos/hitman-colorado-drowning-death-accident-kill

Call Of Duty Ghosts : Ghosts Stories - Mission 1
The experience begins with a high-energy cinematic montage blending tactical visuals and stylized black-and-white warfare imagery. The narrative proper starts in a serene forest, where a father, Elias, recounts the legend of a specialized group of soldiers known as the Ghosts to his sons, Logan and Hesh. This peaceful moment shatters as a massive seismic event triggers immediate chaos. The sky fills with streaks of light as kinetic projectiles from space begin striking the landscape. The perspective then shifts back fifteen minutes to the ODIN control station in low Earth orbit. Specialist Baker navigates outside the station to dock a shuttle before transitioning inside. Tranquility is short-lived as Federation forces board the station. Intense zero-gravity firefights ensue as Baker and Specialist Mosley attempt to reclaim control from the hijackers who have already targeted major American cities. Realizing they cannot stop the weapon's firing sequence from within, the duo scuttles the station by detonating fuel lines, effectively de-orbiting the platform. Back on Earth, the narrative returns to Logan and Hesh as they navigate the immediate aftermath of the strikes. They race through a collapsing neighborhood, dodging falling power lines and crumbling architecture. Reunited with their father, they witness the complete devastation of their city. The prologue concludes with a leap ten years into the future, revealing a world scarred by war where the brothers, now soldiers, prepare for their next mission alongside their loyal canine companion, Riley. Chapters: 0:00:00 - 0:02:12 - Stylized Cinematic Introduction 0:02:12 - 0:03:12 - Narrative Setup in the Forest 0:03:12 - 0:04:38 - Sudden Destruction on Earth 0:04:38 - 0:06:14 - Space Station Infiltration 0:06:14 - 0:08:08 - Combat on the ODIN Station 0:08:08 - 0:10:30 - Scuttling ODIN in Space 0:10:30 - 0:13:12 - Frantic Escape through the Ruins 0:13:12 - 0:15:08 - Aftermath and Ten-Year Time Jump 📖 Interactive written walkthrough with clickable timestamps: https://pixelfungaming.com/videos/call-of-duty-ghosts-ghosts-stories-mission-1

Far Cry 5 - VIETNAM - Calling airstrike on bridge check point
The mission begins with an infiltration of a jungle-based enemy camp during the night. After scouting from a distance with binoculars to identify key targets, an airstrike is called in to neutralize a watchtower and several patrolling soldiers. Moving cautiously through the thick vegetation, the character maneuvers toward a bridge where an enemy truck and additional hostiles are stationed. A second airstrike is requested, decimating the vehicle and the surrounding enemies in a large explosion. Following the destruction, the character advances into the burning camp to clear out the remaining resistance. Utilizing sandbags for cover, the character engages and eliminates lingering threats in the area. The mission involves frequent checks of the tactical map to coordinate movements through the dense jungle environment and ensure all objectives are met. Chapters: 0:00:00 - 0:00:15 - Initial scouting and watchtower airstrike 0:00:15 - 0:00:42 - Navigating through the jungle toward the bridge 0:00:42 - 0:00:58 - Targeting and destroying the bridge convoy 0:00:58 - 0:01:23 - Infiltrating the burning enemy outpost 0:01:23 - 0:01:29 - Tactical map review and objective check 0:01:29 - 0:02:09 - Combat engagement from cover behind sandbags 0:02:09 - 0:02:25 - Secondary map review and planning next steps 0:02:25 - 0:02:30 - Final area sweep and securing the perimeter 📖 Interactive written walkthrough with clickable timestamps: https://pixelfungaming.com/videos/far-cry-5-vietnam-calling-airstrike-on-bridge-check-point

Far Cry 5 - VIETNAM - Major Vong sniper assassination - Undetected
The mission Major Vong in Far Cry 5: Hours of Darkness begins with the character gathering supplies from a watchtower, including a sniper rifle and various ammunition types. After departing the tower, the path leads toward a rice paddy overlooking a small enemy settlement. Using binoculars, the area is scouted, and several enemy soldiers are tagged for tracking. A stealthy approach through dense foliage brings the character to a prime vantage point. With the target, an NVA Commander, identified through the scope, a single precise shot from a distance successfully eliminates him. Following the assassination, the character advances toward the village to collect intelligence. The mission concludes with a successful completion notification and the discovery of a nearby bunker. Chapters: 0:00:00 - 0:00:20 - Preparing for the Mission 0:00:20 - 0:01:00 - Scouting the Outpost 0:01:00 - 0:01:25 - Finding a Vantage Point 0:01:25 - 0:02:05 - Eliminating the NVA Commander 0:02:05 - 0:02:32 - Mission Completion and Exploration 📖 Interactive written walkthrough with clickable timestamps: https://pixelfungaming.com/videos/far-cry-5-vietnam-major-vong-sniper-assassination-undetected

Far Cry 5 - VIETNAM- Lighter location in agent orange fog
The mission begins in a scorched, red-hazed forest as the character moves stealthily toward an NVA camp. Heavy coughing from the toxic atmosphere punctuates the journey through the valley. After navigating the rugged, charred terrain, a white parachute signals the location of a downed US pilot. Looting the body provides the first of several collectible lighters. Hostile NVA soldiers soon intercept the path, leading to a quick and decisive firefight through the thick smoke. Following the encounter, the character transitions into a lush, green jungle environment, regrouping with an ally to proceed through tall grass and dense foliage while observing for further threats. Chapters: 0:00:00 - 0:00:15 - Initial trek through the scorched forest and map check 0:00:16 - 0:00:38 - Navigating the toxic red-hazed valley toward the objective 0:00:39 - 0:00:56 - Locating the fallen pilot and looting the first lighter 0:00:57 - 0:01:03 - Engaging NVA soldiers in a smoke-filled firefight 0:01:04 - 0:01:33 - Transitioning to dense jungle and regrouping with an ally 📖 Interactive written walkthrough with clickable timestamps: https://pixelfungaming.com/videos/far-cry-5-vietnam-lighter-location-in-agent-orange-fog

Far Cry 5 - VIETNAM - Prison Camp #1 - Undetected
The mission begins with a stealthy approach through the dense jungle towards an NVA prison camp. Binoculars provide a critical vantage point for reconnaissance, allowing for the tagging of guards and identification of captured squad members. The objective requires securing the camp and rescuing Joker, Moses, and Yokel while remaining undetected. Infiltration commences by scaling a guard tower for a silent takedown. Progression through the base is methodical, utilizing tall grass and wooden structures for concealment. Guards are neutralized through a combination of hand-to-hand stealth takedowns and precise shots from a recurve bow. After clearing out the remaining hostiles, the camp is successfully secured without triggering any alarms. The mission concludes with the liberation of Joker from his bamboo cage, granting access to a new airstrike team. Chapters: 0:00:00 - 0:01:05 - Initial Approach and Perimeter Scouting 0:01:05 - 0:02:10 - Enemy Tagging and Objective Identification 0:02:10 - 0:03:30 - First Tower Takedown and Infiltration 0:03:30 - 0:04:50 - Stealth Navigation and Indoor Takedowns 0:04:50 - 0:06:15 - Clearing the Camp with the Recurve Bow 0:06:15 - 0:07:01 - Final Neutralization and Freeing the Squad 📖 Interactive written walkthrough with clickable timestamps: https://pixelfungaming.com/videos/far-cry-5-vietnam-prison-camp-1-undetected
GTA 5 ; Escaping jets missile
The gameplay begins with the character entering a military jet, the P-996 Lazer, on the runway of Fort Zancudo. A 5-star wanted level instantly activates upon vehicle entry. The jet accelerates rapidly, utilizing the afterburner (indicated by a purple exhaust plume) to achieve high speed and take off. Once airborne, the jet performs aggressive maneuvers, pulling sharp vertical turns over the mountains bordering the base, quickly gaining maximum altitude to evade enemy pursuit, maintaining a steady climb throughout the final moments of the flight. Chapters: 0:00 - 0:04 - Stealing the P-996 Lazer Jet 0:04 - 0:28 - Rapid Takeoff and 5-Star Wanted Level Evasion 📖 Interactive written walkthrough with clickable timestamps: https://pixelfungaming.com/videos/gta-5-escaping-jets-missile

Far Cry 5 - Dinner Time Walkthrough
The mission 'Dinner Time' begins with the character waiting for Dr. Perkins at a remote camp in Hope County. The primary objective is to capture a ferocious 'Judge Wolf' alive for study. The process starts by opening the main gate to a large animal pen. Following instructions, the character locates a fallen trainer and carries the body into the pen, placing it in a feeding trough to serve as bait. This action triggers a dinner bell, drawing in the first predator. However, the mission hit a snag when nearby allies accidentally kill the target. To find another specimen, the character scales a high water tower to get a clear view of the surrounding forest. After spotting a second Judge Wolf, the character carefully lures it into the pen by acting as live bait and then quickly flipping the gate lever to trap it. The mission concludes with a conversation with Dr. Perkins and the receipt of mission rewards and new crafting recipes. Chapters: 0:00:00 - 0:00:24 - Mission Start and Opening the Pen 0:00:24 - 0:01:21 - Baiting the Trap with a Trainer's Body 0:01:21 - 0:02:18 - First Encounter and Accidental Kill 0:02:18 - 0:04:30 - Scouting for a New Target from the Silo 0:04:30 - 0:05:15 - Luring and Trapping the Second Judge Wolf 0:05:15 - 0:06:30 - Reporting Success to Dr. Perkins 0:06:30 - 0:07:09 - Mission Completion and Rewards 📖 Interactive written walkthrough with clickable timestamps: https://pixelfungaming.com/videos/far-cry-5-dinner-time-walkthrough

Far Cry 5 - Hostages at visitor center Walkthrough
The mission begins with a tactical approach to the Whitetail Park Visitor Center under the cover of night. Initial scouting from a nearby ridge utilizes a high-powered scope to tag numerous cultist guards and locate three hostages held at different points within the facility. Stealthy movement brings the action closer to the buildings, where silenced precision shots neutralize several threats without alerting the entire camp. Combat intensifies as the first two hostages are freed from the souvenir shop and an outdoor enclosure. A final breach of the main information center leads to the elimination of the remaining cultists and the liberation of the last prisoner. The area is then secured, allowing for a thorough collection of ammunition, supplies, and regional maps found inside the buildings. Chapters: 0:00:00 - 0:00:17 - Initial approach to Whitetail Park Visitor Center 0:00:17 - 0:02:18 - Long-range reconnaissance and target tagging 0:02:18 - 0:03:00 - Stealthy infiltration towards the souvenir shop 0:03:00 - 0:03:55 - Engagement with guards and first hostage rescues 0:03:55 - 0:04:45 - Clearing the main information center 0:04:45 - 0:05:24 - Objective completion and area looting 📖 Interactive written walkthrough with clickable timestamps: https://pixelfungaming.com/videos/far-cry-5-hostages-at-visitor-center-walkthrough
Payday2 prison nightmare
The mission begins in the Payday 2 main menu where various settings and options are adjusted. Navigation moves to the Crime.net map, scanning for available contracts and browsing through different heist locations across Washington D.C. After selecting the Prison Nightmare heist on a high difficulty, the preparation phase starts. Crew members select their loadouts, including primary weapons, secondary firearms, and deployable equipment like ammo bags and first aid kits. The heist kicks off in a dark, atmospheric outdoor area of a prison. Combat encounters involve a unique 'Wheel of Misfortune' mechanic, which players must spin to determine their next challenge, such as facing Snipers, Dozers, or Drills. High-intensity firefights erupt against waves of police forces, including special units like Tasers and Cloakers. The team works together to manage objectives and revive downed members during chaotic assaults. The gameplay cycle repeats as different crew configurations and tactics are tested across multiple attempts of the same contract. Chapters: 0:00:00 - 0:00:19 - Main Menu and Settings Adjustment 0:00:19 - 0:02:24 - Navigating Crime.net Map for Contracts 0:02:24 - 0:03:55 - Prison Nightmare Heist Setup and Loadout 0:03:55 - 0:05:45 - Initial Heist Phase: Spinning the Wheel 0:05:45 - 0:08:05 - Defending Objectives Against Police Assault 0:08:05 - 0:11:15 - Intense Prison Firefights and Team Revivals 0:11:15 - 0:13:30 - Contract Review and Menu Navigation 0:13:30 - 0:14:50 - Heist Re-entry and Final Loadout Adjustments 📖 Interactive written walkthrough with clickable timestamps: https://pixelfungaming.com/videos/payday2-prison-nightmare

Elusive Target: The Blackmailer #Hitman
The mission begins with a detailed briefing on the Elusive Target, Walter Williams, known as 'The Blackmailer,' who is currently attending a high-profile fashion show in Paris. The operation requires not only his elimination but also the retrieval of an encrypted memory stick he uses for extortion. After carefully selecting a long-range loadout featuring a sniper rifle, Agent 47 arrives at the palace grounds during the Sanguine fashion show. He bypasses the main red carpet and stealthily infiltrates the restricted side gardens. He enters the palace through a basement window, using a vacuum cleaner as a distraction to lure a security guard into a secluded room. After subduing the guard and taking his uniform, 47 moves through the palace interiors to reach the attic. He secures the top floor by subduing a bodyguard near a balcony overlooking the main stage. 47 assembles his sniper rifle and patiently scopes the catwalk as models cycle through their routines. Once Walter Williams takes the stage, 47 executes a single, precise headshot. The assassin then quickly stows his weapon and navigates back down through the palace to the wine cellar tunnels, successfully exiting the mission area. Chapters: 0:00:00 - 0:00:30 - Mission briefing for The Blackmailer 0:00:30 - 0:02:47 - Loadout selection and mission planning 0:02:47 - 0:03:15 - Arrival at the Paris fashion show 0:03:15 - 0:04:00 - Infiltrating the palace grounds 0:04:00 - 0:04:45 - Acquiring a security guard disguise 0:04:45 - 0:06:00 - Ascending to the upper floors 0:06:00 - 0:08:30 - Securing the attic vantage point 0:08:30 - 0:10:40 - Scoping the catwalk from the balcony 0:10:40 - 0:10:50 - Elimination of Walter Williams 0:10:50 - 0:11:20 - Exfiltration and mission completion 📖 Interactive written walkthrough with clickable timestamps: https://pixelfungaming.com/videos/elusive-target-the-blackmailer-hitman

Elusive Target: Warlord #Hitman
The mission begins with Agent 47, dressed in a sharp white suit, entering the opulent Himmapan Hotel in Bangkok. He checks in at the reception under the alias Tobias Rieper before heading to his room on the upper floor. Once inside, he sabotages the plumbing and calls for room service to lure hotel staff. He subdues the arriving staff members, hides their bodies, and adopts a new disguise as a hotel employee. Now blending in, he navigates the restricted upper floors, carefully avoiding detection while searching for his target. He successfully locates Adeze Oijofor, known as The Warlord, and eliminates her in a secluded bathroom area. Following the hit, Agent 47 works to disable the hotel's security surveillance system and scavenges for useful items, including a fire extinguisher and a machete. He eventually secures a military guard disguise to access deeper parts of the facility. The mission takes a turn for the worse in the basement staff area, where Agent 47 is spotted by several guards. A fierce shootout ensues, and despite his tactical maneuvers, Agent 47 is overwhelmed by superior numbers. The screen fades to black as the mission ends in failure, returning to the game's main menu where various other contracts are displayed. Chapters: 0:00:00 - 0:00:30 - Arrival at the Himmapan Hotel and Check-in 0:00:30 - 0:01:40 - Navigating to Room 205 and Sabotaging the Facilities 0:01:40 - 0:02:45 - Neutralizing Room Service and Acquiring a Staff Disguise 0:02:45 - 0:04:05 - Infiltrating Restricted Guest Areas as Hotel Staff 0:04:05 - 0:04:30 - Target Eliminated: Adeze Oijofor (The Warlord) 0:04:30 - 0:07:05 - Disabling Security Surveillance and Scavenging Equipment 0:07:05 - 0:09:10 - Luring Guards and Securing a Military Uniform 0:09:10 - 0:11:10 - Descending into the Hotel Basement Areas 0:11:10 - 0:12:45 - Tense Basement Shootout and Combat Escalation 0:12:45 - 0:13:52 - Mission Failure and Return to Main Menu 📖 Interactive written walkthrough with clickable timestamps: https://pixelfungaming.com/videos/elusive-target-warlord-hitman

State Of Decay Live
The gameplay session begins with the title and loading screens for *State of Decay*. The character, Marcus Campbell, starts at the established home base, the Church of the Ascension. Marcus interacts with fellow survivors Maya Torres, Sam Hoffman, and Alan Gunderson, discussing their current population status and resource needs. Marcus accesses the supply locker to gather ammunition and medical supplies. The primary mission is to explore and map the territory. Marcus climbs a makeshift lookout tower and uses binoculars to survey the surrounding town, discovering multiple points of interest, including houses, abandoned vehicles, a gas station, and a critical Veterinary Clinic needed for antibiotics. He also spots a group of 'Friendly Survivors' and an active Zombie Horde. Marcus takes a pickup truck to drive toward the Friendly Survivors' location, successfully plowing through several groups of zombies and sustaining heavy damage to the vehicle in the process. He reaches a house where three survivors are trapped, battling the incoming zombies to protect them. After clearing the threat, the player successfully recruits Rylie Archer and Brendan Kohler, increasing the community's population. Marcus then drives the survivors back to the church, encountering and destroying a major zombie horde on the way, earning the 'Zombie Horde Killer' badge. Upon returning, Lily Ritter advises building a sleeping area for the expanded population. The player checks character skills, noting improvements in Leadership and Powerhouse. Finally, the player switches control to Maya Torres to allow Marcus to rest, setting the stage for the next mission to retrieve antibiotics from the Vet Clinic. The current playthrough focuses on nighttime scouting and resource management in the zombie apocalypse survival game, State of Decay. The character, Maya Torres, begins by viewing the tactical map to identify nearby resource locations and threats, specifically noticing an Infestation. She immediately engages two nearby zombies attacking the perimeter defenses, successfully using melee attacks and executions to eliminate the threat. Maya then climbs a watchtower overlooking the fortified base, confirming the status of the home base resources and population. From the elevated position, the character uses a rifle to scan the dark, wooded environment, aiming at distant houses while managing inventory and equipment. The player reviews the detailed map multiple times, analyzing the layout of Trumbull Valley and checking markers for various resource stockpiles and threats, including identifying a 'Scavenger?' mission marker. Maya continues her overwatch duty, keeping a lookout over the perimeter wall built from scrap materials and barbed wire, before finally checking the overall map status once more and exiting the game. Chapters: 0:00 - Video Start and Game Logos 0:18 - State of Decay Title Screen and Loading 2:05 - Gameplay Begins: Home Base Check-In and Dialogue 3:16 - Accessing Supply Locker for Ammunition 3:55 - Checking Map and Setting Waypoint 5:17 - Climbing Lookout Structure 6:56 - Entering Pickup Truck to Begin Drive 7:26 - Driving and Ramming Initial Zombies 7:51 - New Objective: Climb the Cell Tower 9:45 - Arrival near Cell Tower and Vehicle Damage 13:04 - Climbing the Cell Tower 14:17 - Surveying the Landscape, Discovering Locations 15:01 - Mission Update: Collect Medicine from Vet Clinic 15:26 - Discovering Friendly Survivors and Zombie Horde 17:08 - Descending the Tower and Driving to Survivor Location 18:17 - Recruiting Friendly Survivors and Defending the House 20:58 - Survivors Recruited and Supply Check 21:30 - Driving Through a Major Zombie Horde 22:25 - Home Base: Advice to Build Sleeping Area 25:34 - Checking Radio Assistance Options 26:33 - Reviewing Character Stats and Events Log 28:32 - Switching Control to Maya Torres for Rest 28:56 - Maya Torres Gameplay and Final Map Check 0:30:00 - Initial Map Review and Resource Scouting 0:30:14 - Melee Combat and Ground Execution of Zombies 0:30:45 - Character Inventory Check and Watchtower Scouting 0:32:27 - Reviewing the Trumbull Valley Map and Mission Objectives 0:34:04 - Nighttime Perimeter Watch and Local Area Scanning 0:36:36 - Final Base Scan and Game Exit 📖 Interactive written walkthrough with clickable timestamps: https://pixelfungaming.com/videos/state-of-decay-live

#Hitman: Elusive Target #14 Part 1
The mission begins with a detailed briefing on the target, celebrity chef Gabriel Santos, who is attending a high-profile fashion show at the Palais de Walewska in Paris. Initial planning involves selecting the starting location at the main entrance and choosing essential gear, including a lethal poison vial and a lockpick. Upon entering the palace grounds, the character vaults a perimeter fence and sneaks into the basement service areas to avoid primary security checkpoints. Inside the basement locker room, a palace staff disguise is acquired to blend in with the catering crew. After scouting the busy kitchen and observing the target's erratic routine, the lethal poison is discreetly added to hors d'oeuvres intended for Santos. The character then waits nearby as the target and his social media entourage tour the kitchen facilities. Santos eventually consumes the poisoned food, resulting in a quiet and effective elimination. To ensure a safe exit, the character neutralizes a security guard in the wine cellar for a more authoritative disguise. Navigating through restricted attic storage areas allows for bypassing heightened security before escaping via a balcony ladder and the palace gardens. Chapters: 0:00:00 - 0:01:36 - Target Briefing and Mission Overview 0:01:37 - 0:05:25 - Strategy Development and Loadout Selection 0:05:26 - 0:07:29 - Infiltrating the Palace and Acquiring Disguise 0:07:30 - 0:09:40 - Scouting the Kitchen and Monitoring Routine 0:09:41 - 0:11:15 - Setting the Lethal Trap for the Target 0:11:16 - 0:13:45 - Elimination of Gabriel Santos 0:13:46 - 0:17:10 - Evading Security and Mission Completion 📖 Interactive written walkthrough with clickable timestamps: https://pixelfungaming.com/videos/hitman-elusive-target-14-part-1

#Hitman: Elusive Target #13 - The Dictator
The mission begins with a briefing for the Elusive Target contract titled 'The Ex-Dictator' in Bangkok, Thailand. The objectives are to eliminate Richard Ekwensi, a former Central African dictator, and his wife Inez Ekwensi at the Himmapan Hotel. Following the briefing, the menu interface shows the selection of a tactical loadout, including a silenced Custom 5mm pistol and a Jaeger 7 Tiger sniper rifle. The operation commences with the character disguised as a 'Bug Swat' exterminator near the hotel entrance. Movement through the lobby reveals the targets arriving with heavy security. The character utilizes 'Instinct' mode frequently to track the targets' movements through walls and floors. Navigation involves climbing stairs and infiltrating restricted areas while avoiding suspicion from hotel staff and personal bodyguards. A tactical position is established in a private suite, where the sniper rifle is retrieved from an ICA pickup. After careful observation of the targets' routine in the Camberwell Lounge, Richard Ekwensi is eliminated with a precise shot. The remainder of the operation focuses on hunting Inez Ekwensi, requiring a change of disguise to a member of the hotel staff to move deeper into secure corridors. The character navigates laundry rooms, service tunnels, and outdoor balconies, carefully timing movements to bypass high-alert security teams while maintaining a stealthy approach toward the final objective. Agent 47 initiates the contract at the Himmapan Hotel in Bangkok, targeting the former dictator Richard Ekwensi and his partner. Initial movements involve infiltrating the basement corridors to bypass primary security checkpoints. After neutralizing a guard and assuming a security disguise, the mission shifts to a high-vantage sniper strategy. From a secluded laundry room, Agent 47 uses the Jaeger 7 Tiger to disrupt the targets' routine, drawing them into a clear line of sight. Brief skirmishes with hotel security require quick thinking and a tactical disguise swap in a service restroom. With a fresh identity, Agent 47 returns to the window to deliver the final ballistic eliminations. The operation concludes with a silent exit through the lush hotel gardens toward the private docks as the sun sets over the Chao Phraya River. Chapters: 0:00:00 - Mission briefing and target profiles 0:01:58 - Equipment selection and planning phase 0:04:02 - Mission start at Himmapan Hotel entrance 0:06:30 - Tracking targets using Instinct mode 0:09:15 - Infiltrating the upper floor lounges 0:12:45 - Entering the private suite to retrieve gear 0:16:38 - Elimination of target Richard Ekwensi 0:19:45 - Navigating hotel corridors to track Inez Ekwensi 0:23:15 - Stealthy observation of the second target 0:27:00 - Exploring the hotel rooftop and exterior balconies 0:31:00 - Acquiring a new disguise in the laundry area 0:34:00 - Final positioning for the second elimination 0:00:00 - Mission start and hotel infiltration 0:03:15 - Navigating the basement service corridors 0:06:40 - Acquiring the OCADA bodyguard disguise 0:10:20 - Setting up the sniper nest in the laundry room 0:14:50 - Engagement with targets through the courtyard window 0:18:30 - Evading security while compromised 0:21:15 - Stealthy takedown and disguise refresh in the bathroom 0:24:45 - Final positioning for the double elimination 0:27:30 - Successful elimination of Richard and Inez Ekwensi 0:29:45 - Exfiltration via the boat dock 📖 Interactive written walkthrough with clickable timestamps: https://pixelfungaming.com/videos/hitman-elusive-target-13-the-dictator

Sniper Elite Nazi Zombie Army 2
The mission begins with a detailed setup in the main menu, involving adjustments to game settings, audio levels, and control configurations. Once the session starts, an atmospheric introduction cinematic sets the scene, depicting the supernatural rise of the Nazi zombie army and the grim fate of Hitler's inner circle in Berlin. The core gameplay walkthrough centers on the 'Purgatory' mission. The protagonist arrives by boat at a village enveloped in a thick, blood-red mist and immediately begins clearing the area using a scoped rifle. Throughout the mission, long-range tactical sniping is highlighted by the iconic X-ray kill cam, which provides a detailed look at successful headshots against various undead types. The character navigates through burning ruins and narrow alleyways, occasionally switching to a sidearm for close-quarters encounters. The tension escalates as the player reaches a ruined tower to establish a vantage point, leading to a large-scale defensive stand. Despite a valiant effort to hold off waves of aggressive zombies, the protagonist is eventually overwhelmed in a frantic final firefight, concluding the run with a mission failure screen and a breakdown of performance statistics. Chapters: 0:00:00 - 0:03:44 - Menu navigation and settings optimization 0:03:44 - 0:05:16 - Introduction cinematic and narrative setup 0:05:16 - 0:06:03 - Mission briefing and loading for Purgatory 0:06:03 - 0:10:00 - Arrival at the foggy village and initial sniper kills 0:10:00 - 0:15:00 - Clearing the outskirts and utilizing X-ray kill cams 0:15:00 - 0:20:00 - Intense firefights through burning buildings 0:20:00 - 0:25:00 - Advancing toward the village square objectives 0:25:00 - 0:30:00 - Engaging diverse zombie types in urban ruins 0:30:00 - 0:35:00 - Sustained long-range combat from tactical positions 0:35:00 - 0:40:00 - Reaching the vantage point and starting the defense 0:40:00 - 0:43:32 - Final stand and mission failure climax 0:43:32 - 0:48:00 - Post-game performance statistics and score review 0:48:00 - 0:54:43 - Final campaign menu navigation and wrap-up 📖 Interactive written walkthrough with clickable timestamps: https://pixelfungaming.com/videos/sniper-elite-nazi-zombie-army-2

HITMAN Bodies everywhere
Agent 47 navigates a hauntingly quiet suburban neighborhood in Whittleton Creek during the aftermath of a total elimination run. The mission area is littered with the remains of guards and civilians as the character moves with an assault rifle through backyards, driveways, and residential structures. The gameplay focuses on the inspection of various locations including a greenhouse and a large automotive garage, showcasing the scale of the preceding combat. Every sector of the map visited reveals more neutralized targets, emphasizing a completed 'kill everyone' objective. The character maintains a steady pace, surveying the results of the infiltration before moving toward the final extraction point. Chapters: 0:00:00 - 0:00:15 - Initial survey of the lawn and garden area 0:00:15 - 0:00:32 - Navigation through the driveway and past parked vehicles 0:00:32 - 0:00:43 - Movement toward the residential greenhouse 0:00:43 - 0:01:02 - Inspection of the greenhouse interior and nearby garden paths 0:01:02 - 0:01:15 - Approach and entry into the large mechanical garage 0:01:15 - 0:01:28 - Final sweep of the garage and exit to the staging area 📖 Interactive written walkthrough with clickable timestamps: https://pixelfungaming.com/videos/hitman-bodies-everywhere

HITMAN: Colorado - Watch Explosion Walkthrough
Agent 47 infiltrates a heavily guarded farmhouse in Colorado during the Freedom Fighters mission. The objective begins with 47 navigating through a room full of hackers to stealthily acquire a hacker's phone. After securing the device, the mission continues upstairs where he locates and picks up an explosive watch battery from a side table. 47 then spends time monitoring guard rotations and tracking the primary target, Sean Rose, using instinct. He observes Rose's habit of leaving his smartwatch on a desk while he attends to other matters. Seizing a moment when the room is empty, 47 rigs Rose's watch with the explosive battery. He hides in the bedroom and waits patiently for the target to return. Once Rose equips the tampered watch, 47 uses the hacker's phone to send a remote signal. The watch detonates instantly, killing Rose in an explosion that appears as a malfunction. The mission concludes with 47 slipping away as guards rush to the scene of the blast. Chapters: 0:00:00 - 0:00:20 - Infiltrating the farmhouse and acquiring the hacker's phone 0:00:20 - 0:00:45 - Searching the upstairs rooms for the explosive battery 0:00:45 - 0:01:45 - Monitoring enemy positions and guard paths using instinct 0:01:45 - 0:02:25 - Positioning for observation in the bedroom area 0:02:25 - 0:03:30 - Tracking Sean Rose as he inspects the antique clock 0:03:30 - 0:05:45 - Waiting for the target to leave the smartwatch unattended 0:05:45 - 0:06:15 - Planting the explosive battery into the target's watch 0:06:15 - 0:07:35 - Concealing location while waiting for the target to return 0:07:35 - 0:07:55 - Remote detonation of the smartwatch and target elimination 📖 Interactive written walkthrough with clickable timestamps: https://pixelfungaming.com/videos/hitman-colorado-watch-explosion-walkthrough

Destiny Gameplay Part 2
The Guardian logs into Destiny as a Level 2 Titan and selects the story mission "Restoration" on Old Russia, Earth. After a brief orbital loading sequence featuring the Guardian's ship, the mission begins in The Steppes, a desolate, snowy ruin. The Guardian first proceeds to recon the crash site of a downed ship. Upon reaching the wreckage, the Ghost deploys to extract data, which reveals information about the Fallen occupying the area, specifically underground tunnels below the Cosmodrome. The objective changes to accessing the Cosmodrome network inside the tunnels. Descending into the dark, derelict structure, the Guardian engages Dregs and Shanks in close-quarters combat. After securing the immediate area, the Ghost analyzes a control panel, updating the mission to "Find a Warp Drive." The Guardian fights through corridors, encountering stronger Vandal enemies before reaching Dock 13, a Darkness Zone. A fierce boss battle ensues against Rikkis, Devil Archon, a heavily armored Fallen Captain, supported by waves of Dregs and Shanks. Using concentrated fire and grenades, the Guardian defeats the Archon and secures the NLS Drive, completing the primary objective and leveling up to Level 3. The mission concludes, providing activity rewards. A cinematic follows showing the Titan meeting the Speaker in the Tower, who explains the history of the Traveler, the Darkness, and the Guardians' purpose. The Guardian then accesses the character screen to equip new gear and upgrade the Striker subclass abilities. Finally, the Guardian initiates the next story mission, "The Dark Within," preparing to head to the Skywatch. The Guardian restarts a mission checkpoint in the Lunar Complex (Old Russia, Earth) following a death. The objective is to kill the Hive Wizard. The Titan immediately faces oncoming Thralls, using auto rifle fire and dodging melee attacks in the dimly lit interior of the complex. After clearing the initial wave and managing a quick reload, the Guardian pushes forward, engaging Acolytes across a debris-strewn industrial hallway. The persistent Hive enemies force the Titan to use cover effectively while managing incoming fire. After a brief intense fight, the Guardian successfully eliminates the Hive Wizard, completing the mission objective. The mission complete screen appears, showing kills, precision kills, and rewards earned. The Guardian then selects 'Set Destination' and returns to Orbit. From Orbit, the player navigates the Director map, selecting the Tower (the social hub) and launching the ship. Upon arrival at the Tower, the player accesses the character inventory screen, reviewing upgrades and switching armor pieces. The player returns to the Director map, selecting the next story mission, 'The Dark Within' (Level 3 Story) in Old Russia. The Guardian lands back in the Lunar Complex, now tasked with investigating hidden power sources. The mission starts by deploying the Ghost to unlock a sealed, restricted door. The Ghost struggles with the Fallen encryption, warning of high security. Once the door is opened, the Guardian proceeds deeper into the dark complex. Intense close-quarters combat breaks out as Thralls rush the Guardian. The player is overwhelmed and defeated, requiring a checkpoint restart. The Guardian re-engages the Hive forces in the Lunar Complex, utilizing rapid fire and melee attacks to eliminate Thralls and Acolytes, focusing fire on a shielded Goth, Eir Spawn. After clearing the area, the mission ends, and the player receives activity rewards and a new Grimoire Card. The Guardian returns to the Director, reviewing available missions before selecting a Level 4 Patrol mission in the Cosmodrome. The ship launches and transports the Guardian to The Steppes region. Upon landing, the Ghost deploys a scouting objective: 'Like a Bunch of Ants,' requiring the Guardian to find enemy activity in The Divide. The Guardian starts traversing the snowy, rocky landscape, immediately encountering Fallen Dregs and Shanks, engaging them with precision rifle fire. The player moves towards an area marked on the heads-up display. Fallen Vandal and Dregs engage the Guardian from elevated positions. The player pushes through the open territory, eliminating several Fallen units to clear the path. The Ghost alerts the Guardian to the proximity of 'xTHE ALPHAOHM,' a powerful Vandal. The player initiates a firefight, eventually utilizing a Fist of Havoc Super ability to clear the challenging enemies and secure the area. After the patrol objective is secured, the player receives rewards. The player then enters the Dock 13 area, where the scouting objective continues. The Guardian proceeds through the ruined industrial environment, engaging Dregs and Shanks using close-range shotgun blasts and auto rifle fire, successfully clearing the scouting percentage. The player navigates further into the dark, dilapidated tunnels of The Breach and Dock 13, engaging small pockets of Fallen, maintaining situational awareness, and securing the mission area before checking the inventory screen, marking the end of the footage. Chapters: 0:00 - Game Launch and Character Selection (Level 2 Titan) 0:47 - Selecting the 'Restoration' Story Mission on Earth 2:31 - Mission Start: Recon the Crash Site in The Steppes 3:26 - Initial Encounter with Fallen Dregs and Vandals 3:55 - Ghost Deploys at the Crash Site 4:32 - Accessing the Cosmodrome Network Objective Update 5:00 - Combat Sequence: Clearing the Outer Ruins 6:11 - Entering the Cosmodrome Tunnels and Engaging Fallen 7:02 - Ghost Accesses the Map and Updates Objective: Find a Warp Drive 8:17 - Entering Dock 13 and Continuing Search 12:09 - Entering the Darkness Zone and Facing Rikkis, Devil Archon 13:45 - Defeating Rikkis, Devil Archon and Acquiring NLS Drive 15:01 - Mission Complete and Level Up (Level 3) 16:28 - The Tower Cinematic: Meeting the Speaker 19:37 - Reviewing Character Inventory and Upgrades 20:38 - Selecting the Next Mission: 'The Dark Within' 21:36 - Mission Start: Heading to Skywatch 0:00:00 - Hive Combat and Darkness Zone Death 0:03:00 - Hive Wizard Elimination in Lunar Complex 0:06:00 - Mission Complete and Return to Orbit 0:09:00 - Tower Social Space Visit and Mission Selection 0:12:00 - Launching The Dark Within Story Mission 0:15:00 - Unlocking Restricted Hive Area and Intense Thrall Combat 0:18:00 - Hive Wizard Battle and Guardian Down 0:21:00 - Mission End, Rewards, and Launching Patrol 0:24:00 - Patrol Mission Start in The Steppes and Enemy Engagements 0:27:00 - Scouting Fallen in Dock 13 0:30:00 - Clearing Fallen Units in Industrial Zone 0:33:00 - Entering The Divide and Heavy Combat 0:36:00 - Encountering Alpha Ohm (High-Value Target) 0:39:00 - Alpha Ohm Battle and Super Ability Use (Fist of Havoc) 0:42:00 - Activity Rewards Screen and New Patrol Launch 0:45:00 - Patrol Commencement in The Steppes 0:48:00 - Returning to Dock 13 for Enemy Scouting 0:51:00 - Final Combat Encounter in The Divide 0:55:06 - Character Inventory Review and Video Conclusion

Sniper Elite 3 - Gaberoun
This video provides a comprehensive and detailed walkthrough of the 'Gaberoun' mission in Sniper Elite 3, presented in a full, uninterrupted session. Join protagonist Karl Fairburne as he infiltrates a Nazi-occupied desert oasis under the cover of night. The gameplay demonstrates a masterclass in tactical stealth and precision marksmanship, highlighting the core mechanics that make the Sniper Elite series unique. Watch as Fairburne meticulously tags enemies using binoculars, utilizes environmental noises like backfiring generators to mask his long-distance rifle fire, and employs a variety of tools like the silent Welrod pistol and land mines to secure his objectives. The walkthrough covers every primary objective, including gathering critical intelligence and eliminating high-ranking officers, as well as optional challenges such as destroying the motorpool and disabling searchlights. Each kill is punctuated by the series' iconic X-ray kill cams, showing the devastating impact of every well-placed bullet. The mission culminates in a tense final ambush where Fairburne must neutralize a German General before he can escape, followed by a clean exfiltration from the base. Chapters: 0:00:00 - Mission Briefing: Infiltrating Gaberoun Oasis 0:04:30 - Initial Stealth Approach and Guard Takedowns 0:09:15 - Tactical Tagging: Mapping Enemy Positions 0:14:00 - First Major Intel Discovery 0:18:45 - Sniping from the Ruins: Masked Fire Techniques 0:23:30 - Sabotaging the Generator for Silent Shots 0:28:15 - Destroying the Motorpool: Optional Objective 0:33:00 - Clearing the Southern Guard Posts 0:37:45 - Intel Gathering: Searching the Key Officers 0:42:30 - Sniper Nest Challenge: Long-Distance Precision 0:47:15 - Infiltrating the Inner Temple Complex 0:52:00 - Disabling the Searchlight Network 0:56:45 - Navigating the Dark: Advanced Stealth Movement 1:01:30 - Finding the General's Secret Documents 1:06:15 - Clearing Path to the Exfiltration Point 1:11:00 - Setting the Trap: Preparing for the Ambush 1:15:45 - The Final Stand: Eliminating the General 1:20:30 - Mission Accomplished: Exfiltration Cinematic 1:22:59 - Final Mission Results and Summary 📖 Interactive written walkthrough with clickable timestamps: https://pixelfungaming.com/videos/sniper-elite-3-gaberoun

HITMAN : The Icon accidental Death (fire)
Agent 47 infiltrates the film set of 'The Icon' in Sapienza, disguised as a crew member. He maneuvers through the production area to a nearby interior where he uses a lockpick to secure high-octane fuel from a yellow case. Returning to the main set, he sabotages the pyrotechnic controls by swapping the fuel source. The mission then shifts to a patient observation phase as the director, Dino Bosco, rehearses several takes of an action scene involving a large robotic creature. Agent 47 stands among the crew, waiting for the perfect moment. Eventually, the final take begins, and Bosco performs his stunt. When the pyrotechnics trigger, the substituted fuel causes a massive explosion, killing Bosco instantly in what appears to be a tragic on-set accident. The mission objective is fulfilled as the crew reacts in horror to the blast. Chapters: 0:00:00 - 0:00:45 - Infiltrating the shop and stealing high-octane fuel 0:00:45 - 0:01:30 - Sabotaging the pyrotechnic machine on the film set 0:01:30 - 0:03:45 - Observing set rehearsals and director behavior 0:03:45 - 0:05:20 - Waiting for the final take to commence 0:05:20 - 0:06:01 - The pyrotechnic explosion and target elimination 📖 Interactive written walkthrough with clickable timestamps: https://pixelfungaming.com/videos/hitman-the-icon-accidental-death-fire

HITMAN : The Icon Explosive kill useing mine
Agent 47 infiltrates the film set in Sapienza to eliminate Dino Bosco during the 'The Icon' mission. The mission starts with 47 entering through a back door and navigating through a storage room to reach the main square where a movie is being filmed. He discreetly picks up a propane flask and moves to a vantage point on a balcony overlooking the set. Using a silenced pistol, 47 triggers several explosive canisters from afar to draw the target's attention. As Bosco investigates the disturbance, 47 shoots a propane tank directly next to him, resulting in a spectacular explosion kill. After the successful hit, Agent 47 calmly maneuvers through the streets, avoiding alerted guards and civilians, and heads for a quiet exit. The mission concludes as he passes through a large gate, earning a high rating for the clean execution. Chapters: 0:00:00 - 0:00:15 - Infiltration of the building storage area 0:00:15 - 0:00:30 - Acquiring the propane flask on the film set 0:00:30 - 0:00:45 - Positioning on the balcony overlooking the square 0:00:45 - 0:01:05 - Setting the trap with long-range shots 0:01:05 - 0:01:25 - Executing Dino Bosco with a propane explosion 0:01:25 - 0:01:45 - Evading the immediate area after the kill 0:01:45 - 0:02:15 - Navigating Sapienza's streets to the exit 0:02:15 - 0:02:39 - Mission completion and final performance rating 📖 Interactive written walkthrough with clickable timestamps: https://pixelfungaming.com/videos/hitman-the-icon-explosive-kill-useing-mine

Hitman: Escalation Contract - The Lupei Sensitivity Level 1
Agent 47 begins the mission in Marrakesh, Morocco, tasked with eliminating Tomas Persson using a kitchen knife while disguised as a masseur. The primary target is located within the heavily guarded Swedish Consulate. Agent 47 enters a back alley and uses a remote breaching charge to open a locked door leading into the Consulate's staff parking garage. Inside, he subdues a security guard and takes his uniform. Disguised, he proceeds into the Consulate building, navigating the ground floor lobby where his image is briefly recorded by a security camera. He enters the surveillance room, poisons a sitting guard's coffee to eliminate him silently, and then deletes the surveillance evidence tapes before the remaining guard returns. Agent 47 then enters the adjacent staff kitchen area, subdues a patrolling security guard, and conceals the body. He changes into a chef's uniform to move freely in the kitchen area. He picks up the required kitchen knife and prepares a poisoned water bottle, placing it near the dining area. The target, Tomas Persson, eventually becomes ill after drinking the poisoned water and retreats to a private bathroom. Agent 47 finds and subdues the original masseur to take his disguise, which grants access to the restricted upper floors. Disguised as the masseur, Agent 47 enters the main office area and interacts with Persson's assistant, who leads him to the target, Tomas Persson, now lying down for a massage after recovering slightly. Agent 47 performs the melee kill using the kitchen knife, completing the main objective. He quickly escapes the Consulate grounds, navigating through the riotous marketplace crowds, successfully completing the mission. Chapters: 0:00 - 0:51 - Mission Start and Infiltration of Consulate Exterior 0:51 - 2:27 - Acquiring Security Uniform and Poison 2:27 - 4:50 - Poisoning Guard and Securing Kitchen Knife 4:50 - 7:54 - Subduing Staff and Poisoning Target's Drink 7:54 - 10:30 - Target Poisoned and Acquiring Masseuse Disguise 10:30 - 14:38 - Navigating Consulate as Masseuse 14:38 - 21:18 - Eliminating Target Tomas Persson and Escape 21:18 - 23:22 - Mission Accomplished and Debriefing 📖 Interactive written walkthrough with clickable timestamps: https://pixelfungaming.com/videos/hitman-escalation-contract-the-lupei-sensitivity-level-1

Hitman: Elusive Target #6
The mission preparation begins on the Hitman 3 main menu, selecting the Elusive Target mission, "The Twin," set in Sapienza. The briefing reveals the target is Dylan Narváez, distinguished from his identical twin Gonzales by a unique Platinum Mangôt wristwatch. The player receives the critical constraint: Gonzales must not be harmed, or the contract is cancelled. Agent 47 enters the planning screen, selecting the Italian Suit, a Jaeger 7 sniper rifle (smuggled via ICA Safe House), lockpick, and explosive duck, before confirming the mission start in the Main Square. After a loading screen, Agent 47 appears seated on a bench in the sunny Sapienza plaza. Diana delivers final intel, emphasizing the difficulty of identifying the target due to the twins' identical appearance, relying solely on the wristwatch. 47 rises and begins navigating the cobblestone streets. He quickly moves toward the beach area, scouting the surroundings. The twins, accompanied by bodyguards, are observed walking past the square and moving through a shaded archway toward the waterfront. Agent 47 executes a challenging assassination mission in Sapienza, Italy, targeting Dylan Narváez using a sniper rifle. The player first locates an elevated sniping position within a multi-story residential building, using instinct mode to track the target's movements through walls. After retrieving an explosive golf ball from the adjacent apartment, Agent 47 returns to the sniping position and waits for the target to enter the line of sight across the courtyard. The player successfully shoots and eliminates the target, completing the objective. Following the elimination, the player stealthily escapes the area, navigating down a back staircase and proceeding through the busy coastal town plaza. Agent 47 makes his way toward the waterfront, successfully navigating past security and civilians to board an exit speedboat, completing the mission with a 'Ballistic Kill' challenge accomplished. Chapters: 0:00 - Main Menu and Mission Selection for 'The Twin' 1:07 - Mission Briefing: Target Identification and Constraints 1:47 - Planning and Loadout Selection (Sapienza Main Square Start) 2:28 - Loading Screen Transition to Sapienza 3:19 - Agent 47 Deploys in Sapienza Main Square 3:47 - Initial Scouting and Navigating the Coastal Town Streets 4:32 - Locating the Twins and Bodyguards in the Plaza Area 5:00 - The Targets Proceed through the Archway toward the Waterfront 0:00 - Agent 47 establishes sniping position and surveys the area 0:17 - Using Instinct mode to track targets and patrol routes 0:32 - Moving through the interior rooms of the apartment 1:03 - Switching windows and observing potential angles 1:22 - Observing the plaza and target movement from the balcony 1:40 - Entering the adjoining apartment and locating items 2:10 - Returning to the sniping window and preparing for the shot 2:54 - Identifying target location and preparing for the elimination 3:12 - Executing the sniper shot and eliminating Dylan Narváez (Ballistic Kill) 3:14 - Guards alerted; Agent 47 retreats to secure exit route 3:30 - Leaving the apartment floor via the internal staircase 3:50 - Exiting the building and navigating the city streets toward the water 4:15 - Reaching the dock area and locating the exit boat 4:27 - Agent 47 exits the mission via speed boat, completing the objective 4:35 - Mission Accomplished screen and final score details 📖 Interactive written walkthrough with clickable timestamps: https://pixelfungaming.com/videos/hitman-elusive-target-6

HITMAN Marrakesh : Accidental Death - Electricution
Agent 47 begins the mission inside a modern, multi-story office building, tasked with eliminating two targets: Reza Zaydan and Claus Hugo Strandberg. Agent 47, dressed in a black shirt and slacks, moves quickly past security personnel in the upper-level executive lounge area, entering a side door unnoticed. He finds himself in a small control booth overlooking the main floor and a raised interior walkway. One target, Claus Hugo Strandberg, walks along this elevated platform. Agent 47 identifies a control panel on the desk and interacts with it, choosing to turn on the 'Stage Lamp.' He then immediately interacts with the panel again to 'Turn Off' the Stage Lamp. This action triggers a fatal electrical accident above, causing the lamp rigging to collapse and electrocute Strandberg, completing the objective with an 'Accident Kill.' The target's body falls onto the lower level. With one target eliminated, Agent 47 prepares to pursue the remaining objective, Reza Zaydan, and the gameplay ends. Chapters: 0:00 - 0:25 - Entry into the Modern Office Building 0:25 - 0:40 - Securing the Control Room and Identifying the Target 0:40 - 1:10 - Execution of the Accident Kill on Claus Hugo Strandberg 📖 Interactive written walkthrough with clickable timestamps: https://pixelfungaming.com/videos/hitman-marrakesh-accidental-death-electricution

HITMAN Sapienza: "Accidental death " Falling ball
Agent 47 begins the mission positioned on an upper-level balcony overlooking a surveillance room in the mansion. He observes the targets below, planning a stealthy, environmental kill. The objective is to eliminate Silvio Caruso and Francesca De Santis, and destroy the virus. Caruso is seen milling about directly beneath a large, ornate, hanging metal sphere. 47 equips a suppressed pistol and carefully takes aim at the wire suspending the sphere. He fires two precise shots, severing the wire. The heavy sphere immediately drops, crushing Silvio Caruso below and triggering an immediate 'Accident Kill' notification. This successfully completes the challenge 'Bring Down the Sky.' 47 moves away from the scene and enters an adjacent library room containing display cases and a large terrestrial globe. He checks the mission objectives, confirming Caruso's elimination and noting that the remaining objectives are to eliminate Francesca De Santis and destroy the virus. Chapters: 0:00 - 0:47 - Initial Positioning and Setup for Environmental Kill 0:47 - 0:59 - Execution: Eliminating Silvio Caruso via Falling Sphere Accident 0:59 - 1:17 - Movement and Reviewing Remaining Objectives 📖 Interactive written walkthrough with clickable timestamps: https://pixelfungaming.com/videos/hitman-sapienza-accidental-death-falling-ball

Assassin's Creed Valhalla - Defeating Drengr Fisherman
The narrative begins with a cinematic dialogue between Eivor and an ailing man, Thor the Fishmonger, who seeks an honorable death in combat to serve as an example for his son. Eivor respects this ancient Viking custom and agrees to the duel. Before the fight begins, Eivor pauses to manage inventory, upgrading the quiver capacity and equipping the Skadi's Wrath light bow. The combat starts immediately as Eivor wades into the shallow waters to face Thor. Thor uses a fishing spear/staff, executing wide, sweeping strikes and attempting to stagger Eivor. Eivor relies heavily on dodging and quick axe attacks, interspersed with ranged bow shots aimed at Thor's weak points. Thor enters several rage states, indicated by a red glow, launching unblockable attacks that require precise evasion. As the fight nears its end, Thor is knocked down near the shore. Eivor stands over the defeated warrior as Thor the Fishmonger utters his final words, celebrating his honorable death in front of his son. Eivor confirms the kill, and Thor's son, Thor Thorsson, vows to honor his father's memory and become a drengr himself. Completing this world event grants Eivor skill points, rations, and unique runes, including Thor's Rune. Chapters: 0:00:00 - 0:00:37 - Dialogue: Thor the Fishmonger's Request for a Warrior's Death 0:00:37 - 0:00:51 - Inventory Management and Gear Selection 0:00:51 - 0:02:40 - Boss Fight Against Thor the Fishmonger (Drengr Encounter) 0:02:40 - 0:03:56 - Honorable Death, Quest Conclusion, and Reward Collection 📖 Interactive written walkthrough with clickable timestamps: https://pixelfungaming.com/videos/assassin-s-creed-valhalla-defeating-drengr-fisherman

HITMAN Sapienza: Sniping Silvio (Guard Tower)
Agent 47 begins the mission carrying a sniper rifle through the public streets of Sapienza. He approaches a stone wall near a waterfront area, utilizing a climbable vine to scale the structure and reach a dilapidated tower ruin. Entering the ruin, the character uses instinct mode to locate two patrolling guards on the upper levels. He moves quickly, silently eliminating the first guard climbing the stairs via a neck snap, then dragging the body out of sight. The second guard arrives shortly after, and 47 eliminates him with another quick neck snap execution, taking his crowbar. Agent 47 then climbs onto the roof platform overlooking the street and the coastal town. He equips the Jaeger 7 sniper rifle and scopes in on a distant target location. He fires a single shot, achieving a "Ballistic Kill" and successfully destroying the biological virus objective. Guards are alerted to the shot, prompting Agent 47 to quickly retrieve his rifle and descend the exterior wall back down to the ground level, completing the main objectives of the mission run. Chapters: 0:00 - 0:50 - Infiltration and Ascent to Ruins 0:50 - 2:31 - Stealth Elimination, Sniping the Target, and Escape 📖 Interactive written walkthrough with clickable timestamps: https://pixelfungaming.com/videos/hitman-sapienza-sniping-silvio-guard-tower

Hitman: The hexagon protocol - Level One
Agent 47 begins the mission outside the Palais de Walewska in Paris, tasked with eliminating Cédric Gendron while disguised as a security guard. After restarting the mission, 47 infiltrates the outer perimeter by vaulting over a barrier near the parking lot and walking through a garden area. He spots a convenient open window leading into a utility room. Inside the room, a patrolling security guard immediately notices the trespassing agent. 47 quickly subdues the guard using a crowbar, takes his 'Sécurité' uniform disguise, and hides the unconscious body in a nearby locker. Disguised, 47 moves deeper into the building, navigating past staff and other guards, picking up a wrench along the way. He enters the main interior section, observing the grand hall hosting the Sanguine fashion show, utilizing his instinct vision to track NPC movements. 47 then exits back onto the palace grounds, following a main path along a stone wall and carefully bypassing patrolling guards. The target, Cédric Gendron, is observed walking and posing near a small stone building, accompanied by a bodyguard and being interviewed. 47 prepares for the elimination by using a coin to distract Gendron's bodyguard, pulling him away from the target. With the bodyguard inspecting the noise, 47 approaches the isolated Cédric Gendron from behind and performs an unnoticed melee kill (neck snap). With the target eliminated and the primary objective complete, 47 proceeds through a basement door, navigating a storage area and ultimately finding the mission exit in a wine cellar, successfully exfiltrating the area. Chapters: 0:00 - 0:52 - Mission Restart and Loading into Paris 0:52 - 2:33 - Infiltration and Acquisition of Security Disguise 2:33 - 4:24 - Navigating Interior Service Hallways 4:24 - 6:58 - Tracking Target in Exterior Gardens 6:58 - 8:36 - Target Elimination via Distraction and Melee Kill 8:36 - 10:04 - Exfiltration and Mission Accomplished 📖 Interactive written walkthrough with clickable timestamps: https://pixelfungaming.com/videos/hitman-the-hexagon-protocol-level-one

HITMAN: Marrakesh Walkthrough
Agent 47 initiates a stealth mission in Marrakesh, targeting General Reza Zaydan and Claus Hugo Strandberg. The infiltration begins by subduing a worker near a printing press within a schoolhouse setting, acquiring a disguise. Agent 47 sabotages the printing press by collecting a wrench, using it to cause a malfunction, attracting the attention of General Zaydan's assistant. The agent eliminates the assistant via a melee attack, hides the body, and takes the military uniform disguise. The objective shifts to eliminating the second target, Claus Hugo Strandberg, who is being held in a secure underground parking garage. Disguised as a soldier, 47 navigates through military checkpoints and enters the underground bunker. Finding the entrance blocked, 47 triggers a fire alarm to force the target and his escort to move. Strandberg and his guards rush out of the bunker and up into the crowded market area. Agent 47 follows them, blending into the crowd. The agent successfully isolates Strandberg and his immediate escort in a secluded alleyway outside a storefront. 47 quickly performs a silent attack on one guard, and then kills Strandberg and his remaining entourage via melee, completing the primary objectives. With the targets down, 47 quickly exits the mission area through the market gates. The video concludes with a cinematic sequence discussing the broader implications of the assassinations and the threat to the Providence organization. Chapters: 0:00 - 1:15 - Infiltration and Acquisition of Worker Disguise 1:15 - 2:29 - Locating General Zaydan and Sabotaging the Printing Press 2:29 - 5:15 - First Target Elimination and Military Disguise Acquisition 5:15 - 7:50 - Navigating to the Second Target's Location and Initiating Lockdown 7:50 - 11:37 - Tracking and Eliminating Claus Hugo Strandberg in the Market 11:37 - 12:35 - Successful Mission Exit 12:35 - 15:00 - Cinematic Conclusion and Debriefing 📖 Interactive written walkthrough with clickable timestamps: https://pixelfungaming.com/videos/hitman-marrakesh-walkthrough

GTA 5 : My kuruma vs an insurgent #2
The gameplay opens during an intense nighttime chase and shootout in Los Santos. The character is driving a heavily damaged green sports car while engaging numerous police units and an armored vehicle (Insurgent). Heavy automatic gunfire targets the vehicle immediately, causing sparks to fly off the hood and rear. The character attempts to accelerate through the traffic intersection, narrowly avoiding collisions with pursuing police cruisers. As the pursuit continues down the street, the character is quickly boxed in by a large armored military vehicle and several police cars, forcing a stop. The character maneuvers the green car aggressively, ramming into the surrounding vehicles in an attempt to create an escape route while the crossfire remains constant and explosive debris flies past the screen. The conflict peaks as the sports car is effectively pinned by multiple police vehicles and the armored truck, requiring continuous, difficult maneuvering to survive the sustained attack. Chapters: 0:00 - 0:10 - High-Speed Police Engagement and Incoming Fire 0:10 - 0:29 - Vehicle Blockade and Close-Quarters Combat 📖 Interactive written walkthrough with clickable timestamps: https://pixelfungaming.com/videos/gta-5-my-kuruma-vs-an-insurgent-2

Rainbow Six Siege Multiplayer: (Oregon) 5 kills
The match begins on Round 4, Match Point, with the score favoring the attackers 2-1. The operator approaches the exterior wall and rappels upward towards a second-floor window. Deploying a breach charge, the operator quickly detonates the window barrier and immediately fires through the smoke, successfully disabling an Active Defense System (ADS). After taking cover momentarily, the operator shoots again, eliminating a defending operator positioned near the window ledge, resulting in a 4 vs 3 situation. The operator enters the room, navigating around the destruction caused by the breach. A second enemy appears near the far doorway and is swiftly eliminated with a headshot, bringing the score to 4 vs 2. The operator moves into the main area where they are instantly hit by a flashbang, causing a full screen whiteout. Despite the blindness, the operator continues firing based on enemy positioning, securing a third kill. A teammate enters and assists in cornering the final defender. The operator finishes the last remaining enemy defender, resulting in a match victory (3-1). The End of Round Replay highlights the rapid reaction time during the blind engagement. The gameplay concludes with the post-action match scoreboard, showing the final statistics and experience gain. Chapters: 0:00 - 0:05 - Rappelling and Preparing the Window Breach 0:05 - 0:16 - Window Breach and Initial Defender Elimination 0:16 - 0:29 - Entering the Room and Securing a Second Kill 0:29 - 0:43 - Flashbang Engagement and Match Point Victory 0:43 - 1:06 - End of Round Replay and Match Scoreboard 📖 Interactive written walkthrough with clickable timestamps: https://pixelfungaming.com/videos/rainbow-six-siege-multiplayer-oregon-5-kills
GTA Online Live #2
The session begins inside the protagonist's garage, reviewing the GTA Online map and accessing the job list. The character selects a bike race job called 'Up the Creek' but immediately exits the menu, entering a green Annis Elegy RH8 sports car. Driving through the suburban streets, the character briefly crashes into other traffic before arriving at a remote helipad. The player enters a black Buzzard Attack Chopper and flies high into the mountains. After a brief ascent, the character intentionally jumps out and commits suicide via parachute/fall damage. Upon respawning in the city apartment, the character immediately runs to the garage, enters the green sports car, and drives out. A bounty of $3000 is placed on the character. The player drives wildly back towards the heliport area, narrowly avoiding collisions. After arriving, the player steals a large, white Maverick helicopter, flies high over the mountains, and triggers a loading screen for the mission 'Docks to Stock II (Lester).' The mission objective is to 'Acquire a Cargobob.' The character spawns downtown and runs frantically, grabbing an assault rifle and encountering a 4-star wanted level instantly. The player takes control of the green sports car again and attempts to escape the intense police pursuit, driving through city streets, crashing repeatedly, and attracting a police helicopter. After abandoning the heavily damaged car, the character is killed by a police SUV. The player respawns, using Lester's ability to 'Lose the Cops' and eliminate the wanted level. The character then steals a black Vapid Stanier sedan, drives toward the Los Santos International Airport/docks area, and quickly gains a 4-star wanted level again after hitting police vehicles. While speeding on the airport runway, the character calls Lester again to remove the wanted level. The character exits the vehicle and intentionally commits suicide with a sticky bomb after being cornered by police. The gameplay switches to spectator mode, watching another player (Papi Sheeps) driving a large, off-road six-wheel truck into a tunnel and crashing near a crashed military helicopter (Cargobob). Papi Sheeps successfully acquires the Cargobob and flies toward the objective, using the helicopter's mounted gunner view to survey the city at night. The player lands the helicopter near the compound to 'Collect the container,' but the session is abruptly quit. The session begins with the character perched on a high rooftop, scoping out the city using the map and preparing weaponry. The player attempts to fire a rocket launcher at distant targets before switching to ground-level views. After preparing, the player secures a large black and yellow military helicopter (Maverick/Black Hawk variant) from a nearby helipad. The player immediately takes off, flying high above the city skyline, maneuvering through fog and mountains. While flying toward a desert location, the player uses the mounted machine guns and rockets on the helicopter, engaging in aerial skirmishes and destroying objects below. The vehicle flies aggressively over hills and rural areas before crashing into a steep hillside. After respawning on foot, the player runs down a dirt path and successfully carjacks a grey Karin Everday XL SUV from a passing motorist on Route 68, entering a short pursuit phase. The player drives the SUV rapidly down the coastal highway towards Los Santos. After a brief mission setup screen, the character appears on the edge of the Los Santos International Airport military section at night, initiating the mission 'A Titan of a Job'. The player uses a sniper rifle to eliminate hostile NPCs guarding a large military cargo plane inside a hangar. Securing the large Titan aircraft, the pilot successfully taxis out and takes off, flying over the illuminated city. The objective shifts to delivering the Titan to Sandy Shores airfield. The player navigates the massive plane through the night sky, flying low over mountains and open desert before making a successful landing at the Sandy Shores airstrip to complete the mission. The gameplay opens with the character piloting a black helicopter over the expansive, illuminated city of Los Santos during twilight. The pilot skillfully maneuvers the aircraft for a smooth landing onto a high-rise helipad marked with the 'Lombank' insignia. Once landed, the character exits the helicopter, arming themselves with an assault rifle and surveying the rooftop area. The character checks the map to confirm the location, which appears to be a crucial vantage point for an ongoing mission. Taking cover behind a structure, the player equips a sniper rifle and begins surveillance, focusing the scope on targets or areas far below the skyscraper. The player periodically consults the map, reviewing available missions and areas across the city, from Del Perro to the International Airport. The character maintains a long, tense standoff position on the rooftop, scanning the environment with the weapon ready for incoming threats or the arrival of a specific target, using the corner of the structure for cover. The mission remains in this state of readiness and anticipation for the remainder of the footage. Chapters: 0:00:00 - Initial Menu Navigation and Job Selection 0:26:00 - Driving the Annis Elegy RH8 out of the Garage 1:12:00 - Stealing and Flying the Buzzard Attack Chopper 1:50:00 - Parachuting and Committing Suicide/Wasted 3:15:00 - Respawning in Apartment and Driving Away with Bounty 4:16:00 - Acquiring a Maverick Helicopter 5:10:00 - Loading Mission: Docks to Stock II (Lester) 6:00:00 - Starting Mission, Engaging Police in Downtown Los Santos 7:22:00 - High-Speed Police Chase (Wanted Level 4) 9:40:00 - On Foot Gunfight and Death by Police SUV 12:20:00 - Acquiring Stolen Sedan and Evading Cops at Airport 14:40:00 - Using Lester's Ability to Lose Wanted Level 15:15:00 - Switching to Spectator Mode (Papi Sheeps) 15:58:00 - Papi Sheeps Acquires the Cargobob Military Helicopter 18:25:00 - Flying the Cargobob over the City at Night 20:13:00 - Landing Near Compound to Collect Container 20:37:00 - Mission Quit Screen 30:00 - Rooftop Recon and Weapon Prep 31:33 - Acquiring the First Helicopter (Black Hawk Variant) 33:55 - Initial Helicopter Flight over Los Santos 34:48 - Flying over Richman Glen and Mountain Ranges 35:15 - Helicopter Flight over Desert and Firing Rockets 36:15 - Airfield Landing and Helicopter Switch 39:07 - Aggressive Evasion and Helicopter Crash 40:29 - On Foot Escape and Carjacking the SUV 41:55 - Driving the Karin Everday XL on Great Ocean Highway 46:24 - Mission Start: Steal the Titan Cargo Plane 52:16 - Piloting the Titan and Flying to Sandy Shores 55:36 - Successful Landing and Mission Passed 0:00 - Flying helicopter over Los Santos at twilight 0:15 - Executing a controlled landing onto a high-rise helipad 0:40 - Exiting the helicopter and surveying the rooftop with an assault rifle 1:07 - Checking the global map for mission locations 1:21 - Entering sniper scope view for long-range surveillance 2:05 - Running across the rooftop and checking the map again, zooming in on various locations 3:16 - Taking cover against a wall, maintaining a defensive position 4:05 - Repeated map checks and repositioning on the rooftop 4:57 - Extended static tactical hold position, watching the distant cityscape 6:12 - Video concludes during the stakeout

Brothers in Arms Hells highway : Operation Market
The video opens by displaying the desktop environment before transitioning into a lengthy cinematic introduction for the video game, heavily focused on the context of Operation Market Garden. Allied C-47 transport aircraft towing Horsa gliders fly across the sky, setting the stage for the airborne assault. Scenes of US paratroopers, specifically members of the 101st Airborne Division, follow as they prepare for the jump over Ramsbury Air Base, September 16th, 1944. Character introductions focus on the squad members discussing the mission. The scene shifts to the gliders landing in Son, Holland, September 17th, 1944, marking the start of the combat mission. The player assumes a first-person perspective, equipped with an M1 Garand rifle. The first objective is to secure the landing zone (LZ W). The team advances across open fields toward a small Dutch village. The player encounters a Dutch resistance member who provides critical intelligence and switches the player's weapon to an MP40. Immediately following this exchange, the objective shifts to eliminating a German patrol near a farmhouse. Firefights erupt, requiring the use of cover mechanics behind stone walls and sandbags. The player engages German soldiers positioned in defensive positions and inside buildings. After clearing the initial patrol, the mission updates to clear the Germans from the farmhouse completely. The fighting moves into the tight quarters of the farmyard, utilizing both rifle accuracy and close-quarters submachine gun combat. The player aggressively clears the main farmhouse, moving upstairs to eliminate the remaining German presence, completing the objective and securing the building. Chapters: 0:00 - 0:05 - Desktop and Game Launch 0:05 - 2:30 - Cinematic Introduction and Mission Briefing 2:30 - 4:40 - Character Interactions and Deployment Preparation 4:40 - 7:03 - Operation Market Garden: Airborne Insertion and Initial Objectives 7:03 - 8:20 - First-Person Gameplay Starts and Dutch Resistance Encounter 8:20 - 12:28 - Firefight and Clearing the Farmhouse Exterior 12:28 - 14:20 - Repelling Counterattack and Approaching Main House 14:20 - 17:11 - Clearing the Farmhouse Interior and Objective Completion 📖 Interactive written walkthrough with clickable timestamps: https://pixelfungaming.com/videos/brothers-in-arms-hells-highway-operation-market

Walking Dead Game: Long Road Ahead - Episode 3
Welcome to a complete walkthrough of Telltale Games' The Walking Dead: Season 1 - Episode 3, titled 'Long Road Ahead'. In this intense installment, Lee Everett and the group of survivors find themselves at a breaking point. What started as a struggle for daily survival at the motel quickly spirals into chaos when a secret betrayal from within leads to a devastating bandit attack. This video captures every critical choice and emotional beat as the group is forced to abandon their sanctuary and hit the road in a desperate search for safety. Tensions boil over in the RV, leading to one of the series' most difficult decisions regarding Lilly. Soon after, a heartbreaking discovery about Duck changes the group's dynamic forever. As they make their way towards Savannah, they encounter a stalled train that offers a glimmer of hope—and a whole new set of challenges. Watch as Lee balances protecting Clementine, managing a grieving Kenny, and integrating new survivors, Omid and Christa, into their fractured group. From the high-stakes defense of the motel to the somber silence of a roadside forest, 'Long Road Ahead' is a pivotal chapter that tests the limits of loyalty and the cost of survival in a world gone mad. Experience the full story with no commentary for maximum immersion into this post-apocalyptic narrative masterpiece. Experience the harrowing conclusion of The Walking Dead: Episode 3 - Long Road Ahead. In this gameplay walkthrough, Lee Everett and the survivors find their journey toward Savannah halted by a massive fuel tanker precariously dangling from a highway bridge. The group encounters two new survivors, Omid and Christa, who offer assistance but also bring new dynamics to the group. Watch as Lee and Clementine navigate a dangerous, walker-filled train station to retrieve a blowtorch needed to clear the tracks. The stakes escalate rapidly when a massive horde of thousands of walkers is spotted approaching their location. In a race against time, Lee must cut the tanker loose while the group makes a desperate leap back onto the moving train. The episode ends with a shocking discovery on Clementine's walkie-talkie, setting the stage for the next chapter. This video includes the full sequence of events, from the initial encounter on the bridge to the final credits and teaser for Episode 4. Chapters: 0:00:00 - Recap of Previous Episodes and Intro 0:05:00 - Scavenging the Macon Pharmacy 0:10:00 - The Trapped Girl: A Grueling Moral Choice 0:15:30 - Returning to the Motel Tensions 0:20:00 - Lilly's Paranoia: Stolen Supplies Investigation 0:25:00 - Searching for the Thief's Clues 0:30:00 - Detective Duck Joins the Investigation 0:35:00 - Finding the Hidden Supply Bag 0:40:00 - The Bandits Strike: Motel Siege Begins 0:45:00 - Chaos and Escape from the Overrun Motel 0:50:30 - Resting on the Road: Internal Conflict Erupts 0:55:00 - Accusations in the RV: The Breaking Point 1:00:00 - The Fateful Decision: Lilly's Future 1:05:00 - A Father's Nightmare: Duck's Condition Revealed 1:10:00 - Discovering the Stalled Train 1:15:30 - Clearing the Locomotive and Finding Supplies 1:20:00 - The Tanker Roadblock: Investigating the Overpass 1:25:00 - Encountering New Survivors: Omid and Christa 1:30:00 - Solving the Train Engine Puzzle 1:35:00 - Scavenging the Abandoned Cars 1:40:00 - Survival Training: Lee Teaches Clementine to Shoot 1:45:00 - Kenny's Denial and Katjaa's Grief 1:50:00 - Tragedy in the Woods: Saying Goodbye to Duck 1:55:30 - Resuming the Journey to Savannah 2:00:00 - Integrating the Newcomers into the Group 2:05:00 - Night Falls on the Tracks 2:10:00 - Clementine's Growing Resilience 2:15:00 - The Mysterious Walkie-Talkie Signal 2:20:00 - Approaching the Coast: Final Tensions 2:25:00 - Cliffhanger Conclusion and Credits 2:30:00 - Tensions rising on the train ride 2:33:15 - The bridge blockade: Fuel tanker obstacle 2:36:40 - Surveying the area for a way through 2:40:10 - Meeting new survivors: Omid and Christa 2:43:55 - Formulating the plan to clear the tracks 2:47:30 - Searching the train station with Clementine 2:51:15 - Station walker encounter and finding the blowtorch 2:54:20 - The great horde arrives: Tense tanker cutting 2:55:45 - Escape to the train and Omid's injury 2:56:10 - The final radio reveal and Episode 4 teaser 📖 Interactive written walkthrough with clickable timestamps: https://pixelfungaming.com/videos/walking-dead-game-long-road-ahead-episode-3

Rainbow Six Siege: Successful Window entry - 2 kills
The mission begins with the attacking operator rappelling down the exterior of the building, checking the rooftop before repositioning near the building's side entrance. The operator rappels down the second story wall, surveying the windows leading into the objective area (Garage Roof/Garage Front Yard). Approaching a barricaded window, the operator deploys a breach charge. As the charge detonates, the operator quickly engages and eliminates two defending operators immediately inside the window, securing a crucial double kill. A teammate rappels alongside and breaches an adjacent window. The player registers accidental friendly fire damage on the teammate while continuing to suppress the interior. After disabling enemy gadgets with a flashbang/EMP grenade, the operator breaches through the window and drops inside. The final two defenders are quickly located and eliminated using precision shots, securing the round win for the attacking team. The round ends with the score 2-0. Chapters: 0:00 - 0:28 - Initial Approach and Rappel Positioning 0:28 - 0:55 - Window Breach, Double Kill, and Gadget Deployment 0:55 - 1:15 - Aggressive Entry and Round Conclusion 📖 Interactive written walkthrough with clickable timestamps: https://pixelfungaming.com/videos/rainbow-six-siege-successful-window-entry-2-kills

Rainbow Six Siege : Terrorist hunt (house) - Disarm bomb - Success
The cooperative gameplay session begins in the lobby as players select the Terrorist Hunt: Disarm Bomb mission on the House map. Thatcher is chosen as the operator, confirming the AR33 primary weapon. During the preparation phase, an initial drone attempts to scout the Flish Porch entrance before being destroyed. The action phase starts as the assault team approaches the house from the exterior. Thatcher breaches the main entrance door into a vault area and immediately engages the first wave of terrorists in close-quarters combat. Teammates push forward through the destroyed wall, clearing the immediate threat in the hallway and stairwell entrance. The team locates Bomb A in the living room area and establishes a perimeter. A heavy firefight erupts as the defuser is planted, with terrorists flooding the entry points from the kitchen and stairs. The operator holds a tight angle, eliminating multiple hostiles and defending the defuser until Bomb A is successfully disarmed. The team quickly moves to locate Bomb B, traversing through the kitchen and down to the basement/laundry room. The defuser is planted at the second bomb site. The final moments involve intense defense against the remaining terrorists attacking the laundry room. The operator maintains position, eliminating the last incoming terrorists from the stairwell and hallway, securing the mission successful screen as the final bomb is disarmed. Chapters: 0:00 - 0:38 - Matchmaking, Operator Selection, and Loadout Confirmation 0:38 - 1:16 - Spawn Selection and Drone Reconnaissance Phase 1:16 - 2:09 - Initial Breach and Close Quarters Entry Combat 2:09 - 3:55 - Locating and Defusing Bomb A Under Fire 3:55 - 5:47 - Search, Plant, and Defense of Bomb B in the Basement 5:47 - 6:19 - Mission Successful and Match Scoreboard Review 📖 Interactive written walkthrough with clickable timestamps: https://pixelfungaming.com/videos/rainbow-six-siege-terrorist-hunt-house-disarm-bomb-success

Rainbow Six Siege: presidential plane Terrorist hunt - disarm bomb
The gameplay video captures a Terrorist Hunt: Disarm Bomb mission on the Presidential Plane map in Rainbow Six Siege. The Blue Team, playing as Attackers, selects their Operators, focusing on breaching and protection roles like Twitch, Recruit, Montagne, Fuze, and Thatcher. The mission objective is to locate and defuse two bombs hidden on the plane. The team enters the cargo hold and quickly locates Bomb B, heavily guarded by barbwire and enemy AI. During the initial push and subsequent defuser plant, the player is downed by a Bomber but quickly revived. The team successfully defends the defuser against multiple waves of enemies, utilizing tight formation and coordinated fire. After successfully disarming Bomb B, the team pushes toward Bomb A, located in the front sections of the plane. They clear the upper levels, moving through the executive areas and encountering heavy resistance. The team quickly finds and activates the second defuser, holding their position against the final enemy assault in the plane's hallway and office space. The team successfully eliminates the remaining enemies and completes the mission, disarming all bombs. Chapters: 0:00 - 0:44 - Match Setup and Operator Selection 0:44 - 1:15 - Initial Insertion and Bomb B Location 1:15 - 1:50 - Heavy Resistance and Player Downed by Bomber 1:50 - 2:54 - Teammate Revival and Planting Defuser B 2:54 - 3:55 - Defending Bomb B Against Enemy Attack 3:55 - 5:18 - Bomb B Disarmed and Moving to Cargo Hold 5:18 - 7:06 - Ascending to the Second Floor and Clearing Upper Corridors 7:06 - 9:06 - Clearing Executive Areas and Searching for Bomb A 9:06 - 9:56 - Locating and Planting Defuser A 9:56 - 11:32 - Defending Bomb A and Mission Successful 📖 Interactive written walkthrough with clickable timestamps: https://pixelfungaming.com/videos/rainbow-six-siege-presidential-plane-terrorist-hunt-disarm-bomb

Rainbow Six Siege Gameplay
The gameplay begins with the operator selection screen for the attacking team (Blue Team) in a Hostage Rescue scenario on the Consulate map in Rainbow Six Siege. The Preparation Phase starts, and an attacker utilizes a drone to scout the Consulate, moving from the exterior parking area up the main stairs and into the Visa Office on the first floor. The drone successfully locates the Hostage and marks nearby enemy defenders before being destroyed. The Action Phase begins, and the attacking team breaches the building through the Side Entrance and quickly pushes into the Visa Office area, maintaining communication about enemy positions found during reconnaissance. Operators navigate the first floor and push toward the Exit Stairs leading down into the basement/garage section, confirming enemy locations are in the basement Archives/Corridor. The team advances cautiously through the lobby and down the stairs toward the Archives area. A rapid firefight breaks out near the Cafeteria entrance, resulting in the elimination of two defenders, changing the status to 3 vs 3, then 3 vs 2. An operator deploys a smoke grenade for cover. Another operator uses a cluster charge (Fuze) on a nearby wall (3:40). The wall is breached, killing a final defender and clearing the area. The round concludes successfully with all opposing enemies neutralized, winning the first round for the Blue Team. The end-of-round replay showcases the successful breach and the final elimination, followed by the match transition to the second round (Defend). Chapters: 0:00:00 - 0:00:11 - Operator Selection and Match Load 0:00:11 - 0:00:57 - Preparation Phase: Drone Reconnaissance and Hostage Location 0:00:57 - 0:02:30 - Initial Assault, Entry, and Interior Push 0:02:30 - 0:03:56 - Basement Breach, Firefight, and Round Victory 0:03:56 - 0:04:11 - Round Replay and Defend Transition 📖 Interactive written walkthrough with clickable timestamps: https://pixelfungaming.com/videos/rainbow-six-siege-gameplay

Rainbow Six Siege Terrorist Hunt : Club house Walkthrough
The mission begins with the selection of the Recruit operator and deployment in the exterior construction site of the Club House map for a Terrorist Hunt Classic match. The team moves toward the warehouse entrance, where the character deploys a drone to scout the immediate internal area, spotting targets. The character then uses a breach charge to blast open a doorway and immediately engages two terrorists, successfully eliminating them. Moving into the interior, the character clears the block room, engaging another target hidden by shelving. The team advances deeper, moving through a lounge area and up a staircase, encountering heavy resistance and disabling multiple Nitro Cells deployed by the enemy. Using tactical positioning, the character eliminates several enemies positioned around the bar area in the lobby, which is marked by bright red neon lights. After securing the main floor, the team descends into the basement. The character uses a final breach charge to expose the last remaining enemies clustered in the hallway. A rapid sequence of kills eliminates the final terrorists, completing the objective and declaring the mission successful. The post-action report confirms the total enemy elimination. Chapters: 0:00 - 0:05 - Mission Overview and Loading Screen 0:05 - 0:48 - Operator Selection and Spawn Location 0:48 - 1:47 - Exterior Breach and Initial Interior Combat 1:47 - 3:15 - Clearing the Lounge and Disabling Traps 3:15 - 4:36 - Basement Push and Mission Success 4:36 - 4:56 - End of Match Scoreboard and Replay 📖 Interactive written walkthrough with clickable timestamps: https://pixelfungaming.com/videos/rainbow-six-siege-terrorist-hunt-club-house-walkthrough

Brothers in Arms : Lost ( Mission 1 )
The video begins with the launch of Brothers in Arms: Hell's Highway, leading into the main menu where the 'Veteran' difficulty is selected. A series of emotionally charged cinematics depict key traumatic moments experienced by Sergeant Matt Baker throughout the Normandy campaign of 1944. These scenes include the disastrous D-Day parachute drop, the emotional aftermath of battle in St. Come du Mont, confronting enemy soldiers at close range, and moments of quiet reflection and bonding with his comrades. A recurring motif involves Matt's engraved pistol, symbolizing his commitment to his 'Brothers in Arms.' Following the introductory sequence and title screen, the mission 'Lost' begins in Eindhoven, Holland, September 1944. Matt awakens injured and disoriented inside a ruined building, witnessing German soldiers executing a civilian woman. Gameplay starts within the destroyed hospital, with the objective set as 'Exit the Hospital' and 'Rendezvous with the Squad.' Matt navigates the debris-strewn, dark hallways using an MP40. He encounters and engages German infantry in close-quarters combat inside the burning, dilapidated hospital wing. Matt utilizes cover and fire suppression tactics, often reloading the MP40 to eliminate enemies located further down corridors and in adjoining rooms. The combat is intense, marked by sudden enemy appearances and visual damage indicators showing Matt's status. The mission progresses through several checkpoints and interior sections of the hospital until a final cinematic sequence triggers in a large auditorium area. Here, German soldiers surround Matt, leading to a tense, ambiguous scene where Matt appears to face capture or execution. The video concludes abruptly after the final title card is shown, returning to the Windows desktop. Chapters: 0:00 - 0:32 - Game Start and Cinematic Prologue: Matt Baker's Past 0:32 - 1:02 - D-Day Airdrop Cinematic and Plane Explosion 1:02 - 3:14 - Flashbacks and Memories from Normandy Campaigns 3:14 - 3:30 - Brothers in Arms: Hell's Highway Title and Loading Screen 3:30 - 5:31 - Mission Start Cinematic: Eindhoven 1944 and Civilian Execution 5:31 - 6:44 - Gameplay Begins: Exiting the Hospital and Initial Firefight 6:44 - 8:06 - Hospital Hallway Combat and Cover Suppression 8:06 - 9:18 - Navigating the Ruined Building Interior and Checkpoint 9:18 - 9:55 - Final Mission Cinematic and Title Card 9:55 - 12:13 - End of Recording / Desktop View 📖 Interactive written walkthrough with clickable timestamps: https://pixelfungaming.com/videos/brothers-in-arms-lost-mission-1
Call Of Duty : Exo Zombies -OutBreak
The mission begins with a group of four survivors navigating the dark, industrial corridors of an Atlas facility in the Outbreak map of Call of Duty: Advanced Warfare's Exo Zombies mode. Combat starts immediately as basic zombie types emerge, which the players dispatch using handguns, shotguns, and melee strikes. The character navigates toward the power station, eventually restoring electricity to the sector. Following power restoration, the team acquires their Exo Suits, granting them enhanced mobility and tactical abilities essential for survival. As the rounds progress, the intensity increases significantly; faster and more resilient zombies, including some with EMP capabilities, swarm the hub and administrative areas. The gameplay highlights strategic movements, constant weapon switching at Atlas stations, and the frequent use of decontamination zones to ward off infection. High-action sequences occur during rounds 10 through 14, where teammates are frequently downed and revived amidst chaotic firefights. The final stand takes place in the administrative corridor during round 15, where the overwhelming numbers of zombies eventually breach their defenses, leading to the team's defeat. The session concludes with a detailed after-action report showing kills, revives, and total scores for each participant. Chapters: 0:00:00 - 0:02:15 - Early round survival and navigation through the hub 0:02:15 - 0:04:45 - Restoring power and acquiring Exo Suits 0:04:45 - 0:07:30 - Intensifying combat in the morgue and labs 0:07:30 - 0:10:15 - Defending against specialized zombie variants 0:10:15 - 0:13:00 - High-stakes battle in the administrative sector 0:13:00 - 0:15:50 - Final stand and the team getting overrun in Round 15 0:15:50 - 0:16:15 - Defeat screen and final round summary 0:16:15 - 0:16:30 - Post-game stats and lobby return 📖 Interactive written walkthrough with clickable timestamps: https://pixelfungaming.com/videos/call-of-duty-exo-zombies-outbreak

State Of Decay : Year One Live #3
The journey begins within the sanctuary of the Church of the Ascension as night falls over Trumbull Valley. After a quick survey of current resources and the neighborhood map, the focus turns toward the town of Marshall. Driving through the darkness, the route is plagued by roaming hordes and wreckage-strewn streets. A sudden radio transmission interrupts the silence, leading to an investigation of a strange signal broadcasting nearby. This detour leads into the vast cornfields on the outskirts of town, where a mysterious supply crate is discovered. After clearing a group of attackers, the search for Lily's brother, Jacob, intensifies. The rescue mission culminates at a secluded barn where Jacob is found injured alongside another survivor. A frantic drive back to the safety of the church base follows, leading to a heated discussion between the siblings regarding the risks taken. Finally, the day concludes by pairing up with a fellow survivor to clear out local infestations and bolster community morale. The session begins with the character driving a heavily damaged red SUV down a dirt road, repeatedly ramming through hordes of zombies. Smoke pours from the vehicle as the character maneuvers around large rocks and through tall grass, prioritizing speed over caution to clear the path. The car finally breaks down after sustained damage at 31:37. The character and a companion exit the smoking SUV and transition to intense melee combat, using blunt weapons to eliminate the surrounding infected, clearing the mission objective area. A skill increase notification appears for fighting. Next, the characters approach a small, dilapidated church. They fight their way up the wooden steps and into the interior, battling several fast-moving zombies in close quarters. After clearing the building and securing the area, the characters discuss the necessity of cooperating for survival. They find a new white sedan to replace the destroyed SUV and begin the drive back to base, navigating through residential streets that contain scattered zombie threats. Upon arriving at their home base, the Church of the Ascension, the pair gains entry through a large black gate. Inside the safe zone, the 'Fear Itself' morale mission completes. The character speaks with Lily and Jacob Ritter, learning that they must next fetch Doc Hueson from the Old Farmhouse. Dialogue suggests that military patrols might be in the area, leading to uncertainty among the survivors. The character prepares for the new mission, checking inventory and speaking briefly with another survivor, Alan Gunderson. The session concludes shortly after the objective update, transitioning briefly into the game menu and then the console dashboard. Chapters: 0:00:00 - Base management and mission planning 0:02:15 - Night driving through Trumbull Valley 0:04:45 - Investigating the mysterious radio signal 0:07:15 - Zombie combat in the Marshall suburbs 0:10:15 - Looting the high-tier supply drop 0:13:00 - Rescuing Jacob Ritter from the barn 0:15:50 - Mission completion and base return 30:00 - Driving and vehicular zombie combat begins 31:37 - Vehicle breaks down, transitioning to melee combat 32:15 - Entering the dilapidated church and interior combat 33:43 - Area cleared and brief dialogue exchange 34:37 - Securing a new white sedan 35:10 - Driving back to the home base 35:57 - Arriving at the Church of the Ascension base 36:06 - Morale mission completed and receiving new objective 36:56 - Interacting with survivors and discussing military presence 37:40 - End of gameplay footage and transition to console menu 📖 Interactive written walkthrough with clickable timestamps: https://pixelfungaming.com/videos/state-of-decay-year-one-live-3
Metal Gear solid : Phantom pain Part 1
Description here.

State Of Decay : Year One Live #6
The gameplay video captures a mission from State of Decay focused on dealing with hostile military forces, known as the Death Squad, and searching for survivors in the post-apocalyptic world. The character starts at the home base, receives a mission, and drives an SUV out into the wilderness. The first part involves driving while narrowly avoiding zombies and crashing the SUV into trees and obstacles, diminishing its health and affecting the character's trust levels due to reckless driving. The character then encounters the Death Squad, heavily armed military personnel, executing a pair of survivors for squatting. The main character successfully evades the soldiers and drives around the area, repeatedly running over and killing waves of zombies and military personnel with the increasingly battered car. The sequence is punctuated by close-quarters zombie combat where the character is aided by the remaining Death Squad soldiers fighting off the zombie horde. The character then attempts to loot vehicles and houses, engaging in stealth and flashlight use in dimly lit interiors. The primary objective is to find the survivors, which involves navigating the treacherous environment and strategically eliminating threats. The video concludes with intense vehicular combat, using the car to run over the constant flow of zombies until the vehicle is heavily damaged and smoking, forcing the character to return to foot travel near the mission area before the gameplay is paused and the game menu appears. Chapters: 0:00 - 0:45 - Mission Start and Vehicle Departure 0:45 - 1:23 - Reckless Driving and Zombie Encounters in SUV 1:23 - 2:29 - Cutscene: Encounter with the Death Squad and Execution of Civilians 2:29 - 3:28 - Finding a New Vehicle and Initial Engagements with Military and Zombies 3:28 - 4:49 - Weapon Management and Observing Hostilities 4:49 - 6:55 - Intense Vehicular Combat Against Zombie Hordes 6:55 - 9:15 - Sustained Driving and Crashing, Killing Numerous Zombies 9:15 - 11:25 - Character Runs and Engages Zombies on Foot and Supports Allies 11:25 - 18:01 - Looting Houses for Resources and Evading Zombie Attacks 18:01 - 19:33 - Interior House Exploration and Finding Supplies 19:33 - 21:24 - Searching Shelves and Fighting Zombies on Foot 21:24 - 23:42 - Returning to Vehicular Combat and Zombie Horde Alert 23:42 - 24:49 - Final Zombie Kills, Vehicle Damage, and Game Menu 📖 Interactive written walkthrough with clickable timestamps: https://pixelfungaming.com/videos/state-of-decay-year-one-live-6

GTA 5 : Riding and shooting with friend
The gameplay opens during the setup phase of the Humane Raid heist, specifically the Key Codes mission. The character is positioned on the back of a large utility truck equipped with mounted weaponry (implied by the rockets visible on the bed). The objective requires meeting a contact downtown to receive the key codes and setting up lookouts for security. The character switches to an assault rifle while the truck remains stationary. The vehicle begins driving through the city streets at night. The character rides unsecured on the truck bed, serving as a gunner and lookout as the driver navigates traffic and turns. As the truck proceeds down a wide avenue, a hostile target appears on the sidewalk. The character quickly engages the enemy using the assault rifle and successfully eliminates the threat while the truck maintains speed. The driving continues toward the mission objective marker. Chapters: 0:00 - 0:17 - Humane Raid Setup and Initial Vehicle Movement 0:17 - 0:35 - Navigating Downtown Los Santos on the Truck Bed 0:35 - 0:45 - Engaging Hostiles During Transport 📖 Interactive written walkthrough with clickable timestamps: https://pixelfungaming.com/videos/gta-5-riding-and-shooting-with-friend

GTA 5 : Prison Break Set Up - Wet Work WalkThrough ( City Hall Team )
The mission begins with the character climbing a ladder to reach a rooftop vantage point overlooking a busy city street and City Hall. The character equips a sniper rifle and focuses the scope on the City Hall steps, awaiting the arrival of the targets. Communications confirm the targets, two prosecutors, arrive in a black Benefactor Schafter. The moment the targets exit the vehicle, the character executes two clean shots, eliminating both prosecutors simultaneously. After confirming the kills, the character and a teammate descend the building to collect the critical deposition documents. Upon reaching the street level, police swarm the area, and the character quickly enters a customized green sports sedan to initiate a high-speed escape. The police pursuit immediately begins (four-star wanted level). The character maneuvers through heavy downtown traffic, avoiding collisions with police vehicles and civilian cars. Seeking immediate cover, the character drives onto the light rail tracks and enters a dark underground tunnel system, sustaining heavy damage to the vehicle during the escape. The pursuit continues through the tunnels, and the character eventually finds a secluded side platform and stops, waiting for the high wanted level to drop. Once the cops are lost, the character runs briefly along the tracks before re-entering the car. The character then drives the heavily damaged vehicle further through the underground tracks and metro stations toward the final drop-off location. Exiting the tunnel back into the city, the character drives the remaining distance toward a large office building, successfully delivering the deposition to the planning room and completing the mission. Chapters: 0:00 - 0:24 - Reaching the Vantage Point and Awaiting Targets 0:24 - 0:53 - Sniper Assassination of Prosecutors 0:53 - 1:16 - Collecting the Deposition and Fleeing the Scene 1:16 - 2:22 - High-Speed Police Chase in Downtown Los Santos 2:22 - 3:00 - Utilizing Freeway Overpasses and Map Check 3:00 - 4:26 - Evading Police in the Underground Metro Tunnels 4:26 - 5:35 - Hiding in the Tunnel to Lose the Wanted Level 5:35 - 6:29 - Proceeding on Foot and Confirming Police Evasion 6:29 - 8:12 - Driving the Damaged Car Through Metro Tunnels toward Destination 8:12 - 9:35 - Final Drive and Mission Completion 📖 Interactive written walkthrough with clickable timestamps: https://pixelfungaming.com/videos/gta-5-prison-break-set-up-wet-work-walkthrough-city-hall-team

GTA 5 : My kuruma vs an insurgent
The gameplay starts with the character preparing to enter a heavily customized black sports sedan in a high-density urban area of Los Santos. Police sirens and gunfire indicate an ongoing conflict. The character quickly enters the armored vehicle and attempts an immediate escape, driving under a highway overpass. The vehicle immediately runs into a blockade involving a heavily armed military truck (Insurgent or similar) and a police cruiser. Intense close-quarters combat ensues as the vehicle sustains heavy damage from small arms fire. The armored vehicle successfully withstands the attack while the character guns down pursuing hostile players or NPCs, eliminating them (as shown in the killfeed). Utilizing the car's durability, the character performs a sharp maneuver, striking the police cruiser and forcing the officers out. The character eliminates the remaining targets before accelerating rapidly down the city street, successfully breaking the pursuit and gaining distance before the gameplay feed cuts out. Chapters: 0:00:00 - 0:00:06 - Staging the Escape and Initiating the Drive 0:00:06 - 0:00:17 - Confrontation with Armored Vehicles and Heavy Pursuit 0:00:17 - 0:00:27 - Eliminating Targets and High-Speed Evasion 📖 Interactive written walkthrough with clickable timestamps: https://pixelfungaming.com/videos/gta-5-my-kuruma-vs-an-insurgent

Dead Island 2: Hollywood Ending | CO-OP Walkthrough (No Commentary) #DeadIsland2
The final mission of Dead Island 2, titled 'Hollywood Ending,' begins with an incursion onto the blood-spattered streets of Hollywood Boulevard. Slayers track Tisha and Dr. Reed through the ruins of film premieres, engaging in fierce combat within a theatre lobby against waves of Walkers and a Screamer. The investigation leads to the Lotusville Re-Aging Clinic, where finding a keycard reveals a secret passage behind a hidden desk. This path opens into the industrial Eschaton Facility. A pivotal confrontation occurs as Dr. Reed reveals the truth behind the Autophage virus and his horrific experiments. The encounter escalates into a climactic boss battle against the Reubenator, a mutated monstrosity. Slayers utilize a variety of firearms and melee weapons to survive the boss's devastating attacks and encroaching zombie hordes. After the victory, the team navigates a collapsing facility to reach an extraction point. The story concludes at a helicopter where a final choice is made to save a comrade with the remaining cure, while the protagonist stays behind in Hell-A to continue the search for Tisha, resulting in a stylish final stand against the undead. Chapters: 0:00:00 - 0:02:30 - Hollywood Boulevard Arrival and Lobby Combat 0:02:30 - 0:05:00 - Infiltrating the Lotusville Clinic Secret Lab 0:05:00 - 0:07:30 - Dr. Reed's Revelation and Reubenator Transformation 0:07:30 - 0:10:00 - The Reubenator Final Boss Battle 0:10:00 - 0:12:30 - Escaping the Collapsing Eschaton Facility 0:12:30 - 0:15:00 - Final Extraction and the Slayer's Sacrifice 0:15:00 - 0:16:35 - Red Carpet Credits and Final Stand 📖 Interactive written walkthrough with clickable timestamps: https://pixelfungaming.com/videos/dead-island-2-hollywood-ending-co-op-walkthrough-no-commentary-deadisland2

RDR2 - Bayou Moonshine poisoning - STEALTH
The mission begins with the character navigating a swampy area on horseback before dismounting to approach a rival moonshiner operation. Stealthily entering the water, the character swims under the wooden pilings of a swamp hut to avoid detection by guards patrolling above. After carefully maneuvering around the structures, the character climbs onto a wooden deck and enters a dilapidated building. Inside, the character locates the moonshine still and poisons the batch. Immediately after the sabotage, the character exits the building, jumps back into the swamp water, and swims away to clear the area, successfully completing the mission without being detected. Chapters: 0:00:00 - 0:00:13 - Approach to the moonshiner camp 0:00:13 - 0:01:35 - Stealthy navigation under swamp structures 0:01:35 - 0:02:10 - Infiltrating the building and poisoning the still 0:02:10 - 0:02:46 - Escaping the area and mission completion 📖 Interactive written walkthrough with clickable timestamps: https://pixelfungaming.com/videos/rdr2-bayou-moonshine-poisoning-stealth

GTA 5 Live
Experience the first two hours of Grand Theft Auto V in this comprehensive walkthrough. This video covers the critical opening missions for two of our protagonists, Franklin Clinton and Michael De Santa. We start with Franklin's early life in Los Santos, working as a repo man alongside Lamar Davis. Witness the high-speed chases, neighborhood rivalries, and the introduction of the fan-favorite dog, Chop. The action ramps up with 'The Long Stretch,' leading to a massive tactical shootout in a recycling plant. The perspective then shifts to the retired criminal Michael De Santa. We dive into his complex family dynamics in 'Daddy's Little Girl,' which takes Michael from a casual bike race at Vespucci Beach to a high-stakes Seashark escape through the city's canals to rescue his daughter. The final part of this walkthrough focuses on the game's first major heist, 'The Jewel Store Job.' We follow the 'Smart Approach' strategy, including all necessary setup missions like hijacking a Bugstars van and stealing BZ gas grenades from a security transport. The video concludes with the successful execution of the heist, showcasing the teamwork and planning required for the big score. Chapters: 0:00:00 - Prologue & Franklin Introduction 0:05:00 - Mission: Repossession - Car Chase 0:10:00 - High-Speed Pursuit through Los Santos 0:15:00 - Delivering Simeon's Vehicle 0:20:00 - Franklin's Neighborhood & Dialogue 0:25:00 - Mission: Chop - Chasing the Ballas 0:30:00 - Railyard Investigation with Chop 0:35:00 - Finding D at the Train Yard 0:40:00 - Chop Mission Completion 0:45:00 - Mission: The Long Stretch - Gear Up 0:50:00 - Recycling Plant Infiltration 0:55:00 - Intense Firefight at the Recycling Center 1:00:00 - Clearing the Building & Tactical Combat 1:05:00 - Evading the Police Escape 1:10:00 - Switch to Michael - Rockford Hills Life 1:15:00 - Mission: Daddy's Little Girl - Beach Trip 1:20:00 - Bike Race with Jimmy at Vespucci 1:25:00 - Yacht Rescue Infiltration 1:30:00 - Seashark Chase through the Canals 1:35:00 - Heist Planning with Lester 1:40:00 - Setup: Stealing BZ Gas Grenades 1:45:00 - Setup: Hijacking Bugstars Equipment Van 1:50:00 - The Jewel Store Job: Smart Approach 1:55:00 - Heist Execution & Final Getaway 📖 Interactive written walkthrough with clickable timestamps: https://pixelfungaming.com/videos/gta-5-live

Brothers in Arms Hells Highway : Five-Oh-Sink
The video documents intense first-person shooter gameplay set during World War II, starting with the player engaging in a fierce skirmish across a rural landscape. The mission begins with the player utilizing a rifle to take cover behind a large tree, eliminating multiple enemy targets advancing toward a cluster of small farm buildings. After repelling the initial German counterattack, the player moves forward along a dirt road toward a checkpoint. A cinematic cutscene interrupts the action, showing American soldiers advancing before a dramatic scene where a military glider aircraft crashes into the field ahead, followed by an objective update to rendezvous with a specific squad member, Hartsock. Gameplay resumes near a small stone wall as the player switches between an SMG and a rifle, defending the perimeter of the downed glider. The enemy pushes hard, inflicting heavy damage indicated by the screen flashing red. The player holds position behind the brick wall, engaging targets marked by red icons in the field and successfully clearing the immediate threat. The player then advances toward the crash site, moving cautiously through tall grass and utilizing low stone walls for cover. The engagement culminates in a close-quarters fight around a wooden shed and the wrecked glider fuselage. The player frequently reloads the Thompson SMG while maneuvering to clear the remaining German pockets of resistance near a broken truck and hay bales. After securing the immediate vicinity of the downed aircraft, the game signals 'Objective Complete: Secure LZ W,' concluding the mission segment. Chapters: 0:00 - 2:25 - Initial firefight and repelling counterattack 2:25 - 3:35 - Cutscene: Soldier deployment and glider crash 3:35 - 6:55 - Defending a fortified position against German advance 6:55 - 9:58 - Advancing toward the crash site and engaging enemies 9:58 - 13:45 - Close-quarters combat around the wooden shack and wreckage 13:45 - 16:13 - Securing the landing zone and mission completion 📖 Interactive written walkthrough with clickable timestamps: https://pixelfungaming.com/videos/brothers-in-arms-hells-highway-five-oh-sink

Grand Theft Auto 5 - Airplane Stunt - Bridge Binge ( Successful )
The video documents multiple attempts to complete the 'Bridge Binge' Stunt Plane Time Trial in Grand Theft Auto V (GTA V). The character, initially driving an SUV, arrives at an airstrip in the Grand Senora Desert. After interacting with a parked green stunt plane (receiving a humorous goat interaction), the time trial begins. The goal is to fly a stunt plane through a series of checkpoints, including performing inverted flight maneuvers through rings and navigating low under bridges over a river. Most early attempts result in immediate or mid-course destruction of the aircraft due to failed stunts or impacts with terrain and structures, including hitting rocks, trees, and bridge supports. The plane explodes repeatedly, forcing restarts. After several persistent failures, the pilot eventually executes a precise run, successfully flying through all checkpoints, including challenging inverted rings and low bridge passes, achieving a Bronze medal and passing the mission on the ninth attempt. Chapters: 0:00:00 - 0:54:00 - Mission Passed Screen and Driving to Airfield 0:54:00 - 1:55:00 - Stunt Plane Time Trial Setup and First Failed Attempt 1:55:00 - 3:12:00 - Second Failed Attempt - Crashing Near Route 68 3:12:00 - 4:37:00 - Third Failed Attempt - Crashing Near River 4:37:00 - 6:24:00 - Fourth Failed Attempt - Crashing Under Great Ocean Highway Bridge 6:24:00 - 7:39:00 - Fifth Failed Attempt - Hitting Bridge Support 7:39:00 - 8:51:00 - Sixth Failed Attempt - Hitting Tree 8:51:00 - 10:11:00 - Seventh Failed Attempt - Hitting Bridge Pillar 10:11:00 - 11:50:00 - Eighth Failed Attempt - Clipping Under Highway Bridge 11:50:00 - 14:47:00 - Ninth Successful Attempt - Completing Bridge Binge and Earning Bronze 14:47:00 - 15:19:00 - Mission Results Screen and Course Overview 📖 Interactive written walkthrough with clickable timestamps: https://pixelfungaming.com/videos/grand-theft-auto-5-airplane-stunt-bridge-binge-successful

COD Advanced Warfare - TDM Instinct - Good hiding spots
The video documents a full Team Deathmatch game on the map Instinct in Call of Duty: Advanced Warfare, focusing primarily on demonstrating effective hiding spots and camping positions. The match begins after the lobby countdown, pitting the Atlas team against Sentinel. The player, using the AK12 Wrecker, quickly secures the center jungle area and adopts a prone position concealed by large tropical foliage (around 1:59). Using this hidden vantage point, the player eliminates several enemies attempting to cross the center, earning a 5 kill streak. After being killed, the player respawns and continues leveraging dense foliage and environmental clutter around the large yellow excavator/mech to gain positional advantage, successfully destroying an enemy Warbird overhead. As combat intensifies and the score remains close, the player deploys an Assault Drone to provide support and visibility. They transition to a spot utilizing a large green pipe for cover, managing to achieve a 10 kill streak despite the enemy team using a System Hack that temporarily disrupts the HUD. The final moments see the player repositioning near a prefabricated structure, engaging in close-quarters combat until the score limit is reached, resulting in an Atlas victory (75 to 74). The match ends with the final killcam and the after-action report showing the player's performance and rank promotion. Chapters: 0:00 - 0:47 - Match Setup and Loading Screen 0:47 - 2:30 - Team Deathmatch Start and First Hiding Spots 2:30 - 4:20 - Defense from Central Jungle Position and Warbird Destruction 4:20 - 5:40 - Repositioning, Drone Deployment, and System Hack 5:40 - 7:20 - Extended Firefight and 10 Kill Streak 7:20 - 9:54 - Final Push, Victory, and Post-Match Summary 📖 Interactive written walkthrough with clickable timestamps: https://pixelfungaming.com/videos/cod-advanced-warfare-tdm-instinct-good-hiding-spots

Farcry 6| El Este Region live #8
Welcome back to our Far Cry 6 walkthrough! In this extensive gameplay session, we dive deep into the lush and dangerous El Este region. We kick things off with 'The Emerald Skull' treasure hunt, taking us through the treacherous Ominosa and Turey caves, where puzzles and traps await. Following that, we assist the local resistance by completing several key Yaran Stories. In 'Everything to Lose,' we travel between farms—Arrese, Hinojosa, Duarte, and Casa Rivera—to help local farmers overcome FND oppression. Then, we jump into 'Nothing to Hide,' a high-stakes rescue mission to save Petra Toca's daughter from the clutches of the ruthless Sergeant Savón. Throughout the video, you'll see intense combat as we capture major strategic locations, including the Mirador Cape Checkpoint, the McKay Global Acid Plant, and the Roca Pequeña SAT Station. Whether it's tactical stealth, high-flying aerial bombing runs, or full-on tank rampages, we cover all the action Yara has to offer. Don't miss out on the arsenal upgrades and gear checks as we prepare Dani Rojas for the ultimate revolution! Chapters: 0:00:00 - Intro & Main Menu 0:02:30 - Beginning 'The Emerald Skull' Treasure Hunt 0:05:00 - Exploring the Ominosa Cave 0:08:15 - Solving the Skull Totem Puzzle 0:11:45 - Avoiding Gas Traps in Turey Caves 0:13:55 - Treasure Hunt Completed: Reward Secured 0:16:15 - Meeting Petra Toca: 'Everything to Lose' Mission Start 0:19:00 - Helping Arrese Farm: Finding the Fighting Rooster 0:22:30 - Hinojosa Farm Battle: Clearing the Soldiers 0:25:15 - Saving the Captured Farmer at Duarte Farm 0:27:45 - Generator Repair at Casa Rivera 0:29:30 - Mission Complete: Helping the Farmers of Conuco 0:32:10 - Starting 'Nothing to Hide' Yaran Story 0:34:45 - Eavesdropping on Sergeant Savón at Toca Farm 0:37:30 - Travelling to Juantorena Farm by Horse 0:41:00 - Rescuing Gloria from the FND Execution Squad 0:44:10 - Mission Accomplished: Gloria is Safe 0:46:15 - Mirador Cape Checkpoint Capture 0:49:50 - Infiltration of McKay Global Acid Plant 0:53:10 - Securing the Acid Plant for Libertad 0:57:00 - Arsenal Upgrade & Arms Dealer Visit 1:01:00 - Assault on Roca Pequeña SAT Station 1:04:20 - SAT Station Captured & Looting 1:08:15 - Aerial Recon & Supply Scavenging 1:12:30 - Clearing FND Roadblocks in El Este 1:17:15 - Heavy Artillery Combat Encounter 1:22:40 - Stealth Outpost Infiltration 1:27:50 - Defensive Stand Against FND Reinforcements 1:33:15 - Tank Rampage Through the Valley 1:39:00 - Final High-Value Target Capture 1:44:20 - Session Recap & Video Wrap-up 1:45:43 - End of Video 📖 Interactive written walkthrough with clickable timestamps: https://pixelfungaming.com/videos/farcry-6-el-este-region-live-8

Hitman Absolution: BlackWater Park - Mission 17
The video begins with the main menu and selection of the 'Normal' difficulty for a new game in Hitman Absolution. A cinematic sequence shows Agent 47 driving a hearse into Chicago at night before stopping at Tommy Clemenza's tailor shop. Inside, the bloodied 47 requests a new suit. The tailor, Tom, custom fits 47 with his iconic black suit, white shirt, and red tie, completing the 'One of a Kind' portion of the mission. The scene shifts to a tense rooftop negotiation at Blackwater Park. A man, Wade, and a woman, Layla, meet with a cowboy hat-wearing villain, Dexter. When Dexter refuses to hand over the girl, Veronica, and instead reveals the briefcase contains money, Dexter's crew leader attempts to shoot him but is killed by Dexter's bodyguard. Dexter and Layla then enter the building via helicopter. Agent 47 arrives in a taxi below Blackwater Park, marking the start of the 'Infiltrate Blackwater' objective. 47 immediately kills two security guards and takes a security disguise. He moves stealthily through the exterior park area, using Instinct to observe guards. He then sabotages a water pump to lure guards and subdue them, changing into a clean security uniform. Inside the complex, 47 moves past patrolling guards and enters a security office where he kills a guard and steals his uniform (a red bellboy outfit) before hiding the body in a cabinet. Using the bellboy disguise, 47 locates and overrides the retina scanner to activate the elevator. He enters the elevator and shoots out the security camera. The elevator reaches the penthouse where 47, dressed in his black suit, confronts Wade and Layla, before being identified by Wade who alerts Dexter. Dexter, infuriated, rages over the phone about 47's resilience. Layla interjects, claiming she has a way to stop him. The final cinematic sequence shows a disguised 47 (as a concierge) sharing an elevator with a sushi delivery ninja, who is then immediately shot dead by guards waiting outside the penthouse doors in a gory fashion. 47 descends the elevator shaft as the objective shifts to 'Locate Layla,' concluding the mission segment with a summary screen. Chapters: 0:00:00 - 0:08:00 - Main Menu and Cinematic Intro: The New Suit 0:08:00 - 1:04:00 - Agent 47 drives to the tailor shop 1:04:00 - 2:29:00 - Cinematic: 'One of a Kind' - Agent 47 gets his new suit 2:29:00 - 4:43:00 - Cinematic: Rooftop Negotiation and Betrayal 4:43:00 - 5:22:00 - Cinematic: Arrival at Blackwater Park; Part III Begins 5:22:00 - 6:28:00 - Infiltration and Initial Disguise (Security Guard) 6:28:00 - 7:20:00 - Stealth Movement through the Park Exterior 7:20:00 - 8:54:00 - Sabotaging the Water Pump and Acquiring New Disguise 8:54:00 - 10:27:00 - Entering the Facility and Moving Through Vents 10:27:00 - 12:57:00 - Interior Stealth and Acquiring the Bellboy Disguise 12:57:00 - 17:10:00 - Accessing the Penthouse via Elevator and Disabling Security 17:10:00 - 18:48:00 - Cinematic: Confrontation in the Penthouse and Dexter's Rage 18:48:00 - 20:01:00 - Cinematic: The Sushi Ninja and Mission End 📖 Interactive written walkthrough with clickable timestamps: https://pixelfungaming.com/videos/hitman-absolution-blackwater-park-mission-17

Sherlock Holmes : Crimes and Punishments - Riddle of the rails - Part 1
Sherlock Holmes: Crimes & Punishments gameplay walkthrough of Case 3: Riddle on the Rails. The video begins at 221B Baker Street where Dr. Watson tries to convince Sherlock to take a vacation. Their plans are interrupted by Mycroft Holmes, who seeks Sherlock's help regarding a potential terrorist threat by a group called 'The Merry Men'. A week later, while waiting at Evesham station, Sherlock and Watson witness a train seemingly vanish into thin air. The investigation leads them through several stations, including Bridlington and Chesterfield, as they interview station masters and witnesses, collect evidence, and use Sherlock's unique deduction skills to uncover the truth behind the impossible disappearance. The video concludes with Sherlock reconstructing a clever deception involving a modified handcar used to fake the train's arrival. Chapters: 0:00:00 - Introduction and main menu navigation 0:01:20 - Opening cutscene: Watson suggests a countryside retreat 0:02:11 - Mycroft Holmes arrives with a grave request for assistance 0:05:46 - The mystery begins: A train vanishes at Evesham Station 0:08:30 - Sherlock examines the tracks for clues and physical traces 0:13:00 - Using Sherlock's 'Imagination' talent to visualize the event 0:17:50 - Interviewing Evesham Station Master Everett 0:24:43 - Searching the station interior for telegrams and documents 0:31:06 - Traveling to Bridlington Station to investigate the delay 0:34:42 - Portrait and interview of the engineer, Mr. Robinson 0:41:12 - Speaking with an angry passenger forced off the train 0:42:27 - Deduction Space: Linking clues about the 'special wagon' 0:46:00 - Further evidence collection inside Bridlington Station 0:51:17 - Reaching Chesterfield Station to find the missing link 0:56:00 - Portrait of the intoxicated Chesterfield Station Master 1:00:15 - Finding the dismantled handcar parts in the storehouse 1:04:12 - Experiment: Reconstructing the 'fake train' apparatus 1:05:10 - Final thoughts on the train's impossible disappearance 📖 Interactive written walkthrough with clickable timestamps: https://pixelfungaming.com/videos/sherlock-holmes-crimes-and-punishments-riddle-of-the-rails-part-1

HITMAN: Colorado- Slushy pit accident kill
The mission begins with Agent 47 infiltrating a militia compound in Colorado. He starts by poisoning a coffee cup at a technical station and waiting for a guard to leave his post. After tracking down a specific guard, he subdues him to secure an Interpol badge and hides the body in a crate to remain undetected. Agent 47 then navigates through the farm area, bypassing various guards to reach Penelope Graves. He uses the stolen badge as a ruse to convince Graves to meet him for a private conversation. The encounter leads to a secluded shed where he recruits her as an 'insider.' Once she dismisses her guards to reflect on the deal, he follows her to the edge of a slurry pit and pushes her in, completing the assassination as an accident kill. Chapters: 0:00:00 - 0:00:25 - Poisoning the Technical Station Coffee 0:00:25 - 0:01:18 - Waiting for the Guard to Vacate 0:01:18 - 0:01:47 - Securing the Interpol Badge 0:01:47 - 0:03:00 - Navigating the Militia Compound 0:03:00 - 0:04:10 - Initiating the Ruse with Penelope Graves 0:04:10 - 0:05:10 - Private Meeting in the Shed 0:05:10 - 0:05:40 - Elimination at the Slurry Pit 📖 Interactive written walkthrough with clickable timestamps: https://pixelfungaming.com/videos/hitman-colorado-slushy-pit-accident-kill

Sniper Elite 3 : Death Match - Ambush kill
The gameplay opens with the character, a sniper, taking cover behind sandbags in an arid, rocky desert environment, overlooking a distant village. The character cautiously surveys the area, moving along the defensive fortifications. The character utilizes the scope to locate and engage distant enemy soldiers. The first shots are taken, resulting in a series of successful sniper kills, confirmed by the X-ray killcam showing internal damage, including a headshot. After the initial engagement, the character leaves the entrenched position and sprints across the sandy terrain toward the beach. The character moves past debris, including destroyed vehicles and barbed wire obstacles, utilizing structures for temporary cover. Finding a large, camouflaged cylindrical object, the character takes a knee and scopes in again, aiming across a canyon toward a distant position. The character executes another precise shot, scoring a 'LUNG SHOT' indicated by the tactical killcam. The character continues moving rapidly through the hostile environment, advancing past a damaged tank and entering a partially destroyed building. The character climbs a ladder to reach a high vantage point, positioning inside the back of a stationary truck bed, preparing for the next engagement. Chapters: 0:00 - 0:44 - Establishing Cover and Observing the Battlefield 0:44 - 1:04 - First Sniper Engagement and Kill Streak 1:04 - 1:44 - Desert Advance and Lung Shot Killcam 1:44 - 2:24 - Moving Through the Outpost and Securing High Ground 📖 Interactive written walkthrough with clickable timestamps: https://pixelfungaming.com/videos/sniper-elite-3-death-match-ambush-kill

Sherlock Holmes : Crimes and Punishments - The fate of Black Peter - Part 1
Sherlock Holmes investigates a gruesome murder in the case titled 'The Fate of Black Peter'. The investigation begins at 221B Baker Street, where Holmes demonstrates his eccentric target practice methods before being visited by Inspector Lestrade. After receiving details about the victim, Peter Carey, Holmes travels to the crime scene at Woodman's Lee. Upon arrival, he explores the estate grounds and conducts an in-depth interview with the widow, Judith Carey, utilizing his keen observation skills to construct a character portrait. The detective then moves inside the garden cabin where the murder occurred, meticulously examining the scene where the victim was pinned to the wall with a harpoon. By analyzing physical clues like a stained notebook and signs of a forced entry, Holmes concludes that a break-in was attempted and coordinates with Lestrade to set a night-time ambush for the mysterious intruder. The investigation begins with an ambush at Woodman's Lee, leading to the arrest of a young suspect, John Hopley Neligan. He is taken to Scotland Yard, where the detective begins a thorough examination of his personal belongings, including a ring, a handkerchief, and a notebook filled with cryptic abbreviations. An interrogation follows, utilizing a detailed character portrait to uncover physical clues about the suspect's background, such as his expensive but ill-fitting clothing and calloused hands. After a brief return to Baker Street to consult with Dr. Watson and review research materials in the archives, the detective travels back to Scotland Yard for a second round of questioning. Connecting these threads within the Deduction Space reveals new theories regarding the suspect's failed break-in attempts. The search then returns to the original crime scene at Woodman's Lee to interview Mrs. Carey, whose religious past and historical connection to Plymouth provide vital context to the ongoing mystery. The investigation involves constant referencing of the casebook and evidence logs before concluding with a final review of the clues and a return to the game's main menu. Chapters: 0:00:00 - Title screen and game introduction 0:02:24 - Opening cinematic for The Fate of Black Peter 0:03:04 - Sherlock's blindfolded target practice at Baker Street 0:04:21 - Inspector Lestrade presents the murder case details 0:06:11 - Exploration and item interaction at 221B Baker Street 0:07:22 - Sherlock selects a formal outfit from his wardrobe 0:09:02 - Reviewing victim profiles during the carriage ride 0:09:36 - Arrival and exterior investigation at Woodman's Lee 0:11:46 - Interviewing Judith Carey at the estate 0:12:13 - Creating a detailed character portrait of Judith Carey 0:14:16 - Examination of the murder scene inside the cabin 0:15:30 - Analyzing bloodstains and a mysterious notebook 0:16:15 - Deduction sequence and planning the midnight ambush 00:00:00 - Ambush and arrest of John Neligan at Woodman's Lee 00:02:40 - Arrival at Scotland Yard to begin the official investigation 00:03:45 - Detailed examination of the suspect's personal belongings 00:05:15 - First interrogation of Neligan and character portrait analysis 00:08:15 - Reviewing evidence and case documents during carriage travel 00:10:00 - Investigating Baker Street and consulting archives 00:13:00 - Second interrogation focused on the cryptic notebook 00:15:30 - Connecting clues within the Deduction Space 00:18:45 - Returning to Woodman's Lee to search for new leads 00:20:30 - Questioning Mrs. Carey about her past in Plymouth 00:24:45 - Analyzing new character profiles while traveling 00:27:00 - Re-evaluating evidence at the Scotland Yard morgue area 00:29:50 - Returning to the main menu 📖 Interactive written walkthrough with clickable timestamps: https://pixelfungaming.com/videos/sherlock-holmes-crimes-and-punishments-the-fate-of-black-peter-part-1

RDR2 - Reaching Top 3 (#1) Using Sniper In Trade Route
The mission begins with the player positioned atop a moving steam locomotive during a Trade Route event in Red Dead Online. Using a Rolling Block Rifle with a long-range scope, the player systematically eliminates waves of bandits attacking from the rocky cliffs and canyons surrounding the tracks. The train makes its first scheduled stop at a desert station where the first set of goods is successfully secured. As the journey resumes, combat intensifies with bandits appearing on horseback and perched on high ridges. At one point, the train is forced to slow down as a line of wagons blocks the tracks, requiring the player and teammates to clear the path under heavy fire. After defending the cargo through several treacherous stretches of terrain, the train finally pulls into Benedict Point. The event concludes with a total of 18 goods protected and the player achieving a high kill count. Following the event, the player transitions back to the open world during a heavy nighttime thunderstorm. The final moments of the gameplay show the player meticulously cleaning their firearms to maintain weapon performance before mounting their horse and riding toward Gaptooth Ridge. Chapters: 0:00:00 - 0:02:05 - Initial Train Defense and Sniper Gameplay 0:02:05 - 0:02:25 - First Station Arrival and Goods Secured 0:02:25 - 0:03:45 - Continued Bandit Encounters Through Canyons 0:03:45 - 0:05:13 - Clearing Track Obstructions and Mounted Combat 0:05:13 - 0:05:29 - Second Station Stop and Cargo Protection 0:05:29 - 0:07:34 - Final Combat Push into Benedict Point 0:07:34 - 0:08:18 - Trade Route Completion and Rewards Summary 0:08:18 - 0:09:22 - Free Roam Transition and Weapon Maintenance 📖 Interactive written walkthrough with clickable timestamps: https://pixelfungaming.com/videos/rdr2-reaching-top-3-1-using-sniper-in-trade-route

Sniper Elite 3 - Pont Du Fahs Airfield
This video is a complete, high-level walkthrough of the 'Pont Du Fahs Airfield' mission in Sniper Elite III. The gameplay emphasizes a tactical stealth approach, demonstrating how to effectively use silenced weapons like the Welrod, perform quiet takedowns, and utilize environmental distractions to remain undetected. The mission follows elite sniper Karl Fairburne as he infiltrates a heavily guarded German airfield in North Africa. Objectives include sabotaging key infrastructure to create noise cover, infiltrating an extensive underground bunker system to locate maps of the secret 'Ratte' super-tank factory, and providing overwatch for an Allied LRDG assault. The video showcases masterful use of sound masking by sabotaging generators, strategic placement of landmines to neutralize enemy reinforcements, and precise long-range sniping that triggers the game's iconic X-ray kill cams. The mission concludes with an intense firefight against armored vehicles and an extraction sequence under heavy fire. Chapters: 0:00:00 - Introduction and Menu Navigation 0:00:14 - Mission Briefing: Pont Du Fahs Airfield 0:01:28 - Weapon Loadout and Customization 0:03:56 - Infiltration: Reaching the Airfield Perimeter 0:07:32 - Sabotaging Generators for Noise Cover 0:11:45 - Stealthily Clearing the Outer Hangars 0:16:55 - Gaining Access to the Bunker Network 0:21:40 - Identifying the Ratte Factory Map 0:25:55 - Releasing Prisoners from the Holding Area 0:31:45 - Neutralizing the Radio Operator 0:37:32 - Positioning for the LRDG Support 0:42:25 - Destroying German Vehicles with Explosives 0:47:40 - Long-Distance Sniping from the Lookout Tower 0:52:15 - Intense Firefight and Vehicle Destruction 0:58:30 - Clearing Final Resistance and Reaching Evac 1:00:27 - Mission Success and Extraction Cinematic 1:00:50 - Mission Score and Summary 📖 Interactive written walkthrough with clickable timestamps: https://pixelfungaming.com/videos/sniper-elite-3-pont-du-fahs-airfield

Sniper Elite 3 - Siwa Oasis
The mission 'Siwa Oasis' begins with a strategic briefing focused on uncovering the truth behind Project Seuche by searching Vahlen’s office. Initial gameplay focuses on the oasis outskirts, where the character utilizes dense foliage and terrain for silent takedowns of German guards. A primary early objective involves sabotaging multiple anti-aircraft guns, achieved through well-placed grenades and explosive distractions. Upon entering the dense streets of the old city, the character balances close-quarters combat using the silenced Welrod pistol with strategic relocation to high-ground sniper nests. Key mechanics include sound masking, where the character times long-range shots with overhead airplane noise to remain undetected. After successfully infiltrating the headquarters and looting critical documents, the character navigates a complex scaffolding system to reach a final vantage point. Using binoculars to tag officers and identify the primary target based on gathered intel, the mission concludes with a precise, long-range sniper shot on the high-ranking German official. The Siwa Oasis mission in Sniper Elite 3 begins with the character positioned on a high wooden scaffolding, overlooking the sprawling desert town. Armed with an M1 Garand, the primary goal is to systematically eliminate German forces while maintaining stealth. Early segments focus on long-range precision, utilizing the Focus Time mechanic to steady aim for critical hits. X-ray kill cams frequently highlight the devastating impact of these shots, showing detailed skeletal and internal organ damage. As the operation progresses, the character uses the environmental noise of passing airplanes to mask the sound of rifle shots, preventing the garrison from becoming fully alerted. After clearing several patrols and key guards from the initial perch, the focus shifts to armored threats. The character deploys a Panzerschreck to neutralize a tank moving through the streets. Secondary objectives involve finding collectibles like Vahlen's journals and clearing out enemy sniper nests. The mission concludes after a tense final exchange with enemy sharpshooters, leading to a summary screen that details the kills, experience earned, and the player's promotion to a new rank. Chapters: 0:00:00 - Mission Select and Briefing 0:02:30 - Infiltrating the Oasis Outskirts 0:05:30 - Sabotaging the AA Gun 0:08:00 - Sniper Gameplay from the Vantage Point 0:11:00 - Long-range Sound-masked Sniping 0:14:00 - Stealth Infiltration through Town Streets 0:18:12 - Searching Vahlen's Office for Intel 0:22:00 - Reaching the Final Vantage Point 0:25:30 - Identifying and Eliminating the Target Officer 0:00:00 - Mission start at the Siwa Oasis overlook 0:02:15 - Executing long-range precision headshots 0:04:30 - Using aircraft noise to mask rifle shots 0:06:45 - Clearing the central plaza from the elevated perch 0:09:00 - Targeting distant guards in fortified towers 0:11:30 - X-ray kill cam highlights internal organ damage 0:14:00 - Systematic elimination of enemy supply depot patrols 0:16:30 - Collecting Vahlen's Journal collectibles 0:19:15 - Transitioning to mid-range engagement zones 0:22:00 - Neutralizing an enemy tank with the Panzerschreck 0:24:45 - Stealth movement through the stone ruins 0:27:15 - Final sniper duel against enemy sharpshooters 0:29:45 - Mission completion and rank promotion summary 📖 Interactive written walkthrough with clickable timestamps: https://pixelfungaming.com/videos/sniper-elite-3-siwa-oasis

Sniper Elite 3 - Fort Rifuglo Part 1 ( Getting inside )
The mission begins with a tactical briefing for the Fort Rifugio operation, where the objective is to rescue a held informant. The operation starts under the cover of night as the character approaches the massive cliffside fortification. Initial progress involves utilizing binoculars to tag enemy patrols and identify critical searchlight towers for secondary objectives. Stealth remains the primary focus while navigating the rocky terrain, highlighted by a silent close-quarters takedown of an isolated guard. Moving closer to the perimeter, a silenced Welrod pistol facilitates a precise headshot on a watchtower sentry. The character then scales a long ladder to reach a higher vantage point, utilizing a sniper nest to silently thin the ranks of guards near the main gate. Upon successfully infiltrating the fort's interior, the objective updates to locating the informant's specific cell. Tense moments follow in the inner courtyard, where the character carefully maneuvers behind crates and trucks, timing movements to avoid being spotted by numerous patrols. The atmosphere intensifies when a guard discovers a hidden body, triggering an alert status. Despite attempts to remain hidden and pick off searchers, a final confrontation erupts into a frantic firefight, ultimately resulting in the character's death and mission failure. Chapters: 0:00:00 - 0:01:14 - Mission Briefing and Fort Rifugio Setup 0:01:14 - 0:02:40 - Initial Infiltration and Stealth Takedown 0:02:40 - 0:04:22 - Stealthy Approach to the Fort Perimeter 0:04:22 - 0:06:38 - Scaling the Fort and Gaining Entry 0:06:38 - 0:08:30 - Scouting the Inner Courtyard for the Informant 0:08:30 - 0:10:29 - Tense Stealth Evasion in the Courtyard 0:10:29 - 0:10:44 - Final Firefight and Mission Failure 📖 Interactive written walkthrough with clickable timestamps: https://pixelfungaming.com/videos/sniper-elite-3-fort-rifuglo-part-1-getting-inside

Grand Theft Auto IV : Exploring the prison
Niko Bellic starts his day in Liberty City by exiting his apartment and hailing a taxi. He travels to an underground weapons shop in Chinatown to stock up on hardware, including an RPG, sniper rifle, and assault rifle ammo. After equipping himself, he takes another cab to the Helitours landing pad, where he hijacks a Maverick helicopter. Niko flies the stolen aircraft over the water to the Alderney State Correctional Facility. Upon arrival, he lands directly in the yard and spends several minutes exploring the prison's restricted zones on foot, observing inmates and listening to various speeches from religious figures within the compound. He later steals another helicopter from within the facility to reposition himself onto a high roof overlooking the courtyard. From this vantage point, Niko initiates a fierce shootout with the prison guards, quickly escalating his wanted level to five stars. He holds his position against waves of security and successfully downs a police helicopter with a rocket launcher before finally succumbing to heavy gunfire from all directions. Chapters: 0:00:00 - 0:00:30 - Leaving the apartment and hailing a taxi 0:00:30 - 0:01:30 - Purchasing heavy weaponry at the Chinatown gun shop 0:01:30 - 0:02:25 - Hijacking a tour helicopter from the heliport 0:02:25 - 0:04:00 - Aerial journey to the Alderney State Correctional Facility 0:04:00 - 0:06:40 - On-foot exploration of the prison interior and yards 0:06:40 - 0:10:15 - Repositioning via helicopter to a rooftop vantage point 0:10:15 - 0:11:27 - Final stand against guards and police forces 📖 Interactive written walkthrough with clickable timestamps: https://pixelfungaming.com/videos/grand-theft-auto-iv-exploring-the-prison

Sniper Elite 3 Co-op with @kickasgameing
The mission begins with a character meticulously preparing a sniper rifle in a fortified room as artillery fire impacts the surroundings. Movement commences as the character navigates through a building to reach the ramparts. Long-range combat follows, focusing on the elimination of artillery spotters across the valley using focused aim and precision fire. The character moves through sandy trenches and behind sandbag fortifications to locate remaining targets. A cinematic sequence depicts an enemy flak truck arriving before being destroyed by a massive explosion. After recovering from a nearby blast, the character infiltrates a mountain pass, utilizing rocky terrain for cover. Stealth tactics involve quiet movement and close-quarter takedowns of German patrols. Silenced weapons like the Welrod provide covert eliminations while moving toward enemy artillery batteries. Sabotage of Nebelwerfer positions is carried out using grenades and suppressive fire. The character leverages environmental noises to mask long-distance sniper shots. Close-quarters combat involves clearing fortified areas with an MP40 and using medkits to recover from injuries during intense firefights. The mission concludes as the final artillery crew is neutralized and an extraction sequence triggers. Chapters: 0:00:00 - 0:00:45 - Mission Briefing and Character Preparation 0:00:45 - 0:02:05 - Securing the Ramparts and Eliminating Spotters 0:02:05 - 0:03:18 - Cinematic Destruction and Recovery from Blast 0:03:18 - 0:04:30 - Stealth Infiltration of the Mountain Pass 0:04:30 - 0:05:30 - Sabotage of the First Artillery Battery 0:05:30 - 0:06:40 - Cave Navigation and Stealth Takedowns 0:06:40 - 0:08:00 - High-Intensity Firefight and Relocation 0:08:00 - 0:09:22 - Final Artillery Neutralization and Area Clear 0:09:22 - 0:10:56 - Mission Summary and Loading Screens 📖 Interactive written walkthrough with clickable timestamps: https://pixelfungaming.com/videos/sniper-elite-3-co-op-with-kickasgameing

Dead Island 2: Redacted | Bodycount Weapon Location Near Military Base Watchtower | #shorts
The quest for a legendary weapon unfolds across several shipping containers in a sun-drenched military encampment. Initial investigation begins at Container 78, where the character climbs through a roof hatch and smashes wooden crates, only to find a note regarding transit damage. The search shifts to Container 58, revealing more packed supplies but no primary objective. Action intensifies upon approaching Container 66, where a massive Crusher zombie stands guard. The character initiates a swift melee assault, delivering a series of critical blows that quickly bring the powerful foe down. Inside the final container, more crates are cleared away to uncover a specialized Priority Asset case. Opening the case concludes the Lost & Found mission and grants the legendary Bodycount assault rifle as a reward. Chapters: 0:00:00 - 0:00:22 - Investigating Container 78 and checking for items 0:00:22 - 0:00:28 - Brief search of Container 58 0:00:28 - 0:00:42 - Melee combat encounter with a Crusher zombie 0:00:42 - 0:01:00 - Opening the Priority Asset case and claiming Bodycount 📖 Interactive written walkthrough with clickable timestamps: https://pixelfungaming.com/videos/dead-island-2-redacted-bodycount-weapon-location-near-military-base-watchtower-shorts

Dead Space 2 - PT 3
Isaac Clarke encounters a disturbed survivor behind a security gate who urges him to remember "Patient Five." Following a tense communication with Daina, Isaac enters a spacious medical lobby where a security lockdown triggers an ambush. Necromorphs burst through vents, forcing Isaac to defend himself using his plasma cutter to strategically dismember limbs. After clearing the room and scavenging for resources like plasma energy and credits by stomping fallen enemies, Isaac navigates further into the facility. He collects a Power Node and a text log while moving through clinical corridors. Upon reaching a save station, he records his progress before entering a room filled with stasis beds. After eliminating a lone threat, he faces a technical challenge: hacking a security console to proceed. After several failed attempts, he successfully bypasses the security lockout, reviews his objectives, and prepares for the next phase of his escape from the Sprawl. Chapters: 0:00:00 - 0:00:15 - Encounter with the patient NPC 0:00:15 - 0:01:13 - Medical lobby ambush and combat 0:01:13 - 0:01:51 - Scavenging for supplies and looting corpses 0:01:51 - 0:02:29 - Corridor navigation and power node retrieval 0:02:29 - 0:02:41 - Saving progress at the hospital terminal 0:02:41 - 0:03:03 - Clearing the stasis bed room 0:03:03 - 0:04:10 - Security console hacking sequence 0:04:10 - 0:04:42 - Menu navigation and objective review 📖 Interactive written walkthrough with clickable timestamps: https://pixelfungaming.com/videos/dead-space-2-pt-3

Dead Space 2 PT 2
Isaac Clarke navigates the harrowing psychiatric ward of the Sprawl space station. The mission begins with Isaac cautiously exploring dimly lit corridors and medical offices, utilizing a save station before advancing into the facility's depths. He ventures into a claustrophobic crawlspace where flickering lights and distant screams heighten the tension. Upon exiting the vents, Isaac reaches a surgical theater and speaks with Dana over comms while unlocking a kinesis module. He immediately puts the device to use, grabbing surgical stakes and environmental objects to impale approaching necromorphs. Combat intensifies as Isaac moves through high-ceilinged observation rooms and medical hubs, engaging multiple enemies with precise strikes. The sequence concludes with Isaac pushing through a series of secure doors and looted medical bays as the station's alarms signal an escalating outbreak. Chapters: 0:00:00 - 0:00:44 - Navigating the Psychiatric Ward corridors 0:00:44 - 0:01:18 - Crawling through the dark service vents 0:01:18 - 0:02:13 - Reaching the surgical unit and acquiring kinesis 0:02:13 - 0:03:15 - Surgical bay combat using environmental objects 0:03:15 - 0:04:12 - Traversing the medical hub and elevator sequence 0:04:12 - 0:05:01 - Intense necromorph skirmish in the observation theater 📖 Interactive written walkthrough with clickable timestamps: https://pixelfungaming.com/videos/dead-space-2-pt-2

Sniper Elite V2 Gameplay - Part 1
The mission begins with a historical overview of Germany's V2 rocket program and the Allied efforts to capture Nazi scientists during Operation Overcast. The operative navigates the war-torn ruins of Berlin, carefully surveying enemy positions through binoculars to plan a tactical approach. Early objectives emphasize stealth, involving the strategic placement of trip mines and luring guards away from their posts for silent takedowns using a suppressed pistol. After booby-trapping a fallen sentry to cover the rear, the operative reaches a designated vantage point overlooking the Brandenburg Gate. A cinematic cutscene depicts a clandestine meeting between Major General Hans Von Eisenberg and his Russian contact. The gameplay shifts to precise long-range marksmanship as the operative executes a high-stakes assassination. The square quickly erupts into a chaotic battlefield, triggering an intense sniper duel against waves of infantry and marksmen stationed in surrounding buildings. Signature X-ray bullet cam sequences highlight successful headshots as reinforcements flood the area. Following an initial failed attempt to breach the square, the operative utilizes tactical re-positioning and aggressive urban combat to eliminate remaining hostiles. The mission concludes with a successful extraction through the ruins of Berlin. Chapters: 0:00:00 - 0:02:25 - Historical Introduction and Mission Briefing 0:02:26 - 0:05:03 - Surveying the Ruined Berlin Streets 0:05:04 - 0:08:13 - Setting Traps and Adjusting Tactical Settings 0:08:14 - 0:11:21 - Stealth Infiltration and Sentry Elimination 0:11:22 - 0:12:54 - Navigating to the Vantage Point 0:12:55 - 0:14:12 - Assassination of General Von Eisenberg 0:14:13 - 0:17:15 - High-Stakes Sniper Duel in the Square 0:17:16 - 0:21:11 - Combating Reinforcements and Failed Escape Attempt 0:21:12 - 0:24:38 - Urban Firefight and Strategic Re-engagement 0:24:39 - 0:27:32 - Final Extraction and Mission Success Summary 📖 Interactive written walkthrough with clickable timestamps: https://pixelfungaming.com/videos/sniper-elite-v2-gameplay-part-1

Dead Space 2 - Part 4
The mission opens with the character at a store terminal within a sprawling space station. After browsing through various equipment options and weapon schematics, a purchase is made for a new Engineering Suit. The character enters a nearby kiosk for an automated suit change, emerging in more robust armor with enhanced capabilities. Progression leads through a secure airlock into a brief vacuum environment before returning to a pressurized medical wing. An intense combat encounter breaks out in the hospital lobby against multiple Necromorph variants. Tactical dismemberment and stasis are utilized effectively to manage the overwhelming threat. Following the battle, dialogue with an ally named Dana provides critical context about the character's amnesia and the objective to reach a tram station. The journey continues through maintenance ducts and darkened corridors, where frequent looting for ammunition and health packs occurs. Another store terminal is accessed to acquire an Agility Pulse Rifle for improved firepower. Exploration leads into a residential area where localized skirmishes with smaller enemies ensue. A chilling moment occurs when the character witnesses a gruesome NPC transformation behind a glass barrier. A holographic communication from Nolan Stross adds narrative tension before the final segments. The gameplay concludes with high-difficulty combat encounters in narrow residential hallways, involving multiple failed attempts against aggressive Necromorph ambushes. Chapters: 0:00:00 - 0:01:08 - Inventory Management and Store Purchase 0:01:08 - 0:02:15 - Suit Upgrade Animation and Air Bridge Transit 0:02:15 - 0:03:25 - Intense Combat in the Hospital Lobby 0:03:25 - 0:04:42 - Navigating Maintenance and Audio Log Discovery 0:04:42 - 0:05:30 - Acquiring the Agility Pulse Rifle 0:05:30 - 0:06:11 - Exploring Darkened Corridors and Looting 0:06:11 - 0:06:30 - Saving Progress and Sector Transit 0:06:30 - 0:07:40 - Entering the Residential Hallways 0:07:40 - 0:08:08 - Witnessing Necromorph Infection Behind Glass 0:08:08 - 0:09:12 - Dialogue with Nolan Stross and Area Sweep 0:09:12 - 0:10:17 - Apartment Exploration and Combat Skirmish 0:10:17 - 0:11:03 - Close Quarters Confrontation in an Apartment 0:11:03 - 0:11:55 - Laundry Room Navigation and Resource Gathering 0:11:55 - 0:12:45 - Hallway Ambush and Initial Combat Failure 0:12:45 - 0:14:12 - Repeated Combat Attempts and High-Difficulty Encounters 0:14:12 - 0:16:58 - Final Combat Sequence and Conclusion 📖 Interactive written walkthrough with clickable timestamps: https://pixelfungaming.com/videos/dead-space-2-part-4

Payday 2 Gameplay - Benevolent Bank ( Big Bank )
The crew prepares for a major score at the Benevolent Bank, starting with a detailed planning phase to purchase surveillance, hacking assets, and entry tools. Once the team arrives on-site, they begin in casing mode to scout the lobby and locate the server room. Stealth is quickly compromised, forcing the team to put on their masks and suppress both security and civilians. The heist moves into a loud phase as the team hacks computer terminals to retrieve codes and manage a time lock. A massive police assault forces the players into high-intensity combat across the bank lobby and upper levels. After rebooting the security systems, the team breaches the vault floor using thermite and begins looting safe deposit boxes while holding back continuous waves of SWAT forces. The mission concludes with the crew defending their position and securing as much loot as possible under heavy fire. The high-stakes heist of The Big Bank continues with an intense standoff against law enforcement during a full-scale police assault. The crew navigates through the bank's offices and stairwells, engaging in close-quarters combat with SWAT teams while transporting heavy bags of money and gold. Once on the rooftop, defensive positions are established to protect the loot-securing process. Using a crane-assisted extraction method, the team methodically loads dozens of bags into a secure lift. Throughout the process, the characters manage resources, revive downed teammates, and fend off waves of elite units, including shields and snipers. The mission concludes with a successful extraction, followed by a detailed summary of the contract pay, loot bonuses, and experience points earned. Chapters: 0:00:00 - Lobby Phase and Job Overview 0:01:17 - Mission Pre-Planning and Asset Purchasing 0:06:54 - Entering the Bank in Casing Mode 0:07:34 - Stealth Compromised and Initial Gunfight 0:08:26 - Hacking Terminals for Security Codes 0:10:56 - Defending the Lobby During Police Assault 0:13:57 - Vault Breach and Thermite Deployment 0:16:01 - Securing Safe Deposit Box Loot 0:19:00 - Intense Vault Defense Against SWAT 0:22:30 - Final Loot Collection and Combat Standoff 0:30:00 - Police assault intensifies in the bank interior 0:31:30 - Transporting money bags through the stairwells 0:33:00 - Relocating to the rooftop for loot extraction 0:35:00 - Rooftop firefight and securing the first gold bags 0:37:30 - Maintaining a defensive perimeter against SWAT waves 0:40:00 - Coordinating bag movement under heavy fire 0:42:30 - Final push to clear remaining loot from the roof 0:45:00 - Holding the extraction point for the final lift 0:45:55 - Mission success and end-game reward summary 📖 Interactive written walkthrough with clickable timestamps: https://pixelfungaming.com/videos/payday-2-gameplay-benevolent-bank-big-bank

Far Cry New Dawn - Crow's Feet Eagle's eyes (Nana) Walkthrough
The mission begins at Crow's Farm in Far Cry New Dawn, where a character initiates a marksmanship challenge set by the veteran sniper, Nana. The first phase requires sniping ten helmets mounted on poles around the farmstead under a strict time limit. Once completed, Nana initiates a second, more challenging round with helmets placed at greater distances and behind partial cover. Following these initial tests, the character climbs to the top of a large silo to gain a superior vantage point for the next trial. This third round involves popping a series of floating balloons released into the air. The atmosphere shifts from training to combat as a group of Highwaymen launches an ambush on the farm. A prolonged defensive battle follows, with the character using the sniper rifle to eliminate waves of attackers approaching in quads, trucks, and on foot. Nana and Carmina provide support throughout the intense firefight. After repelling the final wave of enemies, the character descends from the silo to speak with Nana, who expresses her respect for the display of skill and officially joins the group as a Gun for Hire. Chapters: 0:00:00 - 0:00:33 - Sniper Challenge: Helmet Round 1 0:00:33 - 0:01:27 - Sniper Challenge: Helmet Round 2 0:01:27 - 0:02:44 - Dialogue with Nana and Silo Ascent 0:02:44 - 0:03:20 - Sniper Challenge: Balloon Round 0:03:20 - 0:04:10 - Ambush Warning and Final Preparations 0:04:10 - 0:07:05 - Defending Crow's Farm Against Highwaymen 0:07:05 - 0:08:28 - Mission Complete and Nana Recruitment 📖 Interactive written walkthrough with clickable timestamps: https://pixelfungaming.com/videos/far-cry-new-dawn-crow-s-feet-eagle-s-eyes-nana-walkthrough

Goat Simulator Gameplay - Pt1 - hilarious :)
The gameplay starts in a quiet suburban yard where a goat immediately begins completing movement challenges. It leaps over fences and metal bars to earn score multipliers and progress through various tasks. The goat ventures onto the main road, headbutting pedestrians and scaring a crowd of protesters near a tunnel entrance. Frequent interactions with moving vehicles result in high-score ragdoll sequences as the goat is tossed across the map by trucks and cars. A backyard garden party becomes the site of significant destruction as the goat knocks over tables, chairs, and guests to achieve the 'Party Crasher' and 'Biggest Combo' milestones. The exploration continues into a local convenience store and gas station. Inside the store, the goat wreaks havoc on the shelves before headbutting a gas pump, triggering a massive chain-reaction explosion that destroys the entire facility and earns the 'Michael Bay' achievement. Following the explosion, the goat enters a residential home, interrupting a family dinner by headbutting the furniture and its occupants. It then moves to an outdoor pool area filled with trampolines and large water slides. Here, the goat focuses on acrobatic feats, performing multiple front and backflips to complete the 'Flipping Easy' challenge. The session concludes with the goat attaching itself to a firework rocket and flying over the neighborhood before crashing back down into a yard. Chapters: 0:00:00 - 0:00:38 - Initial Movement and Jumping Challenges 0:00:38 - 0:01:00 - Scaring Crowds and Knocking Objects 0:01:00 - 0:01:38 - Traffic Collisions and Ragdoll Stunts 0:01:38 - 0:02:40 - Crashing the Garden Party 0:02:40 - 0:03:10 - Convenience Store Chaos 0:03:10 - 0:03:33 - Gas Station Explosion and High-Score Combo 0:03:33 - 0:04:25 - Neighborhood Navigation 0:04:25 - 0:05:46 - Disrupting the Family Dinner 0:05:46 - 0:07:30 - Trampoline Stunts and Pool Slide Acrobatics 0:07:30 - 0:07:49 - Firework Flight and Final Summary 📖 Interactive written walkthrough with clickable timestamps: https://pixelfungaming.com/videos/goat-simulator-gameplay-pt1-hilarious

Titanfall last titan standing gameplay (Victory)
The gameplay features intense rounds of 'Last Titan Standing' within an industrial facility. The IMC pilot initiates combat using a Titan equipped with rapid-fire Quad Rockets, engaging Militia forces in a series of fast-paced skirmishes. Early engagements involve flanking enemy positions and utilizing tactical shields to mitigate incoming damage while dealing heavy rocket barrages. Successive rounds see the pilot navigating through narrow corridors and open industrial zones, securing multiple Titan kills through precise aim and tactical repositioning. During the third round, the pilot's Titan reaches a critical state, triggering a nuclear ejection that damages nearby enemies. The pilot transitions to on-foot combat, successfully performing a rodeo maneuver to dismantle a remaining enemy Titan from above. The final round concludes with the remaining IMC forces overwhelming the Militia, resulting in a decisive team victory as the match ends. Chapters: 0:00:00 - 0:01:07 - Opening Skirmish and First Round Victory 0:01:07 - 0:02:03 - Close-Quarters Combat in the Facility 0:02:03 - 0:04:02 - Nuclear Ejection and Rodeo Takedown 0:04:02 - 0:06:13 - Halftime and Final Push for Victory 📖 Interactive written walkthrough with clickable timestamps: https://pixelfungaming.com/videos/titanfall-last-titan-standing-gameplay-victory

Titanfall last titan standing : Overlook (Defeat)
The match begins with an intense round of Last Titan Standing on the Overlook map. Controlled by the IMC, the Quad Rocket-equipped Titan maneuvers through tight industrial corridors, engaging multiple Militia targets. Heavy ordnance exchanges occur frequently, requiring strategic use of the Vortex Shield and electric smoke to survive. Round two shifts the focus to more open engagement zones where the team coordinates fire to dismantle enemy mechs. By the third round, the pressure mounts as close-quarters combat dictates the pace, leading to a halftime lead for the IMC. Following the side swap, the battle intensifies as the Militia attempts to reclaim ground. Firefights erupt across the central helipad and elevated walkways. Versatile combat maneuvers include transitioning between direct Titan piloting and providing on-foot anti-Titan support with the Archer rocket. The final rounds culminate in a flurry of ejecting pilots and detonating mechs as both teams fight for map control until the final match summary and leaderboard screens appear. Chapters: 0:00:00 - 0:02:05 - Round 1: Initial Engagement on Overlook 0:02:05 - 0:04:05 - Round 2: Tactical Advancement and Map Control 0:04:05 - 0:05:40 - Round 3: Close-Quarters Brawls and Halftime 0:05:40 - 0:08:00 - Round 4: Militia Counter-Attack After Side Swap 0:08:00 - 0:10:10 - Round 5: High-Stakes Helipad Combat 0:10:10 - 0:12:14 - Final Round and Match Conclusion 📖 Interactive written walkthrough with clickable timestamps: https://pixelfungaming.com/videos/titanfall-last-titan-standing-overlook-defeat

Walking Dead Game: Season 2 episode 3 - In Harms Way PT 5
The mission begins with Clementine navigating a radio control room, searching for a way to create a diversion. She locates a compact disc and plays a loud, festive advertisement over the outdoor speakers to distract the surrounding walkers and guards. The path leads her to a wounded Alvin, who is slumped in a chair. A tense conversation follows where Alvin, realizing his time is short, hands over a small handgun and urges Clementine to escape and protect the group. A guard enters the room, and Alvin uses his remaining strength to shoot him before being killed himself. Clementine escapes through a vent and onto the roof, where she surveys a massive herd of walkers closing in on the facility. She re-enters the building through a skylight, dropping down to ambush Carver just as he is threatening the rest of the group. The momentum shifts as Kenny and the others disarm Carver and take him captive. The encounter concludes with the group confronting the defeated leader, dealing with the grief of Alvin's loss, and making a cold decision regarding Carver's fate. Chapters: 0:00:00 - 0:00:27 - Searching the Radio Station 0:00:27 - 0:00:41 - Initiating the Loud Distraction 0:00:41 - 0:01:46 - Alvin's Final Request 0:01:46 - 0:01:59 - Alvin's Sacrifice and Escape 0:01:59 - 0:02:22 - Rooftop Survey of the Herd 0:02:22 - 0:02:58 - Ambushing Carver 0:02:58 - 0:03:48 - Confronting the Fallen Leader 📖 Interactive written walkthrough with clickable timestamps: https://pixelfungaming.com/videos/walking-dead-game-season-2-episode-3-in-harms-way-pt-5

Walking Dead Game: Season 2 episode 3 - In Harms Way PT 3
Clementine navigates the fortified Howe's Hardware compound to meet with Carver in his office. Upon arrival, she encounters a severely beaten Alvin, while Carver begins a chilling monologue about the nature of leadership and the divide between the strong and the weak. He explains his ruthless philosophy of survival and makes a possessive claim over Rebecca’s unborn child, viewing it as his legacy. The meeting concludes when a radio call alerts Carver to a jammed loading bay door. Under the cover of darkness, the survivors convene to discuss their escape. Tensions flare between Kenny and the rest of the group regarding the use of walkers as a distraction. Jane proposes a daring plan involving rooftop infiltration and the use of walker scent for camouflage. Clementine takes the lead on the mission, using a winch rope to scale the building's exterior. She stealthily traverses the rooftop, avoiding searchlights and patrolling guards. Entering through a skylight, she drops into the stockroom to secure vital communication equipment. After hiding from guards engaged in a tense conversation below, she retrieves several walkie-talkies and makes a narrow escape back to the roof. The mission ends with her descending safely and hiding the stolen devices in her bunk just before the final nightly guard sweep. Chapters: 0:00:00 - 0:01:25 - Summoned to the Office 0:01:25 - 0:03:30 - Carver's Philosophy on Strength 0:03:30 - 0:04:10 - Maintenance Disruption 0:04:10 - 0:07:00 - Escape Strategy Debate 0:07:00 - 0:08:45 - Scaling the Hardware Store 0:08:45 - 0:10:15 - Rooftop Stealth Infiltration 0:10:15 - 0:11:45 - The Walkie-Talkie Heist 0:11:45 - 0:13:14 - Regrouping and Concealment 📖 Interactive written walkthrough with clickable timestamps: https://pixelfungaming.com/videos/walking-dead-game-season-2-episode-3-in-harms-way-pt-3

Farcry 6| live #14 Valle de oro
Welcome to this comprehensive Far Cry 6 gameplay walkthrough, where we delve deep into the heart of the revolution in Valle de Oro. This video covers a series of high-stakes missions centered around the resistance group Máximas Matanzas. Join Dani Rojas as they work to unite the voices of Talia and Paolo with Libertad while navigating the treacherous deals of the smuggler Bembé Alvarez. The journey begins with 'Meet Máximas Matanzas,' taking us through the lush marshes to find the group's secret camp. Following a tense rescue, we move into 'Balance the Books,' which requires an infiltration of the town of Segunda. Here, we face off against FND forces and negotiate with the manipulative Bembé, eventually storming a high-end resort to retrieve a vital smuggling key. The action intensifies in 'Precious Cargo' as we launch an assault on the Azucar Plantation to free Rafael and a group of refugees, only to face a shocking betrayal at the hands of our 'ally' Bembé. Finally, we engage in some guerrilla marketing in 'Hype Bomb.' Witness the creative side of the revolution as we plant leaflet bombs, vandalize Maria Marquessa's propaganda, and scale a massive crane to make a bold statement on live television. This walkthrough showcases various gameplay elements including stealth, intense gunplay, vehicular combat with the Avispa Buzzer, and strategic camp upgrades to strengthen the rebellion. Chapters: 0:00:00 - Mission Start: Navigating to Valle de Oro 0:04:30 - Approaching the hidden Camp Máximas 0:09:15 - Meeting Talia, Paolo, and Bicho 0:13:45 - Mission: Balance the Books - Journey to Segunda 0:17:30 - Negotiating with Bembé Alvarez in the Church 0:22:15 - Night Operations in the Streets of Segunda 0:26:45 - Assault on El Tigre Dormido Hotel 0:31:30 - Clearing FND Soldiers from the Resort 0:36:15 - Retrieving the Black Book and Key Retrieval 0:40:45 - Mission: Precious Cargo - Infiltrating Azucar Plantation 0:45:15 - Firefight and Rescue Operation at the Plantation 0:49:30 - Driving Refugees to the Port Meeting Point 0:54:15 - Bembé's Betrayal and Immediate Combat 0:59:00 - Securing the Chemical Storage Area 1:04:15 - Strategic Camp Facility Upgrades 1:08:45 - Mission: Hype Bomb - Guerrilla Marketing Tactics 1:13:30 - Planting Leaflet Bombs in the Town Square 1:18:15 - Climbing the Massive Crane to Hijack the Airwaves 1:22:45 - Vandalizing Final Posters and Mission Success 📖 Interactive written walkthrough with clickable timestamps: https://pixelfungaming.com/videos/farcry-6-live-14-valle-de-oro

Titanfall pilot hunter gameplay
Gameplay features two complete rounds of 'Pilot Hunter' mode in Titanfall. The mission begins on the Overlook map, where the character drops from a transport ship and immediately enters high-mobility combat. Maneuvering involves continuous wall-running, double jumping, and rooftop traversal to outflank IMC forces. After several infantry skirmishes using a carbine, a heavy Titan is called onto the field. The player utilizes the Titan's Quad Rockets to neutralize enemy mechs and secure a dominant victory for the Militia. The round ends with an epilogue phase where the character successfully destroys the enemy extraction craft. The action then transitions to the industrial Demeter map. Combat continues with a focus on fast-paced Pilot encounters before another Titan deployment leads to a final victory. The session concludes with the successful interception of a second enemy dropship and the final match scoreboard results. Chapters: 0:00:00 - 0:02:35 - Overlook Map Lobby and Initial Pilot Deployment 0:02:35 - 0:05:35 - High-Speed Pilot Skirmishes and Urban Navigation 0:05:35 - 0:06:30 - Titan Deployment and Victory on Overlook 0:06:30 - 0:07:40 - Match Transition and Demeter Map Loading 0:07:40 - 0:08:45 - Demeter Pilot Combat and Industrial Maneuvers 0:08:45 - 0:09:33 - Final Titan Offensive and Extraction Interception 📖 Interactive written walkthrough with clickable timestamps: https://pixelfungaming.com/videos/titanfall-pilot-hunter-gameplay

HITMAN: Episode 5 Colorado - Swamp body dump
Agent 47 navigates a garden environment, visibly carrying a firearm and wearing a tactical leather jacket. He approaches two downed individuals lying on a muddy path between raised garden beds. A notification indicates that a non-target has been killed. He proceeds to hide the evidence by dragging each body individually and dumping them into a water-filled garden planter. After concealing both bodies, a controller layout screen briefly appears as the game is paused. The session resumes shortly after, showing Agent 47 standing over the location where the bodies were hidden. Chapters: 0:00:00 - 0:00:05 - Navigation through the garden area 0:00:05 - 0:00:12 - Concealing the first body in water 0:00:12 - 0:00:18 - Concealing the second body in water 0:00:18 - 0:00:23 - Brief pause and return to gameplay 📖 Interactive written walkthrough with clickable timestamps: https://pixelfungaming.com/videos/hitman-episode-5-colorado-swamp-body-dump

Titanfall : Campaign 8 - Battle Of Demeter ( Defeat )
The mission on Demeter begins with a high-stakes orbital insertion as a Militia dropship braves intense IMC anti-air fire. Pilots are forced to eject into the industrial landscape below as their transport is torn apart. The focus immediately shifts to a Hardpoint Domination engagement, where forces must capture and hold three key positions—Alpha, Bravo, and Charlie—to overload the base's reactor core. Initial skirmishes involve fast-paced infantry combat against IMC grunts and Spectres within the facility's narrow corridors and vast open bays. As the battle intensifies, Pilots call in their Titans, leading to powerful mechanical clashes near the heart of the refueling station. Strategic use of parkour and tactical abilities is essential for navigating the complex environment and maintaining control over the contested points. The mission culminates in a desperate final stand as the reactor reaches critical mass, resulting in a devastating explosion that significantly impacts the ongoing conflict between the Militia and the IMC. Chapters: 0:00:00 - 0:01:44 - Mission Briefing and Deployment Prep 0:01:44 - 0:02:30 - Cinematic Dropship Insertion 0:02:30 - 0:05:50 - Securing Initial Hardpoints 0:05:50 - 0:08:25 - Titan Deployment and Reactor Core Combat 0:08:25 - 0:11:30 - Defending Captured Territory 0:11:30 - 0:13:58 - Final Push and Hardpoint Struggles 0:13:58 - 0:15:33 - Mission Conclusion and Narrative Outro 📖 Interactive written walkthrough with clickable timestamps: https://pixelfungaming.com/videos/titanfall-campaign-8-battle-of-demeter-defeat

The Walking Dead Game : Season 2 Episode 1 chapters 1-3
The story follows Clementine as she travels with Omid and Christa, stopping at an abandoned rest stop. While cleaning up in the restroom, Clementine encounters a desperate scavenger who holds her at gunpoint. A tragic intervention by Omid leads to his death, leaving a grieving Christa and Clementine to fend for themselves. The narrative then jumps sixteen months ahead, showing a much older and more weary Clementine surviving in the rainy woods with Christa. They huddle around a failing campfire, discussing their dwindling hopes and the journey toward a rumored safe haven called Wellington. Christa's visible distress and the harsh environment highlight the brutal reality of their ongoing struggle for survival. The segment ends with Clementine reflecting on her past belongings while Christa searches for more firewood. Chapters: 0:00:00 - 0:00:35 - Introduction and Opening Credits 0:00:35 - 0:01:56 - Arrival at the Rest Stop and Dialogue 0:01:56 - 0:03:54 - Exploring the Restroom 0:03:54 - 0:05:05 - Tense Standoff with a Scavenger 0:05:05 - 0:07:42 - Tragic Confrontation and Omid's Fate 0:07:42 - 0:07:53 - Title Sequence: The Walking Dead 0:07:53 - 0:09:30 - Survival in the Woods (16 Months Later) 0:09:30 - 0:10:23 - Reflection at the Campfire 📖 Interactive written walkthrough with clickable timestamps: https://pixelfungaming.com/videos/the-walking-dead-game-season-2-episode-1-chapters-1-3

Farcry 6| live #13
Welcome to this comprehensive gameplay walkthrough of Far Cry 6, focusing on some of the most exciting special Yaran stories. This video takes you through a complete play-through of several key missions, providing a detailed look at the combat, stealth mechanics, and quirky characters that define the Yara experience. We begin with a look at the game's initial setup and menu systems before diving straight into the action in the lush El Este region. The first major focus is the mission 'Undercover Stud,' where Dani Rojas must infiltrate a military-heavy ranch to rescue a high-value hostage, Captain Diaz. This segment showcases intense close-quarters combat at the naval stables followed by a tense, stealth-focused escort sequence through treacherous woods and rivers. You'll see multiple attempts and strategies as we navigate past patrols and guard dogs to successfully deliver the captain to a rebel safehouse. Following this, the video shifts gears to the much-anticipated 'Dani & Danny vs Everybody' special operation. Join forces with Hollywood icon Danny Trejo as he attempts to feed the hungry people of Yara with his world-famous tacos. The mission starts at the Rey Del Diente Croc Farm, where Dani must scavenge for premium ingredients like taco meat, fresh pineapples, and Trejo's signature salsa, all while avoiding military interference. The climax of the video features a massive defensive stand at Trejo's taco stand. Waves of FND soldiers, including ground troops and heavy helicopters, attempt to shut down the operation. We utilize a variety of weaponry, from standard assault rifles to powerful mounted machine guns and launchers, to repel the attack and protect the 'secret taco recipe.' The video concludes with a satisfying mission wrap-up and a celebratory bike ride through the beautiful Yaran landscape with Danny Trejo himself. Whether you're looking for mission guides, combat tips, or just want to see Danny Trejo kick some military butt, this over-an-hour-long video has it all. Chapters: 0:00:00 - Ubisoft and Far Cry 6 Opening Cinematics 0:02:45 - Game Menu and Loading Sequence 0:05:15 - Arsenal Overview and Gameplay Settings Adjustment 0:08:30 - Entering the El Este Region and Exploring Local Bases 0:12:45 - Map Navigation and Finding the Next Objective 0:15:20 - Taking to the Skies: Using the Avispa Buzzer Vehicle 0:18:45 - Starting the Mission 'Undercover Stud' 0:22:15 - Infiltrating the Naval Stables and Rescuing the Hostage 0:25:30 - Stealth Escort: Moving Captain Diaz Through the Forest 0:28:45 - Mission Failure and Retry Strategy 0:32:15 - Successful River Crossing and Evading Patrols 0:35:50 - Reaching the Extraction Point and Safehouse Delivery 0:38:20 - Mission Completion: Talking to Gilberto at Patriotas Peak 0:41:45 - Transitioning to 'Dani & Danny vs Everybody' at the Croc Farm 0:44:10 - Meeting Danny Trejo and Accepting the Taco Challenge 0:47:35 - Scavenging for Taco Ingredients: Meat, Pineapples, and Salsa 0:51:15 - Preparing for the Military Assault on the Taco Stand 0:54:30 - Intense Combat: Defending Trejo's Tacos from Waves of Enemies 0:57:45 - Taking Down an Enemy Attack Helicopter 0:60:20 - Final Push: Clearing the Remaining FND Forces 0:63:15 - Mission Wrap-up and Final Bike Ride with Danny Trejo 0:65:00 - Video Conclusion and Final Thoughts 📖 Interactive written walkthrough with clickable timestamps: https://pixelfungaming.com/videos/farcry-6-live-13

Insurgency sandstorm - GAP
Experience nearly an hour of high-stakes tactical combat in Insurgency: Sandstorm. This gameplay walkthrough showcases intense cooperative matches on the map 'Gap,' featuring both Security and Insurgent perspectives. Watch as the team navigates complex urban environments, utilizing realistic weapon handling and tactical equipment. The video highlights diverse combat scenarios, from stealthy night operations using night vision goggles to brutal daylight street fighting. Key moments include coordinated pushes to capture and defend checkpoints, strategic use of fire support, and the destruction of enemy weapon caches. Witness a variety of weapon loadouts in action, including the M16A4 and AKM, customized with various optics and attachments. Whether you're a veteran player or a newcomer to the genre, this video provides a deep dive into the teamwork and precision required to succeed in one of the most immersive modern military shooters available. Chapters: 0:00:00 - Loadout Selection & Night Mission Start 0:03:30 - First Round Recap & Stats 0:06:00 - Clearing the Hotel Interior (Security) 0:09:15 - Street Combat & Tactical Movement 0:12:45 - Weapon Cache Sabotage 0:15:30 - Defending the Final Checkpoint 0:19:30 - Switching Sides: Playing as Insurgents 0:22:45 - Daylight Urban Warfare Begins 0:26:00 - Objective Alpha: Rooftop Sniping 0:30:15 - Market Area Firefights 0:34:00 - Breaching the Luxury Hotel 0:38:30 - Intense Close Quarters Combat (CQC) 0:42:00 - Planting Explosives on Objective Bravo 0:46:30 - Final Lobby Defense (Insurgents) 0:49:15 - Match Victory & Performance Awards 0:53:00 - Bonus Gameplay: Team Coordination 0:56:45 - Late-Game Spectator Highlights 0:59:10 - Final Match Summary 📖 Interactive written walkthrough with clickable timestamps: https://pixelfungaming.com/videos/insurgency-sandstorm-gap

Brothers in Arms Hells highway : Operation Garden
This video features a full mission walkthrough of 'Operation Garden' from the tactical World War II shooter, Brothers in Arms: Hell's Highway. Set in the Eindhoven Industrial District on September 18th, 1944, the mission follows Sergeant Matt Baker and his squad as they work to clear a path for the XXX Corps. The gameplay begins with an intense firefight to secure the ground floor of a sprawling factory complex. Viewers will see the game's unique squad-based tactics in action, as Baker directs fire and assault teams to suppress and flank German defenders. After clearing the factory's upper levels, the action moves to the rooftop for a dramatic sniper sequence where Baker must protect a young Dutch boy named Pieter. The perspective then shifts to tank commander Redwood, as players take control of a Sherman tank to blast through a railway yard and destroy multiple Flak 88mm anti-aircraft guns. The mission concludes with the liberation of central Eindhoven and a poignant reunion between Pieter and his father. This comprehensive walkthrough showcases the gritty realism, tactical depth, and cinematic storytelling that define the Brothers in Arms series. Chapters: 0:00:00 - Opening Cinematic and Narration 0:02:16 - Objective Start: Secure the Ground Floor 0:04:30 - Heavy Firefight in the Factory Warehouse 0:07:00 - Utilizing Suppressing Fire and Flanking Maneuvers 0:09:40 - Ground Floor Secured: Heading to the Top Level 0:12:15 - Clearing Out German Snipers in the Rafters 0:15:30 - Navigating Through Industrial Machinery 0:18:45 - Close-Quarters Office Combat 0:21:20 - Intense Suppression on the Upper Floor 0:24:50 - Pushing Towards the Rooftop Exit 0:29:04 - Top Floor Secured: Finding a Vantage Point 0:30:16 - Sniper Cover Mission: Protecting Pieter 0:33:45 - Destroying German Flak Positions from the Roof 0:37:00 - Sherman Tank Gameplay: Railway Yard Assault 0:40:15 - Eliminating Final Flak 88mm Batteries 0:43:40 - Rescuing Pieter and Final Room Clear 0:45:00 - Mission Completion and Eindhoven Liberation Cinematic 📖 Interactive written walkthrough with clickable timestamps: https://pixelfungaming.com/videos/brothers-in-arms-hells-highway-operation-garden

Tomb Raider : Part 1 - Coastal Forest
This video features the opening sequences and early gameplay segments of the 2013 video game 'Tomb Raider,' focusing on the protagonist, Lara Croft, as she faces the dramatic shipwreck of the Endurance and struggles for survival on a remote island. The video includes cinematic sequences depicting the storm, the ship breaking apart, Lara's initial peril, and her subsequent escape from a dark, dangerous cave/tomb. Following her narrow escape, the gameplay transition occurs, showing Lara acquiring essential survival skills and tools (like a torch and a makeshift longbow) and encountering other survivors. The video ends shortly after Lara successfully hunts a deer and returns to a base camp, indicating the beginning of her transformation into the seasoned adventurer known as the Tomb Raider. Chapters: 0:00:00 - Cinematic Opening and Character Introduction (Lara Croft) 0:00:19 - Endurance Expedition - Day 22: Shipwreck in Dragon's Triangle 0:00:23 - The Endurance is violently hit by a storm and sinks 0:01:36 - Lara struggles to swim to the surface amidst the wreckage 0:01:58 - Washed ashore on a mysterious island, immediate danger 0:02:30 - Square Enix and Crystal Dynamics logos 0:02:51 - Lara wakes up trapped and injured in a cavern/tomb 0:03:36 - Interactive cinematic QTE: Lara swings to break free from restraints 0:04:32 - Lara impales herself and pulls out the sharp object 0:04:51 - Exploration Gameplay begins: navigating the dark cave 0:05:03 - Acquiring the Torch: Lara lights her way through the dark tomb 0:05:43 - Using the torch to burn obstacles and advance 0:06:05 - First look at 'Survival Instincts' feature (visualizing objectives) 0:06:25 - Climbing and Platforming Mechanics showcase 0:07:29 - Quick Time Event (QTE) combat sequence against a survivor/hostile figure 0:08:16 - Lara escapes the cave into the flooded Scavenger's Den area 0:08:52 - Discovery of a Base Camp (Scavenger's Den) and initial skills acquisition 0:09:22 - Using fire and environmental puzzle solving to move the metal container 0:10:23 - Lara advances through the flooded shipwreck area 0:11:47 - End of Scavenger's Den traversal 0:12:43 - Lara finds a two-way radio and attempts contact 0:13:31 - Lara struggles to climb a steep, slick rock face (QTE) 0:14:31 - Lara collapses, exhausted, but recovers and surveys the wreckage 0:15:08 - TOMB RAIDER title card appears 0:15:20 - Lara progresses up the coast, climbing debris of the wrecked plane 0:17:39 - Climbing the plane wreckage for a better vantage point 0:18:46 - Wall Scramble tutorial - climbing a vertical cliff/waterfall 0:19:00 - Lara finds Sam's abandoned pack containing a video camera and matches 0:20:07 - Lara starts a fire at a campsite (Sheltered Ridge) 0:21:49 - Viewing Sam's video diary showing the crew pre-wreck 0:24:37 - Lara sits by the fire, reviewing Sam's diary and radioing Roth 0:24:57 - Objective: Search for food (Woman Versus Wild) 0:25:28 - Finding a weapon: acquiring the Makeshift Longbow 0:27:18 - Lara retrieves arrows and aims the bow at a hanging corpse (target practice) 0:28:13 - New Objective: Collect Meat from the Deer (Hunting tutorial) 0:29:02 - First successful deer hunt with the longbow 0:30:24 - Returning to camp with the meat to secure food 0:31:07 - Lara encounters and defeats wolves while tracking back to camp 0:33:28 - Base Camp menu and skills upgrade screen 0:33:42 - Radio communication with Roth: he confirms SOS was sent and they are regrouping 0:34:50 - Lara sits by the fire, mentally preparing for the next steps 0:35:48 - Lara discovers a path down a vertical shaft 0:36:34 - Climbing down the vertical shaft using the torch and existing pipes 0:38:27 - Entering the Scavenger's Den main chamber (more disturbing environment) 0:38:48 - Acquiring the Pry Axe for opening locked doors and containers 0:40:06 - Lara finds Sam at a campsite (Sheltered Ridge) with other survivors 0:41:48 - Conversation with Sam and Matthias about Queen Himiko and her Stormguard 0:43:35 - The group splits up: Lara and Whitman seek out Roth 0:44:57 - New Base Camp discovered: Forest Ruins. End of active gameplay segment. 📖 Interactive written walkthrough with clickable timestamps: https://pixelfungaming.com/videos/tomb-raider-part-1-coastal-forest Chapters: 0:00:00 - The Wreck of the Endurance Intro 0:02:45 - Lara Croft: Trapped and Alone 0:05:30 - Reaching the Shores of Yamatai 0:08:15 - Captured: The Scavenger Den 0:12:00 - Fire and the First Torch 0:15:45 - Environmental Puzzles and Escape 0:19:30 - First Glimpse of the Island Ruins 0:23:15 - The Endurance Crew Video Log 0:27:00 - Finding the Makeshift Bow 0:30:30 - First Hunt: Tracking the Deer 0:34:00 - Returning to Sheltered Ridge Camp 0:37:30 - Survival Skills and Upgrades 0:41:15 - Meeting Mathias and Sam 0:44:45 - Following the Survivor Trail

HITMAN: Colorado - Lawnmower explosion accident kill
Agent 47 occupies a stealthy position behind a military-grade equipment trailer on a fortified farm in Colorado. He maintains a clear line of sight on the target, Ezra Berg, who stands near a red lawnmower in the front yard of a two-story house. Guards patrol nearby while the operative waits for the optimal moment to strike. A series of shots ring out, followed immediately by a powerful explosion from the lawnmower. The blast kills Ezra Berg instantly, earning an 'Explosion Kill' bonus. As a 'Target Lockdown' alert triggers and guards converge on the blast site, Agent 47 slips away unnoticed, navigating between parked vehicles toward his next objective. The mission tracking HUD updates to confirm the successful elimination as the operative reaches a safe distance from the chaos. Chapters: 0:00:00 - 0:00:25 - Agent 47 monitors Ezra Berg's movements from a hidden position 0:00:25 - 0:00:35 - Lawnmower explosion eliminates Ezra Berg and triggers target lockdown 0:00:35 - 0:00:40 - Agent 47 retreats from the scene as guards investigate the blast 📖 Interactive written walkthrough with clickable timestamps: https://pixelfungaming.com/videos/hitman-colorado-lawnmower-explosion-accident-kill

MAFIA 3 | Definitive Edition Live #6
Experience the gritty underworld of 1968 New Bordeaux in this comprehensive gameplay session of Mafia III: Definitive Edition. This video follows Lincoln Clay as he meticulously dismantles the criminal infrastructure in the Barclay Mills district, focusing specifically on the corrupt garbage disposal racket. Watch as Lincoln utilizes a blend of stealthy infiltration, brutal hand-to-hand combat, and high-intensity firefights to take down key lieutenants and eventually the racket's head, Paul 'Puppy' Simmons. The walkthrough showcases various core gameplay mechanics, including wiretapping junction boxes to uncover enemy locations and intel, interrogating informants to reveal lucrative targets, and engaging in massive set-piece shootouts within industrial depots and docks. Beyond the action, the video captures the atmospheric 1960s setting, featuring a period-accurate soundtrack and detailed environments that bring the world to life. From high-speed chases through rain-slicked streets to tactical assaults on fortified warehouses, this video provides a deep dive into the vengeful journey of Lincoln Clay as he builds his own criminal empire to take down the Italian Mafia. Chapters: 0:00:00 - Game Intro & Loading Screen 0:02:15 - Wiretapping the First Junction Box 0:05:30 - Exploring Barclay Mills Industrial Zone 0:08:45 - Infiltrating the Garbage Smuggling Depot 0:12:00 - Tactical Firefight in the Warehouse 0:15:15 - Interrogating the Garbage Racket Informant 0:19:30 - Sabotaging the Garbage Dump Operations 0:23:00 - Massive Shootout at the Barclay Docks 0:27:45 - Mission Update: Hunting Paul 'Puppy' Simmons 0:32:15 - Infiltrating Puppy Simmons' Stronghold 0:36:00 - Clearing the Secured Industrial Building 0:40:30 - Final Confrontation with Puppy Simmons 0:44:00 - Securing the Garbage Racket for the Underbosses 0:48:30 - Driving Through the Streets of New Bordeaux 0:52:15 - Starting the 'Dead Stay Gone' Follow-up Mission 0:56:45 - Stealth Infiltration of a New Target Location 1:01:30 - Intense Gunplay and Flanking Maneuvers 1:06:00 - Completing District Objectives in Barclay Mills 1:11:45 - High-Speed Escape from Enemy Reinforcements 1:16:30 - Cinematic Story Development with Underbosses 1:21:00 - Managing the Newly Acquired Rackets 1:26:15 - Exploring Secondary Objectives & Fuses 1:31:00 - Session Summary & Rewards Overview 📖 Interactive written walkthrough with clickable timestamps: https://pixelfungaming.com/videos/mafia-3-definitive-edition-live-6

Destiny : missions and raids with friends
Join us for an extensive two-hour journey through the early stages of Destiny: The Taken King. This video captures a full playthrough of key campaign missions and challenging strikes. We start with the epic prelude cinematic, setting the stage for the arrival of Oryx and the devastating battle at Saturn. The gameplay kicks off with 'The Coming War' mission on Phobos, where we first witness the terrifying power of the Taken as they consume the Cabal forces. Following the campaign intro, we dive into two iconic Strikes on Mars: 'Cerberus Vae III' to take down the massive Valus Ta'aurc and 'Dust Palace' to defeat the agile Psion Flayers. Between missions, we spend significant time in the Tower, the last safe city on Earth, interacting with the Vanguard leaders—Cayde-6, Zavala, and Ikora Rey—to upgrade gear, decode engrams, and advance various quest lines. The adventure concludes with the 'Cayde's Stash' mission back on Earth, featuring a daring vertical climb up an old colony ship in the Cosmodrome and a final intense confrontation with an Echo of Oryx. Whether you're a long-time Guardian looking for nostalgia or new to the series, this video provides a comprehensive look at the world-building, lore, and high-octane action that defined this legendary expansion. Chapters: 0:00:00 - Intro and Roster Navigation 0:01:50 - Cinematic: The Taken King Prelude 0:04:10 - The Battle at Saturn Cutscene 0:07:25 - Mission Start: The Coming War - Phobos 0:10:00 - Exploring the Cabal Fleetbase on Phobos 0:15:00 - First Encounter with the Taken 0:20:00 - Escape from the Phobos Base 0:25:30 - Returning to the Tower Social Space 0:31:10 - Strike Start: Cerberus Vae III - Mars 0:36:00 - Fighting through the Trenchworks 0:41:00 - Valus Ta'aurc Boss Fight Begins 0:48:00 - Final Stage of Valus Ta'aurc Battle 0:53:50 - Mission Completion and Loot Rewards 1:00:00 - Social Interaction in the Tower Plaza 1:06:00 - Selecting Destination: Meridian Bay, Mars 1:10:15 - Strike Start: Dust Palace - Mars 1:16:00 - Entering the Hollows Area 1:22:00 - Reaching the Cortex Sector 1:27:00 - Psion Flayers Boss Encounter 1:33:15 - Dust Palace Strike Completed and Orbit 1:40:00 - Upgrading Equipment and Vault Management 1:45:00 - Talking to Cayde-6 for New Quest Steps 1:53:15 - Mission Start: Cayde's Stash - Earth 2:00:00 - Scaling the Colony Ship in the Cosmodrome 2:06:00 - Searching the Devil Spire for the Stealth Drive 2:11:00 - Boss Encounter: Echo of Oryx 2:15:29 - Final Success Screen and Outro 📖 Interactive written walkthrough with clickable timestamps: https://pixelfungaming.com/videos/destiny-missions-and-raids-with-friends

Hitman Absolution : Welcome To Hope - Mission 7
The video presents key cinematics and initial gameplay from Hitman: Absolution. The sequence begins with Agent 47 driving a classic car at night, establishing a mood of urgency and travel. Interspersed flashback sequences show a woman in a shower and intense close-ups of 47, suggesting a prior violent event and emotional stakes. The drive concludes as the agent enters South Dakota, signaled by a welcome sign. The scene then transitions to a tense meeting at Mount Rushmore. A character named Birdy attempts to negotiate a deal with Blake Dexter and his large bodyguard, claiming he should be the middleman for a recent kidnapping. Dexter rejects Birdy’s offer, revealing he already possesses the target girl, Victoria. Dexter's bodyguard violently subdues Birdy when he tries to bargain further, forcing him to reveal that the kidnapping is connected to ‘The Agency’ and that Victoria is worth millions. Dexter leaves Birdy subdued on the ground. The video transitions again to Agent 47 arriving in Hope, South Dakota, identifying his next target, Lenny, using a matchbook. Part II begins as 47 enters a crowded, rowdy bar named 'Great Balls of Fire.' The objective is to reach the bartender. Agent 47 engages in a chaotic brawl as several hostile patrons recognize him and attempt to attack. Using close-quarters combat, 47 subdues attackers, using environmental objects like bottles and hiding a guard in a nearby restroom stall. He successfully reaches the bar and forces the bartender to reveal Lenny’s location (a barbershop) before taking the staff member’s clothes for a disguise. The sequence concludes with Agent 47 successfully acquiring the necessary intelligence and leaving the bar, achieving a 'Specialist' rating. Chapters: 0:00 - 0:28 - Agent 47 Drives into the City Night 0:28 - 1:16 - Flashbacks and Arrival in South Dakota 1:16 - 2:33 - Mount Rushmore Meeting: Birdy's Offer 2:33 - 3:49 - Negotiation Failure and Victoria's Importance Revealed 3:49 - 5:21 - Agent 47 Arrives in Hope, South Dakota 5:21 - 7:47 - Great Balls of Fire Bar Fight and Disguise Acquisition 7:47 - 8:54 - Interrogation of Bartender and Mission Complete 📖 Interactive written walkthrough with clickable timestamps: https://pixelfungaming.com/videos/hitman-absolution-welcome-to-hope-mission-7

Steam Tutorial : activate gamestop games without a product code
The gameplay session begins with the launch of Brothers in Arms: Hell's Highway from the Steam library. After navigating the initial loading screens and main menu, a mission briefing provides historical context regarding Operation Market Garden. A narrative cutscene follows, featuring Sergeant Matt Baker and his squad discussing their next moves amidst the ruins of a Dutch city. The squad enters active combat in a war-torn urban environment, where Baker utilizes tactical commands to suppress German positions with base-of-fire teams while maneuvering flanking elements. Intense firefights break out in narrow streets, requiring strategic use of cover and grenades. The squad moves through damaged buildings, clearing rooms and engaging enemies in close-quarters combat. A pivotal moment occurs as Baker employs a bazooka to neutralize a fortified enemy position. The advance continues toward a large church, where coordinated squad fire takes out a hidden sniper. The mission concludes with the squad securing the immediate perimeter and preparing for their next objective. Chapters: 0:00:00 - 0:01:30 - Game Launch and Initial Loading Screens 0:01:31 - 0:02:05 - Main Menu Navigation and Level Selection 0:02:06 - 0:03:15 - Mission Briefing and Operation Market Garden Historical Context 0:03:16 - 0:04:45 - Squad Cutscene and Tactical Dialogue 0:04:46 - 0:07:30 - Urban Firefights and Squad Command Mechanics 0:07:31 - 0:10:00 - Building Clearings and Heavy Weapon Engagement 0:10:01 - 0:12:12 - Final Skirmish Near the Church and Objective Push 📖 Interactive written walkthrough with clickable timestamps: https://pixelfungaming.com/videos/steam-tutorial-activate-gamestop-games-without-a-product-code

HITMAN: Garage Massacre- Axeing Soldiers
Agent 47 begins the mission in a subterranean parking garage, immediately arming himself with a fire axe from a nearby cabinet. He swiftly eliminates an approaching soldier on a stairwell before proceeding deeper into the facility. Utilizing parked vehicles for concealment, 47 navigates past several patrols, executing precise axe takedowns when opportunities arise. He systematically disables security measures by shooting out cameras with a suppressed pistol. After a brief skirmish near a transport truck triggers an alarm, 47 retreats to a storage room to wait out the search. He eventually re-emerges to clear out the remaining guards near an armored vehicle, culminating in a series of lethal axe strikes before moving toward his next objective. Chapters: 0:00:00 - 0:01:15 - Axe Retrieval and Initial Takedown 0:01:15 - 0:02:45 - Stealthy Maneuvers Between Vehicles 0:02:45 - 0:04:15 - Disabling Cameras and Tactical Axe Kills 0:04:15 - 0:05:30 - Evading the Alarm Search and Interior Subdual 0:05:30 - 0:06:32 - Final Guard Eliminations and Extraction 📖 Interactive written walkthrough with clickable timestamps: https://pixelfungaming.com/videos/hitman-garage-massacre-axeing-soldiers

Insurgency Sandstorm| Checkpoints Live 1
Experience over 90 minutes of high-stakes tactical combat in this Insurgency: Sandstorm co-op gameplay session. The video features a complete run of Checkpoint Security mode across two diverse maps: the snow-covered Hillside and the detailed Farmhouse. Watch as the team utilizes tactical coordination, various weapon platforms like the M16A4, and devastating fire support to overcome waves of insurgents. The first half focuses on a daytime operation on Hillside, requiring precision at distance and careful urban clearing. The second half shifts to a nighttime operation on Farmhouse, showcasing the game's atmospheric lighting and the strategic importance of night vision and stealth. Whether you're a fan of realistic ballistics, intense firefights, or military simulation, this video captures the core of what makes Insurgency: Sandstorm a standout tactical shooter. Chapters: 0:00:00 - Rifleman class and M16A4 loadout customization 0:03:15 - Entering the Hillside map for Checkpoint Security 0:06:45 - Tactical advance through the snow towards Objective Alpha 0:10:20 - Successfully capturing Alpha and prepping for Objective Bravo 0:14:10 - Fierce defense against a counter-attack at the Bravo building 0:18:30 - Moving uphill and engaging snipers while pushing to Charlie 0:22:15 - Utilizing smoke grenades to cross open terrain under fire 0:26:40 - Final assault on the last objective of the Hillside map 0:30:00 - Match summary and players voting for the next scenario 0:34:00 - Extended lobby wait time as the next map loads 0:38:00 - Continued loading and idle time before the second match 0:41:30 - Deployment on the Farmhouse map for a night operation 0:45:15 - Navigating the outskirts of the farmhouse in low visibility 0:49:50 - Storming the main building to secure Objective Alpha 0:54:20 - Clearing rooms and advancing towards the garden objective 0:58:10 - Coordinated push through the orchards towards Objective Bravo 1:02:45 - Intense firefight at the stone walls surrounding the compound 1:07:30 - Defending Charlie point against waves of enemy technicals 1:11:15 - Resupplying and adjusting equipment for the next phase 1:16:00 - Calling in an A-10 strafe to clear the path to Objective Delta 1:21:20 - Engaging enemy remnants inside the final ruins 1:25:50 - Capturing the ultimate objective on Farmhouse to seal victory 1:30:30 - Final match results, scoreboards, and end-of-session lobby 📖 Interactive written walkthrough with clickable timestamps: https://pixelfungaming.com/videos/insurgency-sandstorm-checkpoints-live-1

HITMAN: Organ Trafficking Syndicate Paris Showdown
Agent 47 begins the operation at a remote safehouse, selecting a high-stakes Syndicate Showdown mission in Paris. After a helicopter flight to the Palais de Walewska, the operative receives intelligence on the target's physical traits and habits. The mission involves identifying a leader among several suspects by cross-referencing descriptions of red hair, accessories, and tattoos. 47 infiltrates the palace, first subduing a guard in the wine cellar to acquire a security disguise. Throughout the palace, 47 uses a handheld camera and instinct to monitor suspects' behaviors, such as smoking and eating habits. The operative meticulously navigates restricted areas, clearing out potential witnesses and lookouts in private dressing rooms and study areas. After confirming the leader's identity, 47 uses distractions to isolate her in an upstairs room. The elimination is carried out swiftly with a silent takedown, followed by a composed walk through the palace gardens to a secure exit. The mission concludes with a full breakdown of the Syndicate's defeat and the distribution of rewards. Chapters: 0:00:00 - 0:00:28 - Mission planning and departure from the safehouse 0:00:28 - 0:01:10 - Arrival at the Paris estate and target briefing 0:01:10 - 0:02:12 - Initial exploration of the palace and crowd monitoring 0:02:12 - 0:03:55 - Infiltration of the basement and subduing a security guard 0:03:55 - 0:05:15 - Moving up to the first floor to track suspects 0:05:15 - 0:06:35 - Monitoring suspects in the meeting rooms and private lounges 0:06:35 - 0:08:17 - Using the camera to identify suspect traits like tattoos 0:08:17 - 0:10:00 - Navigating restricted upper hallways and avoiding enforcers 0:10:00 - 0:12:15 - Searching the garden areas for more suspects and lookouts 0:12:15 - 0:14:30 - Returning to the upper floor to isolate a prime suspect 0:14:30 - 0:16:30 - Systematic takedown of guards and staff to clear a path 0:16:30 - 0:18:15 - Tracking the leader's movement through dressing rooms 0:18:15 - 0:20:30 - Setting traps and using distractions to isolate the target 0:20:30 - 0:21:15 - Elimination of the Syndicate Leader in the private study 0:21:15 - 0:21:55 - Making a stealthy escape through the palace main entrance 0:21:55 - 0:22:27 - Mission completion screen and reward summary 📖 Interactive written walkthrough with clickable timestamps: https://pixelfungaming.com/videos/hitman-organ-trafficking-syndicate-paris-showdown

Dying light 2 Stream - Looting & exploring
Welcome to an extensive gameplay session of Dying Light 2 Stay Human. This video follows the journey of Aiden Caldwell as he navigates the perilous, zombie-infested city of Villedor. Starting with the immersive opening cinematic that details the fall of civilization and the rise of the virus, we dive straight into high-octane parkour action. Watch as Aiden leaps across rooftops, utilizes zip lines, and explores the ruins of a once-thriving metropolis. The main objective of this session is to reach the mysterious Observatory GRE base. Along the way, we delve into dangerous GRE Darkzones like THV Advanced Care, where managing immunity in the shadows is just as critical as fighting off the infected. Witness intense melee combat using improvised weapons, strategic stealth takedowns, and the constant search for valuable loot and Inhibitors to enhance Aiden's survival chances. The latter half of the video features a challenging ascent of the South Loop Radio Tower, showcasing advanced parkour maneuvers and breathtaking views of the city. The session concludes with a brutal street-level brawl that serves as a stark reminder of the dangers lurking in Villedor. Whether you're here for the parkour, the lore, or the combat, this longplay offers a deep look into the world of Dying Light 2. Chapters: 0:00:00 - Opening Cinematic and Lore Introduction 0:02:15 - Main Menu and Session Start 0:05:00 - Parkour Exploration Across Villedor Rooftops 0:08:30 - Navigating Towards the Observatory GRE Base 0:12:00 - Entering the THV Advanced Care GRE Darkzone 0:15:45 - Stealth and Melee Combat Inside the Quarantine Zone 0:19:30 - Looting and Managing Immunity in the Dark 0:24:15 - Finding Inhibitors and Skill Upgrades 0:28:00 - Intense Zombie Encounters in Building Corridors 0:32:30 - Navigating Toxic Areas and Finding Rare Loot 0:36:15 - Exiting the GRE Building and Rooftop Parkour 0:40:00 - Climbing the South Loop Radio Tower 0:44:30 - High-Stakes Climbing and Tower Navigation 0:48:15 - Final Combat Encounter and Character Death 📖 Interactive written walkthrough with clickable timestamps: https://pixelfungaming.com/videos/dying-light-2-stream-looting-exploring

Hitman Absolution : Sniper Challenge
The video opens with the launching of the Hitman Sniper Challenge web game. Agent 47, positioned on a distant rooftop, prepares his sniper rifle overlooking a lavish urban plaza and a nearby helipad. The mission objective is to eliminate two primary targets: Richard Strong Jr. and Mr. Shibasaki. Agent 47 immediately scopes in on the helipad as the two targets approach a waiting helicopter. A rapid sequence of shots results in a double kill, alerting surrounding security personnel. Guards immediately swarm the helipad area to investigate the disturbance. Agent 47 utilizes the sniper rifle to pick off the guards quickly, aiming for headshots and body shots to maximize score multipliers. The sequence involves shooting explosive objects and environmental elements, such as a large spotlight, to create distractions and secondary kills. Agent 47 manages a difficult moving shot on a running guard on the lower rooftop area. The rapid-fire execution continues as numerous guards attempt to take cover or engage the unseen sniper. During the engagement, Agent 47 accidentally hits several civilians, resulting in significant score penalties. Despite the civilian casualties, the primary targets and all critical guards are eliminated efficiently. The mission registers as complete, and the final score is calculated, showing a high base score diminished by the civilian kill penalty. Chapters: 0:00 - 0:35 - Desktop Navigation and Game Launch 0:35 - 1:00 - Mission Briefing and Initial Targets Eliminated 1:00 - 1:35 - Dealing with Guards and Environmental Kills 1:35 - 2:39 - Rapid Target Elimination and Mission Completion 2:39 - 2:56 - End Screen and Score Results 📖 Interactive written walkthrough with clickable timestamps: https://pixelfungaming.com/videos/hitman-absolution-sniper-challenge

Alien Slayer 3D : Mission 1
The video opens with desktop screen capture software before transitioning to a browser loading the Flash game, *Alien Slayer 3D: Training Camp*. After navigating initial production screens, the game prompts for engine selection, recommending the 'Good PC' option with enabled textures. The main menu appears, and the player initiates a 'New Game' selecting the 'Soldier' threat level. The objective for Level 1 is set: destroy five alien eggs. The character, a heavily armored soldier, enters a cold, futuristic metallic corridor in a first-person perspective. The soldier moves forward, collecting rifle bullets, and opens the first sealed door using the spacebar. Initial combat begins immediately, featuring encounters with small, reddish alien creatures. The soldier kills the aliens, earning XP, and quickly reloads the rifle. Navigating around obstacles, the soldier encounters more enemies, dispatching them with rapid bursts of gunfire and performing 'Fast Kills.' The mini-map in the top-left corner guides movement through the facility. The soldier finds and destroys the first alien egg. Continuing through the facility, the soldier picks up more rifle ammunition and an RPG weapon. The character encounters heavier resistance from larger, crab-like aliens and humanoid, crimson-skinned mutants. The soldier defeats the enemies and destroys more eggs, reducing the objective count. A green key is required to open a nearby door. The soldier proceeds down an adjacent hallway, dealing with more alien attackers and collecting a medikit. The green key is obtained and used immediately to open the corresponding green-lit door. The soldier enters a new section of the facility, engaging multiple enemies simultaneously and maintaining focus on destroying the remaining alien eggs. After intense fighting, the soldier secures a red key from a defeated foe. The soldier moves toward the red door, opens it, and enters the final corridor where the last alien eggs are located. The soldier destroys the final eggs, completing the primary objective and earning bonus XP. The character continues clearing the area of remaining alien threats, showcasing various rapid kills until the level officially ends, displaying the accumulated scores and time elapsed. Chapters: 0:00 - 0:34 - Intro, Game Loading, and Engine Selection 0:34 - 1:10 - Main Menu Navigation and Mission Briefing 1:10 - 2:33 - Level 1 Start and Initial Alien Combat 2:33 - 4:20 - Collecting Items and Locating the Green Key 4:20 - 6:05 - Opening the Green Door and Intensive Combat 6:05 - 8:30 - Red Key Acquisition and Primary Objective Completion 8:30 - 9:34 - Clearing Remaining Enemies and Level Complete Screen 📖 Interactive written walkthrough with clickable timestamps: https://pixelfungaming.com/videos/alien-slayer-3d-mission-1

Ghost Recon Wildlands - Protect El Pulpos Walkthrough
The video demonstrates a mission from Tom Clancy's Ghost Recon Wildlands, focusing on the extraction and protection of a high-value target named El Pulpo. It begins with a tactical, stealthy approach to a safehouse, including long-range eliminations and close-quarters takedowns. The second half shifts into a high-intensity vehicle escort mission, where the team must defend a convoy from relentless attacks by Unidad and Santa Blanca forces through rugged terrain and urban areas, eventually reaching an airfield for a successful extraction. Chapters: 0:00:00 - 0:01:05 - Stealth Infiltration and Safehouse Approach 0:01:05 - 0:02:30 - Beginning of High-Speed Escort Mission 0:02:30 - 0:04:08 - Intense Combat and Airfield Extraction 📖 Interactive written walkthrough with clickable timestamps: https://pixelfungaming.com/videos/ghost-recon-wildlands-protect-el-pulpos-walkthrough

Ghost Recon Wildlands - The Truck Depot
This gameplay analysis follows a tactical stealth mission in Tom Clancy's Ghost Recon Wildlands titled 'The Truck Depot.' The video demonstrates a complete infiltration where the objective is to gather intel without being detected. Viewers will see the player character using a ghillie suit for camouflage while scouting the perimeter, neutralizing a key guard to secure a transport truck, and using that vehicle to bypass outer security. Once inside the depot, the footage shows a methodical search of the facility to locate and photograph smuggling documents. The mission concludes with a successful, undetected extraction from the hostile area, resulting in a 'Mission Complete' status. Chapters: 0:00:00 - 0:01:22 - Stealthy Approach and Perimeter Scouting 0:01:22 - 0:01:31 - Neutralizing the Target Guard and Hijacking the Truck 0:01:31 - 0:02:09 - Infiltrating the Depot and Internal Navigation 0:02:09 - 0:02:40 - Locating the Document Storage Room 0:02:40 - 0:02:53 - Photographing the Smuggling Intel 0:02:53 - 0:03:30 - Exfiltrating the Building and Returning to the Vehicle 0:03:30 - 0:04:02 - Departing the Depot and Mission Completion 📖 Interactive written walkthrough with clickable timestamps: https://pixelfungaming.com/videos/ghost-recon-wildlands-the-truck-depot

Sons Of The Forest: Day 1 | Building Cliffside Base
This comprehensive gameplay video showcases survival and base-building mechanics in Sons of the Forest. Viewers will see detailed interactions with companion characters Kelvin and Virginia, including giving them commands and equipment. The core focus is on the construction of a massive defensive palisade wall, demonstrating log gathering, placement, and sharpening techniques. The footage also covers combat encounters with various forest enemies using axes, bows, and firearms, as well as resource management and world exploration through different weather conditions, concluding with the player securing their progress at a base camp during a storm. Chapters: 0:00:00 - 0:02:30 - Companion Management and Initial Construction 0:02:30 - 0:05:00 - Resource Gathering and Defensive Wall Foundations 0:05:00 - 0:07:30 - Looting Camps and Continued Perimeter Building 0:07:30 - 0:10:00 - Ranged Combat and Advanced Wall Fortification 0:10:00 - 0:12:30 - Large-Scale Log Transport and Building Progress 0:12:30 - 0:15:00 - Expanding the Stronghold Perimeter 0:15:00 - 0:17:30 - Sustained Fortification and Combat Defense 0:17:30 - 0:20:20 - Final Wall Completion and Survival in the Rain 📖 Interactive written walkthrough with clickable timestamps: https://pixelfungaming.com/videos/sons-of-the-forest-day-1-building-cliffside-base

Thief Gameplay - Part 2 - Lockdown
The mission begins with Garrett escaping a cart entering Stonemarket during a city-wide lockdown. He navigates through dark alleys and over rooftops, using his focus vision to identify valuables and traversal points. Stealth is key as he avoids numerous city watch patrols and eavesdrops on their conversations to gather information about a valuable jeweled mask located in a nearby shop. Garrett utilizes his claw tool for climbing and lockpicks to bypass secured gates. After infiltrating the jeweler's shop cellar, he systematically loots the residence, eventually cracking a safe to steal the target mask. The gameplay features intense close-quarters combat where Garrett employs rapid dodges and calculated takedowns against multiple opponents. The sequence ends with a final sprint across the rainy rooftops of the city, culminating in his arrival at the Clock Tower hideout and the completion of the mission with a Predator playstyle rating. Chapters: 0:00:00 - 0:03:00 - Escape from the Cart and Entering Stonemarket 0:03:00 - 0:05:30 - Rooftop Navigation and Stealth Exploration 0:05:30 - 0:08:30 - Combat Encounter and Death in the Alleys 0:08:30 - 0:11:30 - Infiltrating the Jeweler's Shop Cellar 0:11:30 - 0:14:30 - The Jewelled Mask Heist and Safe Cracking 0:14:30 - 0:17:30 - Escaping the Residence and Street Level Skirmishes 0:17:30 - 0:20:04 - Final Combat and Reaching the Clock Tower 📖 Interactive written walkthrough with clickable timestamps: https://pixelfungaming.com/videos/thief-gameplay-part-2-lockdown

HITMAN: 47 drumming
Agent 47 enters a recording studio disguised as a crew member. He approaches a blue drum set where a technician is performing final adjustments. After the technician moves away, Agent 47 takes a seat and begins an elaborate and skillful drum solo. The surrounding band members stop what they are doing to watch the performance. Once the solo ends, the lead singer expresses high praise for the display of talent, and a notification appears on screen confirming the completion of the 'Man Machine' challenge. The scene ends with 47 standing up as the band members continue to comment on his technical proficiency. Chapters: 0:00:00 - 0:00:10 - Agent 47 approaches the drum kit and prepares to play 0:00:10 - 0:00:30 - The character performs an impressive and complex drum solo 0:00:30 - 0:00:42 - The performance concludes as band members offer praise and the mission challenge is earned 📖 Interactive written walkthrough with clickable timestamps: https://pixelfungaming.com/videos/hitman-47-drumming

Far Cry New Dawn - Punching Joseph Seed
The mission 'Homecoming' begins with the character standing in a lush, fenced-in settlement in Far Cry New Dawn. The character walks up to Joseph Seed, who stands shirtless near a wooden building. A sudden punch sends him to the ground, where he grovels as the character delivers a rhythmic series of punches to his torso. Joseph mutters about his sins as the blows land. After he is incapacitated, the character initiates a revival, pulling him back up to a standing position. No sooner is he on his feet than another punch sends him reeling back to the ground. The cycle of physical assault and immediate medical aid repeats in the bright daylight of the post-apocalyptic garden. Chapters: 0:00:00 - 0:00:04 - Approaching Joseph Seed in the settlement 0:00:04 - 0:00:21 - Initial punch and ground-and-pound sequence 0:00:21 - 0:00:26 - Reviving the downed character 0:00:26 - 0:00:33 - Resuming the assault immediately after revival 📖 Interactive written walkthrough with clickable timestamps: https://pixelfungaming.com/videos/far-cry-new-dawn-punching-joseph-seed

Far Cry 5 - Elk Law Lodge Outpost - UNDETECTED NO ALARMS
A tactical infiltration of a cult-controlled outpost unfolds in a dense coniferous forest. The approach begins through a body of water, leading to a wooden dock where a guard is silently eliminated from below the surface. After moving ashore, a bow and arrow are used to maintain stealth while navigating through tall grass and taking down another sentry. An alarm system is decommissioned with a well-placed arrow, preventing reinforcements from being called. The focus shifts to a large log structure serving as a laboratory, filled with evidence of animal experimentation. From within, binoculars are used to identify and mark targets around the perimeter. Advanced tactical awareness allows for tracking enemy outlines through the building's walls. The operation concludes with a methodical search of the facility's interior and a climb to the upper rafters to gain a height advantage over the remaining cultists. Stealthily navigating a cult-controlled outpost, this sequence showcases methodical infiltration and elimination tactics using a compound bow. The operation begins on the upper floor of a large wooden lodge, where a guard is neutralized on a balcony before being hidden. Moving with deliberate pace, the interior is cleared, with fallen enemies stashed in side rooms to avoid detection. The focus then shifts outside, where long-range archery is used to pick off guards from cover, including shots through semi-permeable barriers. A flanking maneuver involves swimming across a lake to approach from a less-guarded angle, utilizing tall flowers and foliage for concealment. Precise headshots from the brush systematically thin the remaining cultist forces near the water's edge and behind the main structure. The liberation concludes with a final sweep of the lodge's ground floor, ensuring all hostiles are eliminated without raising an alarm. Tactical bow-based liberation of the Elk Jaw Lodge cult outpost features a combination of silent takedowns and explosive combat sequences. Following a successful stealth kill inside the main lodge, the engagement shifts outdoors where compound bow skills are utilized to neutralize both human cultists and predatory animals. The destruction of a white pickup truck with explosive arrows signals the final push to secure the area, leading to the outpost's successful capture. A concluding cinematic sequence shows resistance fighters reclaiming the location, extinguishing fires, and patrolling the docks before the footage cuts to a prolonged black screen for the remainder of the duration. Chapters: 0:00:05 - Swimming toward the cultist dock 0:01:05 - Stealth takedown from the water 0:01:25 - Infiltrating the outpost perimeter 0:01:40 - Silent elimination of a ground patrol 0:01:55 - Disabling the outpost alarm system 0:02:05 - Entering the animal experimentation laboratory 0:02:45 - Marking targets with binoculars 0:03:30 - Tracking cultist movements through walls 0:04:30 - Navigating the laboratory interior 0:04:55 - Scaling the rafters for a vantage point 0:05:00 - Upper Floor Infiltration and Balcony Takedown 0:05:30 - Clearing the Lodge Interior and Hiding Bodies 0:06:15 - Exterior Archery and Long-Range Neutralization 0:07:20 - Animal Cage Perimeter Takedown 0:07:45 - Lakeside Flanking Maneuver 0:08:15 - Flora-Concealed Stealth Kills 0:09:05 - Fuel Tank Guard Takedown and Rear Clearing 0:09:40 - Final Ground Floor Lodge Sweep 0:00:00 - Stealth melee takedown in the lodge kitchen 0:00:21 - Engaging and neutralizing caged Judge wolves 0:00:43 - Intense bow combat near the white pickup truck 0:01:07 - Destruction of the cultist vehicle with explosive arrows 0:01:35 - Clearing the remaining perimeter of cultist forces 0:01:57 - Notification of successful Elk Jaw Lodge liberation 0:02:06 - Cinematic sequence showing resistance takeover 0:02:24 - Transition to extended black screen 0:06:00 - Continued period of dead air and black screen 0:10:00 - Conclusion of the full video duration 📖 Interactive written walkthrough with clickable timestamps: https://pixelfungaming.com/videos/far-cry-5-elk-law-lodge-outpost-undetected-no-alarms

Assassins Creed: Shadows | Kuji kiri | A True Igan Walkthrough
This comprehensive video provides an in-depth look at a mission from Assassin's Creed Shadows featuring the shinobi Naoe. It begins with a ritual in the Rolling Glen before transitioning to a pivotal story moment in Iga Province during the winter of 1579. Viewers see Naoe receive the grappling hook from her mentor, Momochi Sandayu, and subsequently use it to infiltrate Kunimiyama Fort. The gameplay highlights stealth mechanics such as eavesdropping on enemy soldiers, roof-to-tree traversal, and vertical infiltration of watchtowers. The video concludes with the successful completion of the 'A True Igan' quest, followed by cinematic training montages that emphasize Naoe's development as a warrior and spy. Chapters: 0:00:00 - 0:02:30 - Introduction, ritual sequence, and meeting Momochi Sandayu 0:02:30 - 0:05:15 - Receiving the grappling hook and approaching Kunimiyama Fort using forest traversal 0:05:15 - 0:08:30 - Stealth infiltration of the fort, including roof parkour and eavesdropping on Oda clan soldiers 0:08:30 - 0:11:00 - Climbing the watchtower, discovering the deceased shinobi, and reporting back to the mentor 0:11:00 - 0:13:45 - Training montage showcasing combat skills, bridge practice, and precision strikes 0:13:45 - 0:14:47 - Quest completion wrap-up and closing cinematic sequences 📖 Interactive written walkthrough with clickable timestamps: https://pixelfungaming.com/videos/assassins-creed-shadows-kuji-kiri-a-true-igan-walkthrough

Fireworks :)
A backyard fireworks display ignites at dusk with participants gathered near a windmill silhouette. Red sparks flare on the ground before multiple projectiles shoot into the darkening sky, leaving bright trails. A massive red shell detonates at the apex, filling the frame with a brilliant crimson burst and crackling sounds. The smoke from the explosion dissipates into the clear evening air as the short spectacle concludes. Chapters: 0:00:00 - 0:00:02 - Ignition and initial launch at dusk 0:00:02 - 0:00:04 - Red projectiles ascending into the sky 0:00:04 - 0:00:06 - Main crimson firework detonation 0:00:06 - 0:00:08 - Smoke clearing in the evening sky 📖 Interactive written walkthrough with clickable timestamps: https://pixelfungaming.com/videos/fireworks

Ghost Recon Breakpoint - Spirit Of The Hive - Solar Plant
The mission Spirit of the Hive in Ghost Recon Breakpoint begins with a tactical infiltration of the Aurora Solar Power Plant. The operative moves stealthily between rows of solar panels, using suppressed weapons and squad commands to neutralize Sentinel guards one by one. After securing several gear upgrades from fallen enemies, including an M1911 and specialized tactical boots, the team pushes into the facility's interior buildings. High-intensity close-quarters combat ensues as they clear out hostile forces to reach the scientist Wynh Van Dyke. Once located, Van Dyke begins wiping his research data to prevent it from falling into the wrong hands. This triggers a massive counter-attack by Sentinel forces. The operative must hold a defensive position against waves of ground troops, armored vehicles, automated drones, and a combat helicopter. Following a chaotic firefight and the successful destruction of the data, a cinematic sequence details Van Dyke's involvement with the CLAW program. The mission concludes with the operative reporting to Sam Fisher, securing crucial information for the resistance. Chapters: 0:00:00 - 0:02:15 - Stealthy infiltration of the solar panel field 0:02:15 - 0:04:10 - Securing the perimeter and looting tactical gear 0:04:10 - 0:06:15 - Close-quarters combat in the facility buildings 0:06:15 - 0:08:45 - Clearing the main power plant core 0:08:45 - 0:11:20 - Defending Wynh Van Dyke during the data wipe 0:11:20 - 0:13:28 - Mission completion and cinematic debrief 📖 Interactive written walkthrough with clickable timestamps: https://pixelfungaming.com/videos/ghost-recon-breakpoint-spirit-of-the-hive-solar-plant

Ghost Recon Wildlands - Protect/Extract La Gringa Doctor
A specialized tactical unit arrives at a rebel campsite via helicopter to secure medical attention for a high-value asset known as 'La Gringa'. After transferring the wounded target to a rebel doctor, the team must hold a defensive position against incoming Santa Blanca cartel reinforcements. The engagement features high-stakes firefights, the strategic use of explosive ordnance against enemy air support, and a coordinated defense against armored ground vehicles. Once the target is stabilized, the squad conducts a rapid extraction, boarding the helicopter under persistent threat. The mission concludes with a tactical flight through the marshy terrain of Caimanes to a secure drop-off point, completing the objective despite significant enemy opposition. The extraction of La Gringa begins with a tactical helicopter landing on a remote dirt path where the wounded target is located. Team members quickly secure the area and escort her to a transport helicopter, departing immediately to navigate the dense jungle and mountainous terrain of the Caimanes region. Upon arrival at the Caimanes Bravo extraction point, the target is brought into a secure stone building for processing. A detailed cinematic sequence follows, showing Karen Bowman providing field medical care while engaging in a harsh interrogation regarding the target's involvement with the cartel. The interaction highlights the captive's desperation and her fear of the cartel leader, Sueno. The operation concludes with a successful mission notification and a radio briefing detailing the cartel's latest experiments with high-tech submarines used for smuggling operations. Chapters: 0:00:00 - Helicopter arrival and landing at the rebel camp 0:00:35 - Consulting with the rebel doctor regarding the target's condition 0:00:54 - Santa Blanca cartel forces launch a counter-assault 0:01:31 - Neutralizing an enemy helicopter with an underslung grenade launcher 0:02:15 - Holding the perimeter against multiple armored vehicle convoys 0:03:08 - Target stabilization and preparation for final extraction 0:03:30 - Coordinating the boarding process under enemy fire 0:04:15 - Tactical flight towards the Caimanes Bravo extraction point 0:04:55 - Final landing and mission completion 0:05:00 - Helicopter landing and initial contact with the target 0:05:12 - Escorting the wounded La Gringa to the transport vehicle 0:05:35 - Takeoff and aerial transport across the Caimanes mountains 0:05:52 - Arrival and landing at the designated extraction point 0:06:07 - Cinematic sequence: Bowman provides medical treatment 0:06:45 - Interrogation regarding the captive's future and cartel ties 0:07:15 - Mission completion and rewards summary 0:07:25 - Intelligence briefing on cartel submarine operations

Hitman Blood Money : Zombie Easter egg
Agent 47 prepares for the 'Death on the Mississippi' mission by selecting and upgrading tactical equipment, including the Silverballer and various submachine guns. The operation begins under the cover of night as he boards a large riverboat. Initial gameplay focuses on stealthy infiltrations on the lower decks, where he quietly neutralizes crew members and hides their bodies in engine rooms and storage containers to avoid detection. As he progresses to the more populated upper decks, the approach shifts to aggressive gunplay. 47 navigates narrow hallways and staterooms, using his silenced pistols and high-caliber revolvers to eliminate primary targets and security personnel with clinical efficiency. Chapters: 0:00:00 - 0:01:27 - Mission Briefing and Weapon Customization 0:01:27 - 0:03:45 - Lower Deck Stealth and Initial Infiltration 0:03:45 - 0:05:12 - Infiltrating the Guest Areas and Mid-Deck Clear 0:05:12 - 0:06:26 - Upper Deck Combat and Final Target Neutralization 📖 Interactive written walkthrough with clickable timestamps: https://pixelfungaming.com/videos/hitman-blood-money-zombie-easter-egg

Ghost Recon Wildlands - La Carcel Del Pueblo Walkthrough
Tactical gameplay unfolds as an operative infiltrates La Carcel del Pueblo, a heavily guarded prison facility nestled within a rugged canyon in Ghost Recon Wildlands. The operation begins with careful navigation along steep cliffside paths to establish a superior vantage point. Precision marksmanship is demonstrated as sentries are neutralized using suppressed weaponry while aerial drone reconnaissance identifies high-value targets, including snipers and ground patrols. The mission progresses through methodical movement along elevated catwalks to reach the primary objective: disabling the prison's main generator. Compromising the security systems allows for a meeting with a high-value rebel prisoner who provides critical intelligence about 'El Pozolero'. Following the interrogation, the situation escalates into a chaotic firefight between rebel reinforcements and Santa Blanca cartel forces. Amidst the ongoing conflict, the operative maneuvers through the courtyard to secure a high-caliber SR-25 sniper rifle from the armory before conducting a fighting withdrawal through the mountain pass toward the extraction point. Chapters: 0:00:00 - Initial canyon approach and scouting 0:02:05 - Advanced aerial drone scouting of the facility 0:04:00 - Tactical perimeter breach and guard elimination 0:07:30 - In-depth reconnaissance of the prison interior 0:10:00 - Stealthy infiltration of the upper walkways 0:11:31 - Breaching the generator room and disabling power 0:12:09 - Interrogating the rebel leader (El Pozolero intel) 0:13:30 - Faction warfare: Rebels vs. Santa Blanca 0:14:14 - Securing the armory and SR-25 sniper rifle 0:15:00 - Exfiltration and mission completion

Far Cry New Dawn - (Grace) Buzzkill Walkthrough
The mission begins with a motorcycle ride through the colorful post-apocalyptic landscape of Hope County. The character arrives at Scrapfarm, initiating a fierce combat encounter with Highwaymen using a variety of weapons including shotguns and rifles. After clearing the area, the character meets Grace Armstrong, an old ally who has lost her sight but remains resilient. Grace explains that Highwaymen stole her custom-built weapon and materials, tasking the character with retrieving them from the Old Train Yard. After looting the farm, the journey continues across the map to Buzzard's Hoard. Upon arrival, the character scouts the fortified train yard from a distance, identifying enemy positions. A large-scale firefight ensues, involving ground troops and a hostile helicopter which is eventually shot down. The character systematically clears the area and searches several train cars to find the stolen materials. Inside a high-security container, the character retrieves the Saw Launcher, a powerful new weapon. After gathering the final supplies, the character meets Grace at a nearby extraction point to deliver the goods and complete the mission, securing Grace's help for the community of Prosperity. Chapters: 0:00:00 - 0:01:10 - Arrival at Scrapfarm and Combat 0:01:10 - 0:02:45 - Meeting Grace Armstrong and Receiving Mission 0:02:45 - 0:05:25 - Traveling Through Hope County to the Train Yard 0:05:25 - 0:07:20 - Scouting Buzzard's Hoard with Binoculars 0:07:20 - 0:10:00 - Breaching the Train Yard and Helicopter Combat 0:10:00 - 0:12:00 - Eliminating Remaining Guards and Searching Cars 0:12:00 - 0:14:00 - Finding the Saw Launcher and Stolen Materials 0:14:00 - 0:16:11 - Final Meeting with Grace and Mission Completion 📖 Interactive written walkthrough with clickable timestamps: https://pixelfungaming.com/videos/far-cry-new-dawn-grace-buzzkill-walkthrough

HITMAN 2 - Effigy Ceremony - (Now You Dont)
Agent 47, disguised as the Master of Ceremonies, prepares a fatal trap for Zoe Washington during a ritual at the Isle of Sgàil. He infiltrates a technician area to sabotage the hydraulic system of a large phoenix effigy, ensuring its cage door remains locked. After collecting necessary tools and intelligence, he scales the castle's exterior walls to reach the ceremonial grounds unnoticed. Taking his place at the center of the gathering, he ignites a massive pit of money to start the proceedings. He then summons Zoe Washington to the stage, where she enters the trapped effigy cage to deliver a speech to the assembled Ark Society members, completely unaware of the impending danger. A figure in a red cape and mask addresses a large crowd of people wearing formal attire and white masks. They are gathered around a burning fire pit in front of a grand stone staircase at night. A woman in a white dress stands atop the stairs, framed by a large, metallic, wing-like structure. The speaker concludes a speech about privilege and the future, prompting the crowd to cheer. Two men in red robes then escort a figure up the stairs to join the woman inside the structure. One of the men, disguised as a ritual participant, approaches the fire pit with a torch and ignites the base of the structure while the woman is inside. Flames quickly engulf the metallic cage, and the woman's screams are heard as she is trapped. The crowd watches and applauds the spectacle as the structure burns intensely. The perpetrator then descends the stairs and blends back into the masked crowd as the objective to eliminate Zoe Washington is successfully completed. Chapters: 0:00:00 - Infiltrating the technician area 0:00:10 - Collecting tools and intelligence 0:00:30 - Sabotaging the hydraulic door system 0:01:10 - Scaling the exterior castle walls 0:01:35 - Arriving at the ceremonial courtyard 0:02:00 - Igniting the ceremonial money pit 0:03:10 - Reviewing mission objectives and intel 0:04:00 - Summoning Zoe Washington to the stage 0:04:20 - Zoe Washington begins her ceremonial speech 0:00:00 - Ceremonial speech to the masked assembly 0:00:22 - Ascending the stone stairs to the sacrificial structure 0:00:38 - Igniting the mechanism beneath the cage 0:00:58 - Flames consume the metallic sculpture and target 0:01:11 - Confirmation of target elimination 0:01:25 - Blending into the crowd to escape detection 📖 Interactive written walkthrough with clickable timestamps: https://pixelfungaming.com/videos/hitman-2-effigy-ceremony-now-you-dont

MAFIA 3 | Definitive Edition Live #9
The mission involves a night drive through the rainy streets of New Bordeaux. The car speeds across a bridge and maneuvers through traffic to reach a club in the French Ward. Upon arrival, the protagonist enters a dimly lit bar to speak with Harold Cauley. They discuss local news and the potential for a sex scandal involving city elites. The conversation provides intel on a prostitution operation run by 'Handsome Harry.' The mission journal updates with new objectives, including interrogating pimps and destroying racket assets, as the character prepares for the next phase of the investigation. Chapters: 0:00:00 - 0:00:15 - High-Speed Night Drive Through New Bordeaux 0:00:15 - 0:00:23 - Arriving at the French Ward Club 0:00:23 - 0:00:40 - Dialogue with Harold Cauley 0:00:40 - 0:00:50 - Mission Objectives and Journal Update 📖 Interactive written walkthrough with clickable timestamps: https://pixelfungaming.com/videos/mafia-3-definitive-edition-live-9

Ghost Recon Wildlands - Comms Tool Drop #1
A tactical squad infiltrates a Santa Blanca Cartel camp to steal a helicopter for a communications tool raid. After performing reconnaissance and identifying several high-value targets, the team moves into position near a landing pad. A brief but intense firefight ensues, neutralizing the cartel soldiers guarding the aircraft. Once the perimeter is secured, the squad boards the helicopter and departs for the next objective. Piloting a utility helicopter through a rugged mountain range, the operative navigates a path toward a rebel rendezvous point. The landscape is a mix of arid earth and snow-capped peaks, with winding roads visible below. As the destination approaches, the pilot executes a controlled descent into a narrow canyon where a small rebel encampment is established. Upon touchdown, the mission to deliver communication tools concludes successfully, providing resources for the resistance. The operative, clad in a full ghillie suit, disembarks to meet with local allies amidst their parked technicals and supplies, surveying the camp and the surrounding high-altitude environment. Chapters: 0:00:00 - Initial reconnaissance from the mountain ridge 0:00:15 - Marking cartel soldiers around the landing zone 0:00:31 - Descent down the slope toward the target area 0:01:00 - Utilizing thermal vision to track enemy movement 0:01:25 - Final assessment of enemy positions near the helicopter 0:02:25 - Closing in on the landing pad using stealth 0:03:08 - Coordinating the squad for a synchronized assault 0:03:25 - Engaging the cartel guards in a swift firefight 0:04:44 - Securing the aircraft and taking off 0:05:00 - Initial flight over mountainous terrain 0:05:15 - Navigating high-altitude peaks and valleys 0:05:30 - Descent towards the rebel rendezvous point 0:05:45 - Final approach and landing in the canyon 0:05:53 - Mission completion and delivery of supplies 0:06:05 - Exploring the rebel camp on foot

Surgeon Simulator 2013 LiveStream
The surgical simulation begins with navigating the main menu desk, selecting the heart transplant operation for patient Bob. The operation starts in a dimly lit operating room where a clumsy hand fumbles with basic surgical tools. The initial phase involves forcefully removing the patient's ribs using a bone saw and hammer, often resulting in massive blood spray and accidental organ damage. As the procedure progresses, multiple attempts are made to clear the chest cavity, frequently leading to critical blood loss and surgical failure. The surgeon struggles with the physics-based controls, knocking over trays of instruments and syringes while trying to excise the lungs and reach the heart. Stylized visual glitches appear as the surgical attempts become more frantic and repetitive. Each botched surgery leads back to a quick restart or the main menu, showing the persistent struggle to complete the delicate procedure with highly imprecise movements. The gameplay concludes after several failed heart transplant attempts and a final return to the doctor's desk. Chapters: 0:00:00 - 0:00:23 - Main menu navigation and operation selection 0:00:23 - 0:01:21 - Initial fumbling with tools and first surgical attempts 0:01:21 - 0:03:00 - Aggressive rib cage removal and internal organ displacement 0:03:00 - 0:04:55 - Series of failed procedures and rapid menu resets 0:04:55 - 0:06:15 - Frantic tool use and managing extreme blood loss 0:06:15 - 0:07:47 - Cycle of surgical restarts and instrument chaos 0:07:47 - 0:08:54 - Intense chest cavity clearing with the bone saw 0:08:54 - 0:10:00 - Final high-stakes transplant attempts 0:10:00 - 0:10:30 - Concluding surgical failure and return to desk 📖 Interactive written walkthrough with clickable timestamps: https://pixelfungaming.com/videos/surgeon-simulator-2013-livestream

Dead Island 2: Blood Drive | CO-OP Walkthrough (No Commentary) #DeadIsland2
The mission 'Blood Drive' begins as characters infiltrate the CDC headquarters area on the beach. Combat encounters involve dispatching Hazmat Walkers with katanas and electrical environmental hazards. Systematic exploration of medical tents reveals clues and leads to the facility's Main Dome. Outside the dome, an intense battle breaks out against a horde of infected, featuring heavily armored Riot Gear Walkers. Inside the dome, the objective shifts to utilizing a blood sampling machine, which necessitates restoring the local power supply by toggling circuit breakers. A subsequent search through the autopsy bays is required to find Dr. Dorian's access code, which is eventually recovered from a severed limb. The character undergoes a painful blood extraction process via a robotic interface. After successfully obtaining the sample, the characters push through to Santa Monica beach, navigating past shambling walkers to reach the Lifeguard HQ. The mission reaches its climax with a fierce confrontation against massive Crusher and Inferno Crusher variants within the station. The quest concludes once the area is cleared and the distracting 'Whale Song' audio is deactivated. Chapters: 0:00:00 - 0:00:45 - Infiltration of the CDC Zone and initial Hazmat Walker encounters 0:00:45 - 0:02:15 - Exploration of medical tents and gathering supplies 0:02:15 - 0:03:45 - Navigating the perimeter toward the CDC Main Dome 0:03:45 - 0:04:45 - Heavy combat encounter outside the dome entrance 0:04:45 - 0:05:55 - Entering the dome and restoring power to the sampler 0:05:55 - 0:07:55 - Searching the autopsy bays for Dr. Dorian's access code 0:07:55 - 0:08:45 - Blood extraction sequence at the sampling machine 0:08:45 - 0:10:00 - Breaking out of the facility and heading to Santa Monica beach 0:10:00 - 0:11:45 - Investigating the Lifeguard HQ and beach combat 0:11:45 - 0:14:02 - Final battle against Crushers and mission completion 📖 Interactive written walkthrough with clickable timestamps: https://pixelfungaming.com/videos/dead-island-2-blood-drive-co-op-walkthrough-no-commentary-deadisland2

Hitman Blood Money : Massacre
The mission begins with the selection of the 'Death on the Mississippi' contract in Hitman: Blood Money. Agent 47 starts by customizing his loadout, heavily upgrading an M4 assault rifle with a drum magazine, tactical sights, and a silencer to prepare for a high-intensity engagement. Upon deployment at a riverboat dock at night, Agent 47 initially employs stealth, using a silenced Silverballer to eliminate guards on the exterior gangplanks. The mission quickly transitions into a brutal 'Kill Everyone' run after he retrieves his customized M4 from an ICA supply crate. Agent 47 systematically sweeps through every deck of the ship, utilizing a variety of weapons including the M4, an SMG Tactical, and a Bull.480 revolver to clear rooms of gang members and any witnesses. Combat moves from the cargo holds to the opulent dining halls and upper-deck lounges. In the private quarters on the top deck, he eliminates the primary targets and secures incriminating photographs from a safe. The rampage continues as he clears the remaining crew with aggressive gunplay and remote RU-AP mines. The mission concludes as Agent 47 boards a rescue boat to escape the scene of the massacre, which is later featured in a newspaper headline detailing the 'Terrorist Massacre'. Chapters: 0:00:00 - 0:00:58 - Profile Management and Mission Selection 0:00:58 - 0:02:41 - Mission Briefing and Detailed M4 Customization 0:02:41 - 0:04:30 - Initial Infiltration and ICA Weapon Retrieval 0:04:30 - 0:06:45 - Aggressive Clearing of Main Dining Areas 0:06:45 - 0:09:10 - Top Deck Objectives and Safe Retrieval 0:09:10 - 0:11:15 - Systematic Deck Clearing with SMGs and Mines 0:11:15 - 0:12:03 - Final Escape and Mission Results Summary 📖 Interactive written walkthrough with clickable timestamps: https://pixelfungaming.com/videos/hitman-blood-money-massacre

Dead Island 2: Fun With Makeshift Torpedos #shorts #deadisland2
The combat begins in an open-air training facility where a yellow gas canister is repurposed as an improvised explosive. A precise strike from a melee weapon ignites the fuel, sending the tank careening into a small group of undead before a massive detonation clears the area. Transitioning to a studio parking lot, several Walker zombies converge near a pool of water. Another canister is struck and launched, triggering a fiery blast that immediately incinerates the surrounding targets. The final sequence takes place inside a luxury mall atrium. Facing a significantly larger horde, a well-timed explosion from a gas canister creates a devastating firestorm across the lobby floor, effectively neutralizing the entire group of zombies in one explosive maneuver. Chapters: 0:00:00 - 0:00:14 - Initial Canister Takedown in the Training Yard 0:00:14 - 0:00:37 - Alleyway Pyrotechnics Against Walkers 0:00:37 - 0:01:00 - Large Scale Crowd Control in the Mall Atrium 📖 Interactive written walkthrough with clickable timestamps: https://pixelfungaming.com/videos/dead-island-2-fun-with-makeshift-torpedos-shorts-deadisland2

HITMAN Freelancer: Marakesh Saber Location #shorts
Agent 47 begins the mission in a bustling Marrakesh alleyway, standing near a green van before making a move toward his objective. He vaults over a concrete barrier and discreetly enters a nearby shoe shop. Once inside, he activates his instinct ability to scan the area for potential threats and targets. Navigating behind the retail counter, he locates and retrieves a curved saber, tucking it away for future use. The mission progress is tracked through the menu system, where the current objectives and inventory items are reviewed. The operation concludes with a detailed inspection of the Marrakesh map, specifically pinpointing the shoe shop's location relative to the rest of the market square and surrounding structures. Chapters: 0:00:00 - 0:00:10 - Infiltration of the Marrakesh Shoe Shop 0:00:10 - 0:00:20 - Locating and Retrieving the Saber 0:00:20 - 0:00:35 - Reviewing Mission Intel and Inventory 0:00:35 - 0:00:54 - Strategic Map Analysis of the Territory 📖 Interactive written walkthrough with clickable timestamps: https://pixelfungaming.com/videos/hitman-freelancer-marakesh-saber-location-shorts

Assassin's Creed Valhalla - Tamworth Fortress Assault
The mission 'The Sons of Ragnar' begins with Eivor speaking to Ubba about the conquest of Mercia and the plan to install a new king. The dialogue introduces Ivarr the Boneless and the young Ceolbert, who is being mentored for his future role. Eivor joins Sigurd and the Ragnarsson brothers on a long horse ride toward Tamworth, during which Sigurd discusses his complicated feelings regarding King Harald's unification of Norway. Upon arrival at the gates of Tamworth Fortress, the Norse forces attempt a final negotiation, but King Burgred remains defiant on the battlements, forcing a siege. The assault begins as Eivor takes command of a battering ram, smashing through successive gates while under heavy fire from Saxon archers. Combat intensifies within the fortress courtyards as Eivor clears defenders and climbs the walls to secure strategic points. After breaching the main keep, the Norse warriors realize King Burgred has already fled. Eivor searches the interior and finds a ledger containing a merchant's sigil, revealing that a mercenary named Tonna has been playing both sides. The quest concludes with a discussion between Eivor and the newly crowned King Ceolwulf, setting the stage for the hunt for the deposed monarch. Chapters: 00:00:00 - 00:01:47 - Strategy with the Sons of Ragnar 00:01:47 - 00:04:15 - Riding Through the Mercian Countryside 00:04:15 - 00:06:37 - Sigurd's Thoughts on Norway and Kingship 00:06:37 - 00:08:58 - Failed Negotiations with King Burgred 00:08:58 - 00:10:30 - Preparing the Battering Ram for Assault 00:10:30 - 00:12:45 - Siege of Tamworth: Breaching the Gates 00:12:45 - 00:14:45 - Infiltrating the Keep and Finding the Traitor's Mark 00:14:45 - 00:15:42 - Quest Completion and Alliance Update 📖 Interactive written walkthrough with clickable timestamps: https://pixelfungaming.com/videos/assassin-s-creed-valhalla-tamworth-fortress-assault

HITMAN Freelancer: Eco Crime Syndicate | Mumbai - Final Showdown
Agent 47 is deployed to the dense urban environment of Mumbai for a critical Syndicate Showdown. The mission begins with a detailed briefing on the syndicate leader's known traits, including physical appearance and personal habits. The operative navigates through the crowded market streets and cramped slums, using specialized surveillance tools and instinct to filter through numerous suspects. Each potential target is scrutinized for specific details like headwear, tattoos, and smoking behaviors. The search expands from the central markets to industrial zones and residential apartments as Agent 47 tracks secret meetings to confirm the leader's identity. Once the primary target is isolated, the operation shifts into a tactical phase. Agent 47 skillfully acquires a disguise to infiltrate the target's guarded perimeter. After a precise elimination of the syndicate leader, the mission focus moves to secondary objectives, including the neutralization of high-tier lookouts and the technical breaching of a syndicate safe. The campaign successfully concludes with a quiet extraction from the hostile territory, followed by a full summary of the campaign rewards and mastery progress. Chapters: 0:00:00 - 0:02:30 - Mission briefing and initial suspect surveillance in Mumbai 0:02:30 - 0:05:15 - Extended scouting of suspects in the crowded central markets 0:05:15 - 0:08:45 - Tracking suspect movements through the industrial and bridge zones 0:08:45 - 0:11:30 - Identifying the true Syndicate Leader and planning the hit 0:11:30 - 0:14:15 - Infiltration of secure areas using acquired disguises 0:14:15 - 0:16:00 - Tactical elimination of the target and lookout neutralization 0:16:00 - 0:17:53 - Safe cracking, final objective completion, and campaign finish 📖 Interactive written walkthrough with clickable timestamps: https://pixelfungaming.com/videos/hitman-freelancer-eco-crime-syndicate-mumbai-final-showdown

RDR2 - Legendary Bounty Gene Beau Finley
The mission begins with a ride through the swampy outskirts towards Shady Belle under the cover of night. Upon reaching the plantation house, an intense shootout erupts against gang members. Fire bottles and heavy gunfire illuminate the foggy grounds as the assault progresses through the courtyard. A cougar surprises the attackers near the mansion's porch during the chaos. After clearing most of the resistance, the target, Gene 'Beau' Finley, attempts to flee but is tackled and bound. Once secured, the bounty is hoisted onto a horse for a quick extraction. The escape from Shady Belle involves fending off waves of pursuing riders while navigating back towards civilization. The mission concludes with the successful delivery of the target to the Saint Denis jail and a brief exchange with the local sheriff. Chapters: 0:00:00 - 0:00:38 - Nighttime approach to Shady Belle 0:00:38 - 0:01:42 - Initial assault on the plantation house 0:01:42 - 0:02:20 - Clearing the courtyard and facing a cougar 0:02:20 - 0:02:35 - Capturing and binding Gene 'Beau' Finley 0:02:35 - 0:03:30 - Escaping Shady Belle under heavy fire 0:03:30 - 0:04:00 - Horseback combat against pursuing reinforcements 0:04:00 - 0:04:12 - Delivery to the Saint Denis jail 0:04:12 - 0:05:07 - Mission completion and environmental time lapse 0:05:07 - 0:05:21 - Final mission debriefing scene 📖 Interactive written walkthrough with clickable timestamps: https://pixelfungaming.com/videos/rdr2-legendary-bounty-gene-beau-finley

HITMAN 2 - The Ark Society - How To Steal The Necklace
The gameplay demonstrates a precise stealth operation within Hitman 2's Sgàil location during 'The Ark Society' mission. Viewers will see the protagonist, Agent 47, infiltrating a high-security gallery to obtain a specific artifact. The content covers the process of identifying security blind spots, utilizing a gramophone as a sound-based distraction to lure a guard away, and the subsequent theft of the Aztec necklace. The video concludes with a quiet exit from the immediate area, highlighting a clean and undetected retrieval of the target item. Chapters: 0:00:00 - 0:00:24 - Initial positioning and scanning the gallery environment 0:00:24 - 0:00:33 - Executing the gramophone distraction to lure the guard 0:00:33 - 0:00:45 - Stealing the Aztec necklace from the display case 0:00:45 - 0:00:54 - Exiting the gallery and moving towards a safe zone 📖 Interactive written walkthrough with clickable timestamps: https://pixelfungaming.com/videos/hitman-2-the-ark-society-how-to-steal-the-necklace

Far Cry 5 - Zombies - Fields Of Terror
The mission begins with an intense shootout at a foggy farmstead, where mutation stations spew relentless waves of zombies. Combat is fast-paced as the character uses a double-barrel shotgun and a pistol to clear the initial area and destroy the first glowing mutation station. The action moves through a field of plane wreckage, where burning zombies emerge from the flames. Strategically navigating the environment, the character climbs a water tower to gain a tactical vantage point, raining fire down on the undead below with an M60 machine gun. The battle intensifies as more mutation stations are targeted across the farm, requiring constant movement and weapon swapping between the AK-47 and SPAS-12 to manage the increasing numbers of enemies. The final confrontation takes place inside a large, dilapidated barn filled with hay and more mutation stations. Amidst the chaos of explosions and gunfire, the last of the stations are obliterated, finally stemming the tide of zombies. The mission concludes with a stylistic transition as the movie pitch sequence ends. Chapters: 0:00:00 - 0:01:30 - Initial combat and first mutation station 0:01:30 - 0:03:00 - Navigating the plane wreckage and farm buildings 0:03:00 - 0:04:45 - Destroying stations amidst the burning fields 0:04:45 - 0:06:15 - Tactical vantage point from the water tower 0:06:15 - 0:08:00 - Heavy weapons engagement in the open fields 0:08:00 - 0:10:00 - Clearing the wooded area mutation stations 0:10:00 - 0:11:45 - Final assault on the mutation stations in the barn 0:11:45 - 0:12:20 - Mission completion and pitch conclusion 📖 Interactive written walkthrough with clickable timestamps: https://pixelfungaming.com/videos/far-cry-5-zombies-fields-of-terror

Dead Island 2: Quest l Death At The Party | Walktrhough (No Commentary)
The mission begins with a conversation with Curtis Sinclair, an elderly former actor trapped on a balcony who requests help restoring power to his home's chairlift. After the dialogue, the characters navigate through a zombie-infested garden toward an external power connection. A brief combat encounter occurs near the power panel before the electricity is restored. The team returns to the main residence, clearing out shamblers and walkers near a central fountain. Upon entering the house, Curtis starts his slow descent on the chairlift while the players engage in a frantic battle to clear the ground floor of zombies, including Curtis's own undead nephew. Once the area is secure, Curtis successfully reaches the bottom floor. The side quest 'The Death of the Party' concludes with a final dialogue where Curtis rewards the group with experience points and a rare golf club weapon before directing them toward the Jaunt residence for safety. Chapters: 0:00:00 - 0:00:54 - Initial meeting with Curtis Sinclair 0:00:54 - 0:01:25 - Restoring power to the residence 0:01:25 - 0:02:13 - Returning to the house and garden combat 0:02:13 - 0:02:53 - Entering the residence and Curtis's descent begins 0:02:53 - 0:03:59 - Clearing the house of undead guests 0:03:59 - 0:04:47 - Waiting for the chairlift to reach the ground floor 0:04:47 - 0:06:14 - Completing 'The Death of the Party' side quest 📖 Interactive written walkthrough with clickable timestamps: https://pixelfungaming.com/videos/dead-island-2-quest-l-death-at-the-party-walktrhough-no-commentary

Red Dead Revolver: Part 5 | Pig Josh Bounty (Carnival Life) (Ultra HD)
The mission begins in the dusty town of Brimstone, where Red delivers a bounty and meets Sheriff Bartlett. Following a briefing on dangerous local outlaws, including the circus freak Pig Josh, Red visits the general store to stock up on dynamite and upgrade his weaponry. The objective shifts to an abandoned circus camp where Red discovers Jack Swift trapped in a hanging cage. After a brief skirmish to liberate Jack, intense combat erupts as waves of circus-themed henchmen attack. Red seizes control of a mounted Gatling gun to mow down advancing performers from a high vantage point. The struggle continues through the dilapidated ruins until Pig Josh emerges, launching a barrage of explosives. A protracted boss fight ensues, requiring constant movement and precise rifle fire to deplete the outlaw's health while dodging dynamite blasts. Upon Pig Josh's defeat, Jack Swift departs to settle his own debts, and Red reviews his mission statistics and bounty earnings. Chapters: 0:00:00 - 0:00:52 - Arrival in Brimstone and Bounty Delivery 0:00:52 - 0:02:32 - Town Exploration and Sheriff's Briefing 0:02:32 - 0:03:17 - Weapon Selection and Shop Purchases 0:03:17 - 0:05:36 - Rescuing Jack Swift from the Circus Cage 0:05:36 - 0:06:49 - Gatling Gun Defense against Circus Raiders 0:06:49 - 0:08:31 - Clearing the Abandoned Circus Grounds 0:08:31 - 0:13:04 - Pig Josh Boss Fight and Explosive Showdown 0:13:04 - 0:13:47 - Mission Conclusion and Bounty Statistics 📖 Interactive written walkthrough with clickable timestamps: https://pixelfungaming.com/videos/red-dead-revolver-part-5-pig-josh-bounty-carnival-life-ultra-hd

Far Cry New Dawn - Five Stars Theme Park Walkthrough
The mission begins with a briefing from Roger Cadoret at the home base, detailing a strategic expedition to the Five Stars Theme Park. Upon arrival via helicopter, the environment is scouted from an elevated vantage point to identify Highwaymen positions. The initial approach is methodical, utilizing stealth and long-range scoped rifles to eliminate key threats. Combat intensifies as the movement shifts onto the rusted tracks of an abandoned roller coaster, leading to a loud and chaotic shootout. After navigating the park's grounds and engaging multiple enemy waves with firearms and explosives, the objective building is breached. Inside, the package is secured, which immediately triggers a GPS tracker alerting more hostiles. A rapid dash across the park leads to the extraction zone, where a fierce defensive stand is staged. The character holds the position against relentless reinforcements until the extraction helicopter lands, allowing for a successful escape and mission completion. Chapters: 0:00:00 - 0:00:33 - Mission Briefing with Roger Cadoret 0:00:33 - 0:01:12 - Expedition Selection and Loading 0:01:12 - 0:01:30 - Cinematic Arrival at Five Stars Theme Park 0:01:30 - 0:03:25 - Stealth Approach and Enemy Reconnaissance 0:03:25 - 0:06:00 - Heavy Combat on Elevated Roller Coaster Tracks 0:06:00 - 0:06:22 - Infiltrating the Building and Securing the Package 0:06:22 - 0:06:53 - Maneuvering Through the Park to Extraction 0:06:53 - 0:08:44 - Defensive Hold-out at the Extraction Point 0:08:44 - 0:09:38 - Helicopter Extraction and Mission Success 📖 Interactive written walkthrough with clickable timestamps: https://pixelfungaming.com/videos/far-cry-new-dawn-five-stars-theme-park-walkthrough

Assassins Creed: Shadows | The Wounded | Assassinate Oda Nobunaga
Naoe's mission begins at a secret hideout where she receives word of a potential ally, Lord Akechi Mitsuhide. The journey leads to Katano Castle, where stealth tactics are employed to navigate rooftops and bypass guards while scouting with an eagle. Upon meeting Mitsuhide, a tense dialogue reveals a plot to assassinate Oda Nobunaga, who is blamed for the death of Naoe's father. The character then travels through a snowy landscape toward Kyoto to meet Ise Sadaoki and coordinate an infiltration of Honno-ji Temple. To succeed, Naoe must retrieve genuine delivery documents from a samurai favored by Nobunaga. This objective involves careful observation and silent takedowns within a heavily guarded residence near Nanban Temple. After securing the papers, Naoe departs, preparing for the final stage of the infiltration plan. Naoe begins a high-stakes infiltration of the Honnoji Temple under the cover of night, using dense foliage and shadows to remain undetected. She demonstrates fluid parkour and grappling hook mechanics to scale the temple walls and navigate the rooftops, gaining a tactical vantage point over the patrolling guards. After a series of silent takedowns, the scene shifts to a dramatic cinematic as the temple is set ablaze during a massive assault. Inside the burning structure, Naoe confronts Oda Nobunaga in an intense boss battle where she must dodge quick strikes and counter with precision. The conflict reaches a turning point when Yasuke, Nobunaga's loyal retainer, intervenes. A somber ritual concludes Nobunaga's life, leading to the temple's ultimate collapse. The narrative then follows Naoe back to the charred remains of Katano, where she searches for a young boy named Junjiro. Her quest leads her to a heavily fortified castle during a torrential rainstorm. She utilizes the weather to mask her movements, eventually leading to a final standoff with Yasuke. This confrontation is interrupted by Junjiro, triggering a poignant flashback that provides deeper context to the relationship between the boy and the samurai, ending the encounter on a note of complex resolution. Yasuke and Naoe forge a deep bond and formalize their alliance following the events of the Mibuno Showdown. After a brief transition, they arrive at a secluded temple to meet Tomiko, who welcomes them back with a mix of relief and strictness. Naoe initiates an ancient Igan tradition to solidify their commitment to a shared cause. Gathering around a ritual fire, the group shares a drinking bowl in a symbolic ceremony that marks the birth of the League of the Hidden Blade, known as the Kakushiba ikki. Their focus then turns to a detailed mural illustrating the Onryo, the enemies who killed Naoe's father and stole a sacred box. Yasuke provides crucial intelligence on the targets, identifying the Bessho clan and the Ise family's ties to Akechi Mitsuhide. This strategic planning leads to the selection of their next destinations in Harima and Yamashiro. The segment concludes with the completion of the current quest and an opportunity to explore the temple's interior as either protagonist. Chapters: 0:00:00 - Meeting with Tomiko at the hideout 0:02:29 - Map review and fast travel to Katano 0:03:01 - Arrival and scouting at Katano Castle 0:05:43 - Stealth infiltration of the castle interior 0:07:08 - Tense negotiation with Akechi Mitsuhide 0:10:30 - The revelation regarding Naoe's father 0:12:04 - Journey through the snow towards Kyoto 0:13:00 - Meeting Ise Sadaoki at the Kyoto docks 0:15:30 - Entering the Nanban Temple district 0:17:11 - Infiltrating the guarded samurai residence 0:19:00 - Locating the target and securing documents 0:20:30 - Objective completion and departure 0:30:00 - Stealthy infiltration of Honnoji Temple grounds 0:33:15 - Rooftop traversal and scouting guard positions 0:36:45 - Silent assassinations in the temple courtyard 0:40:20 - Approaching the main temple sanctum 0:44:00 - Cinematic: The assault on Honnoji begins 0:47:05 - Boss Duel: Naoe vs. Oda Nobunaga 0:50:30 - The arrival of Yasuke and the fall of Nobunaga 0:53:45 - Exploration of the destroyed Katano village 0:56:50 - Rainy castle infiltration and stealth navigation 0:59:10 - Standoff with Yasuke and Junjiro's intervention 1:00:00 - Yasuke and Naoe exchange vows of loyalty 1:01:14 - Return to the temple and meeting Tomiko 1:02:19 - Preparing for the Igan tradition ritual 1:03:04 - The founding of the League of the Hidden Blade 1:04:36 - Analyzing the mural of the Onryo targets 1:05:52 - Character selection for the next mission phase 1:06:16 - Mibuno Showdown mission completion and exploration 📖 Interactive written walkthrough with clickable timestamps: https://pixelfungaming.com/videos/assassins-creed-shadows-the-wounded-assassinate-oda-nobunaga

HITMAN 3: Elusive Target | ''The Liability'' | Silent Assassin/Suit Only
Agent 47 begins the operation outside a neon-lit juice bar in Berlin. He moves swiftly through a yard of shipping containers, climbing to a high-ground vantage point to oversee the outdoor club area. Crouching for stealth, he navigates the metal rooftops until he aligns with a hanging disco ball directly above the target. With a single, precise shot from a suppressed pistol, the disco ball drops, eliminating the target in a seemingly accidental incident. He immediately retreats from the ledge and makes his way to the mission exit. The contract concludes with a perfect Silent Assassin rating and a detailed summary of the mission performance and unlocked rewards. Chapters: 0:00:00 - 0:00:07 - Initial positioning near the juice bar 0:00:07 - 0:00:15 - Climbing the container yard for a vantage point 0:00:15 - 0:00:30 - Stealthy movement along the rooftops 0:00:30 - 0:00:34 - Executing the accident kill with the disco ball 0:00:34 - 0:00:43 - Exfiltration and mission completion 0:00:43 - 0:00:59 - Silent Assassin rating and rewards screen 📖 Interactive written walkthrough with clickable timestamps: https://pixelfungaming.com/videos/hitman-3-elusive-target-the-liability-silent-assassin-suit-only

Team fortress 2 w/Waterboy (First time playing)
The session begins in the Team Fortress 2 main menu, where the group navigates the co-op interface to join a Mann vs. Machine match. After a period of matchmaking, the game loads the Bigrock map, and the team selects their respective classes, with the focus on the Medic role. Once spawned, the team enters the upgrade station to purchase enhancements for their weapons and abilities. Wave 1 commences as a swarm of robots emerges from a tunnel; the team holds their ground using sentry guns and coordinated fire. Following the successful completion of the first wave, the players return to the station for more upgrades. Wave 2 presents a significantly higher challenge with giant robots and faster units. Despite defensive efforts, the robots manage to carry the bomb to the hatch, resulting in a mission failure. The session concludes with the team reviewing their performance before returning to the main lobby. Chapters: 0:00:00 - 0:01:20 - Co-op Menu Navigation and Tour of Duty Ticket Management 0:01:20 - 0:02:53 - Matchmaking Search for a Co-op Boot Camp Session 0:02:53 - 0:03:37 - Map Loading for Bigrock and Class Selection Screen 0:03:37 - 0:07:08 - Wave 1 Preparation and Purchase of Initial Upgrades 0:07:08 - 0:11:43 - Combat Against Wave 1 Robot Swarms and Tunnel Defense 0:11:43 - 0:12:22 - Wave 1 Victory and Mid-Match Upgrade Phase 0:12:22 - 0:17:27 - Wave 2 Combat and Mission Failure due to Bomb Deployment 0:17:27 - 0:18:23 - Match Summary Review and Return to the Main Menu 📖 Interactive written walkthrough with clickable timestamps: https://pixelfungaming.com/videos/team-fortress-2-w-waterboy-first-time-playing

Ghost Recon Wildlands - Capture Salasar Walkthrough
The video provides a complete gameplay walkthrough of the 'Salazar' mission in Ghost Recon Wildlands. Viewers will see the tactical approach to a cartel convoy, beginning with an aerial assault from a helicopter to disable the target's vehicles. The gameplay demonstrates the process of landing, securing the high-value target (Salazar), and extracting him via a ground vehicle. Throughout the extraction, the content covers character dialogue that provides narrative context about the cartel's operations in the Tabacal region. The video concludes with a cinematic interrogation scene and the mission completion rewards. Chapters: 0:00:00 - 0:00:38 - Helicopter approach to the mission objective 0:00:38 - 0:01:40 - Aerial engagement and disabling the cartel convoy 0:01:40 - 0:02:58 - Landing and capturing Salazar on foot 0:02:58 - 0:04:42 - Extraction drive to Tabacal Alpha with character dialogue 0:04:42 - 0:05:43 - Cinematic interrogation of the target 0:05:43 - 0:06:11 - Mission success and completion rewards 📖 Interactive written walkthrough with clickable timestamps: https://pixelfungaming.com/videos/ghost-recon-wildlands-capture-salasar-walkthrough

MAFIA 3 | Definitive Edition Live #3
Embark on an epic journey through the crime-ridden streets of New Bordeaux in this comprehensive gameplay walkthrough of Mafia III. Following the story of Lincoln Clay, a Vietnam veteran seeking revenge against the Italian Mafia for the betrayal and slaughter of his surrogate family, this video showcases the intense action, strategic district takeovers, and the gritty atmosphere of a re-imagined 1960s New Orleans. Watch as we navigate through various districts, including Delray Hollow, Pointe Verdun, and the French Ward, dismantling rival operations and building a new criminal empire from the ground up. The gameplay highlights include high-stakes shootouts, stealthy infiltrations, visceral hand-to-hand combat, and high-speed car chases through a detailed open world. We interact with key characters like Nicki and Bear Donnelly to gain intel and sabotage rackets such as moonshine production and protection schemes. Whether you're a fan of the Mafia series or a newcomer to Lincoln Clay's story, this playthrough offers a deep dive into the mechanics and narrative of this compelling crime drama. Chapters: 0:00:00 - Initial Exploration in Delray Hollow 0:04:15 - Navigating the Streets and City Life 0:08:45 - Weapon Management and Mission Prep 0:12:30 - Infiltrating a Protection Racket 0:17:10 - High-Stakes Shootout at the Warehouse 0:22:05 - High-Speed Pursuit across Districts 0:26:40 - Stealth Takedowns in Rival Territory 0:31:15 - Meeting with Nicki for Racket Intel 0:35:50 - Sabotaging the Moonshine Operation 0:40:25 - Exploring the French Ward's Unique Vibe 0:45:00 - Dynamic Combat in the Industrial Area 0:49:35 - Interrogating Informants for Information 0:54:10 - Eliminating High-Value Enforcers 0:58:45 - Large-Scale Gunfight at the Docks 1:03:20 - Managing Racket Assets and Damage 1:07:55 - Strategic District Takeover Progress 1:12:00 - Mission Wrap-up and Playthrough Conclusion 📖 Interactive written walkthrough with clickable timestamps: https://pixelfungaming.com/videos/mafia-3-definitive-edition-live-3

Call Of Duty Ghosts ; Severed Ties - Mission 16
The mission Severed Ties begins with a strategic briefing detailing an assault on a Federation satellite ground array in the Atacama Desert. Badger Company initiates the attack via a high-altitude tank drop, deploying armored units directly into enemy territory. The gameplay starts with intense tank-on-tank warfare across the desert plains, utilizing 120mm cannons and guided missiles to neutralize enemy fortifications, solar arrays, and helicopters. The assault continues onto an enemy airstrip where the armor column decimates hangars and parked aircraft. Following the ground offensive, the perspective shifts to air support as a minigun-equipped helicopter clears the way for an infantry breach of the control tower. Inside the tower, the mission involves fast-paced, close-quarters combat as the squad pushes toward the launch controls. After securing the terminal and initiating a counter-missile launch, the team navigates through the facility's lower levels amidst heavy resistance. The final phase sees a return to armored combat to demolish the remaining ground array dishes and automated turrets, concluding with a chaotic extraction from the collapsing facility. Chapters: 0:00:00 - 0:01:12 - Mission Briefing and Orbital Threat Overview 0:01:12 - 0:02:45 - Armored Deployment and Initial Desert Skirmish 0:02:45 - 0:05:15 - Guided Missile Strikes and Canyon Progression 0:05:15 - 0:07:06 - Airstrip Destruction and Hangar Neutralization 0:07:06 - 0:08:58 - Helicopter Air Support and Tower Infiltration 0:08:58 - 0:11:30 - Control Tower Gunfight and Missile Launch 0:11:30 - 0:13:47 - Facility Lower Level Combat and Train Pursuit 0:13:47 - 0:16:10 - Final Tank Assault on the Ground Array Dishes 0:16:10 - 0:17:34 - Tank Extraction and Mission Conclusion 📖 Interactive written walkthrough with clickable timestamps: https://pixelfungaming.com/videos/call-of-duty-ghosts-severed-ties-mission-16

HITMAN 2 - Three-Headed Serpent - Walkthrough
The video provides a comprehensive walkthrough of the 'Three-Headed Serpent' mission in Hitman 2, set in Santa Fortuna, Colombia. Gameplay demonstrates the methodical elimination of three cartel leaders: Andrea Martinez, Rico Delgado, and Jorge Franco. Viewers will see the utilization of various stealth techniques, including disguise changes, non-lethal takedowns to secure uniforms, and the strategic disabling of surveillance networks. The analysis covers the infiltration of Martinez's village mansion, the heavily guarded Delgado villa, and Franco's jungle cocaine laboratory. Each elimination is executed with precision, showcasing the game's focus on planning and environmental interaction. The content concludes with a successful helicopter extraction and a review of the final mission score and statistics. Chapters: 0:00:00 - 0:01:15 - Infiltration of Santa Fortuna and first disguise acquisition 0:01:15 - 0:03:00 - Mansion entry and surveillance system sabotage 0:03:00 - 0:06:50 - Navigating the interior and elimination of Andrea Martinez 0:06:50 - 0:09:00 - Traveling across the village to the Delgado villa 0:09:00 - 0:12:00 - Villa infiltration and acquiring a high-level guard disguise 0:12:00 - 0:15:30 - Navigating villa security to reach the target's inner sanctum 0:15:30 - 0:18:45 - Elimination of Rico Delgado in his private office 0:18:45 - 0:21:00 - Exiting the villa grounds and moving through the jungle 0:21:00 - 0:23:10 - Finding the jungle lab and eliminating Jorge Franco 0:23:10 - 0:23:52 - Mission extraction via helicopter and final performance review 📖 Interactive written walkthrough with clickable timestamps: https://pixelfungaming.com/videos/hitman-2-three-headed-serpent-walkthrough

HITMAN 2 - The Finish Line - Sniper kill (Car Crash)
This video showcases a high-stakes sniping mission in Hitman 2's Miami level. The gameplay demonstrates Agent 47 positioned on a construction walkway overlooking the Global Innovation Race track. Viewers will see the process of tracking high-speed racing cars through a sniper scope, identifying the target vehicle driven by Sierra Knox, and executing a precise shot that results in a catastrophic crash. The video concludes with Agent 47 efficiently dismantling his equipment and maintaining a low profile to evade detection. Chapters: 0:00:00 - 0:00:15 - Agent 47 establishes a vantage point on a walkway overlooking the racetrack. 0:00:15 - 0:00:30 - Gameplay shows tracking of racing vehicles through the sniper scope. 0:00:30 - 0:00:48 - The agent readjusts position and waits for the optimal timing as the target car approaches. 0:00:48 - 0:01:00 - The shot is taken, resulting in the successful elimination of Sierra Knox via a car crash. 0:01:00 - 0:01:23 - Agent 47 packs the sniper rifle into a briefcase and hides from potential guards.

Insurgency: Sandstorm | Gory Headshot #shorts
The operation commences in a dark, dusty building where the character reviews the tactical map to coordinate movement during a Hardcore Checkpoint mission on the Precinct map. After confirming the current position, the character advances down a dimly lit hallway using a weapon-mounted flashlight to illuminate the path. An enemy target emerges from a side room and is immediately neutralized with a precise shot from a scoped bolt-action rifle. The character proceeds deeper into the structure, moving past a stairwell and entering a room that overlooks a courtyard. Upon identifying a second combatant through a large window, another well-placed round is fired to eliminate the threat. The entire tactical sequence then repeats, showcasing the methodical approach to urban combat and room-clearing techniques in a high-stakes environment. Chapters: 0:00:00 - 0:00:07 - Tactical Map Review and Initial Positioning 0:00:07 - 0:00:15 - First Hallway Engagement and Neutralization 0:00:15 - 0:00:25 - Room Navigation and Window Sniper Kill 0:00:25 - 0:00:35 - Sequence Repeat: Initial Map Check 0:00:35 - 0:00:51 - Sequence Repeat: Combat Engagements 📖 Interactive written walkthrough with clickable timestamps: https://pixelfungaming.com/videos/insurgency-sandstorm-gory-headshot-shorts

MAFIA: THE OLD COUNTRY | CHAPTER 8 | DISGRAZIA WALKTHROUGH #mafiaoldcountry #mafia
This video provides a complete walkthrough of the 'Disgrazia' mission from Mafia: Definitive Edition. The content begins with a cinematic where Enzo is warned by Tino about an impending raid on their illegal tannery operations due to a traitor within their ranks. Gameplay follows as Enzo gathers supplies and drives to the location. Upon arrival, the video demonstrates a mix of stealth and intense firefights as Enzo and his associate Cesare navigate through the facility to secure their assets and personnel. The mission reaches its climax with a high-speed car chase through foggy rural roads to intercept the traitor, L'Ombra, who has stolen a significant amount of money. After a dramatic confrontation and the execution of the traitor, the video transitions to a tense diplomatic meeting held three days later between the heads of rival crime families—Don Galante, Don Spadaro, and Don Torrisi—to discuss the fallout of the raid. Chapters: 0:00:00 - 0:01:54 - Opening Cutscene: Warning of the Raid 0:01:54 - 0:02:09 - Initial Gameplay: Collecting Supplies 0:02:09 - 0:03:07 - Driving Sequence: Traveling to the Tannery 0:03:07 - 0:04:12 - Briefing Associates at the Chapel 0:04:12 - 0:05:30 - Observing the Arrival of Major D'Amico and the Traitor 0:05:30 - 0:08:30 - Stealth Navigation through the Tannery Grounds 0:08:30 - 0:12:40 - Courtyard Shootout against the Guardia 0:12:40 - 0:14:45 - Navigating the Facility to Locate the Forger 0:14:45 - 0:15:52 - Rescuing Giuseppe and Learning about the Stolen Funds 0:15:52 - 0:18:45 - Final Push through Enemy Forces to Intercept the Traitor 0:18:45 - 0:19:28 - Cutscene: L'Ombra's Escape 0:19:28 - 0:21:03 - Intense High-Speed Car Chase 0:21:03 - 0:22:48 - Final Confrontation and Execution of L'Ombra 0:22:48 - 0:26:33 - Three Days Later: Tense Diplomatic Crime Family Meeting 📖 Interactive written walkthrough with clickable timestamps: https://pixelfungaming.com/videos/mafia-the-old-country-chapter-8-disgrazia-walkthrough-mafiaoldcountry-mafia

HITMAN 2 - Poisoning janus‘s breathing apparatus
This video provides a complete walkthrough of a stealthy assassination in Hitman 2's Whittleton Creek level. The content demonstrates how to neutralize a target by infiltrating their home, acquiring a specific disguise, and using poison. Viewers will see tactical use of coins to lure NPCs, methods for body concealment, and the process of sabotaging medical equipment to eliminate the target, Janus, without alerting guards. Chapters: 0:00:00 - 0:00:35 - Initial infiltration of the basement area 0:00:35 - 0:01:12 - Using coin distractions to lure a server into the basement 0:01:12 - 0:01:55 - Neutralizing the server and assuming the disguise 0:01:55 - 0:02:35 - Infiltrating the second floor and preparing the lethal poison 0:02:35 - 0:03:55 - Stealthily waiting for the target while guards patrol nearby 0:03:55 - 0:04:22 - The target succumbs to poison and body concealment 📖 Interactive written walkthrough with clickable timestamps: https://pixelfungaming.com/videos/hitman-2-poisoning-janus-s-breathing-apparatus

#Hitman: Elusive Target #18
The mission begins with a detailed briefing on Richard M. Foreman, an elusive target known as The Chameleon, who is suspected of working with a militia on US soil. Strategic planning involves selecting a starting location near the greenhouse and choosing essential tools like the lockpick and fiber wire. Upon entering the heavily guarded compound in Colorado, the operative utilizes cover and environmental distractions to navigate past patrols. Initial attempts at infiltration involve scouting guard routes and listening to conversations for valuable intelligence. The operative manages multiple setbacks, leading to mission restarts that allow for a more optimized tactical approach. During the infiltration of the main farmhouse, the agent destroys surveillance evidence and subdues key personnel to maintain a low profile. Strategic use of disguises, such as the militia soldier outfit, provides access to restricted areas like the barracks and demolition range. Throughout the operation, the agent demonstrates precise takedowns and effective body disposal in wardrobes and crates. The gameplay showcases a variety of stealth mechanics, including the use of instinct to track targets through walls and managing high-risk trespassing zones. As the mission progresses, the operative continues to scout the target's patterns while searching for required documents, moving closer to completing the contract objectives. The mission begins with a stealthy infiltration of a heavily guarded militia compound in Colorado. Moving through the outskirts, the character avoids detection by patrols and utilizes the environment for cover before reaching the central farmhouse. After finding an entry point through a side window, a militia disguise is secured to facilitate movement within the building. The objectives focus on eliminating the elusive target, Richard M. Foreman, known as The Chameleon, and retrieving sensitive documents detailing militia operations. Intel is gathered from a laptop in the command center while observing the target's movements. Following a period of tracking and planning, a direct confrontation occurs in the upper hallway. A shootout erupts as the character eliminates Foreman and several guards. Despite the high alert and compromised status, the character successfully navigates back through the compound and makes a tactical exit via the covered bridge to complete the contract. Chapters: 0:00:00 - Reviewing the mission briefing and target Richard M. Foreman 0:03:30 - Initial infiltration of the Colorado farm and scouting patrols 0:07:00 - Executing stealth takedowns near the compound buildings 0:11:00 - Penetrating the main farmhouse and disabling security cameras 0:14:30 - Mission restart for a more strategic loadout and approach 0:18:00 - Engaging in tactical combat and managing guard detection 0:22:00 - Utilizing the farmhouse interior for cover and body disposal 0:25:30 - Selecting a new infiltration path from the planning menu 0:29:00 - Acquiring a high-tier militia disguise through silent subduing 0:32:30 - Final compound perimeter scouting and tactical navigation 0:30:00 - Stealthy infiltration of the militia compound 0:30:42 - Approaching the farmhouse headquarters 0:31:23 - Entering the farmhouse through a window 0:31:37 - Securing a militia disguise for interior access 0:31:55 - Navigating the command center and server rooms 0:32:44 - Retrieving operation files from a laptop 0:34:21 - Locating the primary target, Richard M. Foreman 0:36:58 - Briefing on The Chameleon elusive target 0:38:05 - Final preparations and system sabotage 0:40:21 - Combat encounter in the upper hallway 0:40:35 - Elimination of Richard M. Foreman 0:41:40 - Exfiltrating the farmhouse while hunted 0:42:04 - Mission completion at the bridge exit 📖 Interactive written walkthrough with clickable timestamps: https://pixelfungaming.com/videos/hitman-elusive-target-18

Farcry 6 Livestream #1
Welcome to the intense opening chapter of Far Cry 6. This comprehensive gameplay walkthrough covers the entire prologue, starting with the desperate escape from the capital city of Esperanza. You will witness the first appearance of the ruthless dictator Antón Castillo, portrayed by Giancarlo Esposito, and follow protagonist Dani Rojas as he washes up on the shores of Isla Santuario. Throughout this video, we explore the core mechanics of the game, including the 'Resolver' weapon system and the powerful Supremo backpacks. We meet key characters like the revolutionary leader Clara García and the eccentric spymaster Juan Cortez, along with his deadly companion, Guapo the crocodile. Key Missions Included: - La Noche De La Muerte: Surviving the purge in Esperanza. - The Lucky One: Finding the path to Libertad's secret camp. - Juan of a Kind: Recruiting Juan Cortez and mastering the Amigo system. - Du Or Die: A high-stakes infiltration into a military fort for depleted uranium. - Fire and Fury: Delivering a fiery blow to the regime's Viviro tobacco plantation. - Fuel the Revolution: Sabotaging Antón's fuel supplies. - Libertad Rises: The climactic battle to break the blockade and start the true revolution. Experience the high-octane action, stealth, and cinematic storytelling that define Far Cry 6 as Dani begins his journey to liberate Yara. Chapters: 0:00:00 - Game Settings and Main Menu 0:02:00 - Cinematic Intro: The State of Yara 0:03:32 - Escape from Esperanza Begins 0:06:51 - Mission Gameplay: La Noche de la Muerte 0:13:36 - Encounter with Antón Castillo on the Refugee Boat 0:17:15 - Shipwrecked: Mission The Lucky One 0:22:12 - Reaching Clara García and the Libertad Camp 0:26:00 - Finding Juan Cortez & Guapo the Crocodile 0:29:12 - Resolver Workbench: Weapon Customization Tutorial 0:34:58 - Infiltrating Fort Quito for Depleted Uranium 0:42:15 - Receiving and Testing the First Supremo 0:47:00 - Mission: Fire and Fury - Burning the Viviro Fields 0:55:00 - Mission: Fuel the Revolution - Fuel Depot Assault 1:02:00 - Climactic Battle: Mission Libertad Rises 1:08:00 - Breaking the Blockade & Liberating Isla Santuario 1:11:00 - Prologue Completion and Final Cinematics 📖 Interactive written walkthrough with clickable timestamps: https://pixelfungaming.com/videos/farcry-6-livestream-1

SWAT Commander: Raiding Cult's House Of Horrors #swat4
This gameplay video showcases a complete tactical mission from the game Ready or Not, titled 'Silence of the Hansons'. Viewers will see a SWAT team carefully approaching a suspect's residence at night, utilizing realistic tactical maneuvers to clear each room. The mission involves disabling power, breaching various entry points with C2 and battering rams, and dealing with both armed suspects and distressed civilians. Throughout the duration, the video demonstrates the use of night vision, flashbangs, and careful team coordination to navigate a dark and atmospheric environment filled with disturbing details. The mission concludes with all objectives met, highlighting successful suspect neutralization and evidence collection. Chapters: 0:00:00 - 0:00:10 - Mission Briefing and Loading Sequence 0:00:11 - 0:01:12 - Initial Perimeter Approach and Door Wedging 0:01:13 - 0:02:16 - Disabling Power and Breaching the Shed 0:02:17 - 0:03:10 - Initial Combat Engagement and Securing Suspects 0:03:11 - 0:05:03 - Exploring the Dark Basement and Finding Victims 0:05:04 - 0:07:01 - Clearing the Upper Level and Suspect Apprehension 0:07:02 - 0:09:11 - Final Room Clearing and Neutralizing the Last Suspect 0:09:12 - 0:09:32 - Mission Completion Summary and Outro 📖 Interactive written walkthrough with clickable timestamps: https://pixelfungaming.com/videos/swat-commander-raiding-cult-s-house-of-horrors-swat4

Assassins Creed Mirage: Assassinate Warlord Wasif Walkthrough
The mission 'Den of the Beast' unfolds in the bustling city of Baghdad. Basim and the rebel leader Ali observe a heated argument between the ruthless Warlord Wasif and Governor Muhammad from a rooftop. The main objective is to infiltrate the Great Garrison and assassinate Wasif. Basim utilizes stealth, expert parkour, and his eagle Enkidu to scout the fortress, identifying key entry points and picking off guards one by one. After witnessing Wasif execute the rebel leader Beshi in cold blood, a full-scale assault begins. Basim infiltrates the prison area to free captive rebels, creating significant chaos within the garrison. He then lights a signal beacon to lure away Wasif's elite guards, allowing him to slip into the warlord's private quarters. Basim completes the mission with a decisive air assassination on Wasif. The experience concludes with a high-intensity brawling escape through the garrison courtyard alongside the liberated rebels, followed by Basim returning to the Hidden Ones' bureau to report his success and earn the rank of Novice. Chapters: 0:00:00 - 0:01:54 - Planning the Infiltration with Ali 0:01:54 - 0:02:30 - The Tyranny of Warlord Wasif 0:02:30 - 0:03:30 - Scouting the Great Garrison 0:03:30 - 0:05:40 - Infiltrating the Fortress Walls 0:05:40 - 0:08:15 - Stealthy Movement through the Ramparts 0:08:15 - 0:10:20 - Infiltrating the Garrison Barracks 0:10:20 - 0:12:15 - Searching for the Warlord’s Quarters 0:12:15 - 0:13:40 - The Execution of Beshi 0:13:40 - 0:14:20 - Skirmish in the Courtyard 0:14:20 - 0:15:45 - Regrouping and Planning the Prison Break 0:15:45 - 0:17:15 - Freeing the Imprisoned Rebels 0:17:15 - 0:18:45 - Lighting the Signal Beacon 0:18:45 - 0:20:15 - Reaching Wasif’s Private Quarters 0:20:15 - 0:21:55 - Assassination of Warlord Wasif 0:21:55 - 0:22:50 - Desecrating the Warlord’s Remains 0:22:50 - 0:24:45 - Brawling Escape from the Garrison 0:24:45 - 0:26:00 - Proclaiming the Revolution 0:26:00 - 0:27:15 - Reporting to the Hidden Ones Bureau 0:27:15 - 0:29:05 - Earning the Rank of Novice 📖 Interactive written walkthrough with clickable timestamps: https://pixelfungaming.com/videos/assassins-creed-mirage-assassinate-warlord-wasif-walkthrough

Star Wars: Outlaws | Passenger Quest Walkthrough
This gameplay analysis of Star Wars Outlaws provides a comprehensive look at the 'Passenger' mission from beginning to end. The footage begins with Kay Vess accepting a contract on the planet Kijimi to intercept a cargo ship. Viewers will see the transition from ground-based dialogue to space flight as the protagonist travels to a nebula to track the target. The video covers space combat mechanics, navigation through debris fields, and a hyperspace jump to the Akiva system. Once at Achra Station, the content demonstrates stealth and social infiltration, including a keycard theft facilitated by the companion creature, Nix. The mission concludes with the rescue of a high-value agent and a significant space dogfight against pirate forces, showcasing the game's aerial combat systems and mission completion rewards throughout the full duration. Chapters: 00:00:00 - 00:02:30 - Kay Vess accepts the 'Passenger' contract on Kijimi and takes off into space. 00:02:30 - 00:05:15 - Ship navigation through the nebula and discovery of the hijacked escape pod. 00:05:15 - 00:08:00 - Travel to the Akiva system and initial infiltration of Achra Station. 00:08:00 - 00:11:00 - Locating the prisoner Jadd Flaxum and searching for the station's keycard. 00:11:00 - 00:14:00 - Performing a stealthy theft with Nix and freeing the agent from captivity. 00:14:00 - 00:17:11 - Escaping the station and defeating pirate leader Procyon Wy in a space battle. 📖 Interactive written walkthrough with clickable timestamps: https://pixelfungaming.com/videos/star-wars-outlaws-passenger-quest-walkthrough

GTA Online: Player Thought Leaving Would Save Vehicle Cargo #shorts
The gameplay sequence starts with a high-speed motorcycle pursuit through the industrial areas of Los Santos at dusk. A character on a sportbike chases a gold-colored luxury supercar. The chase concludes when the car crashes into a wall near a bridge. After the crash, the character dismounts, equips a Heavy Rifle, and eliminates the opposing driver. As the character approaches the vehicle to claim it, a notification appears stating that the other player has left the session. The character then enters the stolen car, which features distinct yellow neon underglow, and drives it through the city streets. The mission ends with the character successfully delivering the vehicle to a secure warehouse facility. Chapters: 0:00:00 - 0:00:07 - High-speed motorcycle chase and vehicle crash 0:00:07 - 0:00:15 - Eliminating the driver and securing the area 0:00:15 - 0:00:25 - Approaching the vehicle and player rage quit 0:00:25 - 0:00:39 - Entering and driving the stolen supercar 0:00:39 - 0:00:53 - Arriving at the vehicle warehouse 0:00:53 - 0:01:00 - Mission completion and post-delivery overview 📖 Interactive written walkthrough with clickable timestamps: https://pixelfungaming.com/videos/gta-online-player-thought-leaving-would-save-vehicle-cargo-shorts

Red Dead Revolver: Part 1 - Bandit Raid On House
The mission begins with a cinematic introducing the Harlow family on their ranch. Nate Harlow returns home with a unique gift, leading into a shooting tutorial where Red practices his aim at a nearby creek. Red navigates the environment and uses the tutorial to master movement and camera controls. Shooting training follows, requiring precision shots on bullseye targets, wooden dummies, and various kitchenware lined up on a fence. The peaceful atmosphere turns violent as a group of outlaws raids the farm under the cover of a thunderstorm. Combat starts at the creek bed as Red defends himself against waves of approaching bandits. He then fights his way back up toward the main ranch house, engaging in intense shootouts around the burning buildings. The chapter concludes with a tragic cinematic where Red witnesses his parents' deaths and takes up his father's custom revolver to defend himself, barely escaping as his home is destroyed. Chapters: 0:00:00 - 0:01:00 - Intro and Chapter Selection 0:01:00 - 0:02:45 - Harlow Family Cutscene and Movement Tutorial 0:02:45 - 0:04:18 - Target Practice and Shooting Mechanics 0:04:18 - 0:06:14 - Bandit Raid and Ranch Shootout 0:06:14 - 0:07:54 - Tragic Climax and Mission Results 📖 Interactive written walkthrough with clickable timestamps: https://pixelfungaming.com/videos/red-dead-revolver-part-1-bandit-raid-on-house

HITMAN 2 - Chasing Ghosts - Broad Strokes Walkthrough
This video provides a complete walkthrough of the 'Broad Strokes' mission story in Hitman 2's Mumbai level, 'Chasing a Ghost'. The gameplay demonstrates how to manipulate a rival assassin, known as The Kashmirian, into eliminating the target, Dawood Rangan. The footage shows the initial discovery of the sniper in the Chawls, the adjustment of his scope, and the subsequent infiltration of Rangan's tower. Viewers will see the steps required to disguise as a security guard, disable surveillance systems, and locate essential items like the missing tube of paint. The analysis concludes with the final orchestration of the portrait painting session, leading to Rangan's accidental-style assassination by the rival sniper's hand. Chapters: 00:00:00 - 00:01:30 - Locating the Rival Assassin and Adjusting the Scope 00:01:30 - 00:04:45 - Infiltrating Rangan Tower and Acquiring a Disguise 00:04:45 - 00:07:05 - Disabling Surveillance and Finding Artist Supplies 00:07:05 - 00:09:50 - Orchestrating the Portrait Painting Session 00:09:50 - 00:10:41 - The Proxy Assassination and Mission Progression 📖 Interactive written walkthrough with clickable timestamps: https://pixelfungaming.com/videos/hitman-2-chasing-ghosts-broad-strokes-walkthrough
Warthunder: Ground RB - Drowning Enemy Player Tank #shorts
A KV-1 (ZiS-5) heavy tank maneuvers along a tropical coastline, engaging in a high-stakes armored confrontation. The engagement starts with a long-range shot at a distant light vehicle before the tank advances toward a rocky outcrop. Upon rounding a cliff, the KV-1 encounters an enemy tank at point-blank range and immediately initiates an aggressive ramming maneuver. The two steel giants struggle on the water's edge, with the KV-1 successfully pushing its opponent into the sea. A chaotic exchange of fire ensues in the shallow water as both vehicles sustain damage and grapple for position. Despite a drowning warning, the KV-1 delivers a decisive blow, destroying the submerged enemy. The battle concludes as a Sherman Firefly delivers a flanking shot, knocking out the KV-1's crew while it remains partially immobilized in the surf. Chapters: 0:00:00 - 0:00:08 - Initial beach movement and long-range engagement 0:00:08 - 0:00:14 - KV-1 advances toward the rocky coastline 0:00:14 - 0:00:25 - Aggressive ramming maneuver and initial collision 0:00:25 - 0:00:38 - Close-quarters exchange of fire in the shallow water 0:00:38 - 0:00:48 - Drowning struggle and final push against the enemy 0:00:48 - 0:00:52 - Target destruction confirmed for the KV-1 0:00:52 - 0:00:58 - Flanking Sherman Firefly knocks out the remaining crew 📖 Interactive written walkthrough with clickable timestamps: https://pixelfungaming.com/videos/warthunder-ground-rb-drowning-enemy-player-tank-shorts

Metal Gear Solid Delta: Snake Eater | Ending Cinematic Scenes #metalgearsolidremake
The video presents the comprehensive ending cinematic and epilogue for Metal Gear Solid 3: Snake Eater (Delta). It begins with the aftermath of the final battle against The Boss, showing Snake and EVA's escape via a seaplane. Viewers will see a prolonged hand-to-hand combat encounter and a tense psychological standoff inside the aircraft between Snake and Ocelot. The content further demonstrates the emotional resolution of the plot, including EVA's true motivations revealed through a recording, Snake's promotion to the rank of 'Big Boss' in a formal military ceremony, and his final, somber visit to The Boss's grave. The analysis covers every scene, from the initial takeoff to the final historical epilogue text and credits. Chapters: 0:00:00 - 0:01:42 - Intro cinematic and horse sequence in the field of flowers 0:01:42 - 0:02:32 - Seaplane boarding and takeoff sequence 0:02:32 - 0:06:00 - Ocelot's ambush and CQC fight inside the cabin 0:06:00 - 0:09:05 - The Russian roulette standoff and exchange of names 0:09:05 - 0:11:21 - Ambush resolution and the beginning of MIG pursuit 0:11:21 - 0:13:09 - Aerial escape and the MIGs disengaging 0:13:09 - 0:14:00 - Radio codec communication with Major Zero 0:14:00 - 0:16:30 - Snake and EVA's intimate dialogue in the log cabin 0:16:30 - 0:22:43 - EVA's departure and her recorded truth revealed through flashbacks 0:22:43 - 0:27:13 - Formal award ceremony and promotion to Big Boss 0:27:13 - 0:29:27 - The final visit to the cemetery and the iconic salute 0:29:27 - 0:31:09 - Historical epilogue text crawl and final credits 📖 Interactive written walkthrough with clickable timestamps: https://pixelfungaming.com/videos/metal-gear-solid-delta-snake-eater-ending-cinematic-scenes-metalgearsolidremake

Ricky Gervais on Grand Theft Auto IV
Niko Bellic arrives at the Split Sides Comedy Club in Liberty City driving a blue sports car. After parking, he enters the venue and finds a seat. The show announcer introduces Ricky Gervais, who takes the stage to enthusiastic applause. Gervais begins his stand-up routine, starting with a story about a thorough medical examination required for his tour. He describes the awkward process of providing a urine sample and stripping down to his boxers. The routine shifts into an embarrassing moment involving a wardrobe malfunction and his friend's advice to 'go commando.' This leads into a physical comedy bit where he mimics commandos in battle without underwear. The final part of the set addresses his public image and the various adjectives tabloids use to describe his weight, such as 'tubby' and 'rotund.' He shares a specific anecdote about a paparazzi photo taken while he was jogging, which was headlined 'iPodge.' Gervais concludes his performance, thanks the crowd, and exits the stage. Chapters: 0:00:00 - 0:00:13 - Arrival at Split Sides Comedy Club 0:00:13 - 0:00:25 - Ricky Gervais takes the stage 0:00:25 - 0:01:12 - The medical exam story 0:01:12 - 0:01:45 - Wardrobe malfunction and commando advice 0:01:45 - 0:02:20 - The commando battle routine 0:02:20 - 0:03:06 - Tabloid adjectives and iPodge story 0:03:06 - 0:03:12 - Closing and exit 📖 Interactive written walkthrough with clickable timestamps: https://pixelfungaming.com/videos/ricky-gervais-on-grand-theft-auto-iv

Star Wars: Outlaws | On The Run Walkthrough
This video provides a complete gameplay walkthrough of the 'On the Run' quest in Star Wars Outlaws. Viewers will see the protagonist, Kay Vess, infiltrating the Pyke Syndicate District to retrieve a pack for an NPC named Jinjo. The gameplay highlights stealth mechanics in hazardous environments, interaction with black market traders, and the bartering system for quest-essential items like the Tatooine Flight Pass. The video also covers secondary objectives, such as acquiring a specific snack from a market cook, and demonstrates a pivotal narrative choice where the protagonist decides between returning to Jinjo or warning Gorak of a betrayal. The analysis concludes with the resulting cutscene and reputation changes after meeting with Gorak in his gambling parlor. Chapters: 0:00:00 - 0:01:16 - Infiltration of the Pyke Syndicate District and pack retrieval 0:01:16 - 0:02:11 - Journey to meet the Black Market Trader, Lalini Ledeno 0:02:11 - 0:02:54 - Trade screen interaction for the Tatooine Flight Pass and gear 0:02:54 - 0:04:18 - Quest progression through the Market District to find the cook 0:04:18 - 0:05:53 - Decision to warn Gorak and final quest resolution cutscene 📖 Interactive written walkthrough with clickable timestamps: https://pixelfungaming.com/videos/star-wars-outlaws-on-the-run-walkthrough

Warthunder: Air RB - No Ammo No Problem - Improvised Kill #shorts
The mission begins with the pilot surveying a vast, snow-covered landscape from the cockpit of a Soviet fighter aircraft. An enemy P-51D Mustang is quickly identified and targeted at low altitude. The engagement intensifies as the pilot maneuvers to maintain a steady aim, unleashing consistent bursts of machine gun fire that pepper the enemy's tail and wings. Visible hits result in small explosions and trailing smoke from the Mustang. After a prolonged pursuit through the wintry valley, a final concentrated burst causes critical damage, leading to the 'Aircraft destroyed' notification. Following the victory, the pilot banks the aircraft sharply, transitioning to an external view that showcases the plane's camouflage against the snowy forest while a stall warning alerts the pilot of low airspeed. Chapters: 0:00:00 - 0:00:10 - Initial patrol and target identification 0:00:10 - 0:00:40 - Engaging the P-51D Mustang with sustained fire 0:00:40 - 0:00:57 - Enemy destruction and post-combat maneuver 📖 Interactive written walkthrough with clickable timestamps: https://pixelfungaming.com/videos/warthunder-air-rb-no-ammo-no-problem-improvised-kill-shorts

HITMAN 2: NPC Glitch Almost Cost Me Silent Assassin 🙃 #shorts #hitman
Agent 47 executes a silent hit in a tropical setting. The mission starts with the agent creeping behind an unsuspecting guard near a wooden structure. He quickly subdues the individual, dragging the body out of sight to maintain stealth. After securing the perimeter, he approaches a studio setup where a green screen is visible. He enters and efficiently neutralizes a camera operator before turning his attention to the primary target. With a precise shot, the target is eliminated, and Agent 47 secures a 'Silent Assassin' rating, as evidenced by the final mission summary screen displaying his high score and various completed challenges. Chapters: 0:00:00 - 0:00:10 - Stealthy takedown of the exterior guard 0:00:10 - 0:00:27 - Moving the body and scouting the area 0:00:27 - 0:00:35 - Infiltration of the studio and subduing the crew member 0:00:35 - 0:00:46 - Elimination of the primary target 0:00:46 - 0:01:00 - Mission completion and performance summary 📖 Interactive written walkthrough with clickable timestamps: https://pixelfungaming.com/videos/hitman-2-npc-glitch-almost-cost-me-silent-assassin-shorts-hitman

Insurgency: Sandstorm | (GAP) Quick C4 Destruction Of 2nd Cache #shorts
The mission begins with an intense breach into a multi-story building. The character swiftly eliminates an enemy in a doorway before tossing a grenade up a stairwell to clear the path. Moving upstairs, the character exits through a destroyed wall onto a rooftop balcony, immediately engaging multiple hostile targets with precise rifle fire. After securing the rooftop area through a series of close-quarters engagements, the character moves to a designated objective point and plants a high-yield explosive device. Retiring to a safe distance, the character detonates the charge, leveling the objective in a massive explosion and thick cloud of dust, before surveying the destruction in the aftermath. Chapters: 0:00:00 - 0:00:07 - Building Breach and Grenade Toss 0:00:07 - 0:00:15 - Rooftop Entry and Initial Skirmish 0:00:15 - 0:00:28 - Intense Rooftop Firefight 0:00:28 - 0:00:38 - Objective Plant and Preparation 0:00:38 - 0:00:45 - Target Demolition and Aftermath 📖 Interactive written walkthrough with clickable timestamps: https://pixelfungaming.com/videos/insurgency-sandstorm-gap-quick-c4-destruction-of-2nd-cache-shorts

Ready Or Not: Should Of Listened #shorts
The video provides a high-intensity demonstration of tactical room clearing in a first-person shooter, specifically 'Ready or Not'. It showcases a team navigating a hotel hallway, utilizing non-lethal equipment (a flashbang) to gain an advantage before breaching a room. The gameplay demonstrates the process of identifying a threat, giving verbal commands, and reacting to a non-compliant armed suspect in a confined bathroom space. Following the engagement, the team moves in to secure the incapacitated suspect and clear the remainder of the suite, highlighting the importance of positioning and coordination in close-quarters battle (CQB) scenarios. Chapters: 00:00:00 - 00:00:05 - Tactical approach and preparation in the hallway 00:00:05 - 00:00:11 - Flashbang deployment and initial room breach 00:00:11 - 00:00:21 - Engagement with an armed suspect in the bathroom 00:00:21 - 00:00:30 - Securing the target and conducting a secondary search 00:00:30 - 00:00:35 - Ending credits and channel social information 📖 Interactive written walkthrough with clickable timestamps: https://pixelfungaming.com/videos/ready-or-not-should-of-listened-shorts

Far Cry New Dawn - Homecoming Walkthrough
The mission begins with a solemn monologue from Joseph Seed, who reflects on the sacrifices made for New Eden and his visions of a savior. He leads the way through a lush forest path, narrating the history of his community and their struggle against the Highwaymen. The journey culminates at a massive, blossoming tree bearing glowing red fruit, which Joseph describes as a divine miracle. After partaking of the fruit, the character experiences a powerful hallucination, entering a foggy, green-tinted dreamscape. Inside this vision, a fierce boss battle ensues against 'The Beast,' a massive, mutated bear. Combat requires strategic movement, using ziplines to navigate the arena while igniting fire beacons and using fire arrows to strike the creature's weak points. Upon the beast's defeat, the vision clears, and Joseph proclaims the character as the new shepherd and sword of his people. The story transitions back to the New Eden settlement, where a tense reunion unfolds between Joseph and his son, Ethan. The mission concludes as the character gains newfound supernatural abilities, known as Eden's Gift, and prepares for the next phase of the resistance in Hope County. Chapters: 0:00:00 - 0:01:53 - Joseph Seed's Opening Monologue 0:01:53 - 0:04:21 - Journey through the Forest of New Eden 0:04:21 - 0:06:28 - The Tree of Life and the Miracle Fruit 0:06:28 - 0:07:26 - Entering the Hallucination 0:07:26 - 0:13:55 - Boss Battle: Fighting the Beast Within 0:13:55 - 0:18:10 - The Beast's Defeat and the Vision's End 0:18:10 - 0:18:57 - Returning from the Hallucination 0:18:57 - 0:21:30 - Tense Reunion with Ethan Seed 0:21:30 - 0:23:55 - Joseph's Proclamation and Gaining New Powers 📖 Interactive written walkthrough with clickable timestamps: https://pixelfungaming.com/videos/far-cry-new-dawn-homecoming-walkthrough

Metal Gear Solid Delta: Snake Eater | Snake Vs "The Boss" Walkthrough #metalgearsolidremake
The video presents a comprehensive walkthrough of the final boss battle from Metal Gear Solid Delta: Snake Eater, featuring the iconic duel between Snake and The Boss in a field of white lilies. Viewers will witness the game's enhanced graphics and refined combat systems, including Close Quarters Combat (CQC) mechanics, stealth-based sniping, and the tactical use of the survival menu for treating real-time injuries like bone fractures and gunshot wounds. The footage covers the entire engagement, from the initial cinematic confrontation to the high-stakes firefight using varied weaponry like the Scorpion SMG and RPG-7, concluding with the emotionally charged final cutscene and the symbolic environmental transformation of the battlefield. Chapters: 0:00:00 - 0:01:30 - Initial Confrontation and CQC Mechanics 0:01:30 - 0:03:00 - Tactical Menu Usage and Long-Range Sniping 0:03:00 - 0:04:45 - Stealth Manouevres in the Lily Field 0:04:45 - 0:06:30 - Final Combat Phase and Depleting Health 0:06:30 - 0:08:00 - Post-Battle Cinematic and Microfilm Legacy 0:08:00 - 0:08:58 - The Final Shot and Environmental Transformation 📖 Interactive written walkthrough with clickable timestamps: https://pixelfungaming.com/videos/metal-gear-solid-delta-snake-eater-snake-vs-the-boss-walkthrough-metalgearsolidremake

War Thunder: When Ai Gunner Does A Good Job
This War Thunder gameplay video highlights tactical defensive maneuvers and gunner combat from the perspective of a Soviet bomber. The first half of the footage demonstrates a high-stakes flight through narrow canyons and over a village, where the pilot uses the terrain to limit the attacker's angles while the rear gunner successfully fends off a pursuing fighter. The video then transitions to a higher-altitude engagement, showing a different map and a secondary combat sequence. Throughout the video, viewers will see various perspectives, including third-person flight views and close-up gunner sights, illustrating the effectiveness of defensive armament and skilled low-level navigation in aerial combat scenarios. Chapters: 0:00:00 - 0:00:35 - Initial valley flight and first engagement 0:00:35 - 0:01:15 - Low-altitude defensive maneuvering through canyon terrain 0:01:15 - 0:01:50 - Sustained rear-gunner engagement over a village 0:01:50 - 0:02:26 - Final destruction of the first pursuing aircraft 0:02:26 - 0:03:00 - Transition to high-altitude flight over mountainous landscape 0:03:00 - 0:03:45 - Secondary gunner engagement against a new interceptor 0:03:45 - 0:04:06 - Mission conclusion and channel outro 📖 Interactive written walkthrough with clickable timestamps: https://pixelfungaming.com/videos/war-thunder-when-ai-gunner-does-a-good-job

Star Wars: Outlaws | The Droidsmith Walkthrough #starwarsoutlaws
This video provides a complete gameplay walkthrough of the 'The Droidsmith' quest in Star Wars Outlaws. The content begins with a narrative sequence where Kay Vess negotiates for information with Surat to track down a technician named Gedeek. The gameplay demonstrates a variety of core mechanics, including speeder bike travel across the swamps of Akiva, high-stakes stealth infiltration of Imperial Research Station 57, and complex environmental traversal using grappling hooks and ventilation shafts. Viewers will see detailed demonstrations of how to use Nix for distractions, the terminal slicing mini-game, and non-lethal stealth takedowns. The final portion of the video transitions from silent infiltration to high-intensity blaster combat as Kay escapes the facility after locating her objective. Chapters: 0:00:00 - 0:01:30 - Opening cutscene and negotiation with Surat 0:01:30 - 0:02:10 - Speeder bike travel to Imperial territory 0:02:10 - 0:03:10 - Reconnaissance of Research Station 57 using electrobinoculars 0:03:10 - 0:04:30 - Facility infiltration and vertical traversal 0:04:30 - 0:06:00 - Slicing security terminals and initial stealth navigation 0:06:00 - 0:08:30 - Infiltrating the inner laboratories and taking down guards 0:08:30 - 0:11:30 - Navigating maintenance corridors and ventilation systems 0:11:30 - 0:13:30 - Reaching Gedeek's workshop and primary mission dialogue 0:13:30 - 0:16:15 - Solving environmental puzzles with Nix to disable turrets 0:16:15 - 0:18:00 - Final meeting with Gedeek and coordinating the escape 0:18:00 - 0:21:00 - Escaping the facility through intense blaster combat 0:21:00 - 0:22:12 - Exiting the restricted area and quest completion 📖 Interactive written walkthrough with clickable timestamps: https://pixelfungaming.com/videos/star-wars-outlaws-the-droidsmith-walkthrough-starwarsoutlaws

RDR2 - Online - Bounty Hunting
A character in Red Dead Online begins a bounty hunting mission in the dusty town of Tumbleweed. After approaching the local bounty board, the Feliciano and Agapita Corrales poster is selected. The journey leads deep into the desert towards a marked objective. Upon reaching the location, the character engages the targets near their wagon in a swift gunfight. One target is neutralized while Agapita Corrales is successfully subdued and hogtied. The return journey involves a long ride back to town through rugged terrain, punctuated by skirmishes with hostile pursuers attempting a rescue. The mission concludes as the character reaches the Tumbleweed Sheriff's office and delivers the captured bounty to face justice. Chapters: 0:00:00 - 0:00:18 - Intro and loading into the game world 0:00:18 - 0:00:48 - Exploring Tumbleweed and selecting the bounty mission 0:00:48 - 0:01:17 - Riding out from town towards the mission objective 0:01:17 - 0:02:24 - Navigating the desert wilderness to find the targets 0:02:24 - 0:03:14 - Gunfight at the wagon and capturing the bounty target 0:03:14 - 0:05:35 - Escorting the prisoner back to Tumbleweed while fending off pursuers 0:05:35 - 0:05:46 - Delivering the bounty to the Sheriff's office 📖 Interactive written walkthrough with clickable timestamps: https://pixelfungaming.com/videos/rdr2-online-bounty-hunting

Rainbow Six Siege: Multiplayer - Team Work
Thatcher navigates the rooftops of the Favela map during a nighttime mission in Rainbow Six Siege. The operation begins with a cautious approach to a secondary rooftop entrance where Thatcher uses EMP grenades to disable defender gadgets. Suppressive fire from teammates keeps defenders pinned as the team breaches the 2F Football Office. Once inside, Thatcher engages in several close-quarters firefights, methodically clearing rooms and assisting teammates. The momentum shifts quickly as the attackers eliminate the remaining defenders in a final bedroom confrontation. The round ends in a decisive victory for the blue team, followed by an end-of-round replay showcasing the final tactical maneuvers and kills from a teammate's perspective. Chapters: 0:00:00 - 0:00:13 - Rooftop positioning and initial observation 0:00:13 - 0:00:43 - Breaching the rooftop doorway with suppressive fire 0:00:43 - 0:01:06 - Entering the building and clearing the final objective rooms 0:01:06 - 0:01:23 - Round victory confirmation and end-of-round replay 📖 Interactive written walkthrough with clickable timestamps: https://pixelfungaming.com/videos/rainbow-six-siege-multiplayer-team-work

Ready Or Not: S Rank | Elephant (No Mods)
A complete tactical gameplay walkthrough of the 'Elephant' mission in Ready or Not, featuring a successful run at the Watt Community College map. The video showcases the team's methodical approach to securing a large educational facility under an active shooter threat. Viewers will observe various advanced tactical procedures, including the use of breaching rams, stinger grenades, and systematic room clearing. Key moments include the discovery and defusal of two chemical bomb threats, the neutralization of multiple armed suspects, and the safe rescue of numerous civilians. The mission concludes with a professional evaluation, demonstrating the criteria needed to achieve a perfect S-rank rating. Chapters: 00:00:00 - 00:00:11 - Pre-mission briefing and team insertion in the transport vehicle 00:00:11 - 00:03:10 - Initial entry and tactical clearing of the ground floor entrance and corridors 00:03:10 - 00:03:28 - Discovery and successful defusal of the first chemical bomb threat 00:03:28 - 00:04:05 - High-intensity corridor engagement and second bomb defusal 00:04:05 - 00:06:30 - Clearing the second-floor library area and securing trapped civilians 00:06:30 - 00:09:15 - Methodical room-by-room search of the science labs and faculty offices 00:09:15 - 00:12:00 - Neutralization of remaining hostile suspects and final objective checks 00:12:00 - 00:14:10 - Final sweep of building peripheral areas and civilian reporting 00:14:10 - 00:14:40 - Mission completion screen showing official S-rank evaluation and team status 📖 Interactive written walkthrough with clickable timestamps: https://pixelfungaming.com/videos/ready-or-not-s-rank-elephant-no-mods

RDR2 - Random Cabin With Corpse
The character enters a desolate log cabin and finds a skeleton resting on the floor. Investigation of a nearby table reveals a handwritten note. Reading the 'Letter to Martha from Garfield' provides a glimpse into the life of a Civil War soldier torn between duty and love. He reflects on his Southern pride, his affection for a Northern woman, and the impending battle in Scarlett Meadows. Once the letter is put away, the character performs a brief search of the room's shelves and drawers, uncovering more details of the abandoned home. Chapters: 0:00:00 - 0:00:13 - Discovery of the cabin and skeletal remains 0:00:13 - 0:00:38 - Reading the tragic letter to Martha from Garfield 0:00:38 - 0:00:48 - Brief exploration of the cabin interior 📖 Interactive written walkthrough with clickable timestamps: https://pixelfungaming.com/videos/rdr2-random-cabin-with-corpse

GTA Online: What Happens When You Taze Sleeping Guard #shorts
The character sprints through a narrow urban alleyway, passing a line of potted trees. Upon spotting an NPC lying on the ground surrounded by bottles, the character draws a stun gun. A series of electrical discharges are fired into the NPC, causing them to glitch and snap into a standing posture before collapsing again. This cycle of tasing and physical reaction continues in a third-person perspective. The viewpoint then shifts into first-person mode, providing a close-up look at the stun gun's iron sights and charging indicator. The character continues to deliver shocks to the downed individual, repeatedly triggering the ragdoll and recovery animations until the end of the sequence. Chapters: 0:00:00 - 0:00:04 - Character runs through the alleyway 0:00:04 - 0:00:14 - Initial encounter and first taser shot 0:00:14 - 0:00:29 - Third-person physics glitch gameplay 0:00:29 - 0:00:55 - First-person stun gun interaction 📖 Interactive written walkthrough with clickable timestamps: https://pixelfungaming.com/videos/gta-online-what-happens-when-you-taze-sleeping-guard-shorts

Ready Or Not: S Rank | Buy Cheap Buy Twice (No Mods)
This video features a full mission playthrough of the tactical first-person shooter Ready or Not. Viewers will observe a highly coordinated SWAT team executing an operation titled 'Buy Cheap, Buy Twice'. The gameplay demonstrates advanced tactical maneuvers, including room clearing, the use of non-lethal equipment, suspect apprehension, and evidence collection. Throughout the mission, the team moves through various environments such as a dimly lit warehouse, an outdoor parking lot, and a car dealership. The video highlights the importance of teamwork, communication, and methodical progression to achieve a perfect 'S' rank. Key mechanics shown include using mirrors under doors, flashbang deployment, tactical breaching with C2 explosives, and securing civilians and suspects under high-stress conditions. Chapters: 0:00:00 - 0:00:12 - Pre-Mission Briefing and Loadout 0:00:12 - 0:02:30 - Initial Entry and Perimeter Clearance 0:02:30 - 0:05:00 - Warehouse Interior Sweep and Combat Engagement 0:05:00 - 0:07:30 - Securing the Back Lot and Exterior Suspects 0:07:30 - 0:10:00 - Methodical Clearing of the Garage and Side Entrance 0:10:00 - 0:12:30 - Breaching the Main Car Showroom 0:12:30 - 0:14:30 - Final Room Clears and Undercover Officer Rescue 0:14:30 - 0:15:03 - Mission Debrief and S-Rank Evaluation 📖 Interactive written walkthrough with clickable timestamps: https://pixelfungaming.com/videos/ready-or-not-s-rank-buy-cheap-buy-twice-no-mods

RDR2 - Serial Killer Mystery Solved (Walkthrough)
Gameplay begins with a ride through a scenic valley, leading to the discovery of a gruesome crime scene beneath a railway bridge. A mutilated body serves as the first clue in a serial killer mystery. Upon further investigation, a second horrific display is found on a large boulder, accompanied by the chilling message 'Do You See?'. A severed head nearby holds another map fragment. The search continues to a large tree marked 'Behold,' where a third body and map piece are located. With all fragments collected, the completed map points to a secluded cabin cellar. Under the cover of night, the investigation moves to Lucky's Cabin. The cellar reveals a charnel house of horrors, filled with remains, tools of torture, and photographs of victims. As the basement is explored, the killer, Edmund Lowry Jr., launches a surprise attack. A desperate struggle follows, resulting in the killer being subdued and hogtied. The journey then shifts to Valentine, where the captive is delivered to the local sheriff. The mission reaches its climax when the killer attempts a final, violent escape within the office, requiring quick action to save the lawman and permanently end the threat, successfully completing the 'American Dreams' stranger mission. Chapters: 0:00:00 - 0:01:17 - Discovery of the First Murder Scene 0:01:17 - 0:02:45 - Investigating the Painted Rock for Clues 0:02:45 - 0:04:30 - Finding the Final Map Fragment 0:04:30 - 0:05:42 - Navigating to the Killer's Secret Lair 0:05:42 - 0:07:21 - Exploring the Horrors of the Basement 0:07:21 - 0:09:00 - The Killer Attacks from the Shadows 0:09:00 - 0:10:45 - Transporting the Prisoner to Valentine 0:10:45 - 0:12:33 - The Final Showdown at the Sheriff's Office 📖 Interactive written walkthrough with clickable timestamps: https://pixelfungaming.com/videos/rdr2-serial-killer-mystery-solved-walkthrough

HITMAN 2 - Sieera Knox Intravenous Poison Kill Walkthrough
This video provides a complete walkthrough of the 'Intravenous' mission story in Hitman 2's Miami level. It demonstrates a stealthy approach to eliminating Sierra Knox by posing as a medical professional. Viewers will see the step-by-step process of infiltrating the medical area, sabotaging security systems, obtaining a medic disguise, and securing a lethal syringe. The gameplay covers subduing necessary NPCs, preparing the medical equipment with poison, and successfully paging the target to her demise. The analysis concludes with the final execution and concealment of the target's body. Chapters: 0:00:00 - 0:01:10 - Infiltration and Security Sabotage 0:01:10 - 0:02:12 - Obtaining the Medic Disguise and Lethal Syringe 0:02:12 - 0:03:55 - Clearing the Treatment Room and Prepping the IV 0:03:55 - 0:05:20 - Locating the Doctor's Schedule and Staff Interaction 0:05:20 - 0:07:23 - Paging Sierra Knox and Target Arrival Preparation 0:07:23 - 0:09:43 - Target Elimination and Body Concealment 📖 Interactive written walkthrough with clickable timestamps: https://pixelfungaming.com/videos/hitman-2-sieera-knox-intravenous-poison-kill-walkthrough

Far Cry New Dawn - Prisoner Rescue
The mission begins with a stealthy observation of a highwaymen prisoner transport in a field of purple flowers at night. Precise sniper shots eliminate the initial guards from a distance before switching to a sidearm for close-quarters combat. After neutralizing the immediate threats, a high-ground sniper is taken out from behind a vehicle. The character then approaches the transport cage and releases the captive, earning a perk point in the process. Following the rescue, the area is scavenged for resources and ammunition. The session concludes with a transition into hunting as a deer is spotted and taken down with a single long-range shot. Chapters: 0:00:00 - 0:00:15 - Stealth sniper kills and tactical approach 0:00:15 - 0:00:30 - Engaging remaining hostiles and tower sniper 0:00:30 - 0:00:45 - Prisoner rescue and looting the battlefield 0:00:45 - 0:01:03 - Wildlife hunting and exploration transition 📖 Interactive written walkthrough with clickable timestamps: https://pixelfungaming.com/videos/far-cry-new-dawn-prisoner-rescue

MAFIA 2 | Definitive Edition Live
Experience the complete opening hours of Mafia II: Definitive Edition in this detailed gameplay walkthrough. The journey begins with Vito Scaletta reflecting on his life before diving into Chapter 1: The Old Country, where Vito serves in the US Army during the 1943 invasion of Sicily. Witness the intense storming of a town hall and a frantic defense from a balcony using an MG-42. Following his service, Vito returns home to Empire Bay in Chapter 2: Home Sweet Home. Reunited with his best friend Joe Barbara, Vito navigates the snowy streets of 1945, reconnects with his family, and learns of a crushing $2,000 debt left by his late father. Refusing a life of meager dock work, Vito turns to the underworld, learning essential skills like lockpicking from Giuseppe and taking on risky car theft jobs for Mike Bruski. The video concludes with the start of Chapter 3: Enemy of the State, as Vito seeks work at the Southport docks under the union boss Derek Pappalardo. This gameplay showcase features combat mechanics, driving, world exploration, and the cinematic storytelling that defines the Mafia series. Chapters: 0:00:00 - Main Menu & Story Start 0:00:35 - Vito Scaletta's Background & Arrival in America 0:03:57 - Chapter 1: The Old Country - Sicily, July 1943 0:05:15 - Storming the Town Hall in Sicily 0:07:00 - Inside the Town Hall - Tutorial & Combat 0:09:00 - MG-42 Balcony Defense Sequence 0:11:15 - Chapter 2: Home Sweet Home - Return to Empire Bay 0:12:38 - Driving with Joe Barbara - Winter 1945 0:16:03 - Arrival in Little Italy & Homecoming 0:18:58 - Resting in the Scaletta Apartment 0:19:12 - Next Day: Wardrobe & Morning Routine 0:21:21 - Protecting Francesca: Fistfight Tutorial 0:23:44 - Navigating to Joe's Apartment 0:25:36 - Discussing Business and Debts with Joe 0:28:11 - Visit to Giuseppe's Shop 0:30:13 - Lockpicking Mini-game Tutorial 0:33:43 - Legalizing a Stolen Vehicle at the Body Shop 0:35:46 - Meeting Mike Bruski at the Junkyard 0:37:30 - Shooting Tutorial & Range Practice 0:41:48 - Stealing the Walter Coupe from the Bombers 0:45:00 - Evading the Police & Returning to Mike's 0:50:29 - Chapter 3: Enemy of the State - New Opportunities 0:53:00 - Heading to the Southport Docks 0:55:00 - Meeting Derek Pappalardo & Steve Coyne 0:57:00 - Dockwork Tutorial: Loading the Truck 1:01:00 - Union Business: Shaking Down the Workers 📖 Interactive written walkthrough with clickable timestamps: https://pixelfungaming.com/videos/mafia-2-definitive-edition-live
Ready Or Not: Mangled Suspect playing dead #shorts
This video provides a focused look at tactical gameplay from the first-person shooter 'Ready or Not'. The content showcases a SWAT team's methodical approach to clearing a residential building and apprehending suspects. Viewers will see the implementation of non-lethal force, the process of restraining surrendered individuals, and the collection of forensic evidence from the scene. The footage highlights the game's emphasis on procedure and realism within a high-stakes police simulation environment. Chapters: 0:00:00 - 0:00:05 - Initial room entry and securing a downed suspect 0:00:05 - 0:00:20 - Tactical movement through hallways and clearing secondary rooms 0:00:20 - 0:00:32 - Restraining a surrendering suspect using verbal commands 0:00:32 - 0:00:42 - Environmental search and suspect interaction 0:00:42 - 0:00:48 - Locating and securing a knife as evidence 0:00:48 - 0:00:53 - Outro and channel information 📖 Interactive written walkthrough with clickable timestamps: https://pixelfungaming.com/videos/ready-or-not-mangled-suspect-playing-dead-shorts

Warthunder: Air Battle - Turning Tables On Attacker As A Noob Pilot #shorts
The mission begins with a Soviet fighter cruising over a rugged mountain landscape. High-altitude engagement starts as the pilot dives onto an enemy aircraft, initiating a fast-paced dogfight. Heavy G-forces take a toll on the airframe during sharp evasive maneuvers through narrow valleys. The pilot successfully locks onto a P-40E-1, unleashing a burst of cannon fire that disintegrates the target mid-air. After securing the kill, the fighter continues to scan the horizon for more threats. Suddenly, an enemy H-75A-1 catches the aircraft off guard with a series of accurate shots. The engine bursts into flames, and the plane suffers critical damage. The flight ends with the aircraft spiraling toward the earth in a trail of black smoke and fire. Chapters: 0:00:00 - 0:00:10 - Initial dive and engagement over mountain terrain 0:00:10 - 0:00:20 - High-G evasive maneuvers and energy management 0:00:20 - 0:00:26 - Aerial kill confirmed on a P-40E-1 0:00:26 - 0:00:32 - Scanning the valley for secondary targets 0:00:32 - 0:00:43 - Critical damage sustained and final aircraft destruction 📖 Interactive written walkthrough with clickable timestamps: https://pixelfungaming.com/videos/warthunder-air-battle-turning-tables-on-attacker-as-a-noob-pilot-shorts

HITMAN 2 : New York - 2nd crowbar location
The gameplay demonstrates Agent 47 navigating the interior of a bank in New York during the Golden Handshake mission in Hitman 2. The video shows the character entering a small maintenance room to scout for items and overhearing background NPC conversations regarding employee layoffs. Viewers will see the mission interface as the game is paused to access the map and intel tabs, providing a detailed look at the current location and objectives on Level 1 of the facility. The footage captures the transition from environmental exploration to tactical planning within the game's menu systems. Chapters: 0:00:00 - 0:00:06 - Movement into the utility closet area 0:00:06 - 0:00:15 - Observation of environmental items and NPC dialogue 0:00:15 - 0:00:20 - Accessing the mission intel and objectives menu 0:00:20 - 0:00:28 - Reviewing the floor map for the New York bank location 0:00:28 - 0:00:30 - Resuming active gameplay in the storage room 📖 Interactive written walkthrough with clickable timestamps: https://pixelfungaming.com/videos/hitman-2-new-york-2nd-crowbar-location

Warthunder: Air RB - Not Today :) (Protecting My Bomber) #shorts
The mission begins high above a forested map, initiating from a reconnaissance scope view which quickly transitions to the cockpit and then the external perspective of a heavy four-engine bomber. The bomber flies high above the terrain, quickly detecting multiple incoming enemy aircraft. Combat starts immediately as the rear gunner engages a pursuing fighter with sustained tracer fire, registering hits. The bomber maneuvers while the gunner keeps the target in sights. The perspective switches to a front-facing gunner position as a BF 109 G-2 aggressively approaches head-on. The bomber unleashes a powerful stream of defensive fire, focusing on the fighter. The enemy aircraft explodes mid-air, resulting in an immediate 'Aircraft destroyed' message. Although the tactical situation favors the enemy team, the bomber successfully eliminates the immediate threat. The aircraft absorbs two subsequent hits but remains operational, flying onward after the engagement. Chapters: 0:00 - 0:15 - Tactical Deployment and Initial Enemy Detection 0:15 - 0:29 - Rear Gunner Engages Pursuing Aircraft 0:29 - 0:45 - Head-On Engagement and BF 109 G-2 Destruction 📖 Interactive written walkthrough with clickable timestamps: https://pixelfungaming.com/videos/warthunder-air-rb-not-today-protecting-my-bomber-shorts

War Thunder: Taking Out 2 Campers With Artillery #shorts
The engagement begins with a tank positioned in a snowy, mountainous valley as the commander coordinates an artillery strike on a specific map grid. The tank advances through the deep snow, maneuvering between large rock formations to maintain cover. Combat starts when the tank spots enemy targets at a significant distance through the winter fog. The gunner utilizes high-magnification optics to line up precise shots. After several rounds are exchanged, the tank scores multiple direct hits. The encounter peaks with the destruction of two enemy vehicles in rapid succession, resulting in the 'Tank Rescuer' and 'Double Strike' medals as the mission objectives progress. Chapters: 0:00:00 - 0:00:08 - Artillery Strike Coordination and Initial Movement 0:00:08 - 0:00:18 - Tactical Maneuvering Through Snowy Terrain 0:00:18 - 0:00:26 - Long-Range Targeting and Initial Shots 0:00:26 - 0:00:38 - Securing the Double Strike and Combat Awards 📖 Interactive written walkthrough with clickable timestamps: https://pixelfungaming.com/videos/war-thunder-taking-out-2-campers-with-artillery-shorts

Ghost Recon Wildlands - Killing The Predator Walkthrough
Tactical operatives navigate a dense, moonlit jungle while investigating mysterious occurrences. The atmosphere is thick with tension as they track an elusive and technologically advanced extraterrestrial hunter. The Predator uses its iconic cloaking device and thermal targeting system to ambush the squad from various vantage points among the trees. The team utilizes surrounding cover, such as large rock formations and thick tree trunks, to evade the Predator's lethal shoulder cannon blasts. Strategic cooperation becomes essential as teammates frequently go down and require immediate medical attention while others provide suppressing fire. The engagement is a high-stakes game of cat and mouse, requiring constant vigilance to spot the subtle shimmer of the cloaked adversary before it strikes. Defensive measures like proximity mines are deployed to predict and counter the hunter's rapid movements. The battle remains intense throughout, characterized by the frequent red laser sights of the Predator and the rapid response of the tactical team to survive the encounter. A tactical squad engages in a high-stakes confrontation with an elusive, stealthy predator within a dense, nighttime jungle. Throughout the engagement, team members are repeatedly targeted by powerful energy blasts, necessitating constant repositioning and rapid medical intervention to revive downed allies. The predator utilizes advanced cloaking technology, appearing momentarily to fire before disappearing back into the shadows. Intense firefights erupt as the team tracks the target's movements through the foliage. After a prolonged exchange of fire, the predator is finally incapacitated. This victory is immediately followed by a self-destruct sequence, forcing the survivors to sprint away from the designated blast zone. A massive explosion marks the end of the threat, resulting in mission success and the acquisition of unique rewards. Chapters: 0:00:00 - Investigating the Jungle Perimeter 0:00:20 - First Contact and Initial Skirmish 0:00:45 - Setting Up Defensive Perimeters 0:01:25 - Tactical Response to Plasma Caster Attacks 0:02:10 - Coordinated Squad Revivals Under Fire 0:02:55 - Predicting Predator Movement Patterns 0:03:45 - Intensified Combat and Suppressive Fire 0:04:35 - Maintaining Positions in the Final Phase 0:05:01 - End of Combat Engagement 0:00:00 - Initial contact and start of the jungle skirmish 0:01:10 - Squadmates are downed and tactical revives are performed 0:02:35 - Continuous tracking of the cloaked predator through the trees 0:03:55 - Final assault and incapacitation of the predator 0:04:08 - Self-destruct sequence initiated; emergency extraction begins 0:04:35 - Predator's final explosion and mission completion 📖 Interactive written walkthrough with clickable timestamps: https://pixelfungaming.com/videos/ghost-recon-wildlands-killing-the-predator-walkthrough

Dead Island 2 The Red Mist | Walktrhough (No Commentary)
Jacob continues navigating the desolate Brentwood sewers, working to escape the area designated as 'The Red Mist'. After checking his map, he confronts an unexpected antagonist, Konradt, who forcibly triggers his latent zombie abilities by throwing him into the bloody waste below. This action unlocks Fury Mode, initiating a brutal first-person melee sequence where Jacob slaughters a large group of Walkers and Crushers, demonstrating devastating power and unlocking the 'Blood Rush' ability. Upon exiting the visceral, red-soaked sewer system, Jacob steps into the sunny, barricaded streets of Venice Beach. He locates a group of survivors, Kai and Alex, who request help clearing a nearby parking lot contaminated with zombies before they can fully secure their refuge. Jacob engages the remaining horde, which includes Crushers and Walkers, using a quick sporting rifle and a short-barreled shotgun, effectively clearing the area and activating his Fury Mode again to dispatch the larger threats. The gate mechanism is broken, requiring Jacob to find and replace a circuit breaker to close the entrance. Once the area is cleared and the gate is secured, Kai lets Jacob into the Blue Crab restaurant, a temporary safe haven. The survivors discuss the military occupation and the spread of the Zompocalypse. The quest 'The Red Mist' concludes abruptly when an infected Bud is revealed among the survivors, turning into a zombie and getting killed, marking the beginning of the next quest. Chapters: 0:00 - 1:04 - Sewer Exploration and Approach to the Venice Storm Tank 1:04 - 2:59 - Cutscene: Confrontation with Konradt and Activation of Fury Mode 2:59 - 3:47 - Unleashing Fury and Unlocking Blood Rush Ability in Sewer Combat 3:47 - 4:54 - Exiting the Sewers and Reaching Venice Beach Checkpoint 4:54 - 6:55 - Arriving at Venice Beach and Locating the Blue Crab Survivors 6:55 - 9:07 - Starting the 'Clear the Parking Lot' Objective 9:07 - 12:28 - Parking Lot Combat against Crushers and Walkers 12:28 - 15:44 - Finding and Installing the Circuit Breaker to Secure the Gate 15:44 - 18:39 - Entering the Blue Crab Safe Zone and Story Quest Completion 📖 Interactive written walkthrough with clickable timestamps: https://pixelfungaming.com/videos/dead-island-2-the-red-mist-walktrhough-no-commentary

Dead Island 2: The Giant Slayer | CO-OP Walkthrough (No Commentary)
The mission begins with an intense combat encounter at Muscle Beach, where various zombies including walkers and burning runners are dispatched using weighted melee weapons and agile movement. After clearing the outdoor gym area, the character enters the building to meet a survivor named Patton, who is found performing a gruesome dissection on a zombie named Moose. A cinematic sequence follows where Patton reveals a pulsating mutant heart and discusses the internal changes occurring within the infected. Following this discovery, the objective shifts to tracking down Dillon. The character navigates through the streets and backlots of Venice Beach, engaging in firefights against groups of runners and walkers. The path leads to a large parking area where Dillon, a massive Inferno Crusher, emerges amidst explosions and fire. The ensuing boss battle requires a combination of shotgun fire and careful dodging to avoid flaming shockwaves. Despite being momentarily downed, the character is revived and eventually defeats the behemoth. The final segment involves looting the area for rare materials and returning to the Blue Crab safe zone. A conversation with Alex inside the bar brings the quest 'The Giant-Slayer' to a close, rewarding the character with experience and a rare melee cremator mod blueprint. Chapters: 0:00:00 - 0:01:21 - Muscle Beach Gym Combat 0:01:21 - 0:03:51 - Meeting Patton and the Mutant Heart Discovery 0:03:51 - 0:05:15 - Navigating Venice Beach Backlots 0:05:15 - 0:06:42 - Boss Fight: Dillon the Inferno Crusher 0:06:42 - 0:07:50 - Scavenging and Returning to the Safe Zone 0:07:50 - 0:09:21 - Mission Completion at the Blue Crab 📖 Interactive written walkthrough with clickable timestamps: https://pixelfungaming.com/videos/dead-island-2-the-giant-slayer-co-op-walkthrough-no-commentary

Metal Gear Solid Delta: Snake Eater | The Boss Final Cinametic Scene Walkthrough
This video showcases an extensive cutscene from Metal Gear Solid 3: Snake Eater, featuring a poignant final confrontation between Naked Snake and his mentor, The Boss. Set in a field of white lilies, the dialogue explores themes of political shifting, the relative nature of enemies, and the cycle of conflict orchestrated by the shadowy 'Philosophers.' The Boss reflects on her history, from atomic testing and the space race to her personal sacrifices during WWII, including giving birth on the battlefield. The scene culminates with her challenging Snake to a final duel, setting a ten-minute time limit before a planned bombing run. Chapters: 0:00:00 - 0:00:20 - Snake enters the field of white lilies 0:00:20 - 0:01:20 - The Boss appears and reflects on life's end 0:01:20 - 0:02:16 - Discussion on shifting political alliances and the nature of enemies 0:02:16 - 0:03:11 - The Boss explains her motivation to reunite the Philosophers 0:03:11 - 0:04:16 - Historical reflection on atomic testing and the Sputnik launch 0:04:16 - 0:05:25 - Narrative on the Mercury program and cosmic radiation exposure 0:05:25 - 0:06:29 - Perspective on Earth from space and a world without boundaries 0:06:29 - 0:07:22 - Recounting the Bay of Pigs invasion and political betrayal 0:07:22 - 0:08:01 - The duel with The Sorrow and his ultimate sacrifice 0:08:01 - 0:09:25 - The history of the Philosophers and the cycle of eternal war 0:09:25 - 0:10:31 - The Boss reveals her personal loss and giving birth at Normandy 0:10:31 - 0:11:32 - The Boss shows her scar and admits her lack of regret 0:11:32 - 0:13:00 - The final challenge: A 10-minute duel before the bombing 📖 Interactive written walkthrough with clickable timestamps: https://pixelfungaming.com/videos/metal-gear-solid-delta-snake-eater-the-boss-final-cinametic-scene-walkthrough

WarThunder: Blind Enemy Player Gives Me Easy Kill #warthunder #shorts
The engagement begins with a T-34 tank undergoing urgent repairs in a snow-covered urban environment. Once the repairs finish, the turret rotates to scan the surrounding ruins. The tank advances through a stone gateway and immediately encounters an enemy Panzer appearing from around a corner. A single shot from the main gun strikes the enemy vehicle, triggering a massive explosion that destroys the target. After the successful kill, the tank maneuvers past the burning remains of its opponent to assist in capturing objective zone A as the mission continues. Chapters: 0:00:00 - 0:00:06 - Tank repair and situational scanning 0:00:06 - 0:00:14 - Maneuvering through city ruins 0:00:14 - 0:00:19 - Engaging and destroying enemy armor 0:00:19 - 0:00:26 - Advancing to secure the capture zone 📖 Interactive written walkthrough with clickable timestamps: https://pixelfungaming.com/videos/warthunder-blind-enemy-player-gives-me-easy-kill-warthunder-shorts

MAFIA 3 | Definitive Edition Live
The mission begins with a series of historical art panels and a narrative disclaimer, setting the stage for a fictionalized 1968 American South. A documentary-style introduction introduces key characters through interviews, detailing the city's survival through various historical events and the eventual chaos unleashed by Lincoln Clay. The narrative transitions to Mardi Gras night, February 27, 1968, where Lincoln and Giorgi Marcano prepare for a high-stakes heist by burning evidence and boarding an armored truck. Gameplay commences with Lincoln driving the heavy vehicle through the rain-slicked streets of New Bordeaux toward the Federal Reserve. During the drive, dialogue reveals Lincoln’s haunting experiences in Vietnam, including a grim story about the harsh realities of survival. Upon reaching the Federal Reserve, the pair uses forged IDs to gain entry, disguised as guards. They navigate the secure facility, eventually reaching the vault area and the burn room where they dispose of old currency. Tensions escalate when a stealth takedown of a guard leads to the vault's massive cash stores being exposed. An alarm triggers a frantic shootout, forcing Lincoln to defend Giorgi while he drills into the secure area. After prying open an armory to secure a Hartmann machine gun, Lincoln holds off waves of security guards in an intense firefight. The story then flashes back one week to Lincoln’s initial return to the city, meeting old friends and fellow veterans. He drives through the bustling daylight streets with Ellis Robinson, discussing their futures and local tensions before arriving at Sammy’s Bar. The reunion turns somber as arguments between Sammy and Ellis reveal growing trouble with a rival Haitian gang, highlighting Lincoln's deep-rooted loyalty to his surrogate family. The story follows Lincoln Clay as he returns to New Bordeaux and reconnects with his surrogate family. The narrative shifts from a quiet homecoming at a neighborhood kitchen to intense conflict when a rival Haitian gang attacks. Following the assault, Lincoln and Ellis coordinate a retaliatory strike, navigating the treacherous Bayou by airboat under the cover of night. The mission involves a mix of stealthy infiltrations through a shanty town and explosive gunfights as they hunt down the Haitian leader, Baka. After a brutal confrontation and the rescue of a captive named Cassandra, the duo engages in a high-speed chase to escape the swamps. The sequence concludes with a tense drive back to safety and reflections on the escalating criminal underworld tensions involving the Marcano crime family. Chapters: 0:00:00 - Initial Setup and Game Settings 0:01:05 - Narrative Introduction to New Bordeaux 0:02:22 - Lincoln Clay's Personal Backstory 0:04:26 - Mardi Gras Heist Preparations 0:06:14 - Armored Truck Transit to Federal Reserve 0:09:22 - Arrival at the Security Gate 0:10:04 - Infiltrating the Federal Reserve 0:12:48 - Accessing the Vault and Burn Room 0:15:37 - Intense Shootout Inside the Vault 0:19:14 - FBI Retrospective on the Heist 0:20:34 - Flashback to Lincoln's Homecoming 0:22:31 - Navigating the City Streets with Ellis 0:24:31 - Reunion and Gang Tensions at Sammy's Bar 0:00:00 - Father James Reflects on Lincoln's Loyalty 0:00:33 - Arrival at Warm Hearts Neighborhood Kitchen 0:01:01 - Serving Gumbo to the Community 0:02:33 - Haitian Gang Attack and Melee Defense 0:03:16 - History of the Haitian Gang and Baka 0:03:46 - Planning the Retaliation with Sammy and Ellis 0:06:33 - Navigating the Bayou by Airboat 0:07:31 - Stealth Infiltration of the Shanty Town 0:13:40 - Open Firefight at the Hideout 0:15:39 - Confronting and Eliminating Baka 0:16:15 - Rescuing Cassandra from Captivity 0:17:13 - Fighting Through the Swamp Reinforcements 0:22:40 - Escaping the Hideout and Gathering Ellis 0:23:41 - High-Speed Car Chase and Shootout 0:25:44 - Return to Delray Hollow 0:29:44 - The Aftermath and Marcano's Involvement 📖 Interactive written walkthrough with clickable timestamps: https://pixelfungaming.com/videos/mafia-3-definitive-edition-live

Ready Or Not: Enemy Trigger Own Traps #gta #gta5
This video showcases a compilation of gameplay moments from 'The Texas Chain Saw Massacre' video game, specifically focusing on various characters encountering booby-trapped doors. Throughout the footage, viewers will see both Victim and Family characters attempting to navigate through doors, only to be met with explosive traps that cause significant knockback and damage. The content demonstrates the mechanics of trap placement and the resulting physics-based reactions when they are triggered during matches. Chapters: 0:00:00 - 0:00:12 - Initial door breach and explosion sequence 0:00:12 - 0:00:25 - Second example of a trapped door being triggered 0:00:25 - 0:00:36 - Character experiencing a heavy knockdown from a door explosion 0:00:36 - 0:00:43 - Different character navigating obstacles before a trap encounter 0:00:43 - 0:00:53 - Final character trap encounter and video outro

Zero Hour: Taze To The Head = Dead #shorts
This gameplay video showcases realistic first-person shooter mechanics from a body-worn camera perspective. It captures a tactical night-time engagement within an industrial facility. Viewers will observe precise weapon handling using red dot sights, strategic movement through dark corridors, and visceral close-quarters combat. The footage demonstrates two distinct lethal engagements and concludes with a slow-motion breakdown of the final pistol kill, emphasizing the game's detailed character animations and environmental lighting. Chapters: 0:00:00 - 0:00:04 - Initial approach and climbing through an industrial structure at night 0:00:04 - 0:00:12 - Tactical aiming using a red dot sight on a target positioned above 0:00:12 - 0:00:18 - Successful long-range engagement and elimination of the first enemy 0:00:18 - 0:00:26 - Navigation through the building's exterior walkways and threat scanning 0:00:26 - 0:00:33 - Close-range pistol encounter resulting in a successful neutralization 0:00:33 - 0:00:43 - Cinematic slow-motion replay of the final combat encounter 📖 Interactive written walkthrough with clickable timestamps: https://pixelfungaming.com/videos/zero-hour-taze-to-the-head-dead-shorts

GTA 5 Trolling : Booby Traping stores
The gameplay focuses on using strategic explosive traps and sniping against other online players in Grand Theft Auto V (GTA Online). The session begins with the character escaping a hostile player ambush using a sticky bomb and quickly calling Lester to remove the immediate wanted level. The character then initiates a series of retaliatory attacks, primarily employing proximity mines placed near their vehicle and using 'Off the Radar' abilities to hide from targets. Successful proximity mine detonations kill multiple opponents who attempt to approach the parked vehicle. The character also demonstrates precise long-range combat skills by utilizing a sniper rifle to eliminate opponents from a hidden vantage point. Driving sequences involve navigating the city streets at high speeds, often transitioning between different vehicles (a black and a green sports sedan) and tactical locations near Ammu-Nation stores or high-end boutiques (Ponsonbys). Further engagements involve placing mines near busy street corners or throwing sticky bombs at pedestrians/rival cars, resulting in chaotic explosions and kills. The final sequence shows the character successfully using a proximity mine defense to fend off an attacker who attempts to claim a bounty placed on the character's head. Chapters: 0:00 - 0:26 - Initial PvP Attack and Wanted Level Removal 0:26 - 0:54 - Setting and Detonating First Proximity Mine Kill 0:54 - 1:22 - Sniping a Player from Cover 1:22 - 2:48 - Off the Radar Proximity Mine Kill and Police Escape 2:48 - 3:45 - Double Proximity Mine Kill and Vehicle Destruction Penalty 3:45 - 4:31 - Trolling at the Beachfront with Explosives 4:31 - 5:00 - Cinematic View and Off-Screen Explosive Kill 5:00 - 5:58 - Final Mine Trap and Bounty Claim Defense 📖 Interactive written walkthrough with clickable timestamps: https://pixelfungaming.com/videos/gta-5-trolling-booby-traping-stores

RDR2 - RDR2 Posse Vs Posse Battle Part 3
The video provides a comprehensive look at various combat scenarios in Red Dead Online, primarily focusing on PvP (Player vs Player) interactions. It showcases long-range sniping techniques in different lighting conditions, close-quarters combat with shotguns and melee weapons, and tactical movement through diverse environments like open fields, rocky hillsides, and the town of Valentine. The content demonstrates the player character navigating several intense gunfights, managing ammunition by visiting a gunsmith, and utilizing 'Dead Eye' abilities to gain an advantage. The footage highlights both successful offensive plays and the challenges of being under fire, including multiple respawns and tactical retreats. Chapters: 0:00:00 - 0:01:15 - Long-Range Nighttime Sniping Engagements 0:01:15 - 0:02:25 - Close-Quarters Firefights and Cover Utilization 0:02:25 - 0:03:15 - Hillside Tactical Positioning and Sniping 0:03:15 - 0:04:15 - Overlooking Valley Settlements for Targets 0:04:15 - 0:05:00 - Intense Skirmish on the Perimeter of Town 0:05:00 - 0:06:15 - Melee Execution and Forest Combat Maneuvers 0:06:15 - 0:07:00 - Entering Valentine and Navigating Town Streets 0:07:00 - 0:07:35 - Resource Management: Purchasing Ammo at the Gunsmith 0:07:35 - 0:08:45 - High-Stakes Combat Within Valentine 0:08:45 - 0:10:00 - Final Stand near Farmhouse in Morning Light 📖 Interactive written walkthrough with clickable timestamps: https://pixelfungaming.com/videos/rdr2-rdr2-posse-vs-posse-battle-part-3

Ghost Recon Wildlands - Kill La Yuri & El Polito - Walkthrough
This gameplay video provides a complete walkthrough of the 'La Yuri and El Polito' mission in Tom Clancy's Ghost Recon Wildlands. The content begins with a tactical map overview and mission briefing in the Itacua province. Viewers will see a stealthy approach to the targets' hunting lodge, utilizing a drone for aerial reconnaissance to mark enemy positions and identify key structures. The video demonstrates an infiltration of the lodge, including a lockpicking sequence, followed by exploration of the interior which leads to a hidden basement lab. A high-stakes firefight ensues as the team breaches the lab, resulting in the elimination of both high-value targets. The video concludes with mission success confirmation and an overview of the cartel dismantling progress. Chapters: 0:00:00 - 0:00:35 - Mission Briefing and Initial Approach to Hunting Lodge 0:00:35 - 0:01:15 - Tactical Drone Reconnaissance and Hillside Navigation 0:01:15 - 0:01:58 - Stealth Infiltration and Lodge Perimeter Reach 0:01:58 - 0:02:30 - Lockpicking Entry and Main Floor Exploration 0:02:30 - 0:03:15 - Descending to the Basement and Overhearing Targets 0:03:15 - 0:04:00 - Breaching the Lab and Initial Firefight Engagement 0:04:00 - 0:04:55 - Intense Combat and Neutralization of Yuri and El Polito 0:04:55 - 0:05:35 - Mission Completion and Cartel Dismantling Overview 📖 Interactive written walkthrough with clickable timestamps: https://pixelfungaming.com/videos/ghost-recon-wildlands-kill-la-yuri-el-polito-walkthrough

Ghost Recon Breakpoint - 2nd Method - Opening Locked Doors
A tactical operator navigates a snowy military base, showcasing stealthy movement and objective handling. The operator moves with precision, carrying a suppressed primary weapon and specialized gear. After approaching a downed individual, the operator lifts the body and traverses the compound toward a secure structure. Upon reaching the target building, the operator enters the dark interior and places the body on the floor, concluding with a quick scan of the immediate area. Chapters: 0:00:00 - 0:00:12 - Navigating the snowy base exterior 0:00:12 - 0:00:30 - Locating and carrying the body across the grounds 0:00:30 - 0:00:44 - Entering the facility and securing the body inside 📖 Interactive written walkthrough with clickable timestamps: https://pixelfungaming.com/videos/ghost-recon-breakpoint-2nd-method-opening-locked-doors

Dying Light Live
The video opens with the Xbox dashboard showing various games, including Dying Light. The player selects Dying Light, which initiates the game's loading process. A sequence of company logos and legal disclaimers appear before the game's cinematic introduction begins. The cinematic provides a black and white, dramatic overview of the Harran crisis, focusing on the spread of the pathogen, the military lockdown by the Ministry of Defense, and the global relief efforts (GRE). Voiceovers discuss the urgency of recovering a compromised file related to the virus cure and locating the individual who stole it, Suleiman. The game title card appears, followed by the main menu, set against a backdrop of a devastated, smoking city at sunset. The main menu options are explored, including Campaign and Options. The player navigates to the Online options menu and then checks the Extras/Marketplace section, reviewing available outfits and weapon packs like the Night Club Weapon Pack and the Lacerator Weapon Pack, which are compatible with the Ultimate Edition. The player returns to the main menu and attempts to start the campaign but receives a warning that required content is not fully installed. They then check the Online options again, adjusting game type and competition frequency, before returning to the main menu's Play Game section. The player selects "New game" to begin the campaign. The introduction cutscene starts with the player character, Crane, jumping out of an airplane and parachuting into the city of Harran, receiving mission details via a high-tech HUD in his mask. The mission objective is to locate Suleiman and intercept the compromised file. Crane lands hard, injuring himself, and is immediately confronted by raiders who demand his GRE radio. Crane fights back, violently taking out the bandits using Parkour combat, but is bitten by an infected person before being rescued by Jade and Amir. Jade informs the tower command that Amir, their previous runner, is dead, and Crane has been injured and possibly infected. Crane wakes up in the Tower, where a young runner named Rahim explains the situation: the Tower is a survivor refuge, and Crane's GRE Antizin injector was used to save him from turning. Rahim tasks Crane with seeing Brecken, the Tower's leader (who Rahim refers to as "the boss"). Crane travels to the 19th floor where he meets a guard and enters room 190, where Brecken is examining the city from a balcony. Brecken, initially annoyed, explains the desperate situation of the Tower, their reliance on airdropped Antizin, and his runners. He criticizes Crane for not being on the runner list and then shares the story of Amir, a fallen runner. Brecken gives Crane back his GRE radio, telling him to be useful. Crane is then given the first in-game quest: to go to the 13th floor and check on a lost survivor named Mark, who is injured in a room surrounded by infected. Crane finds Mark, who is gravely injured and bleeding heavily. Mark urgently asks Crane to retrieve gauze and alcohol to stem the bleeding, which the player must find to create a Medkit. The video details the early stages of the 'Awakening' main quest in the zombie survival game, Dying Light. The character, Kyle Crane, initially explores an apartment within the Tower to gather materials (alcohol and gauze) necessary to craft a Medkit for a wounded survivor. Crane successfully crafts the item and delivers it, completing the first objective. The scene transitions to a cutscene where Crane talks to Jade, the sister of another survivor, Rahim. After the conversation, the new objective is to speak with Rahim, who initiates a series of parkour training challenges designed to test Crane's agility and mobility. Crane successfully completes the basic parkour maneuvers—including climbing, jumping, and vaulting—across a rooftop obstacle course and scaffolding high above the city, despite several failed attempts and near-fatal falls. Upon completing the difficult parkour test, Crane experiences his first seizure due to the infection, which Rahim quickly dismisses as a side effect. Rahim then directs Crane to speak with the Quartermaster for equipment before meeting Dr. Zere for his first dose of Antizin, marking the end of the current quest objective. The gameplay video captures the player navigating the initial safe zone located inside a derelict building. The player explores the various rooms and hallways, which are dimly lit and filled with junk, hospital beds, and makeshift barricades, indicating the location is a quarantine survivor headquarters. The player interacts with a 'Quartermaster' character, receiving a brief dialogue about the dangerous situation in the city of Harran and the importance of supply drops. The player checks their personal stash, viewing inventory and crafting items like duct tape, metal parts, and nails, confirming the survivalist nature of the game. The main objective displayed instructs the player to use the elevator to reach the ground floor. Multiple attempts to use the elevator result in a display stating that 'required content not yet installed' and showing a percentage loading bar, repeatedly interrupting the descent sequence. The player walks around the Quartermaster's station, checking for additional supplies and interacting with the Quartermaster to retrieve a Gas Pipe and a Lockpick before attempting the elevator again. The video ends after the player initiates the descent sequence one final time, triggering a loading screen with voiceover narration before transitioning to the Slums area, suggesting the completion of the introductory zone. Chapters: 0:00:00 - Xbox Dashboard and Game Selection 0:02:45 - Loading Dying Light 0:03:17 - Cinematic Introduction: Crisis in Harran 0:04:53 - Main Menu and Options Exploration 0:06:01 - Accessing Xbox Marketplace/DLC Menu 0:07:21 - Reviewing Online Options/Game Type Settings 0:08:08 - Reviewing Game and Audio Options 0:10:33 - Returning to Play Campaign Menu 0:16:25 - Starting New Campaign: Infiltrating Harran (Cutscene) 0:17:00 - Airdrop Mission Briefing and Parachute Jump 0:18:04 - Hard Landing and Raider Encounter 0:18:20 - Crane fights raiders and gets infected/rescued 0:19:50 - Jade reports extraction to the Tower 0:21:07 - Crane Wakes Up in the Tower Infirmary 0:22:12 - Meeting Rahim (Initial Conversation) 0:23:13 - Rahim gives the objective to meet 'the boss' (Brecken) 0:25:21 - Walking through the Tower to room 190 0:26:07 - Guard at Room 190 lets Crane pass 0:27:08 - Communicating with GRE Command 0:27:39 - Finding the Survivor Mark on the 13th Floor 0:29:08 - Mark is wounded; Objective: Find gauze and alcohol 0:29:44 - Finding Duct Tape (Crafting Material) 30:00 - Searching for Medkit Components 30:16 - Acquiring Gauze and Alcohol 31:56 - Crafting the Medkit and Helping the Injured Survivor 32:34 - Cutscene with Jade and Rahim 33:40 - Entering the Elevator and Heading to the Gym 35:10 - Speaking with Rahim and Changing Clothes 36:14 - Rahim initiates Parkour Training 37:18 - First Climb and Introduction to Parkour Basics 38:44 - Rahim's 'Wimp' Jump Challenge and Player Fall 39:46 - Successful Extreme Jump and Achievement Unlock 40:08 - Starting the Parkour Test 41:03 - Parkour Attempt 1 (Failed Jump) 41:14 - Parkour Attempt 2 (Failed Jump) 42:14 - Parkour Attempt 3 (Failed Jump) 42:51 - Parkour Attempt 4 (Failed Jump) 47:00 - Parkour Attempt 5 (Failed Jump) 47:49 - Parkour Attempt 6 (Failed Jump) 50:07 - Parkour Test Progress: Navigating Sandbag Obstacles 52:56 - Finishing the Parkour Test and Experiencing a Seizure 58:40 - Rahim Explains the Seizure and Next Objective 0:00 - Initial Exploration of the Safe Zone 0:10 - Navigating the Dilapidated Floors 0:25 - Searching for the Elevator 0:46 - Encountering Non-Playable Characters (NPCs) 1:06 - Finding the Elevator and Initial Attempt to Descend 1:21 - Checking Player's Stash/Inventory and Crafting Items 1:33 - Attempting Elevator Use - Required Content Loading Loop Begins 2:33 - Interacting with the Quartermaster 2:40 - Receiving Starter Weapons (Gas Pipe) and Supplies 3:07 - Final Elevator Attempt and Transition to Loading Screen

Ghost Recon Breakpoint - Cut Scene - An Eye For An Ai
The mission centers on the retrieval of critical data regarding the Drone Control Program. Nomad meets with researchers Christina Cromwell and Grace Maddox in a high-tech facility to discuss their progress. The conversation turns toward Project Deus, a transhumanist initiative aimed at elevating humanity, which triggers a significant flashback for Nomad. This memory transports the narrative to the Middle East in July 2022. Cole Walker, accompanied by Nomad, faces a heated confrontation with a superior officer following a mission where a civilian was killed. Walker defends his radical actions, criticizing the chain of command and the perceived incompetence of those leading the war effort. His intense sense of justice and willingness to bypass protocol are on full display during this tense standoff. Returning to the present, the dialogue resumes as Nomad expresses skepticism about Walker's motivations and the ethical implications of Project Deus. Cromwell hands over a DNA-based flash drive containing the extracted program data, and the encounter concludes with Nomad preparing for the next steps of the infiltration. Chapters: 0:00:00 - 0:00:10 - Entering the Tech Room 0:00:10 - 0:00:58 - Meeting with Cromwell and Maddox 0:00:58 - 0:04:04 - Flashback: Walker's Incident in the Middle East 0:04:04 - 0:05:10 - Retrieving the DNA Flash Drive 0:05:10 - 0:05:25 - Mission Update and Next Phase 📖 Interactive written walkthrough with clickable timestamps: https://pixelfungaming.com/videos/ghost-recon-breakpoint-cut-scene-an-eye-for-an-ai

Call Of Duty Ghosts : End Of The Line - Mission 13
The mission 'End of the Line' begins with a stealthy approach through a dense, rainy jungle at night. Silent takedowns secure the perimeter before the squad moves toward a large Federation factory. Infiltration continues through a train yard where guards are eliminated quietly using suppressed weapons. Upon entering the facility, the team navigates through narrow corridors and storage areas, eventually reaching a massive chamber housing space-based kinetic weaponry. Visual data of these lethal rods is captured and uploaded to command. The objective shifts to data retrieval from the factory's mainframes. As the data copies, an enemy ambush triggers an intense firefight. Combat intensifies as the facility begins to crumble under an Allied bombing run. The squad fights through smoke and fire, utilizing thermal optics to track targets amidst the chaos. The final segment is a high-speed escape through the collapsing structure, ending with a successful extraction as the entire complex is destroyed by air strikes. Chapters: 0:00:00 - 0:02:30 - Jungle Approach and Perimeter Stealth 0:02:30 - 0:05:00 - Entering the Black Zone Facility 0:05:00 - 0:07:00 - Scouting the Kinetic Weapon Rods 0:07:00 - 0:09:30 - Data Theft and Tactical Firefight 0:09:30 - 0:11:30 - Fighting through the Control Room 0:11:30 - 0:13:30 - Evacuation under Heavy Bombardment 0:13:30 - 0:14:22 - Final Extraction and Mission Success 📖 Interactive written walkthrough with clickable timestamps: https://pixelfungaming.com/videos/call-of-duty-ghosts-end-of-the-line-mission-13

COD : Advanced Warfare Multiplayer Domination - Camping (Hiding) Places - 27 kills
The video documents a complete multiplayer match in Call of Duty: Advanced Warfare's Ground War Domination mode on the Comeback map. The match features two rounds of intense objective-based combat. The player, using the AK12 assault rifle, focuses on aggressive rushing and securing map objectives (A, B, and C). The gameplay involves frequent engagements, objective captures, and earning multiple killstreaks, including Bloodthirsty medals and deploying offensive and defensive scorestreaks like the Assault Drone and Warbird. The player's team, Sentinel, maintains control and ultimately secures the victory in the second round. The video concludes with the After Action Report, showing rank promotions and unlocks for the MAAWS Launcher and Tracking Drone. Chapters: 0:00 - 1:07 - Menu Navigation, Loadout Selection, and Match Loading 1:07 - 3:50 - Round 1 Start: Aggressive Objective Capture and Early Kills 3:50 - 6:23 - Mid-Round 1: Sustained Combat, Killstreak, and Objective Trading 6:23 - 6:46 - Halftime and Round Ending Killcam 6:46 - 9:55 - Round 2 Start: Securing Objectives and Utilizing Friendly UAV Support 9:55 - 12:06 - Late Round 2: System Hack Activation and Match Victory 12:06 - 13:01 - After Action Report, Promotions, and Unlocks 📖 Interactive written walkthrough with clickable timestamps: https://pixelfungaming.com/videos/cod-advanced-warfare-multiplayer-domination-camping-hiding-places-27-kills
Ghost Recon Breakpoint - Find Prison Transfer Orders Walkthrough
This video features a complete tactical mission walkthrough in Ghost Recon Breakpoint, centered on infiltrating the Aurora Data Farm facility. The objective demonstrated is to stop a drone backdoor program research project. The gameplay begins with a detailed aerial reconnaissance phase using a drone to identify sentries, objectives, and automated defenses. Following the scouting, the content shows a stealthy approach to the perimeter, utilizing suppressed precision rifles to eliminate guards on balconies and walkways. The video covers interior navigation through office spaces, tactical body disposal to maintain cover, and navigating snowy exterior cliffs to bypass heavily guarded entrances. As the mission progresses, viewers see the character infiltrate the server building, hack terminals for critical intel, and eventually engage in intense close-quarters combat as stealth is broken. The final segments depict the destruction of physical server hardware in the tech lab to successfully complete the mission objective. Chapters: 0:00:00 - 0:02:15 - Aerial Reconnaissance and Initial Perimeter Scouting 0:02:15 - 0:04:45 - Stealthy Infiltration and Initial Sentry Eliminations 0:04:45 - 0:07:30 - Extended Scouting and Repositioning Around the Facility 0:07:30 - 0:10:15 - Perimeter Navigation and Bypassing Automated Defenses 0:10:15 - 0:12:30 - Building Infiltration and Data Extraction 0:12:30 - 0:15:00 - Intense Indoor Firefights and Combat Maneuvers 0:15:00 - 0:17:11 - Final Server Destruction and Mission Completion 📖 Interactive written walkthrough with clickable timestamps: https://pixelfungaming.com/videos/ghost-recon-breakpoint-find-prison-transfer-orders-walkthrough

Dead Island 2: 5 Ways To Electrocute Zombies #shorts
High-voltage combat unfolds across Los Angeles as various urban objects are repurposed into deadly traps. Precise shots at overhead traffic lights trigger massive electrical explosions that instantly incinerate approaching zombie groups. Large electronic warning signs serve as potent area-denial weapons, emitting lethal arcs of electricity when struck. Within shopping malls and plazas, advertising kiosks become explosive hazards when kicked, discharging high-voltage currents into the surrounding floor. Utility poles equipped with vulnerable electric boxes provide tactical overhead strikes, dropping hazardous components onto the street. The sequence concludes by utilizing ground-level light fixtures to create sudden, shocking defenses against the relentless undead horde. Chapters: 0:00:00 - 0:00:12 - Weaponizing Traffic Lights for Electrical Kills 0:00:12 - 0:00:27 - Triggering Electronic Sign Traps 0:00:27 - 0:00:40 - Using Advertising Kiosks as Explosive Hazards 0:00:40 - 0:00:52 - Exploding Pole-Mounted Electric Boxes 0:00:52 - 0:00:58 - Activating Ground-Level Light Fixtures 📖 Interactive written walkthrough with clickable timestamps: https://pixelfungaming.com/videos/dead-island-2-5-ways-to-electrocute-zombies-shorts

RDR2 - Funny WTF Glitches
This gameplay footage from Red Dead Online showcases a mix of peculiar glitches and standard mission activities. The video begins with an unusual encounter where a wagon driver's head is removed via a gunshot, yet the NPC remains seated and continues to steer the horses. The content demonstrates various attempts to interact with or eliminate this glitched character using firearms, dynamite, and fire bottles. The second half of the video transitions to a nighttime scenario featuring a tactical raid on a small enemy camp. Viewers will see the clearing of hostile NPCs, the successful rescue of a captive individual, and the subsequent honor increase before the session concludes with a sudden combat death. Chapters: 0:00:00 - 0:00:15 - Initial encounter and headshot glitch on wagon driver 0:00:15 - 0:00:55 - Resilience testing of the headless NPC with handguns 0:00:55 - 0:01:25 - Wagon destruction attempt using dynamite 0:01:25 - 0:01:42 - Incendiary test with fire bottles on the glitched NPC 0:01:42 - 0:02:02 - Nighttime tactical assault on a hostile camp 0:02:02 - 0:02:25 - Rescuing the tied-up NPC and receiving rewards 0:02:25 - 0:02:40 - Post-rescue combat and player elimination 📖 Interactive written walkthrough with clickable timestamps: https://pixelfungaming.com/videos/rdr2-funny-wtf-glitches

Dead Island 2: Alesis Hernandez | Monarch Studio Boss Fight | Walkthrough (No Commentary)
The mission "Michael Anders and the Holy Grail" unfolds on a vibrant, neon-lit movie set where combat with diverse zombie types is relentless. Interactive environmental hazards, such as pyrotechnic controls and chemical dispensers, provide tactical advantages to incinerate or poison encroaching walkers. Close-quarters combat utilizes electric-charged blades and visceral finishing moves that effectively dismember enemies. The battle transitions across various zones of the film lot, including a diner facade and backlot trailers, requiring constant movement and spatial awareness. Survival hinges on careful health management while fending off agile runners and durable walkers. Following the neutralization of the undead threat, a narrative-driven dialogue occurs within a dressing room trailer, deepening the connection between the characters Michael and Emma. The sequence concludes with mission rewards and a character level increase. Chapters: 0:00:00 - 0:02:15 - Battle at the Cafe Movie Set 0:02:15 - 0:04:30 - Utilizing Pyrotechnics and Spider Venom 0:04:30 - 0:06:45 - Surviving the Undead Waves 0:06:45 - 0:07:45 - Final Confrontation with the Runners 0:07:45 - 0:09:21 - Story Development and Quest Completion 📖 Interactive written walkthrough with clickable timestamps: https://pixelfungaming.com/videos/dead-island-2-alesis-hernandez-monarch-studio-boss-fight-walkthrough-no-commentary

Far Cry New Dawn - Into The Bliss Walkthrough
The mission begins with a ritualistic gathering at New Eden where Ethan, the leader, delivers a sermon to his followers about a non-believer and the eventual return of 'The Father.' After a ceremonial sacrament is consumed, a distorted first-person journey into the northern territories starts. Ethan gives clear instructions on navigating the river and emphasizes the necessity of lighting fire beacons along the way to ward off the deadly Bliss fog. The protagonist takes command of a small motorboat and steers through narrow, foliage-choked waterways illuminated by dim lanterns. Upon entering the thick Bliss, the world becomes a hazy purple, requiring constant use of fire arrows to ignite large signal pyres. Progress is periodically blocked by heavy wooden gates, forcing land excursions to find and pull mechanical levers. During these stops, aggressive mutated wolves frequently attack, leading to intense close-quarters combat with shotguns and Molotov cocktails. The journey continues through ever-thickening fog, balancing careful boat navigation with high-stakes wildlife encounters. Eventually, the boat breaks through the hallucinations into a sun-drenched valley, arriving at the docks of Joseph's Sanctuary. Chapters: 0:00:00 - 0:01:38 - Ritual and Sacrament at New Eden 0:01:38 - 0:04:00 - Ethan's Instructions and Journey Start 0:04:00 - 0:07:00 - Entering the Bliss and Opening the First Gate 0:07:00 - 0:09:30 - Navigating the Foggy River and Signal Fires 0:09:30 - 0:12:00 - Wolf Pack Skirmishes and Continuing North 0:12:00 - 0:14:30 - Clearing the Ruins and Lighting Main Beacons 0:14:30 - 0:16:50 - Final Approach to Joseph's Sanctuary 📖 Interactive written walkthrough with clickable timestamps: https://pixelfungaming.com/videos/far-cry-new-dawn-into-the-bliss-walkthrough

GTA Online: Drone Tazer Trolling #shorts
A character dressed in a formal black suit and a vibrant gas mask stands on a rooftop overlooking the Los Santos skyline at night. The gameplay focuses on a remotely controlled drone targeting this individual. The drone initiates multiple shock attacks, sending the character into a ragdoll state each time. Between shocks, the character manages to stand back up, only to be targeted again. The cycle of shocks continues, demonstrating the game's physics as the character falls and recovers. Following the final shock, the drone maneuvers away from the rooftop, providing a sweeping view of the city buildings and flying through a dark alleyway near street level. Chapters: 0:00:00 - 0:00:06 - Initial rooftop standoff 0:00:06 - 0:00:12 - First drone shock and recovery 0:00:12 - 0:00:18 - Character returns to standing position 0:00:18 - 0:00:24 - Second drone shock event 0:00:24 - 0:00:31 - Recovery from the second fall 0:00:31 - 0:00:37 - Third drone shock and ragdoll physics 0:00:37 - 0:00:43 - Final standing recovery on the ledge 0:00:43 - 0:00:56 - Last shock and drone flight through alleyway 📖 Interactive written walkthrough with clickable timestamps: https://pixelfungaming.com/videos/gta-online-drone-tazer-trolling-shorts
Warthunder: Realistic Ground Battle (SU-122) Long distance Shot #shorts
The mission begins with an SU-100P tank destroyer navigating the vast dunes of a desert environment. Movement continues across open ground toward a rocky ridge. The vehicle halts and shifts to the telescopic sight, scanning a distant hill for hostiles. A target is identified positioned near some defensive barriers. After careful aiming and range adjustment, a single powerful shell is fired. The projectile strikes the enemy tank, resulting in a catastrophic explosion. A 'Target destroyed' confirmation appears on screen. The SU-100P resumes its advance as smoke billows from the smoldering wreckage in the distance. Chapters: 0:00:00 - 0:00:15 - Desert Navigation 0:00:15 - 0:00:45 - Precision Targeting 0:00:45 - 0:01:00 - Target Destruction and Advance 📖 Interactive written walkthrough with clickable timestamps: https://pixelfungaming.com/videos/warthunder-realistic-ground-battle-su-122-long-distance-shot-shorts

Ready Or Not: S Rank | The Spider (No Mods)
The mission begins with a tactical SWAT team deployed in a rainy, urban environment outside a local grocery store. The team moves methodically, utilizing specialized equipment like mirror wands to peek under doors and identify threats before making entry. Initial contact occurs in a narrow back alley where a suspect is quickly neutralized and detained. The team navigates through the store's cluttered backrooms and into a central courtyard, securing civilians found hiding in makeshift shelters. The operation moves into a larger facility that appears to be a daycare or school, characterized by brightly colored walls and child-themed decor. High-intensity room clearing follows, featuring coordinated breaches with flashbangs and non-lethal grenades to overwhelm suspects. The team focuses on identifying key targets, securing evidence, and ensuring all civilians are safely evacuated. The gameplay demonstrates disciplined fire control and tactical patience, resulting in a perfect execution of the mission objectives and achieving the highest possible mission rating. Chapters: 0:00:00 - 0:01:30 - Initial Breach and Alleyway Clearance 0:01:30 - 0:03:15 - Securing the Grocery Store Interior 0:03:15 - 0:05:00 - Courtyard Search and Civilian Rescue 0:05:00 - 0:06:30 - Entering the Daycare Facility 0:06:30 - 0:08:00 - Methodical Clearing of the Second Floor 0:08:00 - 0:09:30 - Intense Room Breaches and Target Securing 0:09:30 - 0:10:45 - Final Objective Completion and Evidence Collection 0:10:45 - 0:11:07 - Mission Debrief and S Rank Results 📖 Interactive written walkthrough with clickable timestamps: https://pixelfungaming.com/videos/ready-or-not-s-rank-the-spider-no-mods

Warthunder: T-34 VS T-34 Duel #shorts
The mission begins with a T-34 (1940) navigating a desert environment, moving through shallow water and sandy terrain towards an objective. Combat ignites as the tank exchanges fire with distant targets, quickly resulting in the vehicle catching fire from an enemy hit. After the crew successfully extinguishes the flames, a frantic close-range duel unfolds with an enemy M24 that has flanked the position. The T-34 manages to maneuver and land a devastating point-blank shot into the M24's turret, securing a target destroyed notification. However, the victory is short-lived as a follow-up strike from another enemy tank strikes the T-34, knocking out the remaining crew and ending the engagement. The session concludes with a summary of the tank's lifetime and targets destroyed during the match. Chapters: 0:00:00 - 0:00:08 - Initial advance and target spotting in the desert 0:00:08 - 0:00:15 - Engaging enemy armor and managing a fire emergency 0:00:15 - 0:00:27 - Close-quarters maneuvering against an encroaching M24 0:00:27 - 0:00:32 - Securing a kill with a point-blank turret shot 0:00:32 - 0:00:40 - Final tank destruction and mission results screen 📖 Interactive written walkthrough with clickable timestamps: https://pixelfungaming.com/videos/warthunder-t-34-vs-t-34-duel-shorts

RDR2 - Moonshiner Mission - Rescue Marcel
The mission begins with a high-speed horse ride across the grassy plains toward the rival moonshiners' camp. Upon arrival, a fierce gunfight erupts as enemies are systematically neutralized with precise pistol shots. After clearing the area, the character frees Marcel from his bonds and helps him onto the horse. The journey continues with a scenic ride back, filled with dialogue detailing Marcel's background and his gratitude for the rescue. Once the mission is completed, a cinematic transition leads into the moonshine shack. Marcel introduces the operations, showcasing the distillation equipment and explaining the intricacies of crafting quality spirits. The scene concludes as they prepare to begin their illicit business venture together. Chapters: 0:00:00 - 0:00:25 - Approaching the Rival Moonshiners' Camp 0:00:26 - 0:00:45 - Eliminating the Rival Moonshiners 0:00:46 - 0:00:54 - Rescuing Marcel 0:00:55 - 0:02:32 - Escorting Marcel to Safety 0:02:33 - 0:02:54 - Mission Accomplished and Transition 0:02:55 - 0:04:44 - Establishing the Moonshine Business 📖 Interactive written walkthrough with clickable timestamps: https://pixelfungaming.com/videos/rdr2-moonshiner-mission-rescue-marcel

Star Wars: Outlaws | intel chain | Imperial Forward Base Stealth Walkthrough
This comprehensive gameplay walkthrough demonstrates a successful stealth infiltration of the Imperial Forward Base on the planet Toshara in Star Wars Outlaws. The video covers the entire operation from the initial approach on a speeder bike to the final extraction. Viewers will see detailed pathfinding through restricted areas using vents and climbing mechanics, effective use of Nix for distractions and sabotage, and multiple stealth takedowns of Imperial officers and stormtroopers. The content highlights finding key collectibles like the Scout Trooper Helmet and Blaster materials, as well as the 'slicing' mini-game used to extract confidential data and credits from Imperial terminals. Chapters: 0:00:00 - 0:00:50 - Approaching the Imperial Forward Base and finding an entry point 0:00:50 - 0:01:45 - Navigating vents and stealthily taking down the first guards 0:01:45 - 0:02:45 - Infiltrating the hangar and looting the Scout Trooper Helmet 0:02:45 - 0:03:32 - Reviewing mission intel and navigating hangar systems 0:03:32 - 0:04:45 - Moving across upper walkways and avoiding stormtrooper patrols 0:04:45 - 0:05:30 - Slicing the first terminal for confidential Imperial data 0:05:30 - 0:07:15 - Deep infiltration into restricted inner base corridors 0:07:15 - 0:08:55 - Stealth takedowns in maintenance areas and labs 0:08:55 - 0:10:45 - Navigating to the vault area and monitoring guard patterns 0:10:45 - 0:11:35 - Accessing the treasure room for blaster upgrade materials 0:11:35 - 0:12:30 - Slicing the credit terminal for a major payout 0:12:30 - 0:13:23 - Exiting the base and returning to the speeder bike 📖 Interactive written walkthrough with clickable timestamps: https://pixelfungaming.com/videos/star-wars-outlaws-intel-chain-imperial-forward-base-stealth-walkthrough

Ghost Recon Breakpoint - Blakes Law Walkthrough
The mission begins with an infiltration into a secure Skell Technology facility under the cover of night. Nomad moves through the campus grounds, navigating past downed sentries to locate a secure laptop. After gathering critical intel on the campus network design, the objective shifts toward Pythagoras Hall. Nomad swims across a narrow waterway to bypass external security and enters the building through a side terrace. Upon entering, stealth gives way to intense close-quarters combat as Nomad clears multiple floors of Sentinel guards using a combination of tactical positioning and explosives. High-ground advantages are utilized to rain fire down on enemies in the central atrium. Once the building is secured, Nomad reaches the upper laboratories to locate Christina Cromwell. A dialogue follows where they discuss the next steps for retrieving the AI from the network, which involves disabling mountain-top antennae and cutting hard lines. The mission 'Blake's Law' concludes successfully as Nomad prepares for the next phase of the operation. Chapters: 0:00:00 - 0:01:15 - Gathering initial intel from secure laptop 0:01:15 - 0:02:00 - Waterborne infiltration toward Pythagoras Hall 0:02:00 - 0:03:40 - Breaching Pythagoras Hall and clearing first floor guards 0:03:40 - 0:06:00 - Intense multi-floor firefight in the atrium 0:06:00 - 0:08:45 - Securing upper levels and clearing remaining hostiles 0:08:45 - 0:10:00 - Meeting Christina Cromwell and mission completion 📖 Interactive written walkthrough with clickable timestamps: https://pixelfungaming.com/videos/ghost-recon-breakpoint-blakes-law-walkthrough

Far Cry New Dawn - Navajo Bridge Expedition Walkthrough
The Navajo Bridge Expedition begins with a helicopter flight over a desert canyon towards a fortified bridge outpost. After a brief equipment check in the menus, the mission starts with a stealthy approach to the enemy-held territory. Initial scouting with binoculars identifies several guards and a specific building marked by pink smoke that houses the objective. The character navigates through the underside of the bridge structure to maintain a low profile before infiltrating the target building. Intense close-quarters combat breaks out upon reaching the second floor, where the package is successfully secured. The extraction phase triggers immediately, forcing a rapid retreat under heavy fire from Highwaymen reinforcements on foot and on ATVs. The character reaches the designated extraction point at a nearby bus station and holds the position against waves of enemies using an LMG and dynamite. Once the rescue helicopter lands, the character boards and provides covering fire from the air as they make a clean getaway, concluding the mission with a summary of rewards and a return to Prosperity. Chapters: 0:00:00 - 0:01:11 - Mission launch and inventory management 0:01:12 - 0:02:35 - Initial scouting of Navajo Bridge 0:02:36 - 0:04:53 - Infiltration and package retrieval 0:04:54 - 0:07:35 - Escape and extraction zone defense 0:07:36 - 0:09:05 - Helicopter extraction and mission completion 📖 Interactive written walkthrough with clickable timestamps: https://pixelfungaming.com/videos/far-cry-new-dawn-navajo-bridge-expedition-walkthrough

Far Cry New Dawn - (Timber) Man Eat Dog World Walkthrough
The side mission 'Man Eat Dog World' begins with a drive through the vibrant, post-apocalyptic landscape of Hope County toward the Meatfort. Upon arrival at the grim facility, the character infiltrates the grounds to find a dog held captive in a small cage. A brief moment of comfort is shared as the character pets the frightened animal, who then leads the way further into the facility. Combat erupts when several Highwaymen are discovered guarding the butchery area. The character quickly neutralizes the hostiles using a combination of firearms and environmental awareness. After the threat is eliminated, the mission focuses on liberating the dog's companions by picking the locks on several nearby cages. The freed dogs run to safety as the mission concludes with a final interaction with the lead dog, Timber. This successful rescue adds Timber to the roster as a permanent Fang for Hire companion. Chapters: 0:00:00 - 0:00:24 - Inbound to the Meatfort facility 0:00:24 - 0:00:56 - Infiltrating the Meatfort and discovering Timber 0:00:56 - 0:01:10 - Following Timber through the butchery area 0:01:10 - 0:01:34 - Eliminating Highwaymen guards 0:01:34 - 0:01:53 - Liberating the remaining caged dogs 0:01:53 - 0:02:19 - Mission completion and unlocking Timber as a companion 📖 Interactive written walkthrough with clickable timestamps: https://pixelfungaming.com/videos/far-cry-new-dawn-timber-man-eat-dog-world-walkthrough

Ghost Recon Breakpoint - Hack Data Server Walkthrough
Tactical operations begin with a high-ground reconnaissance of the Campus Data Farm facility. A surveillance drone deploys to mark enemy positions, identify security systems, and locate the primary objective. Following a thorough scouting phase, the operative descends the cliffs to begin a stealthy infiltration. Moving through dense vegetation and utilizing prone camouflage, the operative reaches the facility's interior. A data server hack successfully disables security protocols before the mission transitions into high-intensity close-quarters combat. The operative engages multiple Sentinel guards and drones using suppressed rifles and tactical abilities. After clearing several floors of the data center and achieving a level up, a final push leads to a helipad. The mission concludes with a clean extraction via a captured helicopter, providing a panoramic view of the Auroa archipelago. Chapters: 0:00:00 - 0:00:52 - Initial Overlook and Ridge Scouting 0:00:52 - 0:02:10 - Comprehensive Drone Reconnaissance of the Data Farm 0:02:10 - 0:03:10 - Cliffside Descent and Stealthy Perimeter Breach 0:03:10 - 0:04:40 - Indoor Infiltration and Security Terminal Hacking 0:04:40 - 0:06:40 - Escalation to Open Combat and Leveling Up 0:06:40 - 0:08:25 - Tactical Clear-out of the Data Storage Facility 0:08:25 - 0:09:35 - Exterior Firefight and Push to the Helipad 0:09:35 - 0:10:00 - Helicopter Extraction and Mission Completion 📖 Interactive written walkthrough with clickable timestamps: https://pixelfungaming.com/videos/ghost-recon-breakpoint-hack-data-server-walkthrough

Star Wars: Outlaws | The Mechanic Walkthrough
This video provides a complete gameplay walkthrough of 'The Mechanic' quest in Star Wars Outlaws. The footage begins with Kay Vess arriving at a remote shop to meet Selo, a skilled mechanic who can upgrade her speeder. After a cutscene detailing the mission, gameplay shows the traversal across the landscape to an Imperial wind harvester facility. Viewers will see the infiltration process using magnetic disrupters, followed by extensive platforming and puzzle-solving involving giant spinning fans and maintenance tunnels. The video demonstrates how to navigate the facility's interior, disable security measures, and eventually retrieve the atmospheric accelerator. The final portion of the video covers the escape from the facility and the return to Selo to receive a permanent speeder boost upgrade. Chapters: 00:00:00 - 00:01:02 - Quest Initiation: Meeting Selo the Mechanic 00:01:02 - 00:03:15 - Speeder Traversal to the Imperial Wind Harvester 00:03:15 - 00:05:45 - Infiltrating the Facility and Navigating Inner Tunnels 00:05:45 - 00:08:50 - Solving Fan Puzzles with Magnetic Disrupters 00:08:50 - 00:11:45 - Climbing Through Internal Maintenance Shafts 00:11:45 - 00:13:40 - Retrieving the Atmospheric Accelerator and Escaping 00:13:40 - 00:15:25 - Returning to Selo and Unlocking the Speeder Boost 📖 Interactive written walkthrough with clickable timestamps: https://pixelfungaming.com/videos/star-wars-outlaws-the-mechanic-walkthrough
RDR2 - Bar Brawl With Rival Moonshiners
A character enters a saloon in Red Dead Online to confront a group of rival moonshiners. Upon entering, an interaction with a patron quickly escalates into a massive bar brawl. The combat involves heavy hand-to-hand fighting, with the character blocking, dodging, and striking multiple opponents simultaneously. As the fight reaches its peak, a cutscene introduces a formidable boss enemy wearing an eyepatch. The fisticuffs continue as the character focuses on defeating this tougher opponent alongside the remaining rivals. After a series of successful counters and knockouts, the mission concludes successfully. The character then proceeds to loot the saloon, searching for provisions and valuables before departing. Chapters: 00:00:00 - 00:00:18 - Saloon entry and initial confrontation 00:00:18 - 00:01:15 - Massive saloon brawl against multiple rivals 00:01:15 - 00:01:25 - Introduction of the rival moonshiner boss 00:01:25 - 00:01:50 - Final showdown and boss knockout 00:01:50 - 00:02:07 - Mission completion and saloon looting 📖 Interactive written walkthrough with clickable timestamps: https://pixelfungaming.com/videos/rdr2-bar-brawl-with-rival-moonshiners

Insurgency: Sandstorm | Sidestepping To Dodge bullets
The mission begins with the player holding a defensive position inside a farmhouse, tasked with protecting objective Alpha. Intense gunfire erupts as enemies approach from the exterior courtyard. The player engages targets through a doorway, managing recoil and maintaining focus on the entrance. As the situation escalates, the objective status shifts to a stalemate, indicating enemies have infiltrated the perimeter. Close-quarters combat ensues as hostiles enter the building, leading to a series of rapid engagements. The player clears rooms and eliminates multiple enemies at point-blank range using an assault rifle. The action reaches a peak as the objective becomes contested, requiring quick reflexes to neutralize threats emerging from various hallways and doorways simultaneously. Chapters: 0:00:00 - 0:00:05 - Initial Defense at the Farmhouse Doorway 0:00:05 - 0:00:10 - Repositioning and First Indoor Engagements 0:00:10 - 0:00:16 - Intense Hallway Firefight and Multi-Kill 0:00:16 - 0:00:21 - Final Stand in the Main Living Area 📖 Interactive written walkthrough with clickable timestamps: https://pixelfungaming.com/videos/insurgency-sandstorm-sidestepping-to-dodge-bullets

Star Wars: Outlaws | Underworld Walkthrough #starwarsoutlaws
This gameplay analysis covers a complete infiltration mission in Star Wars Outlaws. Viewers will see the protagonist, Kay Vess, receive a high-stakes objective to steal a file from the Pyke Syndicate. The video showcases various gameplay mechanics, including social hub interactions, city navigation, and deep stealth tactics within a restricted district. The content highlights the use of environmental cover for concealment, the strategic deployment of the companion Nix for distractions, and the rhythm-based data spike hacking minigame. Additionally, the footage demonstrates vertical traversal through climbing and ventilation shafts, as well as tactical blaster combat when stealth is compromised, culminating in a successful mission execution within the Syndicate's stronghold. Chapters: 0:00:00 - 0:02:30 - Mission Briefing and Initial City Traversal 0:02:30 - 0:05:00 - Syndicate District Infiltration and Stealth Tactics 0:05:00 - 0:07:30 - Environmental Traversal and Hacking Sequences 0:07:30 - 0:09:52 - Stronghold Penetration and Combat Engagement 📖 Interactive written walkthrough with clickable timestamps: https://pixelfungaming.com/videos/star-wars-outlaws-underworld-walkthrough-starwarsoutlaws

HITMAN: Holiday Hoarders - Santa disguise location
The mission begins in the dimly lit cellar of a large estate where the character, initially disguised as a security guard, navigates through storage rooms. Upon entering a hall decorated for Christmas, the character encounters a man dressed as Santa Claus. After subduing him, the character takes the Santa disguise and drags the unconscious body into a nearby wooden crate to hide it. Now dressed in the red suit, the character moves through the basement towards an exit. The sequence follows the character as they ascend a set of stone stairs leading to the mansion's exterior. The footage ends as the character, still in the Santa disguise, approaches the main entrance where two guards are stationed. Chapters: 0:00:00 - 0:00:10 - Navigating the cellar corridors 0:00:10 - 0:00:20 - Subduing Santa Claus in the dining hall 0:00:20 - 0:00:43 - Adopting the disguise and hiding the body 0:00:43 - 0:00:53 - Moving through the basement towards the exit 0:00:53 - 0:01:02 - Ascending the stairs to the main palace entrance 📖 Interactive written walkthrough with clickable timestamps: https://pixelfungaming.com/videos/hitman-holiday-hoarders-santa-disguise-location Chapters: 0:00 - Agent 47 sneaks through a brick corridor in the wine cellar 0:12 - Subduing the Santa character in the banquet room 0:20 - Changing into the Santa Claus disguise 0:25 - Dragging and hiding the body in a nearby storage crate 0:45 - Navigating the festive-themed cellar area towards an exit 0:52 - Ascending the stone stairs to the building's exterior 1:00 - Approaching guards outside the entrance while in disguise

Insurgency Sandstorm: Crossing - Destroy Both Caches Easy WIth Air support
The mission begins with objective Alpha being secured, as the character observes enemy positions from a balcony using binoculars. After identifying high-value targets, a request for an autocannon strafe is called in through the radio. The character moves outdoors, joining fellow soldiers as they advance through a rocky terrain towards the next objective. The first air support strike arrives, delivering a devastating barrage of fire on the targeted building. The mission objective then shifts to advancing and destroying a weapon cache. The character carefully spots the cache location within a distant building and coordinates a second autocannon strafe. The aircraft sweeps across the area, successfully detonating the cache in a massive explosion. With the cache destroyed, the team pushes forward towards the final capture point. Chapters: 0:00:00 - 0:00:25 - Securing Alpha and Spotting Targets 0:00:25 - 0:00:53 - First Autocannon Strafe Deployment 0:00:53 - 0:01:20 - Advancing Towards the Weapon Cache 0:01:20 - 0:01:46 - Weapon Cache Destruction and Final Push 📖 Interactive written walkthrough with clickable timestamps: https://pixelfungaming.com/videos/insurgency-sandstorm-crossing-destroy-both-caches-easy-with-air-support

Far Cry New Dawn - Treasure Hunt - Light Em' Up Walkthrough
The mission begins with an exploration through a vibrant, post-apocalyptic landscape, leading to a small rock cave filled with crafting materials. The journey continues toward Toothchapel, where a fierce wolverine attacks near a garden of purple flowers. Combat then shifts toward Highwaymen scouts patrolling the chapel grounds. Upon reading a note left on a pew, the 'Light 'Em Up' Treasure Hunt begins. The task requires entering the nearby dilapidated church to retrieve a stolen key. Inside, fire spreads across the wooden structure, forcing a path through precarious rafters and crumbling platforms. Navigating the interior involves climbing scaffolding and leaping across burning gaps to reach the upper sections before descending into the basement. The wolverine's nest is eventually located and destroyed with fire, prompting a final confrontation with the beast. After retrieving the Highwaymen shed key from the ashes, a quick escape from the burning building leads to a nearby shed. The treasure hunt concludes by unlocking this stash and collecting a wealth of resources and perk magazines. Chapters: 0:00:00 - 0:00:30 - Initial exploration and cave looting 0:00:30 - 0:01:15 - Arriving at Toothchapel and hunting the first wolverine 0:01:15 - 0:01:50 - Engaging Highwaymen enemies in the flower garden 0:01:50 - 0:02:20 - Initiating the 'Light 'Em Up' Treasure Hunt mission 0:02:20 - 0:03:15 - Entering the church and battling the second wolverine 0:03:15 - 0:04:30 - Navigating through the burning rafters and scaffolding 0:04:30 - 0:05:45 - Scaling the upper levels and navigating roof sections 0:05:45 - 0:06:25 - Burning the nest and reclaiming the Highwaymen shed key 0:06:25 - 0:07:15 - Escaping the collapsing church structure 0:07:15 - 0:07:56 - Unlocking the treasure stash and collecting rewards 📖 Interactive written walkthrough with clickable timestamps: https://pixelfungaming.com/videos/far-cry-new-dawn-treasure-hunt-light-em-up-walkthrough

Far Cry New Dawn - (Sharky) Adventures In Babysitting Walkthrough
The mission "Adventures in Babysitting" begins at Chateau Boshaw, where the character encounters Sharky Bowshaw. He explains he is looking after his cousin Hurk's baby, Blade, and needs help fortifying the base against the Highwaymen. The first objective involves traversing the metal walkways and pipes surrounding the base to arm five steam traps and then activating a central pressure valve. After completing these preparations, a meeting with Sharky in a nearby shed leads to a celebration involving a drink of potent "party liquor." This ethanol-based concoction causes a temporary blackout and time jump. Upon waking, a massive Highwaymen assault is underway. The defense focuses on protecting two high-pressure pipes, East and West, from waves of attackers. Mounted machine guns provide heavy fire against infantry and incoming vehicles while disco music sets a frantic pace. The mission transitions between defending the different pipe locations as Highwaymen attempt to sabotage them. Once the final wave is repelled, Sharky decides that Chateau Boshaw is too hazardous for a child and agrees to join the community at Prosperity. Chapters: 0:00:00 - 0:01:21 - Meeting Sharky Bowshaw at Chateau Boshaw 0:01:22 - 0:02:47 - Arming the base defenses and steam traps 0:02:48 - 0:04:10 - Celebrating with Sharky's ethanol party liquor 0:04:11 - 0:06:43 - Defending the West pressure pipe from Highwaymen 0:06:44 - 0:08:40 - Shifting defense to the East pressure pipe 0:08:41 - 0:10:32 - Repelling the final waves of attackers 0:10:33 - 0:11:17 - Mission completion and recruitment 📖 Interactive written walkthrough with clickable timestamps: https://pixelfungaming.com/videos/far-cry-new-dawn-sharky-adventures-in-babysitting-walkthrough

Hitman 3: Chonggoing Map - Tier 3 Dongle Location
Agent 47 begins the mission inside a secure facility in Chongqing. He approaches a locked armory door and uses his hacking tool to bypass the security protocol. Once the door opens, he enters the room to find lockers and equipment cases. After a brief inspection of the surroundings, he accesses the tactical map to plan his next move. The map displays the various levels of the facility, highlighting objectives and potential extraction points during the Syndicate Showdown. He scrolls through the different floors, meticulously planning his route before closing the interface and returning to the mission area. Chapters: 0:00:00 - 0:00:06 - Hacking the armory door 0:00:06 - 0:00:24 - Entering and inspecting the armory 0:00:24 - 0:00:48 - Navigating the mission map 📖 Interactive written walkthrough with clickable timestamps: https://pixelfungaming.com/videos/hitman-3-chonggoing-map-tier-3-dongle-location

Star Wars: Outlaw | Crashed Walkthrough #starwarsoutlaws
This video provides a comprehensive walkthrough of the opening sequences in Star Wars Outlaws, featuring the protagonist Kay Vess and her companion Nix. The footage begins with a dramatic cinematic crash landing on the planet Toshara, followed by exploration of the wreckage. Viewers will see combat mechanics introduced through an encounter with bandits, including the use of Kay's Adrenaline Rush ability. The gameplay demonstrates traversal across Toshara's open landscapes via speeder bike to reach Mirogana City. Within the city, the video showcases urban exploration, interactions with Imperial Stormtroopers, and stealth-based navigation through a bustling cantina. Key narrative moments include a tense meeting with the Pyke Syndicate underboss Gorak and an introduction to the game's reputation system through a conversation with the broker Danka. The analysis covers environmental interactions, dialogue choices, and the initial setup of the 'Underworld' questline. Chapters: 0:00:00 - 0:00:26 - Opening cinematic and Star Wars Outlaws title sequence 0:00:26 - 0:01:51 - Exploration of the crash site and character introduction 0:01:51 - 0:02:54 - Combat encounter with bandits and Adrenaline Rush tutorial 0:02:54 - 0:03:54 - Dialogue with Waka and mission objectives setup 0:03:54 - 0:04:42 - Speeder bike traversal across Toshara's wilderness 0:04:42 - 0:05:50 - Arrival at Mirogana City and urban environment showcase 0:05:50 - 0:07:13 - Imperial checkpoint interaction and cantina entrance 0:07:13 - 0:08:51 - Stealth navigation and reaching Gorak's VIP suite 0:08:51 - 0:10:41 - Meeting with Gorak and theft of the syndicate ring 0:10:41 - 0:12:24 - Introduction to Danka and the criminal syndicates lore 0:12:24 - 0:13:03 - Reputation system overview and quest confirmation 📖 Interactive written walkthrough with clickable timestamps: https://pixelfungaming.com/videos/star-wars-outlaw-crashed-walkthrough-starwarsoutlaws

Dead Island 2: Becki The Bride | Boss Fight Walkthrough (No Commentary)
The mission "Room Service for Major Booker" reaches its climax within the ballroom of the Halperin Hotel. Jacob establishes radio contact with Dr. Reed, a CDC scientist, disclosing his unique condition of being bitten but remaining uninfected. This discovery is cut short by the arrival of Becki the Bride, a formidable Crusher zombie who crashes onto the dance floor. A brutal boss fight ensues, with Becki employing devastating ground-pound maneuvers that knock opponents back. Throughout the engagement, waves of shamblers and walkers provide constant distractions, requiring efficient crowd management and tactical movement. Jacob cycles through a range of improvised melee weapons, including tire irons and crowbars, to counter Becki's high durability and powerful strikes. The struggle persists across the ballroom as weapons break and are replaced, with Jacob utilizing quick dodges and heavy attacks to chip away at the boss's health. The encounter concludes with a final flurry of blows that finally puts Becki down. After the fight, Jacob communicates his success to Dr. Reed, earns the Ground Pound ability, and completes the mission, leveling up to rank six. Chapters: 0:00:00 - 0:01:12 - Arrival at the ballroom and radio contact with Dr. Reed 0:01:12 - 0:04:00 - Initial engagement with Becki the Bride and boss combat starts 0:04:00 - 0:07:00 - Mid-fight management of additional zombie waves and boss pressure 0:07:00 - 0:10:00 - Sustained melee combat, weapon switching, and environmental awareness 0:10:00 - 0:12:01 - Final phase of the boss fight, Becki's defeat, and mission completion 📖 Interactive written walkthrough with clickable timestamps: https://pixelfungaming.com/videos/dead-island-2-becki-the-bride-boss-fight-walkthrough-no-commentary

Sons Of The Forest: Log Thief #Shorts #sonsoftheforest
This video presents a first-person perspective of a high-fidelity survival game set in a winter environment. The footage begins with the use of binoculars to observe an AI character in the distance who is actively engaged in gathering resources by picking up and carrying a large log. The camera follows this character as they navigate through a dense, snow-covered forest, highlighting the game's detailed foliage, realistic lighting, and atmospheric sound design. After tracking the character for several seconds, the view switches back to a standard perspective, offering a broader look at the surrounding snowy landscape and distant fortifications before transitioning to a channel outro. Chapters: 0:00:00 - 0:00:02 - Initial observation of the snowy forest 0:00:02 - 0:00:07 - Viewing a character interacting with environmental objects 0:00:07 - 0:00:14 - Tracking character movement through the dense woods 0:00:14 - 0:00:19 - Panoramic view of the winter environment 0:00:19 - 0:00:25 - Channel outro and call-to-action 📖 Interactive written walkthrough with clickable timestamps: https://pixelfungaming.com/videos/sons-of-the-forest-log-thief-shorts-sonsoftheforest

Dead island 2: Halperin Hotel (Story) Clear Lobby Easily
The mission begins in a luxurious hotel lobby swarming with walkers, where a directive to eliminate all threats appears. The protagonist strategically navigates the room and places a car battery on the wet floor as a group of zombies approaches. Upon the zombies reaching the trap, the battery discharges a massive electrical shock, stunning and damaging the entire cluster. Ranged fire follows to dispatch the remaining stunned enemies. As a fresh wave of walkers emerges from a nearby hallway, the focus shifts to brutal melee combat. Heavy strikes and environment-assisted takedowns clear the path, culminating in visceral finishing moves that neutralize the final undead attackers in the area. Chapters: 0:00:00 - 0:00:14 - Setting up an electrical trap with a car battery 0:00:14 - 0:00:30 - Activating the shock trap against a zombie cluster 0:00:30 - 0:00:45 - Clearing stunned walkers with ranged attacks 0:00:45 - 0:00:54 - Engaging a new horde in close-quarters melee combat 0:00:54 - 0:01:00 - Executing brutal finishing blows on the remaining enemies 📖 Interactive written walkthrough with clickable timestamps: https://pixelfungaming.com/videos/dead-island-2-halperin-hotel-story-clear-lobby-easily

HITMAN Freelancer: Merekesh | NPC Barbecue With Electricity 😅 #shorts
The gameplay demonstrates a methodical and lethal strategy using environmental hazards in a crowded marketplace. A pile of incapacitated NPCs grows steadily as a high-voltage power outlet is repeatedly toggled on and off. Each time a curious bystander or security guard approaches the scene to investigate the fallen bodies, the electric current is activated, immediately neutralizing them. The process repeats with surgical precision, lure after lure, as the street becomes increasingly cluttered with victims. The surrounding area features traditional architecture, stacks of colorful rugs, and a parked motorcycle, providing a contrast to the chaotic scene unfolding by the archway. By the end of the sequence, a massive mound of bodies showcases the effectiveness of this unconventional elimination technique. Chapters: 0:00:00 - 0:00:15 - Initial Electrocution and Body Pile Setup 0:00:15 - 0:00:30 - Luring and Neutralizing Casual Bystanders 0:00:30 - 0:00:45 - Security Personnel Fall Victim to the Trap 0:00:45 - 0:01:00 - Final Victims and Massive Body Count Display 📖 Interactive written walkthrough with clickable timestamps: https://pixelfungaming.com/videos/hitman-freelancer-merekesh-npc-barbecue-with-electricity-shorts

Farcry 6| El Este Region live #11
Experience an extensive journey across the beautiful yet dangerous landscapes of Yara in this comprehensive Far Cry 6 gameplay session. The video begins with urban navigation at night, quickly transitioning to aerial exploration using the agile Avispa Buzzer. You'll witness a detailed walkthrough of the 'A Rising Tide' Treasure Hunt located in the village of Yarabí. This mission requires keen observation to find boat names—El Tigre del Mar, Papi Chulo, El Lucky, Clarita, and Roja Victoria—scattered around the docks and rooftops to solve a specific switch sequence puzzle. The journey concludes with a high-stakes assault on Anti-Aircraft Site Lambda to clear the restricted airspace. Whether you're looking for puzzle solutions or just want to take in the vistas of the Conuco and Sierra Perdida regions, this video covers it all with full 4K gameplay. Chapters: 0:00:00 - Nighttime Urban Navigation in Concepción 0:04:15 - Acquiring the Avispa Buzzer at the Docks 0:07:30 - Aerial Tour over the Conuco Region 0:12:00 - Flying Towards the Sierra Perdida Coast 0:16:45 - Exploring the Lush Landscapes from Above 0:21:15 - Approaching Yarabí Village 0:23:35 - Starting 'A Rising Tide' Treasure Hunt 0:28:10 - Finding the First Boat Clue: El Tigre del Mar 0:33:00 - Searching the Village Docks for More Boats 0:37:45 - Identifying 'Papi Chulo' and 'El Lucky' 0:42:20 - Locating 'Clarita' and 'Roja Victoria' Clues 0:45:50 - Solving the Switch Sequence Puzzle 0:50:20 - Completing 'A Rising Tide' Treasure Hunt 0:54:15 - Assaulting Anti-Aircraft Site Lambda 0:58:39 - Mission Complete & Video Conclusion 📖 Interactive written walkthrough with clickable timestamps: https://pixelfungaming.com/videos/farcry-6-el-este-region-live-11

Dead Island 2: Call The Calvary Walkthrough (No Commentary)
The mission begins in a modern workshop where a conversation with Sam B takes place. He provides a machete and directs the character to collect spare parts from nearby crates and shelves. Once the materials are gathered, a workbench serves as the station for upgrading the weapon with an electrocution mod. Following this, a dialogue with Emma Jaunt on a scenic balcony reveals plans to head toward the Halperin Hotel evacuation center despite the risks. After obtaining keys from Michael, the character navigates out of the initial estate and enters the 'Goat Pen' mansion. Combat against the undead starts in earnest here, using both melee strikes and environmental hazards. A car battery is used effectively to create an electrified pool of water, taking down multiple zombies at once. Exploration continues through the luxury residence, clearing out walkers and runners in the recording studio and lounge areas. The journey then moves to the fractured streets of Bel-Air, where more zombies are encountered and dispatched using similar environmental tactics. A brief stop at a workbench inside a shipping container allows for weapon repairs before the final approach to the Halperin Hotel. The mission concludes as the character fights through the hotel entrance, bypasses hazards like steam and fire by turning valves, and enters the lobby where Major Booker's voice is heard over the radio. Chapters: 0:00:00 - 0:01:29 - Workshop Preparation and Weapon Modification 0:01:29 - 0:03:45 - Discussing the Escape Plan with Emma Jaunt 0:03:45 - 0:04:24 - Obtaining Keys from Michael to Exit the Estate 0:04:24 - 0:06:13 - Infiltrating the Goat Pen Mansion and Initial Combat 0:06:13 - 0:09:36 - Clearing the Goat Pen Luxury Areas of Zombies 0:09:36 - 0:11:00 - Navigating the Ruined Streets Toward the Hotel 0:11:00 - 0:12:42 - Reaching Halperin Hotel and Completing the Mission 📖 Interactive written walkthrough with clickable timestamps: https://pixelfungaming.com/videos/dead-island-2-call-the-calvary-walkthrough-no-commentary

HITMAN 3: Chonggoing | Shooting Surveillance Undetected
Agent 47 infiltrates a high-security laboratory wearing a white hazmat suit. The mission begins with a tactical entry into a research facility where several guards and scientists are stationed. Instinct mode highlights enemy positions through walls, allowing for careful navigation past potential threats. The character moves stealthily along the perimeter, using large crates and laboratory equipment as cover to stay out of sight. Upon reaching a vantage point behind a central desk, the inventory is accessed to select a silenced Bartoli 75S pistol. A single, precise shot destroys the security camera recorder, erasing all digital evidence of the infiltration. After successfully disabling the security system and gaining 50 XP for 'Recording Erased', the character quickly exits the room and descends a nearby staircase to proceed deeper into the facility. Chapters: 0:00:00 - 0:00:06 - Infiltration and Instinct Assessment 0:00:06 - 0:00:14 - Stealthy Movement Behind Lab Cover 0:00:14 - 0:00:19 - Disabling Security Surveillance 0:00:19 - 0:00:22 - Extraction to Lower Levels 📖 Interactive written walkthrough with clickable timestamps: https://pixelfungaming.com/videos/hitman-3-chonggoing-shooting-surveillance-undetected

Insurgency: Sandstorm | Tideway NO HUD Hardcore Checkpoint - No Deaths
A night operation on the Tideway map unfolds in this hardcore co-op mission. The squad advances through a desert coastal town, utilizing long-range rifle fire to thin out enemy numbers from a distance. Combat shifts to close quarters near a fuel tanker, where rapid transitions between primary weapons and sidearms are necessary to clear the area. Inside a large villa, Molotov cocktails provide vital area denial while the first objective is captured and held. The mission progresses through winding alleys and open, sandy outskirts, with a heavy emphasis on marksman-style gameplay to neutralize insurgents near construction equipment and bridges. The final phase centers on a desperate defense within a residential building, where the team holds back aggressive waves of enemies through narrow hallways and smoke-filled doorways until mission success is confirmed. Chapters: 0:00:00 - 0:00:45 - Initial approach and long-range engagement 0:00:45 - 0:01:25 - Intense skirmish near the fuel tanker 0:01:25 - 0:02:15 - Securing the first objective inside the villa 0:02:15 - 0:03:15 - Holding Alpha against insurgent waves 0:03:15 - 0:04:15 - Advancing through the town outskirts towards Bravo 0:04:15 - 0:05:15 - Combat engagement near the construction site 0:05:15 - 0:06:15 - Pushing through the marketplace towards Charlie 0:06:15 - 0:07:30 - Securing bridge area and advancing to final zone 0:07:30 - 0:08:30 - Marksman-style defense from fortified positions 0:08:30 - 0:09:10 - Final objective holdout and mission completion 📖 Interactive written walkthrough with clickable timestamps: https://pixelfungaming.com/videos/insurgency-sandstorm-tideway-no-hud-hardcore-checkpoint-no-deaths

Insurgency: Sandstorm | Precinct - Shooting Down Helicopter
The mission begins with the character positioned inside a damaged building, monitoring an enemy helicopter circling the urban environment. Armed with an RPG-7, the character takes careful aim and launches a rocket, scoring a direct hit on the aircraft's fuselage. A swift reload follows while the character takes cover behind a thick interior wall. A second rocket is fired soon after, delivering the final blow that causes the helicopter to catch fire and spiral into a crash behind a distant building. Transitioning to ground combat, the character exits the structure and navigates a war-torn street under intense suppressive fire. Bullets impact the surrounding walls as the character sprints across open ground, eventually reaching a raised walkway. The encounter concludes with the character taking a defensive position behind a low stone barrier, scanning the area for hostiles while gunfire continues to echo through the city blocks. Chapters: 0:00:00 - 0:00:09 - Scoping the aerial target from the window 0:00:10 - 0:00:23 - First RPG strike and tactical reload 0:00:24 - 0:00:34 - Helicopter takedown and crash sequence 0:00:35 - 0:00:45 - Navigating heavy street-level firefight 0:00:46 - 0:00:59 - Repositioning and taking cover behind a low wall 📖 Interactive written walkthrough with clickable timestamps: https://pixelfungaming.com/videos/insurgency-sandstorm-precinct-shooting-down-helicopter

Hitman Freelancer: SafeHouse Introduction
Agent 47 stands within his high-tech safehouse as a welcome message introduces the Freelancer mode. A tactical map displays potential mission locations worldwide, emphasizing the scale of the new operations. Brief gameplay montages showcase diverse environments from Berlin to Dubai, illustrating the range of skill and luck required for success. Success and failure carry high stakes, as demonstrated by the sudden end of a mission run and the appearance of a failure screen. Agent 47 then prepares his silenced pistol, demonstrating the meticulous preparation involved before each assignment. The sequence concludes with Agent 47 overlooking his global mission board in the quiet of his base, ready to select the next syndicate to dismantle. Chapters: 0:00:00 - 0:00:13 - Introduction to the Safehouse and Freelancer Mode 0:00:13 - 0:00:23 - Reviewing Mission Intel and Global Targets 0:00:23 - 0:00:31 - Montage of Field Operations across Global Locations 0:00:31 - 0:00:38 - Consequence of Failure and High Stakes Gameplay 0:00:38 - 0:00:46 - Weapon Preparation and Tactical Readiness 0:00:46 - 0:01:04 - Final Mission Planning at the Global Map 📖 Interactive written walkthrough with clickable timestamps: https://pixelfungaming.com/videos/hitman-freelancer-safehouse-introduction

GTA Online: Sticky Bomb Vs Oppressor #shorts
The character sprints through the urban landscape of Los Santos during a vibrant sunset, initially armed with a Combat MG Mk II. While navigating through building underpasses and open streets, the character tracks an opponent maneuvering an Oppressor Mk II in the sky. To counter the airborne threat, the character switches to sticky bombs while maintaining a steady run. After tracking the target's flight path, the character tosses a sticky bomb high into the air and detonates it with precise timing, successfully destroying the flying vehicle and its pilot. The engagement concludes with a confirmed kill notification and a '1 Vs 0' score display. The character then continues toward a maximum security garage entrance to proceed with mission objectives. Chapters: 0:00:00 - 0:00:10 - Initial sprint and weapon preparation 0:00:10 - 0:00:25 - Tactical positioning under building cover 0:00:25 - 0:00:38 - Tracking the airborne target in the open street 0:00:38 - 0:00:48 - Sticky bomb deployment and successful aerial takedown 0:00:48 - 0:00:59 - Kill confirmation and movement toward mission objective 📖 Interactive written walkthrough with clickable timestamps: https://pixelfungaming.com/videos/gta-online-sticky-bomb-vs-oppressor-shorts

AC Valhalla: Magnis Fortress Assault
The assault on Magnis Fortress begins with breaching the outer gates and engaging defenders in the snowy courtyards. After clearing initial resistance, oil jars are used to destroy gate reinforcements, allowing for deeper infiltration into the compound. Combat moves to the battlements where ballista fire and close-quarters skills are employed to thin out the enemy ranks. A critical objective involves shooting the links of a drawbridge under heavy fire to let allied forces flood into the inner keep area. A massive battle breaks out in the central courtyard as the fortress falls to the Viking invaders. Shortly after the initial victory, a Pict counter-attack forces a desperate defensive stand on the ramparts. Eivor fights through waves of attackers and a Pict champion to secure the walls. The mission culminates in a tense pursuit of the traitor King Ricsige through a blizzard-prone mountain pass, leading to a final dialogue and his eventual execution on the snowy heights, solidifying the alliance in the region. Chapters: 0:00:00 - 0:00:52 - Initial Breach of Magnis Fortress 0:00:52 - 0:02:25 - Scaling Walls and Destroying Gate Bars 0:02:25 - 0:03:55 - Clearing Battlements and Secondary Defenses 0:03:55 - 0:04:47 - Lowering the Drawbridge Under Heavy Fire 0:04:47 - 0:05:58 - Final Courtyard Battle and Keep Seizure 0:05:58 - 0:07:38 - Assault Completion and Victory Cinematic 0:07:38 - 0:11:18 - Defending Ramparts Against Pict Counter-Attack 0:11:18 - 0:13:30 - The Search for King Ricsige Begins 0:13:30 - 0:15:00 - Pursuing the Traitor Through the Snow 0:15:00 - 0:17:01 - Final Confrontation and Mission Wrap-up 📖 Interactive written walkthrough with clickable timestamps: https://pixelfungaming.com/videos/ac-valhalla-magnis-fortress-assault

MAFIA 3 | Definitive Edition Live #8
Lincoln Clay begins the story mission 'There's a War Goin' On' in *Mafia III*, tasked with eliminating Remy Duvall. Driving a black muscle car, Lincoln navigates the streets of New Bordeaux, heading towards Frisco Fields to find a Southern Union Deacon. The driving is aggressive and leads to several collisions. Lincoln tracks down the Deacon in a suburban neighborhood and, after a brief gunfight, brutally interrogates the masked informant, learning that Duvall is hosting a rally. Following the informant's instructions, Lincoln drives the damaged car to a secluded, hostile zone where Duvall is giving a fiery speech to a crowd of KKK members beneath a burning cross. Lincoln uses stealth and firepower to eliminate multiple targets and eventually confronts and executes Duvall in a shocking cinematic sequence. Following Duvall's death, the mission objective updates to focus on Olivia Marcano. After resupplying weapons, Lincoln receives instructions from Donovan to infiltrate Remy's wake at the Petrousse Yacht Club disguised as a waiter. Lincoln successfully infiltrates the kitchen, doses several wine bottles with a fast-acting psychedelic, and serves the tainted drinks to the mourners, including Olivia's bodyguards, causing rapid incapacitation. Using the distraction, Lincoln moves in and executes Olivia Marcano, completing the immediate objective. Lincoln Clay infiltrates Remy Duvall's wake, initially tasked with following Olivia Marcano to secure leverage. The atmosphere inside the luxury mansion is disturbing, with guests exhibiting erratic and distressed behavior. After locating Olivia in a private room, Lincoln confronts her bodyguards, eliminating them in a close-quarters gunfight using a silenced pistol. A tense cutscene follows where Lincoln questions Olivia about Stephen DeGarmo's location. When she remains defiant, Lincoln brutally forces the information from her, leaving her severely injured. With the main objective achieved, Lincoln sets out to rescue DeGarmo, moving through the mansion grounds and stealthily dispatching guards in the hostile zone. He finds DeGarmo tied up and severely beaten in a remote building, forcing him to sign documents before being rescued. The escape is chaotic, involving a high-speed car chase in DeGarmo's red sports car as Lincoln evades multiple police cruisers. After losing the police, Lincoln successfully delivers DeGarmo to Donovan, completing the first objective. In subsequent cutscenes, Marcano expresses frustration to his son, Giorgi, over the chaos caused by Lincoln and the loss of the casino opportunity. Donovan meets with Senator Blake to discuss the events, maintaining Lincoln's innocence in Olivia Marcano's eventual death, while Father James reflects on the community's reaction to the violence. Finally, Lincoln, Cassandra, Vito, and Burke meet to divvy up the captured territory of Frisco Fields, with Burke securing the area, gaining increased income. Lincoln sets a waypoint to meet Donovan for the next mission. The video details two subsequent missions in Mafia 3. The first segment involves a frantic car chase to meet Donovan, which results in a hostile confrontation and a brief firefight leading to the main character's defeat and mission failure. The gameplay immediately respawns the character to continue the mission, leading to a meeting with Donovan where they discuss an assassination target, Aldridge, who is a traitorous former CIA asset. The mission progresses to the Villa del Mar Cuban restaurant, which is found to be the scene of a massacre. Lincoln interrogates a survivor named Chuckie who reveals that Aldridge is seeking a CIA safe house, codenamed 'Pedro Pan.' The duo then drives through the bayou to the safe house, which is clearly marked by a burning vehicle and signs of heavy combat. Lincoln and Donovan infiltrate the hostile zone, engaging in intense close-quarters combat against enemy mercenaries inside and outside the facility, utilizing tactical cover, grenades, and automatic weapons. After clearing the area of resistance, they enter the mainframe room, finding Aldridge interrogating a captive agent. Aldridge reveals he is stealing sensitive CIA information related to Cuba before shooting the captive and attempting to escape. Lincoln and Donovan manage to secure the highly sensitive asset files, completing the objective and setting the stage for the next phase of their operation against Aldridge. Lincoln Clay and John Donovan discuss the history surrounding the plane crash incident code-named 'Devotchka.' Donovan reveals that the plane carried a Russian R-12 theater ballistic missile, and Balmana and his crew were returning the weapon before the plane was lost at sea during a storm. Lincoln quickly deduces that the cargo must have been the thermonuclear warhead itself. Donovan confirms that Aldridge, a former operative, may have secured the plane's files and surveillance photos. They decide to find a surviving crew member, Ruben Paez, who is revealed to be working as a janitor in Frisco Fields. As Lincoln and Donovan depart, the perspective shifts to a black-and-white Senate hearing room. Senator Blake interrogates Donovan about his relationship with Aldridge, focusing on Aldridge’s success in infiltrating the NVA and cultivating double agents. Donovan remains evasive and cynical regarding the official reports. Senator Blake presses Donovan specifically on whether he had contact with Aldridge in New Bordeaux in 1968, which Donovan dismisses by stating Aldridge died in Saigon. The scene cuts back to the New Bordeaux swamps, where Lincoln watches Donovan drive away in a red convertible. The mission 'Welcome to the Show' completes, and the next story mission, 'Devotchka,' unlocks. Lincoln enters his blue convertible and consults the map, setting a waypoint toward the French Ward to meet Donovan and track down Paez. Chapters: 0:00 - Game Intro and Title Screens 0:58 - Story Mission Begins: Kill Remy Duvall 1:16 - Driving to Find the Southern Union Deacon 1:56 - Chaotic Driving and Entering Frisco Fields 2:30 - Combat and Interrogation of Southern Union Deacon 4:02 - Driving to the Southern Union Rally Location 6:33 - Approaching the Rally and Calling Arms Dealer for Resupply 7:22 - Infiltrating the Hostile Zone and Southern Union Rally Combat Begins 8:27 - Cinematic Interlude and Location Montages 9:09 - Resuming Combat at the Hostile Zone 11:42 - Confronting and Executing Remy Duvall 12:28 - Post-Murder News Report Cutscene 12:42 - New Objective Set: Kill Olivia Marcano 13:00 - Driving and Re-equipping from Arms Dealer 14:00 - Cutscene: Marcano and Olivia Discuss Duvall’s Will 15:47 - Infiltrating Remy’s Wake as a Waiter 16:11 - Dosing the Wine Bottles in the Kitchen 17:09 - Serving Dosed Wine to Mourners and Bodyguards 17:53 - Executing Olivia Marcano and Mission Wrap-up 18:20 - End of Gameplay Segment 30:00 - Infiltrating Remy's Wake and Following Olivia Marcano 31:39 - Entering the Hostile Zone and Witnessing Errant Behavior 32:50 - Olivia Marcano Expresses Alarm and Orders Reinforcements 33:36 - Confrontation with Olivia Marcano and Eliminating Bodyguards 34:39 - Cutscene: Lincoln Interrogates Olivia for DeGarmo's Location 36:11 - Searching the Mansion Grounds to Find Stephen DeGarmo 37:30 - Cutscene: Stephen DeGarmo is Interrogated and Tortured 38:22 - Escaping the Hostile Zone with DeGarmo 40:20 - Police Chase Begins: Evading Cops and Driving Under Fire 42:55 - Escaping the Pursuit by Abandoning the Vehicle Near the River 45:40 - Losing the Cops and Getting DeGarmo to Donovan 47:52 - Cutscene: Aftermath of the Attack on Marcano 48:38 - Donovan Defends Lincoln Clay to Senator Blake 49:19 - Marcano Discusses Lincoln Clay with Giorgi and Makes a Call 50:39 - Father James Discusses Lincoln's Struggle and the Riots 52:05 - Consolidation Meeting: Burke is Awarded Frisco Fields 53:45 - Activating the Next Story Objective: Meet Donovan 54:49 - Driving and Hearing News Reports of Olivia Marcano's Death 56:22 - Driving Through the City to Meet Donovan 0:00:00 - Driving to Meet Donovan and Initiating a Police Chase 0:01:21 - Hostile Encounter, Shootout, and Mission Failure 0:01:46 - Mission Restart and Meeting Donovan in Frisco Fields 0:04:40 - Drive to the Cuban Restaurant to Find the Target 0:05:43 - Cinematic: Arrival at Villa del Mar and Meeting Marshall 0:06:06 - Marshall Introduces Himself and Mentions Aldridge 0:06:48 - Confirmation that Aldridge is Looking for Horatio Balmana 0:07:06 - Entering the Restaurant and Finding the Aftermath of a Massacre 0:07:49 - Examining a Bloody Birthday Card and Planning to Secure the Upstairs 0:08:16 - Discovering the Dead Bartender and Securing a Survivor 0:10:40 - Interrogating Chuckie the Survivor 0:11:13 - Chuckie Reveals Aldridge is After the CIA Safe House "Pedro Pan" 0:11:43 - Story Mission Complete: Creature of Habit 0:12:00 - Driving to the CIA Safe House in the Bayou 0:18:46 - Arrival at the Safe House and Confronting Hostile Mercenaries 0:19:10 - Starting Combat: Clearing the Exterior of the Safe House 0:20:00 - Infiltrating the Compound and Engaging Enemies in the Mail Room 0:20:30 - Entering the Main Warehouse Area 0:21:55 - Finding a Weapon Cache and Clearing the First Floor 0:23:41 - Climbing to the Second Floor Control Room 0:24:45 - Entering the Mainframe Room and Confronting Aldridge 0:26:00 - Aldridge Escapes and Securing the Asset Files 0:00 - Donovan Discusses the Devotchka Incident 0:17 - Revelation of the Russian Ballistic Missile Cargo 0:38 - Identifying the Thermonuclear Warhead 1:02 - Plotting to Track Down Ruben Paez 1:17 - Donovan Hacking the Mainframe 1:45 - Locating Paez in Frisco Fields 2:09 - Transition to Senate Hearing Interrogation 2:28 - Senator Blake Questions Aldridge’s History as a Double Agent 2:53 - Donovan Confronted About Aldridge in New Bordeaux 3:08 - Cutscene Ends and Gameplay Resumes 3:25 - Story Mission 'Devotchka' Unlocked 3:40 - Setting Waypoint to Meet Donovan in the French Ward 4:03 - Driving to the Next Objective (Video End) Chapters: 0:00 - Hangar 13 and 2K Game Intro 0:18 - Mafia III Main Menu and Mission Start 0:58 - Leaving the Building to Confront the Deacon 1:13 - Driving to the Deacon's Location 2:32 - Chasing and Interrogating the Southern Union Deacon 4:05 - Heading to the Supplies Location 6:58 - Selecting Weapons from the Arsenal Dealer 7:50 - Approaching the Southern Union Rally Scene 8:10 - Engaging in Combat at the Southern Union Rally 8:52 - Stealthily Taking Out Higher Ranking Union Members 10:16 - Confronting and Taking Down Remy Duvall 11:00 - Cutscene: Lincoln Dealing with Remy Duvall

AC Valhalla Stream
Eivor participates in the Samhain festival in Glowecestre, taking part in a local trick-or-treat custom alongside Gunnar while disguised as the Mari Lwyd, a Welsh folkloric figure. Eivor and Gunnar knock on several doors, reciting rhymes and receiving sweets (and moldy cheese). During their third attempt at trick-or-treating, Gunnar gets into a verbal spat with an Anglo-Saxon man named Thickskul. The dispute escalates into a fistfight, and Eivor successfully defeats the local man in a brawl. After the fight, Eivor speaks with the local healer, Modron, who warns of political instability tied to Ealdorman Tewdwr and the forthcoming King of the Harvest ritual. Eivor then finds Tewdwr participating in a heavy drinking contest against a monk named Gwilim. Eivor enters the contest in Tewdwr's place and wins, achieving a brief but severe state of intoxication. Following the contest, a heavily drunk Tewdwr stumbles toward his home, pursued by Eivor. Eivor passes out inside Tewdwr's dwelling and wakes up covered in blood, finding the Ealdorman missing and their bodyguard slain. Cynon, a local authority figure, immediately arrives and accuses Eivor of murder. Eivor initiates an investigation of the bloody scene inside Tewdwr's home, using Odin's Sight to trace the sequence of events: two assailants (Gwilim and his companion) ambushed Tewdwr and his bodyguard, dragging the Ealdorman away after incapacitating him. Eivor finds Gwilim's pouch containing a powerful sleeping herb. Eivor speaks with Modron again about the herb, confirming a druid named Halewyn is known to use such a blend. Modron directs Eivor to Halewyn's cottage to find Tewdwr, leading Eivor to ride out of Glowecestre to pursue the next lead. The journey continues as Eivor rides through the misty woods of Glowecestrescire to locate Halewyn the Druid. Upon arriving at the secluded cottage, initial attempts to speak with the druid are rebuffed until Eivor dons the Mari Lwyd ritual mask to appear as a spirit. Halewyn welcomes the 'spirit' and tasks it with a ritual of fire, requiring the ignition of several wicker men scattered around the property. After completing this fiery display, the druid challenges Eivor with a series of riddles to prove their spiritual nature. The quest then shifts to a detailed investigation of the druid's home and surrounding area, searching for clues and ancient symbols to provide the correct answers to Halewyn's cryptic questions. Chapters: 0:00:00 - Video Starts with Loading Screen and Game Transition 0:01:55 - The First Night of Samhain Quest Begins: Trick or Treat 0:02:38 - Second Trick-or-Treat Attempt in Glowecestre 0:03:49 - Gunnar Gets into a Fight with Thickskul 0:04:40 - Locating Gunnar and Confrontation on the Docks 0:06:00 - Brawl with the Briton (Thickskul) 0:07:39 - Modron the Healer Attends to Gunnar 0:09:32 - Eivor Seeks Ealdorman Tewdwr 0:10:35 - Eivor Finds Tewdwr and Initiates Drinking Challenge 0:11:27 - Eivor Competes in the Drinking Challenge against Cynon 0:12:52 - The Drinking Challenge Ends; Tewdwr Becomes Overly Drunk 0:13:30 - Tewdwr Confesses his Fears and Regrets as Ealdorman 0:16:50 - Following the Drunken Tewdwr through the Festival 0:18:24 - Tewdwr is Abducted; Eivor Wakes Up and is Accused of Murder 0:21:07 - Clues and Riddles Quest Begins: Investigating the Bloody Scene 0:22:50 - Eivor Finds Gwilim's Herb Pouch 0:23:45 - Checking Inventory and Leaving the Dwelling 0:24:47 - Eivor Reports the Findings to Modron 0:27:07 - Modron Identifies the Herb and Directs Eivor to Halewyn the Druid 0:28:06 - Eivor Rides toward Halewyn's Cottage 1:00:00 - Riding to the Druid's Cottage 1:00:45 - First interaction with Halewyn 1:01:07 - Donning the Mari Lwyd ritual mask 1:02:08 - Igniting the wicker men ritual 1:03:18 - Meeting Halewyn for the riddle challenge 1:04:18 - Searching for clues to solve the riddles 📖 Interactive written walkthrough with clickable timestamps: https://pixelfungaming.com/videos/ac-valhalla-stream
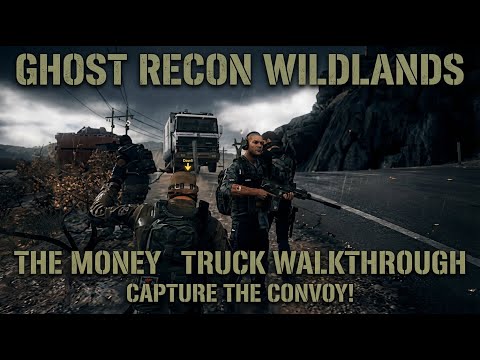
Ghost Recon Wildlands: The Money Truck Walkthrough
The mission begins with a drive through the rugged terrain of Barvechos to locate and hijack a cartel money truck. Upon reaching a strategic bend in the road, the team dismounts and prepares an ambush. As the convoy approaches, combat erupts with heavy gunfire aimed at the escort vehicles and the truck's tires. Once the escorts are neutralized, the money truck is secured and driven through the town towards Pulpo's hideout. The vehicle is successfully parked inside a garage within the heavily guarded compound. The objective then shifts to a high-stakes stealth extraction. The character moves cautiously through a warehouse and out into a yard filled with patrolling guards. Significant time is spent hiding behind shipping containers and crates, waiting for patrol patterns to clear and eavesdropping on cartel conversations. After navigating the perimeter undetected, the character makes a final break for the hills, successfully completing the mission without raising an alarm. Chapters: 0:00:00 - 0:00:42 - Infiltration and Driving to Ambush Point 0:00:42 - 0:01:33 - Convoy Ambush and Combat Engagement 0:01:33 - 0:03:55 - Truck Hijacking and Delivery to Hideout 0:03:55 - 0:08:33 - Stealthy Extraction from the Compound 0:08:33 - 0:08:44 - Mission Success and Final Retreat 📖 Interactive written walkthrough with clickable timestamps: https://pixelfungaming.com/videos/ghost-recon-wildlands-the-money-truck-walkthrough

Dead Island 2: Luring Zombies Into Electrocution Trap 😄 #shorts #walkthrough
The action takes place in a luxurious coastal estate where the character confronts several zombies. Combat begins immediately as the character delivers a powerful ground-slam attack to a group of Shamblers. Utilizing environmental hazards becomes the primary strategy as a severed electrical cable is used to electrify a large pool of water. The character activates a water pipe lever to increase the surface area of the trap, luring Walkers and Shamblers into the deadly puddle. Each zombie that enters the water is instantly incapacitated by electrical shocks. The character continues to navigate around the pool, drawing more enemies toward the hazard until the immediate area is cleared of the undead threat. Chapters: 0:00:00 - 0:00:10 - Ground slam attack against initial zombie group 0:00:10 - 0:00:22 - Activation of water pipe lever to expand the trap 0:00:22 - 0:00:38 - Luring first wave of zombies into electrified water 0:00:38 - 0:00:55 - Final zombie wave neutralized by environmental hazard 📖 Interactive written walkthrough with clickable timestamps: https://pixelfungaming.com/videos/dead-island-2-luring-zombies-into-electrocution-trap-shorts-walkthrough

RDR2 - Raspberry (New Hanover) Location
The mission involves exploring the Heartland Overflow region of New Hanover under the cover of night. Foraging activities begin immediately as the character gathers wild raspberries from bushes in the open fields. Using the Eagle Eye ability, the character identifies tracks of local wildlife, specifically an American Gray Fox, before continuing the herbalist gathering. After collecting several handfuls of berries, the character mounts a horse and gallops across the grassy terrain, periodically using Eagle Eye to maintain situational awareness. The journey leads to another cluster of bushes where the inventory capacity for raspberries is eventually reached. The exploration concludes with a detailed check of the world map, confirming the current location just north of Emerald Ranch and east of the Heartland Oil Fields. Chapters: 0:00:00 - 0:00:20 - Initial raspberry gathering in the dark 0:00:20 - 0:00:35 - Running through the fields to find more plants 0:00:35 - 0:00:52 - Collecting additional wild berries for the satchel 0:00:52 - 0:01:15 - Using Eagle Eye to track an American Gray Fox 0:01:15 - 0:01:38 - Traversing Heartland Overflow on horseback 0:01:38 - 0:02:00 - Harvesting final raspberries and reaching item limit 0:02:00 - 0:02:28 - Reviewing the world map for current location 📖 Interactive written walkthrough with clickable timestamps: https://pixelfungaming.com/videos/rdr2-raspberry-new-hanover-location

HITMAN 2016/Freelancer: Colorado | Sneak In House Undetected Walkthrough #shorts
Agent 47 begins a stealthy infiltration by lockpicking a chain-link gate to enter a restricted suburban area. Once inside, he navigates through tall grass to remain hidden from nearby guards. He uses his instinct ability to track the movements of several armed individuals patrolling the backyard of a residential house. After identifying a gap in their patrol, he moves quickly to the side of the building, climbs a stack of crates, and enters the house through an open bathroom window. Inside, he stays low and carefully monitors the hallway through a cracked door, preparing for the next phase of his mission. Chapters: 0:00:00 - 0:00:05 - Lockpicking the perimeter gate 0:00:05 - 0:00:12 - Infiltrating through the tall grass 0:00:12 - 0:00:29 - Scouting guard positions with instinct 0:00:29 - 0:00:34 - Approaching the side of the house 0:00:34 - 0:00:38 - Entering through the bathroom window 0:00:38 - 0:00:47 - Monitoring the interior hallway 📖 Interactive written walkthrough with clickable timestamps: https://pixelfungaming.com/videos/hitman-2016-freelancer-colorado-sneak-in-house-undetected-walkthrough-shorts

Red Dead Redemption 2 : Feeding Incest Sister To Alligator
Arthur Morgan arrives at the infamous Aberdeen Pig Farm at sunrise. He enters the main house and is immediately confronted by Tammy Aberdeen. After a brief scuffle, she flees outside while her brother, Bray Aberdeen, joins the fight. Arthur quickly lassos and hogties Tammy in the front yard before taking cover behind a wooden wagon to engage Bray in a shootout. He eliminates Bray and then hoists the bound Tammy onto the back of his horse. The journey takes them across state lines from New Hanover into Lemoyne, passing through various landscapes until reaching the alligator-infested swamps of Bayou Nwa. Arthur dismounts and carries his captive deep into the marshy waters. He drops her near a lurking predator and watches as a large alligator approaches and consumes her. Chapters: 0:00:00 - 0:00:12 - Arrival at Aberdeen Pig Farm 0:00:12 - 0:00:30 - Confrontation inside the cabin 0:00:30 - 0:00:55 - Capturing Tammy Aberdeen and taking cover 0:00:55 - 0:01:15 - Shootout with Bray Aberdeen 0:01:15 - 0:01:42 - Preparing for the journey and map check 0:01:42 - 0:02:30 - Traveling through the wilderness with a captive 0:02:30 - 0:03:15 - Reaching the alligator-infested swamps 0:03:15 - 0:03:45 - The final encounter with the swamp predator 📖 Interactive written walkthrough with clickable timestamps: https://pixelfungaming.com/videos/red-dead-redemption-2-feeding-incest-sister-to-alligator

Ghost Recon Wildlands: Agua Verde Intel Stealth walkthrough
The operative moves stealthily through a dense tropical jungle, keeping a low profile to avoid detection by nearby enemies. After navigating the rugged terrain, the character approaches a small guard station and eliminates a sentinel with a suppressed rifle. The infiltration continues toward a large, luxurious resort. Utilizing bushes and architectural features for cover, the operative systematically neutralizes guards patrolling the grounds. Upon entering the main villa, the character moves tactically through hallways and up a staircase to locate a high-value target. The mission concludes with a successful interrogation of the target in a private office, followed by the retrieval of digital intelligence from a nearby terminal, unlocking a new objective concerning a local politician. Chapters: 0:00:00 - 0:01:48 - Stealthy jungle approach toward the resort 0:01:48 - 0:02:30 - Eliminating outposts and clearing the road 0:02:30 - 0:04:00 - Infiltrating the resort gardens and perimeter 0:04:00 - 0:05:30 - Moving through the villa's lower levels 0:05:30 - 0:07:02 - Target interrogation and intel gathering 📖 Interactive written walkthrough with clickable timestamps: https://pixelfungaming.com/videos/ghost-recon-wildlands-agua-verde-intel-stealth-walkthrough

Insurgency: Sandstorm | Outskirts - Destroy First Cache Easy With Air Support. (Commander)
The mission begins with an immediate engagement as the squad moves through a gated compound entrance. Heavy gunfire erupts from the surrounding buildings, forcing tactical positioning behind concrete barriers. An observer requests urgent close air support, calling for a Warlock gun run on a marked enemy position across the river. The team advances into the shallow water, navigating downstream while maintaining visual contact with enemy snipers on the cliffs. As the squad pushes forward, an A-10 Warthog arrives, delivering a devastating strafing run that levels a nearby structure and suppresses enemy fire. Amidst the explosions and smoke, the objective updates to 'Advance and Capture,' prompting the unit to surge through the river towards the bridge. A second air strike clears the remaining resistance, allowing for a successful push onto the target zone. Chapters: 0:00:00 - 0:00:12 - Initial breach and perimeter firefight 0:00:12 - 0:00:28 - Coordinating air support and river crossing 0:00:28 - 0:00:43 - A-10 strafing run and objective advancement 📖 Interactive written walkthrough with clickable timestamps: https://pixelfungaming.com/videos/insurgency-sandstorm-outskirts-destroy-first-cache-easy-with-air-support-commander

GTA Online - Clues to get Double Action Revolver
The mission begins with the investigation of a final clue found deep inside a hillside cave. Upon examining a deceased individual, the location of the ultimate prize is revealed on the map. The character exits the cave and sprints across the rugged mountain terrain, navigating through brush and steep slopes to reach a parked Frogger helicopter. An aerial journey follows, taking the character across the expansive landscape of San Andreas from the southern hills toward the northern coastline of Paleto Cove. After a steady descent and landing on a secluded beach, the character discovers the final scene: a site marked by two bodies and a mysterious wooden crate. Opening the crate rewards the character with the exclusive Double-Action Revolver. The gameplay concludes with a demonstration of the weapon's firing speed and a return flight over the ocean. 📖 Chapters: 0:00:00 - 0:00:54 - Searching the Cave for Clues 0:00:54 - 0:01:57 - Traversing the Mountainside 0:01:57 - 0:04:26 - Piloting the Helicopter to Paleto Cove 0:04:26 - 0:05:01 - Locating the Treasure Chest 0:05:01 - 0:06:09 - Claiming the Double-Action Revolver

Insurgency: Sandstorm | BAB Hardcore CO-OP - Destroy Cache Easy & Fast (Demolitions)
Tactical operations unfold in a snow-dusted urban environment. The engagement begins with high-precision shots from an M4A1, neutralizing hostiles near a white delivery van. Movement through the courtyard remains methodical, using cover and suppressive fire to push toward enemy positions. A thick smoke screen provides concealment during a tactical advance into a narrow, arched alleyway where intense close-quarters firefights occur. The squad utilizes team communication to coordinate positions and call out targets. A pivotal moment features the deployment of a Panzerfaust 3, delivering a devastating explosive blast into a building occupied by multiple hostiles. Following the breach, the interior is cleared to ensure the objective is secure, finishing with a final sweep of the immediate area. Chapters: 0:00:00 - 0:00:15 - Initial Firefight and Van Engagement 0:00:15 - 0:00:32 - Courtyard Advancement and Smoke Cover 0:00:32 - 0:00:54 - Tactical Push through Arched Alley 0:00:54 - 0:01:04 - Panzerfaust 3 Building Clearance 0:01:04 - 0:01:15 - Interior Breaching and Final Sweep 📖 Interactive written walkthrough with clickable timestamps: https://pixelfungaming.com/videos/insurgency-sandstorm-bab-hardcore-co-op-destroy-cache-easy-fast-demolitions

Dead Island 2: Flight Of The Damned | Walkthrough (No Commentary)
The experience begins with a cinematic introduction to the diverse group of survivors, known as Slayers, as they attempt to flee the zombie outbreak in Los Angeles. Each character—Amy, Ryan, Bruno, Carla, Dani, and Jacob—is introduced through brief, stylish vignettes showcasing their personalities and backgrounds during the chaotic evacuation. The scene transitions to the interior of an evacuation flight where tensions remain high. Disaster strikes when the plane is brought down, leading to a character selection screen where the Slayer Jacob is chosen for his feral agility and critical hit bonuses. Following the crash, Jacob awakens in the smoldering wreckage, forced to perform a gruesome self-surgery to remove a piece of debris from his abdomen. He navigates through the twisted, burning fuselage of the plane, scavenging for medical supplies and a makeshift weapon. Upon reaching the exterior crash site, Jacob explores the devastated landscape of the Hollywood Hills, eventually encountering other survivors, including actress Emma Jaunt and her assistants. The first encounter with a Walker occurs shortly after, introducing the game's brutal close-quarters combat and environmental hazards. Chapters: 0:00:00 - 0:00:34 - Introduction of Amy and Ryan 0:00:34 - 0:00:54 - Bruno's security check-in 0:00:54 - 0:01:11 - Chaos on the evacuation bus 0:01:11 - 0:01:50 - Introduction of Carla and Jacob at the airport 0:01:50 - 0:02:26 - Dani's boarding and mid-flight outbreak 0:02:26 - 0:02:46 - The plane crash and Sam B's appearance 0:02:46 - 0:03:18 - Slayer selection and Jacob's stats 0:03:18 - 0:04:30 - Waking up in the wreckage and self-healing 0:04:30 - 0:05:10 - Navigating the flaming plane debris 0:05:10 - 0:05:48 - Finding the machete and meeting survivors 📖 Interactive written walkthrough with clickable timestamps: https://pixelfungaming.com/videos/dead-island-2-flight-of-the-damned-walkthrough-no-commentary

#Hitman: The Icon
Agent 47 undertakes the 'Icon' mission in Sapienza, aiming to eliminate Dino Bosco, a temperamental director filming a disaster movie in the town square. The mission begins with 47 selecting his loadout, including a silenced pistol, lockpick, and remote audio distraction device, before starting near the City Gates entry point. Infiltrating the area, 47 uses the distraction device near a parked van to lure a crew member, subduing him and taking his crew disguise. Now disguised, 47 moves into the bustling, debris-strewn film set. He locates a crew trailer and finds the 'Explosive Manual Override Code' for the set's pyrotechnics. Moving deeper into the set, 47 identifies the main stage featuring a massive robot prop and intentionally tampers with a nearby generator rack, causing a spark and distracting security staff. This completes the first step of an opportunity to interrupt the shoot. 47 then tracks Bosco's entourage, listening in on conversations to uncover additional opportunities, including the target's impending Q&A session with fans inside a gelateria. He uses the chaos caused by the initial sabotage to move through the area. Finding an opportunity to acquire a can of 'High Octane Fuel' from a cafe basement, 47 bypasses security by locking picking a door and deleting surveillance footage. He then uses the acquired fuel on a portable generator connected to the main robot prop on the set. Bosco, dressed in the heavily armored robot suit, demands action from his crew, but as he prepares for the shot, 47 remotely triggers the unstable fuel line by loosening a valve on a connected gas canister. A massive explosion engulfs the robot and Bosco, completing the objective as an Accident Kill. Agent 47 successfully exits the mission. Agent 47 begins a mission in Sapienza, disguised as a production assistant on a chaotic movie set depicting a large monster attack. The director, Dino Bosco, is visibly frustrated by the failed special effects for the key explosion scene. 47 surveys the set, observing the pyrotechnic equipment and the heavily armored stunt double. The assassin uses the distraction caused by the director's outburst to subdue a nearby crew member who is adjusting equipment, stealing his uniform and hiding the body in a nearby truck trailer to maintain stealth. Navigating the busy set, Agent 47 learns that the pyro technicians control the explosive scene effects. He moves into a backstage area disguised as the crew member to locate key items related to the effects setup, successfully retrieving a fuel case key. He returns to the main plaza, observing the target and security personnel while planning how to exploit the pyrotechnic opportunities. After subduing another crew member near the camera crane and securing a screwdriver, the player restarts the mission to execute the plan efficiently, cycling through multiple loading screens before the video concludes. Chapters: 0:00 - Mission Planning and Loadout Selection 1:23 - Mission Loading: Sapienza, The Icon 2:20 - Infiltration via City Gates and Initial Recon 2:50 - Luring and Subduing Crew Member for Disguise 3:25 - Entering Film Set and Locating Explosive Override Code 4:16 - Tampering with Generator Rack for Initial Sabotage 5:58 - Infiltrating Backstage Area and Observing Director's Entourage 9:07 - Opportunity Revealed: Time to Meet the Fans (Q&A Session) 10:28 - Tampering with Main Generator Rack to Interrupt Shoot 12:20 - Observing Dino Bosco in Robot Suit inside Gelateria 13:28 - Shooting Surveillance Camera 14:07 - Deleting Security Footage in Office 14:48 - Unnoticed Kill on Crew Member to Secure Exit Path 16:20 - Acquiring Wrench near Portable Toilets 16:47 - Using Wrench to Create an Oil Leak at Fuel Tank 16:56 - Eliminating Dino Bosco via Explosion Accident Kill 17:05 - Mission Accomplished and Debriefing Screen 0:00:00 - Initial Mission Setup and Movie Set Environment 0:30:26 - Director Dino Bosco complains about the failing special effects 0:31:45 - Director calls 'Action'; underwhelming pyrotechnics trigger outburst 0:32:46 - Agent 47 subdues crew member and acquires disguise 0:33:20 - Traversing side streets, avoiding suspicion 0:34:58 - Locating and picking up the Fuel Case Key 0:35:40 - Returning to the main plaza to analyze pyrotechnic setup 0:36:34 - Mission restart initiated 0:40:48 - Loading screen continues until video end 📖 Interactive written walkthrough with clickable timestamps: https://pixelfungaming.com/videos/hitman-the-icon

HITMAN: Accident kill - car explosion
The mission starts in a dimly lit laundry room where Agent 47 retrieves a wrench before moving through the back corridors. He avoids a patrolling worker and uses a suppressed pistol to disable a security camera monitoring a steel door. Exiting the building, 47 moves into an outdoor courtyard containing several vehicles and shipping containers. He overhears a conversation regarding a faulty Tuk-Tuk engine; a guest, Ken Morgan, wants to purchase the vehicle, contingent on the mechanic fixing the engine. The 'A Local Souvenir' opportunity is revealed. While the mechanic struggles to repair the vehicle, 47 uses a screwdriver to puncture a nearby fuel barrel, creating a substantial fuel leak. 47 then follows the mechanic as he walks toward the main hotel grounds, complaining about the loud band. 47 stealthily subdues a patrolling security guard near the hotel entrance and takes his uniform and hat, hiding the body in a large planter. Disguised as a security guard, 47 returns to the courtyard where Ken Morgan and his entourage are now inspecting the Tuk-Tuk. Morgan instructs the mechanic to start the engine, which ignites the fuel leak. The resulting explosion kills Ken Morgan instantly, completing the first elimination objective via an accident kill. Guards become alerted, but 47 vaults over nearby crates and exits the immediate area, confirming the assassination. Chapters: 0:00 - 0:44 - Initial Stealth and Camera Sabotage 0:44 - 2:38 - Overhearing the Tuk-Tuk Opportunity (Ken Morgan Intel) 2:38 - 3:15 - Sabotaging the Fuel Drum 3:15 - 6:18 - Subduing Security Guard and Acquiring Disguise 6:18 - 7:32 - Ken Morgan Assassination via Tuk-Tuk Explosion 📖 Interactive written walkthrough with clickable timestamps: https://pixelfungaming.com/videos/hitman-accident-kill-car-explosion

HITMAN 3: Ambrose Island | DAK X2 Covert Submachine Gun (Noel Crest) Location #shorts
The operation on Haven Island begins with tactical surveillance of high-value targets as they traverse the beachside settlement at night. Agent 47 navigates the wooden boardwalks and shoreline, maintaining a low profile while positioning for the kill. A precisely timed explosion near a waterfront establishment eliminates multiple targets in a single strike. In the aftermath, the area is cleared of useful resources, including the retrieval of a silenced SMG and sensitive intel. The mission objectives are finalized, confirming the elimination of designated targets via poison and direct methods. The operative then moves through the resort's outskirts toward the extraction zone while reviewing the regional map for safe passage. Chapters: 0:00:00 - 0:00:06 - Target surveillance in the village settlement 0:00:06 - 0:00:15 - Navigating the waterfront docks and shoreline 0:00:15 - 0:00:21 - Executing the explosive trap at the bar 0:00:21 - 0:00:38 - Securing weapons and intelligence from the scene 0:00:38 - 0:00:42 - Movement toward the mission extraction point 0:00:42 - 0:01:00 - Reviewing mission objectives and territory map 📖 Interactive written walkthrough with clickable timestamps: https://pixelfungaming.com/videos/hitman-3-ambrose-island-dak-x2-covert-submachine-gun-noel-crest-location-shorts

HITMAN Sapienza: Eliminate Gary lunn Walkthrough
Agent 47 begins the mission 'The Extraneous' in Sapienza, Italy, targeting Gary Lunn, who is located in a hidden bio-lab beneath Villa Caruso. The assignment requires elimination using any weapon and without a disguise. 47 starts by moving through the bustling town square and descends into a dark underground passage (0:00). He follows the coastal path, navigating rocky terrain towards a restricted door leading directly into the bio-lab complex. Before approaching the entrance, 47 spots and silently destroys a security camera positioned on the rock face using a silenced pistol (1:17 - 1:22). He uses a remote breaching charge to blast open the reinforced entrance door built into the rock (1:42). Entering the caves, 47 quickly subdues a lone scientist using a crowbar and steals the scientist's uniform and glasses as a disguise (2:18 - 2:25). Disguised, 47 proceeds deeper into the hidden facility, which appears to be a makeshift lab and storage area within the cavern. He locates a security room inside a portable container, breaches it, and destroys the camera evidence recorder to ensure stealth (3:40 - 3:44). Moving back out, 47 uses a thrown wrench to lure a patrolling security guard away from the entrance to the main facility area and subdues him (4:09 - 4:18). He disposes of the guard's body and retrieves his items. 47 then bypasses several security personnel and successfully identifies the target, Gary Lunn, who stands near a raised metal platform. Maintaining distance and taking advantage of cover, 47 pulls out the silenced pistol and eliminates Gary Lunn with a headshot (6:19 - 6:28). With the primary objective complete, 47 immediately proceeds to the extraction point—a seaplane docked nearby on the water—and exits the mission area (6:38). The mission concludes successfully with a 'Mission Accomplished' screen and high rating (6:51). Chapters: 0:00 - 1:17 - Initial Infiltration and Coastal Approach 1:17 - 2:34 - Breaching the Entrance and Acquiring Scientist Disguise 2:34 - 4:30 - Entering the Bio-Lab and Destroying Camera Evidence 4:30 - 6:39 - Stealth and Elimination of Gary Lunn 6:39 - 7:21 - Seaplane Extraction and Mission Debriefing 📖 Interactive written walkthrough with clickable timestamps: https://pixelfungaming.com/videos/hitman-sapienza-eliminate-gary-lunn-walkthrough

HITMAN 3: Ambrose Island | Propane Tank Location
The mission begins with the character crouched behind green crates in a dimly lit jungle camp on Ambrose Island. Nearby guards engage in a conversation regarding the constant need for power supply maintenance to keep communications active. The character picks up a white propane flask and begins navigating through the dense foliage, periodically activating instinct mode to highlight enemy silhouettes and patrol routes through obstacles. After traversing a rocky, vine-covered path, the character stops to review the Freelancer mission objectives and study the detailed map of the territory. The current objectives involve taking down syndicate members with specific requirements such as headshot-only kills and poisoning a target. Returning to active movement, the character proceeds toward a wooden staircase where a camp worker stands under a canvas tent, carefully positioning for the next phase of the infiltration. Chapters: 0:00:00 - 0:00:15 - Initial infiltration and overhearing guard dialogue 0:00:15 - 0:00:27 - Navigating jungle paths while carrying a propane flask 0:00:27 - 0:00:44 - Reviewing mission objectives and territory map 0:00:44 - 0:01:00 - Approaching the target area by the camp stairs 📖 Interactive written walkthrough with clickable timestamps: https://pixelfungaming.com/videos/hitman-3-ambrose-island-propane-tank-location

MAFIA 3 | Definitive Edition Live #6
This video provides a comprehensive overview of advanced combat strategies and exploration techniques in a dark fantasy action RPG environment. The footage begins with a detailed showcase of character equipment and attribute point distribution, transitioning into real-world applications of these stats during open-world encounters. Viewers will observe various enemy types, environmental hazards, and the strategic use of terrain to gain tactical advantages. The middle section focuses on identifying rare loot locations and navigating complex dungeon layouts. The final segment features a high-stakes, multi-phase boss encounter, demonstrating precise parry timings, dodge windows, and the effective use of special abilities to overcome a significant challenge. The content concludes with a summary of the loot obtained and a preview of the subsequent map region. Chapters: 00:00:00 - 00:02:45 - Character Build Analysis and Equipment Overview 00:02:45 - 00:05:30 - Open World Navigation and Combat Fundamentals 00:05:30 - 00:08:15 - Dungeon Exploration and Hidden Item Discovery 00:08:15 - 00:11:00 - Advanced Combat Techniques and Enemy AI Interaction 00:11:00 - 00:14:30 - Major Boss Encounter: Phase One and Phase Two Strategies 00:14:30 - 00:16:45 - Post-Boss Rewards and Regional Progression 📖 Interactive written walkthrough with clickable timestamps: https://pixelfungaming.com/videos/mafia-3-definitive-edition-live-6

Hitman: Elusive Target #5
Agent 47 initiates an attempt on the Elusive Target mission, 'The Gunrunner' (Vito Đurić) in Marrakesh. After navigating the initial loading screens and briefing, which reveals the target is an arms dealer seeking extraction from the riot-prone Swedish Consulate, the contract begins at the Bazaar Entrance. In the first attempt, Agent 47 infiltrates the military checkpoint area by climbing a wall and entering a nearby shoe shop. Overhearing a conversation about an escape tunnel and keycard access in the parking garage, he subdues a soldier with a hammer and takes his uniform. Disguised, Agent 47 moves into the underground parking garage, securing remote explosives. The target begins evacuating, and Agent 47 chases him through the tunnels. He quickly subdues two security guards accompanying the target and eliminates Vito Đurić with a silenced pistol shot, concluding the first attempt with a combat result. The video immediately restarts the mission (second attempt). Agent 47 repeats the initial infiltration steps, obtaining the soldier disguise. In the garage, he finds a screwdriver, uses it to puncture a gasoline barrel next to the target's armored vehicle, and plants a proximity explosive next to the vulnerable point. He then secures a keycard from an electrical panel by short-circuiting it with a wrench. As the target and his guards gather near the compromised armored vehicle, Agent 47 triggers the electric short, causing a distraction, and prepares to observe the explosion, concluding his setup for the second attempt as he moves toward the extraction point. Agent 47 begins inside a restricted basement area of the Marrakesh consulate, disguised as a soldier. He utilizes coin distractions and cover provided by lockers to evade several patrolling guards and civilian targets. Using his Instinct ability, 47 identifies the patrol routes of two armed guards and a man in a suit, navigating the confined space. He isolates a target, a man in a black suit, by throwing a coin to lure him near an electrical generator and an oil slick. The attempt results in combat, forcing 47 to quickly subdue the target with a non-lethal object before dragging the body onto the oil slick next to a red fuel barrel. 47 shoots the oil slick, causing an explosion and fire, eliminating the target (Vito Durić) via an 'Accident Kill' and completing 'The Gunrunner' challenge. The agent, now 'Hunted', escapes up a nearby staircase, completing the mission. The gameplay shifts to the mission accomplished screen, showing rewards and Mastery Level progress. The player then enters the main menu to select a new Escalation mission in Marrakesh, 'The Lupei Sensitivity - Level 1/5'. Planning involves selecting a Kitchen Knife and Fiber Wire, with the starting location set to the Bazaar Entrance. Upon starting the new mission, 47 appears in a white suit and immediately changes into a masseur disguise. He navigates the bustling Marrakesh market, searching for Tomas Persson. The agent runs into the consulate area, breaches a restricted door using a remote explosive device, and enters a security room. He swiftly subdues one security guard at his desk by snapping his neck, then subdues a second guard who investigates the noise. 47 destroys the camera evidence via the security console before leaving the room, completing a stealth takedown of the entire security crew. Agent 47, disguised as a Moroccan police officer, infiltrates the heavily secured Swedish Consulate. The infiltration begins by accessing the underground parking garage and securing rat poison from a storage room. 47 then procures a wrench, which he uses to damage a parked scooter, creating an oil leak hazard. He exits the garage via a stairwell and enters the main consulate structure through the revolving doors. Upon reaching the interior, 47 quickly locates the security room and destroys the camera evidence recorder using the wrench, deleting all recent surveillance footage. Continuing the infiltration upstairs, 47 uses a noisy photocopier to lure a staff member away from a secure area, allowing him to bypass observation. He navigates the secure upper hallways, avoiding a conversation between guards and spotting a patrolling soldier. 47 conceals himself inside a large cardboard box, waiting for the guard patrol pattern to clear before the gameplay session ends. Chapters: 0:00:00 - Initial Game Loading and Title Screens 0:02:41 - Main Menu Access and Elusive Target Mission Selection 0:03:50 - Mission Briefing: The Gunrunner (Vito Đurić) 0:05:35 - Mission Start: Infiltration at Marrakesh Bazaar Entrance (First Attempt) 0:07:13 - Infiltration: Subduing Soldier and Obtaining Disguise 0:09:07 - Entering Consulate Parking Garage and Reconnaissance 0:11:53 - Target Evacuation and Escape Route Pursuit 0:17:11 - Target Elimination and Disposal (End of First Run) 0:20:28 - Mission Restart: Beginning Second Attempt 0:21:38 - Infiltration of Parking Garage and Tool Acquisition 0:23:45 - Setting up the Explosive Kill Scenario 0:26:31 - Activating Distractions and Target Lockdown 0:27:40 - Evading Guards and Final Movement Towards Exit 0:29:59 - Video End during Extraction Phase 30:00 - Stealth and Evasion in Restricted Basement 31:30 - Using Coin Distraction to Separate Guards 33:00 - Isolating Target near Generator and Oil Slick 34:30 - Combat Initiation and Target Knockout 37:20 - Eliminating Vito Durić via Accident Kill 37:39 - Exiting Restricted Area and Mission Accomplished 38:41 - Debriefing and Unlocks Screen 39:40 - Menu Navigation and Escalation Selection 43:56 - Starting 'The Lupei Sensitivity' Escalation Mission 45:03 - Agent 47 Disguises as Masseur in Marrakesh Bazaar 45:40 - Approaching Consulate Side Entrance with Breaching Charge 46:11 - Acquiring Consulate Security Disguise and Key 47:50 - Entering Consulate Security Room and Subduing Guards (Failed First Attempt) 53:21 - Mission Restart and Loadout Change (Wrench Added) 54:39 - Breaching Main Gate and Distracting Armored Guard 56:38 - Security Room Takedowns and Evidence Destruction 58:54 - Second Masseur Disguise Attempt and Bazaar Navigation 59:59 - Subduing Security Guards in Consulate 0:00 - Infiltration begins and acquiring rat poison 0:28 - Entering the garage and acquiring a wrench 0:45 - Creating an oil leak distraction and entering the consulate interior 1:35 - Entering the security room and destroying camera evidence 2:01 - Activating photocopier distraction in the upper hallway 3:00 - Waiting in concealment and listening to guards' discussion 4:00 - Moving past staff distraction and hiding from patrolling guard 4:39 - Gameplay session concludes

Ghost Recon Wildlands - Flight Plan - Interrogate The Buyer
This video demonstrates a tactical stealth operation in the video game Ghost Recon Wildlands, specifically focusing on the mission objective 'Flight Plan'. The gameplay begins with a character in a ghillie suit performing long-range reconnaissance on a desert outpost to identify and mark enemy targets. Viewers will see a methodical, stealth-focused approach as the character crawls through the terrain to get within range. The content covers the coordination of a synchronized shot with AI teammates to efficiently neutralize hostiles without alerting the main target. Following the firefight, the character captures and interrogates 'the buyer' to extract critical intelligence regarding a human trafficking network and a person named Boston Reed. The video concludes with a summary of the mission's success and the acquisition of important data. Chapters: 00:00:00 - 00:01:20 - Initial Reconnaissance and Marking Targets 00:01:20 - 00:02:50 - Methodical Stealth Approach to the Perimeter 00:02:50 - 00:03:15 - Execution of Synchronized Tactical Strike 00:03:15 - 00:04:10 - Interrogation of the Buyer and Narrative Intel 00:04:10 - 00:04:24 - Mission Completion and Summary 📖 Interactive written walkthrough with clickable timestamps: https://pixelfungaming.com/videos/ghost-recon-wildlands-flight-plan-interrogate-the-buyer
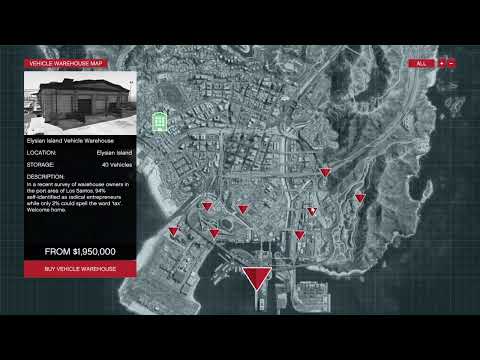
GTa 5 LIVE GAMEPLAY - raging
The gameplay starts with an exploration of a nightclub property before heading outside to complete a weapon challenge using the Stone Hatchet. After earning a significant monetary reward for completing the challenge, the character returns to the nightclub to manage business operations from the office computer. A 'Sell Goods' mission is initiated, requiring a series of five deliveries across the expansive map of San Andreas using a customized Vapid Speedo. The route begins at the industrial docks of Elysian Island, passes through the urban highways of Los Santos, and concludes in the rural desert regions of Blaine County. Following the successful completion of the sales mission, the character navigates the desert terrain in a Karin Rusty Rebel to locate a helicopter. A scenic flight across the mountains leads to the top of the Maze Bank Tower in downtown Los Santos. Inside the high-end office, the player accesses the SecuroServ network to research and purchase a new vehicle warehouse property. The session ends with a character switch back to the single-player story mode, where Franklin Clinton is controlled briefly near a smoke shop. Chapters: 0:00:00 - 0:00:53 - Initial loading and navigating the nightclub interior 0:00:53 - 0:01:44 - Completing the Stone Hatchet challenge for a reward 0:01:44 - 0:02:51 - Accessing management apps to start a sales mission 0:02:51 - 0:06:23 - Beginning the delivery run through the city 0:06:23 - 0:08:03 - Delivering the first package and heading north 0:08:03 - 0:09:22 - Securing the second delivery via off-road paths 0:09:22 - 0:10:29 - Completing the third drop-off in the desert 0:10:29 - 0:11:43 - Finishing the fourth delivery and swapping vehicles 0:11:43 - 0:14:08 - Reaching the final drop-off point and completing the job 0:14:08 - 0:16:50 - Desert driving with the Karin Rusty Rebel 0:16:50 - 0:19:11 - Flying a helicopter toward the city center 0:19:11 - 0:20:36 - Entering the CEO office at Maze Bank Tower 0:20:36 - 0:22:30 - Purchasing a new Vehicle Warehouse property 0:22:30 - 0:22:50 - Switching to Franklin in story mode 📖 Interactive written walkthrough with clickable timestamps: https://pixelfungaming.com/videos/gta-5-live-gameplay-raging

Sons Of The Forest: Spear Cannibal Commits Friendly Fire #shorts #sonsoftheforest
The video demonstrates a combat encounter in the survival game Sons of the Forest. A character is shown defending a fortified cliffside position, utilizing a spiked wooden wall for protection. The gameplay focuses on the use of a primitive spear to engage several hostile enemies, including a large, red-skinned cannibal and a smaller, faster variant wearing white paint. The content highlights spear thrust mechanics, enemy hit reactions, and the use of the GPS tracker while in combat. The video concludes with a brief musical transition and a channel outro. Chapters: 0:00:00 - 0:00:06 - Exploration of a fortified cliffside position near a spike wall 0:00:06 - 0:00:15 - Engagement with a large red-skinned enemy using a spear 0:00:15 - 0:00:26 - Continued combat against multiple enemies while holding a GPS tracker 0:00:26 - 0:00:33 - Transition to a blurred background with thematic music 0:00:33 - 0:00:37 - Outro screen displaying channel branding 📖 Interactive written walkthrough with clickable timestamps: https://pixelfungaming.com/videos/sons-of-the-forest-spear-cannibal-commits-friendly-fire-shorts-sonsoftheforest

Far Cry 5 - Eden's Convent Outpost UNDETECTED NO ALARMS
This Far Cry 5 gameplay video demonstrates a complete stealth liberation of the 'Eden's Convent' cult outpost. Viewers will see the player character initial scouting from a nearby ridge, followed by a silent infiltration using a grappling hook and a compound bow. The video showcases various stealth mechanics, including bush concealment, ledge takedowns, and precise archery to eliminate cultists without triggering alarms. After successfully clearing all enemies, the content shows the outpost being reclaimed by civilians and the final mission completion rewards. Chapters: 0:00:00 - 0:00:34 - Initial scouting and approach to the outpost 0:00:34 - 0:01:21 - Perimeter infiltration and first stealth takedown 0:01:21 - 0:02:22 - Navigating the grounds and executing a ledge takedown 0:02:22 - 0:03:15 - Eliminating central courtyard guards with the compound bow 0:03:15 - 0:04:02 - Entering the main convent building and final liberation 0:04:02 - 0:04:35 - Post-liberation cinematic and mission rewards 📖 Interactive written walkthrough with clickable timestamps: https://pixelfungaming.com/videos/far-cry-5-eden-s-convent-outpost-undetected-no-alarms

Garrys Mod: Prop Hunt -w/Waterboy
The gameplay begins in a surreal environment dominated by missing textures and large red 'ERROR' indicators. The character navigates through a multi-story house, revealing glitched walls and furniture before transitioning to an outdoor urban area similarly affected by graphical anomalies. Combat encounters feature various character models, including Combine soldiers and custom avatars, as they patrol the map looking for 'props'—objects that are actually hidden players. The hide-and-seek nature of the Prop Hunt mode is highlighted by players transforming into everyday items like chairs, tables, and potted plants to evade detection while various audio taunts play from classic movies and games. Successive rounds show both perspectives: the hunters patrolling with firearms and the props employing clever positioning and jumping to survive. The session concludes with a round summary showing player stats and team scores. Chapters: 0:00:00 - 0:01:30 - Interior Exploration of Glitched Building 0:01:30 - 0:03:00 - Outdoor Combat and Urban Navigation 0:03:00 - 0:04:30 - Prop Hiding and Evasion Tactics 0:04:30 - 0:05:15 - Hunter Patrol and Final Scoreboard 📖 Interactive written walkthrough with clickable timestamps: https://pixelfungaming.com/videos/garrys-mod-prop-hunt-w-waterboy

Ready Or Not: Shotgun Turns Suspect Into Bloody Fountain #readyornot
This tactical shooter gameplay video demonstrates a high-intensity engagement from the first-person perspective of a SWAT officer equipped with a ballistic shield. The footage begins with a slow, methodical approach through a residential backyard at sunset, utilizing a command menu to coordinate with an AI team. The video captures a sudden shootout with an armed suspect, highlighting the game's realistic ballistic effects and the shield's utility. A slow-motion replay of the encounter follows, emphasizing the visceral nature of the combat. Finally, the content shows post-engagement protocols, including reporting the suspect, securing weapons as evidence, and issuing further search commands to the squad. Chapters: 0:00:00 - 0:00:15 - Tactical movement and approach with ballistic shield 0:00:15 - 0:00:22 - High-intensity shootout with an armed suspect 0:00:22 - 0:00:29 - Slow-motion replay of the engagement 0:00:29 - 0:00:41 - Securing the scene and evidence collection 0:00:41 - 0:00:45 - Outro and social media information 📖 Interactive written walkthrough with clickable timestamps: https://pixelfungaming.com/videos/ready-or-not-shotgun-turns-suspect-into-bloody-fountain-readyornot

Insurgency: Sandstorm | Tideway First Cache Easy C4 Destruction (Breacher) #shorts
The mission begins with an intense long-range engagement in a sun-drenched desert environment. Precision shots take down an enemy combatant positioned near a crumbling structure. Movement proceeds rapidly through narrow, debris-strewn alleys toward the primary objective. A sudden ambush triggers a chaotic firefight in a central courtyard, where teammates coordinate to suppress hostile positions while seeking cover behind stone walls. The squad pushes forward aggressively, utilizing tactical equipment to clear indoor threats with a well-placed explosive breach. Following the blast, the team reassembles amidst swirling dust and smoke to secure the immediate perimeter and advance toward the next tactical point under heavy fire. Chapters: 0:00:00 - 0:00:05 - Initial long-range engagement and desert scouting 0:00:05 - 0:00:15 - Tactical movement through narrow urban corridors 0:00:15 - 0:00:23 - Intense courtyard firefight and squad suppression 0:00:23 - 0:00:30 - Building breach and explosive room clearing 0:00:30 - 0:00:40 - Regrouping and final push toward Objective C 📖 Interactive written walkthrough with clickable timestamps: https://pixelfungaming.com/videos/insurgency-sandstorm-tideway-first-cache-easy-c4-destruction-breacher-shorts

GTa 5 LIVE GAMEPLAY - Won new car
The mission begins with a Nightclub supply run in the Grand Senora Desert. Hostile bikers ambush the transport truck, leading to an initial firefight. After reclaiming the vehicle, the journey continues through the hills toward Los Santos while fending off persistent enemy motorcyclists. Navigating through heavy city traffic, the delivery reaches the Nightclub garage on Elysian Island. Following the successful mission, a classic Ocelot Swinger sports car is summoned for a drive through the city. This activity quickly draws police attention, sparking a high-stakes pursuit through industrial areas and residential streets. Tactical use of train tunnels helps lose the tail, followed by a quick armed robbery at a convenience store. The action concludes with a final dash through the city to safely store the vehicle in a local garage. Chapters: 0:00:00 - 0:00:56 - Supply run ambush and truck recovery firefight 0:00:56 - 0:03:30 - Driving through the hills under pursuit from enemy bikers 0:03:30 - 0:06:07 - Urban navigation and successful Nightclub delivery 0:06:07 - 0:08:45 - Mission completion and starting a police chase in the Ocelot Swinger 0:08:45 - 0:11:15 - Tactical evasion on train tracks and convenience store robbery 0:11:15 - 0:13:00 - Continued high-speed escape and final vehicle storage 📖 Interactive written walkthrough with clickable timestamps: https://pixelfungaming.com/videos/gta-5-live-gameplay-won-new-car

GTA 5 Prision Break Set up - Wet work (Mansion Team) Walkthrough
The video demonstrates a complete walkthrough of the 'Prison Break - Wet Work' setup mission from Grand Theft Auto V. The content covers the initial target identification, a stealthy approach using sniper rifles, and a direct assault on a heavily guarded mansion to eliminate key figures. Viewers will also see a lengthy getaway sequence through hilly terrain and city streets, concluding with the successful delivery of stolen documents to a planning room. The video concludes by displaying the final mission rewards and player performance statistics. Chapters: 0:00:00 - 0:00:15 - Mission Introduction and Setup Briefing 0:00:15 - 0:00:27 - Target Surveillance Cutscene at the Mansion 0:00:27 - 0:00:41 - Initial Long-Range Sniper Engagement 0:00:41 - 0:01:10 - Infiltrating the Mansion Perimeter 0:01:10 - 0:02:05 - Tactical Combat within the Garden Grounds 0:02:05 - 0:02:20 - Elimination of Primary Mission Targets 0:02:20 - 0:02:50 - Exfiltrating the Estate and Reaching the Vehicle 0:02:50 - 0:04:15 - Off-Road Descent and Initial Getaway Sequence 0:04:15 - 0:06:45 - Navigating City Traffic toward the Safe House 0:06:45 - 0:07:05 - Document Delivery and Mission Completion 0:07:05 - 0:07:55 - Final Mission Rewards and Statistical Summary 📖 Interactive written walkthrough with clickable timestamps: https://pixelfungaming.com/videos/gta-5-prision-break-set-up-wet-work-mansion-team-walkthrough

Assassins Creed Mirage: When You Get Good At Pickpocketing
This gameplay footage of Assassin's Creed Mirage demonstrates the core mechanics of stealthy traversal and pickpocketing within the vibrant city of Baghdad. The video follows the protagonist through various urban environments, from bustling marketplaces to quiet residential alleys, highlighting the fluidity of movement and the precision required for successful thefts. Viewers will observe the process of identifying targets, approaching them undetected, and the rewards obtained, such as Merchant and Scholar Favor Tokens, which are essential for progressing through the game's social and economic systems. Chapters: 00:00:00 - 00:00:15 - Initial street traversal and first successful pickpocket 00:00:15 - 00:00:43 - Navigating narrow alleyways and identifying potential targets 00:00:43 - 00:01:12 - Demonstration of verticality and multi-level environment navigation 00:01:12 - 00:01:31 - Traversing garden courtyards and open plazas 00:01:31 - 00:01:43 - Acquiring high-value items like Sumerian Rings and Scholar Tokens 00:01:43 - 00:02:01 - Crowd blending and final pickpocketing demonstration 00:02:01 - 00:02:06 - Video outro and channel branding 📖 Interactive written walkthrough with clickable timestamps: https://pixelfungaming.com/videos/assassins-creed-mirage-when-you-get-good-at-pickpocketing
Farcry 6| live #16 Valle de oro
Welcome back to Yara! In this comprehensive gameplay walkthrough of Far Cry 6, we tackle several key operations in the Noventarmas and Barrial regions. Watch as Dani Rojas works with the resistance to liberate the island from the grasp of Anton Castillo. This video covers the full progression of three major missions, including stealthy infiltrations, intense firefights, and pivotal story moments. Operations Featured: 1. Lost and Found: We track down the missing Paolo de la Vega, leading us from a guerrilla outpost to a high-stakes rescue at the Noventarmas International Airport. 2. Intervention: Bicho has gone rogue in his pursuit of Bembe. We follow his trail across the island, investigating a sabotaged rodeo and a chemical processing facility before a tense final confrontation. 3. Surgical Extraction: The team needs specialized medication to save a wounded ally. We must navigate enemy checkpoints and secure the necessary supplies under heavy fire. Highlights include tactical sniping at the airport, a hallucinatory escape sequence after a run-in with 'El Doctor,' and the complex moral choices faced by the members of Libertad. Whether you're looking for mission strategies or just want to see the story unfold, this video has it all. Chapters: 0:00:00 - Exploring Camp Maximas and Mission Prep 0:01:21 - Acquiring the Beaumont 'El Presidente' Vehicle 0:03:00 - Road Trip to Noventarmas: Radio Intel 0:05:40 - Clearing an FND Checkpoint 0:08:05 - Starting Operation: Lost and Found 0:10:45 - Tactical Sniping at the Airport Perimeter 0:13:30 - Infiltrating the International Airport Terminal 0:16:45 - Rescue Attempt at the Airport VIP Lounge 0:21:10 - Locating Sergio Estevez 0:25:30 - The Confrontation with 'El Doctor' 0:29:45 - Captivity and the Poison Hallucination 0:34:20 - Escape from the Clinic 0:39:50 - Rallying the Resistance at the Hideout 0:45:15 - Beginning Operation: Intervention 0:49:40 - Investigating the Sabotaged Lezcano Rodeo 0:54:25 - Assault on the Sol de Pina Processing Facility 1:01:10 - Securing Vital Medical Supplies 1:06:50 - The Final Hunt for Bembe 1:12:15 - Confrontation and Bicho's Choice 1:17:00 - Operation Complete: Mission Rewards 📖 Interactive written walkthrough with clickable timestamps: https://pixelfungaming.com/videos/farcry-6-live-16-valle-de-oro

HITMAN 2/Freelancer: Columbia | Machete Location
Agent 47 maneuvers through dense jungle foliage, overhearing nearby conversations from unsuspecting guards. He scans the area and retrieves a lethal machete hidden in the undergrowth. After arming himself, he consults the mission map to scout the layout of the plantation, including the botany lab and production sheds. Upon closing the tactical interface, he resumes his stealthy approach, moving deeper into the vegetation toward the industrial complex ahead. Chapters: 0:00:00 - 0:00:10 - Stealthy Infiltration and Scavenging 0:00:10 - 0:00:18 - Equipping the Machete 0:00:18 - 0:00:35 - Tactical Map and Objective Review 0:00:35 - 0:00:38 - Advancing Toward the Target Area 📖 Interactive written walkthrough with clickable timestamps: https://pixelfungaming.com/videos/hitman-2-freelancer-columbia-machete-location

Star Wars Outlaws: Viper Walkthrough #starwarsoutlaws
This gameplay video provides a comprehensive walkthrough of a high-stakes mission in Star Wars Outlaws. The content begins with Kay Vess navigating a lush jungle environment on her speeder bike to reach a crash site. Upon arrival, gameplay demonstrates an intense combat encounter against Imperial Viper Droids, showcasing the use of cover, blaster fire, and tactical movement. Following a cinematic cutscene where Kay meets with a Rebel contact and Gedeek via hologram, viewers see a detailed infiltration sequence into an Imperial facility. The video highlights various mechanics including stealth takedowns, climbing through vents, using Nix to distract enemies, and slicing into computer terminals to bypass security and disable base defenses. The mission reaches its climax in a laboratory shootout where the team successfully reprograms the Viper Droids. The final portion of the video features a seamless transition from ground combat to a cinematic space escape, where Kay pilots the Trailblazer through an asteroid field while engaging in a dogfight with Imperial TIE fighters. Chapters: 00:00:00 - 00:01:14 - Speeder bike journey through the jungle to the crash site 00:01:14 - 00:03:55 - Combat encounter with Imperial Viper Droids and Rebel reinforcements 00:03:55 - 00:05:22 - Mission briefing and narrative cutscene with Gedeek and the Rebels 00:05:22 - 00:10:10 - Initial infiltration of the Imperial facility through the perimeter 00:10:10 - 00:13:30 - Stealth gameplay and navigating security patrols within the facility 00:13:30 - 00:15:35 - Disabling the Imperial base defense grid at the listening post 00:15:35 - 00:18:20 - Advancing toward the Viper Droid laboratory and clearing guards 00:18:20 - 00:19:18 - Intense laboratory shootout while Gedeek hacks the system 00:19:18 - 00:21:18 - Hangar escape with assistance from reprogrammed Viper Droids 00:21:18 - 00:23:05 - Space escape sequence and TIE fighter space combat 📖 Interactive written walkthrough with clickable timestamps: https://pixelfungaming.com/videos/star-wars-outlaws-viper-walkthrough-starwarsoutlaws

Megabytes: Replay Mode S Rank | Simultaneous Entries - Ready Or Not
This tactical gameplay video features a comprehensive demonstration of breach-and-clear maneuvers in the game Ready or Not. The content showcases different fireteams—Commander, Gold, Blue, and Red—executing coordinated entries into various rooms, including a vibrant bedroom and a densely packed server room. Viewers will see the strategic use of non-lethal equipment such as CS gas, C2 charges, and stingers to subdue suspects. A unique feature of the video is its multi-perspective approach, providing views from the entry teams as well as the 'main suspects' to show the immediate effects of tactical gear like flashbangs and gas during a raid. Chapters: 0:00:00 - 0:00:05 - Introduction and loadout display for Commander and Gold Team 0:00:05 - 0:01:00 - Split-screen comparison of the Commander and Gold Team breaching a bedroom 0:01:00 - 0:01:48 - Main suspect perspective during the tactical entry into the bedroom 0:01:48 - 0:02:58 - Primary Gold Team gameplay showing room clearing and suspect apprehension 0:02:58 - 0:03:08 - Loadout details for Blue and Red fireteams 0:03:08 - 0:03:57 - Coordinated server room breach from Blue and Red team perspectives 0:03:57 - 0:04:53 - Perspective from Suspect #1 during the server room raid 0:04:53 - 0:06:15 - Perspective from Suspect #2 showing the effects of gas and arrest 0:06:15 - 0:06:25 - Closing credits and channel outro 📖 Interactive written walkthrough with clickable timestamps: https://pixelfungaming.com/videos/megabytes-replay-mode-s-rank-simultaneous-entries-ready-or-not

Assassin's Creed Mirage: Hidden One Dagger Location/Walkthrough
The journey begins with Basim perched atop a synchronization point at Dur-Kurigalzu in the Wilderness. He performs a daring leap of faith into a deep, water-filled well that leads into an extensive cave system. Basim swims through submerged tunnels, collecting resources from a chest before resurfacing inside a guarded cavern. He expertly navigates the initial area, using stealth to eliminate guards and engaging in direct combat when necessary. Basim encounters a puzzle involving a heavy movable block and explosive jars. By strategically positioning the block and using fire to detonate the jars, he destroys a breakable wall to progress deeper into the ruins. He continues through the dark corridors, eventually reaching a large, flooded chamber occupied by several elite guards. Basim engages in a high-stakes battle, deploying smoke bombs to confuse his enemies and delivering precise strikes. After clearing the room, he loots a prominent gear chest to claim the Hidden One Dagger. The mission concludes as Basim climbs out of the depths using ladders and scaffolding, returning to the sunlit desert before a final view of the world map confirms the location. Chapters: 0:00:00 - 0:00:20 - Synchronization at Dur-Kurigalzu 0:00:20 - 0:00:58 - Leap of faith and underwater exploration 0:00:58 - 0:01:47 - Infiltration and initial guard encounters 0:01:47 - 0:03:00 - Solving the explosive jar and block puzzle 0:03:00 - 0:03:24 - Navigating deeper into the cave system 0:03:24 - 0:04:09 - Elite guard combat in the treasure room 0:04:09 - 0:04:33 - Acquiring the Hidden One Dagger 0:04:33 - 0:05:06 - Exiting the cavern via scaffolding 0:05:06 - 0:05:36 - Map location overview and outro 📖 Interactive written walkthrough with clickable timestamps: https://pixelfungaming.com/videos/assassin-s-creed-mirage-hidden-one-dagger-location-walkthrough

Red Dead Online: Capturing Player Bounties #2
The character embarks on a series of high-stakes player bounty hunts across various locations in Red Dead Online. The first mission begins in Valentine, where the target is tracked to the local train station. After a brief scuffle, the bounty is hogtied, stowed in a specialized wagon, and delivered to the sheriff. The second contract leads to the swampy Bayou Nwa region for a pursuit of a target traveling on a moving train. Intense sniper fire and a daring leap onto the locomotive precede the capture. Despite a mechanical failure with the bounty wagon in Saint Denis, the delivery is successfully completed after manually extracting the prisoner. The final hunt occurs under the cover of night near Annesburg, involving a stealthy approach through dense woods and a lethal confrontation. The gameplay concludes with a long-distance ride through the foggy wilderness, showcasing the relentless nature of the bounty hunter's life. Chapters: 00:00:00 - 00:01:43 - Valentine player bounty capture and transport 00:01:44 - 00:02:18 - Bounty delivery cutscene and player interaction 00:02:19 - 00:04:44 - High-speed train pursuit and Bayou Nwa capture 00:04:45 - 00:07:15 - Saint Denis delivery and bounty wagon glitch 00:07:16 - 00:09:40 - Lethal nighttime bounty hunt near Annesburg 00:09:41 - 00:10:50 - Final wilderness ride through the night 📖 Interactive written walkthrough with clickable timestamps: https://pixelfungaming.com/videos/red-dead-online-capturing-player-bounties-2

Assassin's Creed Valhalla - Defeating Zealot Callin
Eivor stalks through a misty, snow-dusted forest in pursuit of the Zealot Callin. Initial engagement involves precise bow shots that chip away at Callin's health from a distance. The confrontation shifts to close-quarters combat as Eivor closes the gap, wielding a shield and performing heavy melee strikes. Specialized abilities manifest as red energy surges during intense exchanges, including a powerful stomp attack on the downed opponent. A mix of rapid arrow fire and aggressive melee combos eventually brings Callin down. Eivor then approaches to confirm the kill, triggering a cinematic scene in a shadowy void where the two exchange final words. Upon returning to the physical world, Eivor loots the fallen Zealot, gaining skill points and runes, and then continues through the foggy landscape. Chapters: 0:00:00 - 0:00:15 - Initial Ranged Engagement 0:00:15 - 0:00:40 - Close-Quarters Melee Combat 0:00:40 - 0:00:58 - Final Offensive and Takedown 0:00:58 - 0:01:18 - Cinematic Final Words 0:01:18 - 0:01:54 - Looting and Post-Battle Progression 📖 Interactive written walkthrough with clickable timestamps: https://pixelfungaming.com/videos/assassin-s-creed-valhalla-defeating-zealot-callin

Call Of Duty Ghosts : The Hunted - Mission 9
This video features a comprehensive gameplay walkthrough of the 'The Hunted' mission from Call of Duty: Ghosts. Viewers will see the mission unfold from an intense opening cinematic interrogation aboard a military transport plane to a high-stakes stealth escape through a dense South American jungle. The content demonstrates various gameplay mechanics, including scripted cinematic events, stealth-based movement, the use of specialized tools like the heartbeat sensor for enemy tracking, and tactical combat against multiple infantry units and attack helicopters. The video highlights both the quiet, tense moments of avoiding detection and the explosive firefights that culminate in a dramatic extraction sequence. Chapters: 0:00:00 - 0:02:10 - Opening Cinematic: Interrogation and Plane Attack 0:02:10 - 0:03:45 - Parachute Landing and Initial Jungle Stealth 0:03:45 - 0:06:50 - Navigating Dense Foliage with the Heartbeat Sensor 0:06:50 - 0:09:30 - Regrouping with Ghost Team and Silenced Takedowns 0:09:30 - 0:12:55 - Clearing the Crash Site and Engaging Enemy Patrols 0:12:55 - 0:15:35 - Advancing through the Jungle towards the River 0:15:35 - 0:17:30 - Tense River Sequence and Avoiding Bridge Detection 0:17:30 - 0:19:25 - Grass Stealth and Witnessing the Missile Explosion 0:19:25 - 0:21:03 - Final Forest Firefight and Cliff Jump Extraction 📖 Interactive written walkthrough with clickable timestamps: https://pixelfungaming.com/videos/call-of-duty-ghosts-the-hunted-mission-9

RDR2 - Madam Nazar Location December 13th 2019
The session begins with the character riding a horse across a grassy plain under a clear sky. The destination is a colorful red wagon belonging to Madam Nazar. After arriving and dismounting, the character approaches the merchant. A map menu opens, revealing the exact location of Madam Nazar near Manteca Falls in the Hennigan's Stead region of New Austin. The map interface highlights the Collector role, explaining how to find and sell rare items. The session concludes as the map closes, returning to the live interaction between the character and the merchant. Chapters: 0:00:00 - 0:00:13 - Riding across the plains towards the caravan 0:00:13 - 0:00:19 - Dismounting and approaching Madam Nazar 0:00:19 - 0:00:48 - Reviewing the world map for location details 📖 Interactive written walkthrough with clickable timestamps: https://pixelfungaming.com/videos/rdr2-madam-nazar-location-december-13th-2019

Assassins Creed Mirage: Hidden One Sword Location
Basim infiltrates the Southern Camp in the Wilderness region, starting on a high rooftop overlooking the area. He parkours down using red awnings and wooden structures to reach a small market stall. Tucked away in this stall is a golden gear chest. He loots the chest to obtain the Hidden One Sword. Immediately after, he moves away from the loot site, navigating through tall grass and past wooden fences to stay out of sight. The world map then opens to provide clear context, showing the Southern Camp's location along the coastline, far south of the Round City and Karkh regions, specifically highlighting the gear chest icon. Chapters: 0:00:00 - 0:00:09 - Navigating the Southern Camp and descending from the rooftops 0:00:09 - 0:00:14 - Looting the gear chest to obtain the Hidden One Sword 0:00:14 - 0:00:26 - Moving through tall grass to exit the immediate area 0:00:26 - 0:00:42 - Map overview showing the Southern Camp location in the Wilderness 0:00:42 - 0:00:48 - Outro and channel information 📖 Interactive written walkthrough with clickable timestamps: https://pixelfungaming.com/videos/assassins-creed-mirage-hidden-one-sword-location

Zero Hour: Cocktail Crisis | Score 100
The video provides a complete tactical walkthrough of the 'Cocktail Crisis' operation in a realistic military simulation shooter. The content demonstrates a SWAT team, designated as MS Unit, responding to an active shooter and hostage situation at the 'Moonshine' nightclub. Viewers will see the entire mission from the initial approach through a shopping arcade, to meticulous room-by-room clearing of the multi-level nightclub, high-stakes engagements with armed suspects, and the safe restraint of civilians. The gameplay showcases professional tactical movement, weapon handling, and strategic objective completion, culminating in a perfect mission score. Chapters: 0:00:00 - 0:00:44 - Cinematic intro depicting the shooters' arrival at the nightclub 0:00:44 - 0:01:45 - Initial tactical entry and navigation through the ground floor shops 0:01:45 - 0:02:45 - First suspect engagement and movement to the upper nightclub floor 0:02:45 - 0:04:15 - Clearing the main bar area and securing the dance floor 0:04:15 - 0:05:30 - Systematic sweep of side corridors and staff service areas 0:05:30 - 0:07:00 - Breach of the kitchen area and neutralizing armed threats 0:07:00 - 0:08:30 - Tactical movement through the VIP lounge and casino sections 0:08:30 - 0:10:00 - Re-clearing central zones and identifying hiding civilians 0:10:00 - 0:11:30 - High-tension hallway maneuvers and room-by-room suspect apprehension 0:11:30 - 0:13:00 - Clearing the administration offices and neutralizing final shooters 0:13:00 - 0:14:30 - Final thorough sweep of the premises for objective verification 0:14:30 - 0:15:30 - Team egress from the nightclub to the extraction point 0:15:30 - 0:16:02 - Mission success screen with performance summary and score breakdown 📖 Interactive written walkthrough with clickable timestamps: https://pixelfungaming.com/videos/zero-hour-cocktail-crisis-score-100

Star Wars Outlaws Sabotage Walkthrough
The video provides a comprehensive walkthrough of the 'Sabotage' quest in Star Wars Outlaws from start to finish. It begins with a cutscene where Kay Vess accepts a contract from a Hutt enforcer to disrupt a Pyke Syndicate creature-smuggling operation on Toshara. Gameplay footage demonstrates a variety of mechanics, including speeder bike travel across the open world, rock climbing traversal, and using binoculars for tactical reconnaissance. The video showcases a mix of stealthy infiltration through tall grass and intense blaster combat after being spotted by Pyke enforcers. Viewers will see the player character navigate restricted areas, use a data spike to hack security panels, and ultimately make a choice regarding a stolen client list before planting a Baradium bomb and escaping a collapsing facility under heavy alarm. The walkthrough concludes with Kay returning to the diner to collect her credits and complete the mission. Chapters: 0:00:00 - 0:02:40 - Mission Briefing and Initial Traversal 0:02:40 - 0:05:30 - Meeting the Contact and Scouting the Poaching Station 0:05:30 - 0:08:15 - Stealth Infiltration and Combat Engagement 0:08:15 - 0:11:00 - Infiltrating the Operations Building and Data Retrieval 0:11:00 - 0:13:45 - Double-Crossing Cutscene and Sabotage Planting 0:13:45 - 0:16:21 - Escaping the Explosion and Quest Completion 📖 Interactive written walkthrough with clickable timestamps: https://pixelfungaming.com/videos/star-wars-outlaws-sabotage-walkthrough

Ready Or Not: Sullivans Slope 1.0 | S Rank (No Mods)
This video features a full solo playthrough of the 'A Lethal Obsession' mission in Ready or Not, conducted without mods and resulting in an S-Rank rating. The gameplay demonstrates advanced tactical maneuvers, including the use of mirror guns for reconnaissance, C2 explosive breaching, and precise command of AI teammates to clear a fortified cabin and its surrounding laboratory areas. Viewers will observe the systematic clearing of booby-trapped rooms, the arrest of high-value targets like Gerard Scott, and the successful collection of critical evidence while maintaining non-lethal engagement standards required for the highest mission ranking. Chapters: 0:00:00 - 0:01:05 - Mission Insertion and Initial Approach 0:01:05 - 0:02:30 - Breaching the Cabin and Arresting Gerard Scott 0:02:30 - 0:04:45 - Clearing the Laboratory and Transitioning Outside 0:04:45 - 0:07:15 - Secondary Entry and Hallway Navigation 0:07:15 - 0:08:15 - Final Suspect Apprehension and Evidence Collection 0:08:15 - 0:08:35 - Mission Summary and S-Rank Confirmation 📖 Interactive written walkthrough with clickable timestamps: https://pixelfungaming.com/videos/ready-or-not-sullivans-slope-1-0-s-rank-no-mods

The Walking Dead: Destinies | Episode 10 - Rick VS Shane Fight Walkthrough
This video features a comprehensive gameplay sequence from 'The Walking Dead: Destinies,' centered on the pivotal boss fight between Rick Grimes and Shane Walsh. The footage demonstrates a multi-stage confrontation that blends direct combat with psychological narrative elements. Viewers will see Rick navigate various combat phases, utilizing a range of weapons from crowbars and sledgehammers to firearms. The video highlights unique gameplay mechanics such as character status effects—'Panicked,' 'Tense,' and 'Wrathful'—which impose specific tactical constraints on the player. Throughout the battle, floating text and voiceovers provide narrative depth, reflecting the characters' shared history and the emotional weight of their conflict. The encounter concludes with a dramatic cinematic resolution in a moonlit field, where the final fate of Shane is decided. Chapters: 0:00:00 - 0:01:40 - Initial Confrontation: Direct Boss Fight 0:01:40 - 0:04:15 - Psychological Phase: Memories and Panicked Status 0:04:15 - 0:06:50 - Extended Walker Combat and Narrative Hallucinations 0:06:50 - 0:09:09 - Escalated Battle: Wrathful and Tense Combat States 0:09:09 - 0:10:02 - Final Showdown and Cinematic Execution 📖 Interactive written walkthrough with clickable timestamps: https://pixelfungaming.com/videos/the-walking-dead-destinies-episode-10-rick-vs-shane-fight-walkthrough

Ready Or Not: Hunger Strike HARD MODE S RANK
This gameplay video features a high-intensity tactical room clearance operation within a first-person shooter, specifically showcasing Ready or Not. Viewers will observe a SWAT-style unit breaching an office building, engaging in rapid-fire combat with armed suspects, and securing non-combatants. The video demonstrates professional tactical maneuvers, the use of flashlights in low-light environments, and efficient team coordination. The footage concludes with a mission summary showcasing an 'S' rank achievement, reflecting top-tier performance and adherence to mission objectives. Chapters: 0:00:00 - 0:00:05 - Tactical breach and initial room entry 0:00:05 - 0:00:15 - Intense firefight and neutralization of multiple suspects 0:00:15 - 0:00:23 - Securing civilians and completing room clearance 0:00:23 - 0:00:38 - Post-mission score tally and 'S' rank reveal 0:00:38 - 0:00:42 - Outro and channel branding 📖 Interactive written walkthrough with clickable timestamps: https://pixelfungaming.com/videos/ready-or-not-hunger-strike-hard-mode-s-rank

Hitman 3: Berlin | Keycard Location
Agent 47 navigates the industrial sub-levels of a Berlin nightclub, utilizing his instinct vision to track the movements of guards and staff through the walls. He maintains a low profile, crouching behind cover as he bypasses workers on an elevated walkway. Upon reaching a storage area, he secures a Club Keycard found atop a blue crate, providing necessary access for deeper infiltration. He then proceeds down several flights of stairs, heading toward the main venue. A brief pause allows for a thorough review of the facility's floor plan, pinpointing key locations like the boiler room and the basement bar. The sequence concludes as he steps into the vibrant, strobe-lit environment of the crowded dance floor, seamlessly blending into the crowd to continue his mission. Chapters: 0:00:00 - 0:00:10 - Utilizing Instinct to scout guard positions 0:00:10 - 0:00:24 - Sneaking through the industrial upper walkway 0:00:24 - 0:00:35 - Acquiring the Club Keycard and descending stairs 0:00:35 - 0:00:53 - Detailed analysis of the nightclub floor map 0:00:53 - 0:00:55 - Entry onto the neon-lit dance floor 📖 Interactive written walkthrough with clickable timestamps: https://pixelfungaming.com/videos/hitman-3-berlin-keycard-location
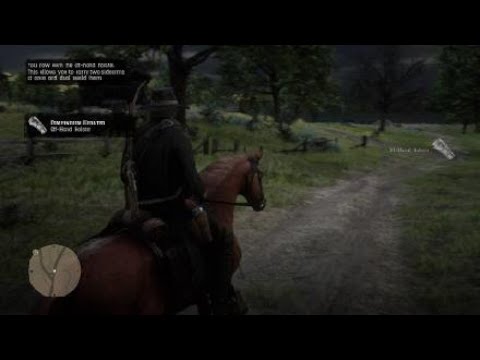
Red Dead Redemption 2 - Sweetwater Jailbreak
Arthur Morgan orchestrates a daring jailbreak in Strawberry to rescue Micah Bell. Using a nearby steam donkey and a sturdy winch cable, the cell wall is forcibly removed, allowing Micah to escape. The jailbreak immediately escalates into a violent confrontation as lawmen swarm the town. Arthur and Micah navigate the narrow, rain-slicked streets, utilizing cover behind logs, barrels, and wagons during an intense shootout. Micah displays his ruthless nature by executing a former cellmate before demanding they retrieve his signature dual revolvers from a local residence. After a bloody house call where Micah eliminates everyone inside to reclaim his weapons, the duo mounts their horses for a high-stakes pursuit through the surrounding forest. They fend off waves of mounted lawmen in a high-speed chase until they manage to lose their pursuers. The mission concludes with a tense conversation on horseback where Micah expresses his gratitude by gifting Arthur a second holster before departing to find a peace offering for the gang's leader. Chapters: 0:00:00 - 0:00:45 - Forcing the Jailbreak 0:00:45 - 0:01:45 - Initial Town Shootout 0:01:45 - 0:03:00 - Fighting Toward Micah's Guns 0:03:00 - 0:03:45 - The House Call at the Cabin 0:03:45 - 0:04:30 - Final Push through Strawberry 0:04:30 - 0:05:30 - High-Speed Horseback Pursuit 0:05:30 - 0:07:24 - Aftermath and Parting Ways 📖 Interactive written walkthrough with clickable timestamps: https://pixelfungaming.com/videos/red-dead-redemption-2-sweetwater-jailbreak

Dead Island 2: Drunk And Disorderly Quest | Walkthrough | Party Starter Weapon Reward #DeadIsland2
Check out our website: https://pixelfungaming.com Follow our Facebook page: https://www.facebook.com/pixelfungames Chapters: 0:00:00 - 0:13:00 - Mall Exploration and Initial Zombie Encounters 0:13:00 - 0:29:00 - Discovering 'Drunk and Disorderly' Quest and First Clue 0:29:00 - 0:41:00 - Quest Journal Review and First Travel Destination 0:41:00 - 0:56:00 - Transition to Venice Beach and Next Clue Hint 0:56:00 - 1:12:00 - Approaching Weed Shop and First Zombie Wave 1:12:00 - 1:44:00 - Intense Combat with Gas Pipe Explosions 1:44:00 - 2:29:00 - Navigating Parking Lot and Explosive Barrel Tactics 2:29:00 - 3:14:00 - Armored Truck Battle and Second Clue Collection 3:14:00 - 3:39:00 - Reviewing Clues and Fast Travel to The Pier 3:39:00 - 3:45:00 - Loading to Pier Lifeguard HQ 3:45:00 - 4:28:00 - Pier Combat and Environmental Explosions 4:28:00 - 5:15:00 - Continued Pier Battle and Surviving Zombie Attacks 5:15:00 - 5:50:00 - Locating Pier Grill and Jordan's Hideout 5:50:00 - 6:40:00 - Boss Fight: Defeating Jordan and Collecting Car Keys 6:40:00 - 7:02:00 - Final Clue and Fast Travel to Serling Hotel 7:02:00 - 7:30:00 - Hotel Lobby Navigation and Parking Garage Entrance 7:30:00 - 7:54:00 - Finding the Car and Quest Completion 📖 Interactive written walkthrough with clickable timestamps: https://pixelfungaming.com/videos/dead-island-2-drunk-and-disorderly-quest-walkthrough-party-starter-weapon-reward-deadisland2

Ready Or Not: Elephant | Solo, Pistol Only
This video provides a complete walkthrough of the 'Elephant' mission in the tactical shooter game Ready or Not. The footage demonstrates a professional tactical approach to an active shooter scenario at Watt Community College. Viewers will see the SWAT team systematically clear various campus locations including the library, science labs, cafeteria, and computer rooms. The gameplay highlights key mission objectives such as neutralizing multiple armed suspects, securing and detaining civilians for evacuation, and locating and defusing chemical explosive devices. The video concludes with a full results screen showing the achievement of an A+ mission rating, proving the effectiveness of the demonstrated tactics. Chapters: 0:00:00 - 0:00:03 - SWAT team pre-mission cinematic and briefing 0:00:03 - 0:00:20 - Initial arrival and approach to the Watt Community College entrance 0:00:20 - 0:01:18 - Securing the second-floor library and surrounding corridors 0:01:18 - 0:01:41 - First suspect engagement and neutralization near the lecture hall 0:01:41 - 0:02:18 - Intense firefight and suspect elimination within the science laboratory 0:02:18 - 0:03:23 - Systematic clearing of upper-level hallways and common areas 0:03:23 - 0:03:45 - Engagement and neutralization of a shooter on the main staircase 0:03:45 - 0:04:18 - Locating and detaining civilians for safety in the ground floor lobby 0:04:18 - 0:04:43 - Identification and successful defusal of a chemical explosive device 0:04:43 - 0:05:44 - Sweeping the campus cafeteria and service areas for remaining threats 0:05:44 - 0:06:12 - Securing additional survivors in the labs and classrooms 0:06:12 - 0:07:12 - Final perimeter sweep and verification of secured zones 0:07:12 - 0:07:42 - Mission complete summary screen showing an A+ performance rating 📖 Interactive written walkthrough with clickable timestamps: https://pixelfungaming.com/videos/ready-or-not-elephant-solo-pistol-only

Star Wars: Outlaws | First 25 minutes
The video provides a comprehensive look at early gameplay from Star Wars Outlaws, following protagonist Kay Vess and her companion Nix. It begins with narrative cutscenes in Kay's hideout and a local cantina called The Broken Hoof on Canto Bight. The footage demonstrates exploration through detailed city environments, specifically the Worker's District, where gameplay covers quest tracking and bartering with merchants to gather credits. Viewers will see stealth mechanics in action as Kay infiltrates Club Tarsus, utilizing tools like the data spike for a rhythm-based lockpicking minigame and issuing commands to Nix to manipulate the environment. The analysis concludes with a demonstration of cover-based blaster combat and tactical navigation as Kay fights her way out of the facility following a high-stakes heist. Chapters: 00:00:00 - 00:01:15 - Opening cutscene and hideout exploration 00:01:15 - 00:02:48 - Dialogue in the Broken Hoof cantina 00:02:48 - 00:03:13 - Cinematic visuals of Canto Bight festivities 00:03:13 - 00:04:35 - Navigating the Worker's District streets 00:04:35 - 00:05:43 - Questing and gathering credits in the city 00:05:43 - 00:07:05 - Merchant interactions and data spike repairs 00:07:05 - 00:08:09 - Approaching Club Tarsus and menu overview 00:08:09 - 00:09:51 - Infiltration and lockpicking mechanics showcase 00:09:51 - 00:11:27 - Stealth movement through the club interior 00:11:27 - 00:13:00 - Bouncer interaction and finding alternate routes 00:13:00 - 00:14:21 - Executing the heist and entering blaster combat 00:14:21 - 00:15:46 - Combat escape and mission conclusion 📖 Interactive written walkthrough with clickable timestamps: https://pixelfungaming.com/videos/star-wars-outlaws-first-25-minutes

HITMAN: Elusive Target | Serial Killer | Silent Assassin Takedown #shorts
Agent 47 infiltrates a residence, moving through a laundry room to access a garage. Inside, he stalks a target while maintaining a low profile. He draws a silenced firearm and executes a precise headshot as the target walks up the interior stairs. After the elimination, Agent 47 leaves the property through a large garage door and heads toward a street corner. He reaches a bus stop and boards a vehicle to successfully exit the mission area. Chapters: 0:00:00 - 0:00:10 - Infiltration of the residence and garage access 0:00:10 - 0:00:28 - Stalking the target within the utility area 0:00:28 - 0:00:35 - Target elimination with a precise headshot 0:00:35 - 0:00:49 - Exfiltration from the area via public transit 📖 Interactive written walkthrough with clickable timestamps: https://pixelfungaming.com/videos/hitman-elusive-target-serial-killer-silent-assassin-takedown-shorts

Zero Hour: Testing New K9
This video provides a comprehensive demonstration of a tactical mission within the 'Zero Hour' universe, specifically set in the Residential House environment. Viewers will see the complete process of a SWAT-style operation, beginning with equipment selection and tactical planning. The gameplay showcases methodical room clearing, dynamic firefights, and the utilization of a tactical dog to locate suspects throughout the multi-story house. Significant moments include gathering digital evidence from a laptop and the successful apprehension of the mission's primary target. The analysis continues through the final extraction phase and the mission performance summary, offering a detailed look at the game's mechanics and strategic requirements. Chapters: 0:00:00 - 0:01:10 - Initial planning phase and equipment loadout selection 0:01:10 - 0:03:05 - Entry into the residence and methodical clearing of ground floor rooms 0:03:05 - 0:06:15 - Securing the main living area and downloading vital intelligence from a laptop 0:06:15 - 0:08:45 - Tactical progression to the upper level and exterior balcony sweeps 0:08:45 - 0:10:20 - Neutralizing final resistance and detaining the high-value suspect 0:10:20 - 0:12:44 - Mission wrap-up, performance review, and return to the game lobby 📖 Interactive written walkthrough with clickable timestamps: https://pixelfungaming.com/videos/zero-hour-testing-new-k9

Insurgency: Sandstorm | Counting On Favorite Pistol (Browning Hi-power) To Save Me #shorts
The mission begins with high-stakes room clearing inside a residential building. The character navigates tight corridors and utilizes an optic-equipped assault rifle to neutralize insurgents in rapid succession. When the primary weapon's magazine is exhausted during a frantic hallway encounter, a swift transition to a sidearm ensures the area is secured. Combat then transitions to a dilapidated industrial setting where the character engages hostiles at medium range using a rifle with a high-capacity drum magazine. Following a series of close-range exchanges, a detailed tactical reload of the drum mag is performed before moving to the next area. The final engagement occurs at Objective Golf, where the character enters a building through a breached wall. Intense fighting breaks out in a smoke-filled stairwell as the character manages multiple threats with precision rifle and pistol fire, holding the position despite the objective being contested by the enemy. Chapters: 0:00:00 - 0:00:17 - Residential Interior Firefights and Room Clearing 0:00:17 - 0:00:37 - Industrial Area Engagement and Tactical Drum Mag Reload 0:00:37 - 0:00:59 - Breach and Interior Defense of Objective Golf 📖 Interactive written walkthrough with clickable timestamps: https://pixelfungaming.com/videos/insurgency-sandstorm-counting-on-favorite-pistol-browning-hi-power-to-save-me-shorts

Insurgency: Sandstorm PVP | Bomb Defusal Victory - Outskirts
The mission begins with a defensive stance in an urban environment, where tactical positioning and map evaluation are prioritized. Combat erupts as enemies approach a central gas station, leading to intense scoped exchanges and disciplined fire. After falling in battle, a quick respawn necessitates a traverse through a hillside shanty town to rejoin the defensive line. Precise shooting and methodical corner-clearing tactics eventually secure a Round 1 victory for the security team. The second round transitions to an offensive role as an insurgent, starting with long-range suppression from a rocky vantage point overlooking the target area. Moving closer to the objective, effective use of cover allows for a successful breach of the store building. Once inside, the interior is cleared of hostiles, and explosives are planted on chemical barrels. The successful detonation of the objective leads to a decisive match victory, followed by a detailed review of performance statistics. Chapters: 0:00:00 - 0:01:40 - Initial Defense and First Contact 0:01:40 - 0:03:20 - Hillside Navigation and Storefront Firefight 0:03:20 - 0:04:10 - Round Victory and Loadout Transition 0:04:10 - 0:05:45 - Offensive Push and Long-Range Suppression 0:05:45 - 0:06:58 - Breaching the Objective and Planting Explosives 0:06:58 - 0:07:35 - Match Victory and Summary Statistics 📖 Interactive written walkthrough with clickable timestamps: https://pixelfungaming.com/videos/insurgency-sandstorm-pvp-bomb-defusal-victory-outskirts

Level Zero Extraction: Research Facility | Merc Gameplay
This video offers a comprehensive overview of Level Zero: Extraction, a sci-fi horror extraction shooter. It begins with a cinematic introduction that sets the stage on the planet Turion and an Antarctic research facility where genetic experiments on alien DNA have gone wrong. The content then transitions into practical gameplay elements, showcasing the character selection screen where viewers can choose between playing as a mercenary or an alien. A significant portion of the video focuses on the intricate inventory management system, demonstrating how to equip weapons, ammunition, health syringes, and essential light sources like flares and flashlights. The video also covers tactical preparation, featuring a mission briefing with an overhead map that outlines objectives, loot locations, and extraction points. The analysis concludes with the deployment phase as a mercenary enters the dark, atmospheric research facility to begin the extraction mission. Chapters: 0:00:00 - 0:00:22 - Cinematic introduction to planet Turion and bioluminescent life 0:00:22 - 0:00:42 - Narrative background on the Antarctic research facility and genetic experiments 0:00:42 - 0:00:54 - Introduction to mercenary characters and the mission premise 0:00:54 - 0:01:07 - Early Access information and developer notice 0:01:07 - 0:01:11 - Character class selection: Mercenary versus Alien 0:01:11 - 0:01:32 - Inventory management: Selecting primary and secondary weapons 0:01:32 - 0:02:02 - Resource preparation: Managing ammunition and medical supplies 0:02:02 - 0:02:29 - Finalizing the loadout with essential light sources and gadgets 0:02:29 - 0:02:50 - Tactical briefing: Analyzing the facility map and extraction points 0:02:50 - 0:03:03 - Mission loading sequence for the Research Facility 0:03:03 - 0:03:14 - Deployment countdown and initial facility entry 📖 Interactive written walkthrough with clickable timestamps: https://pixelfungaming.com/videos/level-zero-extraction-research-facility-merc-gameplay

RDR2 : WANTED; Escape From Saint Denis #1
Arthur Morgan begins his journey at the Saint Denis train station, walking through the industrial district into the heart of the city. After purchasing a newspaper and greeting several residents, a chance encounter with a lawman turns into a desperate struggle for survival. The mission shifts into a high-octane shootout as Arthur navigates cramped alleys and main thoroughfares while being pursued by a growing force of law enforcement. He eventually manages to leave the city limits, transitioning into the swampy terrain of Bayou Nwa. Using the natural landscape for cover, he wades through the marshes to lose his wanted status. The journey concludes as he arrives safely back at the Shady Belle manor, stowing his gear and heading inside to rest. Chapters: 0:00:00 - 0:01:15 - Arrival at Saint Denis Station and city walk 0:01:15 - 0:01:50 - Interacting with local vendors and citizens 0:01:50 - 0:02:45 - Lawman confrontation and initial city shootout 0:02:45 - 0:04:10 - High-stakes urban escape through backstreets 0:04:10 - 0:05:00 - Evading pursuers in the Bayou Nwa marshes 0:05:00 - 0:05:33 - Returning to Shady Belle camp and resting 📖 Interactive written walkthrough with clickable timestamps: https://pixelfungaming.com/videos/rdr2-wanted-escape-from-saint-denis-1

Sons Of The Forest: Hard Survival | Building Back Section Spike/Electric Fence Defenses
This gameplay video provides an in-depth look at building defensive structures in the survival horror game Sons of the Forest. The content covers the fundamental process of creating sharpened stick spikes, reinforcing them with rocks for stability, and integrating them into complex perimeter defenses. Viewers will see demonstrations of building techniques in various environments, including snow-covered hills and dense forests across different seasons. The video also highlights the effectiveness of these traps against diverse enemy types during both day and night encounters, showcasing how resource management and strategic placement lead to a secure base. Chapters: 0:00:00 - 0:02:15 - Initial Construction and Sharpening of Stick Spikes 0:02:15 - 0:04:30 - Reinforcing Defenses with Rocks and Combat Demonstration 0:04:30 - 0:06:45 - Building Spiked Defenses on Log Structures 0:06:45 - 0:09:00 - Advanced Trap Construction in Diverse Seasonal Environments 0:09:00 - 0:11:15 - Effectiveness of Perimeter Traps Against Mutant Waves 0:11:15 - 0:12:45 - Nighttime Defense Showcase and Final Building Refinements 📖 Interactive written walkthrough with clickable timestamps: https://pixelfungaming.com/videos/sons-of-the-forest-hard-survival-building-back-section-spike-electric-fence-defenses

Insurgency: Farmhouse | Quick Cache (IED) Destruction #shorts #insurgencysandstorm
The mission begins with the character moving cautiously across an open, grassy field toward a heavily fortified enemy compound. Heavy gunfire erupts almost immediately, forcing the character to utilize natural cover while returning fire with a suppressed rifle. After neutralizing several threats from a distance, the character advances into the perimeter and breaches a small building. Inside, the combat transitions to intense close-quarters encounters as enemies attempt to hold the narrow hallways. The character maneuvers through the rooms, checking corners and engaging targets at doorways. A remote detonator is deployed to trigger a massive explosion outside, momentarily disorienting the remaining enemy forces and filling the area with thick smoke. The character then takes a defensive position, firing through gaps in the structure to repel an incoming counter-attack until a final explosion or flash concludes the engagement. Chapters: 0:00:00 - 0:00:12 - Initial approach and long-range engagement under fire 0:00:12 - 0:00:26 - Breaching the compound perimeter and entering the first structure 0:00:26 - 0:00:40 - Close-quarters combat in hallways and deployment of remote explosives 0:00:40 - 0:00:59 - Remote detonation and final defensive stand against enemy waves 📖 Interactive written walkthrough with clickable timestamps: https://pixelfungaming.com/videos/insurgency-farmhouse-quick-cache-ied-destruction-shorts-insurgencysandstorm

Dead Island 2: Going Viral Walkthrough | Zom-B-Gon Weapon Reward
Check out our website: https://pixelfungaming.com Follow our Facebook page: https://www.facebook.com/pixelfungames Chapters: 00:00:00 - 00:01:03 - Meeting Amanda Styles and the Stream Proposal 00:01:03 - 00:01:36 - Activating CCTV Cameras for the Livestream 00:01:36 - 00:04:40 - Battle with the TyBecca Power Couple 00:04:40 - 00:05:51 - Slaying Fashion Icons Claritee and Bijou 00:05:51 - 00:07:21 - Navigating the Red Carpet Toward Romero's Stage 00:07:21 - 00:08:38 - Combat Against Amar and Sir Treble 00:08:38 - 00:11:24 - Surviving the Crowds Near the Stage 00:11:24 - 00:12:42 - Confronting the Infected Amanda Styles 00:12:42 - 00:13:40 - Defeating Nickolas De Leon 00:13:40 - 00:16:07 - Final Vlog Message and Mission Completion 📖 Interactive written walkthrough with clickable timestamps: https://pixelfungaming.com/videos/dead-island-2-going-viral-walkthrough-zom-b-gon-weapon-reward

Insurgency: Sandstorm | Explosive Drone Comes Through The Door
The mission begins with the objective to fall back and defend point Charlie. The character takes up a tactical position inside a dilapidated building, aiming an assault rifle through various openings to secure the perimeter. Brief combat occurs as shots are fired toward external threats from behind sandbag fortifications. Suddenly, a makeshift suicide drone enters the building through a side entrance. Despite attempts to neutralize it with rapid fire, the drone explodes upon impact, instantly killing the character. The gameplay then shifts to a spectator view of a teammate remaining on the battlefield near large cargo trucks and concrete barriers as the team awaits a respawn. Chapters: 0:00:00 - 0:00:04 - Positioning for defense at Objective Charlie 0:00:04 - 0:00:08 - Engaging enemies from within the building 0:00:08 - 0:00:11 - Suicide drone entry and detonation 0:00:11 - 0:00:19 - Death and transition to spectator mode 📖 Interactive written walkthrough with clickable timestamps: https://pixelfungaming.com/videos/insurgency-sandstorm-explosive-drone-comes-through-the-door

Hitman 2 : Isle of Sgail | Office Keycard Location
The mission begins with the character approaching a secure wall cabinet in a dimly lit hallway. A quick interaction unlocks the panel, revealing an Office Keycard which is promptly added to the inventory. After securing the item, the character moves through a nearby wooden door. The focus then shifts to the mission interface, displaying the status of various objectives for the Territory Takedown. While the 'No Combat' objective is marked as failed, the requirement for using a silenced firearm is shown as completed. The map of the Isle of Sgàil is then opened, providing a detailed layout of the Ark Society location, specifically highlighting the Restoration Room and the Ark Control Room as the character reviews the area for tactical planning. Chapters: 0:00:00 - 0:00:05 - Unlocking the wall cabinet and finding the Office Keycard 0:00:05 - 0:00:11 - Moving through the doorway and accessing the menu 0:00:11 - 0:00:18 - Reviewing mission objectives and syndicate member status 0:00:18 - 0:00:34 - Detailed map inspection of the Isle of Sgàil 📖 Interactive written walkthrough with clickable timestamps: https://pixelfungaming.com/videos/hitman-2-isle-of-sgail-office-keycard-location

RDR2 - Machine Gun Execution
The gameplay begins with the character picking up a bound prisoner inside a wooden cabin. They carry the captive outside and place them on a large wooden workbench in the center of the camp. After positioning the victim, the character mounts a nearby Maxim gun and fires a lethal barrage at point-blank range, resulting in an honor penalty. The character then locates another tied prisoner near some crates, picks them up, and carries them over to a lit campfire. They drop the prisoner directly into the flames and watch as the victim burns to death. The final sequence features the character using explosives to clear the remaining area. They throw dynamite or shoot explosive barrels near other bound individuals and tents, causing massive explosions that destroy the camp structures and eliminate the remaining targets. Chapters: 0:00:00 - 0:00:20 - Transporting the first captive from the cabin to the workbench 0:00:20 - 0:00:51 - Executing the prisoner with a mounted Maxim gun 0:00:51 - 0:01:32 - Burning a second captive in the camp fire 0:01:32 - 0:01:52 - Destroying the camp and remaining captives with explosives 📖 Interactive written walkthrough with clickable timestamps: https://pixelfungaming.com/videos/rdr2-machine-gun-execution

Insurgency: Sandstorm | Hillside CO OP Checkpoint (Observer) No Deaths
The squad initiates an assault on the snowy Hillside map, focusing on the first objective, Alpha. After securing the position, the team endures a prolonged defense, utilizing heavy air support to repel waves of enemy insurgents. The gameplay then shifts towards urban warfare as the squad navigates through a dense village. Combat becomes increasingly tactical, with players using Molotov cocktails and precise room-clearing techniques to take control of Objective Bravo. The advance continues through narrow alleyways and multi-story structures, requiring constant communication and cover fire. The match reaches its climax at the final objective, where the team holds a fortified position against a final, desperate enemy counter-attack, eventually securing a complete match victory. Chapters: 0:00:00 - 0:01:25 - Initial assault and capturing Objective Alpha 0:01:25 - 0:03:17 - Defending Alpha against heavy counter-attacks 0:03:17 - 0:05:22 - Tactical push through the village outskirts 0:05:22 - 0:06:50 - Room clearing and securing Objective Bravo 0:06:50 - 0:08:44 - Advancing through the streets to secure Objective Delta 0:08:44 - 0:10:05 - Breaching operations for Objective Echo 0:10:05 - 0:11:29 - Final defensive stand and match victory results 📖 Interactive written walkthrough with clickable timestamps: https://pixelfungaming.com/videos/insurgency-sandstorm-hillside-co-op-checkpoint-observer-no-deaths
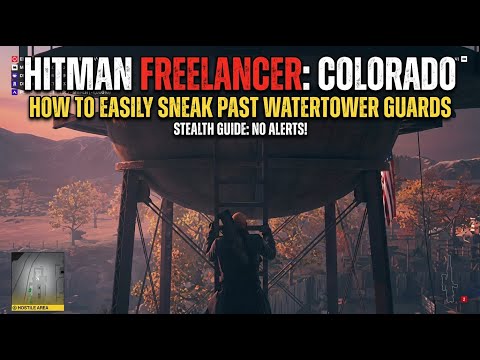
HITMAN Freelancer: Colorado - How To Easily Sneak Past Watertower Guards #hitman
Agent 47 begins the mission stationed on top of a water tower overlooking a high-security farm in Colorado. From this vantage point, he monitors the movements of patrolling guards and scouts for syndicate members using his sniper rifle scope. After concluding his initial surveillance, he descends the long ladder to ground level and moves cautiously through the restricted area. He reaches a wooden building and locates a supply crate tucked under a metal staircase. Opening the crate reveals essential gear, and he selects the emetic rat poison to help neutralize a target later in the mission before continuing his infiltration. Chapters: 00:00:00 - 00:00:22 - Surveillance and scouting from the water tower 00:00:22 - 00:00:32 - Descending to ground level and moving through the compound 00:00:32 - 00:00:41 - Looting the supply crate for poison and equipment 📖 Interactive written walkthrough with clickable timestamps: https://pixelfungaming.com/videos/hitman-freelancer-colorado-how-to-easily-sneak-past-watertower-guards-hitman

HITMAN Freelancer: Big Pharma Leader Takedown #shorts
The mission unfolds in a tropical resort setting as Agent 47 tracks a Syndicate Leader. Using instinct mode, he monitors the target's movement through walls while she walks along a balcony and engages in conversation. Agent 47 moves into a private bathroom to wait for his opportunity. When the target enters and becomes distracted, he uses a Kalmer 2 Tranquilizer to incapacitate her instantly. Once she is down, he proceeds with the final elimination, successfully completing multiple payout and prestige objectives. After confirming the kill with a Tanto, Agent 47 loots a few nearby items, including a newspaper and sunglasses, while keeping an eye on other nearby NPCs before preparing to extract from the area. Chapters: 0:00:00 - 0:00:13 - Tracking the target through walls 0:00:13 - 0:00:23 - Infiltrating the bathroom and sedating the leader 0:00:23 - 0:00:41 - Eliminating the target and completing objectives 0:00:41 - 0:00:57 - Looting items and monitoring surroundings 📖 Interactive written walkthrough with clickable timestamps: https://pixelfungaming.com/videos/hitman-freelancer-big-pharma-leader-takedown-shorts

Red Dead Redemption 2 Rescuing Sean Walkthrough
Arthur Morgan and Javier Escuella initiate a high-stakes rescue mission to save their fellow gang member, Sean McGuire, from bounty hunters. The operation begins with a stealthy approach through a narrow canyon, where Arthur uses a bow to silently eliminate guards. The situation quickly escalates into a full-scale shootout as more bounty hunters emerge from the rocky terrain. Arthur switches to his repeater, moving from cover to cover and systematically taking down enemies. The combat intensifies as two mounted bounty hunters charge the position, followed by a large-scale engagement at the main camp near stacks of timber and supply wagons. Arthur utilizes his Dead Eye ability to gain an advantage against superior numbers. After clearing the camp, Arthur finds Sean hanging upside down from a tree and cuts him down with a knife. The rescue concludes with a meeting between Arthur, Javier, Charles Smith, and Josiah Trelawny, where they celebrate Sean's return before splitting up to evade further patrols. Chapters: 0:00:00 - 0:00:35 - Stealth infiltration in the canyon 0:00:35 - 0:01:18 - Initial gorge shootout 0:01:18 - 0:02:00 - Advancing through the rocky passage 0:02:00 - 0:02:40 - Combat against mounted bounty hunters 0:02:40 - 0:03:05 - Approaching the main camp site 0:03:05 - 0:04:20 - Massive shootout at the timber yard 0:04:20 - 0:04:50 - Clearing out the remaining guards 0:04:50 - 0:05:25 - Rescuing Sean from the tree 0:05:25 - 0:06:42 - Post-rescue dialogue and departure 📖 Interactive written walkthrough with clickable timestamps: https://pixelfungaming.com/videos/red-dead-redemption-2-rescuing-sean-walkthrough

RDR2 - A Look Inside Moonshiners Shack
The mission begins at a campsite at night, where the character interacts with a dog before using a fast travel post to head to the Moonshine Shack. After arriving at the snowy location, the character consumes canned pineapples for health before entering the shack. Inside the main office, the character meets with Maggie Fike to access the Moonshiner Store. The store menu reveals various purchase options, including Toxic Moonshine, bar expansions, decor themes, and business upgrades like a condenser or polished copper still. The character also browses decorative photographs for the bar. After exiting the menu, the character heads downstairs to the distillery to check production status with Marcel. A new batch of moonshine is flavored, and the character then proceeds into the underground bar. The bar area is explored, with the character pouring and drinking several glasses of weak moonshine from the barrels and eating almonds from the counter. The screen begins to blur as the character sits with an NPC and continues drinking, eventually passing out. After recovering, the character walks back through the bar and distillery, returning upstairs to Maggie's office to conclude the session. Chapters: 0:00:00 - 0:00:26 - Fast traveling to the Moonshine Shack 0:00:26 - 0:01:07 - Arrival and entering the shack interior 0:01:07 - 0:02:12 - Browsing the Moonshiner Store upgrades and items 0:02:12 - 0:02:54 - Checking moonshine production with Marcel 0:02:54 - 0:03:44 - Drinking and eating in the underground bar 0:03:44 - 0:04:18 - Experiencing the effects of heavy drinking 0:04:18 - 0:05:00 - Returning to Maggie Fike's office 📖 Interactive written walkthrough with clickable timestamps: https://pixelfungaming.com/videos/rdr2-a-look-inside-moonshiners-shack

Hitman Freelancer: Isle of Sgail | Circumcision Knife Location
Agent 47 moves through a dimly lit storage area within a mountain facility. He stops at a specific wooden shipping crate marked with a red circular symbol. Upon opening the crate, he finds a unique melee weapon, the 'Circumcision Knife,' which he adds to his inventory alongside his hand flares. The interface then shifts to a detailed mission map for the current 'Territory Takedown' objective. The map displays multiple levels of the complex, highlighting key rooms such as the Gallery, Memory Room, and VIP Lounge, providing a strategic overview of the mission area before returning to the live gameplay environment. Chapters: 0:00:00 - 0:00:12 - Opening the shipping crate and discovering the unique knife 0:00:12 - 0:00:24 - Inventory management and item inspection 0:00:24 - 0:00:48 - Reviewing the mission map for Territory Takedown 0:00:48 - 0:00:53 - Returning to the warehouse area 📖 Interactive written walkthrough with clickable timestamps: https://pixelfungaming.com/videos/hitman-freelancer-isle-of-sgail-circumcision-knife-location

RDR2 - New Yorke Token Location In Big Valley Cave
Two characters ride a horse through a lush forest landscape, heading toward a rocky mountain range. They carefully navigate steep inclines and narrow paths until reaching a concealed cave entrance. After dismounting, they venture inside, using lanterns to illuminate the dark tunnels filled with stalactites and ancient cave paintings. They cross a makeshift wooden bridge over a subterranean pool and descend further into the cavern's depths. One character utilizes a metal detector to pinpoint a specific location on the cave floor. They dig into the earth and uncover the 1792 New Yorke Token, completing the collection of 15 coins for Madam Nazar. Following the successful find, they retrace their steps through the tunnels, emerge back into the bright daylight, and mount their horses to depart. Chapters: 0:00:00 - 0:00:50 - Horseback journey through the wilderness 0:00:50 - 0:01:20 - Finding and entering the hidden mountain cave 0:01:20 - 0:01:50 - Exploring the dark cavernous tunnels 0:01:50 - 0:02:25 - Locating and digging up the final coin collectible 0:02:25 - 0:03:00 - Exiting the cave and preparing to travel 📖 Interactive written walkthrough with clickable timestamps: https://pixelfungaming.com/videos/rdr2-new-yorke-token-location-in-big-valley-cave

RDR2 - Raspberry (Great Plains) Location
The gameplay begins with the character gathering raspberries in a dark field to fulfill a daily challenge requirement. After picking the first few berries, the character mounts a horse and rides across the grassy plains under a cloudy night sky to find more. The journey leads to another thicket where the character dismounts and continues foraging for wild plants. While exploring the area, the character uses Eagle Eye to track Sierra Nevada Bighorn Sheep moving across the landscape. After a short search, the character finds the remaining required raspberries, successfully completing the daily challenge and earning rewards. The session concludes with a detailed look at the game map, revealing the exact location of the foraging spot near Manzanita Post in the Tall Trees region. Chapters: 0:00:00 - 0:00:05 - Gathering the first raspberries 0:00:05 - 0:00:23 - Riding on horseback across the dark plains 0:00:23 - 0:01:10 - Locating and picking more berries in the brush 0:01:10 - 0:01:43 - Using tracking skills to find wildlife and plants 0:01:43 - 0:02:00 - Completing the daily challenge for raspberry picking 0:02:00 - 0:02:19 - Viewing the world map to identify the location 📖 Interactive written walkthrough with clickable timestamps: https://pixelfungaming.com/videos/rdr2-raspberry-great-plains-location

Dead Island 2: Fools Gold Walkthrough | Blood Rage Weapon Reward #Deadisland2
Check out our website: https://pixelfungaming.com Follow our Facebook page: https://www.facebook.com/pixelfungames Chapters: 0:00:00 - 0:00:48 - Investigating the Lifeguard Station 0:00:48 - 0:01:30 - Initial Beach Encounters 0:01:30 - 0:02:40 - Following the Paper Trail along the Boardwalk 0:02:40 - 0:03:55 - Shopfront Skirmishes with Electric Weapons 0:03:55 - 0:04:15 - Finding the Secret Code Clues 0:04:15 - 0:05:48 - Combat Against Specialized Zombie Variants 0:05:48 - 0:07:30 - Final Showdown at Lifeguard Headquarters 0:07:30 - 0:07:41 - Quest Completion and Loot Recovery 📖 Interactive written walkthrough with clickable timestamps: https://pixelfungaming.com/videos/dead-island-2-fools-gold-walkthrough-blood-rage-weapon-reward-deadisland2

Red Dead Online: Elk Knocks Me Off Cliff #funnymoment #shorts
The gameplay starts with the protagonist sprinting across a wooden train trestle at night. He reaches a rocky ledge and spots an enemy below. After aiming his weapon briefly, he leaps from the cliff, landing directly on the opponent. A cinematic fistfight ensues accompanied by an iconic sound bite. The action shifts to a different scene where the character rides on horseback through a field towards a small building, as swirling light particles surround the horse. Chapters: 0:00:00 - 0:00:05 - Character runs along train tracks and surveys the area from a cliff 0:00:05 - 0:00:11 - Cliff jump and aerial takedown on an unsuspecting enemy 0:00:11 - 0:00:21 - Melee combat sequence followed by a transition to black 0:00:21 - 0:00:24 - Horseback riding toward a cabin with special glowing effects 📖 Interactive written walkthrough with clickable timestamps: https://pixelfungaming.com/videos/red-dead-online-elk-knocks-me-off-cliff-funnymoment-shorts

RDR2 - Poisoning Moonshine (STEALTH) Big Valley Ranch
The mission begins with a dialogue between the character and Maggie Fike, who explains the cutthroat rivalry in the moonshining business and tasks the character with sabotaging a competitor. Following the briefing, a long ride on horseback takes the character through the scenic forests and plains of West Elizabeth towards a target ranch. Upon arrival at Painted Sky, the character dismounts and utilizes stealth to navigate around the perimeter, scouting for guards. Using a bow and arrow, the character silently eliminates a ranch hand near the barn to maintain cover. Once inside the barn, the character reaches the rival's still and poisons the batch. The mission concludes with a successful escape from the area, leading to a mission completion notification and a rank-up in the Moonshiner role. Chapters: 0:00:00 - 0:00:38 - Mission briefing with Maggie Fike 0:00:38 - 0:02:32 - Traveling to the rival's ranch on horseback 0:02:32 - 0:03:55 - Infiltrating the ranch using stealth tactics 0:03:55 - 0:04:20 - Sneaking into the barn and poisoning the still 0:04:20 - 0:05:02 - Escaping the area and mission completion 📖 Interactive written walkthrough with clickable timestamps: https://pixelfungaming.com/videos/rdr2-poisoning-moonshine-stealth-big-valley-ranch

Dead Island 2: Terror Of Stage 7 Walkthrough | Jade Dragon Weapon Reward
Check out our website: https://pixelfungaming.com Follow our Facebook page: https://www.facebook.com/pixelfungames Chapters: 0:00:00 - 0:01:05 - Dialogue with Sarah Sheppard and mission start 0:01:05 - 0:01:35 - Navigating the Monarch Studios lot 0:01:35 - 0:03:40 - Clearing hostiles in the Sound Stage 7 Ruins Set 0:03:40 - 0:04:35 - Moving to the City Set and finding the first victim 0:04:35 - 0:06:30 - Investigating remaining victims in the backlot 0:06:30 - 0:07:55 - Luring zombies into the City Set trap 0:07:55 - 0:10:45 - Boss Fight: Defeating the Terror of Sound Stage 7 0:10:45 - 0:11:56 - Returning to Sarah and claiming the Jade Dragon reward 📖 Interactive written walkthrough with clickable timestamps: https://pixelfungaming.com/videos/dead-island-2-terror-of-stage-7-walkthrough-jade-dragon-weapon-reward

Red Dead Online: Train Destroys My Hunting Wagon 🙃 #funnymoment #Shorts
The scene begins in the open wilderness of Red Dead Redemption 2, where the character stands on a grassy hillside carrying a deer carcass over their shoulder. In the middle distance, a small wooden cart sits abandoned directly on a set of train tracks. A steam locomotive soon appears from the left, puffing thick black smoke as it moves steadily toward the stationary vehicle. The train collides with the cart, causing it to shatter and disappear instantly. Immediately following the impact, a black notification banner appears at the top of the screen, stating that the vehicle has been destroyed. The train continues its journey along the tracks while the camera remains focused on the destruction message against the backdrop of the departing locomotive. Chapters: 0:00:00 - 0:00:08 - Character observes the tracks while carrying a carcass 0:00:08 - 0:00:15 - Steam train approaches and collides with the cart 0:00:15 - 0:00:28 - Vehicle destruction notification appears on screen 📖 Interactive written walkthrough with clickable timestamps: https://pixelfungaming.com/videos/red-dead-online-train-destroys-my-hunting-wagon-funnymoment-shorts
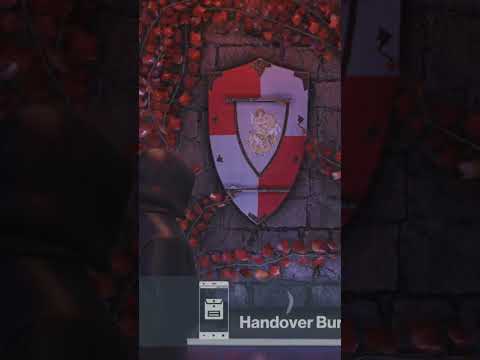
HITMAN Freelancer: Isle of Sgail | Axe & Mace Location #shorts
Agent 47 explores a corridor lined with stone walls and climbing red ivy. He approaches a decorative red and black shield adorned with crossed axes and a central emblem. He extracts a cannonball from his inventory and places it near the shield, then collects a sappers axe that falls from the display. Moving to an adjacent white and red shield featuring a sword, he retrieves a mace. He proceeds to throw cannonballs at the shields, testing for environmental triggers or hidden mechanisms. The focus shifts to the tactical map, where he analyzes the layout of the penthouse and monitors the movement of various suspects during a high-stakes Syndicate Showdown mission. Chapters: 0:00:00 - 0:00:12 - Interacting with the axe shield and collecting items 0:00:12 - 0:00:24 - Moving to the sword shield to gather the mace 0:00:24 - 0:00:38 - Testing shield triggers by throwing cannonballs 0:00:38 - 0:01:00 - Analyzing the penthouse map during a Syndicate Showdown 📖 Interactive written walkthrough with clickable timestamps: https://pixelfungaming.com/videos/hitman-freelancer-isle-of-sgail-axe-mace-location-shorts

AC Valhalla : Breaking Teeth, Not Hearts - World Event
The gameplay opens with the character, Eivor, following two Norse companions through a dark, rugged forest as part of the 'Hunter's Repast' world event. Eivor tracks the path of a dangerous creature through the undergrowth. A white wolf suddenly attacks, initiating combat. Eivor swiftly counters the wolf's lunges and defeats it, acquiring leather resources. The group continues following the tracks, with the companions commenting on the proximity of the creature. They descend toward a rocky, wet shoreline area. Another, larger predator—a fierce brown cougar—appears and attacks. Eivor engages in intense melee combat, dodging the aggressive animal and using a series of quick axe strikes. Eivor successfully defeats the large cat using a final heavy blow. The companions praise Eivor's fighting prowess, noting the ferocity of the felled beast. Completing the hunt triggers the 'Breaking Teeth, Not Hearts' World Event completion, granting a large amount of XP. The Norse companions express their gratitude, and Eivor continues the quest toward the objective marker to speak with Hilde. Chapters: 0:00 - 1:40 - Tracking and Initial Combat with the Wolf 1:40 - 2:30 - Confronting the Ferocious Cougar and Completing the World Event 📖 Interactive written walkthrough with clickable timestamps: https://pixelfungaming.com/videos/ac-valhalla-breaking-teeth-not-hearts-world-event

GTA Online: Stealing Vehicle Cargo With EMP Launcher #shorts
The mission begins with a high-speed motorcycle pursuit through the moonlit streets of Los Santos. A rider chases a classic light-blue sports car, navigating through urban traffic with precision. Upon catching up to the target at an intersection, the rider dismounts and neutralizes the driver with several shots from a compact firearm. The rider then seizes control of the vehicle, which is identified as cargo from the Ex-Presidents. A fast-paced drive through the city follows, with the car weaving between lanes and narrowly avoiding collisions with other motorists. The journey concludes at a secure warehouse facility. After driving into the delivery marker, a confirmation message indicates the vehicle cargo has been successfully stolen. The sequence ends with a brief walkthrough of the warehouse interior. Chapters: 0:00:00 - 0:00:11 - Nighttime motorcycle pursuit through city streets 0:00:11 - 0:00:18 - Neutralizing the driver and hijacking the vehicle 0:00:18 - 0:00:41 - High-speed urban driving in the stolen sports car 0:00:41 - 0:00:52 - Delivering the stolen cargo to the warehouse 0:00:52 - 0:01:00 - Post-delivery warehouse interior overview 📖 Interactive written walkthrough with clickable timestamps: https://pixelfungaming.com/videos/gta-online-stealing-vehicle-cargo-with-emp-launcher-shorts

Insurgency: Sandstorm Teammate gets blown to pieces ( Regular Speed )
The character navigates a war-torn desert urban environment, moving cautiously past sandbag fortifications and ruined buildings. After taking a tactical position behind the bed of a damaged pickup truck, intense combat erupts. The character uses a scoped rifle to engage multiple targets across a courtyard and within a two-story building. Suppression fire from allies and incoming enemy rounds create a chaotic atmosphere. A powerful explosion rocks the immediate area near the 0:23 mark, kicking up debris and smoke, but the character maintains their position and continues to eliminate threats with precise shots until the area is secured. Chapters: 0:00:00 - 0:00:06 - Tactical advance to cover 0:00:06 - 0:00:15 - Engagement of balcony snipers 0:00:15 - 0:00:22 - Mid-range firefight against multiple hostiles 0:00:22 - 0:00:27 - Direct hit explosion and rapid recovery 0:00:27 - 0:00:34 - Final suppression of enemy positions 📖 Interactive written walkthrough with clickable timestamps: https://pixelfungaming.com/videos/insurgency-sandstorm-teammate-gets-blown-to-pieces-regular-speed

RDR2 - Madam Nazar Location December 11th 2019
The session begins with a character riding through the misty hills of the Grizzlies toward Window Rock. Upon reaching Madam Nazar’s colorful traveling caravan, the character dismounts and approaches the vendor. An extensive selling session follows, where various collectible sets are exchanged for cash and experience points. Items sold include the full Cups Tarot Card Set, rare coins like the 1795 Half Eagle and 1800 Gold Dollar, and other curiosities such as splintered arrowheads and family heirlooms. Madam Nazar provides her signature cryptic commentary throughout the transactions. Mid-transaction, the world map opens to pinpoint her current location at Window Rock, situated just north of Cumberland Forest. After concluding the business, the character returns to their horse and departs from the camp, heading back out into the wilderness. Chapters: 0:00:00 - 0:00:20 - Approaching Madam Nazar's caravan at Window Rock 0:00:20 - 0:00:52 - Selling collectible sets and individual items 0:00:52 - 0:01:21 - Viewing Madam Nazar's location on the world map 0:01:21 - 0:01:30 - Finalizing sales and listening to Madam Nazar's dialogue 0:01:30 - 0:01:38 - Mounting the horse and departing the area 📖 Interactive written walkthrough with clickable timestamps: https://pixelfungaming.com/videos/rdr2-madam-nazar-location-december-11th-2019

RDR2 - Surviving player bounty underground
The character navigates a snowy landscape, seeking refuge inside a weathered wooden shack. Preparations begin by consuming health tonics and selecting specialized ammunition. As bounty hunters approach, the character maintains a defensive position, monitoring the entrances while clutching a shotgun. An explosive blast rocks the structure, followed by another that ignites the interior. Combat intensifies as a burning bounty hunter breaches the cabin, only to be neutralized immediately. The character moves outside amidst the chaos, using a bolt-action rifle and dynamite to repel the remaining attackers. A series of close-range shotgun blasts finishes off the last of the hostiles. The encounter concludes with the character looting the fallen enemies and surveying the charred remains of the hideout under the moonlight. Chapters: 0:00:00 - 0:01:13 - Preparing for the encounter and taking cover 0:01:13 - 0:02:19 - Maintaining a defensive stance during the initial explosion 0:02:19 - 0:03:10 - Engaging bounty hunters as the cabin burns 0:03:10 - 0:04:05 - Repelling attackers with explosives and shotgun combat 0:04:05 - 0:04:54 - Looting bodies and surveying the aftermath 📖 Interactive written walkthrough with clickable timestamps: https://pixelfungaming.com/videos/rdr2-surviving-player-bounty-underground

Red Dead redemption 2 Live Action
The gameplay takes place in the town of Blackwater and surrounding areas in Red Dead Online. It features a series of chaotic encounters between a character and other outlaws. The session involves frequent horse riding, lassoing both NPCs and other players, and intense shootouts with various firearms like revolvers and repeaters. Combat often results in death, followed by quick respawns and a frantic rush back into the fray. Key moments include rooftop sniping from the town's buildings, high-speed horseback chases through the streets, and close-quarters grappling and fistfights. The cycle of combat and respawn continues throughout the day and into the night, showcasing the volatile nature of the town during this online session. Chapters: 0:00:00 - 0:00:40 - Navigating the dusty streets of Blackwater on horseback 0:00:40 - 0:01:50 - Engaging in a brief gunfight followed by a cross-country sprint after a respawn 0:01:50 - 0:02:40 - Lassoing a target in the street leading to a fatal encounter 0:02:40 - 0:04:15 - Returning to town from the outskirts and facing immediate gunfire 0:04:15 - 0:05:15 - Engaging in a high-speed chase and shootout across the town perimeter 0:05:15 - 0:06:20 - Subduing an adversary with a lasso and managing a hostile confrontation 0:06:20 - 0:07:40 - Tactical repositioning after death and engaging in a horseback duel 0:07:40 - 0:09:10 - Exploring the back alleys and main roads while dodging bullets 0:09:10 - 0:10:30 - Scaling a ladder to reach a rooftop vantage point for sniping 0:10:30 - 0:12:10 - Night falls over Blackwater as street-level combat intensifies 0:12:10 - 0:13:00 - Rapid-fire exchanges in the town center ending in a defeat 0:13:00 - 0:14:00 - Returning to the rooftops to hold a defensive position 0:14:00 - 0:15:06 - Final stand on the building tops during an extended shootout 📖 Interactive written walkthrough with clickable timestamps: https://pixelfungaming.com/videos/red-dead-redemption-2-live-action
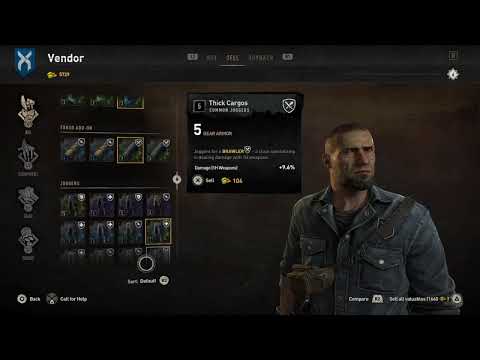
Dyling light 2 stream - Short Stream
Aiden begins his journey in a high-rise safe zone overlooking the dilapidated cityscape of Villedor. Exploration through the city streets is characterized by fluid parkour, involving wall-running and daring leaps between rooftops. Early encounters with the infected require quick reactions and melee combat, but the utility of the Peacekeeper (PK) Crossbow soon becomes evident for taking down enemies from a distance. A significant interaction occurs at a local cathedral where Aiden meets an NPC named Pete, leading to the initiation of the 'Could You Repeat' side quest. Traversing the sprawling urban environment involves frequent use of the paraglider to bridge wide gaps and bypass ground-level hazards. Strategic pauses allow for management of the skill tree, upgrading parkour and combat abilities to enhance Aiden's survival prospects. Stealth becomes a primary tactic during interior building investigations, utilizing the crossbow for silent takedowns. The journey concludes with an extensive paraglider flight at dusk to secure a military airdrop on a remote rooftop, yielding valuable high-tier equipment. Traversing the nocturnal skyline of Villedor begins with fluid paragliding and expert parkour maneuvers across dilapidated rooftops. The character utilizes a grappling hook to bridge gaps between buildings and climb steep surfaces. Upon reaching a secure safe zone, an encounter with a local vendor allows for extensive inventory management. Valuables are liquidated for currency, and critical resources such as scraps, resin, and medicine are procured to bolster survival chances. After the trading session, the character stays within the relative safety of the fortified rooftop, observing the atmospheric city environment and the distant lights of the urban sprawl as the night cycle continues. Chapters: 0:00:00 - Menu navigation and loading into the game world 0:01:45 - Inventory management and initial map analysis 0:04:00 - First combat encounters and traversal on the city streets 0:07:00 - Building exploration and parkour movement techniques 0:09:50 - Dialogue with NPC Pete and quest initiation 0:12:30 - In-depth skill tree upgrades and menu navigation 0:15:00 - Paraglider navigation across the urban cityscape 0:18:00 - High-rise stealth combat using the PK crossbow 0:20:15 - Final paraglider flight and military airdrop retrieval 00:00:00 - Nighttime paragliding and rooftop parkour traversal 00:02:45 - Utilizing the grappling hook for vertical navigation 00:05:10 - Entering a rooftop safe zone and approaching a vendor 00:07:20 - Detailed trading and resource acquisition at the vendor menu 00:10:30 - Inventory review and equipment management 00:13:00 - Observing the safe zone environment and surrounding skyline 00:16:15 - Static surveillance of the city from the safety of the base 00:19:30 - Extended period of character idling within the safe house 00:22:45 - Monitoring rooftop activity and ambient environmental sounds 00:25:50 - Continued stationary positioning in the secure zone 00:28:40 - Final atmospheric observations before the session ends 📖 Interactive written walkthrough with clickable timestamps: https://pixelfungaming.com/videos/dyling-light-2-stream-short-stream

ACOD LIVE GAMEPLAY
Alexios begins by stealthily clearing a small enemy camp under the cover of night, using his bow for precise headshots. He then takes a moment to review his growing list of tasks in the quest menu, including investigations into the Delian League and local favors. A thorough examination of the world map follows, identifying points of interest across the rugged terrain of Phokis. After a brief ride through the wilderness, Alexios encounters a woman in need and accepts a new contract titled 'Dances with Witches.' The journey continues with aerial scouting using Ikaros to mark targets within fortified positions. The infiltration of Nine Roads Camp transitions from careful archery to a chaotic melee brawl against multiple Spartan soldiers. The sequence concludes unexpectedly during a confrontation with wild boars that leads to a sudden desynchronization. The mission begins with the character navigating the rugged, mountainous terrain of Megaris. Significant time is spent traversing steep trails and utilizing parkour to scale sheer rock faces as the sun begins to set. Upon reaching the border of Boeotia, the character focuses on the massive Fort of Plataia. A tactical approach involves climbing high cliffs to gain a vantage point over the garrison. After scouting the interior from the battlements, a stealthy takedown attempt on a tower guard fails, triggering an immediate alert. A chaotic skirmish ensues against multiple Athenian soldiers. Forced to retreat due to the overwhelming numbers, the character leaps from the walls and sprints through a desolate, burned forest area. The sequence concludes with a successful escape on horseback, riding away from the pursuing guards into the open countryside. Chapters: 00:00:00 - Stealthy infiltration and archery at a small camp 00:01:12 - Reviewing active quests and odyssey chapters 00:02:42 - Scouting the Phokis region via the world map 00:04:15 - Riding through the countryside on horseback 00:04:53 - Interaction with a quest giver for 'Dances with Witches' 00:05:58 - Using Ikaros to tag enemies and discover locations 00:06:52 - Strategic map planning and waypoint management 00:09:42 - Approaching Desphina Fort for scouting 00:10:05 - Initiating combat at Nine Roads Camp with bow and arrow 00:11:00 - Engaging in direct melee combat with Spartan guards 00:11:35 - Sudden animal attack leading to player death 0:00:00 - Exploration and climbing through the mountains of Megaris 0:05:30 - Progressing toward the Boeotia region boundary 0:10:15 - Arrival at the outskirts of the Fort of Plataia 0:14:45 - Strategic scouting of the fort's defenses from a high vantage point 0:19:20 - Scaling the vertical rock faces to reach the fort walls 0:24:00 - Navigating the fort battlements in stealth mode 0:27:05 - Combat engagement with fort guards after a failed stealth attack 0:29:15 - Retreating from the fort and escaping on horseback 📖 Interactive written walkthrough with clickable timestamps: https://pixelfungaming.com/videos/acod-live-gameplay

Red Dead Online: 2 VS 1 In Valentine Using Rolling Block
The gameplay session begins with the character navigating fast travel menus to arrive at Manzanita Post, where an immediate ambush leads to a quick death. Following a respawn, the character engages in high-intensity mounted combat across the open plains of the Heartlands, using a scoped Carcano rifle to pick off rivals from a distance. The character moves through dense forests and rocky hills, consistently utilizing Dead Eye and tonics to maintain a combat advantage. Skirmishes move toward a small camp and town outskirts, where tactical positioning allows for suppressive fire against multiple targets. Mid-video action transitions into brutal close-quarters combat featuring dual-wielded revolvers and a series of lethal knife executions. The latter half of the gameplay focuses on long-range sniper duels from mountain peaks, showcasing precision shots across vast valleys. The character concludes the session by securing a final killstreak and performing celebratory emotes from a high vantage point. Chapters: 00:00:00 - 00:02:30 - Fast Travel and Initial Ambush Skirmishes 00:02:30 - 00:05:00 - Close-Range Fighting Near the Camp 00:05:00 - 00:07:30 - Long-Range Sniping Along the Ridges 00:07:30 - 00:10:00 - Tactical Maneuvers Near the Town Outskirts 00:10:00 - 00:13:00 - Suppressive Fire Across Open Terrain 00:13:00 - 00:16:00 - Brutal Melee and Close-Quarters Combat 00:16:00 - 00:19:00 - High-Altitude Sniper Duels Across Valleys 00:19:00 - 00:22:40 - Final Killstreak and Celebration 📖 Interactive written walkthrough with clickable timestamps: https://pixelfungaming.com/videos/red-dead-online-2-vs-1-in-valentine-using-rolling-block

RDR2: Loading Murfree Broods Into Wagon
The journey begins on a dark, wooded trail as a horse-drawn wagon moves through the night. Arthur Morgan hears cries for help and intervenes just as Murfree Brood members prepare to torture a captured man. After a brief physical confrontation, the outlaws are incapacitated and the victim is set free. The focus then shifts to a systematic collection of unconscious Murfree Brood members found in the area. Each outlaw is hogtied and tossed into the back of the wagon. This process continues until the wagon bed is filled with screaming captives. Once loaded, the wagon heads toward civilization, entering the town of Annesburg. The drive through the town's main streets and industrial zones causes a stir among the local residents, who react with shock and alarm to the sight and sound of the wagon full of tied-up outlaws pleading for release. Chapters: 0:00:00 - 0:00:45 - Intervening in a Murfree Brood ambush 0:00:45 - 0:01:30 - Rescuing the captured victim 0:01:30 - 0:04:00 - Hogtying outlaws and loading the wagon 0:04:00 - 0:06:30 - Collecting more captives to fill the wagon 0:06:30 - 0:07:15 - Approaching the town of Annesburg 0:07:15 - 0:08:40 - Driving the captive-filled wagon through town 📖 Interactive written walkthrough with clickable timestamps: https://pixelfungaming.com/videos/rdr2-loading-murfree-broods-into-wagon

GTAV : Cayo Perico Heist - Elite Challenge ( Longfin Approach )
The Cayo Perico heist begins with an amphibious landing at the North Dock. The character moves stealthily, avoiding guard vision cones to find an island guard disguise near a fishing pier. After changing clothes, the character re-enters the Longfin boat and navigates to the island's airfield. Upon arrival, the character scouts for equipment, securing a grappling hook and locating a supply truck. Secondary looting takes place in a large hangar, where a cutting torch is used to access stashed drugs. The character then drives the supply truck across the island, passing through checkpoints by using the disguise. At a secondary warehouse, more loot is gathered until the bag is full. The character then drives to the compound's perimeter and uses the grappling hook to scale the wall. Once inside, guards are eliminated silently to obtain gate keys. The character enters El Rubio’s office to loot a hidden wall safe before heading to the underground vault. A fingerprint hack grants access to the elevator, leading down to the vault where the Bearer Bonds are stored in a safe. After securing the primary target, the character escapes the compound by scaling the wall again and swims out to sea, eventually hijacking a dinghy to flee the island. The mission concludes with a successful delivery of the loot and a final payout screen showing the heist statistics. Chapters: 0:00:00 - 0:01:15 - Initial landing and finding the island guard disguise 0:01:15 - 0:03:15 - Coastal navigation to the airfield and finding grappling equipment 0:03:15 - 0:04:30 - Scouting the airfield and secondary looting in the hangar 0:04:30 - 0:06:00 - Driving the supply truck to the compound gate and gathering more loot 0:06:00 - 0:07:45 - Scaling the compound wall and eliminating guards stealthily 0:07:45 - 0:09:00 - Hacking the elevator and looting the underground vault 0:09:00 - 0:10:35 - Escaping the island and final heist payout summary 📖 Interactive written walkthrough with clickable timestamps: https://pixelfungaming.com/videos/gtav-cayo-perico-heist-elite-challenge-longfin-approach

GTA 5 Online - How To Create A Motorcycle Police Outfit ( No glitches )
The character meticulously assembles a tactical law enforcement-style outfit within the closet of a luxury high-rise apartment. The process begins by navigating through various clothing categories to select a navy tucked service shirt. Next, the character browses the pants menu and chooses navy cargo pants to match the upper attire. The look continues with the selection of a white open-face helmet and smoke-tinted aviator glasses. To complete the specialized gear, the character equips black armored gloves and a black wristwatch from the accessories categories. After finalizing the clothing items, the character walks into the main hallway and uses the interaction menu to display standard body armor over the shirt, providing a complete tactical appearance. The session concludes with the character surveying the foggy Los Santos skyline through the apartment's expansive windows while receiving business notifications. Chapters: 0:00:00 - 0:00:34 - Selecting the navy tucked service shirt 0:00:34 - 0:01:04 - Choosing navy cargo pants 0:01:04 - 0:01:21 - Equipping the white open-face helmet 0:01:21 - 0:02:07 - Selecting smoke aviator glasses 0:02:07 - 0:02:37 - Adding armored gloves and a wristwatch 0:02:37 - 0:03:15 - Equipping body armor and viewing the city 📖 Interactive written walkthrough with clickable timestamps: https://pixelfungaming.com/videos/gta-5-online-how-to-create-a-motorcycle-police-outfit-no-glitches

RDR2 - Madam Nazar Location December 10th 2019
The gameplay session begins with a night-time ride toward Madam Nazar’s ornate traveling wagon located in the New Austin region. Upon arrival, an interaction menu opens, allowing for the sale of various gathered collectibles. The character sells multiple full sets, including Ancient Tools, Family Heirlooms, American Wild Flowers, Coins, and Lost Jewelry Rings. Each sale yields significant cash rewards and experience points, eventually triggering a Collector Award for completing weekly lists. Following the transactions, the in-game map opens to pinpoint Madam Nazar's exact location near Manteca Falls and Thieves Landing. The map interface zooms out to show the broader surrounding area of Henigan's Stead and the San Luis River before returning to the close-up view of the vendor's position to confirm the coordinates. Chapters: 0:00:00 - 0:00:08 - Arriving at Madam Nazar's wagon in New Austin 0:00:08 - 0:00:22 - Selling collectible sets for cash and XP 0:00:22 - 0:00:28 - Unlocking the Collector Award and weekly bonuses 0:00:28 - 0:00:55 - Reviewing map location near Manteca Falls 0:00:55 - 0:01:00 - Closing the map and returning to the campsite 📖 Interactive written walkthrough with clickable timestamps: https://pixelfungaming.com/videos/rdr2-madam-nazar-location-december-10th-2019

RDR2 - Eagle Flies Grave Location
The journey begins with a character navigating a horse through the dense forests of Ambarino. They approach the scenic cliffs of Donner Falls, where a humble memorial rests amidst the grass and stones. This memorial, a simple branch tied with black fabric, marks the grave of Eagle Flies. The character takes a moment to observe the site before the map opens to reveal the exact coordinates. The location sits directly north of Bacchus Bridge, providing a vantage point over the roaring waterfalls below. Chapters: 0:00:00 - 0:00:10 - Riding toward the cliffside overlook 0:00:10 - 0:00:25 - Discovering the grave site at Donner Falls 0:00:25 - 0:00:44 - Mapping the exact location of Eagle Flies' grave 📖 Interactive written walkthrough with clickable timestamps: https://pixelfungaming.com/videos/rdr2-eagle-flies-grave-location

RDR2 - Moonshine sabotage (Stealth) - Bayou Farm
The mission begins with an approach to a rival moonshiner camp through a swampy forest on horseback. Upon reaching the outskirts, the character dismounts and equips a bow for a stealthy infiltration. Silent arrows eliminate the first several guards stationed around the perimeter. Moving from cover to cover between trees and buildings, the character clears the camp with precise bow shots, ensuring no alarms are raised. A brief period of looting yields supplies from the downed enemies before moving to the primary objective. Reaching the target still, the character pours poison into the vat to sabotage the rival operation. The mission concludes with a fast escape on horseback through the woods as the sabotage is confirmed successful with a mission passed notification. Chapters: 0:00:00 - 0:00:15 - Arrival at the camp and preparation 0:00:15 - 0:01:05 - Eliminating the first lookouts with arrows 0:01:05 - 0:02:15 - Systematic clearing of the camp interior 0:02:15 - 0:02:45 - Looting the defeated moonshiners 0:02:45 - 0:02:55 - Poisoning the rival still 0:02:55 - 0:03:23 - Successful escape and mission completion 📖 Interactive written walkthrough with clickable timestamps: https://pixelfungaming.com/videos/rdr2-moonshine-sabotage-stealth-bayou-farm

RDR 2 Online - Stranger Mission - Repossession
The mission begins at a secluded lakeside cabin where an old man requests assistance in retrieving a stolen supply wagon. After accepting the task, the journey proceeds with an extensive horse ride across rugged mountain trails and through dense forests to reach the ambush site. Upon arriving near Six Points Cabin, a stealthy approach through the trees allows for the reclamation of the horse-drawn wagon from an enemy camp. As the return trip starts, a group of pursuers quickly gives chase, triggering an intense high-speed battle along winding cliffside roads. Frequent gunfights occur as pursuers on horseback attempt to stop the wagon, requiring precise aim while navigating the treacherous terrain. The mission concludes with the successful delivery of the supplies to a designated shack, followed by a brief moment of exploration near the water. Chapters: 0:00:00 - 0:01:23 - Meeting the Old Man and Accepting the Mission 0:01:23 - 0:03:30 - Initial Horse Ride Through the Mountains 0:03:30 - 0:05:02 - Navigating the Forest Trails Towards the Target 0:05:02 - 0:05:36 - Stealing the Wagon from the Enemy Camp 0:05:36 - 0:08:00 - High-Speed Wagon Escape and Defensive Combat 0:08:00 - 0:10:10 - Final Pursuit and Successful Wagon Delivery 0:10:10 - 0:10:22 - Mission Completion and Free Roam 📖 Interactive written walkthrough with clickable timestamps: https://pixelfungaming.com/videos/rdr-2-online-stranger-mission-repossession

RDR2 - Posse Friend Getting Drunk - Funny Moment
The gameplay begins in the dusty town of Armadillo, where the character enters the local saloon and orders a beer. After taking a seat on a plush red couch to enjoy the drink, the character explores the interior, eventually settling at a wooden table near the bar. The scene shifts to the saloon porch, where the character rests on a bench beside an ill townsperson. Suddenly, a violent encounter occurs outside as a woman is shot dead in the street. The character then picks up her body and carries it through the desolate town toward a mass grave. Upon reaching the graveyard, the character carefully places the deceased woman into an open wooden coffin, spending several moments adjusting her position to ensure she rests properly inside. Chapters: 0:00:00 - 0:00:15 - Entering the Armadillo saloon and ordering a drink 0:00:15 - 0:01:00 - Relaxing on the saloon couch with a beer 0:01:00 - 0:01:40 - Moving to a table and observing other patrons 0:01:40 - 0:02:10 - Resting on the porch bench next to a sick resident 0:02:10 - 0:02:30 - Witnessing a sudden shooting on the main street 0:02:30 - 0:03:00 - Carrying the deceased woman through town 0:03:00 - 0:03:54 - Delivering the body to the graveyard and arranging it in a coffin 📖 Interactive written walkthrough with clickable timestamps: https://pixelfungaming.com/videos/rdr2-posse-friend-getting-drunk-funny-moment

GTA Online| Best way to complete criminal damage
A B-11 Strikeforce pilot engages in the Criminal Damage Freemode event at Fort Zancudo. The mission begins with the pilot executing low-altitude strafing runs across the military base's runways during the night. Using the jet's explosive cannon and barrage missiles, the pilot systematically destroys parked Lazer fighter jets and military transport planes. The damage counter rises steadily as vehicles erupt in flames during successive passes. Night turns to dawn as the pilot continues the assault, maneuvering tightly to maintain line-of-sight on new targets. After amassing over $4.5 million in damages through persistent aerial bombardment, the event concludes with a victory message confirming the top rank. The pilot then banks the jet away from the base, flying toward the cityscape as the sun rises over the horizon. Chapters: 0:00:00 - 0:00:45 - Initial strafing run and first targets destroyed 0:00:45 - 0:01:30 - Sustained bombardment of parked aircraft on the runway 0:01:30 - 0:02:15 - Precision maneuvering and attacks on hangar area vehicles 0:02:15 - 0:03:00 - Cockpit view transition and continued aerial assault 0:03:00 - 0:03:45 - Heavy damage accumulation targeting transport planes 0:03:45 - 0:04:30 - Final high-value target destruction and event conclusion 0:04:30 - 0:05:00 - Victory confirmation and post-event flight at dawn 📖 Interactive written walkthrough with clickable timestamps: https://pixelfungaming.com/videos/gta-online-best-way-to-complete-criminal-damage

HITMAN Freelancer: PSY OPS Syndicate | Isle of Sgail - Final Showdown
Agent 47 begins a high-stakes Syndicate Showdown on the dark and rainy Isle of Sgàil. The mission starts with scaling the castle's rocky exterior to avoid initial security checkpoints. Isolating and neutralizing a guard early on provides a necessary disguise for navigating restricted areas. Using specific intel regarding the leader's appearance and habits—such as wearing glasses and suffering from dehydration—the search for the target begins throughout the winding corridors, kitchens, and galleries of the massive fortress. Scouting involves scanning various suspects with a camera to rule out decoys. Strategic path-clearing occurs as guards are lured into private rooms using environmental distractions like overflowing sinks and thrown objects to maintain a silent approach. After identifying the correct target, the execution is carried out in a private bathroom to minimize witnesses. The mission concludes with a daring dash past alerted security to reach a helicopter on the castle roof, marking the successful completion of the campaign. Chapters: 0:00:00 - 0:01:26 - Infiltration and First Disguise 0:01:26 - 0:04:02 - Exploring the Castle Substructure 0:04:02 - 0:06:30 - Identifying Suspects with the Scanner 0:06:30 - 0:09:00 - Clearing Security Paths Silently 0:09:00 - 0:11:30 - Navigating Upper Levels and Secret Areas 0:11:30 - 0:13:50 - Utilizing Distractions to Isolate Targets 0:13:50 - 0:15:35 - Confirming the Syndicate Leader 0:15:35 - 0:17:36 - Final Kill and Helicopter Extraction 📖 Interactive written walkthrough with clickable timestamps: https://pixelfungaming.com/videos/hitman-freelancer-psy-ops-syndicate-isle-of-sgail-final-showdown

RDR2 - Prairie Poppy (Great Plains) Location
The mission involves gathering Prairie Poppies in the Great Plains to complete a daily challenge in Red Dead Online. The character starts by harvesting several plants in the tall grass during the night, triggering a challenge completion notification and a streak update. After securing the necessary herbs, the journey continues on horseback across the dark, undulating landscape. Periodic uses of Eagle Eye help navigate and identify nearby resources in the low visibility. A brief stop allows for picking an additional poppy before checking the world map to confirm the current position south of Blackwater. The session concludes with a steady gallop across the open terrain as the character continues their exploration. Chapters: 0:00:00 - 0:00:22 - Harvesting Prairie Poppies and completing a daily challenge 0:00:22 - 0:01:34 - Navigating the Great Plains on horseback at night 0:01:34 - 0:01:51 - Collecting additional Prairie Poppy plants 0:01:51 - 0:02:10 - Checking the world map for current location south of Blackwater 0:02:10 - 0:02:19 - Resuming the ride across the open plains 📖 Interactive written walkthrough with clickable timestamps: https://pixelfungaming.com/videos/rdr2-prairie-poppy-great-plains-location

GTa 5 LIVE GAMEPLAY - Won new car
Welcome to an extensive 2.5-hour session of GTA Online open-world mayhem and business management. This video showcases the diverse activities available in Los Santos, featuring ecliberty as they navigate the chaotic streets of San Andreas. The gameplay starts with a competitive 'Stand Your Ground' event, where the player must defend a specific zone against waves of rival players in intense street combat. Following this, the focus shifts to CEO and MC club activities, including the high-stakes collection and delivery of Special Cargo, where every shipment is a target for others in the session. Watch as we execute 'Headhunter' assassination missions, taking out high-value targets across the city with strategic use of armored vehicles and aerial support. The action ramps up further with 'Client Jobs' launched from the Terrorbyte, including a stealthy drone-based jewelry heist in 'Diamond Shopping' and a frantic vehicle tracking mission in 'Data Sweep'. The latter part of the video features pure open-world destruction, utilizing the powerful TM-02 Khanjali tank to dominate the battlefield and the unique rampage ability of the Stone Hatchet for a melee combat spree in downtown. Whether it's high-speed chases, aerial dogfights in the Buzzard, or tactical ground warfare, this video captures the essence of the GTA Online experience. Chapters: 0:00:00 - Intro & Stand Your Ground Starts 0:03:15 - Defending the Zone 0:06:30 - Rival Player Attacks 0:09:45 - Intense Final Defense 0:12:05 - Stand Your Ground Victory 0:15:10 - General Free Roam and Menu Navigation 0:18:20 - Street Skirmish with Players 0:21:40 - Joining a New CEO Organization 0:24:50 - Special Cargo Collection Mission 0:27:15 - Delivering the Van while Under Fire 0:30:10 - Cargo Successfully Warehouse-d 0:33:25 - Start of Cargo Sale Mission 0:36:10 - Cargo Vehicle Destroyed by Rivals 0:39:40 - Finding a New Session Activity 0:42:55 - Stand Your Ground in Chamberlain Hills 0:45:15 - Tactical Firefights against Attackers 0:48:30 - Long-range Sniping Defense 0:51:05 - Holding the Line at the Park 0:54:20 - Repelling Persistent Adversaries 0:57:40 - Victory in Stand Your Ground 1:00:25 - Starting the Headhunter Mission 1:03:45 - Target Assassinations in Progress 1:06:15 - Final Headhunter Target Eliminated 1:09:50 - Collecting Rewards and Calling Vehicles 1:12:30 - Buzzard Helicopter Combat Initiation 1:15:55 - Aerial Dogfight with Rival Choppers 1:18:20 - Chopper Shot Down and Ground Fight 1:21:45 - Hostile Takeover Mission Start 1:24:10 - Briefcase Secured and Escape Attempt 1:27:35 - High-Speed Police Chase 1:30:50 - Hostile Takeover Briefcase Delivered 1:33:20 - Entering the Terrorbyte Mobile Center 1:36:15 - Starting Diamond Shopping Client Job 1:39:45 - Drone Infiltration and Hacking 1:42:20 - Jewelry Store Heist Execution 1:45:55 - Diamond Delivery and Job Completion 1:48:15 - Initiating the Data Sweep Job 1:51:40 - Tracking and Hacking Mobile Data Targets 1:54:05 - Firefight with Security Units 1:57:30 - Final Data Retrieval and Delivery 2:00:50 - Open World PvP near Maze Bank Arena 2:03:20 - Spawning and Using the TM-02 Khanjali Tank 2:06:45 - Tank Domination in the Streets 2:09:15 - Heavy Ground Battle vs Multiple Players 2:12:35 - Tank Combat Highlights and Destruction 2:15:40 - Stone Hatchet Rampage Frenzy 2:18:10 - Downtown Melee Mayhem 2:21:25 - Police Confrontation after Rampage 2:24:50 - Evading 4-Star Wanted Level 2:27:30 - Return to CEO Office for Management 2:30:15 - Rebranding the Organization 2:33:40 - Final Gameplay Moments and Wrap-up 📖 Interactive written walkthrough with clickable timestamps: https://pixelfungaming.com/videos/gta-5-live-gameplay-won-new-car

RDR2 - Legendary Bounty Philip Carlier Walkthrough
The mission begins with a dark introduction to Philip Carlier, a former clerk turned legendary murderer who escaped into the swamps of Lemoyne years ago. The pursuit leads deep into the Bayou Nwa at night, where the air is thick with mist and tension. Upon finding Carlier's makeshift camp, the encounter takes a surreal turn as he uses a hallucinogenic concoction to incapacitate the hunters. A bizarre combat sequence follows in a distorted, purple-tinted reality where giant animals and ghostly clones of Carlier attack from all directions. After the hallucinations fade, the hunt resumes through the swamp waters to locate the actual target. Once captured and hogtied, Carlier is loaded onto a horse for the trek back to civilization. The journey through the swamp and into the streets of Saint Denis is filled with Carlier's deranged ramblings about the local 'Night Folk.' The mission concludes with the successful delivery of the bounty to the Saint Denis jail and the collection of the reward. Chapters: 0:00:00 - 0:00:48 - Philip Carlier Backstory and Mission Briefing 0:00:48 - 0:01:58 - Tracking and Encountering the Target in the Bayou 0:01:58 - 0:04:47 - The Hallucinogenic Battle Against Spectral Entities 0:04:47 - 0:05:40 - Searching the Murky Swamps for the Real Carlier 0:05:40 - 0:07:54 - Escorting the Bounty Through Saint Denis 0:07:54 - 0:09:02 - Mission Completion and Collection of Reward 📖 Interactive written walkthrough with clickable timestamps: https://pixelfungaming.com/videos/rdr2-legendary-bounty-philip-carlier-walkthrough

Insurgency: Sandstorm | Explosive Drone Comes Through door #shorts
The mission begins with the character moving through a war-torn building to defend objective Charlie. They navigate through tight corridors and enter a room fortified with sandbags, with gunfire audible in the distance. As the character approaches an open doorway, a small white aerial drone flies directly towards them. They immediately open fire on the drone with their scoped rifle, but the drone detonates in close proximity. The force of the explosion knocks the character to the ground, leaving them incapacitated as the screen blurs. The perspective then shifts to a teammate positioned outside in a courtyard, who is armed with a shotgun and watching over a nearby road. Chapters: 0:00:00 - 0:00:07 - Navigating the building to defend objective Charlie 0:00:07 - 0:00:11 - Encountering and shooting at a hostile drone 0:00:11 - 0:00:17 - Detonation and character being downed 0:00:17 - 0:00:19 - Spectating a teammate in the outdoor courtyard 📖 Interactive written walkthrough with clickable timestamps: https://pixelfungaming.com/videos/insurgency-sandstorm-explosive-drone-comes-through-door-shorts

Red Dead Online - Revive Player Challenge - Easy Way (Funny)
The session starts with an inspection of the daily challenges menu, highlighting the requirement to revive three other players. Located on a dark, grassy slope near a cluster of buildings, characters coordinate to manipulate a horse's defensive behavior. One character deliberately positions themselves behind the horse to receive a powerful kick, resulting in an immediate incapacitated state. A second character then performs the revive action to progress the challenge. This sequence repeats multiple times throughout the encounter. Characters frequently use the item wheel to consume canned kidney beans and peaches, replenishing health cores lost during the maneuvers. The completion of the third revive successfully fulfills the daily challenge, yielding gold bars and experience rewards. The group persists with the horse-kicking interactions and revivals, refining their technique and timing even after the primary objective is met. Chapters: 0:00:00 - 0:00:40 - Initial Setup and First Player Revive 0:00:40 - 0:01:25 - Coordinated Horse Kicks and Health Management 0:01:25 - 0:01:55 - Completing the Daily Revive Challenge 0:01:55 - 0:02:28 - Post-Challenge Gameplay and Continued Revives 📖 Interactive written walkthrough with clickable timestamps: https://pixelfungaming.com/videos/red-dead-online-revive-player-challenge-easy-way-funny

Assassins Creed Mirage: Zanj Uprising Outfit Upgrade Schematic | Location
The gameplay commences with the character navigating a bustling, sandy city environment, utilizing parkour skills to scale scaffolding and leap across rooftops. The primary objective involves regrouping at the Bureau, prompting the character to move through the city with a blend of stealth and combat. The character frequently employs an eagle vision ability to highlight enemies and points of interest, planning routes and anticipating encounters. Combat sequences include stealthy throwing knife takedowns, swift assassinations from cover or above, and dynamic sword fighting against multiple adversaries. The character demonstrates proficiency in parrying, dodging, and executing finishing moves. Along the way, the character collects various items such as Dirham, Peacock Feathers, and Bone Dice. Environmental interactions play a crucial role, with the character hiding bodies, pushing large objects to clear paths, and using elements like explosive pots to neutralize threats. The journey involves traversing diverse sections of the city, from open rooftops to enclosed guardhouses and market areas, all while maintaining a tactical approach. The character successfully clears several areas of guards, collecting valuable upgrade schematics for the 'Zanj Uprising Outfit' from treasure chests. The video concludes with a brief view of the in-game map, showcasing the Harbiyah district and its numerous collectibles, before transitioning to a promotional end screen. Chapters: 0:00 - 0:43 - Initial Rooftop Navigation and Reconnaissance 0:43 - 1:15 - Stealth Takedowns and First Combat Encounters 1:15 - 2:05 - Ascending Structures and Assassinations 2:05 - 2:50 - Continuing Stealth and Enemy Neutralization 2:50 - 3:45 - Persistent Stealth and Rooftop Skirmishes 3:45 - 5:00 - Clearing the Rooftops and Looting Treasure 5:00 - 6:20 - Advanced Parkour and Environmental Interaction 6:20 - 7:57 - Final Stealth and Objective Completion 7:57 - 8:26 - Map View and Video Outro 📖 Interactive written walkthrough with clickable timestamps: https://pixelfungaming.com/videos/assassins-creed-mirage-zanj-uprising-outfit-upgrade-schematic-location

HITMAN Freelancer: Mumbai | Amputation Knife Location #shorts
The mission progresses through the industrial train yards of Mumbai. Agent 47 utilizes his instinct ability to highlight nearby targets and points of interest through walls. He moves stealthily through dense foliage to bypass several guards patrolling the area. Upon reaching a stationary train, he boards Vanya Shah's private carriage. Inside, he navigates past servants and explores the opulent interior. He discovers an amputation knife sitting on a small table and adds it to his inventory while listening to NPC dialogue regarding local figures. The mission continues with a brief check of the area map to orient his position within the larger Mumbai district before reviewing the controller configuration. Chapters: 0:00:00 - 0:00:05 - Using instinct to scout guards 0:00:05 - 0:00:11 - Stealth movement through foliage 0:00:11 - 0:00:16 - Infiltrating the train carriage 0:00:16 - 0:00:28 - Finding the amputation knife 0:00:28 - 0:00:41 - Reviewing the Mumbai district map 0:00:41 - 0:00:46 - Checking controller layout 📖 Interactive written walkthrough with clickable timestamps: https://pixelfungaming.com/videos/hitman-freelancer-mumbai-amputation-knife-location-shorts

RDR2 - Frozen Settler Location
The journey leads up the treacherous, snowy slopes of Mount Hagen in the Grizzlies West region. Near the peak, a frozen corpse sits slumped against jagged rocks, remarkably preserved and clad in 16th-century Spanish armor. The character approaches the remains of this 'Frozen Settler' and takes a moment to document the discovery, sketching the eerie, armored figure into the journal. A quick check of the map confirms the precise location on a high ridge overlooking the frozen landscape below. After inspecting the site, the character swaps their current headwear for the unique Morion Helmet, a rare collectible item found only in this remote spot. The mission concludes with a trek across the high mountain ridges, showcasing the expansive, wintery vista and the feathered plume of the newly acquired helmet swaying in the wind as the character surveys the surrounding peaks. Chapters: 0:00:00 - 0:00:15 - Discovery of the Frozen Settler 0:00:15 - 0:00:25 - Journaling the Unique Find 0:00:25 - 0:00:37 - Map Location on Mount Hagen 0:00:37 - 0:00:45 - Equipping the Rare Morion Helmet 0:00:45 - 0:01:31 - Exploring the Snowy Mountain Peak 📖 Interactive written walkthrough with clickable timestamps: https://pixelfungaming.com/videos/rdr2-frozen-settler-location

RDR2 - Sock Eyed Salmon Fishing (Ambarino) Location
The fishing expedition takes place under a moonlit sky at O'Creagh's Run in the Grizzlies East region. Using a special river lure, the character skillfully casts into the dark water, waiting for the telltale ripple of a bite. The first catch involves a brief struggle before a 5lb 3oz Sockeye Salmon is reeled in and inspected. Without hesitation, the line is cast again, quickly attracting another aggressive salmon. This second encounter proves slightly more challenging, but results in the successful capture of a 5lb 12oz fish. The session concludes with a detailed look at the map, pinpointing the exact location on the western side of the lake for those seeking similar prime fishing spots. Chapters: 0:00:00 - 0:00:13 - Reeling in the first catch 0:00:13 - 0:00:26 - Inspecting the Sockeye Salmon 0:00:26 - 0:00:54 - Casting for a second fish 0:00:54 - 0:01:13 - Reeling in another Sockeye Salmon 0:01:13 - 0:01:33 - Checking the catch and resetting 0:01:33 - 0:01:57 - Map location of O'Creagh's Run 📖 Interactive written walkthrough with clickable timestamps: https://pixelfungaming.com/videos/rdr2-sock-eyed-salmon-fishing-ambarino-location

#Hitman : Elusive Target #12 - The Identity Thief
This video provides a complete walkthrough of the 'The Identity Thief' Elusive Target mission in Hitman. Watch Agent 47 infiltrate the Palais de Walewska in Paris to eliminate the IT billionaire Brendan Conner. The gameplay demonstrates a high level of stealth, including strategic disguise changes and careful observation of the target's movements. After meticulously clearing paths and assuming the identities of various palace personnel, the player eventually reaches a perfect sniper vantage point. The mission concludes with a precise long-range shot that takes out the target, followed by a clean exit via helicopter. Perfect for players looking for a tactical approach to this limited-time challenge, featuring high-stakes gameplay and a successful Silent Assassin-style completion. Chapters: 0:00:00 - Mission Briefing & Target Intel 0:01:57 - Infiltration: Agent 47 Arrives in Paris 0:03:32 - Acquiring the First Disguise (Security Guard) 0:06:33 - High-Level Access: Assuming the CICADA Bodyguard Identity 0:08:42 - Tracking the Target: Initial Observation on the Balcony 0:11:05 - The IAGO Auction: Following the Target into Restricted Areas 0:14:15 - Setting the Trap: Moving to a Strategic Vantage Point 0:18:30 - Patience is Key: Waiting for the Perfect Opening 0:23:45 - Target Re-evaluation: Conner's Movement Patterns Analyzed 0:28:10 - Positioning for the Final Strike 0:35:31 - The Kill: Precise Sniper Elimination of Brendan Conner 0:36:12 - Clean Exit: Leaving Paris by Helicopter 0:36:30 - Mission Complete: Final Ratings and Results Screen 📖 Interactive written walkthrough with clickable timestamps: https://pixelfungaming.com/videos/hitman-elusive-target-12-the-identity-thief

Assassins Creed Mirage: Jailbreak | Liberating Ali Walkthrough
The video follows the protagonist, Basim, through a daring jailbreak mission in Damascus Gate Prison. Basim navigates the restricted area using stealth, observing enemy patrols and utilizing cover to remain undetected. Early on, he engages in direct combat with several guards, demonstrating his sword-fighting and dodging skills. He loots chests for supplies like leather, components, and steel ingots. As he progresses, Basim employs stealth assassinations and throws knives to take down guards silently. He encounters an injured civilian who reveals that 'the jailer' is responsible for their plight, prompting Basim to search further for Ali. Basim scales walls and moves between levels to find his way, often taking out guards with swift, hidden attacks. He locates Ali, who is being interrogated by the Jailer. A combat sequence ensues where Basim confronts and defeats the Jailer and his accomplice. After freeing Ali, they discuss the next steps, needing to find orders in the guards' quarters that might reveal Al-Ghoul's plans. Basim and Ali work together to navigate the prison, unlocking doors and finding the necessary documents. They escape the prison and travel to the Watermill, where Ali addresses a group of rebels, acknowledging Basim's assistance. They then meet with Roshan and Beshi to debrief, learning that Al-Ghoul is using prisoners and migrant laborers for dig sites and is currently at the Caravanserai. Basim is tasked with eliminating Al-Ghoul, a mission he accepts, while Ali prepares a diversion. Chapters: 0:00:00 - 0:22:00 - Infiltrating Damascus Gate Prison and Initial Stealth 0:22:00 - 0:47:00 - First Combat Encounter and Stealth Resumption 0:47:00 - 1:22:00 - Navigating Deeper into the Prison and Multiple Engagements 1:22:00 - 2:25:00 - Discovering Tortured Civilian and Clues about the Jailer 2:25:00 - 3:03:00 - Advanced Stealth and Searching for Keys 3:03:00 - 3:45:00 - Unlocking Cages and Continuing Search for Ali 3:45:00 - 4:30:00 - Locating Ali and Confronting the Jailer's Accomplices 4:30:00 - 5:55:00 - Boss Fight: Defeating the Jailer and Freeing Ali 5:55:00 - 6:49:00 - Basim Frees Ali and Discusses Next Steps 6:49:00 - 7:55:00 - Searching Guards' Quarters for Al-Ghoul's Orders 7:55:00 - 8:29:00 - Discovering Critical Intelligence and Planning Escape 8:29:00 - 10:01:00 - Escaping the Prison and Evading Pursuit 10:01:00 - 10:49:00 - Becoming Anonymous and Case Unveiled: Watermill 10:49:00 - 11:26:00 - Journey to Watermill and Ali's Speech 11:26:00 - 13:09:00 - Debriefing with Roshan and Beshi 13:09:00 - 14:45:00 - Planning the Assassination of Al-Ghoul and Mission End 📖 Interactive written walkthrough with clickable timestamps: https://pixelfungaming.com/videos/assassins-creed-mirage-jailbreak-liberating-ali-walkthrough

Ready Or Not: (No Mods) Elephant | All Hostages Rescued - A Rating
This video showcases a complete, high-stakes mission playthrough of the tactical shooter 'Ready or Not' set at Watt Community College. The gameplay demonstrates a professional SWAT team's response to an active shooter and bomb threat scenario. Viewers will observe systematic room-clearing techniques, the process of securing multiple civilians under duress, and the high-pressure task of defusing multiple explosive devices. The content covers the entire operation from the initial briefing and cinematic insertion to the final tactical sweep and mission debriefing, where the team achieves an 'A' grade for their performance. Chapters: 0:00:00 - 0:00:27 - Mission Briefing and Tactical Insertion 0:00:27 - 0:02:10 - Initial Campus Entry and First Classroom Clearance 0:02:10 - 0:03:42 - Advancing Through Hallways and Securing Science Labs 0:03:42 - 0:05:03 - Breach Operations and High-Intensity Engagement 0:05:03 - 0:06:21 - Neutralizing Suspects and Hostage Recovery 0:06:21 - 0:07:25 - First Bomb Defusal and Cafeteria Sweep 0:07:25 - 0:08:45 - Tactical Breach of the Second Floor and Library Area 0:08:45 - 0:10:05 - Final Room Clearances and Objective Completion 0:10:05 - 0:10:43 - Mission Debriefing and Score Performance Analysis 0:10:43 - 0:10:55 - Outro and Credits 📖 Interactive written walkthrough with clickable timestamps: https://pixelfungaming.com/videos/ready-or-not-no-mods-elephant-all-hostages-rescued-a-rating

HITMAN Freelancer: Isle of Sgail | Burial Dagger Location #shorts
Agent 47 navigates the interior of a warehouse on the Isle of Sgàil during a Syndicate Showdown in Hitman Freelancer. The mission involves locating a specific item within the environment. Agent 47 approaches a wooden crate marked with red symbols and breaks it open to reveal a Burial Dagger. After picking up the lethal melee weapon, the inventory screen opens to show the collected items, including a stethoscope, banana, and crowbar. The gameplay concludes with a detailed look at the map, pinpointing the exact location of the warehouse and the character's current position within it. Chapters: 0:00:00 - 0:00:08 - Navigating the Warehouse 0:00:08 - 0:00:18 - Finding the Burial Dagger 0:00:18 - 0:00:28 - Inventory Review 0:00:28 - 0:00:54 - Map Location Reference 📖 Interactive written walkthrough with clickable timestamps: https://pixelfungaming.com/videos/hitman-freelancer-isle-of-sgail-burial-dagger-location-shorts

RDR2 Epilogue A Really Big Bastard
The mission begins with John Marston joining Sadie Adler at Beecher's Hope to embark on a bounty hunt. They ride together toward the dense forests of Tall Trees, engaging in a conversation about John's family life and his intention to propose to Abigail using a ring once owned by Arthur Morgan. As they enter the woods, Sadie explains that their target is Marshall Thurwell, an accountant who has attempted to disappear into the wilderness. They soon discover an abandoned campsite that shows signs of a violent struggle. John utilizes his tracking skills to follow a trail of footprints and blood deeper into the foggy forest. The search leads to a ruined cabin where Sadie finds Thurwell hiding in the debris. Just as the arrest is made, a massive grizzly bear ambushes the group, pinning John to the ground. A frantic struggle ensues as John defends himself with a knife while Sadie provides covering fire to kill the beast. After securing the prisoner on a horse, they begin the return journey to Blackwater. Their progress is interrupted by two rival bounty hunters who attempt to steal the reward. John dispatches the rivals in a swift Deadeye shootout. The ride continues into the night, with Sadie mentioning rumors about Micah's whereabouts before they finally arrive at the Blackwater jail to deliver the bounty and collect their payment. Chapters: 0:00:00 - 0:01:30 - Departure from Beecher's Hope and character dialogue 0:01:30 - 0:03:05 - Entering the dense woods of Tall Trees 0:03:05 - 0:04:05 - Investigating the ravaged campsite 0:04:05 - 0:05:15 - Tracking the target through the forest 0:05:15 - 0:06:20 - Finding the cabin and arresting Marshall Thurwell 0:06:20 - 0:07:45 - Survival battle against a massive grizzly bear 0:07:45 - 0:08:30 - Securing the prisoner for transport 0:08:30 - 0:09:45 - Shootout with rival bounty hunters 0:09:45 - 0:11:03 - Return to Blackwater and mission completion 📖 Interactive written walkthrough with clickable timestamps: https://pixelfungaming.com/videos/rdr2-epilogue-a-really-big-bastard

Farcry 6| live #15 Valle de oro and esperenza
Welcome to this comprehensive gameplay walkthrough of Far Cry 6. In this video, we tackle some of the most intense missions and base captures in Yara. We start with a high-stakes infiltration of La Divinidad Cathedral, an FND base crawling with elite soldiers. You'll see stealth tactics in action as we scout the area, tag enemies, and move in for silent takedowns to disable alarms and secure the location for Libertad. Following the base capture, we head into the heart of Esperanza for the 'Re-Education' story mission. Our goal is to rescue Dr. Matias Alonso from the True Yaran Academy. This mission shifts from a tense infiltration to an all-out war as we defend the medical wing against waves of government forces while the doctor performs life-saving surgery. Throughout the video, we showcase various weapons, Supremo abilities, and the beautiful yet dangerous environment of Far Cry 6. Whether you're looking for mission strategies or just want to enjoy some high-octane action, this playthrough has it all. Chapters: 0:00:00 - Objective: Capture La Divinidad Cathedral FND Base 0:05:20 - Scouting the Cathedral and Tagging Enemies 0:10:45 - Stealth Infiltration of the Inner Courtyard 0:15:30 - Disabling the Alarms to Cut Off Reinforcements 0:20:15 - Clearing Out Remaining FND Special Forces 0:25:00 - FND Base Captured: La Divinidad Cathedral 0:30:10 - Resource Gathering and Map Planning 0:35:25 - Traveling through the Occupied Streets of Esperanza 0:40:40 - Starting Mission: Re-Education at True Yaran Academy 0:45:15 - Infiltrating the Academy and Locating Matias Alonso 0:50:00 - Defending the Medical Wing against Heavy Fire 0:52:54 - Mission Success and Video Conclusion 📖 Interactive written walkthrough with clickable timestamps: https://pixelfungaming.com/videos/farcry-6-live-15-valle-de-oro-and-esperenza

RDR2 - Testing The Mauser & Semi-Automatic Pistols
The mission begins with a direct assault on the Hanging Dog Ranch hideout. Dual pistols are utilized to quickly eliminate O'Driscoll outlaws in the open fields before moving toward the ranch buildings. Combat intensifies as the character clears out enemies around the stables and central yard, using crates and barrels for cover. After neutralizing the exterior guards, the character enters the main ranch house, clearing the ground floor before heading upstairs to confront the final holdouts and the hideout leader. Following a intense close-quarters shootout to eliminate the leader, the hideout is officially cleared. The remaining time is spent searching the ranch for supplies and collectibles, eventually resulting in the discovery of a Three of Swords Tarot Card to complete a set for the Collector role. Chapters: 0:00:00 - 0:00:45 - Assault on Hanging Dog Ranch Perimeter 0:00:45 - 0:01:35 - Clearing the Stables and External Yard 0:01:35 - 0:02:20 - Intense Gunfight Near the Main Barn 0:02:20 - 0:03:05 - Infiltrating the House and Eliminating the Leader 0:03:05 - 0:04:47 - Post-Combat Looting and Tarot Card Discovery 📖 Interactive written walkthrough with clickable timestamps: https://pixelfungaming.com/videos/rdr2-testing-the-mauser-semi-automatic-pistols

MAFIA| Definitive Edition Live #2
This is a comprehensive walkthrough of the final climactic acts of Mafia: Definitive Edition, featuring major missions and the emotional conclusion of Tommy Angelo's story. The video begins with the 'Election Campaign' mission, where Tommy must infiltrate an old prison to assassinate a corrupt politician from a guard tower. Following a high-intensity escape and car chase through Lost Heaven, the story moves into the 'Just For Relaxation' chapter. Here, Tommy, Paulie, and Sam embark on a daring heist to steal what they believe are cigars from a customs warehouse, only to discover a secret cache of diamonds. Tensions rise as the crew questions Don Salieri's honesty. The narrative then shifts to the 'Moonlighting' mission, where Paulie and Tommy go rogue to pull off a massive bank robbery. The final act, 'The Death of Art,' sees the tragic fallout of their betrayal, leading to a bloody confrontation at the city's art gallery. The video concludes with the game's poignant epilogue, showing Tommy's life in witness protection and his eventual fate many years later. This video captures every key cinematic moment and intense shootout, providing a complete look at the remake's updated storytelling and gameplay. Chapters: 0:00:00 - Mission Start: Election Campaign - Briefing with Vincenzo 0:02:45 - Driving through Lost Heaven to the Old Prison 0:04:30 - Infiltrating the Prison via the Sewer System 0:07:15 - Sneaking through the Prison Interior 0:10:00 - Navigating the Cell Blocks and Avoiding Guards 0:12:30 - Reaching the Guard Tower Vantage Point 0:13:21 - Assassinating the Politician 0:15:30 - Escaping the Tower - Shootout with Police 0:18:45 - Fighting through the Cell Blocks 0:21:30 - Prison Courtyard Battle and Exit 0:23:45 - High-Speed Car Chase through the City 0:27:00 - Losing the Cops and Mission Wrap-up 0:35:00 - Tommy's Future Reflections (Cutscene) 0:50:00 - Intermission - Moving between Chapters 1:03:15 - Chapter Start: Just For Relaxation - Briefing with Salieri 1:08:30 - Planning the Diamond Heist with Sam and Paulie 1:12:15 - Intercepting and Stealing the Customs Truck 1:17:00 - Infiltrating the Customs Impound Lot 1:20:20 - Searching for Information in the Warehouse Offices 1:25:30 - Stealthily Navigating the Warehouse Floor 1:30:10 - Finding the Hidden Diamonds in the Cigar Crates 1:32:45 - Daring Escape from the Warehouse with the Loot 1:38:00 - Losing the Police and Regrouping 1:43:00 - Discovering the Real Value of the Score 1:47:00 - Chapter Start: Moonlighting - Bank Robbery Preparation 1:52:45 - Entering the Bank and Taking Control 1:55:00 - In the Vault - Collecting the Cash 1:59:30 - Huge Shootout with the Police outside the Bank 2:04:00 - Escaping the Crime Scene and Losing the Heat 2:10:15 - The Tragic Discovery at Paulie's Apartment 2:12:40 - Final Chapter: The Death of Art - Arriving at the Gallery 2:15:50 - Intense Shootout in the Art Gallery 2:17:15 - Final Confrontation with Sam 2:17:44 - Epilogue: Tommy's Ultimate Fate and End Credits 📖 Interactive written walkthrough with clickable timestamps: https://pixelfungaming.com/videos/mafia-definitive-edition-live-2

RDR2 - Checking out Christmas Decor & Music (Dancing)
The journey begins in the festive streets of Saint Denis at night, where glowing Christmas lights adorn the historic buildings. The character rides through the quiet city toward a Moonshine Shack, entering and descending into the hidden speakeasy below. Inside, the bar is fully transformed for the holidays with wreaths, colorful lanterns, and a beautifully decorated Christmas tree. A lengthy sequence follows on the dance floor, showcasing a wide variety of dance emotes including awkward, carefree, bold, and graceful styles, all performed to lively seasonal music from the house band. The setting then shifts to a moonlit wilderness camp, where another festive tree stands beside the campfire while Cripps plays a holiday tune on his harmonica. Chapters: 0:00:00 - 0:01:07 - Riding through decorated Saint Denis at night 0:01:07 - 0:01:38 - Entering the Moonshine Shack 0:01:38 - 0:02:00 - Navigating the shack interior 0:02:00 - 0:02:54 - Exploring the Christmas-themed speakeasy 0:02:54 - 0:03:10 - Inspecting the speakeasy Christmas tree 0:03:10 - 0:06:53 - Dancing to festive music with various emotes 0:06:53 - 0:07:46 - Visiting the wilderness camp and festive tree 📖 Interactive written walkthrough with clickable timestamps: https://pixelfungaming.com/videos/rdr2-checking-out-christmas-decor-music-dancing

GTa 5 LIVE GAMEPLAY - Got the million
Inside the Omega nightclub, the character moves through the main floor to the office area to access the business terminal. Upon logging in as a CEO, management screens reveal total earnings and current stock levels across various business categories like cargo and sporting goods. The character examines potential upgrades for equipment, staff, and security before heading down to the garage level. Once outside the facility, a call to the mechanic results in the delivery of a Gauntlet Classic muscle car. The session concludes with an extensive night drive through Los Santos, featuring aggressive maneuvers through highway traffic and high-speed navigation of city streets under the glow of neon signs and streetlights. Chapters: 0:00:00 - 0:00:48 - Nightclub Interior Navigation 0:00:48 - 0:01:00 - Registering as CEO 0:01:00 - 0:01:44 - Nightclub Management and Menu Browsing 0:01:44 - 0:02:10 - Navigating to the Garage Exit 0:02:10 - 0:03:00 - Requesting and Entering the Gauntlet Classic 0:03:00 - 0:05:02 - High-Speed Night Driving in Los Santos 📖 Interactive written walkthrough with clickable timestamps: https://pixelfungaming.com/videos/gta-5-live-gameplay-got-the-million

RDR2 - Whale Bones
Arthur Morgan rides through the misty, pine-covered hills of Big Valley. Upon reaching a rocky plateau, he discovers a massive, weathered skeleton of a whale resting far from the ocean. He approaches the remains, walking the length of the spine and ribs to inspect the bleached bones. Pulling out a handheld camera, he captures several angles of the prehistoric-looking find. He then records the discovery in his journal, carefully sketching the skeletal structure on a fresh page. The exploration concludes with a look at the world map, identifying the site's exact location on the ridge west of Owanjila. Chapters: 0:00:00 - 0:00:05 - Approaching the rocky ridge 0:00:05 - 0:00:40 - Inspecting the whale bone remains 0:00:40 - 0:00:58 - Documenting the find with photographs 0:00:58 - 0:01:12 - Sketching the bones in the journal 0:01:12 - 0:01:23 - Revealing the map location 📖 Interactive written walkthrough with clickable timestamps: https://pixelfungaming.com/videos/rdr2-whale-bones

Assassin Creed Mirage | Baghdad Bound Cinamatic Scene
The journey to Baghdad begins as Basim and his companions traverse various desert landscapes on camelback. Cinematic sequences showcase their trek through narrow canyons, vast dunes, and under natural rock arches during different times of day. A nighttime respite by the campfire highlights the iconic Hidden Blade, a symbol of Basim's commitment to the Hidden Ones. The group braves a powerful sandstorm before finally arriving at a vista overlooking the sprawling city of Baghdad at dawn. Following a brief dialogue where Roshan and Fuladh provide instructions on their next meeting point near Shari's mosque in Harbiyah, Basim stands alone, ready to enter the city. The mission 'Baghdad Bound' commences as Basim approaches his mount, overlooking the destination that calls to him. Chapters: 0:00:00 - 0:00:37 - Trekking through the vast desert landscapes 0:00:37 - 0:00:48 - A moment of rest and the Hidden Blade 0:00:48 - 0:01:15 - Braving the elements on the road to Baghdad 0:01:15 - 0:01:40 - Arrival at the overlook of Baghdad 0:01:40 - 0:02:10 - Strategic briefing with Roshan and Fuladh 0:02:10 - 0:02:27 - Basim begins his mission: Baghdad Bound 📖 Interactive written walkthrough with clickable timestamps: https://pixelfungaming.com/videos/assassin-creed-mirage-baghdad-bound-cinamatic-scene

RDR2 - Madam Nazar Location December 9th 2019
The character navigates a steep hillside on horseback, moving through tall grass and scattered rocks toward a red and gold traveling wagon. Upon arrival, Madam Nazar performs a greeting while a gramophone nearby emits a crackling melody. The screen transitions to the in-game world map, showing the marker for Madam Nazar located directly south of Window Rock in the Grizzlies West area of Ambarino. The map scrolls across the surrounding wilderness, highlighting nearby landmarks like Cotorra Springs and Bacchus Station to provide geographical context for the shop's current position. Chapters: 0:00:00 - 0:00:07 - Approaching Madam Nazar's caravan on horseback 0:00:07 - 0:00:15 - Meeting Madam Nazar at her shop near the river 0:00:15 - 0:00:30 - Pinpointing the location on the map near Window Rock 0:00:30 - 0:00:44 - Detailed map overview of the Grizzlies West region 📖 Interactive written walkthrough with clickable timestamps: https://pixelfungaming.com/videos/rdr2-madam-nazar-location-december-9th-2019

RDR2 - The Powerful Sawn-Off Shotgun
The mission begins with the character riding toward the Shady Belle hideout on horseback. Upon reaching the perimeter, the character dismounts and immediately initiates a firefight against the Lemoyne Raiders using a sawed-off shotgun. Combat continues through the camp as the character moves from cover to cover, clearing out enemies near the tents and gazebo. The assault transitions to the main plantation house, where the character clears the porch before breaching the front door. Inside, intense close-quarters combat occurs in the hallways and up the stairs. After eliminating the gang leader and several guards on the second floor, the character methodically loots the bodies and searches the rooms for valuables. A final group of enemies is dispatched in the rear of the property to successfully clear the hideout. The gameplay concludes with the character collecting rare items and completing daily challenges around the site. Chapters: 0:00:00 - 0:00:15 - Approach to Shady Belle on horseback 0:00:15 - 0:01:13 - Clearing the exterior camp and perimeter defenses 0:01:13 - 0:01:30 - Breaching the main house and ground floor combat 0:01:30 - 0:02:40 - Upstairs floor sweep and eliminating the gang leader 0:02:40 - 0:03:20 - Looting the house for valuables and collectibles 0:03:20 - 0:04:00 - Final stand against reinforcements and clearing the hideout 0:04:00 - 0:04:21 - Post-mission looting and daily challenge completion 📖 Interactive written walkthrough with clickable timestamps: https://pixelfungaming.com/videos/rdr2-the-powerful-sawn-off-shotgun

Assassins Creed Mirage: Zeroing In (Find Prisoner Records) Walkthrough
Basim arrives at the Khurasan Gate Guardhouse on a mission to discover Ali's whereabouts. The operation begins with aerial reconnaissance as Basim uses his eagle, Enkidu, to survey the fortification, tagging guards and identifying key entry points from above. Maintaining a low profile, Basim navigates the rooftops and perimeter walls to avoid detection by the numerous sentries. He reaches a strategic vantage point to eavesdrop on a conversation between two soldiers, revealing that prisoner records are kept in the scribe’s office. Basim then systematically eliminates guards using throwing knives and silent assassinations to clear a path through the inner courtyards. Upon reaching the scribe’s quarters, he retrieves a vital list of prisoners which confirms that Ali has been moved to the Damascus Gate Prison, successfully concluding the investigation at the outpost. Chapters: 0:00:00 - 0:01:55 - Aerial Reconnaissance with Enkidu 0:01:55 - 0:03:30 - Stealthy Rooftop Navigation 0:03:30 - 0:04:05 - Eavesdropping on Guard Conversations 0:04:05 - 0:05:20 - Infiltrating the Inner Courtyard 0:05:20 - 0:05:58 - Securing Prisoner Records in the Scribe's Office 📖 Interactive written walkthrough with clickable timestamps: https://pixelfungaming.com/videos/assassins-creed-mirage-zeroing-in-find-prisoner-records-walkthrough

Far Cry 5 - VIETNAM - Lighter location near Temple Gun
The mission begins with the character navigating a dense, misty jungle in Far Cry 5: Hours of Darkness. A quick check of the map highlights the location of a collectible lighter situated near a crashed US pilot. The character moves through the lush vegetation, passing a discarded parachute sprawled on the muddy ground. Tucked behind a large boulder, the body of a US pilot is found resting in a seated position. The character approaches the pilot and loots the body to retrieve the US Navy Fighter Pilot's Lighter. A notification appears on the screen, confirming the collection and updating the quest progress for the lighters. The character remains briefly at the site before the mission continues. Chapters: 0:00:00 - 0:00:14 - Mapping the target location 0:00:14 - 0:00:22 - Navigating the jungle and finding the crash site 0:00:22 - 0:00:34 - Looting the US pilot and collecting the lighter 📖 Interactive written walkthrough with clickable timestamps: https://pixelfungaming.com/videos/far-cry-5-vietnam-lighter-location-near-temple-gun
Red Dead Online | Capturing Player Bounties #3
This gameplay session features a series of high-stakes player bounties across the diverse landscapes of Red Dead Online. The action begins under the cover of night as a marksman tracks a target to a secluded cabin, culminating in a brutal rooftop confrontation. After securing the first bounty in Blackwater, the hunt continues across open plains, utilizing long-range precision to neutralize targets from horseback. Intense firefights erupt in and around towns like Valentine, where tactical use of explosives and close-quarters combat becomes necessary to take down elusive players. The journey concludes with a series of successful captures, demonstrating various bounty-hunting techniques from long-range sniping to high-speed chases across the frontier. 📖 Chapters: 0:00:00 - 0:01:16 - Tracking and neutralizing WHITE0ARILLA at a cabin 0:01:16 - 0:02:05 - Transporting the first bounty to Blackwater 0:02:05 - 0:02:48 - Turning in the bounty and departing Blackwater 0:02:48 - 0:03:45 - Long-range hit on PROPH0CY_KING near a homestead 0:03:45 - 0:04:45 - Riding towards Valentine with the second bounty 0:04:45 - 0:05:15 - Successful bounty delivery at Valentine Sheriff's Office 0:05:15 - 0:06:14 - Searching for ELITE_SWAGGY across the countryside 0:06:14 - 0:06:32 - Intense firefight and capture in Valentine 0:06:32 - 0:07:10 - Delivering the third bounty to the Valentine authorities 0:07:10 - 0:08:00 - Completing the turn-in and hunting for new targets 0:08:00 - 0:08:33 - High-speed pursuit and shootout with DISCREETDECEIT 0:08:33 - 0:09:15 - Transporting the final target to a prison wagon 0:09:15 - 0:09:49 - Turning in the last bounty and concluding the hunt

Ready Or Not: Mission 6 | Idles Of March - Brisa Cove - B Rating
The mission 'Ides of March' in Ready or Not begins with a tactical briefing detailing an assassination attempt on Senator Cornelius Fremont at a park rally. The SWAT team is deployed to clear the 12th floor of the Brisa Cove Luxury Apartments, where suspects are reportedly held up. The team moves methodically through the high-rise structure, employing mirror guns to scout behind closed doors and identify potential traps or armed threats. High-intensity tactical breaches follow, using flashbangs, stinger grenades, and CS gas to neutralize suspects and protect non-combatants. Throughout the operation, the team coordinates closely, clearing apartments room by room and securing vital evidence. Key objectives include locating a sniper rifle used in the attack, rescuing all civilians, and apprehending specific high-value targets like a music producer and a retired naval officer. The mission concludes with a comprehensive debriefing screen that calculates scores based on mission success, tactical efficiency, and adherence to rules of engagement. Chapters: 00:00:00 - 00:02:27 - Mission Briefing and Tactical Overview 00:02:28 - 00:05:20 - Insertion and Initial Hallway Clearing 00:05:21 - 00:07:35 - Securing Civilians and First Firefights 00:07:36 - 00:10:30 - Tactical Breaching and Finding Objectives 00:10:31 - 00:13:50 - Methodical Room Sweeps and Trap Management 00:13:51 - 00:16:45 - Penthouse Clearing with CS Gas Deployments 00:16:46 - 00:19:25 - Intense Room Breaches and Suspect Neutralization 00:19:26 - 00:21:45 - Final Objective Securing and Perimeter Check 00:21:46 - 00:22:43 - Mission Debrief and Scoring Analysis 📖 Interactive written walkthrough with clickable timestamps: https://pixelfungaming.com/videos/ready-or-not-mission-6-idles-of-march-brisa-cove-b-rating

Assassins Creed Mirage: Basim Training | Cinamatic Scene
Basim meditates on a rocky outcrop overlooking the vast desert landscape of Alamut. A sweeping view of the mountain fortress establishes the setting for his long training journey. Early sessions show Basim struggling in sword combat against fellow initiates, frequently getting knocked to the ground as he learns the fundamentals. He attempts to handle an eagle under the guidance of Fuladh, though the bird is initially uncooperative and aggressive. His physical training involves perilous climbs and jumps across jagged cliff faces, showing his progression through occasional falls and near misses. He practices lethal air assassinations on training dummies and masters stealth techniques by crawling through the dense brush alongside Roshan. As time passes, Basim’s appearance changes with a growing beard, signifying his maturation into a dedicated Hidden One. A fierce sparring match with Roshan showcases his newfound speed and combat skill, ending in a moment of mutual respect between teacher and student. The training montage concludes as Basim successfully calls his eagle companion while meditating at sunset. Gameplay begins with Basim standing on the cliffside, receiving a skill point and the objective to locate Al-Hasan's workshop. Chapters: 0:00:00 - 0:00:08 - Introduction and Scenic Overview of Alamut 0:00:08 - 0:00:17 - Early Combat Training and Struggles 0:00:17 - 0:00:30 - Learning to Bond with the Eagle 0:00:30 - 0:00:46 - Parkour Mastery and Assassination Practice 0:00:46 - 0:00:57 - Stealth Training with Roshan 0:00:57 - 0:01:12 - Advanced Combat Duel Against Roshan 0:01:12 - 0:01:29 - Initiation Completion and Mutual Respect 0:01:29 - 0:01:45 - Final Meditation and Eagle Bond Achievement 0:01:45 - 0:02:05 - Transition to Gameplay and Quest Start 📖 Interactive written walkthrough with clickable timestamps: https://pixelfungaming.com/videos/assassins-creed-mirage-basim-training-cinamatic-scene
RainBow Six Siege Article 5 Gameplay Walkthrough
The video documents multiple attempts at the 'Article 5' Situation mission in Rainbow Six Siege, which involves disarming a bomb on a college campus shrouded in yellow biohazard gas. The video begins with a cinematic introduction detailing the biohazard attack on Bartlett University and the deployment of the Rainbow Team. The first attempt at the mission ends quickly in failure due to the team being overwhelmed by enemy combatants and toxic gas after planting the defuser. The players attempt the mission a second time, again selecting attackers and deploying to the contaminated campus. Using their thermal vision to navigate the dense yellow gas and identify enemies, the team aggressively pushes towards Bomb B. They manage to plant the defuser in the Trophy Room and defend it through intense close-quarters combat against several waves of enemies. They successfully neutralize all hostiles and disarm the bomb, achieving Mission Successful status. Chapters: 0:00 - 2:21 - Main Menu and Cinematic Introduction 2:21 - 3:03 - Match Loading and Operator Selection 3:03 - 6:10 - First Mission Attempt: Bomb A Defusal 6:10 - 11:13 - First Mission Failure and Post-Action Report 11:13 - 17:45 - Menu Navigation and Second Match Setup 17:45 - 20:05 - Second Mission Attempt: Entry and Bomb B Approach 20:05 - 23:20 - Bomb B Defusal and Successful Mission Completion 23:20 - 25:36 - Post-Action Report and Mission Conclusion Cinematic 📖 Interactive written walkthrough with clickable timestamps: https://pixelfungaming.com/videos/rainbow-six-siege-article-5-gameplay-walkthrough

Sherlock Holmes: Devils Daughter - Chain Reaction
Sherlock Holmes faces one of his most complex forensic challenges in 'The Devil's Daughter' as he investigates a massive multi-vehicle collision in the heart of Victorian London. This full walkthrough covers the 'Chain Reaction' case from start to finish. Watch as the Master Detective meticulously reconstructs a chaotic scene involving multiple carriages, falling scaffolding, and mysterious electrical traps. The investigation begins with a broad search for 13 critical elements within the crash site, leading to the discovery of an orchestrated sabotage rather than a simple accident. Sherlock uses his keen observation to identify gang members among the victims, decodes a hidden corporate cover-up on a repainted carriage, and tracks an anarchist plot back to a nearby apartment. The video showcases the game's unique mechanics, including the slow-motion reconstruction mode where players must order events chronologically to solve the mystery. From interrogating nervous merchants to connecting the final dots in the Mind Palace, this comprehensive gameplay analysis reveals the tragic motives behind the chaos and delivers a definitive conclusion to the case. Chapters: 0:00:00 - Sherlock Holmes arrives at the crash scene 0:03:15 - Initial assessment of the victims and wreckage 0:06:20 - Reconstructing the scaffolding collapse 0:09:45 - Investigating the first set of carriages 0:13:10 - Discovering the electrified puddle and upgraded gas lamps 0:17:30 - Analyzing the falling wardrobe sequence 0:21:40 - Examining the dead driver in the technical cab 0:25:55 - Finding the mechanism that triggered the pile-up 0:30:15 - Final elements of the scene investigation located 0:34:45 - Interrogating the pumpkin merchant 0:39:10 - Character portrait of the gang members 0:43:25 - Deducing the cause of the sudden cab stop 0:47:00 - Identifying the railway company involvement 0:51:30 - Successful recreation of the full accident sequence 0:55:00 - Identifying suspects within the crowd 0:59:15 - Searching for the ambush point in the apartment 1:03:40 - Analyzing the anarchist literature and bank debt 1:07:50 - Interrogating suspect Thomas Garrett 1:12:15 - Investigating Reginald Butcher's sick daughter 1:16:30 - Final interrogation at Scotland Yard 1:20:00 - Connecting clues in the Mind Palace 1:23:42 - Case Concluded 📖 Interactive written walkthrough with clickable timestamps: https://pixelfungaming.com/videos/sherlock-holmes-devils-daughter-chain-reaction

Farcry 6| El Este Region Treasure Hunt live #12
The gameplay video follows the completion of two separate treasure hunts in Far Cry 6. The first hunt, 'A Little Birdie Told Me,' involves the character, Dani, tracking a pelican named Daniilo to find a supply stash. Dani feeds the pelican in two different locations, which causes the bird to drop a key at the final spot. The key unlocks a chest containing an AR-C rifle and other materials. The second treasure hunt, 'Passing the Torch,' requires Dani to follow clues left by older guerrillas in a small compound. Dani must locate and pull three electrical switches on three separate buildings to open a locked door inside a main house. The stash inside the locked room contains a Supremo-Bond and a 'Fifteen Wishes' wrist gear, which completes the mission. Dani Rojas undertakes two major Treasure Hunts in the world of Far Cry 6. The first mission, 'Sweet Fifteen,' involves infiltrating the Torres Warehouse, navigating cluttered platforms and industrial areas adorned for a Quinceañera celebration. Dani uses stealth takedowns and throws explosives to eliminate guards and manipulate electrical systems, eventually activating a large breaker that reveals a majestic white horse, El Unicornio, completing the mission. The second hunt, 'Mimo Abosi's Triada Relic,' begins at a remote drill site in La Joya. Combat erupts immediately outside, involving explosives and a mounted machine gun to clear FND soldiers. Dani enters a contaminated cave system, solving an electrical puzzle involving a portable generator to proceed deeper. The final part of the video focuses on 'The Long Drop' Treasure Hunt at the Santos Espinosa Dam, where Dani must navigate high platforms and use the grappling hook to reach a military stash guarded by soldiers, culminating in a fierce firefight and aerial takedown of a military helicopter before securing the final objective. The mission begins near the Santos Espinosa Dam in La Joya, where the character must locate a stash. The initial approach involves climbing grassy hills and breaching a boarded-up structure to enter the search zone. The character moves onto the metal structure of the dam, utilizing a grapple hook to descend the sheer wall facing the turbulent outflow. The first descent is aborted near the water, requiring the character to swim against strong currents to reach a safer section of the dam wall. The character then uses explosive rounds from a unique grenade launcher to blast away sections of concrete and pipe near the water level, clearing a path. After establishing access, the character grapples back down. A brief enemy encounter results in a worker falling into the rushing water, confirming the worker holds the key needed for the stash. The character descends to the water level to retrieve the key from the submerged body. Upon obtaining the key, the character swims out of the dangerous water flow and circles back around the dam structure. After climbing back onto the main platform, the character uses the grapple hook once more to descend to the lower level. They navigate the broken concrete to access the newly opened underwater passage and swim through the submerged corridor, avoiding two sharks, to finally reach and secure the stash, completing the objective. Chapters: 0:00 - Starting the 'A Little Birdie Told Me' Treasure Hunt 0:20 - Finding and feeding Daniilo the pelican for the first time 0:36 - Daniilo takes flight, leading Dani toward the next location 0:41 - Using the wingsuit/grapple hook to traverse the jungle quickly 1:55 - Following Daniilo to Roxas Farm 2:02 - Finding Daniilo at Roxas Farm and feeding the pelican 2:15 - Daniilo flies to the third location, prompting Dani to follow 2:37 - Driving an ATV toward the next objective, encountering resistance on the road 3:05 - Continuing the journey on the ATV, navigating jungle paths 3:39 - Arriving at Sotomayor Farm and locating the pelican again 3:44 - Feeding Daniilo; the pelican drops the Fisky Key 4:00 - Using the wingsuit to descend from the cliff toward the water 4:32 - Flying past a military convoy on the highway 5:20 - Using a jet ski to travel across the water toward the final stash location 6:15 - Arriving at the shore and locating the treasure chest 6:20 - Reading the note and unlocking the chest with the Fisky Key 6:47 - 'A Little Birdie Told Me' Treasure Hunt Completed, acquiring the AR-C rifle 10:33 - Beginning the 'Passing the Torch' Treasure Hunt (Map Location) 15:32 - Reading the note in the first building, giving the clue to find three switches 17:18 - Finding and flipping the first power switch 18:20 - Shooting out the boarded up window to find the second switch 19:41 - Flipping the second power switch in the main house 20:48 - Listening to the TV broadcast about Viviro and Anton Castillo 21:02 - Locating the third power switch and flipping it, unlocking the door 21:10 - Entering the previously locked room and opening the final stash 21:16 - 'Passing the Torch' Treasure Hunt Completed, acquiring the Fifteen Wishes wrist gear 22:21 - Beginning the 'Sweet Fifteen' Treasure Hunt (Map Location) 24:18 - Finding the first note for 'Sweet Fifteen' at the Torres Warehouse 24:50 - Finding the second note, indicating deliveries should be made at the back door 27:03 - Finding the third note, discussing a quinceañera party setup 27:29 - Activating the main party control panel (no power) 28:15 - Finding and flipping the first switch in the warehouse 28:31 - Finding and flipping the second switch, restoring power 30:00 - Entering Torres Warehouse for 'Sweet Fifteen' Treasure Hunt 30:50 - Activating the first breaker switch inside the warehouse 31:45 - Accessing and inspecting the arsenal menu 32:18 - Executing stealth takedowns on upper platform guards 33:16 - Using CQC takedowns on patrol guards 34:39 - Using explosives to breach a wooden wall 35:08 - Activating the main breaker and triggering fireworks 35:38 - Observing the 'El Unicornio' horse inside the warehouse 38:50 - Quinceañera celebration begins upon mission completion 39:07 - Sweet Fifteen Treasure Hunt completed and rewards obtained 39:52 - Acquiring and operating the motorbike/gyrocopter vehicle 40:44 - Arriving at McKay Global Drill Site D - Mimo Abosi's Triada Relic 41:48 - Acquiring the Fan Room Keycard 42:24 - Finding Mimo Abosi's Triada Relic note near the cave entrance 43:10 - Solving the generator power puzzle inside the cave 45:18 - Collecting Mimo Abosi's Mirage Foot Gear and completing the Treasure Hunt 46:21 - Starting 'The Long Drop' Treasure Hunt near the dam 46:48 - Engaging in combat with FND forces at the dam site 47:26 - Destroying an FND helicopter using the grenade launcher 51:19 - Finding 'The Long Drop' note and identifying the key carrier 55:16 - Eliminating the FND worker to retrieve the key 56:55 - Using the grapple to traverse the dam structure 58:45 - Navigating the dam's complex exterior, climbing high platforms 59:45 - Collecting the stash and completing 'The Long Drop' 60:00 - Approaching the Santos Espinosa Dam Search Zone 60:08 - Breaking into a utility building and observing notes 60:15 - Navigating the dam structure and locating grapple points 60:36 - Grapple descent down the first dam wall section 61:48 - Swimming against dam outflow and climbing a support structure 62:38 - Exiting the water and reloading specialty weapon 63:44 - Using explosives to breach a concrete wall near the water 64:16 - Second grapple descent and neutralizing the worker holding the key 64:35 - Detaching and plunging into the water to retrieve the key 65:19 - Accessing the Arsenal and System Menus 65:43 - Resuming mission and moving back onto the dam structure 66:07 - Descending the rope to retrieve the key from the fallen worker 66:46 - Swimming near the dam outflow to find final access point 67:38 - Using explosives to open the path to the stash 68:04 - Diving underwater and swimming past sharks 68:48 - Final grapple descent to reach and open the stash 69:11 - Mission objective complete and final menu access

RDR2 - Clearing Murfree Brood Cave With Semi-Auto Shotgun
The assault on Beaver Hollow begins with a quick weapon swap to the semi-auto shotgun. Moving toward the cave entrance, the character engages the Murfree Brood in a rapid-fire shootout, clearing the exterior perimeter. Once inside the dark, gruesome tunnels, the action turns brutal as the character clears rooms with devastating shotgun blasts at point-blank range. Every corner reveals new hostiles hiding in the shadows, requiring quick reflexes and constant reloading amidst the narrow cave walls. After pushing deep into the cavern through pools of blood and debris, a switch to dual Volcanic Pistols provides the precision needed for the final stand. Dead Eye is activated to mark and execute the last remaining enemies in the inner hideout, concluding the violent raid on the brood's lair. Chapters: 0:00:00 - 0:00:13 - Approach to the Murfree Brood hideout 0:00:13 - 0:00:31 - Breaching the cave entrance with the shotgun 0:00:31 - 0:01:15 - Intense close-quarters combat in the tunnels 0:01:15 - 0:01:45 - Navigating the deep cavern chambers 0:01:45 - 0:02:11 - Clearing the final room with Volcanic Pistols 📖 Interactive written walkthrough with clickable timestamps: https://pixelfungaming.com/videos/rdr2-clearing-murfree-brood-cave-with-semi-auto-shotgun

Metal Gear Solid : Phantom Pain Part 2
The video opens with game initialization and loading screens, transitioning into the cinematic prologue of Metal Gear Solid V: The Phantom Pain. Venom Snake awakens in an ambulance and escapes the vehicle during a chaotic night sequence near Dhekelia Sovereign Base Area, Cyprus. He is immediately confronted by a man in a gas mask and a blazing horse entity. Ocelot, mounted on a white horse, intervenes, pulling Snake onto the horse for a desperate escape. Snake utilizes an assault rifle to shoot the pursuing fiery entity, which eventually disappears in a massive explosion. The scene fades to black and displays the mission results (Prologue: Awakening). A subsequent cinematic montage reveals mission details: Kazuhira Miller has been captured in Afghanistan by Soviet forces. Ocelot tasks Snake with rescuing him, emphasizing the world now views Big Boss as a legend. Snake receives a prosthetic arm and eye patch, establishing his new identity. The gameplay transitions to Afghanistan (Northern Kabul), marking the beginning of Episode 1: Phantom Limbs. Mounted on horseback, Snake and Ocelot arrive at a mountainous, dusty region, surveying the terrain. Ocelot instructs Snake to perform reconnaissance on the nearby village of Da Ghwandai Khar, a Soviet outpost. Snake uses binoculars to identify and mark numerous enemy soldiers, vehicles, and weapon emplacements, establishing key tactical information. Snake then dismounts D-Horse and initiates stealth infiltration towards the outpost, moving low behind cover and through tall grass. He successfully executes two non-lethal CQC takedowns on patrolling Soviet guards, retrieving ammunition and carrying the unconscious bodies into nearby structures to maintain a low profile, completing the initial scouting and infiltration phase. A focused gameplay playthrough of Metal Gear Solid V: The Phantom Pain, concentrating on the mission to locate and rescue Kazuhira Miller. Snake infiltrates a desert village, neutralizing several enemy soldiers via CQC and tranquilizer weapons to maintain stealth. After locating an intelligence file that reveals Miller's location, Snake infiltrates the main Soviet-occupied Ghwanda Town. He uses tactical positioning and silenced headshots to subdue multiple guards patrolling the village streets and rooftops, often entering and quickly dissolving alert status. He successfully locates the severely injured Miller, cuts him loose, and carries him piggyback out of the containment area. The extraction sequence involves traversing rugged terrain under darkness while avoiding potential detection, heading toward the designated landing zone for helicopter pickup. The mission continues with Big Boss carrying Kazuhira Miller, evacuating him from the hot zone in Afghanistan. Initially, they traverse the dark, rocky terrain on foot, heading towards the extraction point. As they move, the presence of the Skulls, an enemy unit, becomes apparent, shrouded in a strange, thick mist that obscures visibility. Big Boss calls for a change in the landing zone as the original location is covered in the gas. D-Horse is called in, and Big Boss mounts the horse, carrying Miller across the rugged, dusty landscape to outrun the gas and the pursuing Skulls. They ride quickly, utilizing the horse's speed to cover long distances while navigating dangerous terrain and avoiding the edge of the mission area. As the gas clears and the environment transitions to a sunnier, scrub-filled desert, the extraction helicopter arrives. Big Boss reaches the LZ, places Miller into the chopper, and extracts successfully, completing the mission. The video concludes with the mission score and revenue screen. Chapters: 0:00 - Game Startup and Loading Screens 2:28 - Main Title Screen: Metal Gear Solid V: The Phantom Pain 3:00 - Cinematic Prologue: Ambulance Escape and Fiery Encounter 5:07 - Escape Sequence Gameplay: Shooting the Fire Entity with Ocelot 7:58 - Mission Complete: Prologue - Awakening Score Screen 8:16 - Cinematic Transition and Credits Montage: Ocelot's Revelation 12:59 - Chapter 1 Title Card: REVENGE 13:46 - Snake Receives the Prosthetic Hand and iDroid 15:00 - Loading Episode 1: Phantom Limbs 17:09 - Gameplay Begins: Riding D-Horse in Afghanistan 17:45 - Reconnaissance Phase: Scouting Da Ghwandai Khar Village 18:48 - Marking Enemy Positions and Artillery 19:38 - Ocelot's Final Instructions on Revenge 20:46 - Infiltration Approach: Riding Toward the Outpost 22:50 - Dismounting D-Horse and Initiating Stealth Mode 23:58 - Cover Mechanics and Marking Final Targets 27:06 - Stealth Takedowns and Hiding Guards 0:30:00 - Infiltrating the village and neutralizing the first guard 0:31:10 - Marking enemies and transitioning to night infiltration 0:32:30 - Acquiring Intel File revealing Miller's location (Cutscene/Map Update) 0:34:07 - Neutralizing rooftop guards and triggering a temporary alert 0:35:30 - Exiting the village area and calling D-Horse 0:38:00 - Approaching the next guard post and tranquilizing sentries 0:41:00 - Capturing the guard post and securing resources 0:44:00 - Riding D-Horse across the wilderness towards Ghwanda Town 0:46:40 - Commencing stealth infiltration of Ghwanda Town 0:50:10 - Neutralizing multiple guards in the village ruins with tranquilizer headshots 0:53:35 - Taking down key guards near the objective building 0:56:10 - Locating and rescuing Kazuhira Miller (Cutscene) 0:57:11 - Carrying Miller toward the extraction zone 0:58:40 - Requesting helicopter extraction and reaching the LZ perimeter 60:00 - Evacuating Miller on Foot in the Dark 60:33 - Checking Map and Continuing Evasion 61:15 - Hostile Helicopter Spotted, Approaching New LZ 61:58 - Extraction Helicopter Aborts Due to Gas and Skulls Appearance 62:21 - Calling D-Horse and Mounting for Faster Travel 63:00 - Riding Through the Mist, Approaching Mission Area Edge 63:40 - Navigating Difficult Terrain on Horseback 64:10 - Continuing Ride Towards the New Rendezvous Point 64:56 - Observing Skulls from a Distance 66:41 - Support Helicopter Arrives at LZ 67:24 - Riding Through Rocky Terrain Under Clearer Skies 69:38 - Entering Outpost Area with Mission Objectives Cleared 70:30 - Reaching Extraction Zone and Encountering Enemy Chopper 71:05 - Big Boss Places Miller on Helicopter and Escapes 71:41 - Mission Complete and Score Screen

RDR2 - Chance Encounter With Tilly In Saint Denis
John Marston encounters his former gang member Tilly Jackson in the bustling streets of Saint Denis. Now known as Mrs. Tilly Pierre, she sits on a bench outside a park when John approaches her. The two share a heartwarming reunion, catching up on the years that have passed since the Van der Linde gang disbanded. Tilly expresses her happiness in her new life, having married a lawyer and moved into a city house. John reciprocates the positive news, mentioning that he, Abigail, and Jack are settled at Beecher's Hope. As a city trolley pulls up, Tilly prepares to depart, but not before they exchange addresses and promise to stay in touch through letters. The interaction concludes with John watching his old friend ride away into her new life. Chapters: 0:00:00 - 0:00:15 - A Surprise Reunion in Saint Denis 0:00:15 - 0:00:45 - Reflecting on the Past and Family 0:00:45 - 0:01:05 - Discussing Their New Lives 0:01:05 - 0:01:16 - Farewell and Promises to Write 📖 Interactive written walkthrough with clickable timestamps: https://pixelfungaming.com/videos/rdr2-chance-encounter-with-tilly-in-saint-denis

Red Dead Online - American Beaver (West Elizabeth) Location
A character in Red Dead Redemption 2 hunts North American Beavers along the Upper Montana River. The session begins with navigating a horse through the rocky riverbed under an overcast sky. Spotting several beavers in the shallow water, the character uses a rifle to dispatch them quickly. After the hunt, the character dismounts and retrieves the carcasses from the water, bringing them to the gravelly riverbank. The process continues with skinning the animals to obtain pelts, fat, scent glands, and stringy meat. Each item is carefully stowed in the horse's saddlebags. One whole beaver carcass is also kept and secured on the back of the horse. The gameplay concludes with a detailed look at the in-game map, pinpointing the exact hunting location south of Strawberry, specifically along the banks of the Upper Montana River near Owanjila. Chapters: 0:00:00 - 0:00:12 - Navigating the river on horseback 0:00:12 - 0:00:19 - Hunting North American Beavers with a rifle 0:00:19 - 0:00:45 - Retrieving beaver carcasses from the water 0:00:45 - 0:01:13 - Skinning the first beaver and stowing items on the horse 0:01:13 - 0:01:35 - Skinning the second beaver and collecting materials 0:01:35 - 0:01:52 - Stowing a whole beaver carcass on the horse 0:01:52 - 0:02:25 - Reviewing the map for the specific hunting location 0:02:25 - 0:02:32 - Conclusion of the hunting session 📖 Interactive written walkthrough with clickable timestamps: https://pixelfungaming.com/videos/red-dead-online-american-beaver-west-elizabeth-location

Sherlock Holmes: Devils Daughter - A Study In Green Part 2
Experience the full walkthrough of the 'A Study in Green' case from Sherlock Holmes: The Devil's Daughter. This video captures every step of the investigation, from the initial discovery of clues at the London Archaeological Institute's Bowling Club to the final confrontation in Marley's office. Watch as Sherlock Holmes and Dr. Watson unravel a mystery involving a cursed Mayan expedition, a disappearing gold statue, and a series of strange deaths linked to tropical diseases. The gameplay showcases various detective mechanics including character analysis, chemical research, environmental investigation, and intense chase sequences through the streets of Victorian London. Follow along as we solve complex puzzles, such as steaming open a secret letter and decoding mechanical locks, to uncover the truth behind the legend of Tecún Umán. Chapters: 0:00:00 - Introduction to 'A Study in Green' Case 0:02:30 - Reviewing Evidence at Scotland Yard 0:05:00 - Foundry Discovery & Photo Analysis 0:07:30 - Consulting Dr. Watson on Tropical Diseases 0:10:00 - Investigating the London Archaeological Institute 0:12:30 - Meeting Bernard Marley at the Bowling Club 0:15:00 - Arrival at Bernard Marley's Foundry 0:17:30 - Character Analysis: Bernard Marley 0:20:00 - Searching the Foundry for Statue Pieces 0:22:30 - Uncovering the Truth About the Guatemala Expedition 0:25:15 - Mini-game: Steaming Open the Secret Letter 0:27:30 - A Tense Exchange with Alice on the Balcony 0:30:00 - Infiltrating the Hospital for Tropical Diseases 0:32:30 - Locating and Observing James Byron (Albeit) 0:35:00 - Interrogating the Escapee at the Hospital 0:37:30 - Mapping Albeit's Hideout in London 0:40:00 - Starting the High-Stakes Street Chase 0:43:00 - Navigating the Slums to Find Albeit's Home 0:46:00 - Investigating the Crime Scene at Albeit's House 0:49:00 - Finding Clues About the Mayan Calendar 0:52:00 - Solving the Secret Compartment Puzzle 0:55:00 - Uncovering the Legend of Tecún Umán 0:58:00 - Nighttime Break-in at Marley's Office 1:01:00 - Final Deductions and Statue Prototype Investigation 1:03:02 - Case Conclusion 📖 Interactive written walkthrough with clickable timestamps: https://pixelfungaming.com/videos/sherlock-holmes-devils-daughter-a-study-in-green-part-2

Farcry 6| El Este Region live #7
Dani Rojas starts near the Tempestad Lighthouse, exploring the coast before locating an operation nearby. After confirming the mission details on the map, Dani prepares for combat by cycling through the weapon arsenal and swapping rifles for a shotgun, then back to the AK-M, before using a thrown grenade to eliminate an enemy near the shore. Dani then fast travels to the Valle Prehistórico military target (FND Base) and speaks with a Guerrilla Scout who reveals information about the McKay Global Acid Plant and its chemical operations, unlocking the plant as a military target. Dani calls in the Avispa Buzzer (a Resolver helicopter) for transport, flying over the tropical landscape and coastline toward Concepcion while listening to the in-game radio. Dani lands near Concepcion to meet Yelena, entering the El Rincón Del Ron building. Inside the Guerrilla Hideout, Dani reads propaganda posters and a notice about farmers resisting the regime. Dani descends into the hidden La Moral headquarters, entering a long cutscene where Yelena and Jonrón discuss the revolution's direction. El Tigre, a legendary revolutionary, arrives and presents the "National Treasure" operation: rescuing Karlito from Castillo’s museum. Dani then accepts two new operations: "Knuckleball" (ambushing a convoy) and "Room Service" (stopping an interrogation at the Grand Hotel Caballero). Dani tracks the "Room Service" operation and takes the Avispa Buzzer toward the hotel, landing outside the heavily guarded location. Dani infiltrates the Grand Hotel Caballero, performing silent machete kills on FND soldiers before entering the pool courtyard. Dani quickly eliminates "The Dentist," the interrogator, who was torturing Hugo by the pool, completing the first objective. Dani subsequently defends the area against reinforced FND soldiers, utilizing the AK-M rifle against enemies positioned around the balconies and pool. After clearing the area, El Tigre arrives and raises a La Moral flag over the hotel. Yelena uses a laptop inside the hotel to monitor a propaganda broadcast featuring Admiral Benitez and McKay, confirming the successful capture of the area and revealing a new checkpoint target. Dani then tracks the "Knuckleball" operation and flies the Avispa Buzzer to Borrero Farm to recruit more farmers, ensuring they have RPGs and road spikes for the impending ambush at Schaub Pass, as the sun begins to set over the sea. Dani flies the helicopter through the jungle terrain toward the Sombrea Gorge location to prepare for the final ambush. The mission begins with the protagonist flying a gyrocopter toward Schaub Pass to ambush a special convoy. After landing, the player equips an AK-M rifle and a grenade launcher, establishing an ambush point near a road tunnel. Once the convoy arrives, the player successfully destroys the lead vehicle, followed by a tank. The player infiltrates and hijacks the tank, destroying the main target vehicle and completing the 'Knuckleball' operation. The player then drives the unique tank, dubbed 'Karlito,' to the Museum of the False Revolution for the next objective: 'National Treasure.' Inside the museum, the player meets El Tigre, a legendary guerrilla fighter and the tank's original owner. The player repairs the tank, which is then used to break out of the museum grounds. Driving Karlito through the jungle, the player engages in intense tank combat, destroying multiple enemy armored vehicles and a hostile helicopter. The tank reaches the Apito-Bara Cave hideout, successfully completing the escort objective. Inside the cave, the player meets Yelena Morales, who tasks them with the 'Harpoon' operation—assassinating Admiral Benitez. The player prepares by customizing equipment at the workbench before commandeering an armored jeep and driving through the city of Concepcion toward the next objective, navigating traffic while remaining vigilant against hostile forces. The mission begins with the protagonist driving a red, armored truck through a tropical road before stopping to repair the vehicle using a welding tool. A guerrilla scout approaches, detailing a planned ambush at a military checkpoint known as Villar Farm (codename: Aracari). The player traverses through dense jungle and shallow riverbeds toward the location. Upon arriving, the player uses stealth takedowns and a throwing knife to silently eliminate two sentries guarding the entrance, revealing an armored military vehicle and several soldiers inside the compound. The player initiates a massive firefight, utilizing an assault rifle and grenade launcher to destroy the armored vehicle and eliminate several enemy soldiers, including the local Comandante, successfully completing the Ambush objective. The player then repairs the captured armored truck and begins driving towards the next objective: meeting El Tigre at Sierra Perdida. The journey involves driving through flooded roads and past propaganda billboards promoting President Castillo. Upon arriving at the beachhead, the player meets El Tigre and other guerrilla allies. A cinematic sequence begins, showing a nighttime attack during a heavy storm, where El Tigre operates a mounted machine gun, laying waste to enemy boats and infantry, signaling the start of the primary mission. The player is tasked with escorting the tank, Karlito, into the heavily fortified Fontana Fort. Heavy combat ensues, with the player using the machine gun to eliminate soldiers and maintain defense. The objective shifts to defending Yelena while she hacks the fort's main cannons, which are then used to breach the gates. After the gate is destroyed, the player enters the fort, navigating through burning, debris-filled hallways contaminated with poison gas. The player must find and manipulate several valves to shut off the poison supply. Fighting Hazmat-suited soldiers, the player obtains a Northern Wing Keycard from a fallen officer, which allows access to a control room. The protagonist uses the control panel to release captured guerrillas, who immediately join the fight. Returning to the exterior, the player secures a large tank cannon emplacement. Using the repaired tank cannon, the player blasts open the reinforced door of Admiral Benitez's office, eliminating remaining enemy reinforcements and a flying drone. The player confronts Admiral Benitez, who is holding a hostage in her office. The player quickly kills Admiral Benitez with a pistol shot, completing the assassination objective. The video opens with a celebratory cutscene following the successful 'Harpoon' operation, showing Dani Rojas and Libertad allies cheering as they raise the body of Admiral Benitez as a trophy. Yelenas congratulates Dani, noting that an 'eye for an eye' approach was justified, while others, like Lucky Mama, question the brutality. El Tigre joins the celebration, sharing Benitez's private stash of rum and toasting 'Viva La Moral!' El Tigre pulls Dani aside, offering philosophical advice that Dani Rojas will be a bigger legend because Dani's war will end, unlike the previous revolution. The screen cuts to black with the 'Operation Completed' notification. The scene transitions to a dramatic cinematic inside the Coronado Prison in Esperanza. Antón Castillo and Mr. McKay enter, discussing the state of the prison. Antón’s son, Diego, speaks with an imprisoned, elderly rebel known as the Legend of '67, who was captured after the Battle of Esperanza. The Legend reveals he watched Diego's grandfather die and accuses the Castillo family of raping Yara. When Diego is provoked into opening the cell, the Legend threatens to strangle him, calling Diego 'another Castillo.' Diego recoils in shock and pain, clutching his hands which are covered in the Legend's blood from the handcuffs. Antón sees Diego's distress, comforts him, and leads him away. The video returns to gameplay, showing Dani completing the mission. Clara calls Dani, confirming the Admiral is dead but warning that Antón will seek revenge and has increased the military presence. Clara informs Dani of a defection problem within Castillo's ranks. The new mission objective, 'Our Right to Party,' requires Dani to meet Yelena at a bar named Chuchi's. Dani navigates the rooftop of Concepcion, checking the map to locate the objective marker which is situated near the Fernando Valley and La Joya regions. Chapters: 0:00 - Starting near Tempestad Lighthouse and moving to the coast 0:37 - Accessing arsenal and switching weapons 1:07 - Checking the map and mission objectives 2:40 - Fast traveling and receiving the McKay Global Acid Plant military target 4:02 - Calling and entering the Avispa Buzzer helicopter 5:39 - Landing in Concepcion and moving toward the hideout 7:55 - Cutscene: Yelena's speech and El Tigre assigning the National Treasure operation 11:41 - Accepting new operations: Knuckleball and Room Service 13:17 - Starting the Room Service operation and flying to Grand Hotel Caballero 14:53 - Infiltrating the Grand Hotel Caballero and eliminating the Dentist 17:55 - Securing the hotel and short cutscene with El Tigre 19:18 - Operation Room Service complete, viewing propaganda broadcast and finding Notice of Disposal 22:27 - Unlocking FND Cache via mounted gun and flying to Borrero Farm 25:13 - Recruiting farmers for the Knuckleball ambush 27:08 - Flying the Avispa Buzzer towards the Schaub Pass ambush location 30:00 - Starting Knuckleball Operation: Flying to Schaub Pass 31:27 - Setting up the ambush position near the road entrance 32:45 - Selecting weapons for the convoy ambush 35:36 - Ambushing the special convoy and destroying the lead truck 35:48 - Disabling and hijacking a tank 36:37 - Knuckleball operation completed; securing Karlito the tank 37:37 - Tracking the National Treasure operation: Liberate Karlito 41:20 - Arriving at the Museum of the False Revolution 41:47 - Meeting El Tigre inside the museum 45:16 - Repairing Karlito the tank using a welding torch 45:46 - Driving Karlito and breaching the gates; engaging forces 46:29 - Tank combat and destruction of an attack helicopter 47:30 - Continuing the tank escort through the jungle and riverbed 48:58 - Driving Karlito into the Apito-Bara Cave hideout 54:12 - Receiving Harpoon Operation: Assassinate Admiral Benitez 55:36 - Modifying weapons and gadgets at the Resolver Workbench 58:21 - Driving the armored jeep toward the destination through Concepcion 59:25 - Evading special forces and clearing the immediate area 60:00 - Driving and Vehicle Repair 60:31 - Initiating Ambush at Villar Farm (Aracari) 61:25 - Villar Farm Firefight and Ambush Completion 62:21 - Driving to Sierra Perdida for Main Mission 65:30 - Meeting El Tigre and Beginning the Attack Cinematic 66:58 - Nighttime Beach Assault Cinematic and Mission Start 67:23 - Assaulting Fontana Fort and Escorting Karlito 68:57 - Repairing Cannon and Breaching Fort Gates 70:18 - Entering the Burning, Poisoned Fort Interior 72:26 - Stopping the Poison and Equipping Hazmat Gear 73:52 - Searching the Interior for Keycards 80:18 - Acquiring Northern Wing Keycard 81:17 - Opening Prison Doors and Rejoining Allies 84:05 - Reaching Artillery and Targeting Benitez's Office 86:30 - Cannon Malfunction and Repair 89:45 - Final Confrontation and Assassinating Admiral Benitez 90:00 - Benitez's Death and Celebration Cutscene 90:17 - Dialogue about war, soldiers, and revolution 91:09 - Transition to Coronado Prison (Antón and McKay) 91:37 - Diego confronts the Legend of '67 92:19 - The Legend attacks Diego and Antón intervenes 92:54 - Operation Harpoon Completed and Mission Start (Our Right to Party) 93:41 - Clara calls Dani: Admiral dead, warnings of revenge and defection 94:10 - Map Navigation and Objective Check

RDR2 - Our Best Selves Walkthrough
The mission begins with the Van der Linde gang riding on horseback through a forest toward Saint Denis to execute a planned train robbery. Dutch outlines the plan, focusing on hitting the train at a refuel stop outside the city. Arthur and John ride off to retrieve hidden dynamite. After collecting the explosives, they ride toward the railroad tracks, discussing how the Pinkertons are closing in on the gang. The full group meets at the Saint Denis train depot just as the target train arrives. Arthur and John board the train from the rear, climbing onto a flatcar and engaging security guards immediately in close-quarters combat. Arthur utilizes Dead Eye to efficiently eliminate multiple armed guards. They move quickly through the open carriages, fighting toward the front of the train. An explosive device planted by another gang member detonates on one car, setting it ablaze. John successfully uncouples the burning carriage. Arthur then mans a mounted Maxim gun and defends the train against Pinkerton riders attacking from the riverbank and forest edge as the train speeds toward a chasm where a bridge is under construction. After clearing the initial patrol, Arthur and Sadie (who has joined him) plant dynamite on the heavily armored front car. The explosion breaches the car, and they retrieve several bags of U.S. Army payroll. Upon discovering the engineer is dead, they realize the train will not stop and is heading directly toward the broken bridge. The remaining gang members leap off the train moments before the armored car plunges into the canyon. The gang regroups with the bags of money. Dutch, Bill, and Micah arrive, revealing that Pinkerton agents captured Abigail and are using her to lure out John. A fierce argument ensues regarding the fate of Abigail. Arthur, disillusioned by Dutch's selfishness, decides to abandon the gang's plan to travel west. He gives Tilly a substantial amount of money to take Jack and flee to Copperhead Landing. Arthur then rides off with Sadie to track down Abigail, leaving the rest of the gang behind. Chapters: 0:00 - 0:28 - Setting up the Saint Denis Train Robbery Plan 0:28 - 1:55 - Retrieving Dynamite from the Hidden Wagon 1:55 - 3:21 - Ride to Saint Denis and Discussion of Dutch's Decreasing Competence 3:21 - 5:48 - Arrival at Saint Denis Train Station and Final Instructions 5:48 - 7:10 - Boarding the Train and Initial Firefight with Guards 7:10 - 9:40 - Clearing the Flatcars and Securing the Armored Car 9:40 - 11:30 - Manning the Maxim Gun and Defending Against Pinkerton Riders 11:30 - 12:48 - Continuous Defense and Movement Towards the Armored Car 12:48 - 14:21 - Planting Dynamite, Breaching the Armored Car, and Leaping to Safety 14:21 - 15:24 - Retrieval of Payroll and Narrow Escape as the Train Crashes 15:24 - 17:48 - The Gang Regroups and Arthur Leaves to Save Abigail 📖 Interactive written walkthrough with clickable timestamps: https://pixelfungaming.com/videos/rdr2-our-best-selves-walkthrough

Red Dead Online - Chanterelle Location - Old Battlefield
The character rides through a dense forest at night on horseback, searching for flora. Upon finding a patch of Chanterelle mushrooms, the character dismounts to forage and consume them, triggering a status message regarding plant consumption. After remounting, the journey continues toward the ruins of an abandoned church under a darkening sky. The map is accessed to pinpoint the location near Bolger Glade and Rhodes. The character explores the skeletal remains of the structure as a thunderstorm begins, utilizing a lantern to navigate the shadows and the surrounding environment. Chapters: 0:00:00 - 0:00:13 - Nighttime ride through the forest 0:00:13 - 0:00:38 - Foraging and consuming Chanterelle mushrooms 0:00:38 - 0:00:59 - Approaching the abandoned church ruins 0:00:59 - 0:01:21 - Map location check near Bolger Glade 0:01:21 - 0:01:47 - Exploration of ruins during a thunderstorm 📖 Interactive written walkthrough with clickable timestamps: https://pixelfungaming.com/videos/red-dead-online-chanterelle-location-old-battlefield

RDR2 - Obelisk Structure Location
Exploration begins in a mist-shrouded, mountainous region where the character, adorned with a Viking-style horned helmet, discovers an ancient stone obelisk standing prominently on a cliff edge. After a thorough initial observation, the character carefully sketches the monument into their journal, documenting the find with a detailed drawing. A brief survey of the surrounding foggy forest and steep cliffside follows, highlighting the isolation and atmosphere of the remote location. The visit concludes with the character taking a high-quality photograph of the obelisk using a handheld camera, reviewing the shot in the Social Club gallery, and then preparing to move on from the site. Chapters: 0:00:00 - 0:00:20 - Discovery and inspection of the stone obelisk 0:00:20 - 0:00:30 - Documenting the find in the explorer's journal 0:00:30 - 0:00:50 - Surveying the foggy mountain landscape 0:00:50 - 0:01:12 - Capturing a photograph and viewing the gallery 📖 Interactive written walkthrough with clickable timestamps: https://pixelfungaming.com/videos/rdr2-obelisk-structure-location

Metal Gear Solid : Phanthom Pain Part 4 CS2 WalkThrough
Punished 'Venom' Snake begins Episode 4: C2W by selecting his loadout, including D-Horse as his companion. The mission requires Snake to destroy comms equipment at the Eastern Communications Post to disable Soviet reinforcement systems. Snake deploys into Northern Kabul, Afghanistan, surveying the rocky, arid terrain with binoculars to locate the target outpost and mark enemy soldiers and emplacements. Running through the winding desert paths, Snake approaches the smaller Spugmay Keep outpost first. Using suppressed pistol fire, Snake systematically neutralizes two guards before using the Fulton recovery device on the guards and a deployed heavy machine gun. Snake then summons D-Horse and rides toward the Eastern Communications Post, weaving through canyon roads. Arriving near the main facility, Snake performs extensive reconnaissance, marking numerous enemy soldiers, vehicles, a radar dish, and communication equipment. Alert status is triggered after initial tactical takedowns, forcing Snake into combat. He continues neutralizing enemies rapidly and extracts a second gun emplacement. Engaging enemies near the comms building, Snake utilizes a mortar emplacement to wipe out multiple approaching soldiers and then enters the building containing the objective. Snake destroys the communication equipment, completing the primary objective. With the objective complete, Snake quickly extracts from the hot zone riding D-Horse away from the compromised post. The mission concludes with the results screen showing a B rank, acquired staff, and unlocked R&D developments. Chapters: 0:00 - 1:46 - Mission Deployment and Initial Scouting 1:46 - 5:38 - Infiltration Approach and Target Marking 5:38 - 7:48 - Neutralizing Outpost Guards and Extracting Gear 7:48 - 10:04 - Horse Travel to Main Communications Post 10:04 - 13:28 - Detailed Reconnaissance and Stealth Takedowns 13:28 - 19:42 - Combat Escalation and Objective Destruction 19:42 - 24:05 - Exfiltration and Mission Complete Scorecard 📖 Interactive written walkthrough with clickable timestamps: https://pixelfungaming.com/videos/metal-gear-solid-phanthom-pain-part-4-cs2-walkthrough

Red Dead Online: Sniping Player Bounty Trying To Escape #shorts
The mission begins with a pursuit across the open plains where a high-precision scoped rifle takes down a bounty target from long range. After neutralizing the threat, the character rides to the fallen target, retrieves the body, and secures it to the back of the horse. The journey proceeds through the dense forests of Tall Trees toward Manzanita Post. Upon reaching a prison wagon, the character delivers the deceased bounty to the warden. The mission concludes with a successful completion screen, confirming the delivery and reward. Chapters: 0:00:00 - 0:00:11 - Sniper engagement with the bounty target 0:00:11 - 0:00:29 - Retrieving and loading the bounty onto the horse 0:00:29 - 0:00:42 - Navigating the forest trail to the delivery point 0:00:42 - 0:00:54 - Delivering the bounty to the prison wagon warden 0:00:54 - 0:01:00 - Mission completion and rewards 📖 Interactive written walkthrough with clickable timestamps: https://pixelfungaming.com/videos/red-dead-online-sniping-player-bounty-trying-to-escape-shorts

Red Dead Online - 2 Chanterelle Locations - New Hanover
The mission starts with riding through the rolling hills near Emerald Station under a predawn sky. The focus shifts to foraging as the character dismounts to pick Chanterelle mushrooms, progressing a daily challenge. Exploration continues on horseback, utilizing the Eagle Eye ability to reveal tracks of various animals across the terrain. Upon spotting a Virginia Opossum, a quick shot from the saddle takes it down, followed by a skinning animation to secure its pelt. The search for the remaining mushrooms leads deep into the woods, where careful tracking reveals the final clusters. Collecting these completes the daily objective, followed by a brief orientation using the map before riding out across the railway tracks. Chapters: 0:00:00 - 0:00:17 - Riding through the hills near Emerald Station 0:00:17 - 0:01:03 - Collecting the first set of Chanterelle mushrooms 0:01:03 - 0:01:17 - Checking the world map for location details 0:01:17 - 0:02:25 - Navigating through the woods and tracking animals with Eagle Eye 0:02:25 - 0:02:50 - Hunting and skinning a Virginia Opossum 0:02:50 - 0:03:25 - Searching the forest floor for remaining challenge items 0:03:25 - 0:04:00 - Finding final mushrooms to complete the daily challenge 0:04:00 - 0:04:30 - Final map check and riding towards the horizon 📖 Interactive written walkthrough with clickable timestamps: https://pixelfungaming.com/videos/red-dead-online-2-chanterelle-locations-new-hanover

Sherlock Holmes: Devils Daughter - Infamy Part 2
Experience the complete investigative journey in this comprehensive walkthrough of Sherlock Holmes: The Devil's Daughter. This video covers the intense 'Infamy' case, where Sherlock must deal with an attack on his own life and infiltrate the criminal underworld of Whitechapel. Watch as he uses various disguises to enter the notorious Green Dragon Tavern, employs his keen senses to eavesdrop on dangerous gangs, and navigates rooftops in a high-stakes stealth sequence. The adventure continues with the high-octane 'Chain Reaction' case, starting with a catastrophic multi-carriage pile-up in the heart of London. You'll see Sherlock and Dr. Watson spring into action to save lives at the accident scene before diving deep into a complex web of technical sabotage and corporate greed. The video showcases all core gameplay mechanics including the deduction space, character profiling, re-creating crime scenes, and intense action set-pieces. From the quiet library of 221B Baker Street to the smoky alleys of Victorian London, witness the world's greatest detective solve some of his most challenging cases yet. Chapters: 0:00:00 - Introduction and Wardrobe Disguises 0:04:22 - Infiltrating the Green Dragon Tavern 0:08:42 - Eavesdropping on Whitechapel Gangs 0:13:10 - Upper Floor Investigation & Secret Rooms 0:16:38 - Planning the Tavern Brawl Diversion 0:18:23 - Stealth: Navigating Tavern Rooftops 0:22:45 - Finding 'The Dart' Evidence 0:25:35 - Sherlock's Pastor Disguise & Exorcism Act 0:30:30 - Reassembling the Torn Letter Clues 0:33:17 - Infamy Case Conclusion: Condemning Jack Cole 0:35:09 - Chain Reaction: The Great Carriage Accident 0:38:38 - Rescue Operations at the Crash Site 0:43:00 - Character Profiling: Interrogating Survivors 0:48:00 - Examining the Debris for Technical Clues 0:53:00 - Reconstructing the Accident Sequence 0:58:00 - Investigating the Vehicle Workshop 1:03:00 - Deduction Space: Connecting the Sabotage Clues 1:08:00 - Locating the Hidden Evidence Room 1:13:00 - Uncovering the Conspiracy Plot 1:18:00 - The Final Confrontation in the Warehouse 1:23:00 - Chain Reaction Case Resolution 1:28:00 - Return to Baker Street & Alice Confrontation 1:33:00 - Preparing for the Final Chapter 1:36:37 - Episode Conclusion 📖 Interactive written walkthrough with clickable timestamps: https://pixelfungaming.com/videos/sherlock-holmes-devils-daughter-infamy-part-2

RDR2 - Weird Corpse With withered Arm
Arthur Morgan traverses the marshy terrain of Bayou Nwa and comes across a deceased individual lying in the mud. He approaches the body and initiates an inspection, discovering a uniquely withered arm on the victim. Following the investigation, Arthur takes out his journal and creates a detailed sketch of the scene while recording his observations. He then stands over the remains, examining the surrounding area. To get a better look at the deformity, Arthur uses his binoculars to zoom in on the body's arm and facial features before eventually putting them away and continuing his exploration through the swamp. Chapters: 0:00:00 - 0:00:08 - Arthur discovers a corpse in the Bayou Nwa marsh 0:00:08 - 0:00:18 - Initial inspection of the withered arm corpse 0:00:18 - 0:00:28 - Arthur sketches the scene and writes in his journal 0:00:28 - 0:00:40 - Observing the body from a standing position 0:00:40 - 0:01:02 - Detailed binocular examination of the remains 📖 Interactive written walkthrough with clickable timestamps: https://pixelfungaming.com/videos/rdr2-weird-corpse-with-withered-arm

Ready Or Not: 3 Letter Triad | S Rank
Experience a full, high-stakes tactical mission in 'Ready or Not' with this complete gameplay walkthrough of the '3 Letter Triad' operation at the Elysian Hotel. Watch as an LSPD SWAT team methodically clears a sprawling, derelict hotel filled with dangerous suspects and trapped civilians. This video demonstrates advanced CQB (Close Quarters Battle) tactics, including the precise use of the 'Optiwand' mirror tool, various door-breaching techniques, and coordinated AI squad commands for both Red and Blue teams. Witness intense firefights and careful evidence collection as the player aims for the prestigious S Rank. From the initial beach-side entry to the final upper-floor room clearing, every step is calculated to maintain order and save lives. The video concludes with the mission summary screen showcasing a perfect S rank score, no officer casualties, and all objectives fulfilled. Chapters: 0:00:00 - Mission Briefing & Beach Entry 0:02:45 - Ground Floor Room Clearing 0:05:20 - First Suspect Engagement 0:08:30 - Methodical Corridor Sweeping 0:12:10 - Securing the Main Lobby & Reception Area 0:15:45 - Tactical Clearing of the Restaurant & Kitchen 0:19:30 - Stairwell Ascent to Upper Floors 0:23:15 - High-Intensity CQB in Guest Rooms 0:27:05 - Clearing Outdoor Balconies & Walkways 0:30:30 - Final Suspect Arrests & Securing Evidence 0:32:10 - Mission Complete: S Rank Summary 📖 Interactive written walkthrough with clickable timestamps: https://pixelfungaming.com/videos/ready-or-not-3-letter-triad-s-rank

Far Cry 5 - Death From Below - Cattle Co Outpost
The mission begins with a stealthy approach toward a cult-controlled outpost in Far Cry 5. Positioned beneath a ledge, the character executes a lethal ledge takedown on an unsuspecting cultist guarding the perimeter. Following the successful elimination, the character loots the body to replenish supplies, including rifle ammunition and dynamite. The character then vaults over a white picket fence to enter a field of flowers, crouching low to maintain a hidden profile while advancing toward the next objective. Chapters: 0:00:00 - 0:00:03 - Executing the ledge takedown on a cultist 0:00:03 - 0:00:07 - Looting the fallen enemy for supplies 0:00:07 - 0:00:11 - Moving into stealth cover in the flower field 📖 Interactive written walkthrough with clickable timestamps: https://pixelfungaming.com/videos/far-cry-5-death-from-below-cattle-co-outpost

RDR2 - The King’s Son Walkthrough
The mission begins with Arthur Morgan visiting Chief Rains Fall at the Wapiti Indian Reservation. They engage in a somber discussion about the rash actions of Rains Fall's son, Eagle Flies, who has been captured by the US Army and is being held at Fort Wallace. Arthur agrees to assist in a rescue and sets off with Charles Smith. During their long ride to the fort, the two share a poignant conversation regarding the deteriorating state of the Van der Linde gang, Dutch's increasingly erratic leadership, and Arthur’s own terminal tuberculosis diagnosis. Upon arriving at a vantage point overlooking the fort, they wait for the cover of night. A tactical, stealthy approach ensues under a heavy rainstorm. Armed with bows, Arthur and Charles move down the ridge and silently eliminate sentries at the main gate. They maneuver around the perimeter to find a weak point in the defenses. After successfully scaling the high wooden walls, they infiltrate the compound. The duo continues to navigate the inner walkways of the fort, using silent takedowns to clear a path toward the jail cells to locate and liberate Eagle Flies. Chapters: 0:00:00 - 0:01:56 - Meeting with Chief Rains Fall 0:01:56 - 0:04:30 - Traveling to Fort Wallace 0:04:30 - 0:06:15 - Scouting the Fort at Night 0:06:15 - 0:08:24 - Stealthy Perimeter Infiltration 0:08:24 - 0:10:08 - Navigating the Inner Ramparts 📖 Interactive written walkthrough with clickable timestamps: https://pixelfungaming.com/videos/rdr2-the-king-s-son-walkthrough

FIFA 15 Demo - Live Stream
The video opens with navigation through the game settings menu of FIFA 15, adjusting camera settings before proceeding to the match. The main content is a simulated football match between Liverpool and Manchester City in the Barclays Premier League, followed by a second match between PSG and Boca Juniors in a friendly setting. The pre-match sequence features introduction graphics, team line-ups, and player walkouts for the first fixture. The action begins with the kickoff, focusing primarily on tactical gameplay using on-screen indicators and player movement suggestions. Manchester City quickly takes control of the match, scoring the first goal in the 6th minute and adding a second in the 35th minute. The half-time stats show Manchester City dominating possession and shots on target. The second half continues with Manchester City maintaining their lead, executing a substitution around the 70th minute, and scoring a third goal in the 82nd minute via a deflected free-kick. After the final whistle and match statistics review, the video transitions to the FIFA Ultimate Team menu, showcasing squad chemistry concepts. The footage then switches to a second match, a friendly between PSG and Boca Juniors. Boca Juniors immediately finds success, scoring in the 3rd minute and adding two more quick goals in the 10th and 11th minutes, highlighting a dominant early performance in the second demonstration game. The video features a FIFA 15 friendly match simulation between Paris Saint-Germain (PSG) and Boca Juniors, primarily covering the second half. Boca Juniors leads 0-2 at the start of the visible gameplay. Early in the remaining first half, Boca Juniors launches a quick counter-attack, capitalizing on a tight sequence inside the box to score a third goal via Erbes, making the score 0-3 momentarily, though the halftime screen later reverts to 0-2. The first half concludes shortly after. After the break, PSG begins the second half aggressively. Edinson Cavani scores in the 54th minute, reducing the deficit to 1-2. The mid-second half involves intense midfield battles and defensive posturing by both teams. Boca Juniors manages substitutions and utilizes slow buildup play to maintain control, while PSG attempts several attacking moves, including a chip shot that is saved and a corner kick that fails to convert. The match ends with Boca Juniors securing a close victory over PSG with a final score of 1-2. Chapters: 0:00 - Menu Navigation and Game Settings 0:17 - Liverpool vs. Manchester City Match Introduction 0:40 - Player Lineups and Pre-Match Rituals 1:23 - Manchester City Starting XI and Formation Display 2:38 - Kickoff: First Half Begins 3:30 - GOAL! Manchester City Takes the Lead (1-0) 6:08 - Liverpool Defensive Play and Counter-Attack Attempts 7:42 - GOAL! Manchester City Doubles the Lead (2-0) 9:36 - Liverpool Attempts to Break Down Manchester City Defense 11:44 - Half-Time Match Facts Screen 12:06 - Second Half Kickoff 13:11 - Manchester City Substitution: Navas Enters 14:40 - Manchester City Substitution: Fernando Enters 16:21 - Liverpool Pressing High, Attempting to Recover 17:21 - GOAL! Manchester City Extends the Lead (3-0) 18:54 - Final Whistle and Match Facts Review 19:35 - Transition to FIFA Ultimate Team Demo 20:41 - Friendly Match Setup: PSG vs. Boca Juniors Selection 22:33 - PSG vs. Boca Juniors Match Introduction 24:28 - Friendly Match Kickoff 24:52 - GOAL! Boca Juniors Scores Early (1-0) 27:42 - GOAL! Boca Juniors Doubles the Lead (2-0) 29:15 - GOAL! Boca Juniors Scores Again (3-0) 29:57 - Gameplay Continues in PSG vs. Boca Juniors Match 0:00 - Boca Juniors maintains 0-2 lead in late first half 0:43 - Boca Juniors scores third goal after tight buildup and rebound finish 1:44 - Instant replay of Boca Juniors' third goal 2:02 - Midfield play and possession exchange 3:03 - PSG attempts to build offense but struggles with final pass quality 3:32 - First half ends (PSG 0 - 2 Boca Juniors) and substitutions occur 6:42 - Second half kicks off (45:00 game time) 7:53 - Edinson Cavani scores for PSG, reducing the deficit to 1-2 8:31 - Match stats display updated score and goal replay 10:13 - Boca Juniors goalkeeper makes safe save from PSG attack 12:08 - Boca Juniors makes substitutions and game pace slows down 13:38 - PSG takes a corner kick; defense clears the ball effectively 14:18 - Goalkeeper long throw sparks a midfield battle 15:10 - PSG presses high during stoppage time 15:35 - Full-time whistle blows; Boca Juniors wins 1-2 16:41 - Match facts and highlights menu display 19:01 - Video concludes 📖 Interactive written walkthrough with clickable timestamps: https://pixelfungaming.com/videos/fifa-15-demo-live-stream

Rainbow Six Siege: 2 quick kills
The mission begins with a tactical breach through the East Garden of the Skyscraper map. The character, playing as Thatcher, moves alongside teammates toward the main entrance. Initial contact occurs as suppressing fire is exchanged through the doorway. Moving into the reception area, the character takes a strategic position behind a counter, picking off an enemy at the top of the stairs. A fierce firefight erupts in the restaurant section, where multiple enemies are neutralized in quick succession. After clearing the immediate threats, the character moves to secure the objective area. The round concludes with a victory for the blue team as the final opponent is eliminated. A post-round replay showcases the final moments of the engagement, highlighting the coordinated push into the objective room. Chapters: 0:00:00 - 0:00:12 - Initial breach and entry through East Garden 0:00:12 - 0:00:25 - Securing the reception area and first elimination 0:00:25 - 0:00:45 - Intense gunfights in the restaurant and bar 0:00:45 - 0:01:00 - Objective secured and round victory replay 📖 Interactive written walkthrough with clickable timestamps: https://pixelfungaming.com/videos/rainbow-six-siege-2-quick-kills

RDR2 - Perfect Whitetail Deer Pelt Walkthrough
The character rides a horse through a grassy valley, carrying a carcass on the back of their mount. Upon sighting a herd of pronghorns, they deploy a bow and arrow to take down an American Pronghorn Buck with a single shot. The character continues the hunt on foot, stalking through high grass to eliminate several whitetail deer with silent, accurate bow fire. After securing the kills, the character skins a deer, which completes a daily challenge objective and earns experience points. The gameplay concludes with the character riding back towards a town along a set of train tracks as a storm begins to brew in the distance. Chapters: 0:00:00 - 0:00:10 - Riding through the plains with a carcass 0:00:10 - 0:00:22 - Taking down a pronghorn buck with a bow 0:00:22 - 0:00:50 - Stalking and hunting whitetail deer on foot 0:00:50 - 0:01:15 - Skinning the whitetail deer to complete challenges 0:01:15 - 0:01:51 - Traveling along the train tracks toward town 📖 Interactive written walkthrough with clickable timestamps: https://pixelfungaming.com/videos/rdr2-perfect-whitetail-deer-pelt-walkthrough
The Walking Dead: Destinies | ACT 2 - Episodes 6-10 Walkthrough
Experience the ultimate 'What If?' scenario in this complete walkthrough of The Walking Dead: Destinies, covering Episodes 6 through 9. This video showcases a timeline where pivotal choices drastically alter the fate of the survivors. Watch as Rick Grimes and Shane Walsh's growing animosity reaches its boiling point at the Greene Farm. We navigate through the treacherous woods in 'What Lies Ahead' (Episode 6) searching for a lost Sophia, venture into a walker-infested high school for medical supplies in 'Bloodletting' (Episode 7), and witness the haunting origins of Shane's betrayal in 'Haunted' (Episode 8). The journey concludes with the explosive 'Pretty Much Dead Already' (Episode 9), featuring the iconic barn massacre and a final, heart-wrenching showdown between former best friends. See how different priorities lead to shocking character deaths and a desperate escape towards the prison outskirts. Chapters: 0:00:00 - Roadside Camp & Group Conflict 0:02:56 - Episode 6: What Lies Ahead - Woods Mission 0:04:22 - Rick Finds a Machete in the Woods 0:06:53 - Navigating through the Fog and Walkers 0:08:58 - Harvesting Skill Points and Supplies 0:10:53 - Finding Sophia & Her Hiding Place 0:12:26 - Defending Against the Highway Herd 0:14:53 - Sophia Goes Missing in the Woods 0:15:30 - Carl is Accidentally Shot 0:17:31 - Arrival at the Greene Farm 0:18:03 - Episode 7: Bloodletting - School Mission 0:20:00 - Maggie's Stealth Mission at the High School 0:22:37 - Shane’s Perspective at Cranwall High 0:24:50 - Shane Clears the High School Courtyard 0:27:30 - Fighting the High School Guards 0:30:29 - Defining Choice: Rick vs. Shane's Priorities 0:31:30 - A Grave Ending for Carl 0:32:05 - Episode 8: Haunted - Hospital Flashback 0:35:41 - Shane’s Decision at Rick’s Bedside 0:38:09 - Episode 9: Pretty Much Dead Already 0:41:22 - Preparing for the Barn Confrontation 0:44:09 - Breaking Open the Barn 0:46:24 - The Barn Massacre Gameplay 0:48:24 - Sophia’s Final Reveal 0:50:17 - Boss Fight: Rick Grimes vs. Shane Walsh 0:55:00 - Rick's Struggle Against Shane's Fury 1:00:00 - Final Phase of the Rivalry Battle 1:03:33 - Rick Kills Shane: The Aftermath 1:05:07 - Escaping the Farm & Losing Hershel 1:06:11 - Reaching the Prison Outskirts 📖 Interactive written walkthrough with clickable timestamps: https://pixelfungaming.com/videos/the-walking-dead-destinies-act-2-episodes-6-10-walkthrough

Insurgency: Sandstorm | Funny Moments And Brutal Deaths #insurgencysandstorm
The gameplay unfolds across multiple intense rounds and varied maps in Insurgency: Sandstorm, showcasing a mix of close-quarters combat, strategic plays, and unexpected deaths. The action begins with an indoor hotel shootout where the player uses a scoped assault rifle, navigating through smoke and eliminating multiple enemies. A highlight reel segment features a unique grenade kill from a downed state and a precise headshot. Subsequently, the player defends an office building, engaging in heavy firefights across cubicles and open spaces, utilizing LMG fire and grenades. One unfortunate incident leads to the player's demise by their own gas grenade during a snowy outpost defense. Shifting perspectives, the gameplay then shows an explosive drone attack that kills the player, followed by spectating urban combat. Another segment features a desert town engagement where the player falls victim to an RPG. Inside a building, a friendly fire incident occurs, leading to a teammate's death, as the player continues to clear rooms. A series of fiery explosions in a confined space results in multiple player and teammate deaths. The player executes stealthy drop-down kills in tight alleyways and engages enemies in a multi-level environment. Combat shifts to rooftops with long-range sniping before moving back indoors for more close-quarter encounters, including a moment of 't-bagging' by an enemy. Further street battles unfold, marked by a teammate's shotgun death and aggressive defense amidst smoke and fire. The video culminates in a factory-like setting where the player confronts a suicide bomber, calls in artillery support, and ultimately suffers a defeat due to a helicopter attack, bringing the intense session to a close. Chapters: 0:00 - 0:24 - Initial Close-Quarters Combat 0:24 - 0:42 - Grenade Kill & Headshot Highlights 0:42 - 1:40 - Office Building Holdout 1:40 - 2:56 - Snowy Outpost Skirmish and Self-Inflicted Gas Death 2:56 - 3:25 - Drone Attack and Spectating Urban Combat 3:25 - 4:10 - Desert Town Engagement and RPG Demise 4:10 - 4:34 - Friendly Fire Incident and Room Clearing 4:34 - 5:11 - Fiery Room Defense and Death by Incendiary 5:11 - 5:50 - Stealthy Drop-Down Kills in Alleyways 5:50 - 6:58 - Rooftop Sniping and Indoor Ascent 6:58 - 7:34 - Close-Range Engagements and Fire Hazards 7:34 - 9:07 - Intense Street Defense with Explosives 9:07 - 10:11 - Suicide Bomber Encounter and Artillery Support 10:11 - 10:37 - Helicopter Attack and Round Defeat / Outro 📖 Interactive written walkthrough with clickable timestamps: https://pixelfungaming.com/videos/insurgency-sandstorm-funny-moments-and-brutal-deaths-insurgencysandstorm

Red Dead Redemption 2 - Davey Callander & Jenny Kirk Grave Locations
The journey through the frozen wilderness of Ambarino begins with a nighttime ride across treacherous snowy ridges. The character navigates through deep drifts and narrow mountain passes, eventually descending into a valley towards the abandoned settlement of Colter. Upon arrival, the character dismounts to pay respects at Davey Callander's grave in the small local cemetery. After consulting the map, the expedition continues north towards Spider Gorge, scaling steep, icy inclines and traversing a frozen riverbed. The ride leads deep into the mountains near the glacier, where the character eventually finds and inspects the secluded grave of Jenny Kirk before reviewing the location on the map. Chapters: 0:00:00 - 0:00:41 - Night ride through snowy mountains 0:00:41 - 0:01:49 - Navigating steep mountain paths 0:01:49 - 0:02:48 - Riding into the valley towards Colter 0:02:48 - 0:03:09 - Traversing the abandoned town of Colter 0:03:09 - 0:03:36 - Inspecting Davey Callander's grave 0:03:36 - 0:03:48 - Planning the route on the world map 0:03:48 - 0:04:31 - Journeying north from Colter 0:04:31 - 0:05:25 - Climbing the icy slopes of Spider Gorge 0:05:25 - 0:06:23 - Exploring the secluded snowy plains 0:06:23 - 0:06:52 - Finding Jenny Kirk's final resting place 📖 Interactive written walkthrough with clickable timestamps: https://pixelfungaming.com/videos/red-dead-redemption-2-davey-callander-jenny-kirk-grave-locations

RDR2 - Rescue (Lemoyne) Stranger Mission Walkthrough
The mission begins with the character riding into a swampy outpost to locate a missing person. Intense combat erupts as several hostile gang members defend the area from a stilt house and surrounding docks. After a fierce shootout using repeaters and shotguns, the protagonist enters the building and frees a hogtied woman held captive. More reinforcements arrive, leading to another tactical skirmish from the doorway and on the boardwalks. Once the area is clear, the character loots the fallen enemies for supplies and ammunition before summoning their horse. The woman joins the rider, and they navigate a scenic trail through dense forests and across a shallow river. During the journey, the two engage in dialogue regarding her capture and her companion, Jimmy. The trek concludes at a riverbank camp where she is safely reunited with her partner. The mission successfully ends with a reward, and the character continues riding deeper into the wilderness toward new objectives. Chapters: 0:00:00 - 0:00:10 - Approaching the swamp settlement 0:00:10 - 0:00:23 - Initial shootout at the stilt house 0:00:23 - 0:00:43 - Rescuing the hogtied stranger 0:00:43 - 0:01:16 - Clearing remaining hostiles and looting 0:01:16 - 0:01:35 - Whistling for the horse 0:01:35 - 0:02:55 - Escorting the stranger through the woods 0:02:55 - 0:03:10 - Mission completion at the campsite 0:03:10 - 0:03:31 - Riding toward the next destination 📖 Interactive written walkthrough with clickable timestamps: https://pixelfungaming.com/videos/rdr2-rescue-lemoyne-stranger-mission-walkthrough

Far Cry 5 - Pin-Ko Radar Station Outpost - UNDETECTED, NO Alarms
The mission begins with a stealthy infiltration of the Pin-Ko Radar Station. Moving through the dark corridors of the initial facility buildings, the bow serves as the primary tool for silent, long-range takedowns against distracted guards. The path leads outside to the surrounding perimeter, where scouting from high ground allows for a systematic clearance of enemies patrolling the rooftops and open grounds. Bodies are carried away and disposed of over cliffs to maintain the element of surprise and prevent alarms from being triggered. The tactical approach continues as the main radar tower is scaled, clearing guards on each level and the rooftop. The final stretch of the operation involves carefully searching the hangars and lower storage areas to locate the last remaining cultists. Upon the elimination of the final guard, the outpost is officially liberated, culminating in a cinematic sequence where the Resistance raises the American flag over the base. Chapters: 0:00:00 - 0:02:15 - Initial Infiltration and Interior Clearance 0:02:15 - 0:04:45 - Exterior Perimeter Scouting and Stealth Kills 0:04:45 - 0:07:15 - Scaling the Radar Tower for High Ground 0:07:15 - 0:09:45 - Cliffside Guard Elimination and Body Disposal 0:09:45 - 0:12:15 - Final Hangar Sweep and Resistance Push 0:12:15 - 0:13:00 - Outpost Liberated and Victory Cinematic 📖 Interactive written walkthrough with clickable timestamps: https://pixelfungaming.com/videos/far-cry-5-pin-ko-radar-station-outpost-undetected-no-alarms

Red Dead Redemption 2 - Putting Murfree Broods On Train Tracks
Arthur Morgan carries a hogtied Murfree Brood member along a scenic railway path nestled between hills. He reaches a strategic point on the tracks and drops the first captive. Arthur then retrieves a second hogtied gang member from his horse and carefully places him alongside the first on the iron rails. After ensuring both men are positioned face-down across the tracks, Arthur mounts his horse and rides up a nearby cliffside. He navigates the rocky terrain to reach a high vantage point overlooking the railway. From this distance, Arthur waits patiently as a steam locomotive approaches from the distance. The train whistles loudly, signaling its arrival. Using binoculars, Arthur observes from above as the heavy engine and its following carriages roll over the two bound men on the tracks. Once the train passes through, Arthur turns his horse and rides off into the wilderness. Chapters: 0:00:00 - 0:00:40 - Transporting the first captive to the railway 0:00:40 - 0:01:15 - Placing Murfree Brood members on the tracks 0:01:15 - 0:01:45 - Final positioning of the bound captives 0:01:45 - 0:02:25 - Riding to the high-ground vantage point 0:02:25 - 0:02:55 - Waiting for the approaching train 0:02:55 - 0:03:15 - The locomotive rolls over the captives 0:03:15 - 0:03:31 - Arthur departs from the scene 📖 Interactive written walkthrough with clickable timestamps: https://pixelfungaming.com/videos/red-dead-redemption-2-putting-murfree-broods-on-train-tracks

RDR2 - Pagan Ritual Site Location
The mission begins with the character approaching a macabre scene deep in the woods under the cover of night. A ritualistic circle is drawn on the ground in white, surrounding a mutilated corpse mounted on a wooden stake. The corpse wears a skeletal animal mask, which the character promptly swaps for his own, obtaining the Pagan Mask. After collecting the mask, the character opens a journal to document the discovery with a detailed sketch titled 'Pagan Ritual.' The character then walks around the perimeter of the ritual site, observing the lit candles and atmospheric surroundings. Finally, the map is opened to reveal the exact location of the site near Owanjila, west of Strawberry, providing a clear reference for finding this hidden Easter egg. Chapters: 0:00:00 - 0:00:20 - Exploring the Pagan Ritual Site 0:00:20 - 0:00:33 - Collecting the Pagan Mask and Journaling 0:00:33 - 0:00:58 - Observing the Ritual Circle at Night 0:00:58 - 0:01:17 - Map Location Reveal near Owanjila 📖 Interactive written walkthrough with clickable timestamps: https://pixelfungaming.com/videos/rdr2-pagan-ritual-site-location

RDR2 - Lockbox Location Cairn Lodge
The mission involves exploring a remote, snow-covered cabin known as Cairn Lodge near Cairn Lake. The character enters the dilapidated structure and navigates through the debris to reach a small cot in the corner. Upon inspecting the area beneath the bed, a hidden lockbox is discovered. Opening the box reveals several items, including a bottle of Ginseng Elixir and high-velocity rifle cartridges. The primary objective is achieved when the character retrieves 'The Poisonous Trail Map 1' from the box. The gameplay concludes with a detailed view of the world map, pinpointing the exact location of Cairn Lodge in the Ambarino region, north of Lake Isabella. Chapters: 0:00:00 - 0:00:15 - Entering Cairn Lodge 0:00:15 - 0:00:39 - Searching the cabin and finding the lockbox 0:00:39 - 0:00:52 - Acquiring The Poisonous Trail Map 1 0:00:52 - 0:01:09 - Map location overview of Cairn Lake 📖 Interactive written walkthrough with clickable timestamps: https://pixelfungaming.com/videos/rdr2-lockbox-location-cairn-lodge

RDR2 - Favored Sons Walkthrough
Arthur Morgan joins Dutch van der Linde and Eagle Flies to plan an ambush on a military patrol in the 'Favored Sons' mission. The mission begins with a strategic discussion on a cliffside overlooking a narrow valley path. Arthur and Dutch descend to the valley floor where Arthur carefully plants dynamite on marked trees and runs detonation wires back to a plunger on the ridge. The group waits in silence as the army patrol enters the kill zone before Arthur triggers the explosives, causing a massive landslide that traps the soldiers. A chaotic shootout ensues between the gang and the pinned army unit. Arthur provides precision cover fire from the high ground, neutralizing the remaining threats. The mission concludes successfully once the primary ambush objectives are met, followed by a brief review of the world map location near Window Rock. Chapters: 0:00:00 - 0:01:25 - Strategic planning and mission briefing on the cliff 0:01:25 - 0:03:20 - Planting dynamite and setting up the detonation wires 0:03:20 - 0:04:55 - Waiting for the army patrol to reach the kill zone 0:04:55 - 0:05:40 - Triggering the ambush and the resulting explosion 0:05:40 - 0:06:20 - Intense firefight with the trapped military patrol 0:06:20 - 0:06:49 - Mission success and location verification on the map 📖 Interactive written walkthrough with clickable timestamps: https://pixelfungaming.com/videos/rdr2-favored-sons-walkthrough

Red Dead Redemption 2 - Train Robbery Walkthrough
Arthur Morgan and the Van der Linde gang execute a high-stakes train robbery in the snowy mountains. The mission begins with a ride to a vantage point overlooking the tracks where Arthur assists Bill Williamson in setting up a dynamite detonator. After the initial explosion fails, the gang must chase down and leap onto the moving train. High-octane combat ensues across the roofs and through the carriages as Arthur and Lenny work their way toward the engine to bring the locomotive to a halt. Following a massive shootout with Cornwall's private guards near the stopped train, the gang uses dynamite to breach a heavily armored private car. Arthur meticulously searches the luxury interior for valuable bearer bonds. The encounter concludes with a choice regarding the surviving guards before Arthur restarts the train to send it away, successfully completing the heist and regrouping with the gang. Chapters: 0:00:00 - 0:01:08 - Gang ride and ridge setup 0:01:08 - 0:02:45 - Setting the dynamite charges 0:02:45 - 0:04:40 - Preparing for the robbery 0:04:40 - 0:05:51 - The failed explosion and train boarding 0:05:51 - 0:07:00 - Navigating the train roof and internal cars 0:07:00 - 0:08:42 - Gunfight to the engine 0:08:42 - 0:10:28 - Stopping the train and ground shootout 0:10:28 - 0:11:45 - Confrontation with Cornwall's guards 0:11:45 - 0:12:45 - Breaching the armored private car 0:12:45 - 0:14:48 - Searching for the bearer bonds 0:14:48 - 0:16:05 - Securing the loot and guard confrontation 0:16:05 - 0:17:31 - Restarting the train and mission exit 📖 Interactive written walkthrough with clickable timestamps: https://pixelfungaming.com/videos/red-dead-redemption-2-train-robbery-walkthrough

RDR2 - Policeman Doesn't Mind If I Tie Up Racist Man
Arthur Morgan rides into the heart of Saint Denis and approaches a man publicly promoting eugenics. After listening to the man's hateful rhetoric for a brief period, Arthur tackles him to the pavement and secures him with a lasso. Despite the presence of nearby citizens and law enforcement, no one intervenes as Arthur hoists the captive onto his shoulder and stows him on the back of his horse. The journey continues out of the city limits, through the industrial outskirts, and deep into the murky swamps of Lemoyne. Arthur follows the railroad tracks until he reaches a secluded area. He dismounts, pulls the struggling man from the horse, and carefully positions him across the iron rails. Arthur then retreats to a short distance on horseback to observe. A heavy steam locomotive eventually approaches, blowing its whistle as it bears down on the helpless man. The train runs over the captive, and Arthur watches the long line of carriages pass before the scene concludes. Chapters: 0:00:00 - 0:00:32 - Arthur Morgan encounters the Eugenics Supporter in Saint Denis 0:00:32 - 0:01:04 - Arthur tackles and hogties the man in broad daylight 0:01:04 - 0:02:29 - Transporting the captive through the city and into the bayou 0:02:29 - 0:02:40 - Arthur places the bound man across the railroad tracks 0:02:40 - 0:02:58 - Waiting for the incoming train to deliver final justice 📖 Interactive written walkthrough with clickable timestamps: https://pixelfungaming.com/videos/rdr2-policeman-doesn-t-mind-if-i-tie-up-racist-man

Red Dead Online - Prairie Chicken (West Elizabeth) Location
The session begins in the Great Plains near Blackwater at dusk. The character spots a flock of Greater Prairie Chickens taking flight and uses a Lancaster Repeater to quickly down several birds. After the initial hunt, the character approaches the first carcass and skins it, progressing a daily challenge to skin three prairie chickens. The character then runs through the tall grass toward a group of large rocks where more birds fell. A second bird is located and skinned. To provide context for the location, the world map is opened, revealing the exact hunting spot just west of the Blackwater city limits. The footage concludes with the character continuing to search the immediate area for the remaining downed birds to complete the challenge objective. Chapters: 0:00:00 - 0:00:13 - Hunting a flock of Greater Prairie Chickens with a Lancaster Repeater 0:00:13 - 0:00:28 - Skinning the first bird and progressing the daily challenge 0:00:28 - 0:00:51 - Locating and skinning additional birds near rock formations 0:00:51 - 0:01:12 - Detailed map view showing the hunting location west of Blackwater 0:01:12 - 0:01:20 - Final search for remaining carcasses in the Great Plains 📖 Interactive written walkthrough with clickable timestamps: https://pixelfungaming.com/videos/red-dead-online-prairie-chicken-west-elizabeth-location

RDR2 - Epilogue - The Wheel
The epilogue of the story begins as John Marston, Abigail, and young Jack travel by wagon through a scenic river valley, seeking a fresh start after years on the run. Their journey leads them toward the mountain town of Strawberry. Along the way, tense but hopeful conversations reveal their desire for a normal life, free from their outlaw past. Upon arriving in Strawberry, John immediately looks for honest work, eventually securing a delivery job at the local general store. After a brief reunion with Abigail and Jack, John sets out alone to deliver supplies to Pronghorn Ranch. The long drive through the wilderness is interrupted when members of the Laramie Gang harass the ranch hands and steal the delivery wagon. John quickly mounts a horse, chases down the thieves, and reclaims the wagon through a physical confrontation. He successfully delivers the goods to the ranch overseer, Mr. Dickens, who offers the family a place to stay and work. The mission concludes with the Marstons settling into a modest cabin on the ranch grounds, marking the true beginning of their attempt at a peaceful existence. Chapters: 0:00:00 - 0:01:40 - A New Beginning on the Road 0:01:40 - 0:03:00 - Discussing the Future with Jack 0:03:00 - 0:03:45 - Arriving in Strawberry 0:03:45 - 0:05:05 - Seeking Honest Work at the General Store 0:05:05 - 0:06:15 - Meeting Abigail and Preparing for Delivery 0:06:15 - 0:09:45 - Delivering Supplies to Pronghorn Ranch 0:09:45 - 0:11:15 - Conflict with the Laramie Gang 0:11:15 - 0:12:40 - Chasing Down the Stolen Wagon 0:12:40 - 0:14:48 - Settling into Pronghorn Ranch 📖 Interactive written walkthrough with clickable timestamps: https://pixelfungaming.com/videos/rdr2-epilogue-the-wheel

RDR2 - Epilogue - The Best Of Women
Daily life at Beecher's Hope begins with John Marston performing essential ranch work. He hammers repairs in the barn before moving outside to groom his horse and load heavy sacks of grain onto a wagon alongside Uncle. This routine is interrupted by the long-awaited arrival of Abigail and Jack, who walk up the ranch path carrying their belongings. John immediately drops his work to embrace Abigail in a poignant reunion. He greets his son, Jack, and the family makes their way toward the main house, sharing lighthearted banter about their new life and their dog, Rufus. After the family enters the home, gameplay transitions to free-roam where John stands by the ranch fence, overlooking his property before navigating across the grounds. Chapters: 0:00:00 - 0:00:21 - Performing chores in the barn 0:00:21 - 0:00:44 - Grooming horses and loading grain 0:00:44 - 0:01:00 - Abigail and Jack arrive at the ranch 0:01:00 - 0:01:21 - Heartfelt family reunion 0:01:21 - 0:01:58 - The family enters their new home 0:01:58 - 0:02:13 - Free roam gameplay at Beecher's Hope 📖 Interactive written walkthrough with clickable timestamps: https://pixelfungaming.com/videos/rdr2-epilogue-the-best-of-women

Elusive Target #21 The Surgeons
The mission begins with a strategic selection of gear and a starting location within the GAMA medical facility in Hokkaido. Agent 47 initially deploys undercover as medical staff in the operating theater area. After reviewing the mission briefing for 'The Surgeons,' targets Dr. Pavel Frydel and Dr. Akane Akenawa, the operation moves into the facility corridors. The operative navigates through sterile hallways and maintenance areas, reaching the morgue to carry out a critical tactical objective: infiltrating the security room to disable surveillance systems and destroy evidence. The strategy then shifts to disguise acquisition, involving a series of silent subduals in the spa's restroom area. By systematically incapacitating staff, security guards, and eventually the Hospital Director, Agent 47 gains unrestricted access to all sensitive medical zones. The mission highlights include using a master RFID chip to rescue an allied agent from a cryogenic storage pod in the morgue, significantly compromising the facility's security protocol. Agent 47 infiltrates the high-tech GAMA facility in Hokkaido to eliminate two high-profile targets in 'The Surgeons' Elusive Target mission. The operation begins with a stealthy entry from the snowy mountain path, leading into the lower levels of the hospital. After securing a surgeon disguise, Agent 47 gains access to the restricted medical areas, carefully avoiding cameras and guard patrols. The first target, Pavel Frydel, is intercepted in the outdoor garden; a strategic push over a cliffside railing ensures an accidental death. Moving into the intensive care unit, Agent 47 tracks the second target, Akane Akenawa. A simple distraction using an overflowing sink draws her into a secluded corner, allowing for a swift lethal injection. With both objectives complete, the mission concludes with a rapid trek across the frozen terrain to the helipad for a helicopter exfiltration. Chapters: 00:00:00 - Mission Planning and Loadout Selection 00:01:50 - Initial Infiltration as Medical Staff 00:01:59 - Mission Briefing and Target Identification 00:03:20 - Navigating the Facility Lower Levels 00:04:08 - Neutralizing Security Surveillance Data 00:05:25 - Disguise Chaining in the Restroom Area 00:07:15 - Security Guard Infiltration and Subdual 00:08:50 - Assuming the Hospital Director's Role 00:09:50 - Rescuing Agent Smith from the Morgue Freezer 0:00:00 - Mission Start: Mountain Path Infiltration 0:04:30 - Entering the GAMA Facility via the Lower Levels 0:09:00 - Acquiring the Surgeon Disguise 0:13:30 - Navigating Restricted Medical Wings 0:18:00 - Scouting Target Routines in the Garden 0:22:30 - Identifying Akane Akenawa's Location 0:27:00 - Setting Up Distractions in Intensive Care 0:30:54 - Elimination of Pavel Frydel 0:31:47 - Elimination of Akane Akenawa 0:31:58 - Helipad Exfiltration and Mission Accomplished 📖 Interactive written walkthrough with clickable timestamps: https://pixelfungaming.com/videos/elusive-target-21-the-surgeons

RDR2 - Mrs. Sadie Adler, Widow Walkthrough
The mission starts with an emotional conversation between Arthur Morgan and Sadie Adler at their campsite. Sadie expresses her need for vengeance against the remaining O'Driscolls, and Arthur agrees to help while sharing his own plans for a quiet escape from the gang's life. They ride out to Hanging Dog Ranch, where the assault begins. Sadie identifies her main target, and the pair launch a direct attack on the fortified ranch. Arthur initiates the fight with long-range precision, using a scoped rifle to eliminate lookouts and snipers from the perimeter. As the battle moves closer, the combat becomes more frantic. Arthur clears out the barn with a shotgun, engaging in lethal close-quarters combat against waves of O'Driscoll gunmen. Meanwhile, Sadie pushes into the main farmhouse. Arthur eventually finds her in the attic, where she finally confronts and brutally kills the man responsible for her husband's death. The tension breaks into a somber moment of reflection as Sadie realizes the cost of her vengeance and the monster she feels she has become. The encounter ends with Sadie riding off alone to find peace after finally settling her score. Chapters: 0:00:00 - 0:01:53 - Planning the Assault and Departure from Camp 0:01:53 - 0:02:34 - Approaching Hanging Dog Ranch and Scouting 0:02:34 - 0:03:28 - Long-Range Sniper Combat at the Perimeter 0:03:28 - 0:05:35 - Infiltrating the Ranch and Clearing the Barn 0:05:35 - 0:07:57 - Sadie's Final Revenge and Mission Completion 📖 Interactive written walkthrough with clickable timestamps: https://pixelfungaming.com/videos/rdr2-mrs-sadie-adler-widow-walkthrough

RDR2 - Rooster (Lemoyne) Location
The session opens at a small farmstead where the protagonist targets livestock within a fenced chicken coop. Utilizing a bow with small game arrows, several chickens and a Java Rooster are systematically eliminated. After securing the carcasses, the character moves through a meadow filled with yellow wildflowers toward a parked horse. A Java Rooster is skinned on the spot, which successfully fulfills a daily challenge requirement. The resulting feathers and meat are collected, and the carcasses are stowed on the horse. To provide geographic context, the world map is accessed, pinpointing the farm's exact position just north of Rhodes at Ecliberty in the Lemoyne region. The map review includes varying zoom levels to ensure the location is easily identifiable. Finally, the character mounts the horse and departs from the farm area. Chapters: 0:00:00 - 0:00:21 - Hunting chickens in the coop 0:00:21 - 0:00:39 - Collecting carcasses and moving to the horse 0:00:39 - 0:00:54 - Skinning the Java Rooster for the daily challenge 0:00:54 - 0:01:05 - Organizing inventory on the horse 0:01:05 - 0:01:37 - Reviewing the map location near Rhodes 0:01:37 - 0:01:46 - Departing the farm on horseback 📖 Interactive written walkthrough with clickable timestamps: https://pixelfungaming.com/videos/rdr2-rooster-lemoyne-location

RDR2 - Chanterelle (New Hanover) Location
The character moves through a dark forest at dusk, specifically hunting for Chanterelle mushrooms. Several clusters of the bright yellow fungi are harvested from the forest floor. After gathering a full supply, the world map opens to reveal the precise location of the harvest. The area is situated in the Lemoyne region, positioned north of Bluewater Marsh and east of Emerald Ranch, near the Kamassa River and a Trapper's Cabin. The map zooms in and out to provide both local and regional context for finding this specific foraging spot. Chapters: 0:00:00 - 0:00:32 - Harvesting Chanterelles in the forest 0:00:32 - 0:01:05 - Mapping the exact location near Kamassa River 📖 Interactive written walkthrough with clickable timestamps: https://pixelfungaming.com/videos/rdr2-chanterelle-new-hanover-location

HITMAN 2 - Elusive Target - The Politician
The mission begins with a detailed briefing on the target, Dame Barbara Elizabeth Keating, a disgraced New Zealand tycoon and former politician accused of embezzlement. Agent 47 arrives at a secluded beach in Hawke's Bay under the cover of night. He carefully navigates the dunes and tall grass, avoiding security patrols and cameras. After scouring a ruined structure on the beach for useful items, he moves toward the target's modern, high-tech residence. Using a silenced pistol, he disables a security camera to clear a path. He lures a guard away from a side entrance, incapacitates him, and hides the body in a nearby dumpster before adopting his uniform as a disguise. Once inside, Agent 47 explores the storage and utility areas, collecting house keys and other supplies. He moves to the upper floors, where the target and her body double are rehearsing a public address. By carefully observing their patterns and avoiding suspicious guards, he identifies the real Dame Barbara. He eventually catches her alone in a service corridor and eliminates her with a single suppressed shot. With the objective complete, Agent 47 retraces his steps back to the beach, avoiding late-arriving security details, and escapes on a waiting boat as the mission concludes with a summary of his performance and experience earned. Chapters: 0:00:00 - 0:00:52 - Mission briefing for The Politician 0:00:52 - 0:02:30 - Infiltration from the Hawke's Bay beach 0:02:30 - 0:04:45 - Disabling security and acquiring a guard disguise 0:04:45 - 0:05:30 - Entering the residence and navigating the lower levels 0:05:30 - 0:06:50 - Observation of the target and her body double 0:06:50 - 0:07:30 - Locating and eliminating the real target 0:07:30 - 0:09:15 - Exfiltration back to the beach and boat escape 0:09:15 - 0:10:18 - Mission completion and rewards summary 📖 Interactive written walkthrough with clickable timestamps: https://pixelfungaming.com/videos/hitman-2-elusive-target-the-politician

RDR2 - Chance Encounter With Mary Beth at Train Station
John Marston encounters his old gang member Mary-Beth Gaskill at a train station. They share a warm greeting and catch up on their lives since the gang's dissolution. Mary-Beth reveals she has become a successful writer of romance novels under a pseudonym. The conversation turns somber as they remember Arthur Morgan and the fate of Dutch van der Linde. Before departing on her train, Mary-Beth gifts John one of her books. After she leaves, John boards the train himself, navigating through the passenger cars and taking in the scenery from a window seat while his horse gallops alongside the moving locomotive. Chapters: 0:00:00 - 0:01:30 - A chance reunion with Mary-Beth Gaskill 0:01:30 - 0:02:05 - Mary-Beth departs and John boards the train 0:02:05 - 0:04:10 - Exploring the train and scenic journey 📖 Interactive written walkthrough with clickable timestamps: https://pixelfungaming.com/videos/rdr2-chance-encounter-with-mary-beth-at-train-station

Red Dead Online - 3m Jump Onto Horse - Daily Challenge
The gameplay focuses on completing a specific daily challenge in Red Dead Online within the Grizzlies East region. The character navigates a rocky hillside, climbing up a steep incline to reach a tall, flat-topped boulder. After positioning himself at the edge, the character leaps off the rock and lands directly into the saddle of the horse waiting below. This action successfully triggers the 'Jumped onto a horse from a 3m height' daily challenge completion notification. Following the jump, the character rides briefly through the grassy area before opening the world map to pinpoint the exact location near O'Creagh's Run, providing a reference for where to find this specific rock formation. Chapters: 0:00:00 - 0:00:13 - Scaling the rock formation in Grizzlies East 0:00:13 - 0:00:16 - Performing the 3-meter jump onto the horse 0:00:16 - 0:00:27 - Challenge completion and streak notification 0:00:27 - 0:00:40 - Pinpointing the map location near O'Creagh's Run 📖 Interactive written walkthrough with clickable timestamps: https://pixelfungaming.com/videos/red-dead-online-3m-jump-onto-horse-daily-challenge

RDR2 - Taking Lemoyne Raider Back To Jail
The mission begins with an intense horseback pursuit through a foggy swamp, culminating in a violent gunfight with Lemoyne Raiders near a covered bridge. After eliminating the guards protecting a caged prison wagon, a thorough search of the area follows, involving looting the fallen enemies for supplies. The prisoner is released from his cage only to be immediately chased down on foot. A lasso is used to restrain the fugitive, who is then hogtied and stowed onto the back of a horse. A lengthy journey across the heartlands follows, with a strategic pause to consult the world map and plan the route to the nearest authorities. The trek continues through rolling hills and forests until the town of Rhodes comes into view. The prisoner is carried through the dusty streets to the local Sheriff's office, where he is handed over to the law and secured in a jail cell to complete the delivery. Chapters: 0:00:00 - 0:00:45 - Intercepting the Lemoyne Raider prison wagon and opening fire 0:00:45 - 0:01:30 - Looting the fallen Raiders and Lawmen at the scene 0:01:30 - 0:02:15 - Releasing the prisoner and pursuing him with a lasso 0:02:15 - 0:03:32 - Hogtying the fugitive and loading him onto the horse 0:03:32 - 0:06:02 - Consulting the world map to navigate toward Rhodes 0:06:02 - 0:08:48 - Transporting the bounty across the countryside 0:08:48 - 0:09:43 - Delivering the prisoner to the Rhodes Sheriff's office 📖 Interactive written walkthrough with clickable timestamps: https://pixelfungaming.com/videos/rdr2-taking-lemoyne-raider-back-to-jail

Assassin's Creed Odyssey - First 10 minutes
The mission begins with King Leonidas of Sparta overlooking the battlefield at Thermopylae in 480 BCE. He engages in a somber conversation with Dienekes about the life of a soldier and the missed simple joys of family. Leonidas puts on his helmet and addresses his gathered Spartan troops with a powerful speech, rallying them to face the Persian army. A brutal cinematic combat sequence follows, showcasing Leonidas cutting through Persian soldiers with his spear and shield. Gameplay then takes over, placing the character in the thick of a massive battle. Leonidas utilizes light and heavy attacks along with special abilities like Bull Rush to dispatch groups of enemies. The combat is fluid, involving parries, dodges, and devastating finishing moves. After clearing several waves of Persian grunts, a cinematic scene transitions to a one-on-one encounter with the Persian commander, Kurush. An intense boss fight ensues where Leonidas must dodge Kurush's heavy axe swings and break his guard to land killing blows. Upon Kurush's defeat, a final cinematic depicts the Spartans standing among the fallen, marking the end of the legendary stand. Chapters: 0:00:00 - 0:00:40 - King Leonidas and the Spartan Intro 0:00:40 - 0:01:43 - Speech to the 300 Spartans 0:01:43 - 0:02:29 - Cinematic Battlefield Combat 0:02:29 - 0:03:18 - Initial Gameplay: Clearing Persian Soldiers 0:03:18 - 0:04:45 - Using Special Abilities and Spear Sweeps 0:04:45 - 0:05:45 - Combat Continues through the Ranks 0:05:45 - 0:06:46 - Advanced Melee Tactics and Finishing Moves 0:06:46 - 0:07:08 - Cinematic Pursuit of the Commander 0:07:08 - 0:08:29 - Boss Encounter: Leonidas vs. Kurush 0:08:29 - 0:09:20 - Defeating the Persian Commander 0:09:20 - 0:10:02 - Battle Aftermath Cinematic 📖 Interactive written walkthrough with clickable timestamps: https://pixelfungaming.com/videos/assassin-s-creed-odyssey-first-10-minutes

Red Dead Redemption 2 - Killing Pervert
Arthur Morgan approaches a flickering campfire in the dark wilderness of Red Dead Redemption 2. He finds a lone stranger who invites him to rest. As the two men sit by the flames, the stranger begins a disturbing tale about a woman he encountered near Annesburg. He describes her as a beautiful widow and admits to watching her from the bushes for long periods, revealing himself to be a dangerous stalker. Arthur listens to the man's creepy fixation until he's heard enough. Suddenly, Arthur lashes out, knocking the stranger to the ground with a series of heavy blows. In a brutal act of frontier justice, he pushes the unconscious man directly into the campfire. The stranger is engulfed in flames and eventually burns to death. Arthur stands over the charred remains for a moment before turning away and retreating into the night. Chapters: 0:00:00 - 0:00:15 - Arthur approaches the lonely campsite at night 0:00:15 - 0:01:00 - Initial greeting and interaction with the stranger 0:01:00 - 0:01:35 - The stranger confesses to stalking a widow near Annesburg 0:01:35 - 0:01:45 - Arthur attacks and knocks the stranger unconscious 0:01:45 - 0:02:10 - The stranger burns in his own campfire 0:02:10 - 0:02:19 - Arthur leaves the scene after the execution 📖 Interactive written walkthrough with clickable timestamps: https://pixelfungaming.com/videos/red-dead-redemption-2-killing-pervert

Red Dead Online - Red Dead Online (Lemoyne) Location
The character scouts the foggy marshlands near Saint Denis, looking for Roseate Spoonbills. After spotting a group near the water's edge, a repeater is used to systematically take down the birds. The character then approaches the downed birds to harvest their plumes and meat. Skinning the birds progresses the daily challenge tracker. Once two birds are skinned, the challenge is marked as complete. The character gathers additional plumes before opening the world map to provide a precise location for other hunters, showing the spot along the coastline north of the city. Chapters: 0:00:00 - 0:00:13 - Scouting the marshland for Roseate Spoonbills 0:00:13 - 0:00:29 - Taking down a flock of birds with a repeater 0:00:29 - 0:00:48 - Skinning the first Roseate Spoonbill 0:00:48 - 0:01:18 - Completing the daily challenge by skinning the second bird 0:01:18 - 0:01:33 - Harvesting remaining plumes from the flock 0:01:33 - 0:02:22 - Reviewing the world map for the exact hunting location 📖 Interactive written walkthrough with clickable timestamps: https://pixelfungaming.com/videos/red-dead-online-red-dead-online-lemoyne-location

Red Dead Online - Muskie (New Hanover) Fishing Location
The character casts a line into the dark waters near the Van Horn Trading Post lighthouse during a nighttime fishing session. A large Muskie bites, leading to a brief struggle before it is successfully landed. After securing the catch, the character carries the massive fish across the jagged rocks to a nearby horse and stows it on the saddle. Once prepared, the character mounts the horse and navigates the rocky shoreline. The player then pulls up the world map to pinpoint the exact coordinates of the fishing spot, providing a clear reference for the location. The sequence ends with the character positioned on horseback overlooking the water. Chapters: 0:00:00 - 0:00:34 - Catching a large Muskie at night 0:00:34 - 0:01:04 - Carrying and stowing the fish on the horse 0:01:04 - 0:01:12 - Mounting the horse and navigating rocks 0:01:12 - 0:01:40 - Map location reveal for the Muskie spot 0:01:40 - 0:01:50 - Final look at the shoreline terrain 📖 Interactive written walkthrough with clickable timestamps: https://pixelfungaming.com/videos/red-dead-online-muskie-new-hanover-fishing-location

Assassin's Creed Odyssey - Lumber Shipyard
The mission begins with a sudden wolf attack in a dark, forested area. After fending off the animals, the focus shifts to the Lumber Shipyard, where the eagle companion scouts the bandit-occupied territory to mark enemies and loot. The character then infiltrates the camp, using elevated platforms for stealth and tactical positioning. Combat follows, primarily utilizing bow and arrow to thin out the guard count from a distance. The central encounter features a battle against the bandit leader, Hipponax, on a wooden structure. Following his defeat, the character systematically clears the remaining bandits and explores the camp. The final phase involves thorough looting of chests and resource caches spread across the shipyard. The location is fully completed once all treasures are found and the leader is confirmed dead. Chapters: 0:00:00 - 0:00:44 - Wolf encounter in the forest 0:00:44 - 0:01:54 - Aerial scouting of the Lumber Shipyard 0:01:54 - 0:02:49 - Entering the camp and initial looting 0:02:49 - 0:03:42 - Tactical bow combat from rooftops 0:03:42 - 0:05:00 - Luring guards and stealth eliminations 0:05:00 - 0:05:37 - Boss fight against Bandit Leader Hipponax 0:05:37 - 0:06:53 - Clearing the remaining camp security 0:06:53 - 0:08:26 - Searching camp structures for resources 0:08:26 - 0:09:32 - Finding final treasures and objectives 0:09:32 - 0:09:52 - Location completion and summary 📖 Interactive written walkthrough with clickable timestamps: https://pixelfungaming.com/videos/assassin-s-creed-odyssey-lumber-shipyard

RDR 2 Online - New Austin Player Assassination
The mission begins in a desert camp where a character named Shaky provides details about a target that needs to be eliminated. After the briefing, the pursuit starts immediately as the rider mounts their horse and gallops across the rugged terrain of New Austin. The chase leads through cacti-filled valleys and over rocky hills, with the rider constantly tracking the target's movements on the horizon. The journey continues for several minutes, showcasing the vast open-world environment and the stamina management of the horse. As the distance closes, the target is spotted on a high ridge. Combat ensues as the rider fires several well-aimed shots from a repeater while still mounted. The mission concludes successfully with the elimination of the player target and the receipt of rewards. Chapters: 0:00:00 - 0:00:45 - Mission Briefing with Shaky 0:00:45 - 0:01:45 - Initial Pursuit and Terrain Navigation 0:01:45 - 0:02:45 - Extended Horseback Chase across the Desert 0:02:45 - 0:03:15 - Closing in on the Target 0:03:15 - 0:03:27 - Final Engagement and Mission Success 📖 Interactive written walkthrough with clickable timestamps: https://pixelfungaming.com/videos/rdr-2-online-new-austin-player-assassination

Red Dead Online - American Red Fox Location
The hunt begins in the dense, dark woods of Tall Trees as a rider tracks an American Red Fox through the undergrowth. After utilizing Eagle Eye to follow the trail, a single, precise shot takes the animal down. The rider dismounts and carefully skins the fox to secure a perfect pelt and meat resources. Once the materials are gathered, the carcass is stowed securely on the back of the horse. The mission continues with a brief tactical pause to consult the map, pinpointing the location near Manzanita Post, before riding further into the wilderness at daybreak. Chapters: 0:00:00 - 0:00:22 - Tracking the American Red Fox through the forest 0:00:22 - 0:00:30 - Dispatching the target and approaching the kill 0:00:30 - 0:01:00 - Harvesting resources and skinning the fox 0:01:00 - 0:01:23 - Stowing the animal carcass and mounting the horse 0:01:23 - 0:01:46 - Navigating the map near Manzanita Post 0:01:46 - 0:01:52 - Resuming the journey through the wilderness 📖 Interactive written walkthrough with clickable timestamps: https://pixelfungaming.com/videos/red-dead-online-american-red-fox-location

Far Cry New Dawn - Protect Prosperity (Under Siege)
The mission begins at the Prosperity settlement where Thomas Rush emphasizes the need for specialists to strengthen the community. Following a facility upgrade, the residents gather for a morale-boosting celebratory dinner. The peaceful atmosphere is abruptly shattered when Highwaymen flares signal a surprise assault. Mickey and Lou, the ruthless leaders of the Highwaymen, arrive to terrorize the settlement, delivering a violent ultimatum and promising to destroy Prosperity if the residents do not leave. After their departure, the mission 'Under Siege' activates. The character travels to an observation post to meet with a scout before rushing back to defend the settlement from incoming waves of enemies. Intense urban combat follows, utilizing assault rifles and a specialized saw launcher to repel ground forces. The battle escalates as the character takes a defensive position on the rooftop, using a mortar to eliminate enemy vehicles and clustered infantry attacking from the north and west walls. The final stage of the defense involves repelling paratroopers dropped directly into the settlement. In the somber aftermath, the survivors regroup amidst the ruins, leading to a desperate decision to seek aid from Joseph Seed's New Eden. The sequence concludes with a flashback showing Carmina's past encounter with the New Eden leader. Chapters: 0:00:00 - 0:02:18 - Settlement Upgrades and Community Celebration 0:02:18 - 0:04:14 - The Twins Deliver a Deadly Ultimatum 0:04:14 - 0:07:11 - Meeting the Scout and Preparing for Siege 0:07:11 - 0:09:12 - Initial Defense Against the Highwaymen Assault 0:09:12 - 0:13:30 - Mortar Combat and Defensive Fire on the Rooftop 0:13:30 - 0:14:03 - Repelling Paratroopers and Ending the Siege 0:14:03 - 0:15:30 - Aftermath and the Desperate New Eden Proposal 0:15:30 - 0:16:30 - Intermission: Carmina's Memory of Joseph Seed 📖 Interactive written walkthrough with clickable timestamps: https://pixelfungaming.com/videos/far-cry-new-dawn-protect-prosperity-under-siege

Red Dead Online - Laughing Gull (Seagull) Hunting Location
The session begins with the character navigating a rocky shoreline near a river on the outskirts of Van Horn. Combat maneuvers follow as the character uses a rifle to hunt various birds, including gulls and sparrows, both in flight and perched on the landscape. Following the hunt, the character forages for common bulrush along the riverbank and begins harvesting feathers and gamey bird meat from the downed animals. While moving up a grassy hill, a brief encounter occurs with another traveler on horseback. The character then reviews the world map to pinpoint the exact location south of the Van Horn Trading Post before closing the interface and continuing the trek along the water's edge. Chapters: 0:00:00 - 0:00:10 - Navigating the rocky coast 0:00:10 - 0:00:25 - Targeting and shooting birds 0:00:25 - 0:00:35 - Foraging for common bulrush 0:00:35 - 0:01:00 - Harvesting bird feathers and meat 0:01:00 - 0:01:20 - Encountering a rider on the trail 0:01:20 - 0:01:45 - Reviewing the map near Van Horn 0:01:45 - 0:01:53 - Resuming the journey along the river 📖 Interactive written walkthrough with clickable timestamps: https://pixelfungaming.com/videos/red-dead-online-laughing-gull-seagull-hunting-location

Farcry 6| El Este Region live #10
Experience the full, action-packed journey through the El Este region of Far Cry 6 as Dani Rojas joins forces with the guerrilla groups La Moral and The Legends. This comprehensive gameplay walkthrough covers critical operations aimed at dismantling Sean McKay's poison empire and chemical production facilities. The video begins with the 'Weapon of Choice' mission, where Dani infiltrates McKay's high-security refinery to sabotage the production of PG-240, a lethal poison. Witness intense indoor firefights, tactical stealth, and a heart-pounding escape as the building is flooded with toxic gas. The action escalates with an exterior battle against military helicopters. Next, Dani undertakes 'Surgical Strike' alongside Lucky Mama. This mission requires precision as you track a massive pipeline across the Yaran landscape, systematically destroying key substations to cripple the regime's infrastructure. Highlights include expert sniping from vantage points and multi-front assaults on fortified positions. The final act, 'The Deported,' takes to the skies. Dani pilots a Yaran plane to bomb gasoline reserves before heading to the port for a final confrontation with Sean McKay himself on his cargo ship. The video concludes with the successful liberation of the region and a celebratory cinematic showing the union of the guerrilla factions. Whether you're looking for mission guides, combat tips, or just want to enjoy the explosive story of Yara's revolution, this complete playthrough has it all. Chapters: 0:00:00 - Initial Stealth at PDP Offices 0:05:15 - Meeting Yelena Morales: Weapon of Choice 0:10:30 - Infiltrating the La Joya Refinery 0:14:45 - Refinery Terminal Sabotage 0:21:20 - Escape from the Poisonous Gas 0:25:45 - McKay's Helicopter Assault 0:30:10 - Weapon of Choice Mission Complete 0:34:50 - Undercover Stud: Meeting Gilberto Rosario 0:41:30 - Starting Operation: Surgical Strike 0:46:20 - Sabotaging Pipeline Substation 1 0:51:15 - Sniping Guard at the Drill Site 0:56:40 - Destroying the Second Substation 1:02:10 - Assault on the La Joya Chemical Plant 1:06:50 - Defending the Computer Hack 1:13:20 - Final Chemical Silo Sabotage 1:17:45 - Aerial Bombing Run: The Deported 1:22:15 - Confronting Sean McKay on the Ship 1:25:30 - Liberation Celebration and Final Cinematic 📖 Interactive written walkthrough with clickable timestamps: https://pixelfungaming.com/videos/farcry-6-el-este-region-live-10

Resident Evil 2 : Part One - Police Station
Experience the terrifying opening chapter of Resident Evil 2 Remake in this detailed gameplay walkthrough featuring Leon S. Kennedy. The journey begins with a chilling encounter at a rural gas station, where Leon faces his first zombie and realizes the scale of the nightmare unfolding. After a high-stakes escape and a brief union with Claire Redfield, a devastating accident separates the pair, forcing Leon to brave the streets of Raccoon City alone. Upon reaching the Raccoon Police Department (R.P.D.), Leon discovers a facility overrun by the undead. Watch as he explores the dark corridors of the East Wing, attempts a desperate rescue of a fellow officer, and eventually meets Lieutenant Marvin Branagh, who provides him with the tools and information needed to survive the night. This video showcases the game's stunning visuals, intense combat, and oppressive atmosphere. Chapters: 0:00:00 - Opening Cinematic: The Trucker's Story 0:02:22 - Leon Arrives at the Mizoil Gas Station 0:04:40 - First Zombie Encounter & Shootout 0:07:58 - Meeting Claire Redfield & Escaping the Station 0:09:28 - Opening Credits & Arrival in Raccoon City 0:12:10 - Tanker Explosion & Separation from Claire 0:14:56 - Leon Reaches the R.P.D. Front Gates 0:16:30 - Checking the Security Monitors in the Main Hall 0:20:00 - Investigating the East Side Corridor 0:25:50 - The Gruesome Fate of Officer Elliot 0:31:13 - Failed Attempt & Game Over Scene 0:34:10 - Retrying the East Wing Exploration 0:39:00 - Meeting Lieutenant Marvin Branagh 📖 Interactive written walkthrough with clickable timestamps: https://pixelfungaming.com/videos/resident-evil-2-part-one-police-station

RDR2 - Muskie (Grizzlies) Fishing Location
A fishing session begins at the frozen Lake Isabella in the Grizzlies West region. The character casts a river lure into a small opening in the ice and successfully hooks a large Muskie. After a brief struggle, the 19lb 6oz Muskie is reeled in, completing a daily challenge. The character stows the large fish onto the back of their horse. Following the catch, the world map is opened to display the precise location on the eastern shore of Lake Isabella. The session concludes as the character rides their horse across the snow-covered ice toward the shoreline. Chapters: 0:00:00 - 0:00:15 - Casting the lure and hooking a fish 0:00:15 - 0:00:29 - Reeling in the large Muskie 0:00:29 - 0:00:44 - Daily challenge completion and stowing the catch 0:00:44 - 0:01:11 - Map view showing the Lake Isabella fishing spot 0:01:11 - 0:01:18 - Riding away across the frozen lake 📖 Interactive written walkthrough with clickable timestamps: https://pixelfungaming.com/videos/rdr2-muskie-grizzlies-fishing-location

Red Dead Redemption 2 -Grizzly Bear In Cabin Location
The journey starts with a ride through the flower-filled fields of Big Valley, eventually reaching a secluded log cabin near Little Creek River. After checking the map for location confirmation, entry into the cabin triggers a sudden and violent attack by a large grizzly bear. A frantic struggle follows, ending when the predator is downed with several close-range shots. With the threat eliminated, a thorough search of the interior reveals various collectibles, including a Black Widow Spider cigarette card and personal poems. The grizzly bear is skinned for its valuable pelt and parts. The mission concludes by reading a poignant letter found in the desk and departing the cabin with the bear pelt in hand. Chapters: 0:00:00 - 0:00:32 - Traveling through Big Valley to the secluded cabin 0:00:33 - 0:00:43 - Mapping the location near Little Creek River 0:00:44 - 0:00:58 - Surprise grizzly bear attack and combat inside the cabin 0:00:59 - 0:01:50 - Searching the desk for collectibles and cigarette cards 0:01:51 - 0:02:05 - Skinning the grizzly bear for its pelt and resources 0:02:06 - 0:02:38 - Locating personal poems in the cabin drawers 0:02:39 - 0:03:48 - Reading the 'Dear Annabella' poem in detail 0:03:49 - 0:04:06 - Exiting the cabin with the bear pelt 📖 Interactive written walkthrough with clickable timestamps: https://pixelfungaming.com/videos/red-dead-redemption-2-grizzly-bear-in-cabin-location

Far Cry New Dawn - Photograph Location - Eden's Gate Church
The mission involves finding and aligning old photographs with their current locations in Hope County. The character stands on the shore of a lake at night, holding a historical photo of a white church. By adjusting their position and perspective, the character matches the image in the photograph with the ruined structure across the water. Once perfectly aligned, the mission progress updates to four out of nine locations found, and a perk point is awarded. A companion character, Gina Guerra, stands nearby as the character takes in the surrounding nighttime scenery, including the crescent moon and distant mountains reflecting on the water's surface. Chapters: 0:00:00 - 0:00:07 - Aligning the church photograph 0:00:07 - 0:00:18 - Mission update and landscape view 📖 Interactive written walkthrough with clickable timestamps: https://pixelfungaming.com/videos/far-cry-new-dawn-photograph-location-eden-s-gate-church

RDR2 -Burdock Root (Roanoke Ridge) Location
Gathering Burdock Root begins along the misty riverbanks of the Roanoke Valley under the cover of night. The character methodically moves through the tall grass, identifying and picking several clusters of the plant. Each successful harvest adds multiple Burdock Roots to the inventory, which are essential for crafting potent medicine or completing herbalist challenges. Following the collection phase, the world map opens to reveal the precise location just north of Annesburg. The map view zooms in and out, highlighting the proximity to the river and the railroad bridge near Brandywine Drop, providing a clear visual reference for the foraging site. Chapters: 0:00:00 - 0:00:48 - Harvesting Burdock Root along the riverbank 0:00:48 - 0:01:08 - Map view pinpointing the Brandywine Drop location 📖 Interactive written walkthrough with clickable timestamps: https://pixelfungaming.com/videos/rdr2-burdock-root-roanoke-ridge-location

Red Dead Redemption 2 - Mowing Down Lymoyne Raiders With Maxim Machine Gun
Arthur Morgan maneuvers a heavy wagon equipped with a mounted Maxim gun onto a ridge overlooking a Lemoyne Raider camp. He opens fire, devastating the camp and its occupants with a continuous barrage of bullets. After the initial slaughter, he descends the hill to search the bodies and camp for valuables. The aftermath reveals a scene of destruction with multiple casualties and small fires. Once the looting is complete, he returns to the wagon and steers the horse-drawn vehicle away from the settlement into the open countryside. Chapters: 0:00:00 - 0:00:29 - Positioning the Maxim gun wagon on the ridge 0:00:29 - 0:01:06 - Assault on the Lemoyne Raider camp 0:01:06 - 0:02:10 - Looting the fallen enemies and camp supplies 0:02:10 - 0:02:27 - Departing the area in the armored wagon 📖 Interactive written walkthrough with clickable timestamps: https://pixelfungaming.com/videos/red-dead-redemption-2-mowing-down-lymoyne-raiders-with-maxim-machine-gun

GTAV Online - Business Battle - How To Disable Aircraft Carrier Air Defense
The character initiates a bold assault on an aircraft carrier, clearing the hangar deck before moving into the ship's interior. Close-quarters combat unfolds in the hallways as the character pushes toward the command center, neutralizing security personnel with automatic fire. After securing the bridge with the help of high-yield explosives, the character hacks into two separate terminals to deactivate the vessel's air defenses while requesting backup from a private security firm. With the skies clear, a swift retreat to the flight deck leads to the acquisition of a P-996 Lazer fighter jet. The character pilots the aircraft across the ocean towards the city lights of Los Santos. A tactical bail-out followed by a controlled parachute descent allows for a stealthy approach to the target delivery zone in the industrial district. The mission ends with the successful drop-off of stolen weaponry at a local nightclub garage. Chapters: 00:00:00 - 00:01:00 - Ship Infiltration and Hangar Gunfight 00:01:00 - 00:01:45 - Clearing Corridors to the Command Center 00:01:45 - 00:02:30 - Securing the Bridge and First Hacking Sequence 00:02:30 - 00:03:08 - Second Hack and Disabling Air Defenses 00:03:08 - 00:03:45 - Flight Deck Breach and Jet Hijack 00:03:45 - 00:04:40 - High-Speed Flight to Los Santos 00:04:40 - 00:05:37 - Parachute Infiltration and Final Delivery 📖 Interactive written walkthrough with clickable timestamps: https://pixelfungaming.com/videos/gtav-online-business-battle-how-to-disable-aircraft-carrier-air-defense

RDR2 - Fire bombing KKK Members, Feeding One To Gator
The gameplay features a night-time encounter with a group of hooded figures gathered around a cross in the woods. An incendiary fire bottle is thrown into the center of the group, igniting multiple members and causing a chaotic scramble. After clearing the area of fleeing members, the character tracks down another hooded figure by the water, capturing and hogtying them. The captive is stowed on the back of a horse for a long ride into the foggy, alligator-infested swamps of Lemoyne. The character then carries the tied man through murky waters, actively seeking out large predators. After navigating the swamp and using tracking abilities to locate the best spot, the hooded figure is dropped on the shoreline in the direct path of an alligator. The predator eventually lunges and kills the captive as the character watches from a distance. Chapters: 0:00:00 - 0:00:45 - Ambush of the hooded gathering with fire 0:00:45 - 0:01:30 - Lassoing and hogtying a straggler by the river 0:01:30 - 0:03:15 - Transporting the captive to the swamp via horseback 0:03:15 - 0:05:30 - Navigating alligator territory while carrying the prisoner 0:05:30 - 0:06:31 - Executing the final alligator feeding in the swamp 📖 Interactive written walkthrough with clickable timestamps: https://pixelfungaming.com/videos/rdr2-fire-bombing-kkk-members-feeding-one-to-gator

Rise Of The Ronin: Chapter 2 (Dusk Difficulty) Black Ships, Long Shadows | Part 1
Experience the journey as we soar into the bustling city of Yokohama using a prototype glider. Upon arrival, witness the growing tension between local citizens and the shogunate before navigating the city's rooftops and alleyways with a grappling hook and fluid parkour. After reuniting with Ryoma Sakamoto, we meet the elegant geisha Taka Murayama in the Miyozaki Pleasure District, who tasks us with retrieving a camera in exchange for information regarding the Black Ships. The quest leads to an alliance with the eccentric tinkerer Igashichi Iizuka. We infiltrate a bandit camp to recover stolen camera schematics, utilizing stealth and explosive barrels before facing the formidable Mochisuke Kira in a high-stakes boss fight. With the camera secured and tested, we return to the pleasure district for a series of covert photography missions. This path leads to a duel with a "drunk samurai" who reveals himself as Kogoro Katsura, a key leader in the anti-shogunate movement. Our mission culminates in a high-stakes infiltration of the US Consulate. After strategic planning at the Sakura Inn, we use the glider to breach the consulate grounds, battling waves of disciplined soldiers to reach Townsend Harris. The confrontation takes a shocking turn with the reappearance of the protagonist's lost Blade Twin, leading to an intense multi-stage boss fight that will shape the political future of Japan. Chapters: 0:00:00 - Gliding into Yokohama 0:00:43 - The Chief Minister's Decree 0:02:53 - History of the Black Ships 0:03:15 - Navigating the Rooftops of Yokohama 0:04:05 - Reuniting with Ryoma Sakamoto 0:06:03 - Journey to the Pleasure District 0:07:09 - Clash with Tosa Retainers 0:07:44 - Entering the Miyozaki Pleasure District 0:08:29 - Meeting Kichi Saito 0:10:45 - An Audience with Taka Murayama 0:13:41 - Negotiating for Information 0:15:05 - Traveling to the Longhouse 0:17:15 - Bond Dialogue with Ryoma 0:18:41 - Receiving the Pocket Watch 0:19:40 - Finding the Photographic Studio 0:20:13 - Confronting the Corrupt Officials 0:20:55 - Street Combat in Yokohama 0:23:05 - The Tinkerer's Request 0:24:41 - Preparing the Castle Infiltration 0:30:00 - Initial Infiltration and Stealth Takedowns 0:31:46 - Cooperative Recruitment and Battle Prep 0:32:19 - Bandit Camp Skirmish with Allies 0:32:38 - Boss Encounter: Mochisuke Kira 0:35:45 - Securing the Camera Schematics 0:36:12 - Obtaining the Camera from Igashichi 0:37:33 - Testing Camera Mechanics at the Temple Hall 0:38:11 - Mission Locating the Camera Complete 0:39:41 - Pleasure District Infiltration Begins 0:40:21 - Starting A Pleasure District Portrait Mission 0:40:44 - Photographing the Servant's Quarters 0:42:12 - Rooftop Stealth and Navigation 0:43:54 - Capturing Kogoro Katsura's Photograph 0:44:57 - Boss Fight: The Drunk Samurai 0:47:17 - Conversation with Ryoma Sakamoto and Katsura 0:48:48 - Reporting Findings to Taka Murayama 0:49:59 - Mission Complete and Further Leads 1:00:00 - Meeting with Ryoma Sakamoto 1:00:27 - Navigating the pleasure district 1:00:45 - Encounter with the anti-shogunate faction 1:02:22 - Strategy planning at the Sakura Inn 1:02:55 - Gliding towards the US Consulate 1:03:18 - Final reconnaissance with Kogoro Katsura 1:03:55 - Infiltrating the consulate grounds 1:04:30 - Combat within the consulate interior 1:05:35 - Intense battle for the ballroom key 1:08:15 - Confrontation with Townsend Harris 1:09:12 - Boss Duel: The Blade Twin 1:10:45 - Mission debrief and aftermath 1:11:45 - Historical context and conclusion 📖 Interactive written walkthrough with clickable timestamps: https://pixelfungaming.com/videos/rise-of-the-ronin-chapter-2-dusk-difficulty-black-ships-long-shadows-part-1

HITMAN 2: New York - High Security Guard Disguise Walkthrough
The mission takes place within the high-security confines of a New York bank. Agent 47, disguised as a standard security guard, navigates the IT department to find tools for bypassing the vault's defenses. He successfully locates and retrieves a vault security dongle from a storage shelf. Moving toward the server room, he uses a lockpick to gain silent entry. Inside, he interacts with the security interface, eventually disabling the vault security lock after a series of attempts. This action creates a noise distraction, drawing a high-level guard into the room. Agent 47 quickly hides inside a large red equipment crate to avoid detection. Once the guard is preoccupied, Agent 47 emerges, subdues him with a silent takedown, and assumes his identity by changing into his suit. He carefully hides the body in the crate and picks up the guard's dropped keycard. After reviewing the facility map and mission intel to plan the next move, he exits the room in his superior disguise. Chapters: 0:00:00 - 0:00:25 - Retrieving the vault security dongle in the IT room 0:00:25 - 0:00:35 - Lockpicking the entrance to the server room 0:00:35 - 0:01:05 - Disabling the vault security lock mechanism 0:01:05 - 0:01:30 - Hiding in the equipment crate from a searching guard 0:01:30 - 0:01:55 - Subduing the guard and taking a new disguise 0:01:55 - 0:02:05 - Hiding the body and collecting dropped items 0:02:05 - 0:02:49 - Reviewing mission intel and navigating the bank map 📖 Interactive written walkthrough with clickable timestamps: https://pixelfungaming.com/videos/hitman-2-new-york-high-security-guard-disguise-walkthrough

Ghost Recon Breakpoint - Easy/Fast way to Destroy Flying Drones
In this Ghost Recon Breakpoint tutorial video, we will be showing you an easy and fast way to destroy flying drones. Ghost Recon Breakpoint is a game where players must eliminate various enemies and flying drones is one of them. Drones can be a bit tricky to take down, but with our guide, you'll be destroying them in no time! Our guide will provide you with tips and tricks on how to successfully destroy flying drones and come out on top. We will walk you through the process step by step, giving you a complete tutorial on how to complete it. This video is perfect for players who are new to Ghost Recon Breakpoint or are looking to improve their gameplay. With our help, you'll be drone hunting like a pro in no time! #ghostreconbreakpoint #ghostrecon #tomclancy TOM CLANCY’S GHOST RECON BREAKPOINT https://store.playstation.com/#!/en-us/tid=CUSA14405_00 Chapters: 0:00:00 - 0:00:15 - Coastal Navigation and Stealth 0:00:15 - 0:00:35 - Drone Detection and Prone Camouflage 0:00:35 - 0:00:45 - Loadout Adjustment and Tactical Planning 0:00:45 - 0:01:20 - Observing the Swarm from Cover 0:01:20 - 0:01:35 - Disabling the Drones with Explosives 0:01:35 - 0:02:04 - Scavenging Wreckage and Looting Equipment 📖 Interactive written walkthrough with clickable timestamps: https://pixelfungaming.com/videos/ghost-recon-breakpoint-easy-fast-way-to-destroy-flying-drones

HITMAN 2: New York - Athena Savalas Silent Take Down
The mission begins with Agent 47 navigating the upper floors of the Milton-Fitzpatrick Bank. He quickly enters a private room and conceals himself inside a large wooden chest. After a brief period of waiting, the primary target, Athena Savalas, enters the adjacent area accompanied by a guard. Agent 47 exits the chest and takes a tactical position behind a curtain to track their movement. As both individuals enter the small corridor, Agent 47 neutralizes them with suppressed pistol shots in rapid succession. He ensures the target's elimination by snapping her neck and retrieves a keycard. To maintain his stealth rating, he drags both bodies back to the chest and hides them inside. The operation concludes with Agent 47 exiting the secure area and moving back through the bank's main halls towards the lower levels. Chapters: 0:00:00 - 0:00:15 - Infiltration and finding a hiding spot 0:00:15 - 0:00:55 - Waiting for the target to arrive 0:00:55 - 0:01:30 - Target acquisition and tactical positioning 0:01:30 - 0:01:45 - Elimination of Athena Savalas and guard 0:01:45 - 0:02:10 - Concealing evidence and looting key items 0:02:10 - 0:02:40 - Exfiltrating the private quarters 📖 Interactive written walkthrough with clickable timestamps: https://pixelfungaming.com/videos/hitman-2-new-york-athena-savalas-silent-take-down

RDR2 - Oregano Plant Location
Gameplay begins with a character riding a horse through the grassy clearings of Cumberland Forest. After identifying a patch of wild herbs, the character dismounts to begin foraging. Five stalks of Oregano are gathered from the undergrowth, completing a daily challenge. The search continues on foot as the character navigates between trees to locate more plants. A second patch containing Indian Tobacco is discovered and harvested. To provide a clear reference for the foraging area, the in-game map is opened, revealing the exact location within the heart of Cumberland Forest, situated between Window Rock and Fort Wallace. The session concludes with a brief scan of the surrounding wilderness. Chapters: 0:00:00 - 0:00:13 - Riding through Cumberland Forest 0:00:13 - 0:00:27 - Gathering Oregano for Daily Challenges 0:00:27 - 0:00:44 - Searching for additional herbs on foot 0:00:44 - 0:01:04 - Harvesting Indian Tobacco 0:01:04 - 0:01:19 - Mapping the exact foraging location 📖 Interactive written walkthrough with clickable timestamps: https://pixelfungaming.com/videos/rdr2-oregano-plant-location

Red Dead Redemption 2 - One Dynamite = 11 Dead KKK members
The mission begins with the character stealthily approaching a secret gathering in the dark woods at night. He opens the weapon wheel to select dynamite while observing a group of robed figures gathered around a large wooden cross. As the leader delivers a speech, the character hurls multiple sticks of dynamite into the center of the crowd, causing a series of massive explosions that ignite and scatter the group. Combat continues as the character switches to a bolt-action rifle, systematically picking off the surviving members who attempt to flee into the surrounding forest. Once the threat is neutralized, the character begins a thorough search of the area. He navigates through the smoldering remains and fallen bodies, meticulously looting each individual for money, moonshine, and various supplies. The remainder of the sequence involves the character moving from body to body across the clearing, ensuring every item is collected before the encounter concludes. Chapters: 0:00:00 - 0:00:19 - Stealthy approach and weapon selection 0:00:19 - 0:00:33 - Explosive ambush on the gathering 0:00:33 - 0:00:48 - Eliminating fleeing survivors with a rifle 0:00:48 - 0:01:45 - Initial looting of the encounter area 0:01:45 - 0:02:50 - Comprehensive looting and search for supplies 📖 Interactive written walkthrough with clickable timestamps: https://pixelfungaming.com/videos/red-dead-redemption-2-one-dynamite-11-dead-kkk-members

GTa 5 LIVE GAMEPLAY - Got the million
Welcome to another session of GTA Online! In this video, we embark on a diverse journey across San Andreas. We start with a high-speed drive from Los Santos to the Grand Senora Desert in the stylish Ocelot Swinger, testing its limits off-road. Next, we head to the Money Gang Clubhouse to manage our criminal empire, switching roles and purchasing a new Cocaine Lockup business. The adventure continues under the cover of night as we switch to a motorcycle for a scenic cruise before a minor mishap leads us to a new mission. We take on a bounty for Maude, tracking down a target in Grapeseed for a quick payout. Following a lead on a secret stash, we locate a hidden treasure chest containing the powerful Stone Hatchet at an abandoned house. The action ramps up as we enter a competitive Headshot Kills Challenge in the city, leading to an intense sniper duel with another player near the Diamond Casino. We wrap up the day with some classic vehicle theft, evading a two-star police pursuit to deliver a modified Fathom FQ 2 to Simeon's garage at the docks. Don't forget to like and subscribe for more GTA action! Chapters: 0:00:00 - Starting the journey in the Ocelot Swinger 0:02:45 - Off-road desert driving and stunting 0:05:35 - Visiting the Money Gang Clubhouse 0:07:15 - Buying a new business and changing roles 0:09:40 - Nighttime motorcycle cruise through the countryside 0:12:10 - Off-road motorcycle fails and river jump 0:14:20 - Claiming insurance and tracking a bounty target 0:17:35 - Completing the bounty mission in Grapeseed 0:21:15 - Finding the secret treasure: The Stone Hatchet 0:24:35 - Entering the Diamond Casino PvP zone 0:27:50 - Intense street sniper battle with Tenetwist 0:30:15 - High-stakes sniping from the bridge 0:31:55 - Police chase through the streets of Los Santos 0:33:45 - Modding the Fathom FQ 2 at LS Customs 0:34:45 - Delivering the vehicle to Simeon's garage 📖 Interactive written walkthrough with clickable timestamps: https://pixelfungaming.com/videos/gta-5-live-gameplay-got-the-million

GTA 5 Prison Break (Prisoner) Walkthrough
Grand Theft Auto 5 - Follow our Facebook page: https://www.facebook.com/vgfreaks Chapters: 0:00:00 - 0:02:15 - Prison Infiltration and Corridor Combat 0:02:15 - 0:05:30 - Securing the Courtyard and Target Rescue 0:05:30 - 0:07:45 - Facility Escape and Transport to Airfield 0:07:45 - 0:10:15 - Aerial Evasion and Drop Zone Maneuvers 0:10:15 - 0:11:05 - Final Extraction and Heist Completion 📖 Interactive written walkthrough with clickable timestamps: https://pixelfungaming.com/videos/gta-5-prison-break-prisoner-walkthrough
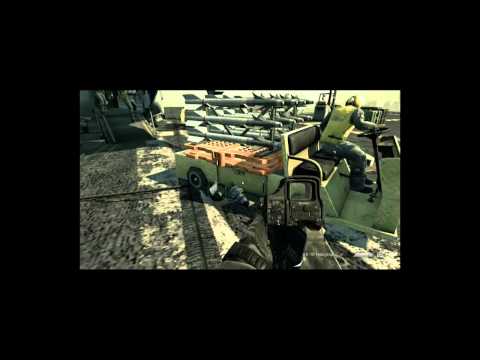
Call Of Duty Ghosts : Sin City - mission 14
The mission All or Nothing begins with a somber narrative regarding the burial traditions of the Ghosts. Following a briefing on the USS Liberator carrier, the scene shifts to three days later as Federation forces launch a massive assault on the ship. Logan moves through the interior corridors and reaches the flight deck, which is under heavy fire from helicopters and boarding troops. Intense ground combat ensues across the deck while enemy jets and helicopters crash nearby. The battle moves to the ship's edge, where Logan repels sea-borne Zodiac boats. Support arrives via an Osprey gunship, and the focus shifts to remote-controlling its minigun and missiles to sink Federation warships. After the sea defense, Logan navigates a debris-strewn deck to reach the Sparrow missile launcher. Targeting a massive Federation gunship, Logan fires guided missiles to bring down the aircraft. The mission reaches its climax as orbital strikes hit the Liberator, forcing a desperate sprint across the sinking deck toward an extraction helicopter. The segment concludes with the team flying away as the carrier is completely engulfed in fire and smoke. Chapters: 0:00:00 - 0:02:10 - Intro Narrative and Mission Briefing 0:02:10 - 0:04:41 - Initial Carrier Deck Combat and Helicopter Defense 0:04:41 - 0:05:29 - Defending the Carrier Edge from Zodiac Boats 0:05:29 - 0:06:51 - Osprey Gunship Support and Sinking Enemy Ships 0:06:51 - 0:07:44 - Pushing Toward the Sparrow Missile Launcher 0:07:44 - 0:08:48 - Destroying the Federation Gunship with Sparrow Missiles 0:08:48 - 0:10:02 - Escaping the Sinking Carrier via Helicopter 📖 Interactive written walkthrough with clickable timestamps: https://pixelfungaming.com/videos/call-of-duty-ghosts-sin-city-mission-14

RDR2 - Wild Carrots Location
The gameplay focuses on completing a daily challenge in Red Dead Online. The character searches through a grassy field near Mattock Pond, just north of Rhodes, to find and pick wild carrots. After collecting the first few carrots, the daily challenge notification appears, tracking progress toward the goal of five. To speed up the search, the character mounts their horse and rides to nearby patches of vegetation. Upon picking the fifth wild carrot, the daily challenge completes, awarding experience points and gold. The session concludes with a detailed look at the world map to pinpoint the exact location of the carrot patches for future reference. Chapters: 0:00:00 - 0:00:25 - Initial wild carrot picking and challenge start 0:00:25 - 0:00:55 - Searching the field and riding to new plant patches 0:00:55 - 0:01:20 - Completing the daily challenge and receiving rewards 0:01:20 - 0:01:40 - Reviewing the map location near Mattock Pond 📖 Interactive written walkthrough with clickable timestamps: https://pixelfungaming.com/videos/rdr2-wild-carrots-location

HITMAN: Marrakesh Accidental Death (Turret)
Agent 47 begins the mission disguised as a soldier, tailing the targets Reza Zaydan and Claus Hugo Strandberg through a busy, military-occupied alleyway in Marrakesh. The targets approach a large, armored military vehicle parked near a makeshift command post. Agent 47 positions himself next to a computer terminal located on a supply crate beside the vehicle. He interacts with the computer terminal, initiating a hack or command. This action triggers a massive explosion from the armored vehicle, immediately eliminating both targets and scattering debris and personnel. The game confirms both targets are down with an 'Explosion Kill' and 'Accident Kill' designation. Soldiers in the vicinity enter a heightened state of alert and begin searching, but Agent 47 maintains his soldier disguise and calmly walks away from the immediate blast zone, past patrolling guards, toward the mission exit. Chapters: 0:00 - 0:26 - Following Targets and Positioning for the Kill 0:26 - 0:35 - Vehicle Sabotage and Double Target Elimination 0:35 - 1:01 - Escape from the Immediate Aftermath and Guard Search 📖 Interactive written walkthrough with clickable timestamps: https://pixelfungaming.com/videos/hitman-marrakesh-accidental-death-turret

Ghost Recon Breakpoint - Eternity Center Walkthrough
TOM CLANCY’S GHOST RECON BREAKPOINT https://store.playstation.com/#!/en-us/tid=CUSA14405_00 Chapters: 0:00:00 - 0:00:21 - Mission briefing and medical record investigation 0:00:21 - 0:02:13 - Hospital navigation and initial stealth maneuvers 0:02:13 - 0:02:38 - Combat encounter outside the hospital 0:02:38 - 0:03:12 - Off-road traversal and helicopter transition 0:03:12 - 0:04:31 - Drone reconnaissance of the Eternity Center 0:04:31 - 0:05:31 - Perimeter infiltration and guard elimination 0:05:31 - 0:07:03 - Interior facility sweep and laboratory clearing 0:07:03 - 0:07:45 - Finding and hacking David Madera's cryotube 0:07:45 - 0:09:58 - Exfiltration and return to the extraction vehicle 📖 Interactive written walkthrough with clickable timestamps: https://pixelfungaming.com/videos/ghost-recon-breakpoint-eternity-center-walkthrough

RDR2 - Western Toad Hunting Location
The mission begins in the sunny wetlands of Bluewater Marsh where a Western Toad is tracked and harvested using a bow with small game arrows. After skinning the animal, the scene shifts to a rainy night in the same region. Using Eagle Eye to highlight animal tracks, several more toads are identified near a wooden bridge. Rapid bow shots secure several additional specimens in the mud. Upon picking up the second required toad, a notification confirms the completion of the daily challenge. The character then opens the world map to provide a clear view of the specific hunting grounds located just north of Lagras. Chapters: 0:00:00 - 0:00:20 - Hunting the first Western Toad during the day 0:00:20 - 0:00:48 - Tracking and shooting multiple toads at night 0:00:48 - 0:01:01 - Completing the daily challenge and collecting specimens 0:01:01 - 0:01:17 - Location reveal on the world map 📖 Interactive written walkthrough with clickable timestamps: https://pixelfungaming.com/videos/rdr2-western-toad-hunting-location

Red Dead Redemption 2 - Rock Sculpture Location
The mission begins with a trek through the rocky terrain of the East Grizzlies near Moonstone Pond. After a quick map check to confirm the location, navigation continues through a narrow passage between high rock walls. Upon reaching a clearing on the cliffside, a grim scene unfolds at a construction site where a body hangs from a wooden scaffold. A well-placed revolver shot severs the rope, allowing for the retrieval of a suicide note from the sculptor. This note reveals the tragic inspiration behind the massive face carved into the mountain. Further climbing up the scaffolding provides an impressive view of the 'Face in Cliff' landmark, which is then sketched into the journal. Exploration of the upper platforms leads to a hidden chest containing a Special Health Cure Pamphlet and a Platinum Pocket Watch. The sequence concludes with a descent from the heights as the sun sets over the valley. Chapters: 0:00:00 - 0:00:26 - Mapping the location near Moonstone Pond 0:00:26 - 0:00:41 - Navigating the narrow mountain passage 0:00:41 - 0:01:10 - Discovering the sculptor's construction site 0:01:10 - 0:01:47 - Retrieving the sculptor's note 0:01:47 - 0:02:13 - Inspecting and sketching the Face in Cliff 0:02:13 - 0:02:40 - Looting the hidden chest on the upper scaffolding 0:02:40 - 0:03:08 - Descending the scaffolding at sunset 📖 Interactive written walkthrough with clickable timestamps: https://pixelfungaming.com/videos/red-dead-redemption-2-rock-sculpture-location

Red Dead Online - Tall Trees Grizzly Bear Location
Are you having trouble finding the elusive Grizzly Bear in the Tall Trees area of Red Dead Redemption 2 (RDR2)? Look no further! This video will provide you with a detailed guide on where to find the bear and tips on how to successfully hunt it. From the exact location of the bear, to the best weapons and strategies to use, we have you covered. Whether you're new to RDR2 or an experienced hunter, this tutorial will help you master the art of tracking and hunting the Grizzly Bear in the Tall Trees area. So join us and learn how to take down the most challenging animal in RDR2. #reddeadredemption #rdr2 #talltreesgrizzly Red Dead Redemption 2 https://store.playstation.com/#!/en-us/tid=CUSA03041_00 Chapters: 0:00:00 - 0:00:25 - Cougar ambush and combat encounter 0:00:25 - 0:00:45 - Recovery and tracking a second predator 0:00:45 - 0:01:15 - Utilizing the environment for tactical advantage 0:01:15 - 0:01:45 - Grizzly bear encounter and hunt 0:01:45 - 0:02:10 - Skinning the bear and transporting the pelt 0:02:10 - 0:02:40 - Skinning the cougar and collecting materials 0:02:40 - 0:03:20 - Location reveal via the in-game map 📖 Interactive written walkthrough with clickable timestamps: https://pixelfungaming.com/videos/red-dead-online-tall-trees-grizzly-bear-location

Hitman 2: New York - Chloroform Location, Vent Poisoning Walkthrough
Chapters: 0:00:00 - 0:00:15 - Entering the Vault Perimeter 0:00:15 - 0:00:30 - Disabling Surveillance and Navigating Backrooms 0:00:30 - 0:00:50 - Locating the Chloroform Flask 0:00:50 - 0:01:10 - Sabotaging the Ventilation System 0:01:10 - 0:01:30 - Neutralizing Security Guards with Gas 0:01:30 - 0:01:44 - Entering the Security Room and Erasing Evidence 📖 Interactive written walkthrough with clickable timestamps: https://pixelfungaming.com/videos/hitman-2-new-york-chloroform-location-vent-poisoning-walkthrough

RDR2 - Cabin With 2 Dead Kids
Red Dead Redemption 2 https://store.playstation.com/#!/en-us/tid=CUSA03041_00 Chapters: 0:00:00 - 0:00:10 - Mapping the location of Clawson's Rest 0:00:10 - 0:00:47 - Entering the cabin and discovering the deceased 0:00:47 - 0:01:38 - Finding and reading the tragic letter 0:01:38 - 0:02:20 - Scavenging for supplies in the kitchen area 0:02:20 - 0:02:50 - Locating collectible cigarette cards 0:02:50 - 0:03:30 - Igniting the cabin and watching the fire spread 0:03:30 - 0:04:05 - Departing the scene on horseback 📖 Interactive written walkthrough with clickable timestamps: https://pixelfungaming.com/videos/rdr2-cabin-with-2-dead-kids

Far Cry 5 -The Lesson Walkthrough
The mission "The Lesson" begins with a stealthy approach to the Hope County Jail. Initial combat involves sniping cultists from a distance before moving into the prison grounds. Faith Seed's voice haunts the character as they navigate through fences and towards the main building. After climbing onto the roof, an intense firefight ensues against enemies positioned in watchtowers and across the rooftop. The character then enters the prison's ventilation system, crawling through ducts while listening to Virgil's desperate pleas over the intercom. Emerging into the cell block, a massive firefight breaks out across multiple levels. Once the area is secured, prisoners are liberated, and Tracey is found locked in a cell. A search for the jail key leads to a fallen cultist, allowing Tracey's release. An emotional cutscene follows, showing Tracey attempting to comfort a dying Virgil as they reflect on Faith's manipulations. The final segment involves navigating the hallways of the prison, following Faith's spectral voice toward an inevitable confrontation. Chapters: 0:00:00 - 0:01:00 - Sniping cultists outside the jail entrance 0:01:00 - 0:02:30 - Infiltrating the prison grounds and climbing to the roof 0:02:30 - 0:03:15 - Rooftop combat and entering the ventilation system 0:03:15 - 0:04:30 - Intense firefight in the jail cell block 0:04:30 - 0:05:35 - Finding the jail key and liberating Tracey 0:05:35 - 0:06:30 - Cutscene: Virgil's final moments with Tracey 0:06:30 - 0:06:51 - Navigating the prison to confront Faith Seed 📖 Interactive written walkthrough with clickable timestamps: https://pixelfungaming.com/videos/far-cry-5-the-lesson-walkthrough

RDR2 - American MuskRat (Lemoyne) Location
The session begins with the hunting of American Muskrats in the swampy, foggy terrain of Bluewater Marsh. The character locates and shoots a muskrat using a varmint rifle to ensure a clean kill. After securing the animal, the character proceeds to skin it, which triggers a notification for the daily challenge progress. A second muskrat is then skinned on the riverbank, successfully completing the daily challenge requirement of skinning two American Muskrats. The completion of this task also advances the character's Daily Challenge Streak, awarding experience points and gold. The gameplay concludes by opening the world map to pinpoint the exact location where the muskrats were found, situated just north of Saint Denis in the Bluewater Marsh area. Chapters: 0:00:00 - 0:00:05 - Hunting the American Muskrat 0:00:05 - 0:00:39 - Skinning muskrats and completing daily challenges 0:00:39 - 0:01:00 - Map location for muskrat hunting 📖 Interactive written walkthrough with clickable timestamps: https://pixelfungaming.com/videos/rdr2-american-muskrat-lemoyne-location

RDR2 - West Elizabeth Horse Race Walkthrough
Arthur Morgan rides along a scenic riverbank when he encounters a stranger who boasts about his expensive horse. The stranger challenges Arthur to a race to Diablo Ridge, which is quickly accepted. The race takes both riders across varied terrain, including high-speed paths through forest trails, a passage across a covered wooden bridge, and a shallow river crossing. Arthur maintains a lead and reaches the destination well ahead of his opponent. Upon his arrival, the defeated challenger loses his temper and begins physically abusing his horse in frustration. Arthur intervenes as the man’s aggression escalates, resulting in a fatal shootout. The encounter ends with the looting of the stranger's body near the finish line. Chapters: 0:00:00 - 0:00:19 - Meeting the Challenger and Accepting the Race 0:00:19 - 0:00:48 - Racing Across Trails and Through the Covered Bridge 0:00:48 - 0:01:10 - Navigating Forested Paths and Water Crossings 0:01:10 - 0:01:33 - Reaching the Diablo Ridge Finish Line First 0:01:33 - 0:02:05 - Interacting with the Angry Defeated Challenger 0:02:05 - 0:02:36 - Lethal Confrontation and Looting the Body 📖 Interactive written walkthrough with clickable timestamps: https://pixelfungaming.com/videos/rdr2-west-elizabeth-horse-race-walkthrough

Red Dead Online -(Heartlands) Vulture Location
Red Dead Redemption 2 Vultures are in The Heartlands of New Hanover https://store.playstation.com/#!/en-us/tid=CUSA03041_00 Chapters: 0:00:00 - 0:00:10 - Hunting the vulture at Twin Stack Pass 0:00:10 - 0:00:23 - Navigating the hillside to reach the carcass 0:00:23 - 0:00:44 - Plucking the vulture for daily challenge progress 0:00:44 - 0:00:55 - Riding away from the hunting spot 0:00:55 - 0:01:14 - Map overview of the hunting location 📖 Interactive written walkthrough with clickable timestamps: https://pixelfungaming.com/videos/red-dead-online-heartlands-vulture-location

Far Cry 5 - Prepper Stash - Ship Wreck Walkthrough
The Shipwreck Prepper Stash mission in Far Cry 5 begins near the Tanami Residence, where a large, partially submerged dredge sits in the water. The character swims out to the rusted structure and enters through a flooded window. Navigating the murky interior, the character reaches a ladder and climbs into a dry control room. Interacting with the mechanical levers activates the dredge, causing the massive machine to shift and reveal a hidden underwater entrance beneath its original position. A long, tense underwater swim follows through narrow cave tunnels illuminated only by a flashlight. The character navigates past rocky obstacles and reaches an air pocket leading to a bunker hatch. Once inside the bunker, the character discovers stacks of cash and Perk Magazines. A sudden rattlesnake attack occurs near a storage desk but is quickly dealt with using a suppressed weapon. A keycard found in the room unlocks a secondary area containing more supplies and a personal note from Roy. After picking the lock on a nearby safe for extra currency, the character climbs a ladder to exit the underground facility, emerging back on solid ground to complete the treasure hunt. Chapters: 0:00:00 - 0:00:45 - Infiltrating the submerged dredge 0:00:45 - 0:01:15 - Reaching the upper control room 0:01:15 - 0:01:35 - Activating the dredge to reveal the cave 0:01:35 - 0:03:20 - Navigating the deep underwater tunnels 0:03:20 - 0:03:50 - Entering the secret bunker hatch 0:03:50 - 0:04:10 - Snake ambush and initial looting 0:04:10 - 0:04:40 - Unlocking the inner stash with a keycard 0:04:40 - 0:05:05 - Cracking the safe and final cleanup 0:05:05 - 0:05:20 - Exiting the bunker to the surface 📖 Interactive written walkthrough with clickable timestamps: https://pixelfungaming.com/videos/far-cry-5-prepper-stash-ship-wreck-walkthrough

RDR2 - Harmonica Location
Arthur Morgan visits Granger's Hoggery to complete unfinished business. He kicks open the door to the small, rustic cabin and begins a thorough search for valuables. He discovers various items, including a harmonica which is a specific request for Sadie Adler. After collecting the loot, he steps outside where the body of Emmet Granger lies after their duel. Arthur draws his revolver and shoots a lantern hanging from the porch, causing the interior to ignite. He then retrieves a fire bottle and hurls it at Granger's remains, engulfing the area in flames. As the cabin and body burn fiercely against the night sky, Arthur retreats to his horse, mounts up, and rides away into the dark wilderness. Chapters: 0:00:00 - 0:00:30 - Searching the cabin for loot 0:00:30 - 0:00:50 - Finding Sadie Adler's harmonica 0:00:50 - 0:01:10 - Setting the cabin and body ablaze 0:01:10 - 0:02:00 - Escaping the burning farmstead on horseback 📖 Interactive written walkthrough with clickable timestamps: https://pixelfungaming.com/videos/rdr2-harmonica-location

RDR2 - Wild Mint (West Elizabeth) Location
The gameplay focuses on gathering Wild Mint plants in the Big Valley region of Red Dead Online. The character starts near Little Creek River at night, systematically searching the grassy area and picking individual stems of Wild Mint. Progress on a daily challenge is tracked as each plant is harvested. After completing the initial five-plant requirement, the character continues to gather additional plants in the immediate vicinity before moving towards a nearby horse. Finally, the map is opened to reveal the precise location of the Wild Mint patch between Little Creek River and Wallace Station. Chapters: 0:00:00 - 0:00:33 - Completing Wild Mint Daily Challenge 0:00:33 - 0:01:07 - Gathering additional Wild Mint 0:01:07 - 0:01:32 - Map location reveal 📖 Interactive written walkthrough with clickable timestamps: https://pixelfungaming.com/videos/rdr2-wild-mint-west-elizabeth-location

Far Cry 5 - Wingman (Find Nicks Plane) Stealth Walkthrough
The mission begins with an infiltration of the Seed Ranch cult outpost to recover Nick Rye's plane. Initial movement focuses on stealthily navigating the perimeter and scouting enemies. Combat erupts when a grizzly bear suddenly attacks, forcing a transition into a frantic shootout with both the animal and cultists. After clearing the area, the character enters the hangar and boards the yellow floatplane named 'Carmina'. The gameplay shifts to an aerial perspective as the character taxis out and takes off. The middle portion consists of a series of flight tests involving flying through green smoke rings to demonstrate maneuverability. Aerial combat follows, involving the destruction of cult structures, silos, and fuel tankers across the landscape. The mission concludes with a descent toward Nick's airstrip, a successful landing on the dirt runway, and a cutscene where Nick Rye expresses his gratitude for the return of his aircraft. Chapters: 0:00:00 - 0:01:45 - Infiltrating Seed Ranch Outpost 0:01:45 - 0:04:30 - Outpost Combat and Grizzly Bear Encounter 0:04:30 - 0:05:15 - Entering the Hangar and Boarding Carmina 0:05:15 - 0:08:45 - Takeoff and Initial Flight Maneuvers 0:08:45 - 0:11:30 - Aerial Assault on Cult Targets and Silos 0:11:30 - 0:14:30 - Advanced Flight and Water-Level Navigation 0:14:30 - 0:16:17 - Landing at the Airstrip and Mission Conclusion 📖 Interactive written walkthrough with clickable timestamps: https://pixelfungaming.com/videos/far-cry-5-wingman-find-nicks-plane-stealth-walkthrough

RDR2 - Horse Race (Lemoyne) Walkthrough
Arthur Morgan encounters a competitive stranger while traversing the trails of Lemoyne. The woman compliments Arthur's mount before proposing a race to Catfish Jacksons to test their speed. Arthur accepts the challenge, and the competition begins instantly as they gallop through the lush environment. The route winds through dense woods and over grassy hills, eventually tracing the scenic shoreline of the Lannahechee River. Arthur skillfully manages his horse's stamina and navigates the natural obstacles to maintain a significant lead. Upon reaching the destination first, he secures a clear victory. The stranger arrives shortly after, expressing intense frustration over her loss and taking her anger out on her horse. This interaction concludes with Arthur earning a bonus to his horse bonding level. Chapters: 0:00:00 - 0:00:15 - Encountering the stranger and accepting the race challenge 0:00:15 - 0:01:33 - Racing through the countryside toward Catfish Jacksons 0:01:33 - 0:01:45 - Reaching the finish line and winning the race 0:01:45 - 0:02:04 - The stranger's reaction and horse bonding level increase 📖 Interactive written walkthrough with clickable timestamps: https://pixelfungaming.com/videos/rdr2-horse-race-lemoyne-walkthrough

HITMAN 2: New York - Crowbar Location
It can be found in various locations throughout the map, including in the maintenance room on the ground floor of the main building, in the construction site, and in the back alley near the parking garage. It can also be taken from guards and security personnel in the area, as they are known to carry it. It's important to keep in mind that the crowbar is a versatile tool that can be used to break open locked doors and containers, and can also be used as a melee weapon in combat. The location of the crowbar may vary depending on the mission's difficulty level and the choices made during the game. Hitman 2 - Gold Edition https://store.playstation.com/#!/en-us/tid=CUSA12421_00 Chapters: 0:00:00 - 0:00:08 - Agent 47 navigates the bank stairwells and service corridors 0:00:08 - 0:00:17 - Entry into the vault control room and activation of the main vault door 0:00:17 - 0:00:25 - Traverse through the high-security vault passage into the storage bay 0:00:25 - 0:00:35 - Exploration of the underground parking facility and armored truck area 0:00:35 - 0:00:45 - Acquisition of a crowbar and stealthy movement past police cruisers 0:00:45 - 0:00:51 - Arrival at the maintenance corridor and restroom facilities 📖 Interactive written walkthrough with clickable timestamps: https://pixelfungaming.com/videos/hitman-2-new-york-crowbar-location

RDR2 - Online - Bounty Hunting
Experience the gritty life of a frontier lawman in this comprehensive Red Dead Online Bounty Hunter gameplay showcase. Follow along as we traverse the diverse landscapes of the five states, from the sun-scorched deserts of New Austin to the misty woods of Roanoke Ridge, tracking down some of the west's most dangerous outlaws. This video features a compilation of multiple bounty missions, showcasing different tactical approaches including stealthy captures, high-speed horse chases, and intense long-range shootouts using the Rolling Block Rifle. Witness the complete workflow of a professional bounty hunter: scouting the boards in iconic towns like Strawberry, Valentine, and Rhodes, navigating treacherous terrain, engaging with hostile gangs protecting their own, and ultimately bringing justice to the frontier. Whether capturing targets alive for a maximum reward or delivering them across a saddle for a final payout, see what it takes to climb the ranks and earn gold and cash in Red Dead Online's premier specialist role. Perfect for players looking for mission walkthroughs, tactical tips, or simply wanting to immerse themselves in the cinematic world of Rockstar Games' western masterpiece. Chapters: 0:00:00 - Delivering Bounty to Tumbleweed Sheriff 0:01:45 - Capturing Feliciano Corrales 0:03:15 - Completing Bounty in Tumbleweed 0:04:40 - New Bounty Mission Start: Strawberry 0:06:20 - Tracking Targets through Big Valley 0:08:40 - Intense Firefight at the Target Camp 0:11:30 - Delivering Captured Outlaw to Strawberry Jail 0:14:10 - Arriving in Rhodes for Next Assignment 0:15:55 - Selecting New Bounty Poster in Rhodes 0:18:00 - Scouting the Target Location near Rhodes 0:21:15 - Sniper Takedown Sequence with Rolling Block Rifle 0:23:30 - Transporting Bounty Target to Rhodes Sheriff Office 0:26:45 - Nighttime Bounty Mission: Valentine Outskirts 0:29:15 - Engaging Hostiles Under Moonlight 0:32:00 - Final Target Delivery to Prison Wagon 0:34:00 - Mission Summary and Rewards 📖 Interactive written walkthrough with clickable timestamps: https://pixelfungaming.com/videos/rdr2-online-bounty-hunting

RDR2 - Attacking Murfree Brood Hideout
The assault on the Murfree Brood begins under the cover of darkness. Arthur Morgan positions himself on a ridge overlooking the cave entrance, systematically picking off guards with a scoped rifle. As the alarms go off, the engagement shifts to close-quarters combat. He descends towards the camp, utilizing his revolvers and a sawed-off shotgun to eliminate the remaining outlaws outside. After clearing the perimeter, the infiltration of the cave begins. Arthur navigates the tight, dimly lit tunnels, clearing out the Murfree Brood members in brutal encounters. Throughout the mission, he carefully loots the fallen enemies, gathering supplies and valuables as he pushes deeper into the hideout. Chapters: 0:00:00 - 0:00:45 - Long-range stealth sniping from the ridge 0:00:45 - 0:02:30 - Closing in on the cave entrance and initiating a shootout 0:02:30 - 0:04:15 - Intense close-quarters combat and perimeter clearing 0:04:15 - 0:05:45 - Infiltrating the dark tunnels of the cave hideout 0:05:45 - 0:07:30 - Clearing the interior chambers and systematic looting 0:07:30 - 0:08:50 - Final sweep of the hideout and gathering supplies 📖 Interactive written walkthrough with clickable timestamps: https://pixelfungaming.com/videos/rdr2-attacking-murfree-brood-hideout

Sherlock Holmes: Devils Daughter - A Study In Green Part 3
Welcome to Part 4 of our comprehensive walkthrough for Sherlock Holmes: Crimes & Punishments. In this episode, we continue the investigation into the 'A Study in Green' case. Following the trail of the mysterious assailant, Sherlock Holmes and Dr. Watson arrive at Albeit's residence, only to find the scene of a recent struggle. We meticulously search the premises, uncovering hidden compartments and ancient artifacts that hint at a dark past involving an expedition to Guatemala. The highlight of this episode is the discovery of Albeit himself, hiding in a state of terror. Through a rigorous interrogation, Holmes learns about the 'Double Statues' and the alleged curse of Tecún Umán that has plagued the expedition members. The investigation then moves to Bernard Marley's Foundry, a location filled with industrial hazards and complex mechanical puzzles. Watch as Holmes uses his exceptional lockpicking skills and navigates high-altitude platforming challenges to reach Marley's private safe, where the most damning evidence yet is revealed. Whether you're looking for help with the mechanical lock puzzles or wanting to see how the deductions come together, this gameplay video covers every detail. Don't miss the intense moments as we piece together the truth behind the Mayan curse and the murder of Zacharias Greystoke. Chapters: 0:00:00 - Investigating the Disturbance at Albeit's House 0:05:30 - Analyzing the Assailant's Escape Route 0:10:45 - Deduction Board: Connecting Sir Charles to the Case 0:15:20 - Searching for the Missing Statue Evidence 0:20:15 - Detecting Hidden Compartments in the Library 0:24:30 - Discovering Albeit Hiding in the Sarcophagus 0:30:30 - Interrogating Albeit: The Guatemala Expedition 0:35:15 - Discussing the Legend of the Living Statue 0:40:00 - Interrogation: The Truth About Albeit's Identity 0:45:45 - Examining Documents and Personal Letters 0:51:20 - Uncovering the Mayan Pyramid Miniature 0:56:45 - Final Room Search and Clue Consolidation 1:02:10 - Heading to Bernard Marley's Foundry 1:07:30 - Solving the Mechanical Lock Puzzle 1:12:15 - Exploring the Foundry Interior 1:18:00 - Foundry Platforming: The Overhead Crane Challenge 1:23:45 - Infiltrating Marley's Private Office 1:28:10 - Opening the Safe: Recovering the Golden Fragments 1:33:00 - Escaping the Foundry & Post-Investigation Briefing 📖 Interactive written walkthrough with clickable timestamps: https://pixelfungaming.com/videos/sherlock-holmes-devils-daughter-a-study-in-green-part-3